Facebook
 Reddit
 Email
Email
Here’s why your frame rate suffers on your gaming laptop. Discover ways you can fix the issue and regain performance.
Most gaming laptop owners don’t adjust their power settings and then wonder why their $2,000 machine feels outdated. The culprit isn’t broken hardware; it’s usually the preconfigured power plans and OEM settings that alter your GPU and CPU power priorities. The guide below explains how you can regain lost performance and achieve the performance you paid for.
Note: 1usmus or other community-made custom power plans work best. But they require a fresh OS install and heavy debloating to be effective. If you are thermal throttling and experiencing low frame rates, the steps below won’t work.
Read More: Best Premium Laptops To Play CS2
1. Core Parking Enabled (CPU Cores Disabled Mid-Game)
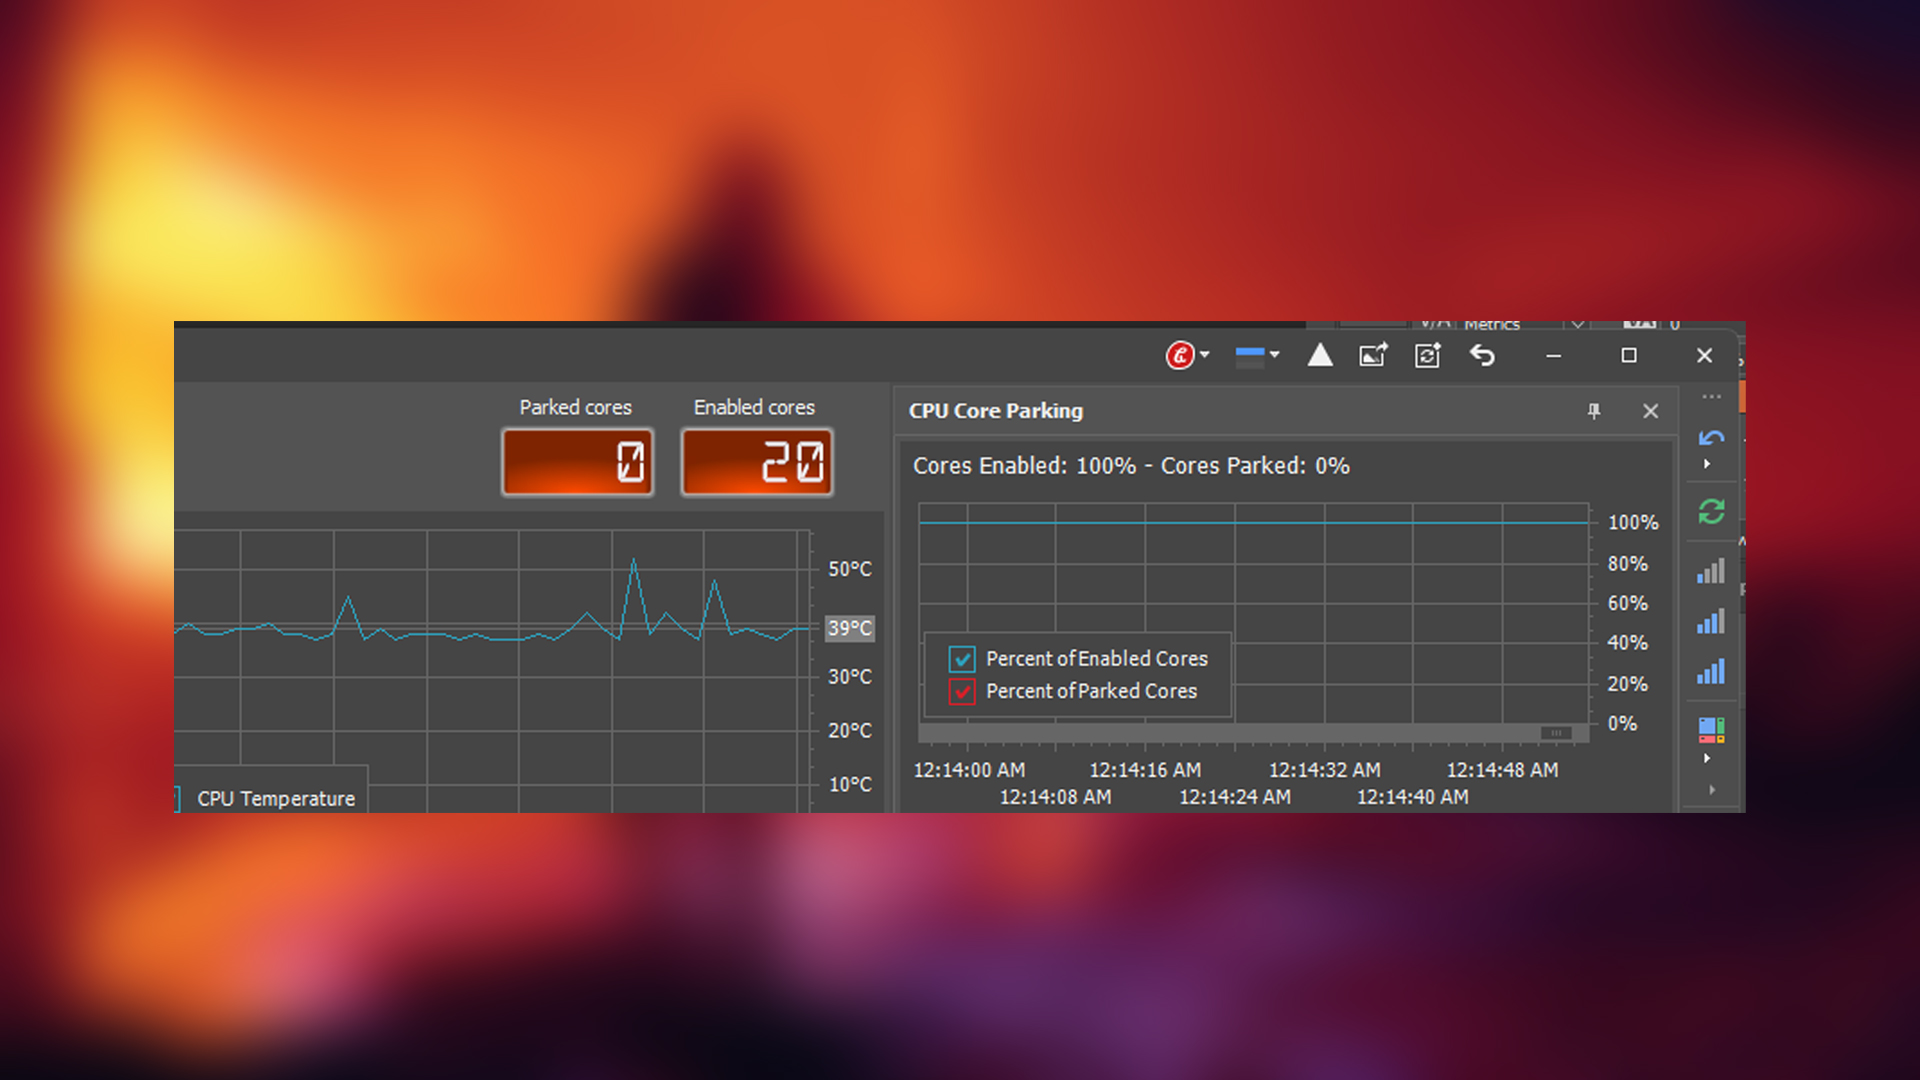
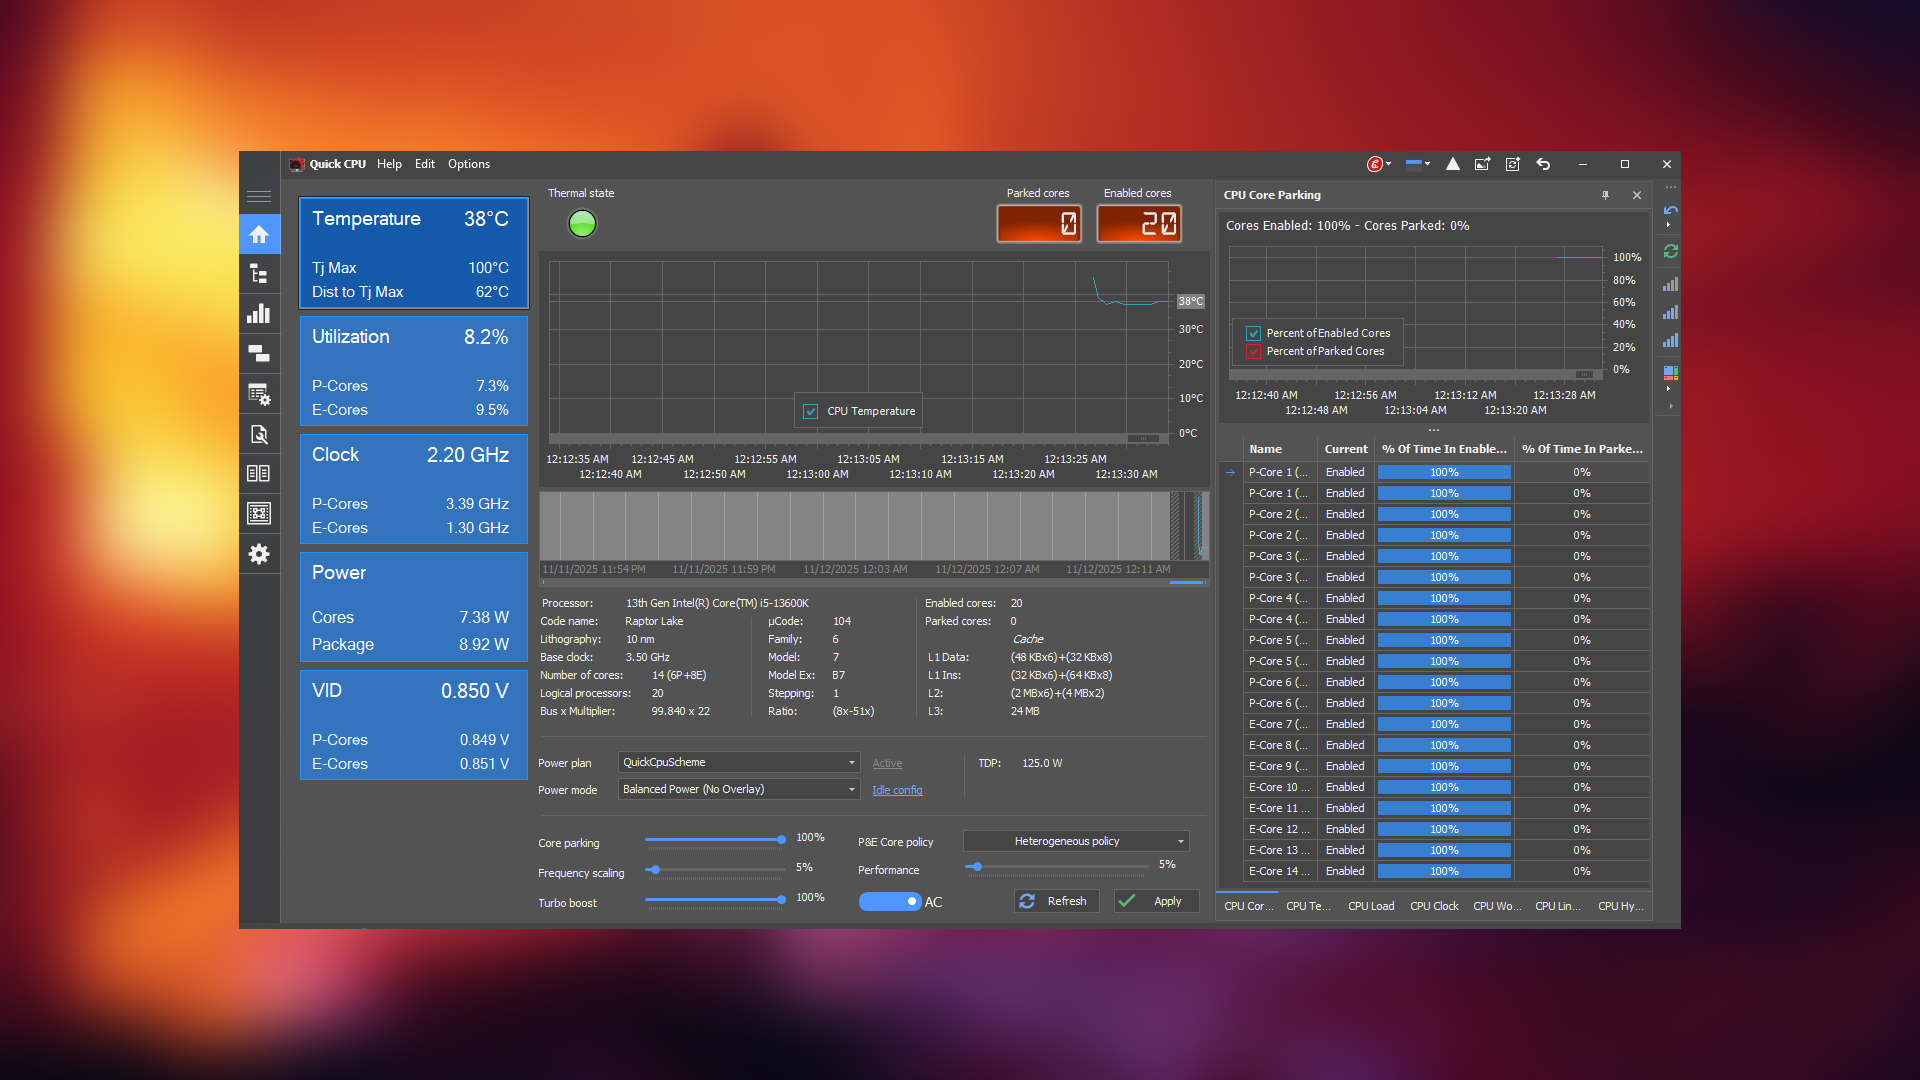
Nowadays, most gaming laptops include multiple core types, such as P-cores, E-cores, and LPE-cores. The problem is that the total core count is often remarkably high. Although the Windows 11 scheduler is quite intelligent and properly utilizes the Thread Director, it is still not perfect and can perform inconsistently. If you have a high-core-count CPU, such as 2 P-cores and 8 E-cores, you can try unparking all the cores.
You can do this by downloading QuickCPU (free) and, within its core parking settings, setting it to 100% for both AC and DC modes. Battery performance may take a hit, but the system will become noticeably more responsive and efficiently use all resources as intended. Once you unpark your CPU cores, you will notice smoother gaming performance.
2. Frequency Scaling Disabled or Too Conservative
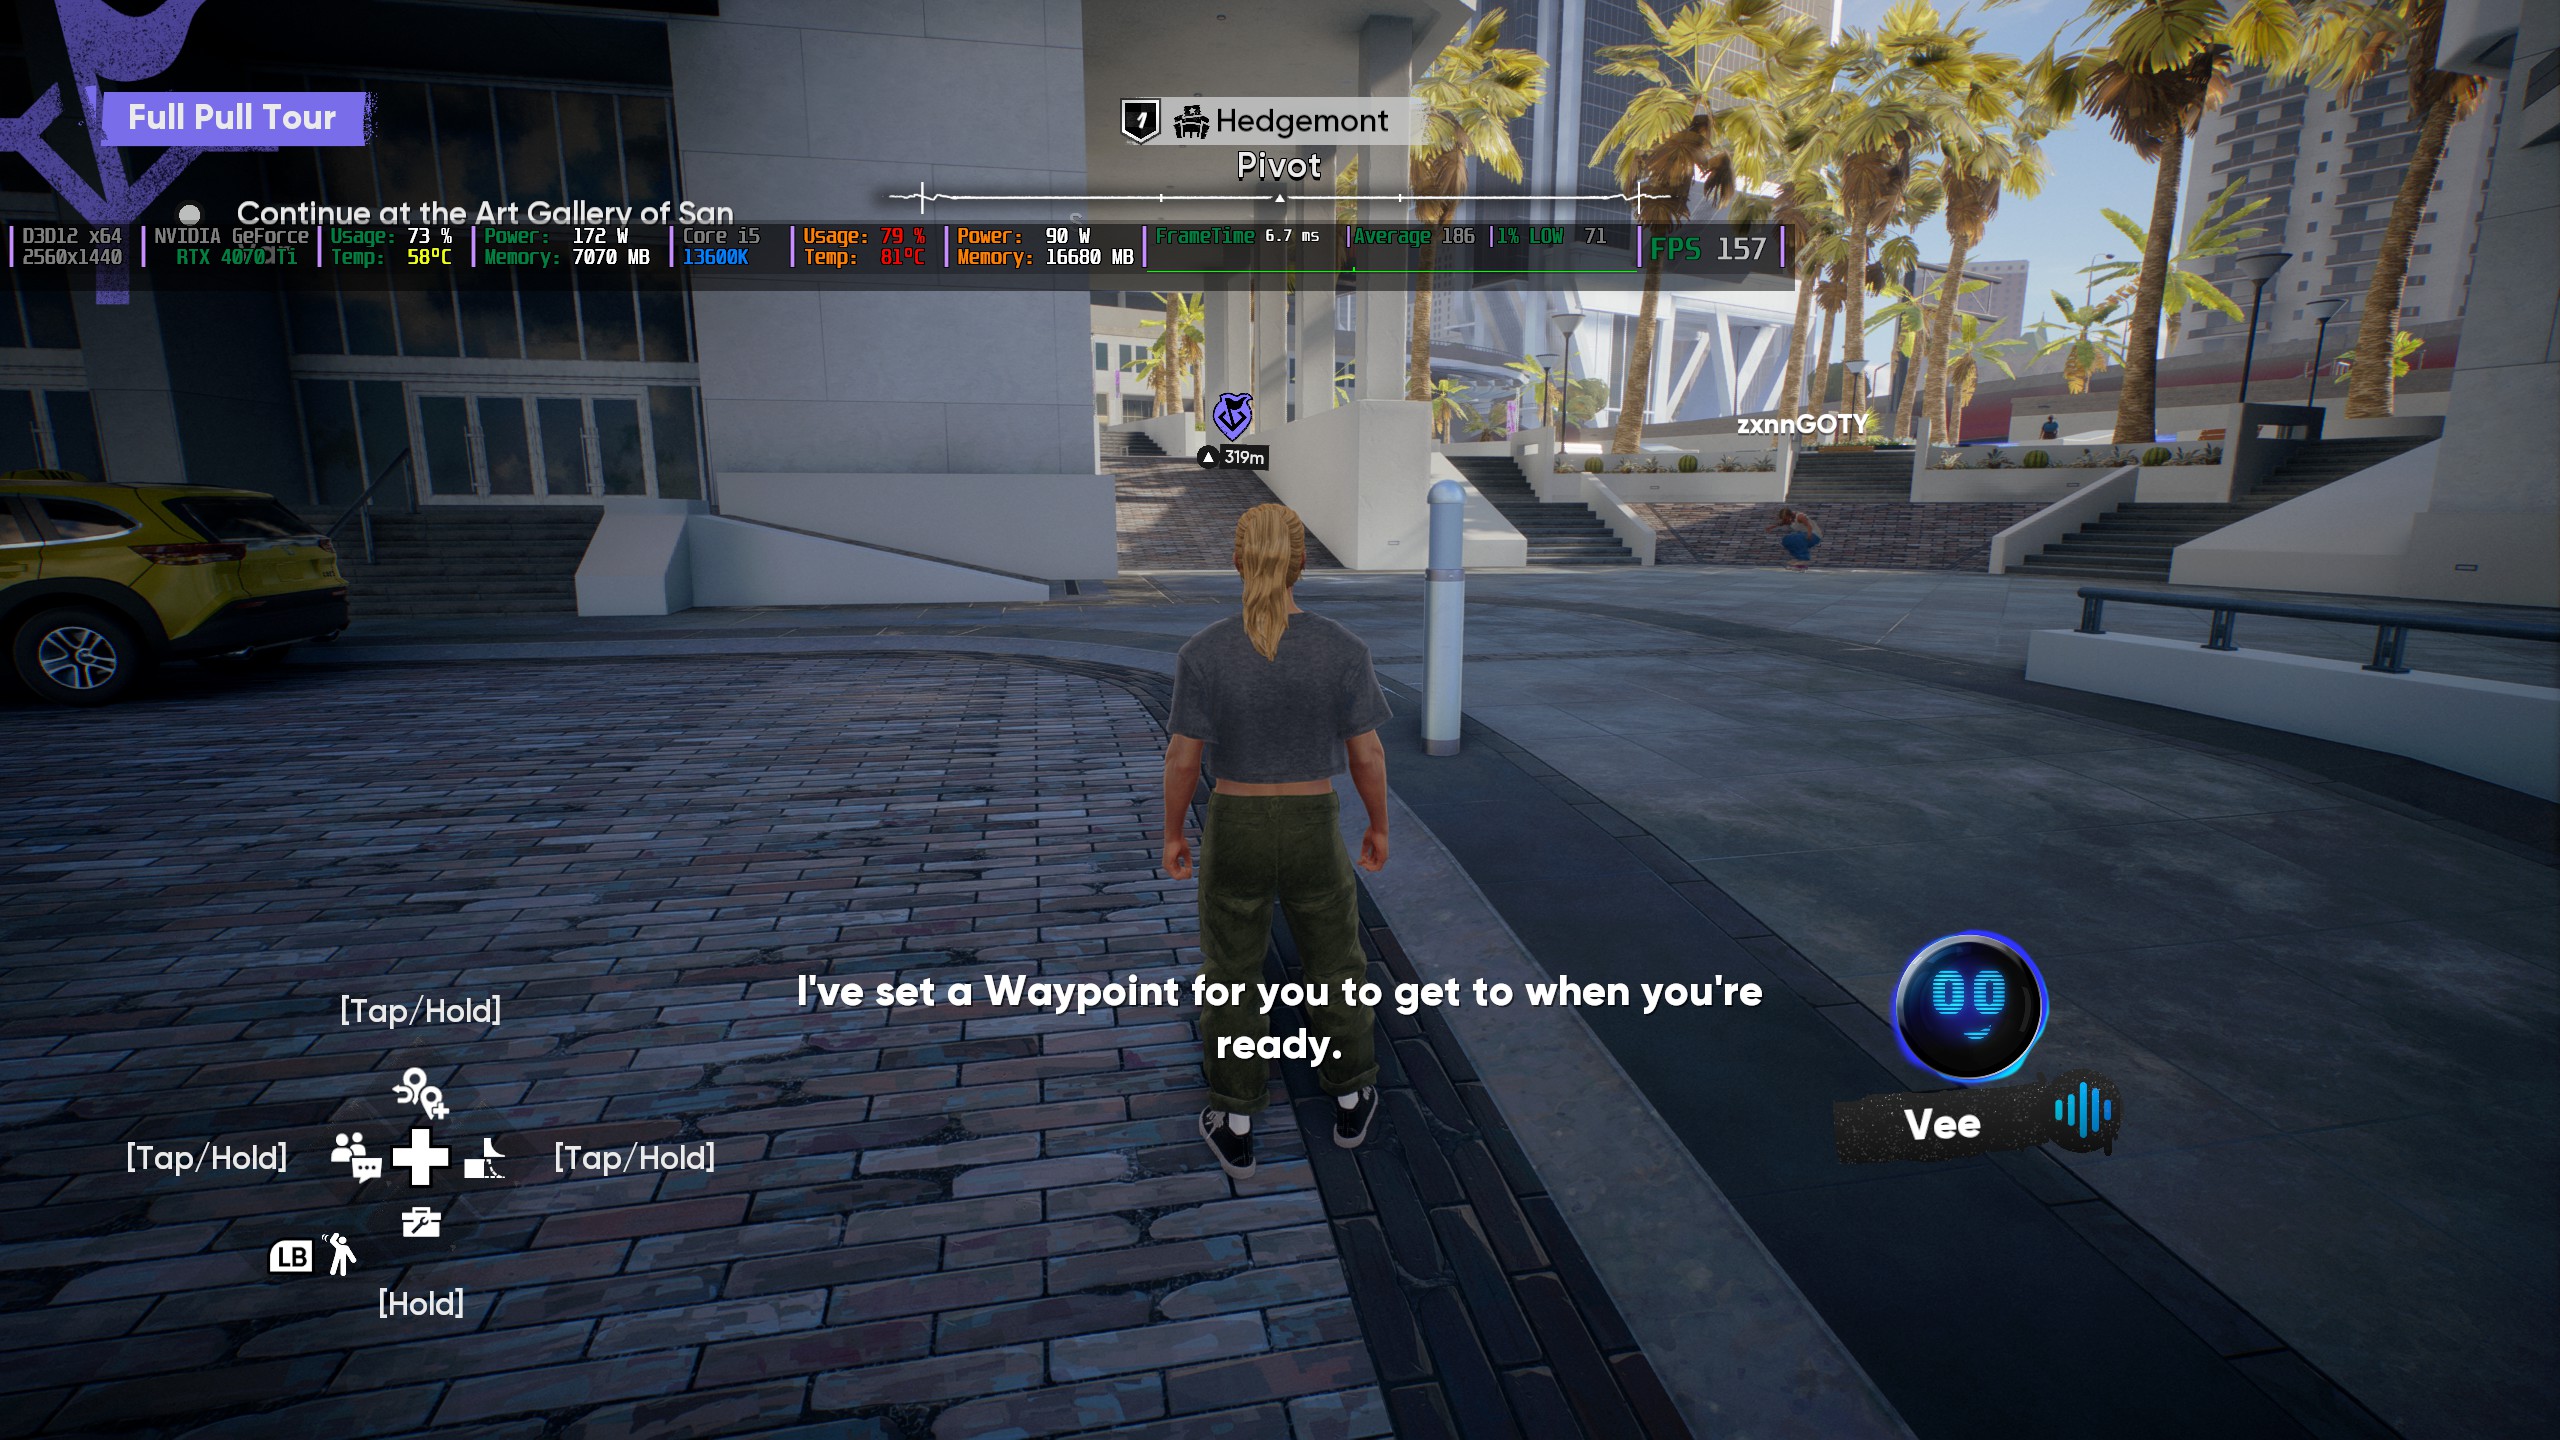
Frequency scaling is another factor that causes heavy CPU usage fluctuations in your laptop under load. By default, your CPU continuously downclocks during CPU-heavy scenes and clocks up during GPU-heavy scenes, leading to frame pacing and frame time issues. This behavior is hard-coded by the OEM, but the good news is that you can change it.
In the QuickCPU app, set both Frequency Scaling sliders to 100%. This locks your CPU to respond instantly with higher clock speeds under any given load. However, this is not recommended for battery use. You can create custom power plans within the application and adjust them as needed.
3. Turbo Boost Limited or Throttled
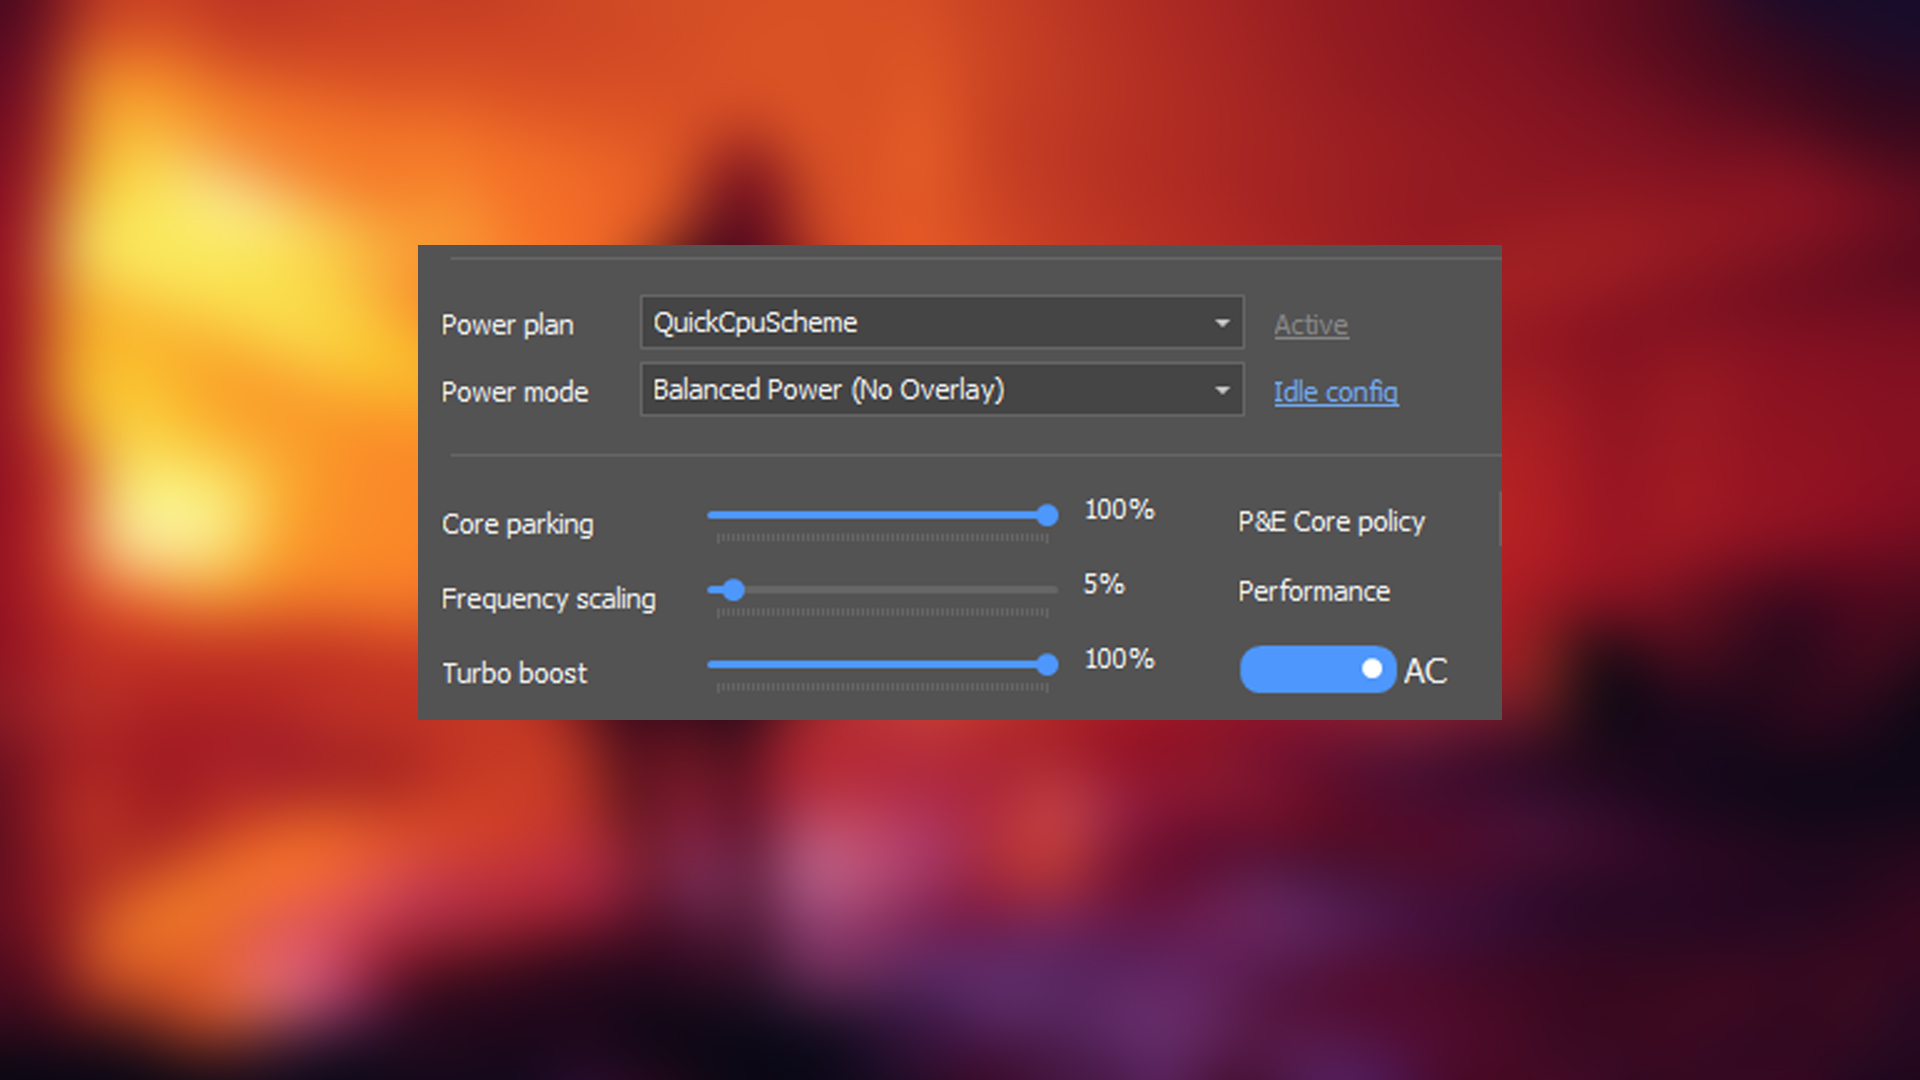
OEM profiles, by default, limit your turbo speeds. They do not reduce the clock speed but alter the boost behavior. You can change this with QuickCPU. In Advanced Settings, locate Turbo Power Long Duration and Turbo Power Short Duration, and make sure both are enabled and set to their maximum values.
4. Minimum Processor State Too Low (Below 50%)

Many OEM power profiles set the processor state to 5%, whereas the Windows default is 10%. This can cause CPU state transitions to create micro-delays, regardless of the gaming load. To fix this, open Power Options > Advanced Settings > Processor Power Management, and set Minimum Processor State to 50% or higher. This keeps your CPU stable by avoiding dynamic frequency jumps.
5. Using Balanced or Power Saver Power Plan
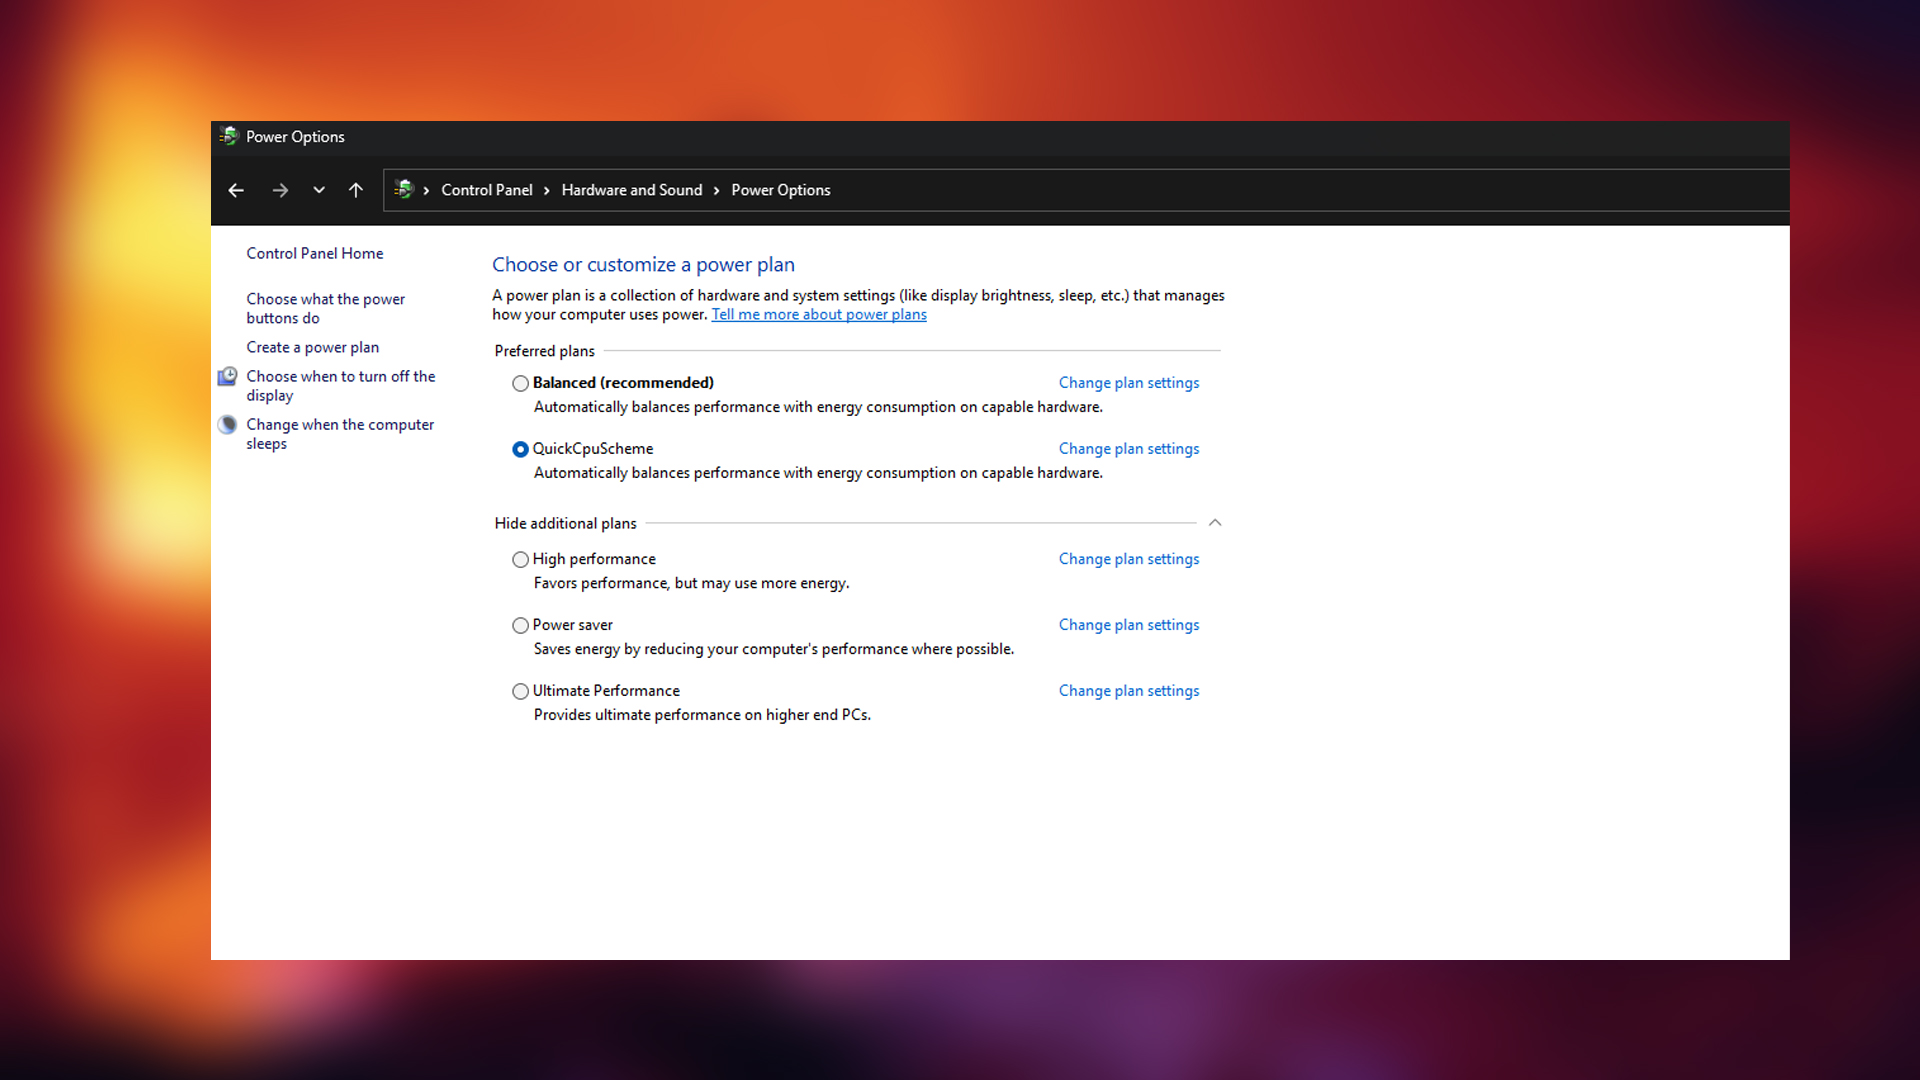
Many OEMs alter the default Balanced or Power Saver power plans and make them overly conservative. By Windows’ default standards, these power plans are not bad and do not hamper performance; in fact, CPU boost behavior remains as advertised.
To fix the power plan issue, switching to High Performance on a laptop works, but it is not recommended. This is where 1usmus and QuickCPU power plans come in handy. QuickCPU includes several well-optimized power plans by default. Try each one and see which works best for your system.
Read More: 5 Reasons Your Gaming Laptop Is Stuttering
We provide the latest news and “How To’s” for Tech content. Meanwhile, you can check out the following articles related to PC GPUs, CPU and GPU comparisons, mobile phones, and more:
- 5 Best Air Coolers for CPUs in 2025
- ASUS TUF Gaming F16 Release Date, Specifications, Price, and More
- iPhone 16e vs iPhone SE (3rd Gen): Which One To Buy in 2025?
- Powerbeats Pro 2 vs AirPods Pro 2: Which One To Get in 2025
- RTX 5070 Ti vs. RTX 4070 Super: Specs, Price and More Compared
- Windows 11: How To Disable Lock Screen Widgets