Facebook
 Reddit
 Email
Email
This guide focuses on the best Bard build in Baldur’s Gate 3, the College of Swords Subclass, and includes all components to build a powerful character.
- Patch 8 Changes for BG3
- Features and Mechanics
- Bard Spell Mechanics
- Blade Flourish Explained
- Subclass Explained
- Character Creation for College of Swords Bard Build
- Level Progression
- Alternative Build
- Best Gear
- Best Consumables
- Permanent Bonuses for College of Swords Bard BG3
- Gameplay Tips and Tricks
- Changes in Patch 7 for BG3
- Bard Build Summary Guide
- Why is Swords bard so good in BG3?
- Which fighting style for College of Swords bard BG3?
- Which College to choose for bard BG3?
This build page has been updated for the Patch 8 version of Baldur’s Gate 3.
Everything About the College of Swords Bard in Baldur’s Gate 3
In Baldur’s Gate 3 the College of Swords is a subclass that will turn your Bard into a potent weapon-based damage dealer with spells. Therefore, this fundamental change to the class means that their ability score, gear, and additional loadouts will look significantly different. Additionally, the College of Swords subclass gets Extra Attack which will improve overall damage significantly. Pick up this build if you want a different playstyle of the Bard based on weapon damage rather than support. The following guide will walk you through character creation, level progression, and gear for the Best Baldur’s Gate 3 College of Swords Bard Build Guide.
Bards are versatile characters who are skilled in a variety of areas, including music, magic, and combat. They are known for their ability to inspire their allies, debuff their enemies, and their unique ability to play musical instruments. Think of the Bard as an out-of-combat, fun, different and unique playstyle. Inside of combat, their ability diminishes significantly and is weak compared to other classes.
| Sword Bard Class Pros | Sword Bard Class Cons |
|---|---|
| Melee Damage | Bonus Action Usage |
| Multple Attacks | Weak Mobility |
| Crowd Control Enemies | Lacks Heavy Armour |
Patch 8 Changes to College of Swords Bard Build for BG3
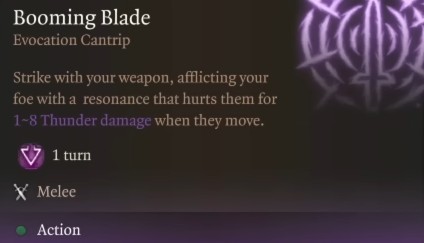
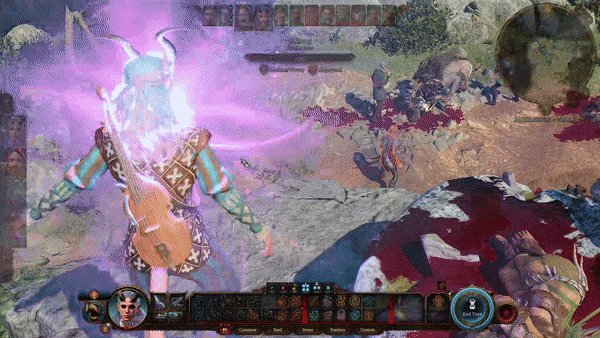
Patch 8 introduced some major changes to the Bard class in Baldur’s Gate 3, most notably the College of Glamour subclass and the Booming Blade cantrip. The College of Glamour is an excellent choice for players focused on support, offering powerful crowd control and enhancing your ability to engage in dialogue and persuasion.
While Bards don’t naturally gain access to Booming Blade, you can unlock it by multiclassing into Warlock. This allows you to craft a versatile build, and when combined with levels in Fighter later on, you can create an incredibly potent melee character. In the Leveling Progression section below, we’ll explore an alternative hybrid build that takes advantage of this unique combination.
Bard Class Features and Mechanics
The following list presents all the essential Bard Mechanics in Baldur’s Gate 3
- Primary Ability: Charisma
- Saving Throws: Dexterity and Charisma
- Subclass: College of Sword
- Armor Proficiency: Light Armour (medium at level 3)
- Weapon Proficiency: Simple Weapons, Hand Crossbows, Rapiers, Longswords, Shortswords, Rapiers (Scimtars at level 3)
- Preferred Armor: Medium Armour after level 3
- Preferred Weapon: Rapier
- Bardic Inspiration: Add a +1d6 bonus to the allies next Attack Roll, Ability Check, or Saving Throw.
- Song of Rest: essentially a Bard spell providing a short rest for your group.
- Blade Flourish: Changes Bardic Inspiration to weapon-based attacks.
- Duelling Fighting Style: gain a +2 bonus to damage rolls with a one-handed weapon that is not two-handed or versatile and no off-hand weapon.
- Extra Attack: You can attack twice, instead of once, whenever you take the Attack action on your turn.
Bard Spell Mechanics
- Cantrips: are like spells, but you can cast them infinitely, and they don’t take your spell slots.
- Spell Slots: At each level, you gain access to more usage of spells and high-tier spells but only have a finite number of spells until a long rest.
- Learn Spells: Unlike Wizard, you get opportunities at leveling up to unlearn and learn new spells.
- Concentration: is a spell mechanic that requires you to maintain concentration otherwise, the spell effect ends.
For the list of the best spells for the Bard, look below in level progression.
Blade Flourish Explained
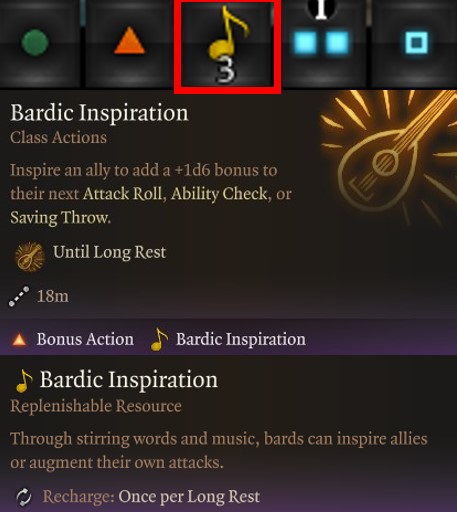
Bardic inspiration is a core feature of the bard class in Baldur’s Gate 3. It allows the bard to inspire their allies, giving them a bonus to their next attack roll, ability check, or saving throw. This is a limited usage resource that recharges on long rest. The amount of resources you can spend goes up based on level and you get 3 to start.
Also Check:- BG3 Interactive Map
For this build, Bardic Inspiration will change to Blade Flourish at level 3 with the College of Swords subclass selection. This changes the resource to weapon-based attacks that can be used at range or melee. Below is a list of Blade Flourish for the College of Sword Bard:
- Defensive Flourish: deal extra damage to enemies with Weapons and increase their own Armour Class (AC) by 4 if you hit.
- Slashing Flourish: Attack up to 2 enemies at once in a 2-meter cone.
- Mobile Flourish: Push your target back 6 m, then teleport to the target.
College of Sword Bard Subclass Explained
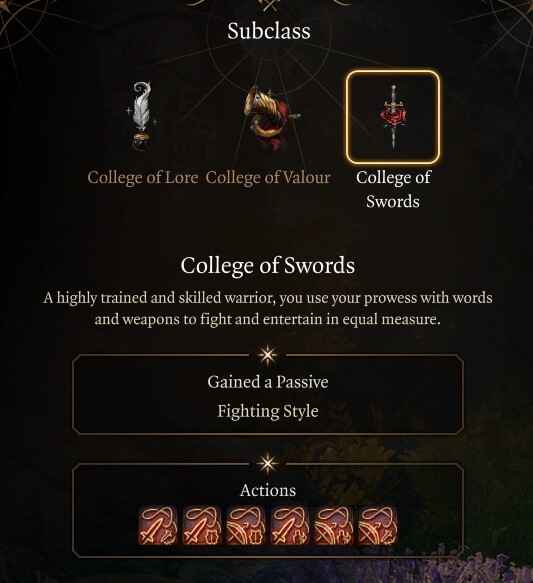
The College of Swords is a great subclass for Bard players looking to use weapons and skills for damage rather than play a support class. You can unlock skills that consume Bardic Inspiration for damage, stuns, and defense. And with Extra Attack, you attack and deal some significant damage while providing the Bard’s support. This build is recommended for players wanting weapon-based Bard that still has spells for crowd control and support.
College of Sword Progression
Below is a list of the College of Swords Bard subclass progression, features, and spells:
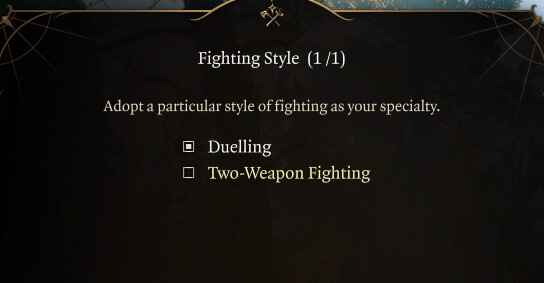
- Choose a Fighting Style (Level 3): Dueling or Two-Weapon Fighting only.
- Slashing Flourish (Melee) (Level 3) – Attack up to 2 enemies at once.
- Slashing Flourish (Ranged) Level 3 – Attack up to 2 enemies at once.
- Defensive Flourish (Melee) (Level 3) – Attack defensively, increasing your Armour Class by 4 if you hit.
- Defensive Flourish (Ranged) (Level 3) – Attack defensively, increasing your Armour Class by 4 if you hit.
- Mobile Flourish (Melee) (Level 3) – Thrust your weapon with enough force to push your target back 6m. Afterward, you can Teleport to the target.
- Mobile Flourish (Ranged) (Level 3) – Shoot a target with enough force to push it back 6m. Afterwards, you can teleport to the target.
- Proficiencies (Level 3) – Scimitar and Medium Armour
- Extra Attack (Level 6) – Can make an additional free attack after making an unarmed or weapon attack.
Character Creation for College of Swords Bard Build
| Category | Selection |
|---|---|
| Character | Origin – Custom character |
| Race | Asmodeus Tiefling |
| Class | Bard |
| Subclass | College of Swords |
| Cantrips | Vicious Mockery, Blade Ward |
| Spells | Healing Word, Cure Wounds, Tasha’s Hideous Laughter, Thunderwave |
| Background | Entertainer |
| Ability Score | STR: 8 DEX: 14 CON: 16 INT: 10 WIS: 10 CHA: 16 |
| Skill Proficiencies | Deception, Intimidation, and Persuasion |
Recommended Backgrounds for College of Swords Bard
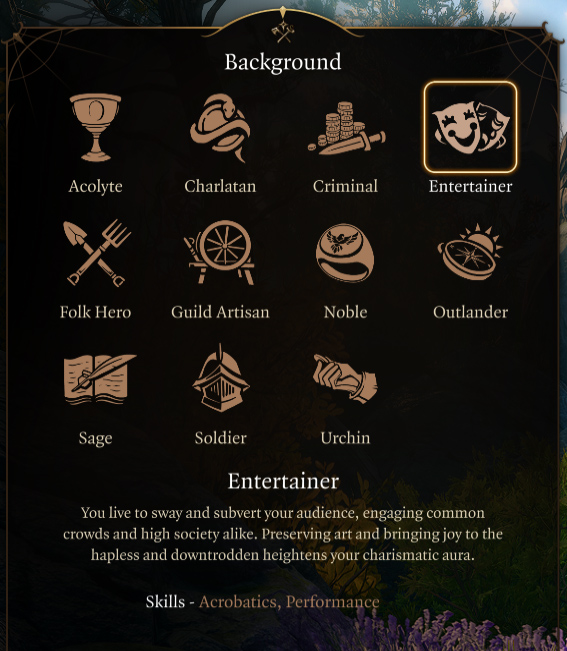
Entertainer is the Best background for the College of Swords Bard Build in Baldur’s Gate 3. This choice mostly influences roleplaying and dialogue options aspects and allows you to create unique characters. Additional choices are:
- Entertainer: Proficiency in Acrobatics (dexterity) and Performance (charisma). You live to sway and subvert your audience, engaging common crowds and high society alike.
- Guild Artisan: Proficiency in Insight (wisdom) and Persuasion (charisma). Your skill in a particular craft has earned you membership in a mercantile guild, offering privileges and protection while engaging in your art. No Guild Artisan companions in BG3.
- Urchin: Proficiency in Sleight of Hand (dexterity) and Stealth (dexterity). After surviving a poor and bleak childhood, you know how to make the most out of very little.
Best Race Choice for College of Swords Bard Build

Asmodeus Tiefling is the best Racial Choice for a Bard because you get a Hellish Rebuke, fire resistance, dark vision, and an extra Darkness spell. Wood Elf is a secondary choice because they have the highest movement speed, Darkvision, and Elven Weapon training which gives proficiency in Longbows.
| Asmodeus Tiefling | Wood Elf |
|---|---|
| Hellish Resistance | Fleet of Foot |
| Darkvision (12m) | Darkvision |
| Fire Resistance | Elven Weapon Training |
| Darkness Spells | Fey Ancestry |
The ability score improvement will be determined by your class and no longer your race freeing up choices. Every race will get +2 and +1 to spend on their Ability Score. Each of these races offers unique advantages that can enhance your combat prowess, survivability, or utility. Additionally, consider the roleplaying opportunities and character concepts that resonate with you for this Best Baldur’s Gate 3 College of Swords Bard Build Guide.
Recommended Skills for College of Swords Bard Build
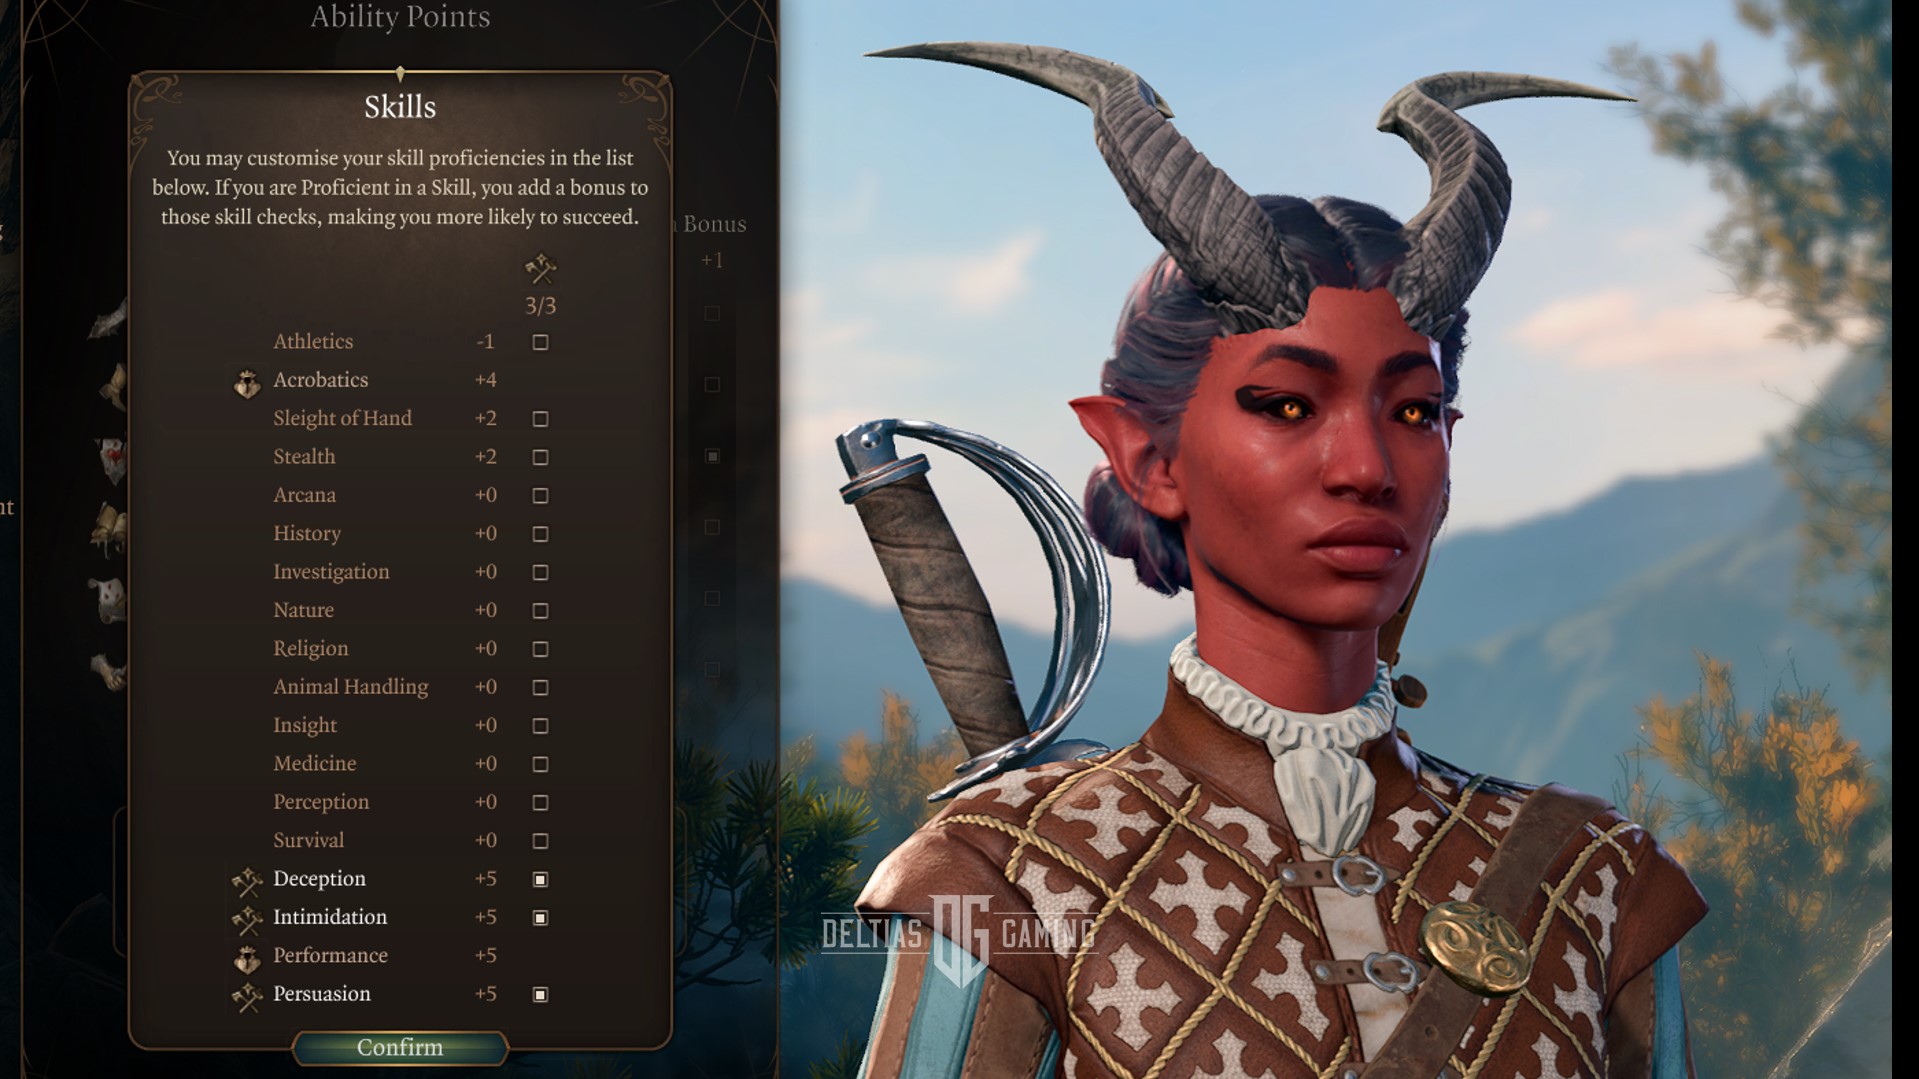
Deception, Intimidation, and Persuasion are the best skills for the College of Swords Bard in Baldur’s Gate 3 because they complement your class abilities and enhance your effectiveness in various situations. In Baldur’s Gate 3, skills represent the abilities and proficiencies of your character that allow them to perform various actions and interact with the game world. Skills are associated with specific attributes and are used to determine the success or effectiveness of certain actions or abilities. They can be edited during character creation or with companions, during respec or reroll screen.
Here are the skills for Bard in Baldur’s Gate 3:
- Intimidation: is a Charisma skill used to bully, threaten, and induce fear in dialogue situations.
- Deception is a Charisma skill used to lie, cheat, and manipulate the truth in speech checks.
- Persuasion is a Charisma skill to turn on the charm, coax, and cajole NPC during dialogue ability checks.
Best College of Sword Bard Ability Scores
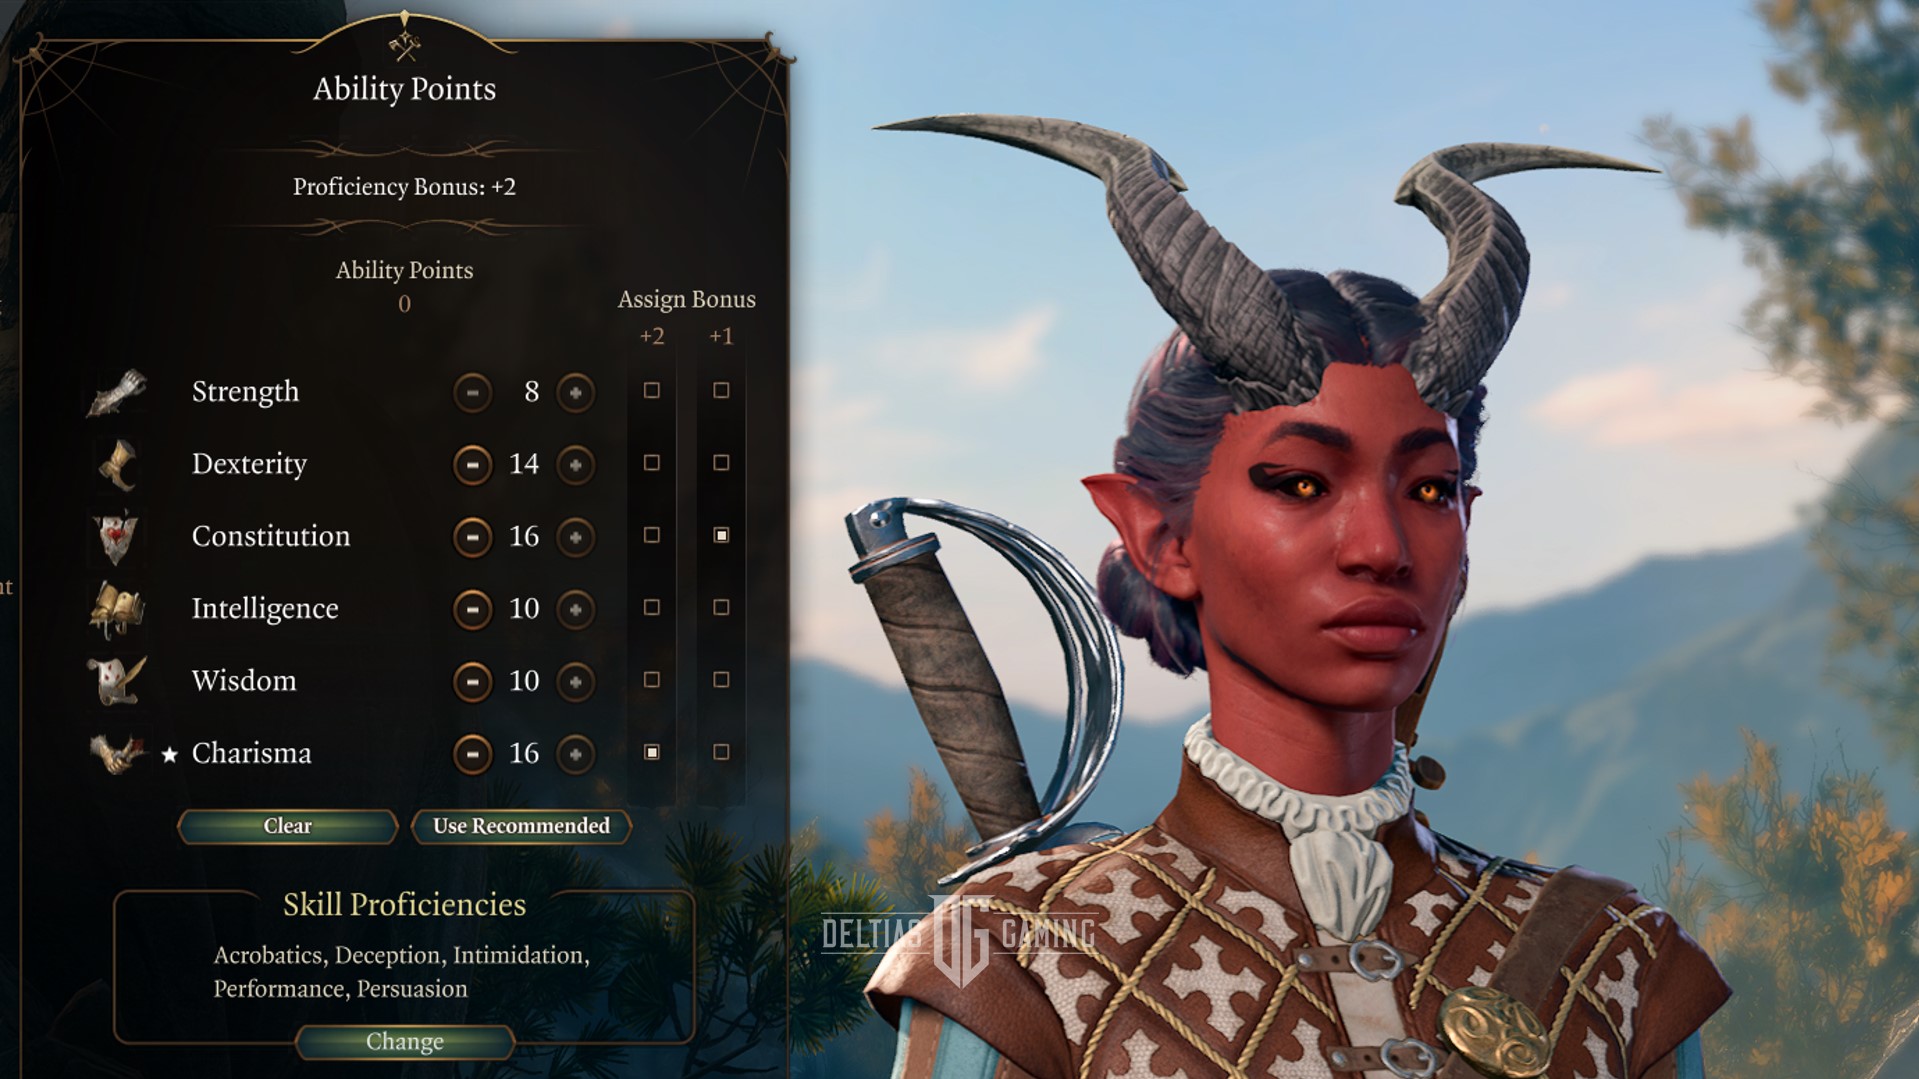
Here’s the recommended ability point distribution to maximize a College of Swords Bard Build potential in Baldur’s Gate 3:
| Ability | Points Goal |
|---|---|
| Strength | 8 |
| Dexterity | 16 |
| Constitution | 14 |
| Intelligence | 10 |
| Wisdom | 10 |
| Charisma | 16 |
The best ability score for a College of Sword bard is 16 Charisma for spellcasting, 16 Dexterity for weapon damage, and 14 Constituion for the health pool. With the College of Swords subclass, Dexterity is our ability that determines damage from weapon attacks. Charisma is less important in this subclass because our spells are mostly used for crowd control and utility. As we progress with this build, we will look to improve Dexterity with the +2 ability improvement feat.
You can increase your ability score via a quest in Act 1, Act 2, and Act 3. Make sure to check out our Permanent bonus guide on how you can boost your ability score through quests.
Bard Spell Slots
Here’s a chart that shows the levels and spell slots unlocked for the Bard class in Baldur’s Gate 3:
| Bard Level | 1st | 2nd | 3rd | 4th | 5th | 6th |
|---|---|---|---|---|---|---|
| Level 1 | 2 | 0 | 0 | 0 | 0 | 0 |
| Level 2 | 3 | 0 | 0 | 0 | 0 | 0 |
| Level 3 | 4 | 2 | 0 | 0 | 0 | 0 |
| Level 4 | 4 | 3 | 0 | 0 | 0 | 0 |
| Level 5 | 4 | 3 | 2 | 0 | 0 | 0 |
| Level 6 | 4 | 3 | 3 | 0 | 0 | 0 |
| Level 7 | 4 | 3 | 3 | 1 | 0 | 0 |
| Level 8 | 4 | 3 | 3 | 2 | 0 | 0 |
| Level 9 | 4 | 3 | 3 | 3 | 1 | 0 |
| Level 10 | 4 | 3 | 3 | 3 | 2 | 0 |
| Level 11 | 4 | 3 | 3 | 3 | 2 | 1 |
| Level 12 | 4 | 3 | 3 | 3 | 2 | 1 |
Best Companions for College of Swords Bard
With this particular Bard build, you won’t be doing much of the support and it’s a good idea to bring a Cleric particularly Shadowheart to your party. We suggest respecing her to the Life subclass which has a lot of powerful healing and utility spells. This will allow you to stick with doing high damage.
Here’s a list of the best companions for the Best Baldur’s Gate 3 College of Swords Bard Build Guide:
- Lae’zeal (Fighter): damage, crowd control, and in-your-face aggression, which takes the pressure off you.
- Gale (Wizard): damage, crowd control, and elemental effects considered your range damage dealer.
- Shadowheart (Cleric): healing, support, buffs, and crowd control
When putting your party together, consider companions for not only their combat prowess but also their outside abilities and skills that can influence storytelling, dialogue, and exploration. A balanced party will fit the traditional RPG ‘holy trinity’: Tank, Healer, and DPS. Ideally, in Baldur’s Gate 3, you are going to want one tank, one healer, one melee DPS, and one range DPS. Some classes/subclasses can cover both roles, so feel free to experiment and find out what works best for you.
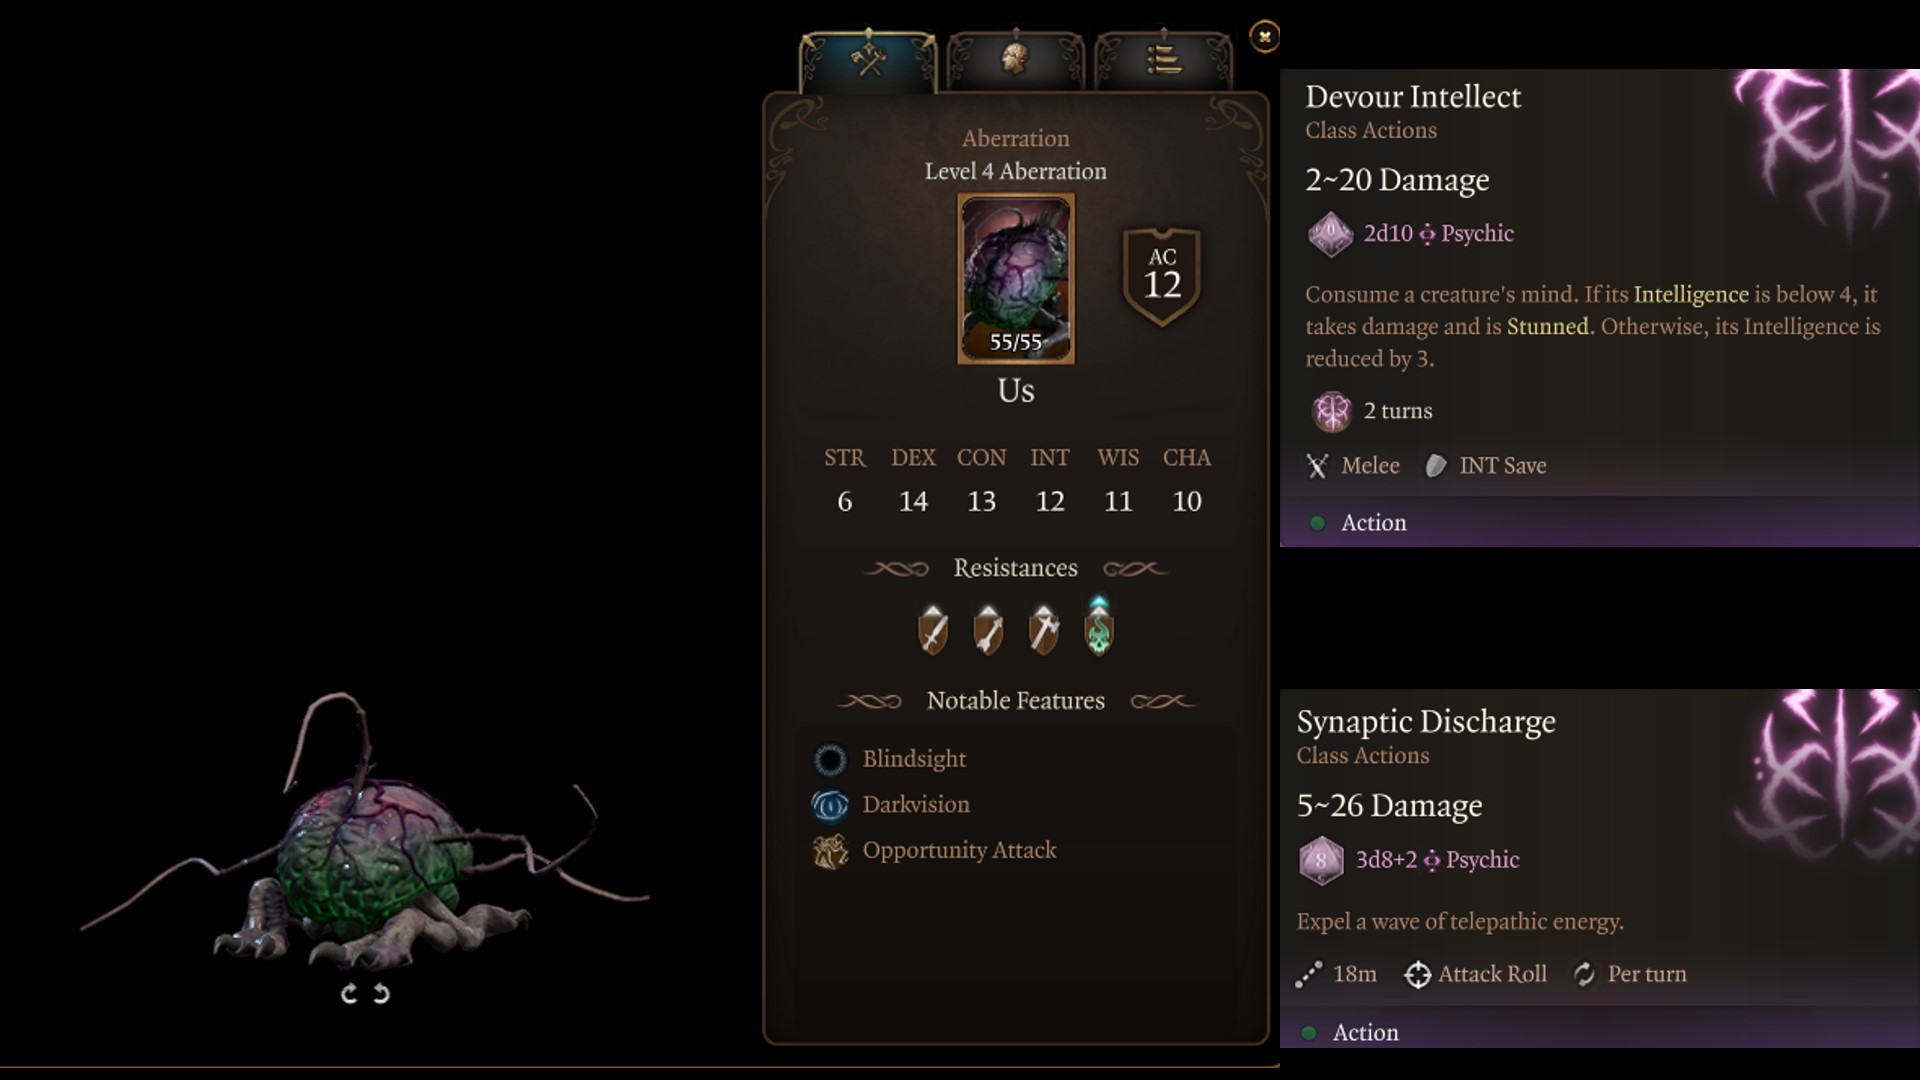
College of Sword Bard Illithid Powers
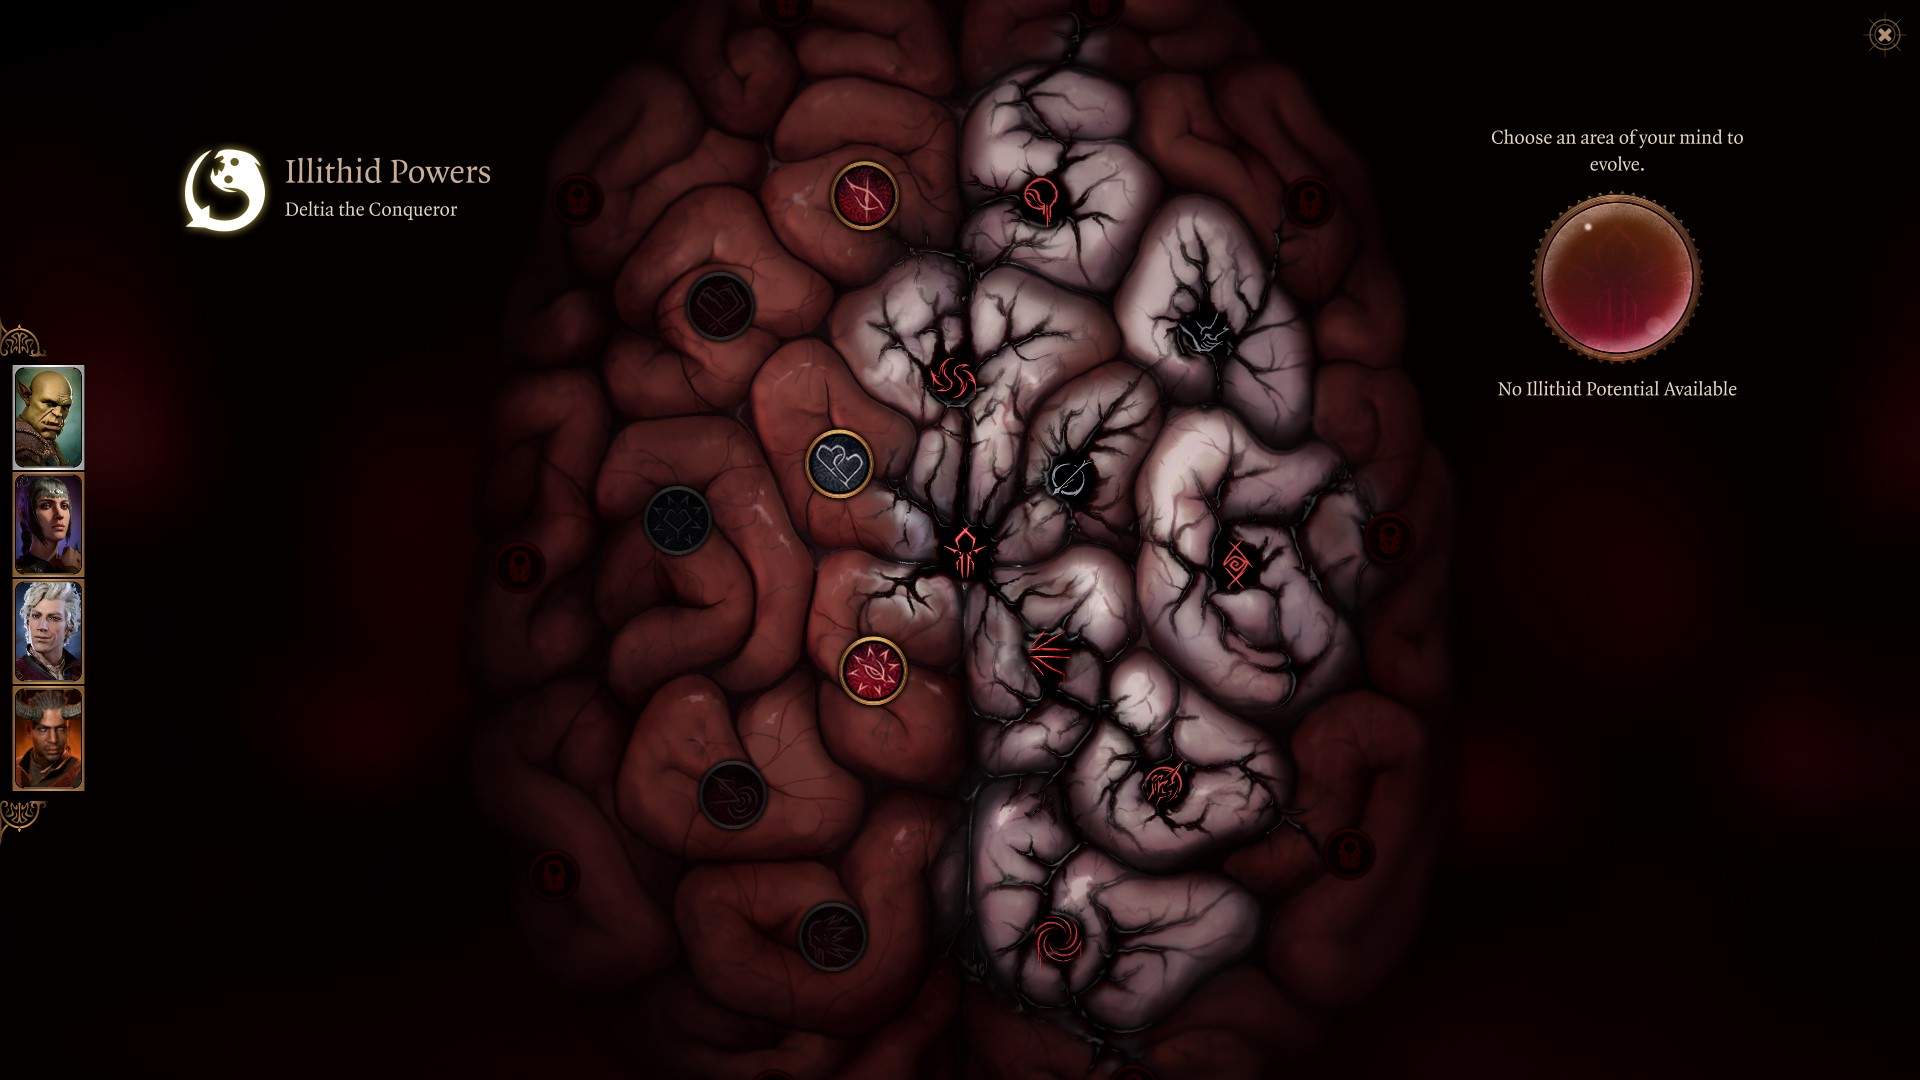
Illithid Powers are unlocked later in the game when you learn more about the Mind Flayers and Tadpoles. You can gain jars of Mind Flayer Parasite Specimens, and consume them to gain one point. This is essentially another skill tree advancement with some very strong powers. If you decide to advance this skill line, these are the choices we suggest.
Here are the best Illithid Powers for the Best Baldur’s Gate 3 College of Swords Bard Build Guide:
| Illithid Powers | Description |
|---|---|
| Luck of the Far Realms | When you make a successful Attack Roll against a foe, you can change that hit into a Critical Hit. |
| Cull of the Weak | When you bring a creature down to fewer hit points than your number of evolved Illithid powers, it dies and all nearby creatures take 1-4 Psychic damage. |
| Psionic Backlash | When an enemy within 9m casts a spell, you can use your reaction to inflict ld4 Psychic damage to the caster per the spell’s level. |
| Blackhole | Area-based suck-in that slows targets. |
| Repulsor | Massive area knockback that can hit friendlies. |
| Charm | This is the priority power you want to obtain because you can force enemies to attack something else. |
College of Swords Bard Level Progression
| Level | Class | Selection |
|---|---|---|
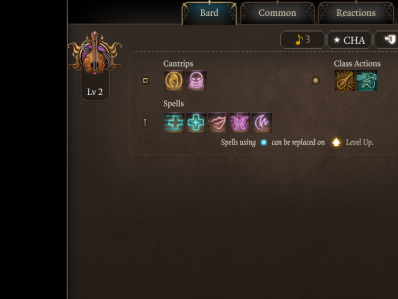
| 1 | Bard | Bardic Inspiration,Vicious Mockery, Blade Ward, Healing Word, Cure Wounds, Tasha’s Hideous Laughter, Thunderwave |
| 2 | Bard | Song of Rest, Faerie Fire |
| 3 | Bard | Subclass: College of Swords, Heat Metal, Duelling Fighting Style |
| 4 | Bard | Feat: Savage Attacker, Mage Hand, Shatter |
| 5 | Bard | Improved Bardic Inspiration, Stinking Cloud |
| 6 | Bard | Counter Charm, Extra Attack, Glyph of Warding |
| 7 | Bard | Polymorph |
| 8 | Bard | Feat: Ability Improvement Dexterity, Greater Invisibility |
| 9 | Fighter | Second Wind |
| 10 | Fighter | Action Surge |
| 11 | Fighter | Subclass: Battle Master, Feinting Attack, Riposte, Precision Attack |
| 12 | Fighter | Feat: Ability Improvement Dexterity |
Alternative College of Swords Bard Build
For this alternative College of Swords Bard build, you’ll start at Level 1 by choosing Warlock and the Hexblade subclass. This grants you access to two potent cantrips, Eldritch Blast and Booming Blade, providing a solid foundation for both ranged and melee combat. At Level 2, take another level in Warlock to unlock Hellish Rebuke and a couple of useful Eldritch Invocations, boosting your versatility and survivability.
At Level 3, you’ll multiclass into Bard, and at Level 5, you’ll select the College of Swords subclass. This works perfectly with a melee-focused build, enhancing your combat effectiveness. To cap it all off, take levels in Fighter, choosing the Eldritch Knight subclass for additional spellcasting and even greater melee damage potential.
| Level | Class | Selection |
|---|---|---|
| 1 | Warlock | Subclass: Hexblade, Eldritch Blast, Booming Blade, Hex, Wrathful Smite |
| 2 | Warlock | Hellish Rebuke, Eldritch Invocations: Devil’s Sight and One with Shadows |
| 3 | Bard | Multiclass: Bard, Vicious Mockery, Friends, Longstrider, Speak with Animals, Tasha’s Hideous Laughter, Charm Person |
| 4 | Bard | Thunderwave Spell |
| 5 | Bard | College of Swords subclass, Duelling fight style, Invisibility spell |
| 6 | Bard | Mage Hand cantrip, Heat Metal spell, Feat: +2 Charisma |
| 7 | Bard | Glyph of Warding spell |
| 8 | Bard | Fear spell, replace Heat Metal with Hold Person |
| 9 | Fighter | Multiclass: Fighter, Defence Fighting Style |
| 10 | Fighter | Action Surge |
| 11 | Fighter | Subclass: Eldritch Knight, Chromatic Orb, Magic Missile spells, Bursting Sinew, Fire Bolt cantrips, Shield extended |
| 12 | Fighter | Feat: Alert, Protection from Good and Evil |
Level 1

As a level one Bard, you will be able to pick an instrument and have Bardic Inspiration, Cantrips, and Spells. Musical instruments are for roleplay, nothing performance-based. At level 1 you will be wearing light armor and random weapons. Then at level 3, you will want to select subclass and switch to medium and Rapier because the College of Sword grants proficiency and these armor and weapons. For now, mainly work towards reaching your subclass which will give you a lot more damage.
Bardic Inspiration (class feature): 18m range consuming a bonus action ally can add a +1d6 bonus to their next Attack Roll, Ability Check, or Saving Throw. This can be used four times and recover charges by taking a long rest.
Cantrips
- Vicious Mockery: Do 1d4 Psychic damage and the target receives a Disadvantage on its next Attack Roll. A useful skill to do some ranged damage and debuff a target.
- Blade Ward: Gain Resistance to Bludgeoning, Piercing, and Slashing damage from weapon attacks. This is helpful when you need a non-spell slot defensive skill against melee aggressors.
Spells
- Healing Word: Heal a creature you can see up to 18m away using a bonus action. This is a useful heal because it’s ranged and consumes a bonus action, which can be paired with Cure Wounds a melee heal when in need.
- Cure Wounds: Touch a creature to heal it with 1d8. This is a melee-based heal that is more powerful than Heal Word and requires action so it can be used back-to-back if needed.
- Tasha’s Hideous Laughter: Inflict a creature with fits of laughter, leaving it Prone without the ability to get up for 10 turns and requires concentration. This is a great single-target crowd control ability and gives you some utility and defense.
- Thunderwave: Release a wave of thunderous force that pushes away enemies and deals damage. This is your knockback ability perfect to push aggressors back or knock enemies off ledges.
Gameplay at this level revolves around buff allies with Blade Ward, Crowd Control with Hideous Laughter, and healing with Healing Word and Cure wounds. You use Thunderwave to knock back enemies and Vicious Mockery for some damage and debuff. From here, the Bard gets more of the same as the levels progress. Mainly in the form of enemy crowd control effects and debuffs. Keep reading to find out more level progression for the Best Baldur’s Gate 3 College of Swords Bard Build Guide.
College of Swords Bard Gameplay & Priorities
During the early phase of BG3, the Bard should equip a Shortsword in the main hand and a dagger in the off-hand or a Longsword. You will also want to equip a back bar Hand Crossbow, or Shortbow for ranged damage. Additionally, your other primary goal is to focus on spells that give you utility and crowd control. This build isn’t concerned with supporting allies, but until levels 3-6, you won’t have much at your disposal for damage. Moreover, look to acquire Elixir of Bloodlust and Oil of Accuracy. You can combine these two for massive damage increases and your Bard will feel very powerful immediately.
Your overall priority with the College of Swords build is the following:
- Complete Prologue
- Recruit Companions
- Unlock Withers, respec companions to proper class/ability score
- Collect the Necromancy of Thay (important in Act 3)
- Reached Hollowed City/Druid Grove
- Sell, Stock up, complete quest
- Unlock summons, Scratch, Shovel
- Progress to level 5
- Reach Underdark and Grymforge
- Check all Permanent Bonuses in Act 1 and the best Gear
Following these steps ensures a strong foundation for her especially if you plan on playing solo or on Honour Mode difficulty.
Level 1 College of Swords Bard Spell Loadout: Healing Word, Cure Wounds, Thunderwave, Tasha’s Hideous Laughter.
Level 2

At level 2, Jack of All Trades is unlocked which adds half of your Proficiency Bonus (like persuasion) to Ability checks that you are not Proficient in. This essentially has little impact on performance but helps in story-telling and exploring situations.
Song of Rest will be unlocked at level two as well. This essentially provides an out-of-combat heal, like a short rest. Nothing that will aid you in a fight but can help you from heading back to camp repeatedly to heal up.
At level two, you will unlock more level 1 spell slots. You will also get the chance to unlearn any spells. This is useful if you picked the wrong spell loadout at character creator since you cannot prepare spells like a Wizard. We suggest taking Faerie Fire to this level.
- Faerie Fire: The targets turn visible, and Attack Rolls against the targets have an Advantage of 6m and require concentration. This is useful to help gain Advantage and very useful for Rogues who thrive off advantage attack roles.
Your gameplay remains unchanged here, you just use Song of Rest to help outside of combat recovery.
Level 2 College of Swords Bard Spell Loadout: Healing Word, Cure Wounds, Thunderwave, Tasha’s Hideous Laughter, Faerie Fire.
Level 3
At level three you get to pick a subclass. The obvious choice is College of Swords because it unlocks all the weapon-based damage attacks and a fighting style. We’ll unlock the Heat Metal spell and get to choose a Fighting Style.
- Heat Metal (spell selection): Cause a metal weapon or armour to glow red-hot and force the creature touching it to let go or receive a Disadvantage on Attack Rolls and Ability Checks.
- Duelling (Fighting Style): When you are wielding a melee weapon that is not Two-Handed or Versatile in one hand and no weapon in the other, you deal an additional 2 damage with that weapon.
- Slashing Flourish (subclass feature): Attack up to 2 enemies at once.
- Defensive Flourish (subclass feature): Attack defensively, increasing your Armour Class by 4 if you hit.
- Mobile Flourish (subclass feature): Thrust your weapon with enough force to push your target back 6m. Afterward, you can Teleport to the target.
- Proficiencies (subclass feature): Scimitar and Medium Armour
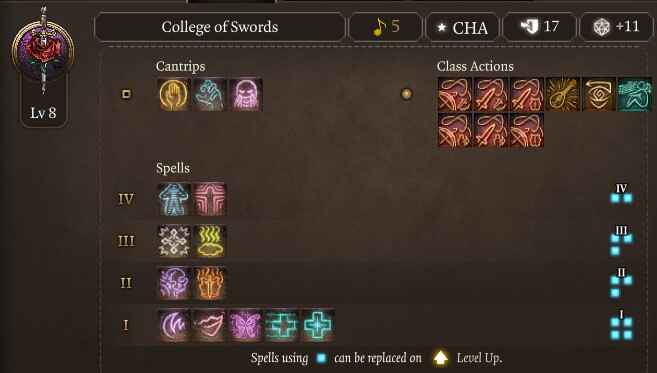
College of Swords Bard Subclass Actions
The subclass selection unlocks a lot of attacks which you need to understand. Slashing, defensive, and mobile flourish all consume Bardic Inspiration but can be very helpful. You need to be aware of your Bardic Inspiration and just like spell slots, recharge them frequently because this is where your damage and utility come from.
Slashing Flourish is great for area damage (multiple enemies), Defensive is great for increasing your AC (harder to hit you), and Mobility is an awesome knockback that can be used to instantly kill enemies off ledges.
Your Fighting Style Duelling gives you extra damage for a Rapier or Scimitar in your off-hand with just one weapon. So, this is the reason we recommend this playstyle and weapon type. Rapiers are more common with some very powerful even legendary items in Act 3. Rely on your weapon attacks to do damage, and spells to crowd control. Level 6 you see a spike in damage via Extra Attack which gives you two attacks per action.
College of Swords Bard Proficiencies
Lastly, you gain proficiency in medium armor and Scimitar. Scimitars can be a great weapon, but are harder to find and in Act 3 become weak due to options. Medium armor gives higher AC but caps your AC to +2. Later in the game, you can get item sets that remove this cap giving you massive AC, thus making you very hard to hit. Feel free to use either light or medium depending on the bonuses and work towards collecting Act 3 gear sets with medium and rapier as weapons and armor.
Level 3 College of Swords Bard Spell Loadout: Healing Word, Cure Wounds, Thunderwave, Tasha’s Hideous Laughter, Faerie Fire, Heat Metal
Level 4


At level four, you can either take a feat or an ability improvement, one new spell and another Cantrip. Below are our recommendation selections for the College of Sword Bard at level 4:
- Mage Hand (cantrip selection): Create a spectral hand that can manipulate and interact with objects.
- Shatter (spell selection): Damages all nearby creatures and objects. Creatures made of inorganic material such as stone have Disadvantages on their
- Saving Throw.
- Savage Attacker (feat selection): When making a melee weapon attack, you roll your damage dice twice and use the highest result.
The Savage Attacker feat will increase your damage significantly, and once we get more Dexterity, the damage will further increase. Shatter can be useful as a range damage-dealing tool, and Mage Hand is purely for utility. The gameplay remains the same at this level, and not much changes until level 6.
Level 4 College of Swords Bard Spell Loadout: Healing Word, Cure Wounds, Thunderwave, Tasha’s Hideous Laughter, Faerie Fire, Heat Metal, Shatter
Level 5
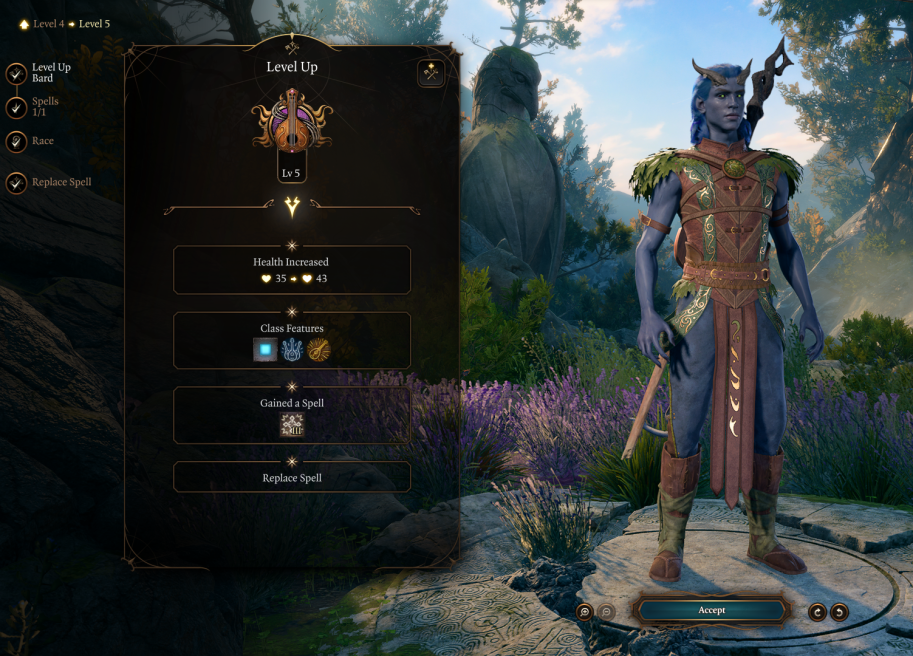
At level five, Bardic Inspiration is enhanced going from a 1d6 to 1d8 benefit on attack rolls. You also gain all Bardic Inspiration on a short rest. Bards get access to level 3 spells at this point, and what you pick will depend on what your group composition needs. Our recommended spell is Stinking Cloud. This spell is in a massive 8m radius and creates a huge cloud that constantly makes Dex check to see if enemies cannot use actions. It essentially shuts down an entire area (friend or foe) from taking action.
- Font of Inspiration (class features): You regain all your Bardic Inspiration after a Short or Long Rest.
- Improved Bardic Inspiration (class features): The bonus gained from Bardic Inspiration increases to +1d8 and +1d10.
- Stinking Cloud (spell selection): Create a cloud of gas so nauseating it prevents creatures from taking action.
At level 5, you get another area-based crowd control Sinking Cloud.
Level 5 College of Swords Bard Spell Loadout: Healing Word, Cure Wounds, Thunderwave, Tasha’s Hideous Laughter, Faerie Fire, Heat Metal, Shatter, Stinking Cloud
Level 6

At level 6 we gain Counter Charm, Extra Attack, and another spell. Here are the details at this level:
- Counter Charm (class feature): You and any allies within 9m have Advantage on Saving Throws against being Charmed or Frightened.
- Extra Attack (subclass feature): Can make an additional free attack after making an unarmed or weapon attack.
- Glyph of Warding (spell selection): Inscribe a circle of arcane glyphs on the ground that triggers a magical effect when stepped on by an enemy. This grants an area-based effect of your choosing, like fire, thunder, or even sleep. You can set a trap or use it on top of enemies for the specific effect you want and big damage.
Level 6 gives us an Extra Attack making one attack deliver two attacks increasing our damage radically. The only issue with the Bard at this point is the lack of bonus action utility. You don’t have many ways to combo your action with a bonus action. Look to use your bonus action for potions, consumables, etc., and action for pure damage with weapons or spells for CC.
Ending Act 1 with the College of Swords Bard
Around Level 6 you should be close to finishing Act 1 content. Be sure to check in with merchants and stock up on camp and alchemy supplies. Moreover, check out the best Act 1 items. Additionally, you don’t want to miss the permanent bonuses you can acquire in Act 1. Lastly, Grymforge has powerful armor and weapons (Adamantine) that can aid you well into Act 3. Consider taking the time to craft at least one thing there before transitioning to Act 2, where you won’t be able to return.
Level 6 College of Swords Bard Spell Loadout: Healing Word, Cure Wounds, Thunderwave, Tasha’s Hideous Laughter, Faerie Fire, Heat Metal, Shatter, Stinking Cloud, Glyph of Warding
Level 7
At level 7 we get access to level 4 spells. We recommend taking Polymorph.
Polymorph (spell selection): Transform a creature into a harmless sheep.
We won’t see much happen at this level, but Polymorph is a great single-target CC. Use this on the enemy’s primary damage dealer only if the percentage to land is 60% or higher. The reason why, you don’t want to use your action and whiff (miss) and lose out on two attacks with Extra Attack. You want the percentage to land to be higher or it’s not worth the risk. Factor that into your gameplay when doing any crowd control from this point forward.
Level 7 College of Swords Bard Spell Loadout: Healing Word, Cure Wounds, Thunderwave, Tasha’s Hideous Laughter, Faerie Fire, Heat Metal, Shatter, Stinking Cloud, Glyph of Warding, Polymorph
Level 8
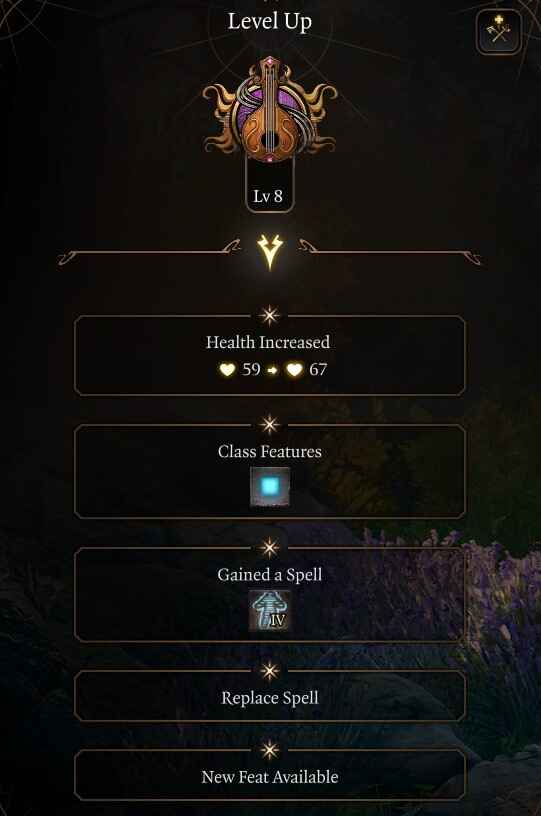
At level 8 we get access to another spell slot and a feat.
- Greater Invisibility (spell selection): Turn a creature Invisible. The attack against it have Disadvantage. It attacks with Advantage. When interacting with items, casting spells, or attacking, Stealth Checks are needed to maintain Invisibility. The check becomes harder with each successful attempt.
- Ability Improvement (feat selection): Put +2 into your Dexterity ability score to give your character a total of 18.
At this level, you get a utility spell and more Dexterity which will help with damage and landing attacks. Feel free to select a different spell, it’s not critical, and mainly the Bard levels from this point forward are lackluster.
Level 8 College of Swords Bard Spell Loadout: Healing Word, Cure Wounds, Thunderwave, Tasha’s Hideous Laughter, Faerie Fire, Heat Metal, Shatter, Stinking Cloud, Glyph of Warding, Polymorph, Great Invisibility
Level 9
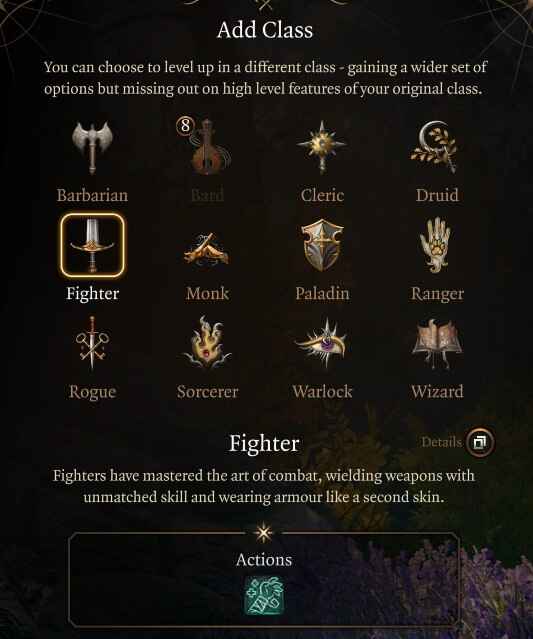
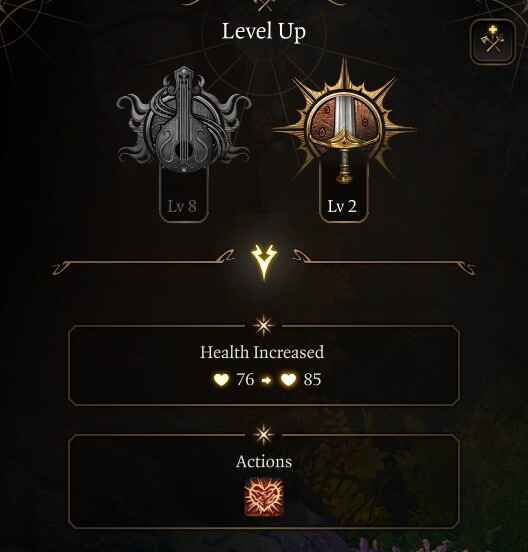
Past level 8 the College of Swords Bard doesn’t get much for their subclass selection and so we’re going to lean into their action-based combat and choose to multiclass. There are two different, but effective routes you could choose here: Thief Rogue for their extra bonus action, or Battle Master Fighter for Action Surge. I’m choosing to go with Fighter because Battle Master will give us Action Surge, two attacks per short rest, and with Extra Attack you can take a lot of actions per turn.
If you choose to stay in the Bard levels, you will get weak spell selections, zero increase to actions, and only two weak subclass features. Fighter is the play with four levels you can unlock Action Surge, Battle Master Subclass, and an extra feat! To do this, press the + box in the upper left when leveling then select the Fighter class. We will stay with Fighter until the maximum level of 12. Your spells will remain unchanged from this point forward, so use them for utility mainly.
- Second Wind (Fighter class feature): Draw on your stamina to heal yourself for 1d10 + Fighter Level hit points.
We still have 5 Bardic charges, which is good since they regenerate on short rest. Your Bonus Action at this point should be used for Bardic Inspiration or consumables.
Level 10
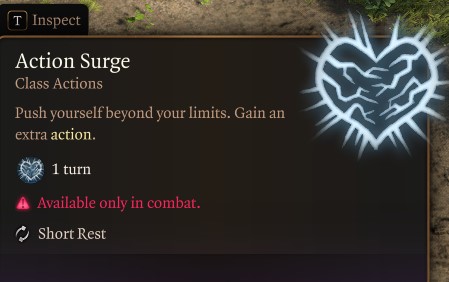
At level 10 you’ll put another level into the Fighter class. This will unlock the Action Surge feature, which allows your character to take another free turn once every short rest. Action Surge is an incredible ability that needs to be used wisely. You get a second action, and with Extra Attack, that means four attacks and one bonus action per turn. This gives you huge damage potential but needs to be recharged with short rest.
The way to use Action Surge is to wait for a target to be vulnerable or nearly at death. You use Action Surge and finish the target off. Do not use Action Surge on your first turn, be precise with it when you need to press the action, retreat, off-heal or your party will die. Once you get used to it, the combination with all your spells and weapon damage makes the Fighter levels worth it in the Best Baldur’s Gate 3 College of Swords Bard Build Guide.
Action Surge (Fighter class feature): Immediately gain an extra action to use this turn.
Level 11
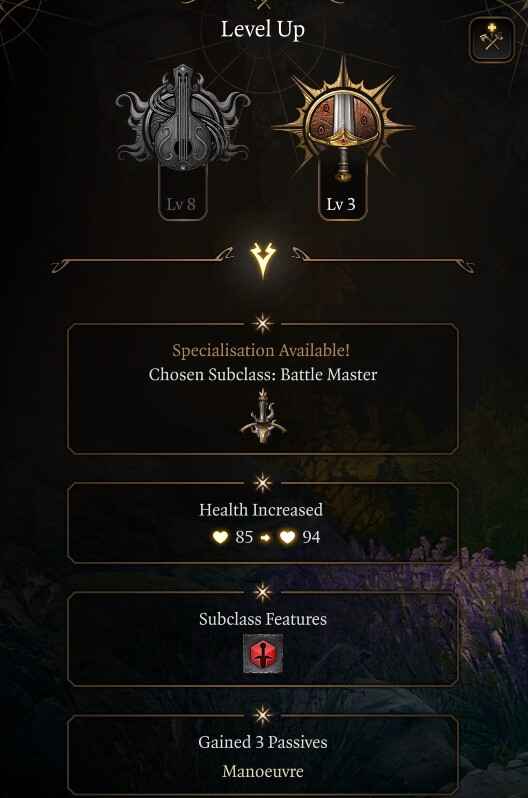
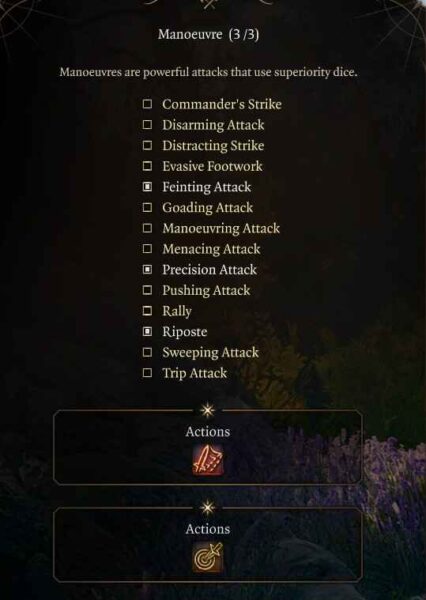
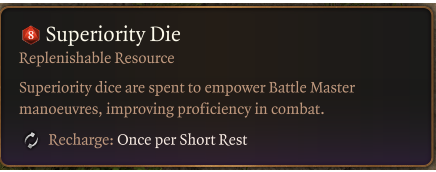
At Level 11, you can take another level in the Fighter class and you’ll now be able to select a subclass. I recommend choosing the Battle Master subclass. This will unlock three maneuvers, as well as superiority dice. Superiority Dice is another resource that can be spent for abilities or passive benefits. You will now have a lot of resources to manage but short rest will recharge Superiority Die and Action Surge.
- Feinting Attack: You can use both your action and bonus action on a turn to attack a target with Advantage and deal an additional 1d8 damage.
- Riposte: When a hostile creature misses you with a melee attack, expend a superiority die to retaliate with a powerful strike that deals an additional 1d8 damage.
- Precision Attack: You can spend a Superiority Die to add it to the result of an Attack Roll.
Feinting Attack is the maneuver that consumes both your action and bonus action for extra damage, somewhat similar to a Smite. This is very useful for the Bard considering our weakness is the lack of bonus action utility. With this resource, you can use Smite or Feinting on back-to-back turns for a huge damage ability, or with Extra Attack one turn produces massive damage.
Riposte is a passive reaction that will do damage and consume superiority dice resources. With high AC, up to 21 with our armour choices, enemies will miss you a lot. This simply punishes them with free damage that does not require an action. Precision Attack is useful because it’s a passive skill, it does not require an action or bonus action, and it does a bit of damage. Using the maneuvers for extra damage and bonus damage usage, not crowd control since we have that alongside healing.
Level 12
You’ve reached the maximum level of 12 with the Best Baldur’s Gate 3 College of Swords Bard Build Guide. At this level, you will select a +2 Dexterity bonus and reach 20 if you follow this guide. Not many changes gameplay-wise, and our next suggestion is to look below for gear sets and start optimizing your builds loadout.
Best Gear for College of Swords Bard in Baldur’s Gate 3
Beginner: Act 1

The following table is a recommended beginner gear for the Best Baldur’s Gate 3 College of Swords Bard Build Guide:
| Gear Slot | Best Gear Item | Effect |
|---|---|---|
| Head | Haste Helm | Increase Movement |
| Cape | – | |
| Chest | Adamantine Scale Mail | 16 AC |
| Gloves | Gloves of the Growling Underdog | Advantage when surrounded |
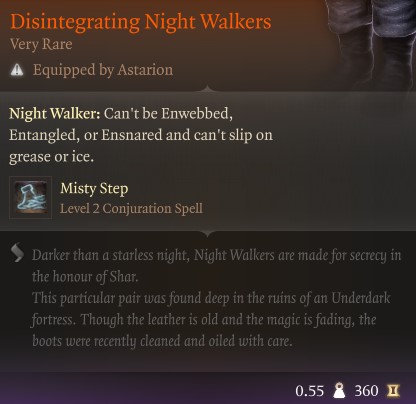
| Boots | Disintegrating Night Walkers | Mobility and Misty Step |
| Necklace | Moondrop Pendant | Avoid Attacks of Opportunity |
| Ring | Caustic Band | +2 Acid Damage |
| Ring | Crusher’s Ring | Increase Movement |
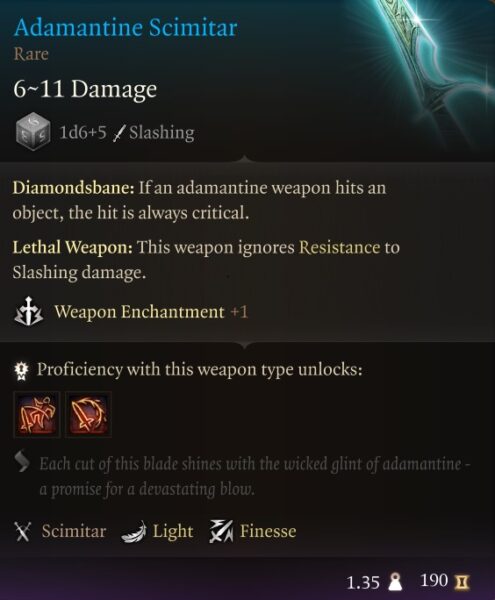
| Weapon 1 Main Hand | Adamantine Scimitar | Ignores Resistances |
| Weapon 1 Off-Hand | None | Leave Free |
| Weapon 2 Range | Hunting Shortbow | Free Hunter’s Mark |
Below is the best Act 1 Armor, Weapons, and Equipment for College of Swords Bard in BG3:
- Haste Helm: Locked chest near to the Ancient Rune Circle in the Blighted Village (Alternative Shadow of Menzoberranzan, or Cap of Wrath).
- Adamantine Scale Mail: Crafted in Adamantine Forge (Alternative Hide +2 Armour, or Githyanki Half Plate).
- Gloves of the Growling Underdog: Looted from the chest behind Razglin’s throne room (Alternative Gloves of Hail of Thorns, or Gloves of Archery).
- Disintegrating Night Walkers: Can be looted from True Soul Nere in Grymforge. (Alternative Boots of Genial Striding, or Boots of Striding).
- Moondrop Pendant: Found in a magically sealed chest inside the Owlbear Nest, Act 1. (Alternative Amulet of Misty Step).
- Caustic Band: Buy it from Derryth in the Myconid colony, Underdark. (Alternative The Sparkswall).
- Crusher’s Ring: Looted or stolen from Crusher in the Goblin Camp. (Alternative Ring of Absolute Force).
- Adamantine Scimitar: Crafted in Adamantine Forge (Alternative Speedy Reply, Sword of Screams, or Rupturing Blade).
- Hunting Shortbow: Sold by Dammon in Druid Grove Act 1.
Advanced: Act 3 End Game


The following table presents the best advanced and end-game gear for the best Bard College of Swords Build in Baldur’s Gate 3:
| Gear Slot | Best Gear Item | Effect |
|---|---|---|
| Head | Birthright | +2 Charisma |
| Cape | Fleshmelter Cloak | Acid Attackers |
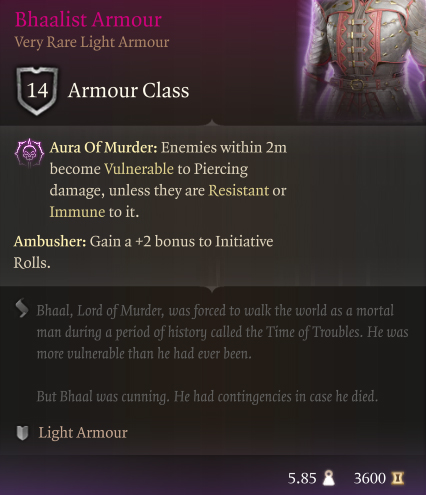
| Chest | Bhaalist Armour | 2x Piercing Damage |
| Gloves | Legacy of the Masters | +2 Attack Rolls |
| Boots | Helldusk Boots | Better Mobility |
| Necklace | Surgeon’s Subjugation Amulet | Free Stun |
| Ring | Killer’s Sweetheart | Auto Critical |
| Ring | Ring Of Regeneration | Self Healing |
| Weapon 1 Main Hand | Duellist’s Prerogative | Best Rapier in BG3 |
| Weapon 2 Off-Hand | None | Leave blank |
| Weapon 2 Ranged | Hellfire Hand Crossbow | Free Scorching Ray |
| Weapon 2 Range Off-Hand | Hand Crossbow +2 | +2 Weapon |
| Musical Instrument | Glimmergad’s Selgaunt Fiddle | Unique Instrument |
Below is the best Act 3 Armor, Weapons, and Equipment for College of Swords Bard in BG3:
- Birthright: Purchased at Sorcerous Sundries in Act 3 (Alternative Helldusk Helmet).
- Fleshmelter Cloak: Act 2 House of Healing Morgue (Alternative Cloak of Protection, or Shade-Slayer Cloak).
- Bhaalist Armour: Become Unholy Assassin in Murder Tribunal, Sold by Echo Abazigal (Alternative Helldusk Armour, or Armour of Agility).
- Legacy of the Masters: Sold by Dammon in Lower City Act 3, Forge of the Nine (Alternatives Gloves of Soul Catching, Helldusk Gloves, or Gloves of Dexterity).
- Helldusk Boots: Locked Chest, Wyrm’s Rock Fortress, Act 3 (Alternative: Disintegration Night Walkers).
- Surgeon’s Subjugation Amulet: Looted from Malus Thorm at the House of Healing in Act 2. (Alternative: Amulet of Greater Health)
- Killer’s Sweetheart: Found in Self-Same Trial inside the Gauntlet of Shar. (Alternative: Risky Ring).
- Ring Of Regeneration: Purchased from Rolan at Sorcerous Sundries (Alternative Ring of Free Action).
- Duellist’s Prerogative: Earned as a quest reward for Save Vanra Quest (Alternative Crimson Mischief, Knife of the Undermountain King, or Justiciar’s Scimitar).
- Hellfire Hand Crossbow: Looted from Yurgir in the Gauntlet of Shar.
- Hand Crossbow +2: Found on the Second floor of Lady Jannath’s Estate in Act 3.
- Glimmergad’s Selgaunt Fiddle: Purchased at Chromatic Scale in the Lower City.
Best College of Swords Bard Consumables, Potions, and Items

The following list represents the best individual use consumable items that will aid in our College of Swords Build:
- Elixir of Bloodlust: Once per turn when you kill a foe, you gain HP 5 temporary hit points and an additional action.
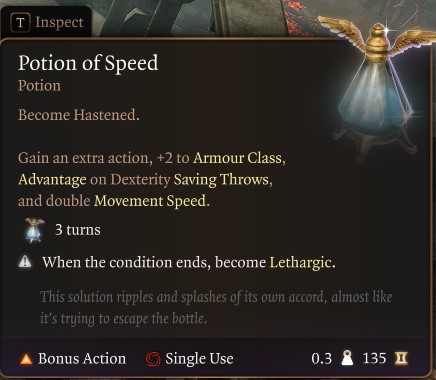
- Potion of Speed: Gain extra action, +2 AC, Advantage on Dexterity Saving Throws, and double movement speed.
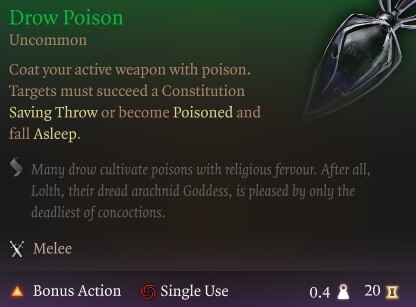
- Drow Poison: Weapon poison that adds Constitution Saving Throw or becomes Poisoned and falls Asleep.
- Potion of Flying: Drink to gain a flying speed of 60ft for one hour.
- Elixir of Heroism: Gain 10 temp HP and become Blessed until a long rest.
- Potion of Greater Healing: 4d4 + 4 hit points restored.
- Oil of Accuracy: Coat weapon for a +2 in Attack Rolls bonus.
- Elixir of Vigilance: Drink to gain a +5 bonus to Initiative and you can’t be Surprised.
- Elixir of Darkvision: (only non-Darkvision race): Drink to gain the ability to see in the dark up to 12m.
Read More – Baldur’s Gate 3 Shadow Magic Sorcerer Build
Permanent Bonuses for College of Swords Bard BG3
Throughout Baldur’s Gate 3, you will have the ability to gain permanent bonuses to your character. These can grant additional spells, ability scores, and other bonuses. Permanent Bonuses are not displayed throughout the campaign but are vital to increase overall combat performance. We have all permanent bonuses here in a guide, but the most important ones for you to collect are listed below.
| Act 1 | Act 2 | Act 3 |
|---|---|---|
| Auntie Ethel’s Hair: Gain +1 to an Ability Score. | Potion of Everlasting Vigour: Gain +2 Strength. | Mirror of Loss – +2 to an Ability Score of your choice. |
| Awakened: Use illithid powers as a Bonus Action. | Slayer Form: Ability to transform into the Slayer. | Partial Ceremorphosis: Access to tier 3 illithid Powers. |
| Scratch: Gain Find Familiar Scratch. | Summon Us: Allows you to summon Us. | Sweet Stone Features: Blessed permanent. |
| Cheeky Quasit: Gain Summon Quasit Shovel. | Statue of the Gods: +2 to Saving Throws | |
| Loviatar’s Love: 30% Hit Points or less, you gain a +2 bonus to Attack Rolls and Wisdom saving throws. | ||
| Necromancy Of Thay: access to powerful spells in Act 3. | ||
| Volo’s Ersatz Eye: See Invisibility |
Best Permanent Bonuses for College of Swords Bard in Baldur’s Gate 3
College of Swords Bard Gameplay Tips and Tricks
The following list is 10 gameplay, combat, tips, and tricks for playing a Bard effectively in Baldur’s Gate 3:
- Inspire Allies: Constantly use Combat Inspiration during and before a fight to give them a massive advantage.
- Bonus Action: Always exhaust your bonus action with Combat Inspiration, potion, hide even shove can be beneficial.
- Environment Protection: Use line of sight, hide, and dash to avoid extra damage from melee aggressors as Bards are not equipped for frontline fighting.
- Knockback: Having a spell-like Thunderwave is essential to handling pressure from melee targets.
- Crowd Control: Bards should use single target and area-based control spells to reduce incoming damage.
- Rest Constantly: Constantly return to camp for a full rest so you enter with a full complement of spell slots.
- Use Consumables: Use the Potion of Speed in a tough fight to get an extra action per turn for a limited duration.
- Heal: The goal is to keep damage dealers from having to self-heal or use a bonus action potion, so constantly heal them to keep group damage high.
- Roleplay: Bards are god-tier RP characters and should mostly be doing dialogue options because of their huge built-in advantages.
- Use Skills: Check your dice roll score by hovering over a dialogue check to see what gives you the best advantage.
Remember, this build guide serves as a foundation, and you can always adapt it to suit your preferences and the needs of your campaign. Enjoy playing as a formidable Best Baldur’s Gate 3 College of Swords Bard Build Guide!
College of Swords Bard Changes in Patch 7 for BG3
The College of Swords Bard class didn’t receive any changes with the Baldur’s Gate 3 Patch 7. Nothing major has changed if you’re already familiar with how the class works.
Read More – Top 10 builds for Baldur’s Gate 3
Larian Studios’ main focus in this patch is mods and some new cinematic scenes focusing on evil endings. The game now features a modding toolkit and an in-game mod manager, allowing players to create and install mods directly within the game. This best College of Swords Bard Build Guide remains unchanged, mainly in Baldur’s Gate 3 Patch 7.
Baldur’s Gate 3 College of Swords Bard Build Summary Guide
Subclass College of Swords
Armor: Medium
Weapons: Rapier
Background – Entertainer
- Strength 12
- Dexterity 14
- Constitution 16
- Intelligence 8
- Wisdom 10
- Charisma 16
Level Progression
- Level 1 – Vicious Mockery
- Level 2 – Song of Rest
- Level 3 – College of Swords Subclass
- Level 4 – Savage Attacker Feat
- Level 5 – Font of Inspiration
- Level 6 – Extra Attack
- Level 7 – Polymorph Spell
- Level 8 – Feat +2 Dexterity
- Level 9 – Multi-class Fighter
- Level 10 – Action Surge
- Level 11 – Battle Master Subclass
- Level 12 – Feat +2 Dexterity
Frequently Asked Questions
Why is Swords bard so good in BG3?
The College of Swords Bard is a good pick in BG3 as it features magic, melee, and utility in a flexible way. You can use this subclass as a frontline duelist, support caster, and damage dealer.
Which fighting style for College of Swords bard BG3?
Even though this choice is pretty subjective based on your preferences, the best overall picks can be a dueling fighting style. You can also go for archery as your fighting style.
Which College to choose for bard BG3?
College of Swords is one of the best bard college in BG3. However, other good options you can go for are College of Lore and College of Valor.
Looking For More About Baldur’s Gate 3?
Thank you for reading Best Baldur’s Gate 3 College of Swords Bard Build Guide guide. We provide the latest news and create guides for Baldur’s Gate 3. Also, watch me play games on Twitch or visit my YouTube channel!