Facebook
 Reddit
 Email
Email
In this guide, we will explain the best Lae’zel Companion Build in Baldur’s Gate 3, the Battle Master subclass, and the optimal setup.

This build page has been updated for the Patch 8 version of Baldur’s Gate 3.
Lae’zel Companion Introduction
Welcome to the companion build guide for Lae’zal, one of the companions in Baldur’s Gate 3. Lae’zal is a powerful Githyanki warrior who joins your party on your journey through the tumultuous world of Avernus. This guide will provide you with essential information about Lae’zal, her background, abilities, quests, and tips on how to maximize her potential in combat and interactions.
Lae’zal is a Githyanki, a race of fierce and proud warriors hailing from the astral plane. She is a skilled fighter, wielding a deadly mind blade that allows her to channel psionic powers in combat. Lae’zal’s motivation for joining your party revolves around her mission to retrieve a stolen artifact known as the “Nautiloid.” Her character is marked by her stoic and disciplined demeanor, and her interactions with the player and other companions can be complex and revealing.
This Lae’zel Best Fighter build is focused on using a two-handed weapon style, ultra-aggressive, and big damage. The strength is single target damage, crowd control, and durability. An added value of this build is, it’s very simple and easy for newer BG3 players. It starts out strong and continues throughout the max level of 12.
| Lae’zel Pros | Lae’zel Cons |
|---|---|
| Amazing in Combat | Weak Ability Score |
| Great Gear Automatically | Rewards Aggression Dialogue |
| Flexibility in Build | No Magic Casting |
Lae’zel Companion Build Changes in Patch 8 for BG3
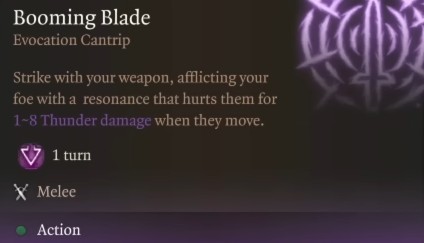
Patch 8 brings a major shake-up to Baldur’s Gate 3, introducing 12 new subclasses that dramatically expand the possibilities for character customization. These additions don’t just diversify playstyles, they redefine what’s viable in both combat and utility-focused builds. One of the biggest winners from this update is the Eldritch Knight Fighter, who now benefits immensely from access to the Booming Blade cantrip. This single spell adds reliable thunder damage to melee attacks, giving the subclass a significant damage boost and greater tactical depth.
Another standout change is the emergence of a new powerhouse multiclass option: Fighter/Warlock. In particular, combining Eldritch Knight with a one-level dip into Hexblade Warlock offers a flexible and potent alternative to the classic Fighter/Paladin synergy. While we still recommend the pure Battle Master Fighter for players who enjoy a more direct, martial-focused experience, the new subclass and multiclass options are worth serious consideration.
For those wanting to enhance their magical toolkit without straying too far from the Fighter’s strengths, the 11/1 Fighter-Hexblade split hits a sweet spot. It introduces spellcasting versatility, ranged magical damage, and bonus action utility, all while preserving your core stats and weapon-focused gameplay. You only sacrifice one feat, but still have room to reach 20 Strength and take Great Weapon Master. This makes the build especially appealing for solo players who need a bit more flexibility in how they handle combat scenarios. We’ve laid out a detailed version of this alternative build below for those ready to try a more dynamic approach to playing a Lae’zel Fighter build.
Lae’zel Companion Features & Mechanics
The following list presents all the essential Lae’zel Companion Mechanics and Features in Baldur’s Gate 3:
- Race: Githyanki
- Background: Soldier
- Primary Ability: Strength
- Class: Fighter
- Proficiencies: Acrobatics, Arcana, Athletics, Intimidation, Survival
- Origin Character: Yes
- Romance: Yes
- Location: The Ravaged Beach – north of the Roadside Cliffs, Act 1
Your companion can be respecced or rerolled early in the game. This means you can change their class, subclass, ability score, and more. The only feature that cannot be adjusted is their race and story. We suggest using Withers at Camp after he’s unlocked to optimize the build.
Recommended Subclass
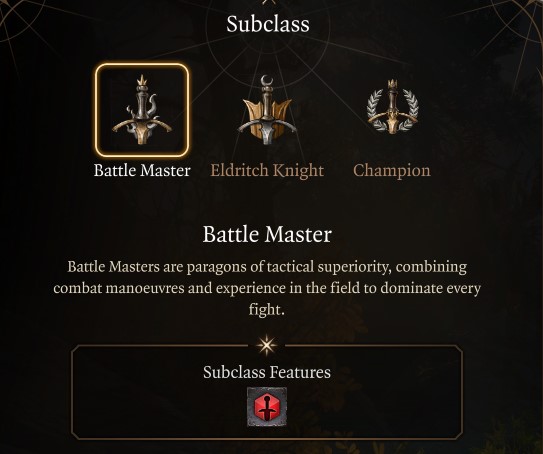
The Battle Master subclass is the best subclass for the Best Baldur’s Gate 3: Lae’zel Companion Build because it is the most versatile and adaptable. Subclass selection will be unlocked at level 3 for the Fighter Class.
Here’s the list of the Fighter’s Subclasses:
- Battle Master: is a more versatile subclass for the Fighter. Battle Masters use Superiority Dice and Battle Manoeuvres for control and damage.
- Champion: are the most straightforward subclass for the Fighter. This subclass gives a bonus to critical damage.
- Eldritch Knight: is a subclass that combines the martial prowess of the Fighter with the spellcasting ability of the Wizard.
Baldur’s Gate 3 Battle Master Fighter Features & Progression
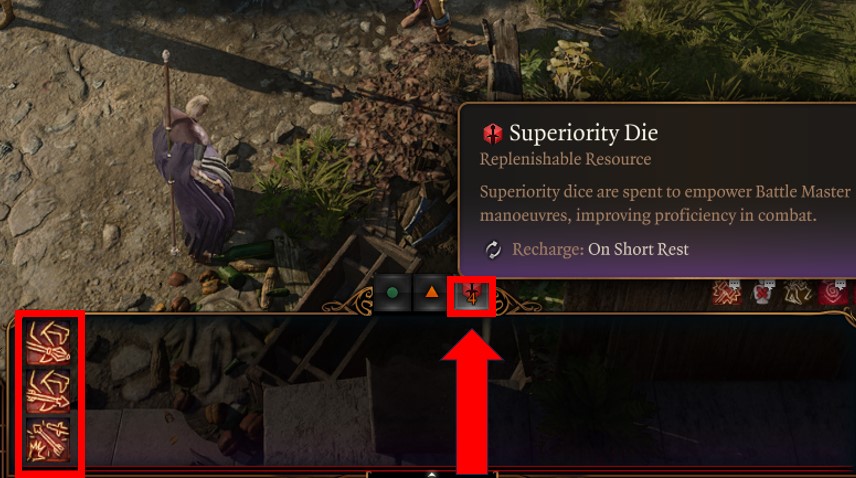
Battle Master will give you three passives you can pick from, along with Superiority Dice by 4. Superiority dice are a mechanic built into Fighter Attacks and can be replenished during a short rest. This mechanic will be explained in level progression but helps you have added attacks that can do damage, crowd control, and more.
The Battle Master Fighter subclass unlocks the following features and spells:
- Superiority Dice: 4 (Level 3): Your Superiority Dice are d8s. You have 4. They fuel your Battle Master manoeuvers and are expended upon use. You regain expended Superiority Dice after a Short or Long Rest.
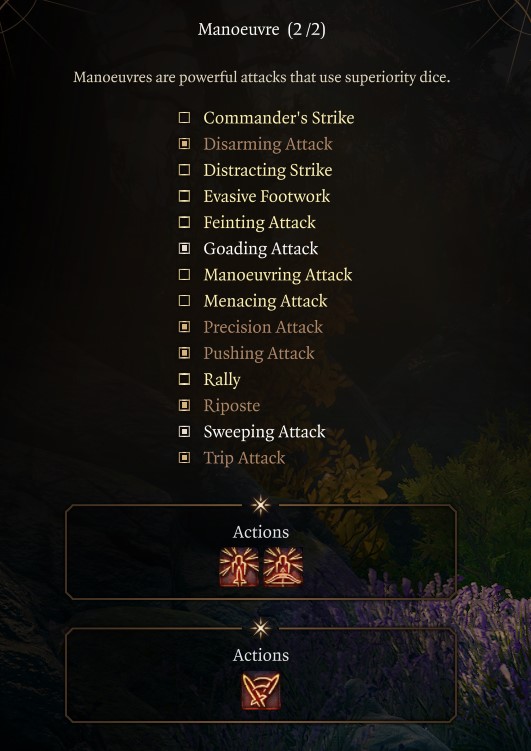
- Battle Manoeuvers (Level 3): Manoeuvers are powerful attacks that use superiority dice. You can choose three.
- Battle Manoeuvers (Level 7): Manoeuvers are powerful attacks that use superiority dice. You can choose two more
- Superiority Dice: +1 (Level 7): Gain an additional Superiority Dice
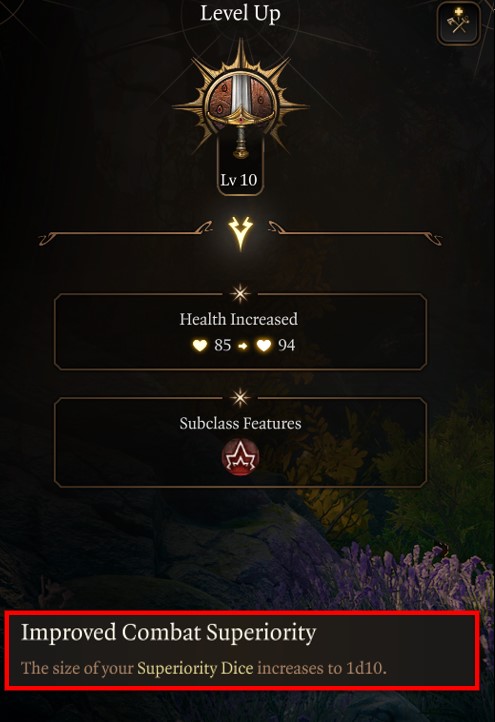
- Battle Manoeuvers (Level 10): Manoeuvers are powerful attacks that use superiority dice. You can choose two more
- Improved Superiority Dice (Level 10): The size of your Superiority Dice increases to 1d10.
Related:
Where to Find Lae’zel and How to Recruit Her?

The first time, you’ll meet Lae’zel aboard the Nautiloid, imprisoned with you by the Mind Flayers. During the prologue, she temporarily joins your party. To fully recruit her as a companion, escape together and then find her again at the Roadside Cliffs, near the Ravaged Beach. Free her from Tiefling captors in a hanging cage. You can resolve the conflict peacefully if you pass a charisma check or kill Tieflings. In both cases, Lae’zel will join your party.
Lae’zel Race
The Githyanki are a prominent race in the world of Baldur’s Gate 3. Hailing from the astral plane, they are fierce and proud warriors with a deep-seated hatred for the mind flayers, also known as Illithids. Their history is one of rebellion and escape from the oppressive rule of the mind flayers, which has shaped their culture and motives.
Also Check:- BG3 Interactive Map
Long ago, the Githyanki were enslaved by the mind flayers, who used them as labor and sustenance. Over time, a rebellion led by a powerful Githyanki warrior named Gith broke free from their oppressors, creating two distinct factions: the Githyanki and the Githzerai. The Githyanki are more militaristic, with a focus on raiding and plundering the planes, particularly hunting down Illithids and their Nautiloid ships.
Githyanki Racial Features:
- Base Racial Speed 9m.
- Choice of skill proficiency
- Proficiency in Light Armor, Medium Armor
- Proficiency in Shortsword, Longsword, and Greatsword
- +2 and +1 to any ability of your choosing
The Githyanki make a perfect race for a two-handed Fighter build and that’s what we suggest with Lae’zel.
Character Creation for Lae’zel Companion Build in BG3
| Category | Selection |
|---|---|
| Character | Origin – Lae’zel |
| Race | Githyanki |
| Racial Bonus (if any) | Astral Knowledge, Githyanki Psionics, Martial Prodigy |
| Class | Fighter |
| Subclass | Battle Master |
| Background | Soldier |
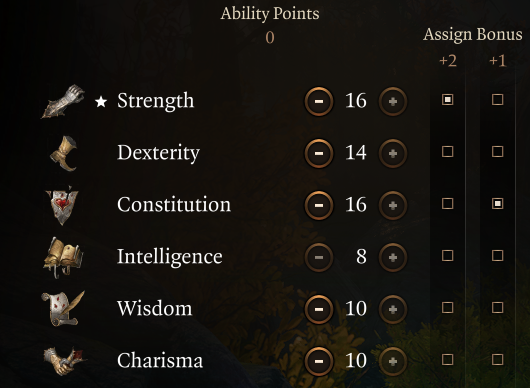
| Ability Score | STR: 16 DEX: 14 CON: 16 INT: 8 WIS: 10 CHA: 10 |
| Skill Proficiencies | Acrobatics and Perception |
Recommended Skills for Lae’zel Build

Acrobatics and Perception are the best skills for the Best Baldur’s Gate 3: Lae’zel Companion Build because they complement your class abilities and enhance your effectiveness in various situations. In Baldur’s Gate 3, skills represent the abilities and proficiencies of your character that allow them to perform various actions and interact with the game world. Skills are associated with specific attributes and are used to determine the success or effectiveness of certain actions or abilities. They can be edited during character creation or with companions, during respec or reroll screen.
Here are the skills for Lae’zel in Baldur’s Gate 3:
- Acrobatics is a Dexterity Skill.
- Perception is a Wisdom Skill
Lae’zel Ability Score
Here is the Best Baldur’s Gate 3: Lae’zel Companion Build ability score:
| Ability | Points Goal |
|---|---|
| Strength | 16 |
| Dexterity | 14 |
| Constitution | 16 |
| Intelligence | 8 |
| Wisdom | 10 |
| Charisma | 10 |
The Best Ability Score for Lae’zel companion is high Strength of 16 and Constitution of 16 that way your melee abilities will do a lot of damage with a massive health pool for good survivability. The next priority is Dexterity at 14 so you have a higher initiative because going first or sooner means eliminating more enemies and taking less damage.
In Baldur’s Gate 3, ability scores are the six core stats that determine a character’s capabilities. For companions, the game automatically distributes them without the ability to change initially. However, later you can change your default ability score in your camp via the NPC Withers for 100 gold.
Lae’zel Level Progression in Baldur’s Gate 3
| Level | Class | Selection |
|---|---|---|
| 1 | Fighter | Great Weapon Fighting, Second Wind |
| 2 | Fighter | Action Surge |
| 3 | Fighter | Subclass: Battle Master, Disarming Attack, Trip Attack, Riposte |
| 4 | Fighter | Feat: Great Weapon Master |
| 5 | Fighter | Extra Attack |
| 6 | Fighter | Feat: Ability Improvement Strength |
| 7 | Fighter | Precision Attack, Pushing Attack |
| 8 | Fighter | Feat: Alert |
| 9 | Fighter | Indomitable |
| 10 | Sweeping Attack, Goading Attack | |
| 11 | Fighter | Improved Extra Attack |
| 12 | Fighter | Feat: Ability Improvement Strength |
Alternative Lae’zel Fighter Build – Spellcaster Playstyle
If you’re looking to push Lae’zel’s combat potential even further, consider transitioning her into an Eldritch Knight build with a splash of Warlock. By taking 11 levels in Fighter (Eldritch Knight) and dipping 1 level into Hexblade Warlock at Level 12, you unlock a wealth of spellcasting versatility without compromising her martial dominance.
While Warlock relies on Charisma, and Lae’zel is not built for it naturally, the sheer utility this dip offers makes it a worthwhile trade. You’ll still have enough feat flexibility to reach 20 Strength and pick up Great Weapon Master, preserving your raw melee power. Furthermore, if you start with 17 Strength during character creation and plan to secure Auntie Ethel’s +1 bonus in Act 1, hitting 20 Strength is easy and efficient.
This hybrid approach elevates Lae’zel from a pure frontline bruiser to a more versatile and tactically flexible warrior. With strong melee damage, enhanced ranged capability, and a touch of magic utility, she becomes a deadly force in both solo and party play. It’s an excellent way to get more out of her character without sacrificing the core strengths that make her such a powerhouse.
| Level | Class | Selection |
|---|---|---|
| 1 | Fighter | Great Weapon Fighting |
| 2 | Fighter | – |
| 3 | Fighter | Subclass: Eldritch Knight, Booming Blade, Friends, Shield, Thunderwave, Longstrider |
| 4 | Fighter | Feat: +2 STR, Chromatic Orb |
| 5 | Fighter | – |
| 6 | Fighter | Feat: Great Weapon Master |
| 7 | Fighter | Darkness, Gust of Wind |
| 8 | Fighter | Feat: Savage Attacker, Misty Step |
| 9 | Fighter | – |
| 10 | Fighter | Firebolt, Protection from Good and Evil |
| 11 | Fighter | Scorching Ray |
| 12 | Warlock | Hexblade Subclass, Eldritch Blast, Toll of the Dead, Hexed, Hellish Rebuke |
Level 1


At level one you unlock an ability that allows you to heal yourself. Don’t expect much gameplay-wise outside of attacking with a melee weapon. Aim to pick up a Greatsword right away. Level 3 you will get your subclass pick and a lot of utility then. Your goal is to get a two-handed weapon. Ideally, during the prologue, you get the Everburn Blade and give it to Lae’zel. Use the medium armor you have until you find better heavy and get a crossbow.
Remember that companions will come default with their preferred class and subclass. If you can, unlock Withers as early as level 2 just after the prologue, and respec Lae’zel for the correct ability score.
Fighting Style Choice
- Great Weapon Fighting: When you roll a 1 or 2 on a damage die for an attack with a two-handed melee weapon, that die is rerolled once. This just helps us not fail on dice rolls and gives us more reason to use two-handed weapons.
Class Features
- Health Points: The Fighter class will have higher health than other classes, so be aware and prepare to force fights and jump in.
- Second Wind: You will receive a very powerful self-heal immediately called Second Wind. This allows you to heal yourself using a bonus action, not an action. This is very important because you can heal and attack in one turn.
Lae’zel Gameplay & Priorities
During the early phase of BG3, Lae’zel as a two-handed Fighter will be very strong. Your primary goal is to find a back-bar ranged weapon at the start of the game. You will have limited mobility, and the Heavy Crossbow or Longbow is great until you reach level 5 with the Misty Step spell. Moreover, look to acquire Elixir of Hill Giant Strength and Oil of Accuracy. You can combine these two for huge damage increases and Lae’zel will feel very powerful immediately.
Your overall priority with this build is the following:
- Complete Prologue
- Recruit Other Companions
- Reached Hollowed City/Druid Grove
- Sell, Stock up, complete quest
- Unlock Withers, respec to proper ability score
- Progress to level 5
- Reach Underdark and Grymforged
Following these steps ensures a strong foundation for her especially if you plan on playing solo or on Honour Mode difficulty.
Level 2
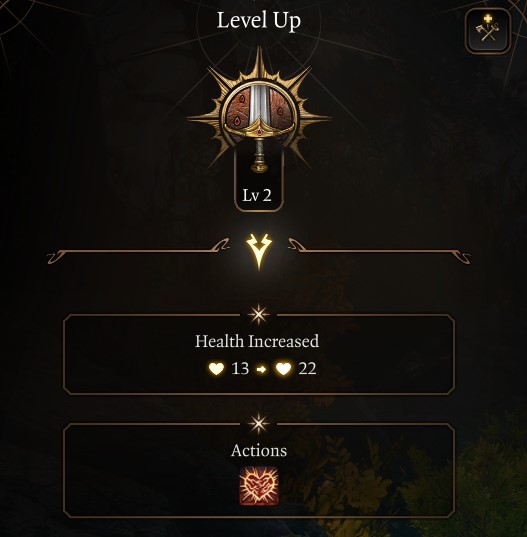
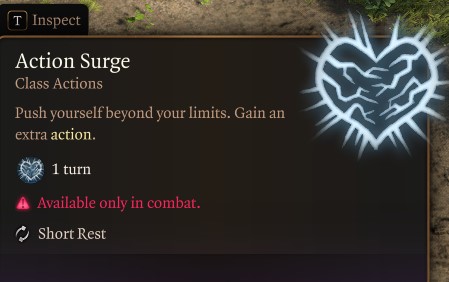
Level two the Fighter gets a very powerful skill, Action Surge. Gain one additional Action. This allows the Fighter very early to take multiple actions, which will likely be an additional attack. This makes you incredibly formidable very early in the game. Moreover, you only need a Short Rest to replenish this, which can be done twice in the bottom right of your User Interface. To replenish this resource, just Short Rest.
Gameplay you now have a way to get two attacks in one turn along with a self-heal. Play aggressively and charge in. Don’t forget to equip a bow because you want some type of range weapon when melee isn’t an option because of distance.
Level 3
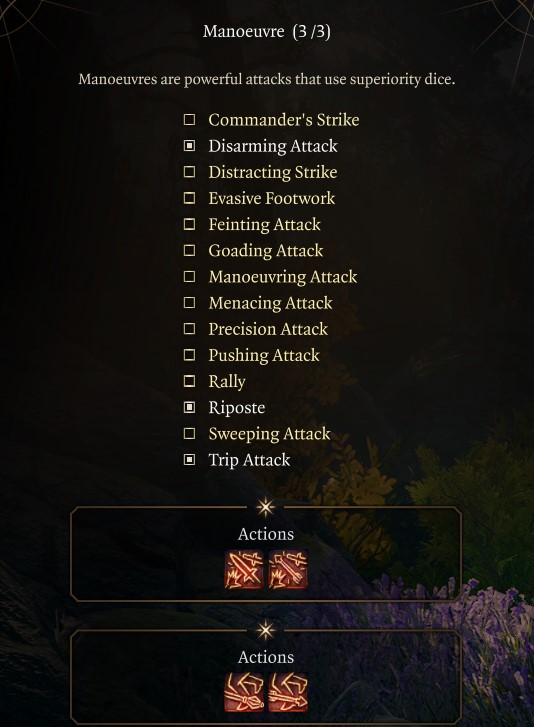
Level three you get access to your subclass and for this build, we want to select the Battle Master Subclass. This subclass unlocks a new mechanic called Superiority Dice, which are d8s. Think of this as an additional resource that can be replenished during a Long Rest. You will also get to select three maneuvers which are attacks that consume superiority dice.
Manoeuvres Explained

- Disarming Attack: Spend a superiority die to make an attack that deals an additional 1d8 damage and possibly forces the target to drop the weapons they are holding. This essentially shuts down completely weapon-based damage dealer if you drop their weapon. You can use this at melee or at range and is super effective against Barbarians, Fighters, and Longbow users. You can disarm and even pick up the weapon immediately following preventing the enemy from using it. This doesn’t work on casters, but amazing skill for the entirety of the game.
- Trip Attack: Spend a superiority die to make an attack that deals an additional 1d8 damage and possibly knocks the target Prone. The target must be Large or smaller. This attack is used for a stun in melee or at range. Prone is a status effect and this can be used on casters or non-weapon-based enemies. With these two maneuvers, you will have battlefield control early instead of mindlessly swinging your two-handed weapon.
- Riposte: When a hostile creature misses you with a melee attack, expend a superiority die to retaliate with a powerful strike that deals an additional 1d8 damage. Your Fighter will most likely be taking a lot of damage, and if they miss this use a reaction (not an action) and do some free damage in return using your superiority dice resource. Don’t use the resource if you are low and need a stun next turn.
Gameplay on the Fighter at this level gives you two types of control disarm and stun. You can also use Pommel Strike on a Greatsword to proc Daze as well. Continue to use crowd control and weapon damage and use Action Surge when you need another attack. Short rest after every battle if possible to replish your resources.
Related:
Level 4

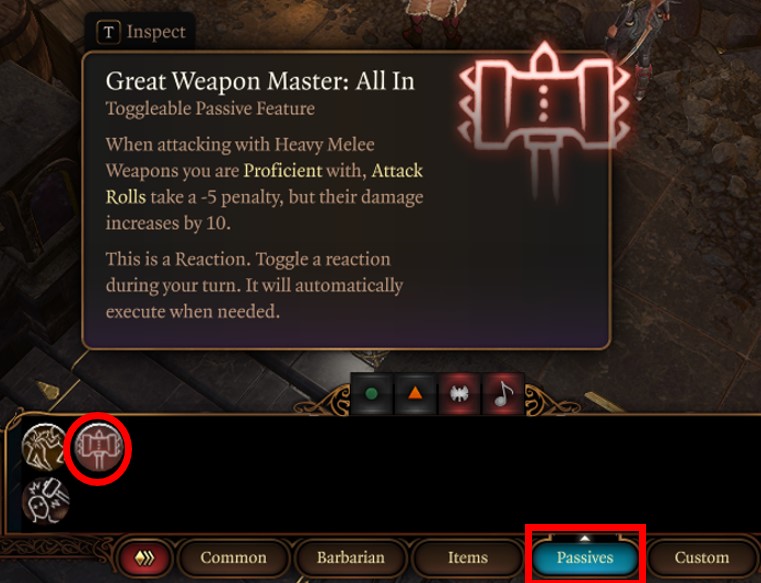
At level four you can take a feat or increased ability score for your main stat Strength. We recommend taking the Great Weapons Master feat at level 4 for Lae’zel because it will help you make use of your bonus action offensively. Great Weapon Master: When a melee attack scores a critical hit or kills a creature, you can make another melee attack as a bonus action. When attacking with Heavy Weapons you are proficient with, attack rolls take a -5 penalty, but their damage increases by 10.
Great Weapon Master Explained
Great Weapon Master does two things for you. One, it has a high-risk high reward ability to add 10 damage BUT -5 attack roll penalty. You can turn this off in the Passive section on your toolbar, which will give you the normal percentage. At level four, this will lower your percentage significantly, but as your Strength increases and if you add in buffs like Bless, the percentage will come up into a respectable range of 60% or greater. Just go to passives and toggle GWM off, if you are in the 30% and want more consistent damage until a higher level.
Secondly, this feat allows you to use your bonus action after you successfully critical strike or kill an enemy. At level four, this is very helpful because our one weakness early is bonus action utility. Constantly getting kills and critical strikes turns the Fighter into an offensive juggernaut. Combat should therefore be initiated using your action first, saving your bonus action for a Great Weapons Master attack.
You are just one level away from an awe-inspiring Extra Attack. At this level, you want to optimize Great Weapons Master, focusing on kills to get bonus action extra attack.
Level 5

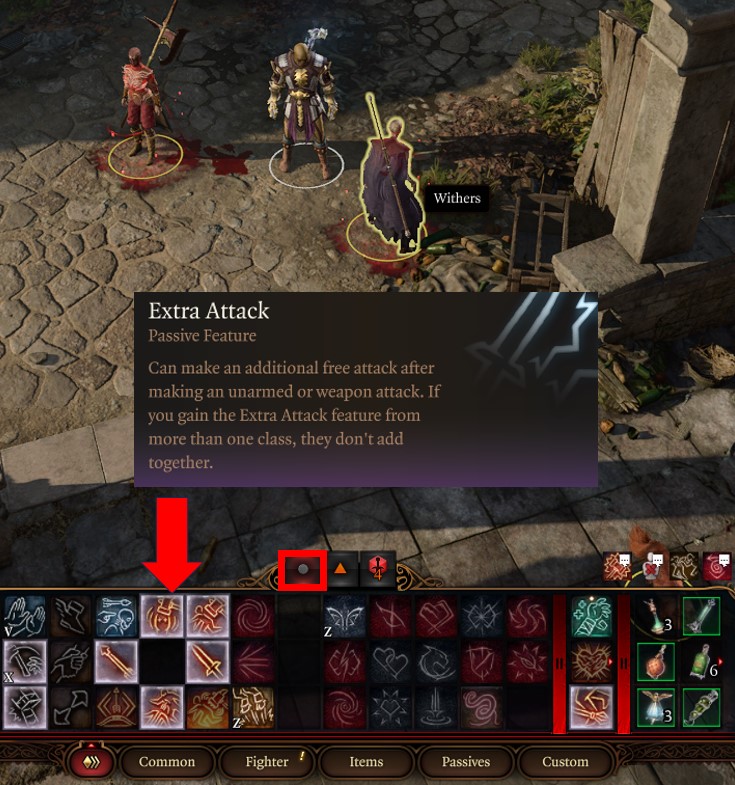
Level five is where the Fighter starts to feel very powerful. You get Extra Attack, along with Action Surge AND Great Weapon Master. Extra Attack: allowing you to make two attacks when you take the Attack action on your turn. This significantly boosts your damage potential in combat. In one turn, you can attack twice with Extra Attack, kill an enemy or critical strike, and attack again with Great Weapon Master.
You use Action Surge and attack another two times for a total of 5 in one turn. You can make it 7 by either using a potion of speed or having someone cast Haste on you. This gives you another action once per turn. And this is why the Fighter is so strong, in an action meta game, nothing beats it. You need to use superiority dice and those attacks sparingly when the situation calls for it. Otherwise, just keep it simple and blast people with multiple attacks!
Multiclass Options for Lae’zel
At level 5, you can decide on Multiclass the Fighter with Lae’zel. Having completed Tactician, we highly recommend not doing so. The reason why, at level 11 you gain Improved Extra Attack. This provides the Fighter with 3 attacks per one action. As shown in our solo build here, you cannot beat the raw damage potential of a pure Fighter class. If performance in combat is your concern for Lae’zel, keep it simple in stay as a Fighter.
Level 6
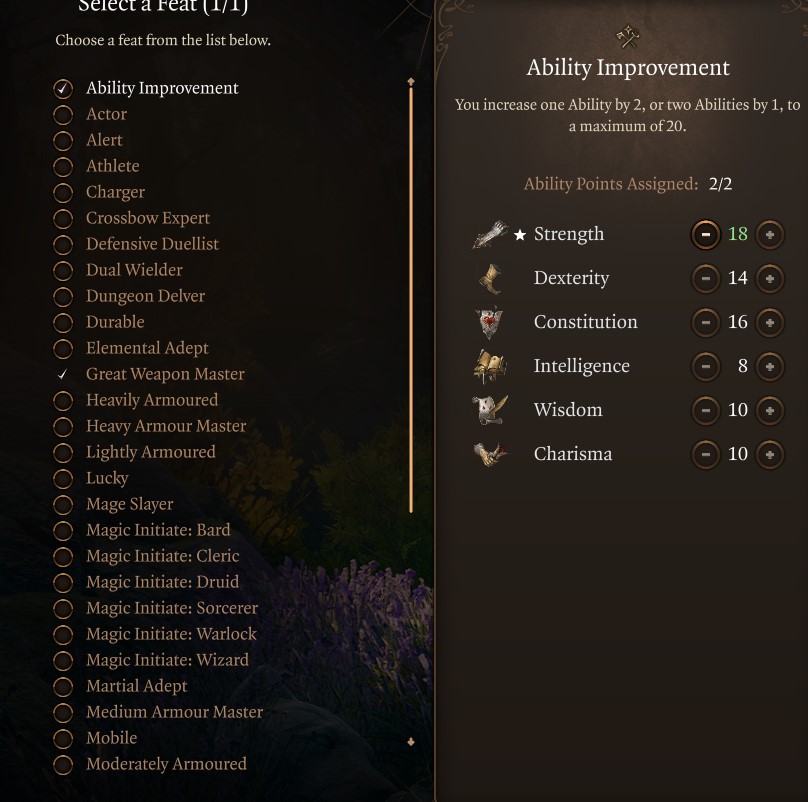
At level 6, the Fighter gets another feat or ability improvement. We want to increase Strength by +2 for a total of 18. This will help us hit harder, and more likely to land attacks which is especially handy with Great Weapons Master. If you have this toggled off due to lower percentages of chances to strike, turn it back on. Also, use the spell Bless or have someone cast it on you for much higher percentages and big damage!
The nice thing about Fighter is you get feats at levels 4, 6, 8, and 12. Most classes give you just 3 so this is a big advantage for staying in the class only and not multi-classing.
Level 7
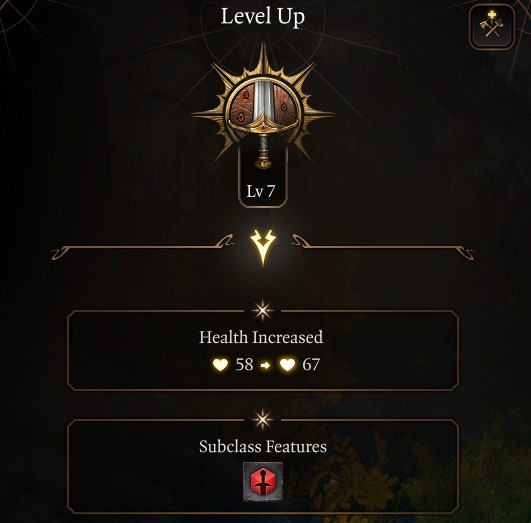
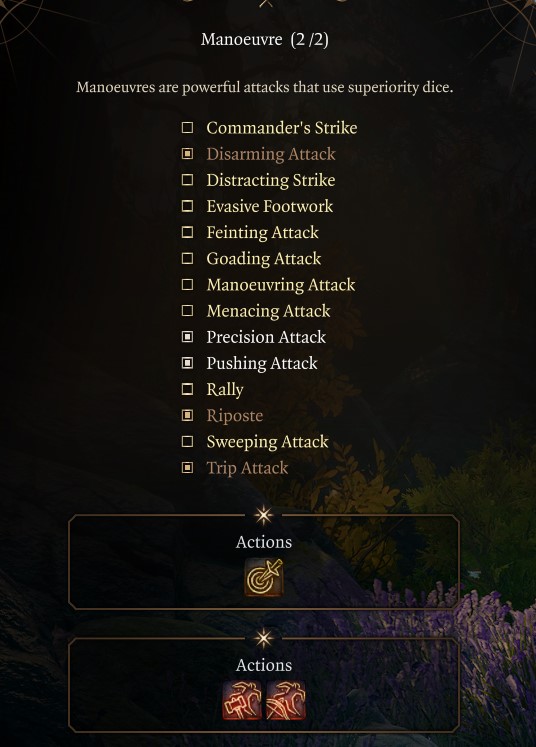

At level 7, the Fighter gets to pick two more manoeuvres. Here are our suggestions:
- Precision Attack: Your next weapon attack gets an Attack Roll bonus equal to your Superiority Die. The nice thing about this attack is it doesn’t require an action, just a superiority die resource. You obviously want to use it with the highest amount of Superiority Die possible and make it last until a long rest. So, as soon as you get done long resting, you can activate it immediately for a big opener next fight.
- Pushing Attack: Spend a superiority die to deal damage type depending on the weapon used and possibly push the target back 4.5m. This is a simple knockback that can be used in melee or ranged. You can get many kills from knocking enemies off ledges and this gives you more battlefield crowd control.
Level 8
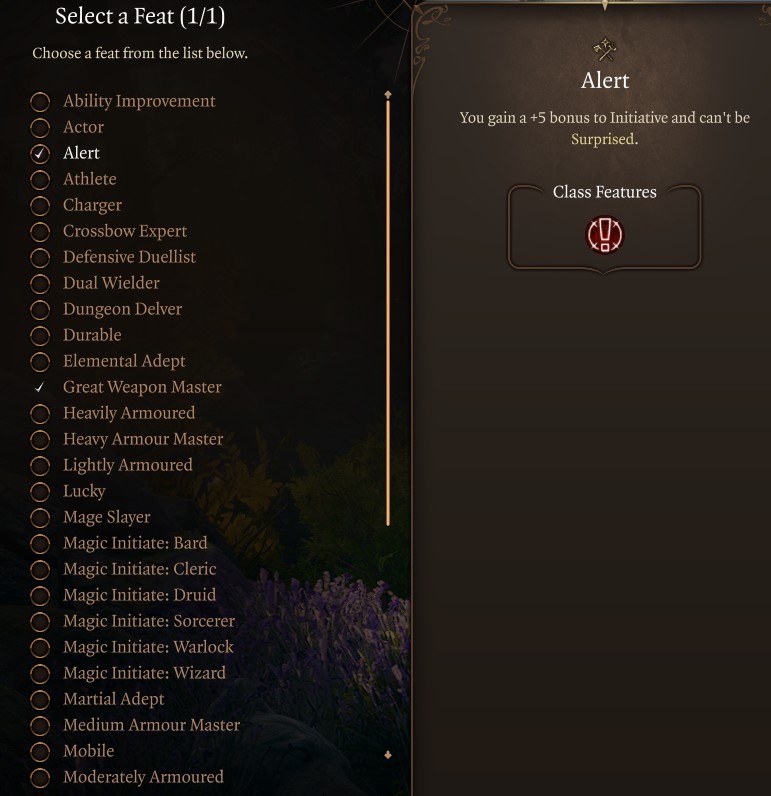

At level 8 the Fighter gets another feat choice. Alert makes the most sense for the build. You gain a +5 bonus to Initiative and can’t be Surprised.
At first, this feat may seem to be lackluster, but it’s incredible. The weakness of the Fighter is going way later in the round. If you can open up with the Fighter, crowd control, or kill multiple targets, your incoming damage is significantly reduced. Not to mention, just having a Fighter with high health and AC near targets will create a distraction. The lack of high Initiative is a big weakness of the Fighter because we don’t stack that much Dexterity, because of wearing heavy armor and strength-based damage. With 8 initiatives you are going pretty early in the round if not first and that gives you a huge advantage.
Another reason this is so strong is the Surprised status effect. This essentially skips one round for you. In some fights, particularly dialogue-based consequences later in Acts 2 and 3, you will be surprised after a conversation with combat starting immediately. Without this benefit, your entire team will miss one turn, and then return to you. With high difficulty and the enemy being given a free round, you are starting at a massive disadvantage. When you cannot be surprised and you go first, second, or third, you can crowd control or outright kill high-damage dealers. This prevents a catastrophic round one nuke, and I cannot recommend this enough for specifically a Fighter build.
Level 9
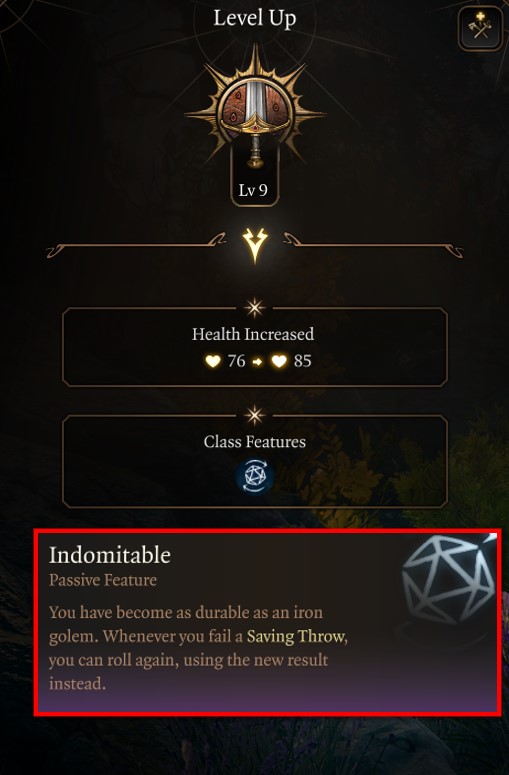
Not much happens at level 9 for the Fighter besides getting the class feature Indomitable. Whenever you fail a Saving Throw, you can roll again, using the new result instead. This is a simple passive feature that helps increase our survivability and requires zero action by you the player.
Level 10

At level 10 the Fighter with Battle Master subclass will get an additional two battle maneuvers. Here are our suggestions:
- Sweeping Attack: Swing your weapon in a rapid, sweeping arc to attack multiple enemies at once. Roll your superiority die for damage. This attack acts as area-based AOE damage. The weakness of the Fighter is the lack of area damage outside of Cleave skill from our weapon. This isn’t super important, but if you need to get down multiple targets in one action, this is a good choice.
- Goading Attack: Deal an additional 1d8 and attempt to goad the target into attacking you. Target receives Disadvantage on attacking any other creature. Our Fighter isn’t necessarily a tank, but this skill can be useful when a Wizard or spellcaster is getting harassed by a damage dealer. Even if you don’t force them to attack you, you give them Disadvantage so likely they will do less damage even if they land an attack.
Related:
Level 11
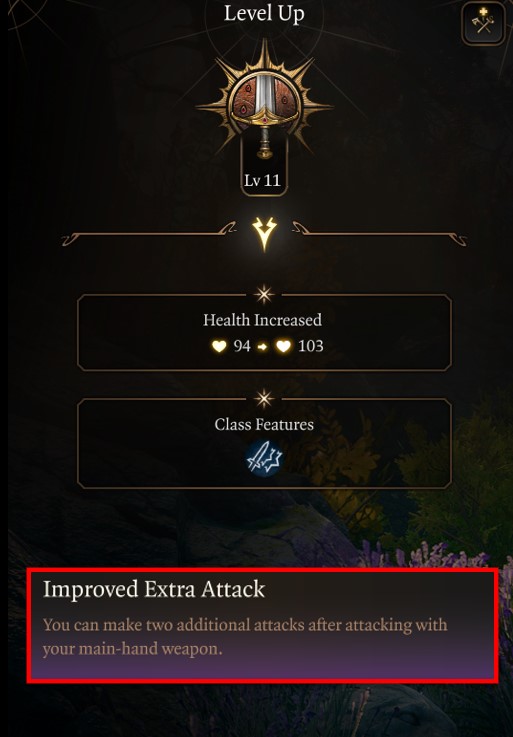
At level 11, the Fighter receives another amazing bonus, Improved Extra Attack.
Improve Extra Attack: You can make two additional attacks after attacking with your main-hand weapon.
This makes the Fighter the most action-heavy class and build in Baldur’s Gate 3. You get multiple actions, then two more, along with an Action Surge for another action, and with Great Weapon Master you can use your bonus action for another attack. Not to mention if someone casts Haste on you or you use a Potion of Speed. This is why that Alert feat is so powerful at this level. If the Fighter goes early in the turn, and they cannot be crowd-controlled by a caster, it’s nearly game over for the entire opposition.
Level 12
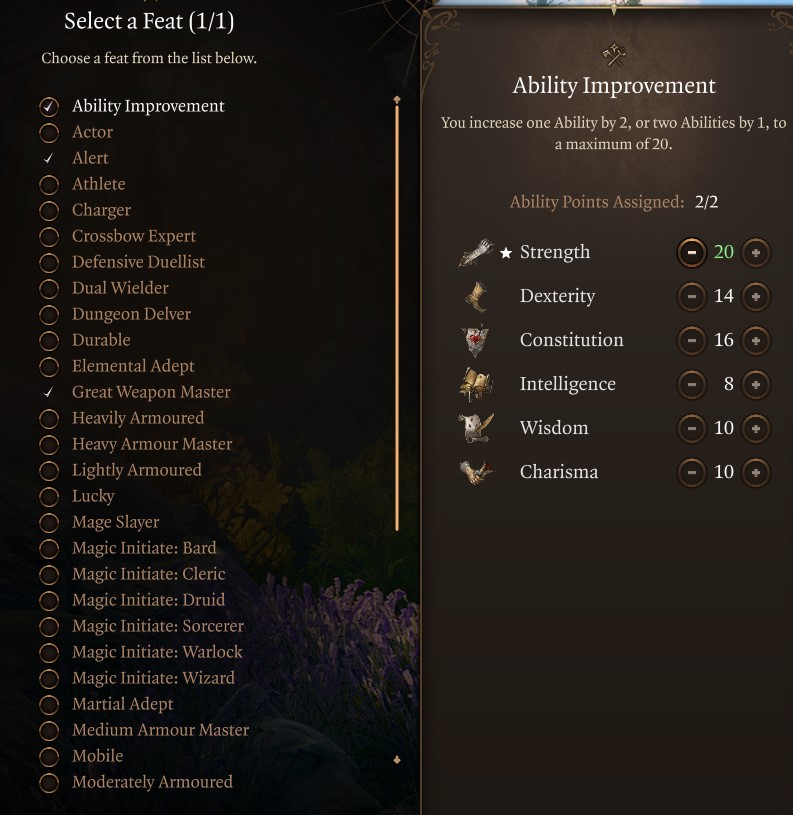
We’ve reached the max level in Baldur’s Gate 3, and improving our Strength to 20 is the play with this feat. At this level, you should feel insane powerful and we hope you enjoyed reading our leveling progression.
Recommended Weapons and Armor
In Games like Baldur’s Gate 3, you’ll explore the world, loot chests and your enemies’ dead bodies, and complete quests, and all those activities can reward you with useful items, potions, armor, weapons, scrolls, and much more. There are three Acts in BG3, and Best Baldur’s Gate 3 Lae’zel Companion Build Guide includes suggested sets and alternatives for Act 1 and Act 3.
Beginner: Act 1

The following table presents the best advanced and end-game gear for Lae’zel Companion Build in Baldur’s Gate 3:
| Gear Slot | Best Gear Item | Effect |
|---|---|---|
| Head | Grymskull Helm | Critical Hit Protection |
| Cape | – | |
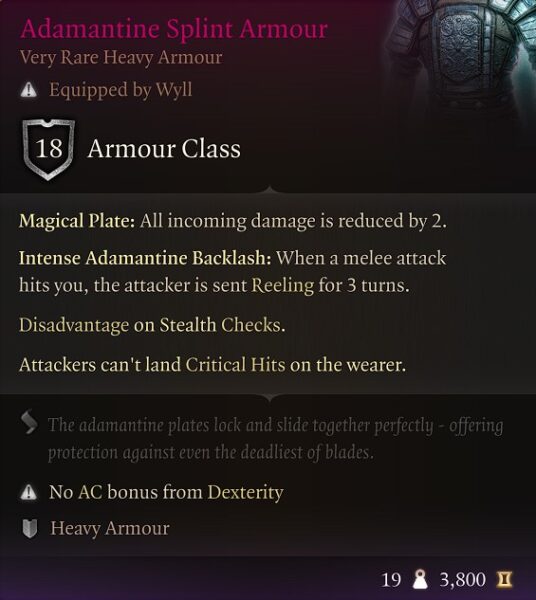
| Chest | Adamantine Splint Armour | 18 AC |
| Gloves | Gloves of the Growling Underdog | Advantage on Melee |
| Boots | Disintegrating Night Walkers | Mobility |
| Necklace | Moondrop Pendant | No Opportunity Attacks |
| Ring | Crusher’s Ring | Increase Movement |
| Ring | Caustic Band | Poison Damage |
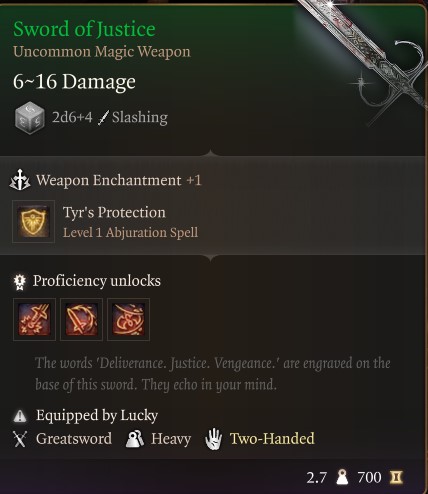
| Weapon 1 Main Hand | Sword of Justice | 2d6 Slashing |
| Weapon 2 Ranged | Titanstring Bow | Add STR modifier |
Below is a list of the best Act 1 equipment for the Lae’zel Companion in Baldur’s Gate 3:
- Grymskull Helm: Defeat Grym, a construct boss in The Adamantine Forge (Alternatives Haste Helm, or Cap of Wrath).
- Adamantine Splint Armour: Crafted at Grymforge (Alternatives Chain Mail +1, or Githyanki Half Plate).
- Gloves of the Growling Underdog: Chest behind Razglin’s throne room. (X:295 Y:69) (Alternatives Gloves of Dexterity, or Gloves of Missile Snaring).
- Disintegrating Night Walkers: Obtained in Gyrmforge as part of Free True Soul Nere questline (Alternatives Boots of Striding, Boots of Genial Striding, or Boots of Speed).
- Moondrop Pendant: Sealed chest inside the Owlbear Nest (Alternatives Amulet of Branding, Amulet of Misty Step, or Amulet of Restoration).
- Crusher’s Ring: Can be looted or stolen from Crusher in the Goblin camp (Alternatives Strange Conduit Ring, or Ring of Absolute Force).
- Caustic Band: Obtained from merchant Derryth Bonecloak in the Myconid Colony (Alternatives Fetish of Callarduran Smoothhands, or The Sparkswall).
- Sword of Justice: Looted from Anders near Karlach (Alternatives Silver Sword of the Astral Plane, or Everburn Blade).
- Titanstring Bow: Brem in Zhentarim Hideout Act 1 (Alternatives Bow of Awareness, Hunter’s Shortbow, or Giantbreaker).
Advanced: Act 3 End-Game
The following table presents the best advanced and end-game gear for Lae’zel Companion Build in Baldur’s Gate 3:
| Gear Slot | Best Gear Item | Effect |
|---|---|---|
| Head | Helm of Balduran | Self-healing |
| Cape | Fleshmelter | Return Damage |
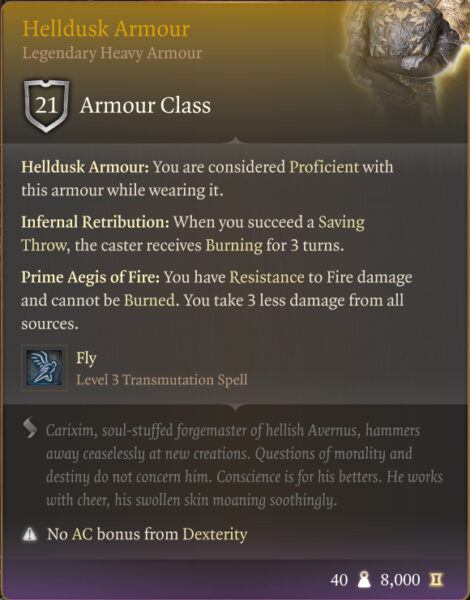
| Chest | Helldusk Armour | 21 Armour Class |
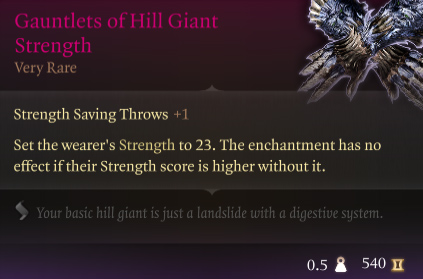
| Gloves | Gauntlets of Hill Giant Strength | 23 Strength |
| Boots | Helldusk Boots | Mobility |
| Necklace | Amulet of Greater Health | 23 Constitution |
| Ring | Killer’s Sweetheart | Auto Crit |
| Ring | Ring Of Regeneration | Self-healing |
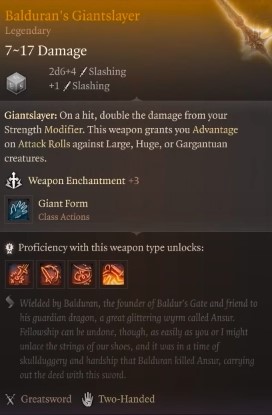
| Weapon 1 Main Hand | Balduran’s Giantslayer | Best Greatsword |
| Weapon 2 Ranged | Darkfire Shortbow | Best Longbow |
Here are the best Weapon and Armor for Lae’zel in Baldur’s Gate 3:
- Helm of Balduran: Obtained in Dragon’s Sanctum on an altar X: 636 Y: -964 (Alternatives Helldusk Helmet, Sarevok’s Horned Helmet, or Mask of Soul Perception).
- Fleshmelter: Found in Chest in House of Healing Morgue (Alternative Cloak of Protection).
- Helldusk Armour: Dropped by Raphael in the House of Hope (Alternatives Armour of Devotion, Armour of Persistence, Bhaalist Armour).
- Gauntlets of Hill Giant Strength: Obtained in Archive of the House of Hope (Alternatives Helldusk Gloves, Legacy of the Masters, or Gloves of Soul Catching).
- Helldusk Boots: In a locked chest, Wyrm’s Rock Fortress X: -32 Y: 219 (Alternative Disintegrating Night Walkers).
- Amulet of Greater Health: Found in the House of Hope in Baldur’s Gate City (Alternative Surgeon’s Subjugation Amulet, or Periapt of Wound Closure).
- Killer’s Sweetheart: Obtained from the Gauntlet of Shar in Act 2 (Alternative Ring of Protection, Risky Ring).
- Ring Of Regeneration: Sold by Rolan at Sorcerous Sundries (Alternative Ring of Free Action, Shifting Corpus Ring).
- Balduran’s Giantslayer: Obtained as a reward for completing the Wyrmway trials (Alternatives Sword of Chaos, or Silver Sword of the Astral Plane).
- Darkfire Shortbow: Sold by trader Damon Act 2 Last Light Inn X: -35 Y: 169 (Alternatives Gontr Mael, or Fabricated Arbalest).
Best Consumable Items for Lae’zel in BG3


Consumables are items that can be used once and then destroyed. They are typically used to restore health or other resources. Some common types of consumables include potions, scrolls, food, drinks, and arrows.
The following list represents the best individual use consumable items that will aid in the Best Baldur’s Gate 3: Lae’zel Companion Build:
- Elixir of Hill Giant Strength: Increases Strength ability score to 21 until Long Rest.
- Elixir of Bloodlust: Once per turn when you kill a foe, you gain HP 5 temporary hit points and an additional action.
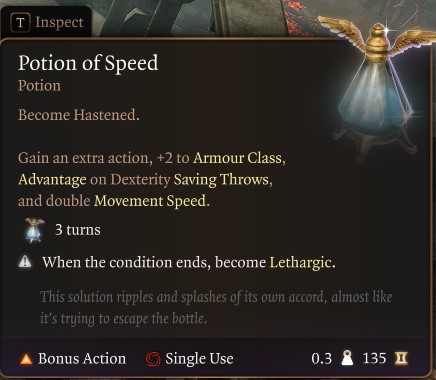
- Potion of Speed: Gain extra action, +2 AC, Advantage on Dexterity Saving Throws, and double movement speed.
- Drow Poison: Weapon poison that adds Constitution Saving Throw or becomes Poisoned and falls Asleep.
- Potion of Flying: Drink to gain a flying speed of 60ft for one hour.
- Elixir of Heroism: Gain 10 temp HP and become Blessed until a long rest.
- Potion of Greater Healing: 4d4 + 4 hit points restored.
- Oil of Accuracy: Coat Weapon. Bonus of +2 in Attack Rolls.
- Elixir of Vigilance: Drink to gain a +5 bonus to Initiative and you can’t be Surprised.
- Elixir of Darkvision: (only non-Darkvision race): Drink to gain the ability to see in the dark up to 12m.
Lae’zal Combat, Gameplay Tips, and Tricks
Here are 10 combat gameplay tips and tricks specifically for playing the Best Baldur’s Gate 3: Lae’zel Companion Build:
- Initial Turn: Make sure your initial move either puts you in melee range so you can strike or attack with a range weapon.
- Bonus Action: Make use of your bonus action with skills like Pommel or even shove to knock back enemies.
- Potion of Speed: Use these potions to gain more movement and additional action.
- Long Rest: Make sure to rest when your Superiority Dies counters are low so you start with many available.
- Equip Range: Find and equip a bow early because it will increase your kill potential and take advantage of the fighter’s weapon versatility.
- Make use of Action Surge: Save Action Surge for critical moments in combat or to gain an advantage over tough opponents.
- Action and Bonus Actions: Use your bonus action for potions, Great Weapon Master, or apply Oils to weapons.
- Maximize your Attacks: Use Action Surge in conjunction with Bloodlust and Potion of Speed for 4 Actions in 1 turn.
- Weapon Selection: Consider Greatswords, Longbows, and Heavy Crossbows as the best weapons for Lae’zel.
- Utilize Maneuvers: Use Maneuvers frequently and always short rest to replenish the resources post-combat.
Remember, this build guide serves as a foundation, and you can always adapt it to suit your preferences and the needs of your campaign. Enjoy playing as The best Lae’zal Build in Baldur’s Gate 3!
Lae’zel Changes in Patch 7 for BG3
The release of Patch 7 for Baldur’s Gate 3 only impacted Lae’zel with minor bug fixes and dialogue additions. However, Lae’zel’s Fighter build, combat, and gameplay elements remained untouched. Therefore, if you are familiar with the the companion Lae’zel’s playstyle, almost all remain the same.
Larian Studios’ main focus in this patch is mods and with new cinematics for evil endings. The game now features a modding toolkit and an in-game mod manager, allowing players to create and install mods directly within the game. This best Lae’zel Build Guide remains unchanged, mainly in Baldur’s Gate 3 Patch 7.
Baldur’s Gate 3 Lae’zel Companion Build Summary Guide
If you followed the guide, this is how your Baldur’s Gate 3 Lae’zel with all Build components should look:
Recruit Lae’zel
- North of Roadside Cliffs
Subclass – Battle Master
Preferred Weapon: Greatsword
Preferred Armor: Heavy
Race – Githyanki
Best Early Action – Action Surge
Best Late Action – Sweeping Attack
Lae’zel Abilities Score
- Strength 16
- Dexterity 14
- Constitution 16
- Intelligence 8
- Wisdom 10
- Charisma 10
- Level 4 – Great Weapon Master
- Level 6 – +2 Strength
- Level 8 – Alert
- Level 12 – +2 Strength
Looking For More About Baldur’s Gate 3?
Thank you for reading Best Baldur’s Gate 3: Lae’zel Companion Build guide. We provide the latest news and create guides for Baldur’s Gate 3. Also, watch me play games on Twitch or visit my YouTube channel!