Facebook
 Reddit
 Email
Email
This guide will explain the best Shadowheart Companion Build in Baldur’s Gate 3, the Cleric Class, and the Life Domain subclass, for the optimal setup.

This build page has been updated for the Patch 8 version of Baldur’s Gate 3.
Shadowheart Companion Introduction
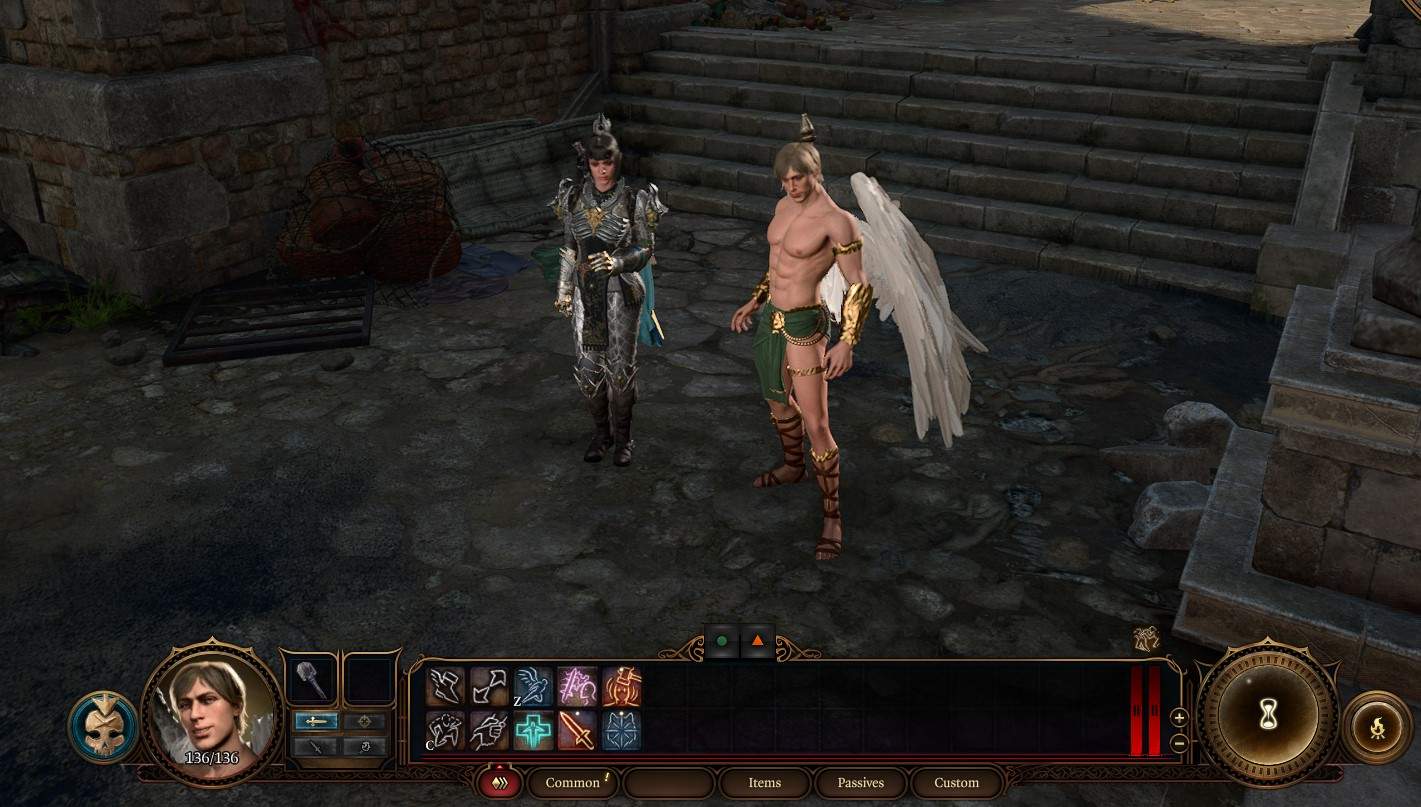
Shadowheart is a High Half-Elf Cleric who serves Shar as a Trickery Domain. However, we recommend respecing her immediately to a Life Cleric upon unlocking Withers. Shadowheart’s innate subclass choice is due to her story as a powerful spellcaster proficient in stealth and deception. Throughout her story, she battles between good and evil, and you can make an important choice in Act 2, which changes how Shadowheart appears and behaves.
Companions in Baldur’s Gate 3 are a group of non-player characters (NPCs) who join the player’s party and accompany them throughout their journey in the game. These companions are essential characters that offer various benefits, such as providing additional combat support, contributing to the story, and offering different perspectives on the events unfolding in the game world.
Companions can be avoided entirely, die, be romanced, and have their own sprawling background. In this build guide for Shadowheart, we will explore her character and how to make a powerful Cleric Build with her. We also suggest using the Respec or Reroll feature to change Shadowheart’s default subclass to a much more powerful one. This will be explained later.
| Shadowheart Pros | Shadowheart Cons |
|---|---|
| Great Support Class | Secretive & Withdrawn |
| Proficient in Stealth | Weak Damage |
| Versatility Outside Combat | Lacks Area Damage |
Shadowheart Build Changes in Patch 8 for BG3
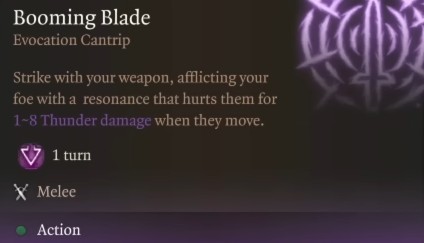
The Cleric’s most notable update with Patch 8 in BG3 comes with the addition of the Booming Blade cantrip. This new option benefits melee builds, with the Death Domain Cleric getting the most out of it. While the Cleric’s role as a healer, tank, or radiant damage dealer is largely unchanged, recent buffs to monsters have made Tactician and Honour Modes more difficult. It’s something to consider when designing your character builds.
For those aiming to balance survivability and offense, the Light Domain paired with Fighter offers a strong multiclass option. With a focus on radiant damage, crowd control, and defensive spells, it provides flexibility for players seeking a more well-rounded approach in challenging encounters. Below, we’ll also suggest a build that leans into a tankier Cleric style for players who want to focus on durability.
Shadowheart Features & Mechanics
The main feature of Shadowheart is her innate healing ability regardless of Subclass since she’s a Cleric. She’s also one of the main characters in the story and a fan favorite.
The following list presents all the essential Shadowheart Companion Mechanics and Features in Baldur’s Gate 3:
- Class: Cleric
- Race: High Half-Elf
- Background: Urchin
- Subclass: Default Trickery, Reroll to Life Domain
- Base Proficiencies: Sleight of Hand, Stealth, Religion, Insight
- Best Build: Cleric, Life Domain, Heavy Armor
- Origin Character: Yes
- Romance: Yes
- Location: On the beach next to the Abandoned Ruins, Act 1
Your companion can be respecced or rerolled early in the game. This means you can change their class, subclass, ability score, and more. The only feature that cannot be adjusted is their race and story. We suggest using Withers at Camp after he’s unlocked to optimize the build.
How to Find and Recruit Shadowheart

To unlock Shadowheart in Baldur’s Gate 3, you need to follow these steps:
- During the prologue, free Shadowheart from a tadpole pod.
- Find the Eldritch Rune near Shadowheart’s pod and free her.
- Once freed, Shadowheart will join you until the completion of the prologue.
- If you are unable to free her, at least make the effort to speak with her and try.
- Post prologue, find Shadowheart on the beach near Abandoned Ruins.
- Ask her to join, and she will join your party.
You can easily swap companions in and out by speaking to them in your camp. Even if you don’t intend to use all the companions, it’s wise to unlock them and have your camp full if needed.
Cleric Spell Mechanics

- Cantrips: are like spells, but you can cast them infinitely, and they don’t take your spell slots.
- Spell Slots: At each level, you gain access to more usage of spells and high-tier spells but only have a finite number of spells until a long rest.
- Learn Spells: Unlike Wizard, you get opportunities at leveling up to unlearn and learn new spells.
- Concentration: is a spell mechanic that requires you to maintain concentration otherwise, the spell effect ends.
Recommended Subclass
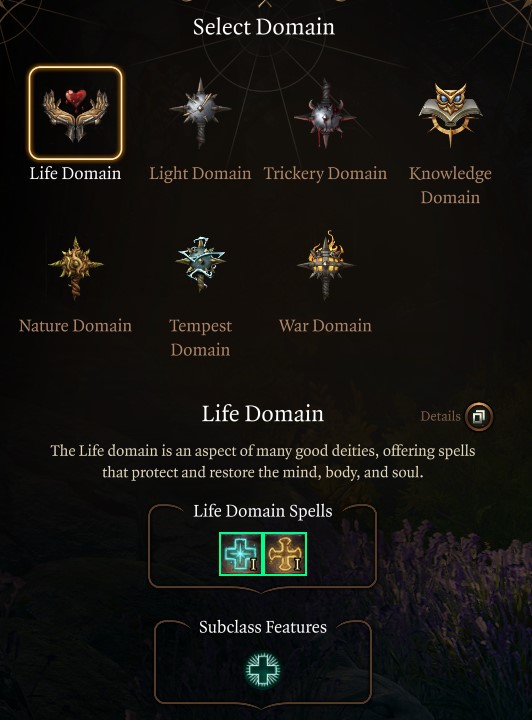
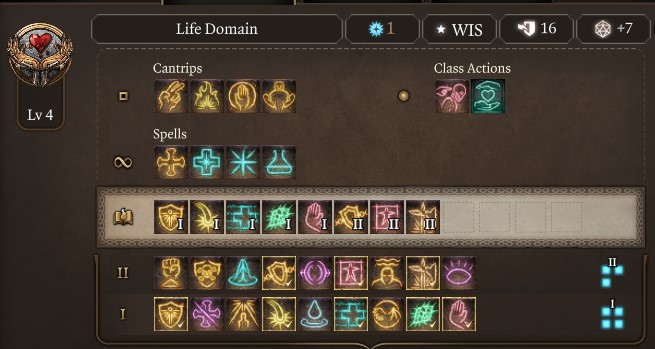
The Best Subclass for Shadowheart build is Life Clerics because it provides the best overall healing and group utility for a support class. The Life Subclass has Heavy Armour Proficiency, Disciple of Life, and Domain Spells. Additionally, Shadowheart defaults to Trickery, which is similar to this build and can be modified. Also, you want to respec her in your camp with the NPC Withers for 100g at the beginning of the game to get the most out of her as a companion.
Here are all the Baldur’s Gate 3 Cleric Subclasses:
- Knowledge Domain: Dedicated to the pursuit of knowledge and skilled in history, religion, and the arcana.
- Life Domain: They are skilled in the use of healing spells, and they can also use their divine power to restore hit points to their allies
- Light Domain: Skilled in radiant damage and more offensive Cleric subclass.
- Nature Domain: Skilled in the use of nature’s spells, and they can also use their divine power to control the weather and animals.
- Tempest Domain: Skilled in the use of lightning and thunder damage spells, and they can also use their divine power to control the weather and create powerful storms
- Trickery Domain: Skilled in the use of illusion and enchantment spells, and they can also use their divine power to create illusions and disguise themselves
- War Domain: Skilled in the use of weapons and armor, and they can also use their divine power to enhance their martial prowess.
Baldur’s Gate 3 Life Cleric Features & Progression
The Life Cleric subclass unlocks the following features and spells:
- Disciple of Life (Level 1): Your devotion empowers your healing Spells. When casting a healing spell, the target regains additional Hit Points equal to 2 + Spell’s level.
- Heavy Armour Proficiency (Level 1)
- Domain Spells (Level 1): Bless and Cure Wounds
- Channel Divinity Action (Level 2): Preserve Life
- Domain Spells (Level 3): Aid and Lessor Restoration
- Domain Spells (Level 5): Revivify and Beacon of Hope
- Blessed Healer (Level 6): Regain 2 + Spell Level hit points when casting a healing spell on another creature.
- Domain Spells (Level 7): Guardian of Faith and Death Ward
- Divine Strike: Life (Level 8): Once per turn deal 1d8 Radiant in addition to your weapon’s weapon damage when you make a melee attack.
- Domain Spells (Level 9): Greater Restoration and Mass Cure Wounds
Character Creation
Shadowheart Race
Sahdowheart by default is a High Half-Elf. A touch of the Feywild remains in half-elves with this bloodline, and even those untrained in magic possess a hint of wild power. Here are the following bonuses:
- Fey Ancestry: Advantage on saving throws when an enemy attempts to charm you, and prevents you from being put to sleep by potions, scrolls, and spells.
- Darkvision: see up to 12m in dark locations.
- Extra Cantrip: Firebolt which can do decent damage and blow up oil or grease to cause fire explosions.
Recommended Skills for Shadowheart Build

Medicine and Persuasion are the best skills for Baldur’s Gate 3: Best Shadowheart Companion Build because they complement your class abilities and enhance your effectiveness in various situations. In Baldur’s Gate 3, skills represent the abilities and proficiencies of your character that allow them to perform various actions and interact with the game world. Skills are associated with specific attributes and are used to determine the success or effectiveness of certain actions or abilities. They can be edited during character creation or with companions, during respec or reroll screen.
Here are the skills for Shadowheart in Baldur’s Gate 3:
- Medicine is a Wisdom Skill
- Persuasion is a Charisma Skill
Shadowheart Ability Score
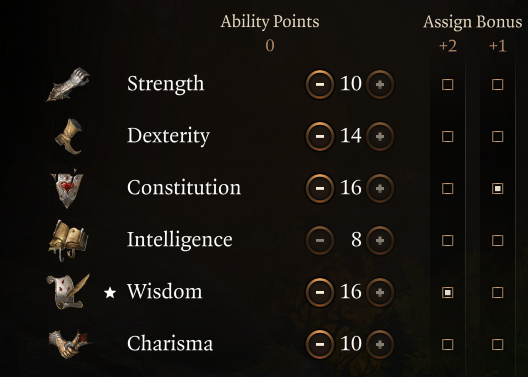
Here’s the best ability score for the Baldur’s Gate 3: Best Shadowheart Companion Build:
| Ability | Score |
|---|---|
| Strength | 10 |
| Dexterity | 14 |
| Constitution | 16 |
| Intelligence | 8 |
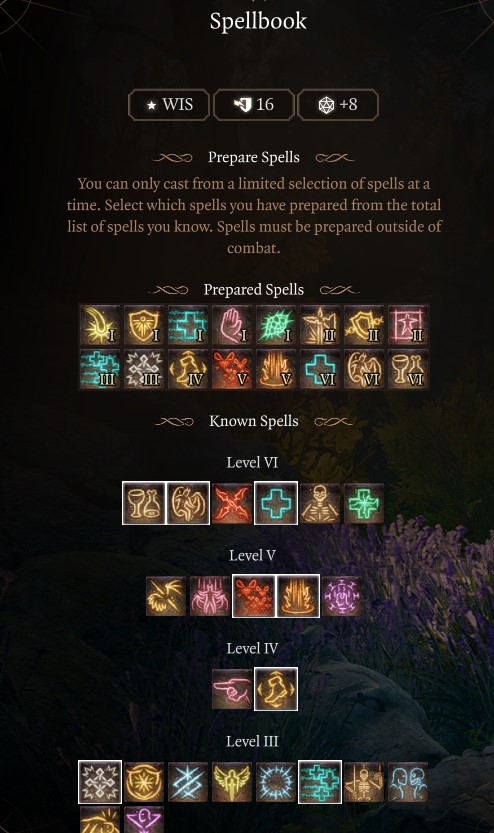
| Wisdom | 16 |
| Charisma | 10 |
The most important ability score for the Baldur’s Gate 3: Best Shadowheart Companion Build is Wisdom followed by Constitution and Dexterity. It’s important to land on even numbers and get at least 16 in Wisdom for optimal spell casting. In Baldur’s Gate 3, ability scores are the six core stats that determine a character’s capabilities. You can adjust for the optimal setup in character creation or reroll with Withers in your Camp.
Cleric Spell Slots
Here is a list of the Clerics’ Spell Slots as they progress:
| Cleric Level | 1st | 2nd | 3rd | 4th | 5th | 6th |
|---|---|---|---|---|---|---|
| Level 1 | 2 | 0 | 0 | 0 | 0 | 0 |
| Level 2 | 3 | 0 | 0 | 0 | 0 | 0 |
| Level 3 | 4 | 2 | 0 | 0 | 0 | 0 |
| Level 4 | 4 | 3 | 0 | 0 | 0 | 0 |
| Level 5 | 4 | 3 | 2 | 0 | 0 | 0 |
| Level 6 | 4 | 3 | 3 | 0 | 0 | 0 |
| Level 7 | 4 | 3 | 3 | 1 | 0 | 0 |
| Level 8 | 4 | 3 | 3 | 2 | 0 | 0 |
| Level 9 | 4 | 3 | 3 | 3 | 1 | 0 |
| Level 10 | 4 | 3 | 3 | 3 | 2 | 0 |
| Level 11 | 4 | 3 | 3 | 3 | 2 | 1 |
| Level 12 | 4 | 3 | 3 | 3 | 2 | 1 |
Related:
Shadowheart Level Progression
| Level | Class | Selection |
|---|---|---|
| 1 | Cleric | Sacred Flame, Guidance, Thaumaturgy, Guiding Bolt, Healing Word, Inflict Wounds, Bless, Cure Wounds, Shield of Faith |
| 2 | Cleric | Command, Turn Undead, Preserve Life |
| 3 | Cleric | Spiritual Weapon, Aid, Lesser Restoration |
| 4 | Cleric | Feat: Ability Improvement Wisdom, Blade Ward, Warding Bond |
| 5 | Cleric | Revivify, Beacon of Hope, Mass Healing Word |
| 6 | Cleric | Glyph of Warding |
| 7 | Cleric | Death Ward, Guardian of Faith, Freedom of Movement |
| 8 | Cleric | Feat: War Caster, Remove Curse:, Divine Strike |
| 9 | Cleric | Insect Plague, Flame Strike, Mass Cure Wounds, Greater Restoration |
| 10 | Cleric | Light, Planar Binding |
| 11 | Cleric | Planar Ally, Heal |
| 12 | Cleric | Feat: Ability Improvement Wisdom, Heroes’ Feast |
Alternative Shadowheart Build
The best alternative to the pure Cleric Shadowheart build above is a tank-like setup that also multiclasses into Fighter. This alternate build focuses on debuffing enemies with Radiating Orb via Luminous Armour. You can obtain this gear in Act 1 and use it throughout the game while maintaining decent damage with Spirit Guardians. Although this build can be more complex to master, we recommend it if you struggle with survival in tough fights.
| Level | Class | Selection |
|---|---|---|
| 1 | Cleric | Subclass: Light, Thaumaturgy, Guidance, Sacred Flame, Command, Guiding Bolt, Sanctuary, Healing Word |
| 2 | Cleric | Shield of Faith |
| 3 | Cleric | Spiritual Weapon |
| 4 | Cleric | Feat: Alert, Blade Ward, Aid |
| 5 | Cleric | Spirit Guardians, Swap Healing Word for Mass Healing Word |
| 6 | Fighter | Multiclass: Fighter, Defence Fighting Style |
| 7 | Fighter | Action Surge |
| 8 | Fighter | Subclass: Eldritch Knight, Booming Blade, Fire Bolt, Shield, Thunderwave, Longstrider |
| 9 | Fighter | Feat: Ability Improvement +2 Wisdom, Chromatic Orb |
| 10 | Cleric | Multiclass: Cleric, Protection from Energy, Glyph of Warding |
| 11 | Cleric | Drop Shield of Faith, Add Freedom of Movement and Death Ward |
| 12 | Cleric | Feat: War Caster, Banishment |
In Baldur’s Gate 3, ability scores are the six core stats that determine a character’s capabilities. For companions, the game automatically distributes them without the ability to change. Keep in mind, change your default ability score in your camp via the NPC Withers for 100 gold.
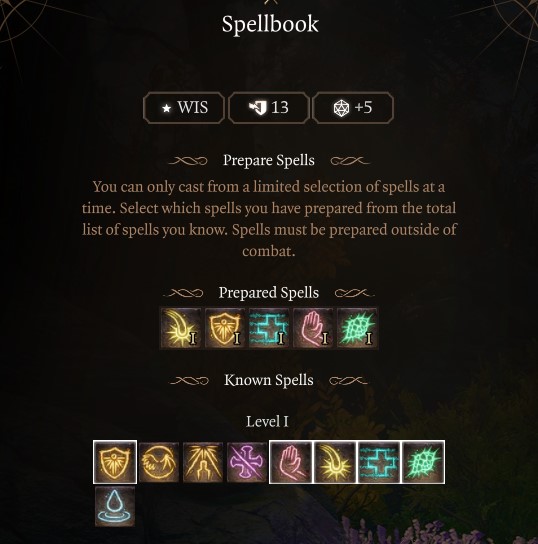
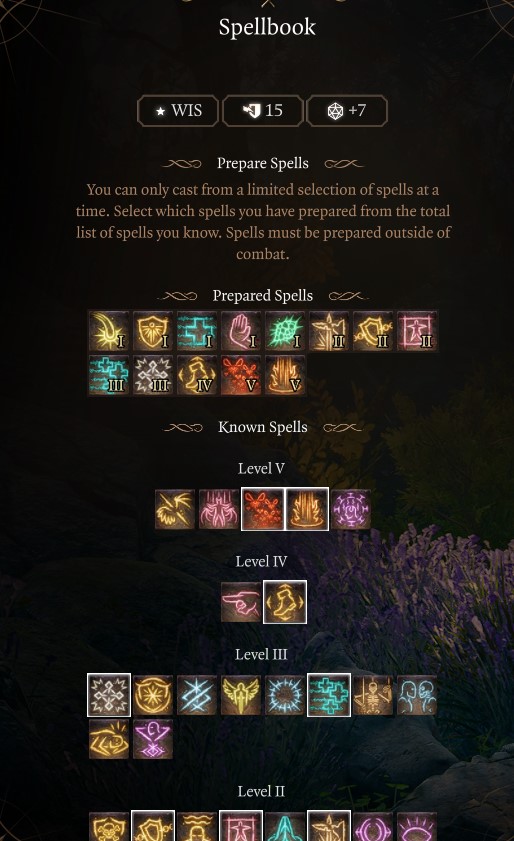
Level 1

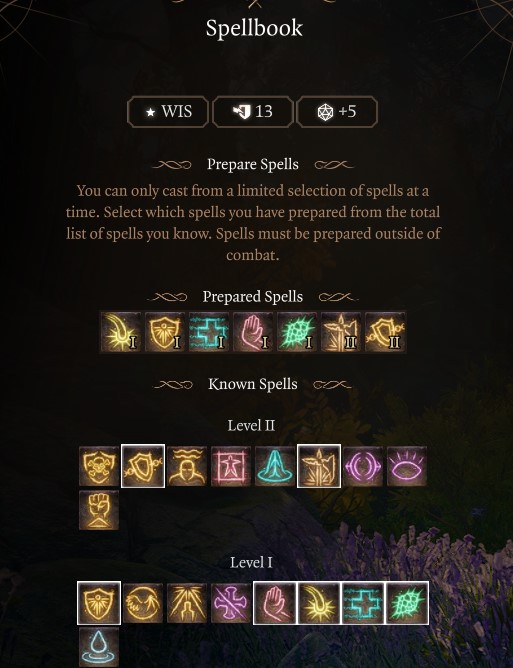
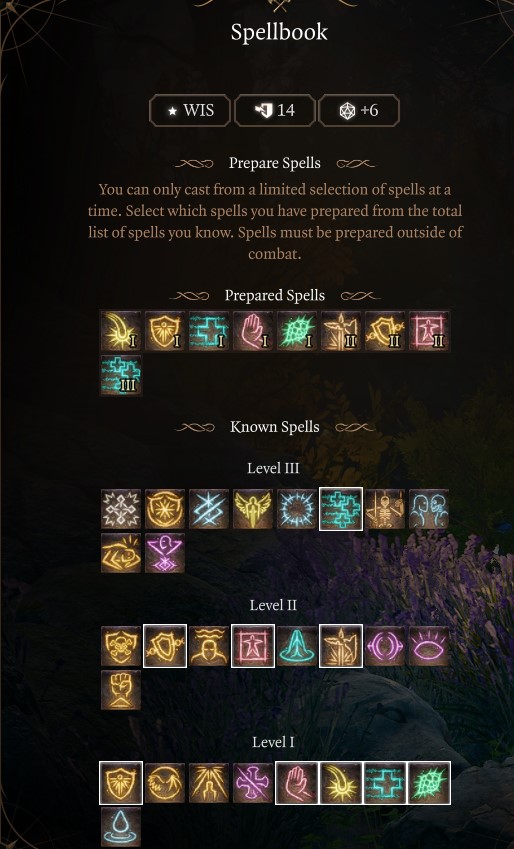
You will unlock three cantrips at Level One and pick three prepared spells. Cantrips are reusable and don’t require a spell slot resource. Prepared spells can be swapped in and out before combat, so make sure to use the loadout at the end of the level for a helpful guide.
REMEMBER that companions, will come default with their preferred class and subclass. If you can, unlock Withers as early as level 2 just after the prologue, and respec Shadowheart skills, ability score, and subclass. Feel free to swap in and out spells with Shadowheart Cleric after you’ve learned them. Each subclass unlocks “always prepared” spells. If it’s confusing, look at our suggested prepared spell list at the bottom of every level. Always-prepared spells will still consume a spell slot when you cast them, but they will not require a spellbook slot, allowing for more flexibility.
Character Creation Spell and Cantrip Selections
Cantrip Selection
- Sacred Flame: Conjure a flame-like radiance that deals 1d8 Radiant. This Cantrip acts with a very low damage range ability that can be used without a spell slow.
- Guidance: Gain a +1d4 bonus to Ability Checks. This spell is critical during dialogue checks and is very useful outside of combat.
- Thaumaturgy: Gain Advantage on Intimidation and Performance Checks. This is another helpful noncombat-related cantrip.
Spell Selection
- Guiding Bolt: 4d6 Radiant damage that grants Advantage on the next Attack Roll against the target. This is very high damage early and helpful because of the Advantage component. Consider this your main offensive spell.
- Healing Word: 1d4 Heal a creature you can see up to 18m away with a bonus action. Since this is a bonus action heal, you can combine it with an action-based heal like Cure Wounds or others to do two heals in one turn.
- Inflict Wounds: 3d10 damage necrotic. Used in melee range for good damage.
- Bless: Up to 3 creatures gain a +1d4 bonus to Attack Rolls and Saving Throws. This spell requires concentration which can be broken, but it can be but it can be pre-cast before combat with a long 10-turn duration. This drastically helps melee build land attacks like a Fighter and Barbarian.
- Cure Wounds: 1d8 heal requiring you to touch a creature to heal it. Melee-based heal that isn’t that powerful but at early levels it can be combined with Healing Word for two heals in one turn.
- Shield of Faith: Use a bonus action to grant 2 AC to a character. Useful because this spell requires bonus action, not an action to provide protection.
Subclass Feature
- Disciple of Life: Your devotion empowers your healing Spells. When casting a healing spell, the target regains additional Hit Points equal to 2 + Spell’s level.
Shadowheart Gameplay
Gameplay at this level is using Guiding Bolt for damage entirely. You can combine Healing Word and Cure Wounds for two heals in one turn. You can also use Shield of Faith or Bless as a buff that requires concentration but not both. Remember, you will be dreadfully low on spell slots at this level, so use a lot of Fire Bolt cantrips with Shadowheart for damage without consuming a spell slot. As you progress in level, this isn’t an issue but can be hard to manage at a lower level. Also constantly look for resting supplies and barrels and crates so you can rest frequently until higher levels.
How I play Shadowheart at this level is using Shield of Faith a lot of the time outside of combat on a “squishy” ally. Someone who has a low Armour Class and seems to die or take aggro. This will help that character avoid damage. Next, I start my turn with a buff like Blessed if I’m not using Shield of Faith. Both require concentration, and most likely you will have one concentration spell active at all times as a buff or debuff. Then you fire off Guiding Bolt at range, Fire Bolt for cantrip with low spell slots, or Sacred Flame when you don’t have a direct line of sight.
For healing, you have an action-based heal, Cure Wounds, and bonus action heal, Healing Word. You will get two improved versions of these spells later in the game so get familiar with them. Early on, there won’t be much damage or buffs needing to be applied. At levels 4, 5, 7, and 9 expect big spikes in power. You get summons, better spells, feats, and so forth that dramatically increase your utility.
Shadowheart Weakness
The biggest issue you need to be aware of with the Cleric is lack of initiative due to lower Dexterity and movement speed. Lower initiative means you go later in the combat round. This leaves you vulnerable to stuns, which in our gear section I suggest items that can help mitigate these problems. For lackluster speed and movement, the Misty Step spell is your best friend. You can get an Amulet that provides free use of Misty Step once per short rest. Also, be on the lookout at traders for scrolls of this and stock up. Generally, you use Misty Step once per combat round either to jump into healing range or jump out when pressured.
Lastly, you have a lack of bonus action utility and we do not advise you to multiclass her. You want to use your bonus action later for Spiritual Weapon, Misty Step, and Healing Word (heal spell). You also want to consider any spell or spell scroll that allows you to cast a spell as a bonus action like Shield. Moreover, consider using Elixirs which last until a long rest. You can use fire resistance early which helps in certain situations and later Elixir of Universal Resistance which makes you near god-like.
Early Priorities
Shadowheart should be pretty survivable if you picked the Life subclass and heavy armour with one hand and shield. Within a few hours of gameplay, go North and look for two Vendors in the Hollowed City. They will sell a +1 Scale or Chain Mail armour. This can get your AC to 17 or 18 depending straight away. Throw on Shield of Faith, and you can reach 20 AC within a few hours becoming VERY tanky. Here’s your goal at this level and what to work towards:
- Upgrade armor to heavy +1
- Upgrading shield to uncommon
- This should get you to 17 or 18 AC
- Stocking up on scrolls of Misty Step
- Stock up on camping supplies for a long rest
- Buy every crafting material from vendors
- Acquire Amulet of Misty Step
Look below for our gear suggestions, but this will help you out dramatically during your playthrough and make it much more enjoyable. Don’t sleep on the vendors in Act 1 BG3, they sell a lot of good items very early which can help you get to Act 2, then you can do the same thing all over again. The best-in-slot items will come from quest turn-ins and puzzles, but the alternatives are good as well. Shadowheart gameplay is, buff, damage, react and heal when health is low. Enjoy the rest of the build and suggestions, it’s a fun one!
Spell Loadout at level 1: Healing Word, Cure Wounds, Inflict Wounds, Guiding Bolt, and Shield of Faith.
Level 2
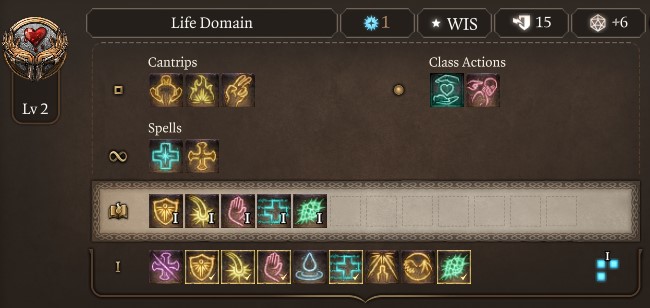
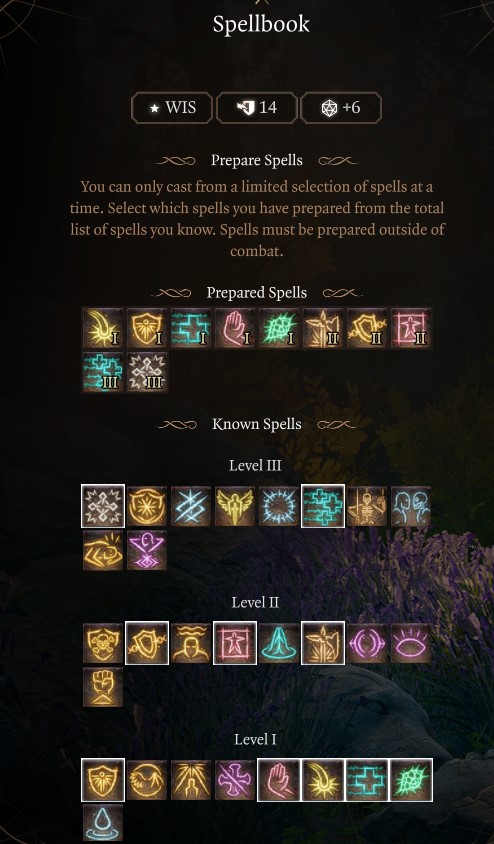
At level two your spells will largely stay the same. You will have prepared spells and can pick up to 5 to learn and swap out outside of combat the ones you’ve already learned. Next, you will get granted Turn Undead and Preserve Life via your subclass and we recommend you take the spell Command.
Spell Selection
- Command: Command a creature to flee, move closer, freeze, drop to the ground, or drop their weapon 18m requiring concentration. This is a powerful area-based crowd-control effect that can force weapons to drop. Use this early in the game when overwhelmed with enemies.
Subclass Features
- Turn Undead: Inflicts Turned. Present your holy symbol and pray. Each undead that can see or hear you is forced to flee from you.
- Preserve Life: Evoke a healing energy that restores (3*Cleric Level) hit points to allied creatures. Does not affect undead and constructs.
The gameplay stays the same for the most part at this level. The addition of Preserve Life gives you a massive area-based healing that requires charges. While this healing uses an action, it’s extraordinarily strong because the healing gets more powerful the higher levels you become. Moreover, it doesn’t use a spell slot and should be your primary area-based healing spell early and even late. Turn Undead can be handy in specific fights. The Command spell is a great addition for crowd control, use it to drop opponents’ weapons or put them in prone.
Spell Loadout at level 2: Guiding Bolt, Shield of Faith, Healing Word, Command, Inflict Wounds
Level 3
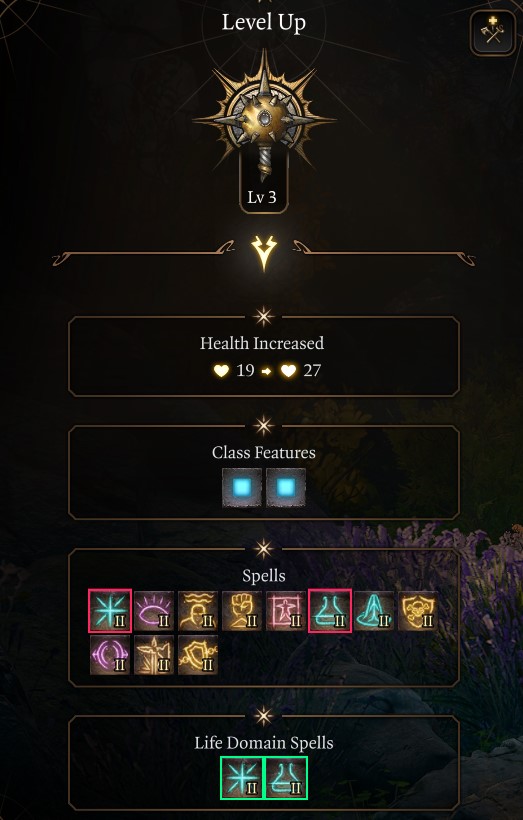
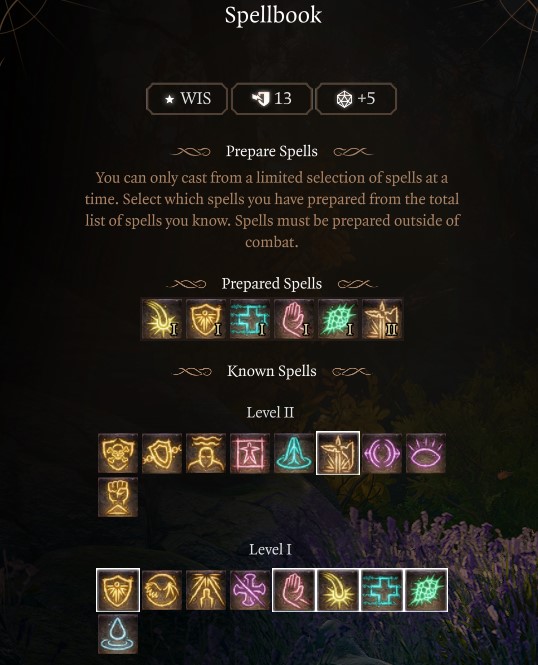
Level three you will unlock two level 2 spells and an additional level 1 spell. Will take Spiritual Weapon for our level two spell slot. Will also get two free spells from Life Domain.
Spell Selection
- Spiritual Weapon: Summon a spiritual weapon that can attack enemies nearby. This is amazing because you can use bonus action AND it doesn’t cost concentration. Recommend spear form, each form has a different attack that can debuff the enemy.
Subclass Feature
- Aid: Bolster your allies with toughness and resolve to heal and increase their hit point maximum.
- Lesser Restoration: Cure a creature from disease, poison, paralysis, or blindness.
Gameplay at this level changes a bit considering how Spiritual Weapon works. Since this is a bonus action, you can use it in conjunction with an action in the same turn. Also, this can be pre-cast before combat along with Bless if you know an encounter is about to unfold. This spell also doesn’t cost concentration and it soaks up damage and does a bit as well, making it powerful at this stage of the game. Consider Inflict Wounds your flex spell which can be dropped for something else (Sanctuary) if you do not use it.
Spell Loadout at level 3: Guiding Bolt, Shield of Faith, Healing Word, Command, Inflict Wounds, Spiritual Weapon
Level 4
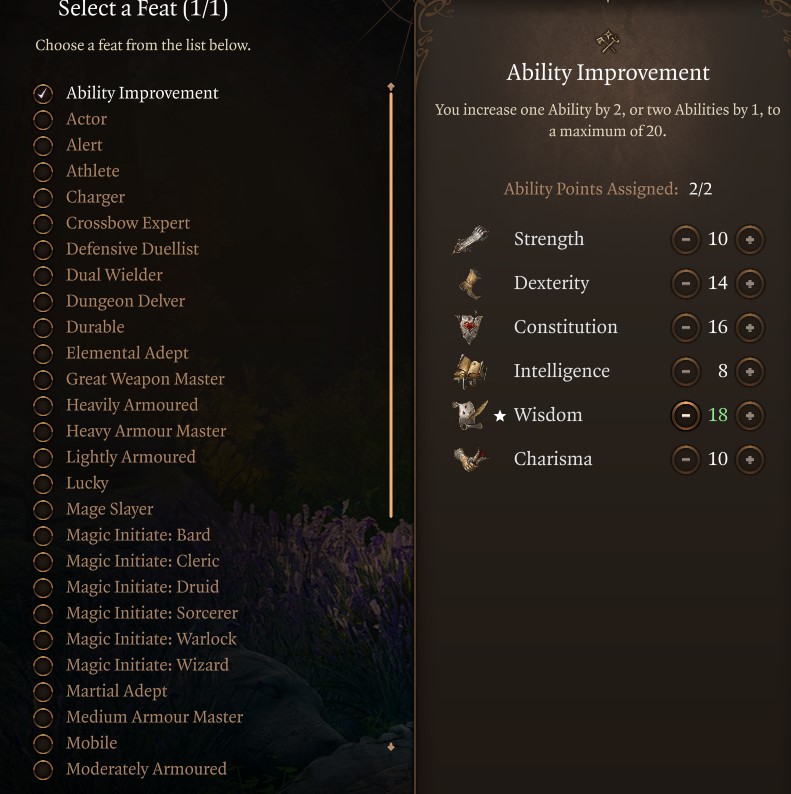
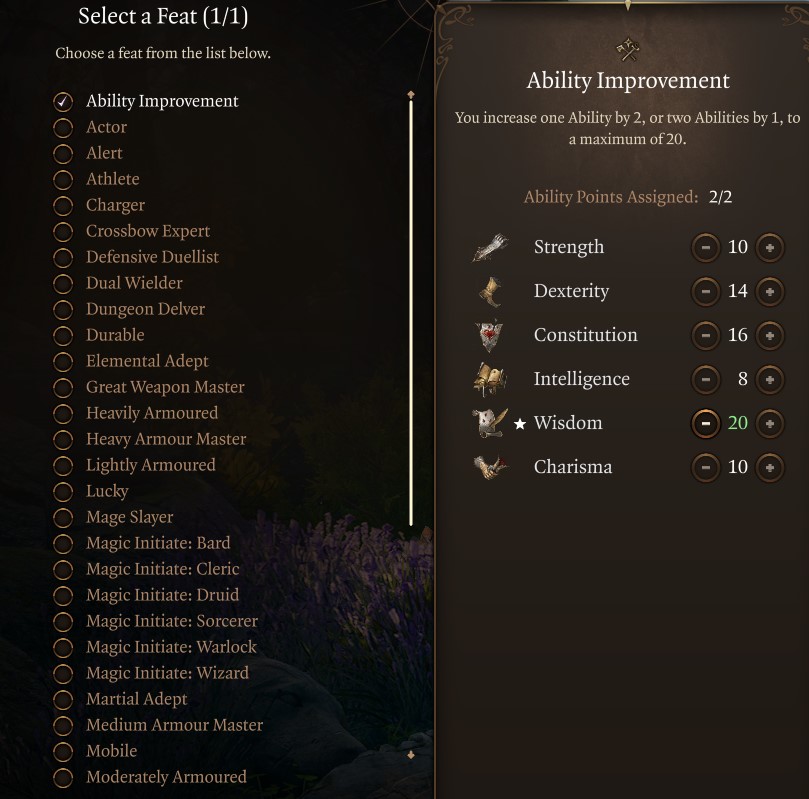
At level four, the Cleric gets one cantrip, one more prepared spell, and a feat or ability improvement. We suggest you increase your ability score Wisdom by 2. Our goal is to increase the effectiveness of our healing so take the Ability Improvement feat and put two ability points into Wisdom. We will select Warding Bond for our spell and Blade Ward for our cantrip.
Cantrip Selection
- Blade Ward: Take only half of the damage from Bludgeoning, Piercing, and Slashing attacks. This is a decent cantrip when expecting incoming melee damage.
Spell Selection
- Warding Bond: The target gains +1 on AC, +1 on saving throws, and resistance to all damage, but the caster shares damage. This is helpful because it lasts until a long rest and can be pre-cast outside of combat.
Gameplay at this level doesn’t change much, you can use Warding Bond for a buff and expect more damage and healing with a higher ability score. Sanctuary and Hold Person are two alternative options at this level. Sanctuary makes a target un-targetable though it can take area-based damage. Hold Person is another powerful stun that can lock a target in place. This is helpful for humanoid boss fights or annoying Githyanki.
Spell Loadout at level 4: Healing Word, Inflict Wounds, Guiding Bolt, Shield of Faith, Command, Spiritual Weapon, Warding Bond.
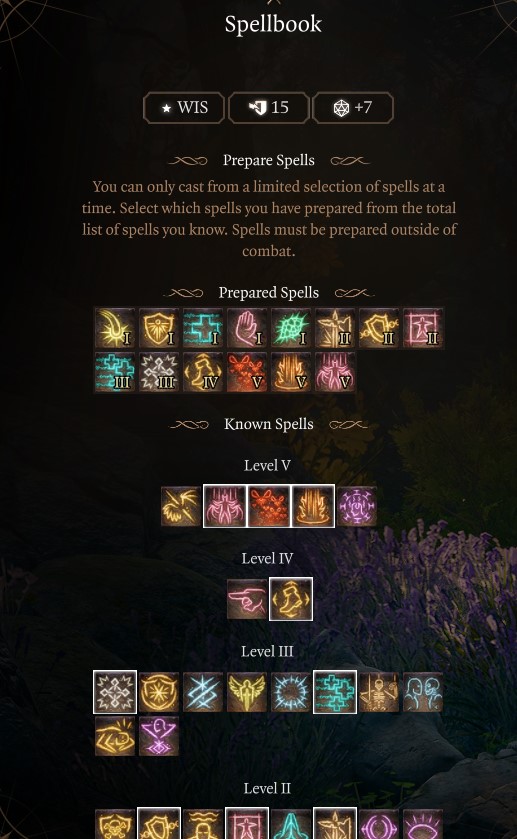
Level 5
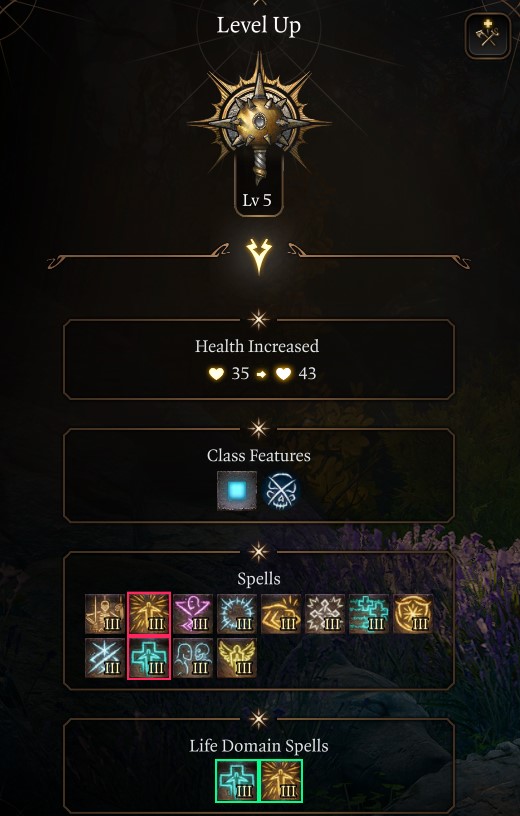
At level five, the Life Cleric gets two free spells via your subclass and you get to pick a level 3 spell. The best healing option here is Mass Healing Word because it’s massive AOE healing and requires a bonus Action rather than an action.
Subclass Spells
- Revivify: Revive a companion. They return to life with 1 hit point. Can be used to revive Ally which I almost always throw a potion rather than this spell because they return with more HP.
- Beacon of Hope: Your allies will regain the maximum hit points possible when healed. They also gain Advantage on Wisdom Saving Throws and Death Saving Throws. Used as our concentration spell when you expect heavy damage and you won’t be doing anything but healing each turn.
Spell Selection
- Mass Healing Word: heal for 1d4+3 up to 6 creatures. Using a bonus action his is a very powerful wide area-based heal that can be combined with an action in the same turn.
At this level, Mass Healing Word is an upgraded version of Healing Word. You can now do an area-based heal of 6 creatures with a bonus action. Additionally, you can drop another level 2 spell and pick up Glyph of Warding if you want more offensive pressure. Animate Dead is helpful if you like allies fighting alongside you, however, it can go against Shadowheart’s lore background.
Spell Loadout at level 5: Guiding Bolt, Shield of Faith, Healing Word, Command, Inflict Wounds, Spiritual Weapon, Warding Bond, Hold Person, Mass Healing Word, Glyph of Warding.
Level 6
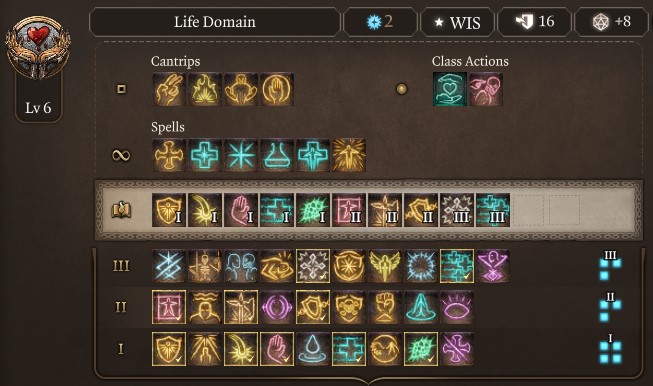
At level six for a Life Cleric, you gain another level 3 spell, another Channel Divinity Charge, and a Blessed Healer Passive. Here is the recommendation for the Baldur’s Gate 3: Best Shadowheart Companion Build:
Class Features:
- Channel Divinity Charges: either Preserved Life or Turn Undead. Preserved Life is preferred because it’s a powerful 9m are based heal. At this level you have two.
- Blessed Healer: When you cast a healing spell of Level 1 or higher on another creature, you regain hit points equal to 2+ the spell’s level. Healing others essentially heals you.
Spells Selection
- Glyph of Warding: Inscribe a circle of arcane glyphs on the ground that trigger a magical effect when stepped on by an enemy. This spell is useful because you can proc elemental effects and do massive area damage.
Gameplay at this level is summoning Spiritual Weapon with bonus action on the first turn. Usually casting Bless on the team before combat or first turn. Then use Guiding Bolt or Glyph of Warding for damage. Mass Healing Word and another heal Preserved Life for big healing.
Ending Act 1
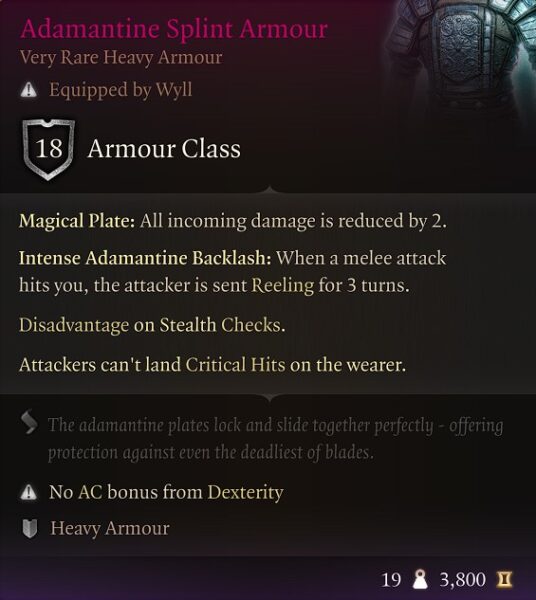
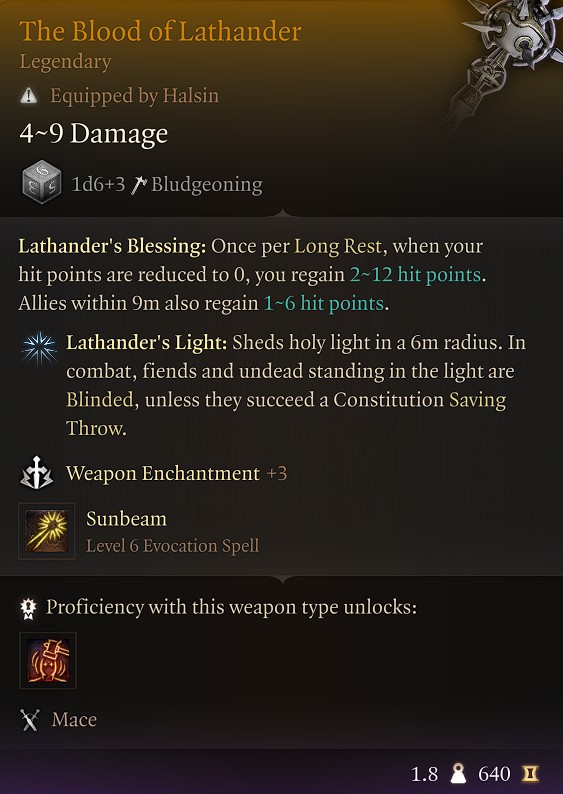
At this level, you should be close to transitioning out of Act 1. Make sure to check vendors and stock up on camp and alchemy supplies. Moreover, look over the best Act 1 items, and don’t forget the legendary weapon Blood of Lathander. While this quest can be tedious and annoying, it’s one of the best weapons for Shadowheart and can be used the entire game. Lastly, make sure to complete the Underdark and Grymforge if you can. The heavy Adamantine Armour is incredible and can last you until Act 3.
Spell Loadout at level 6: Guiding Bolt, Shield of Faith, Healing Word, Command, Inflict Wounds, Spiritual Weapon, Warding Bond, Hold Person, Mass Healing Word, Glyph of Warding
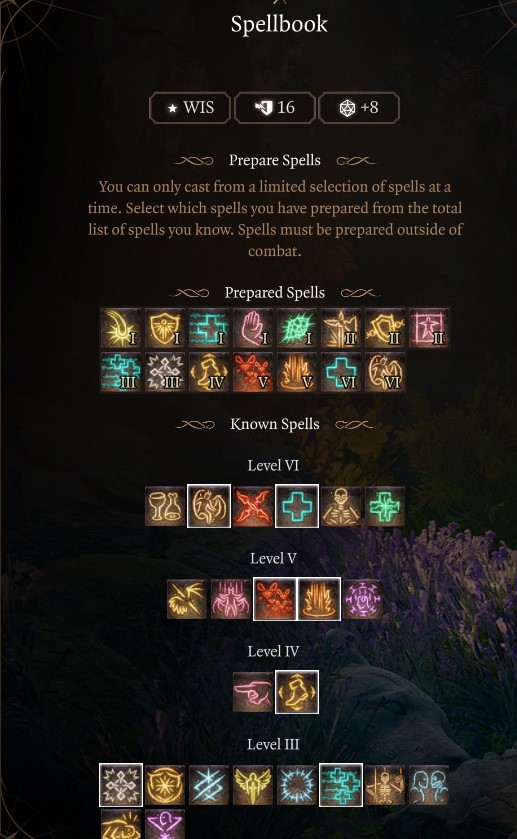
Level 7
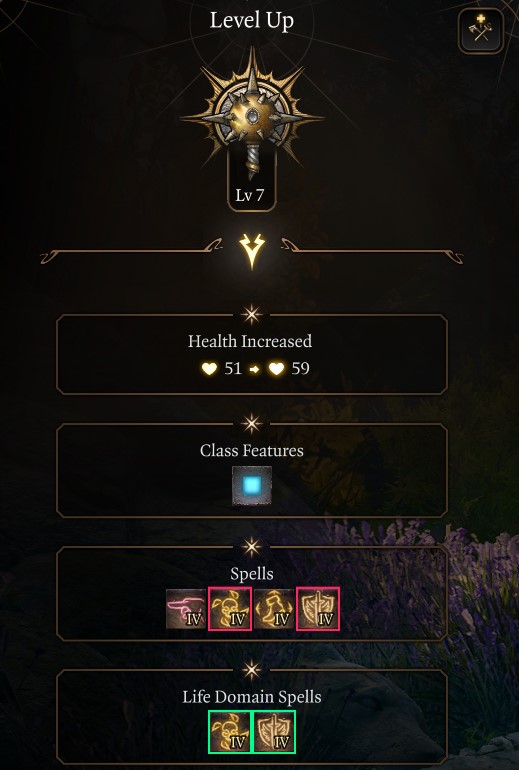
At level 7, the Life Cleric gains one level 4 spell slot, and two subclass-specific spells, Death Ward and Guardian of Faith.
Subclass Spells
- Death Ward: When the target drops to 0 hp for the first time, it automatically returns to 1 hp. This is essentially a Relentless Endurance Half-Orc racial feature mimic. It’s very handy to use on difficult boss fights where you assume someone on your team will get one shot on turn one.
- Guardian of Faith: Hostile creatures within a 10-ft radius of the created guardian must succeed on a Dex. save or take 20 radiant damage. This summonses a created guardian which cannot move but deals damage in a 10ft radius. Every time it does damage, it takes damage. The nice thing about this spell is it can be used in conjunction with a Spiritual Weapon. One is an action, one a bonus action and BOTH do not require concentration. So, on turn one, you can drop down Guardian in the middle of the action along with Spiritual Weapon.
Spells Selection
- Freedom of Movement: The Target’s movement is unaffected by difficult terrain, spells or water. A beneficial spell for movement in or outside of combat.
Gameplay at Midgame
Near the middle of the game, you can utilize main summoning abilities, especially on turn one. Your first turn is generally the most important if you can cast both summonses on turn one using an action and a bonus action (Guardian of Faith and Spiritual Weapon). From here, you go into priority mode emphasizing healing and buffs with Bless.
If everyone is high on health, use Glyph of Warding for area damage and Guiding Bolt for a single target. If you feel you lack crowd control (CC) swap out Freedom of Movement for Banishment which is a great single-target CC. You can also use scrolls for crowd control to avoid using spell slots or different prepared spells. Remember the Cleric class and Shadowheart can swap in and out spells outside of combat. Don’t be afraid to experiment and deviate from our spell suggestions if you are don’t feel one is useful.
Spell Loadout at level 7: Guiding Bolt, Shield of Faith, Healing Word, Command, Inflict Wounds, Spiritual Weapon, Warding Bond, Hold Person, Mass Healing Word, Glyph of Warding, Freedom of Movement
Level 8
At level 8 the Life Cleric gets Divine Strike, an additional level 4 spell slot, and a feat. Here’s what we suggest at this level.
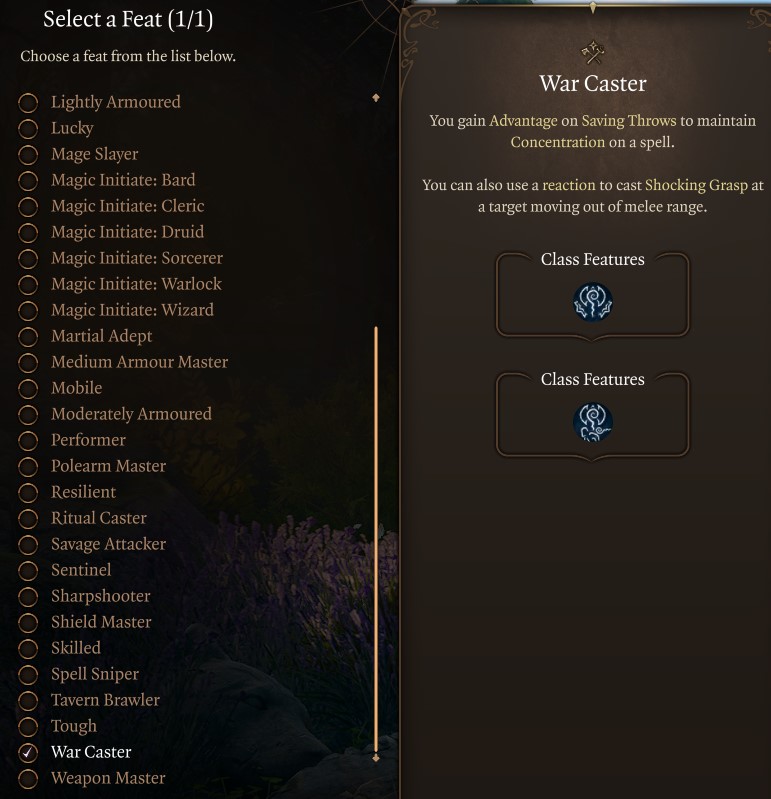
Feat War Caster
- War Caster: You gain Advantage on Saving Throws to maintain Concentration on a spell. You can also use a reaction to cast Shocking Grasp at a target moving out of melee range. So, War Caster helps dramatically maintain concentration which is almost always active for our build. We will use the level 12 feat to push our Wisdom to 18, but after testing this was more helpful at level 8.
Spells Selection
- Remove Curse: Touch a creature or object to remove all Curses and Hexes affecting it. This is a niche spell in this slot, Banishment is a good substitute if you find it lacking.
Subclass Feature
- Divine Strike: Strike a foe with your weapon as it becomes wreathed in gleaming radiance. This weapon damage action isn’t our priority since we are a support build and Guiding Bolt fills out single-target needs.
Gameplay: Not many changes at this level as you won’t be using Divine Strike, but expect better luck maintaining concentration which will be helpful to keeping important spells active while taking pressure.
Spell Loadout at level 8: Guiding Bolt, Shield of Faith, Healing Word, Command, Inflict Wounds, Spiritual Weapon, Warding Bond, Hold Person, Mass Healing Word, Glyph of Warding, Freedom of Movement, Remove Curse
Level 9
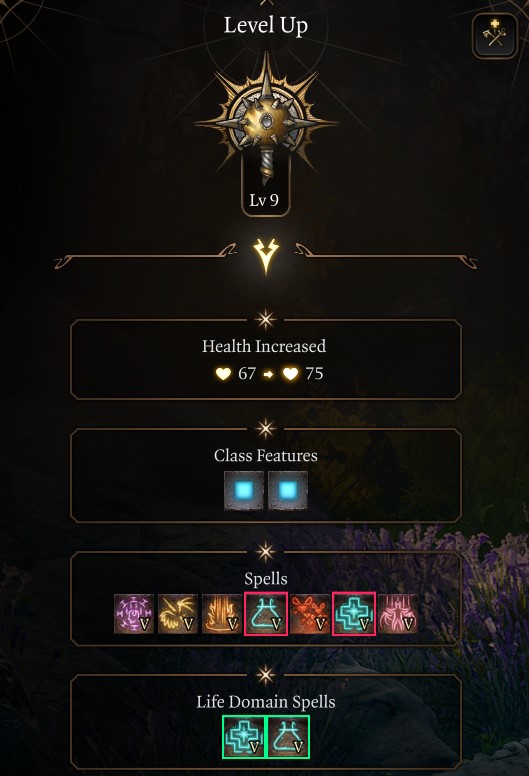
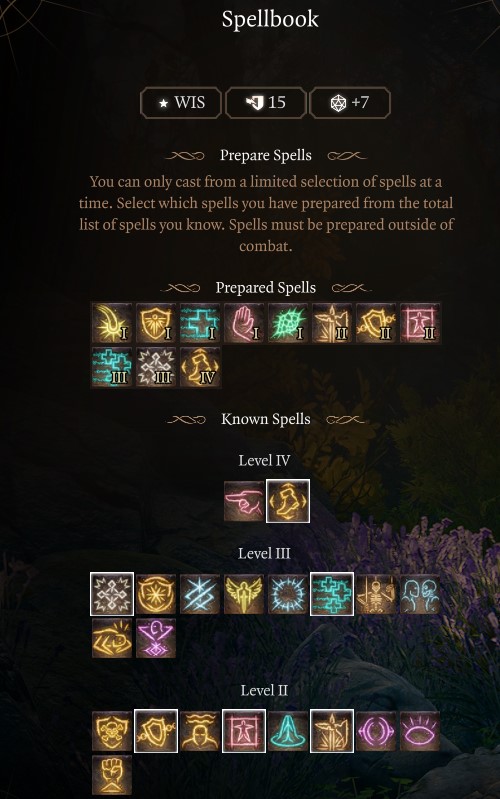
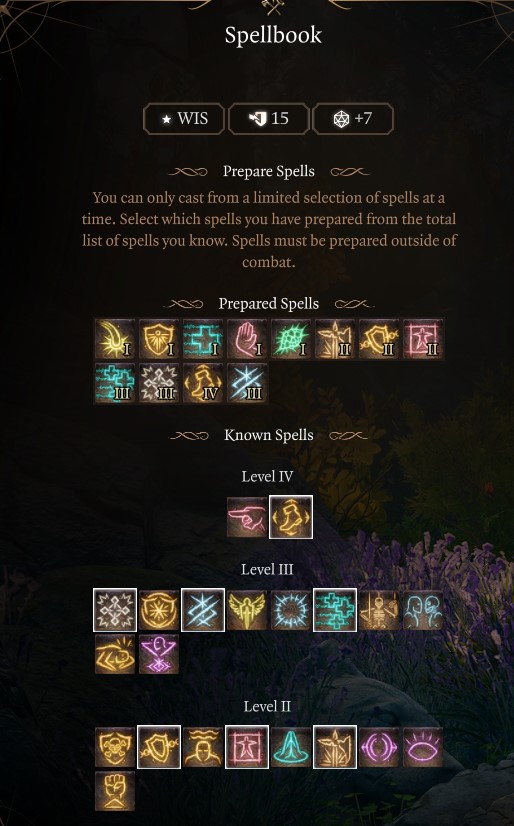
At level 9, the Cleric gets two free spells, Mass Cure Wounds, Great Restoration, 1 level 4 spell slot, 1 level 5 spell slot, and an additional prepared spell bringing the total to 13. I also have some thoughts on multi-classing the cleric at this level. Here are our recommendations:
Spells Selection
- Insect Plague: 4d10 piercing damage Locust attack everyone within range, make the area Difficult Terrain, and impose Disadvantage on Perception Checks. This requires concentration but this spell does great damage in a massive area and hinders movement though requires concentration.
- Flame Strike: 10-60 damage Make a pillar of divine fire roar down from the heavens like the wrath of affronted angels. On Save: Targets still take half damage. Doesn’t require concentration and a harder-hitting area-based spell than Glyph of Warding.
Subclass Features
- Mass Cure Wounds: Up to 6 creatures regain 3d8+Spell Ability modifier
- Greater Restoration: End one condition (charmed or petrified), one curse, any ability scores or hp reduction, or one exhaustion level.
Gameplay: at this level, you have much better area-based healing and damage. You now have two high-level spells that can be used with or without concentration and even better healing making this level a big leap in power.
Multi-Class Options
At level 9, the Cleric can decide to multi-class. This has some pros and cons and I’ve found it better to fully level the Life Cleric so you can reach level 6 spells. Here’s a brief breakdown of options:
Fighter (two levels): The fighter with two levels has Action Surge. This gives you an additional action once per fight and recharges on short rest. The Clerics main issue is lacking multiple actions, and this helps to solve that. You do lose out on level 6 spells and another feat but it’s an option.
Rogue (four levels): The Thief and Rogue combination is a powerful way to increase Shadowheart’s mobility and bonus action. With Fast Hands, you gain an additional bonus action alongside cunning actions. These allow Dash, Hide, and Disengaged to be used with a bonus action rather than an action. However, you will sacrifice some spells in the end-game that might make it not worth considering, but Thief Rogue is an option.
Cleric Level 12: this is the way I prefer because you get access to level 5 and 6 spells and another feat pushing our Wisdom to 20 with War Caster. Something about summoning a Cambion and Spiritual Weapon on turn one makes it so fun and very effective.
Level 9 Cleric Prepared Spells: Guiding Bolt, Shield of Faith, Healing Word, Command, Inflict Wounds, Spiritual Weapon, Warding Bond, Hold Person, Mass Healing Word, Glyph of Warding, Freedom of Movement, Insect Plague, Flame Strike
Level 10
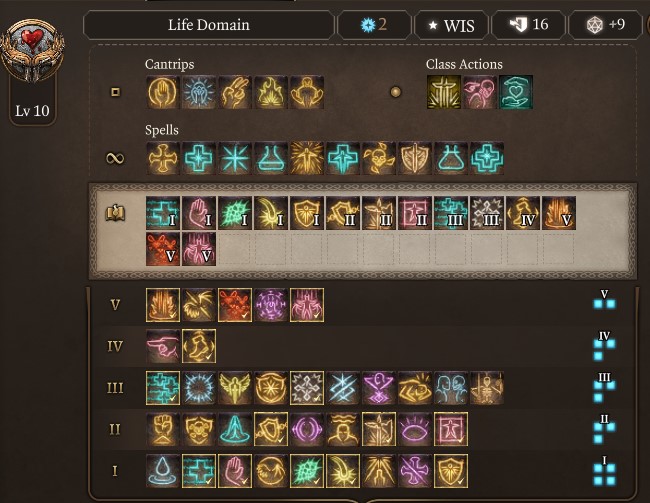
At level 10, the Life Cleric gets a subclass feature Divine Intervention, one cantrip, another spell slot, and another prepared spell.
Subclass Feature
- Divine Intervention: You can cast Divine Intervention to invoke your God’s aid. Once used, this can never be used again. You have a couple of options with this one-time-only spell, but the obvious one is a damage spell. It’s a massive area and huge damage. I suggest saving this for the last boss or something you just cannot complete.
Cantrip
- Light: Infuse an object with an aura of light. This is an occasionally used utility spell.
Spell Selection
- Planar Binding: Target an otherworldly creature and attach its consciousness to your own. It will follow and fight for you as an ally. Provides decent crowd control if the percentage is high enough, over 60%.
Divine Intervention
You should save Divine Intervention for the final fight of the game where damage is critical to complete the story. However, you can ‘cheese’ this spell and hire a hireling. With a Hireling, you can respec to Life Cleric and cast one of the versions which gives you a free legendary mace. You can then equip Shadowheart with it and dismiss the companion. This is extremely cheesy, but helpful if you lack gear from Act 1.
Level 10 Cleric Prepared Spells: Guiding Bolt, Shield of Faith, Healing Word, Command, Inflict Wounds, Spiritual Weapon, Warding Bond, Hold Person, Mass Healing Word, Glyph of Warding, Freedom of Movement, Insect Plague, Flame Strike, Planar Binding
Level 11
At Level 11, you get access to the final Level 6 spell slot.
Spell Selection (drop Planar Binding)
- Planar Ally: Summon a deva, djinn, or cambion to help the caster until a long rest.
- Heal: heal for 70 damage, heal a target’s wounds, and remove Blindness and any diseases.
Cleric Prepared Spells: Guiding Bolt, Shield of Faith, Healing Word, Command, Inflict Wounds, Spiritual Weapon, Warding Bond, Hold Person, Mass Healing Word, Glyph of Warding, Freedom of Movement, Insect Plague, Flame Strike, Planar Ally, Heal
Planar Ally
We prefer using my 6 spells for Planar Ally after a long rest. It comes with so much health and doesn’t require concentration. Additionally, it provides damage, distraction and it just looks cool! You want to cast this spell after every long rest because the ally will follow you and not interfere in dialogue. Moreover, it can do serious damage and provide a distraction for enemies. Remember, you will only get 1 level 6 spell slot unless you have the Legendary Staff found early in Act 3. Quarterstaff and Shields can be combined so consider this an option.
Level 12
Congratulations on reaching the maximum level of 12 with Shadowheart! At this level the Life Cleric, we get one spell and one more feat. Here are the recommended final choices for the Baldur’s Gate 3: Best Shadowheart Companion Build:
Feat: +2 ability improvement to 20 Wisdom. Some items can get you to 22 but this is easy and helps with healing, damage, and success chance.
Spell Selection: Heroes’ Feast: Produce a feast for 12 guests that cures diseases, immunizes to poison, and increases hp by 2d10 for 24 hours. This spell helps with status effects and increasing health. I prefer Planar Ally, but this has some good utility.
Shadowheart Final Level
Gameplay: At max level, you should feel very powerful. Using multiple summons, powerful single target, and area-based healing along with great damage. The Life Cleric surprisingly has a ton of damage and you can burst your team up with one turn using action and bonus action combination.
Level 12 Cleric Prepared Spells: Guiding Bolt, Shield of Faith, Healing Word, Command, Inflict Wounds, Spiritual Weapon, Warding Bond, Hold Person, Mass Healing Word, Glyph of Warding, Freedom of Movement, Insect Plague, Flame Strike, Planar Ally, Heal, Hero’s Feast
Recommended Weapons and Armor
In Games like Baldur’s Gate 3, you’ll explore the world, loot chests and your enemies’ dead bodies, and complete quests, and all those activities can reward you with useful items, potions, armor, weapons, scrolls, and much more. Progression and finding new gear are part of the game, and you will organically get more powerful weapons during your journeys.
Beginner: Act 1
Here’s the best beginner gear for the Baldur’s Gate 3: Best Shadowheart Companion Build:
| Gear Slot | Best Gear Item | Effect |
|---|---|---|
| Head | Wapira’s Crown | Additional healing |
| Cape | – | |
| Chest | Adamantine Splint Armour | 18 Armour Class |
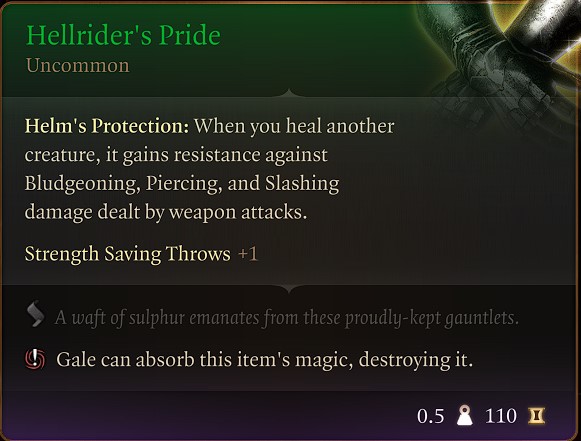
| Gloves | Hellrider’s Pride | Heals give resistance |
| Boots | Boots of Aid and Comfort | Additional Temporary HP |
| Necklace | Amulet of Misty Step | Misty Step Spell |
| Ring | Ring of Absolute Force | Thunderwave Spell |
| Ring | The Whispering Promise | Healing gives Blessed |
| Weapon 1 Main Hand | Staff of Arcane Blessing | Free Blessed Spell |
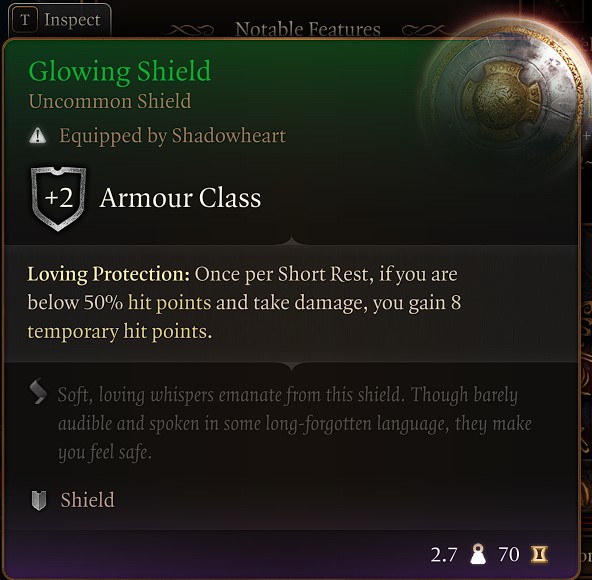
| Weapon 1 Off-Hand | Glowing Shield | HP When Low |
| Weapon Ranged | Hunting Shortbow | Hunter’s Mark Spell |
- Wapira’s Crown: Reward from Zelvor for killing 3 leaders and the Goblin camp, accept gold (alternative Haste Helm, or Grymskull Helm).
- Adamantine Splint Armour: Complete Adamantine Forge Quest (X: -593 Y: 309) (alternative Luminous Armour, or Chain Mail +1)
- Hellrider’s Pride: Can be bought, stolen, or earned from Zevolr (alternative Gloves of Missile Snaring Vendors Act 1).
- Boots of Aid and Comfort: Sold by Grat The Trader at the Goblin Camp (alternative Disintegrating Night Walkers).
- Amulet of Misty Step: Found in a Gilded Chest (X386 Y8) in Defiled Temple (alternative Amulet of Silvanus, or Absolute’s Talisman).
- Ring of Absolute Force: Dropped by Sergeant Thrinn in Grymforge (alternative Crusher Ring).
- The Whispering Promise: From traders Zhentarim Hideout, Goblin Camp, Druid Grove, or Shattered Sanctum (alternative Ring of Colour Spray).
- Staff of Arcane Blessing: Obtained in Arcane Tower (alternative The Watcher’s Guide).
- Glowing Shield: Found in a chest on a slope behind the goblin camp. (X: -54, Y: 462) (alternative Wood Woad Shield).
- Hunting Shortbow: Sold by Dammon in the Druid Grove.
Advanced: Act 3 End Game
Here is the best advanced and end-game gear for Shadowheart Companion Build in Baldur’s Gate 3:
| Gear Slot | Best Gear Item | Effect |
|---|---|---|
| Head | Helm of Balduran | Cannot be Stunned |
| Cape | Mantle of the Holy Warrior | Free Crusader’s Mantle Spell |
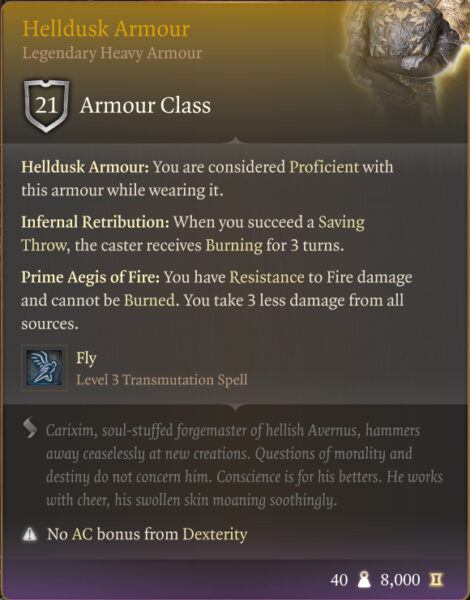
| Chest | Helldusk Armour | 21 Armour Class |
| Gloves | The Reviving Hands | Healed Gain Blade Ward |
| Boots | Helldusk Boots | Cannot be Moved |
| Necklace | Amulet of Greater Health | 23 Constitution |
| Ring | Crypt Lord Ring | Free Create Undead |
| Ring | Till Death Do Us Part | Free Beacon of Hope |
| Weapon 1 Main Hand | The Blood of Lathander | Sunbeam and Healing |
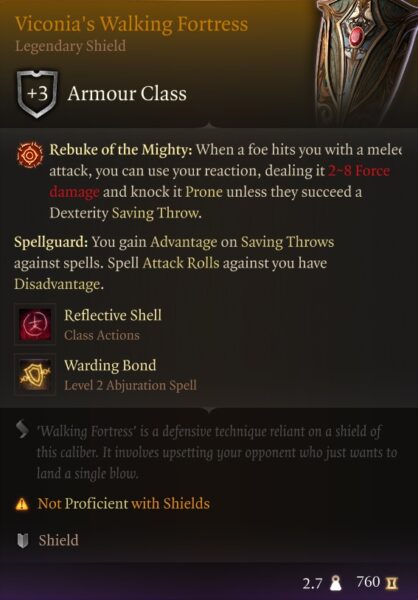
| Weapon 1 Off-Hand | Viconia’s Walking Fortress | 3 AC, Reflect Spell |
| Weapon 2 Ranged | Darkfire Shortbow | Free Haste Spell |
- Helm of Balduran: Found during Wyrmway trial under Wyrmrocks Keep in Act 3 (Alternative Helldusk Helmet, or Hood of the Weave).
- Mantle of the Holy Warrior: Sold by Vicar Humbletoes in Stormshore Tabernacle (Alternative Cloak of the Weave, or Cloak of Protection).
- Helldusk Armour: Looted from Raphael in the House of Hope in Act 3 (Alternative Armour of Persistence).
- The Reviving Hands: Sold by Vicar Humbletoes in Stormshore Tabernacle (Alternative Jhannyl’s Gloves)
- Helldusk Boots: Gilded Chest on the top floor of Wyrm’s Rock Fortress (Alternative Disintegrating Night Walkers).
- Amulet of Greater Health: Archive in the House of Hope (Alternative Amulet of the Devout, or Spellcrux Amulet).
- Crypt Lord Ring: The Mystic Carrion’s Servant quest (Alternative Shifting Corpus Ring)
- Till Death Do Us Part: Looted from Lady Jannath in Act 3 (Alternative Ring of Free Action)
- The Blood of Lathander: The Blood of Lathander quest in Act 2 (Alternative Selûne’s Spear of Night, or Markoheshkir).
- Viconia’s Walking Fortress: Looted from Viconia DeVir Act 3 (Alternative Shield of Devotion)
- Darkfire Shortbow: Sold by Dammon Last Light Inn Act 2.
Best Consumable Items and Potions
Consumables are items that can be used once and then destroyed. They are typically used to restore health or other resources, and common consumables include potions, scrolls, food, drinks, and arrows.
The following list represents the best individual use consumable items that will aid in the Baldur’s Gate 3: Best Shadowheart Companion Build:
- Potion of Greater Healing: 8d4 + 8 healing and removes burning.
- Potion of Invisibility: Become invisible for 1 minute. Attacking or casting spells ends the status.
- Potion of Flying: 10 turns of flying.
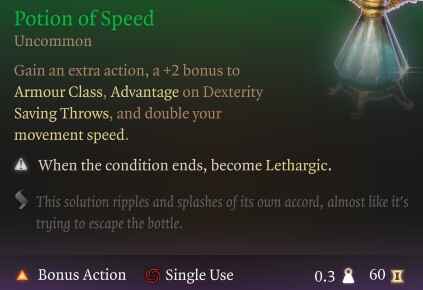
- Potion of Speed: 3 turns of an increased action via the Haste condition.
- Potion of Angelic Slumber: fall asleep for two turns, then restore all spell slots, hit points, and abilities.
- Elixir of Peerless Focus: gain advantage on concentration saves (ingredients Sublimate of Belladona, and any ashes).
- Elixir of Vigilance: gain +5 bonus initiative and you cannot be surprised (ingredients sublimate of bloodstained hook, any ashes).
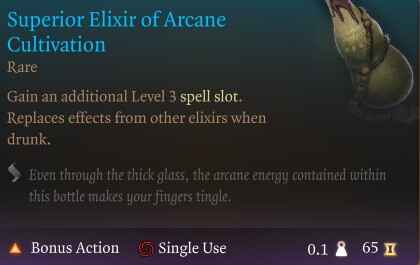
- Superior Elixir of Arcane Cultivation: gain a level 3 spell slot (ingredients Solution of Night Orchid, any Vitriol).
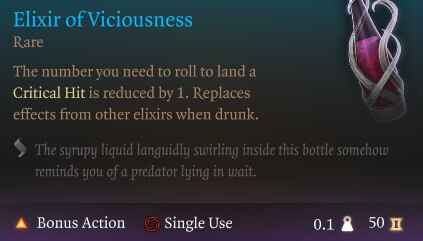
- Elixir of Viciousness: increase your critical hit chance (ingredients Vitriol of Shadowroot Sac, any Ashes).
- Elixir of Universal Resistance: gain resistance to all damage (ingredients Vitriol of Divine Miasma, any Sublimate).
Shadowheart Combat, Gameplay Tips, and Tricks
Here are 10 gameplay tips and tricks for playing the Baldur’s Gate 3: Best Shadowheart Companion Build:
- Heal Allies: Focus on healing allies vs doing damage so your heavy hitters can spend actions and bonus actions doing damage.
- Bonus Action Heal: Make the most of your bonus action heal in conjunction with primary action-based heal.
- Blessed: Cast Bless outside of combat before engaging and get a lot of turns without having to use a turn in combat.
- Crowd Control: CC opponents with Blind, and Command to take less damage overall.
- Cantrips: Use these when lacking spell slots are you’re not committed to a major offensive spell to keep some spell slots in reserve.
- Guiding Bolt: Early on this is your big nuke spell and it’s wise to use it on the first turn when teammates don’t need a heal.
- Area vs Single Target: Make sure to get the most out of each spell and if you need multiple players healed, get in position, and use an area-based heal.
- Consumables: Take advantage of a potion of speed when you need multiple actions per turn.
- Health Potions: Make sure teammates are stocked up on healing potions in case they are out of your line of sight or need massive healing themselves.
- Range: Make sure to hang out at medium range where you can melee heal or do damage but not too far back to the line of sight your teammates.
Remember, this build guide serves as a foundation, and you can always adapt it to suit your preferences and the needs of your campaign. Also, enjoy playing with the Baldur’s Gate 3: Best Shadowheart Companion Build!
Shadowheart in Patch 7 for BG3
Expect little changes to Shadowheart in Patch 7 of BG3 as only minor bug fixes and cinematics changes impact Shadowheart. On September 5th, 2024, Patch 7 for Baldur’s Gate 3 was released, bringing a massive update to the game. The developers added 13 new cinematic scenes, including some new battle sequences with the Netherbrain. The Honour Mode is also getting enhancements, with more legendary actions added to existing bosses, making the game more challenging.
However, Larian Studios’ main focus in this patch is mods. The game now features a modding toolkit and an in-game mod manager, allowing players to create and install mods directly within the game. This update is intended to hand over creative control to the community, enabling players to produce unique content and continue the story in new ways. Most of the best of Shadowheart remains the same in this build guide, giving you an enduring character and companion in Baldur’s Gate 3.
Best Baldur’s Gate 3 Shadowheart Companion Build Summary Guide
Recruit Shadowheart
- The beach next to the Abandoned Ruins
Subclass – Life Domain
Preferred Weapon: One Hand & Shield
Preferred Armor: Heavy
Race – High Half-Elf
Best Early Spell – Guiding Bolt
Best Late Spell – Planar Ally
Shadowheart Abilities Score
- Strength 10
- Dexterity 14
- Constitution 16
- Intelligence 8
- Wisdom 16
- Charisma 10
- Level 4 – +2 Wisdom
- Level 8 – War Caster
- Level 12 – +2 Wisdom
Looking For More About Baldur’s Gate 3?
Thank you for reading Baldur’s Gate 3: Best Shadowheart Companion Build Guide. We provide the latest news and create guides for Baldur’s Gate 3. Also, watch me play games on Twitch or visit my YouTube channel!