Facebook
 Reddit
 Email
Email
This guide focuses on the best Wizard build in Baldur’s Gate 3, the Conjuration subclass, and includes all components to create a powerful character.

This build page has been updated for the Patch 8 version of Baldur’s Gate 3.
Everything About the Conjuration Wizard in BG3
This build will use the Conjuration subclass, which allows for additional mobility and summon ally spells. This build does a combination of area spell damage, crowd control, and defensive spells for survival. You will want to play this build if you like summoning creatures to support you in combat and a Wizard that has high defensive survival skills.
The Wizard class in Baldur’s Gate 3 is a spellcasting class that focuses on using arcane magic to defeat their enemies and support their allies. Wizards are masters of the arcane arts, and they can learn a wide variety of spells from different schools of magic, such as Evocation, Abjuration, Necromancy, Conjuration, Enchantment, Divination, Illusion, and Transmutation. Keep reading below for more details on the Best Baldur’s Gate 3 Conjuration Wizard Build Guide.
Patch 8 Changes to Conjuration Wizard Build for BG3
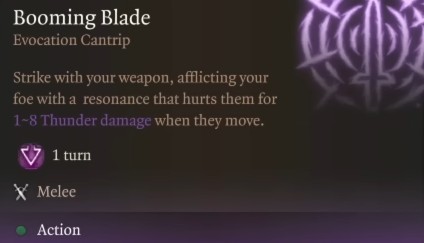
Patch 8 of Baldur’s Gate 3 brings a major shift to the Wizard class with the introduction of the Bladesinging subclass and the Booming Blade cantrip. These additions give Wizards a strong presence in melee combat, transforming them from fragile backline casters into agile, front-line duelists. Bladesinging boosts survivability with increased AC and mobility, while Booming Blade adds reliable melee damage that scales well. However, choosing this path means giving up some of the raw spellcasting power and utility offered by more traditional subclasses.
For those looking to expand this melee-focused playstyle in a different way, taking a one-level dip into Warlock (Hexblade) adds another layer of combat effectiveness. This grants access to armor and weapon proficiencies, as well as powerful cantrips like Eldritch Blast, making your Wizard more durable and versatile from the very beginning. While this hybrid build sacrifices an extra feat at Level 12, the added survivability and early combat potential more than make up for it. If this style sounds appealing, we’ll break down the build in detail below.
Conjuration Wizard Class Mechanics and Features
Here are the essential Baldur’s Gate 3 Conjuration Wizard Build features and mechanics to focus on:
- Primary Ability: Intelligence
- Saving Throws: Intelligence, Wisdom
- Subclass: Conjuration School
- Armour Proficiency: Cloth Armor
- Weapon Proficiency: Quarterstaves, Light Crossbows
- Conjuration Savant: Learning Conjuration spells from scrolls costs half as much, becoming 25 gold pieces per spell level.
- Benign Transposition Teleport: Teleport to a nearby, unoccupied space, or swap places with an ally.
- Minor Conjuration Create Water: Call forth rain. It extinguishes exposed flames and forms a Water Surface.
Wizard Spell Casting Explained
- Cantrips: are like spells, but you can cast them infinitely, and they don’t take your spell slots.
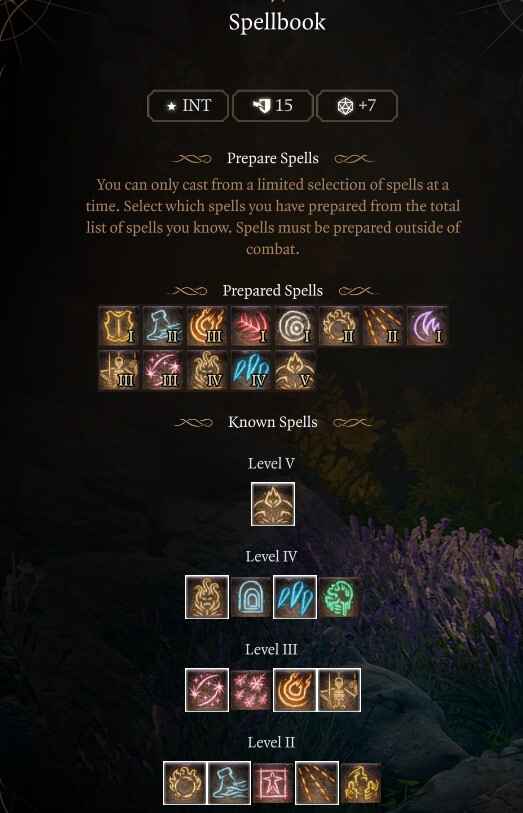
- Prepared Spells: allows you to swap in and out spells that you’ve learned in your spell book.
- Spell Slots: limited resource of spells you can cast which needs long rest to replenish.
- Arcane Recovery: a resource that allows you to recover used spell slots.
- Concentration: spells that require you to focus which can be interrupted and you can only have one active at a time.
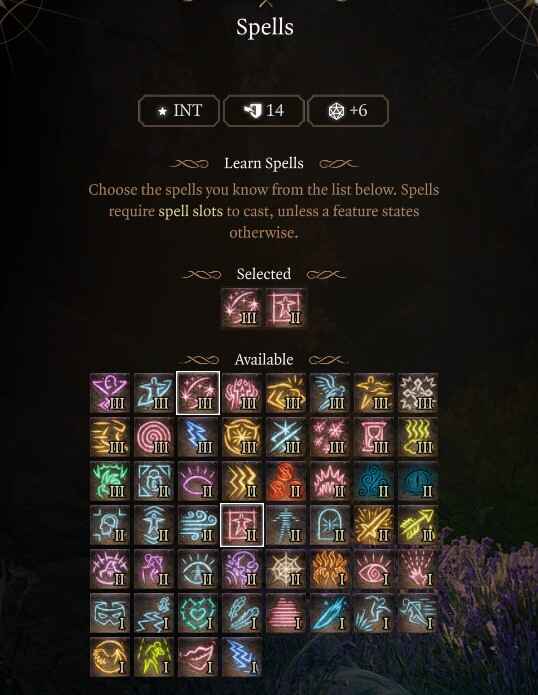
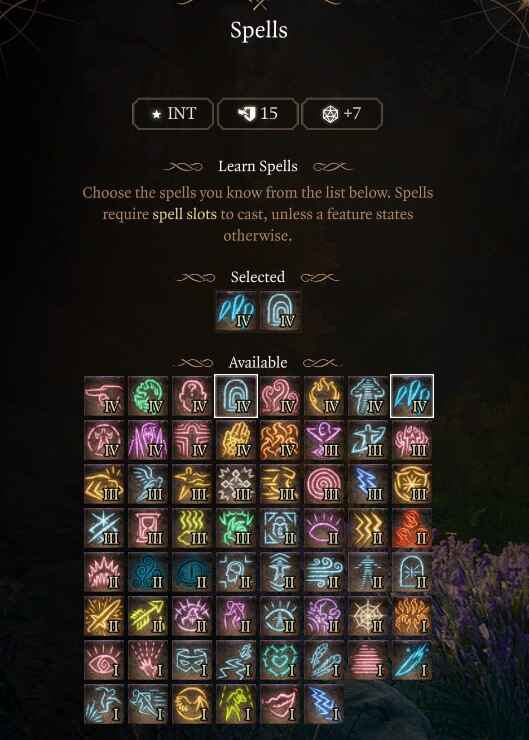
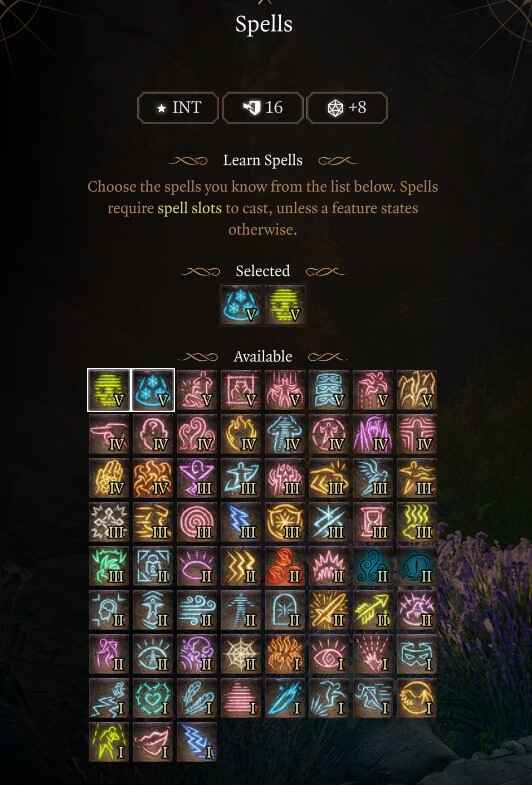
For the list of the best spells for the Wizard, look below in level progression.
Conjuration Subclass
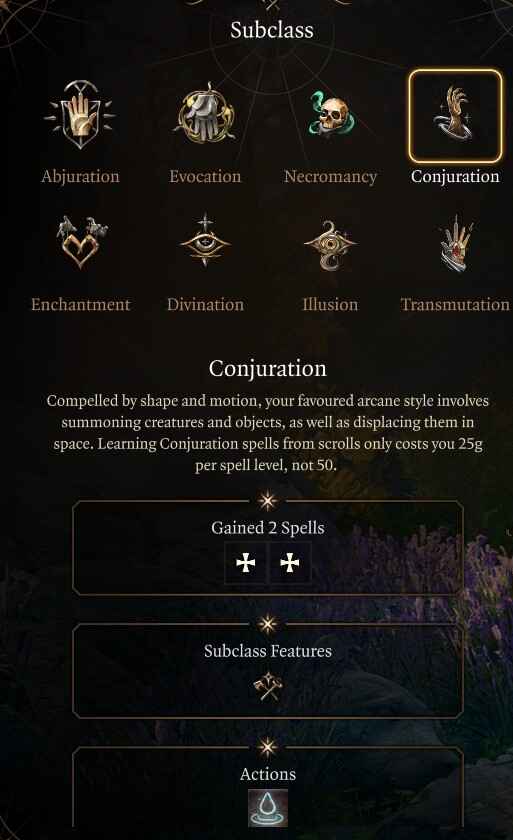
Conjuration Wizards are known for their ability to summon a wide variety of creatures from other planes of existence, such as Elementals, Fey, and Devils. These creatures can be used to fight for the Wizard, scout ahead, or even distract the enemy. Conjuration Wizards can also use their magic to teleport themselves and their allies across the battlefield, giving them a significant advantage in combat.
In addition to their summoning and teleportation abilities, Conjuration Wizards can also use their magic to create powerful objects and effects. For example, they can conjure a wall of fire to block off an enemy’s path, or they can create a fog cloud to obscure the battlefield. They can also use their magic to enhance their own weapons and armour, making them more effective in combat.
The Conjunction Wizard School subclass unlocks the following features and spells:
- Conjuration Savant (Level 2): Learning Conjuration spells from scrolls costs half as much, becoming 25 gold pieces per spell level.
- Minor Conjuration: Create Water (Level 2): Call forth rain. It extinguishes exposed flames and forms a Water Surface.
- Benign Transposition: Teleport (Level 6): Teleport to a nearby, unoccupied space, or swap places with an ally.
- Focused Conjuration (Level 10): Damage taken while you are Concentrating on a Conjuration spell will not break your Concentration.
Character Creation
| Category | Selection |
|---|---|
| Character | Origin – Custom character |
| Race | High Half-Elf |
| Racial Bonus | Darkvision, Fey Ancestry, Fire Bolt Cantrip |
| Class | Wizard |
| Subclass | Conjuration |
| Cantrips | Fire Bolt, Blade Ward, Mage Hand, Light |
| Spells | Mage Armour, Find Familiar, Thunderwave, Sleep, Magic Missile, Chromatic Orb |
| Background | Sage |
| Ability Score | STR: 8 DEX: 16 CON: 14 INT: 16 WIS: 10 CHA: 10 |
| Skill Proficiencies | Investigation and Religion |
Recommended Backgrounds for Conjuration Wizard
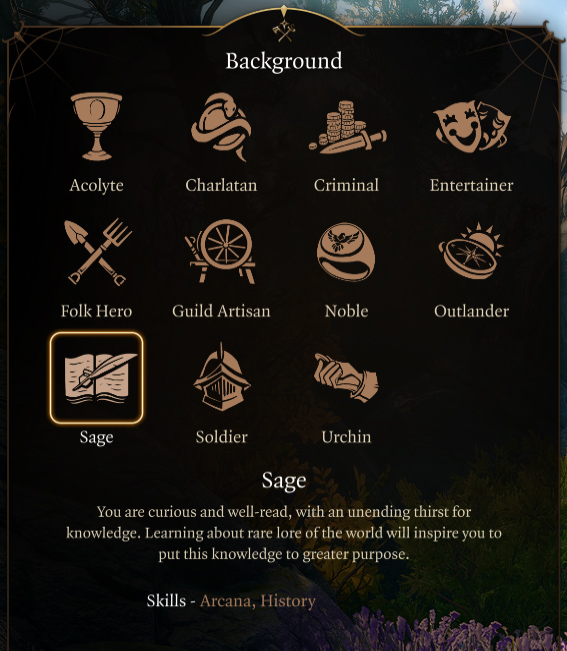
Sage is the best background for the Conjuration Wizard Build because you gain two intelligence-based skills. This choice mostly influences roleplaying and dialogue options aspects and allows you to create unique characters. Additional choices for the Best Baldur’s Gate 3 Conjuration Wizard Build are:
- Sage: Proficiency in Arcana (intelligence) and History (intelligence). You are curious and well-read, with an unending thirst for knowledge. A companion who’s a Sage background is Gale.
- Acolyte: Proficiency in Insight (wisdom) and Religion (intelligence). You have spent your life serving a temple, learning sacred rites, and providing sacrifices to the god or gods you worship. Shadowheart is an Acolyte.
- Noble: Proficiency in History (intelligence) and Persuasion (charisma). You were raised in a family among the social elite, accustomed to power and privilege. A noble companion is Minthara.
Best Race Choice for Conjuration Wizard Build

The best race is High Half-Elf because they have an extra cantrip, Darkvision, good movement speed, and Civil Militia. This helps with additional armour choices and shields and a balanced racial choice. The Human race is also useful because they have Civil Milita as well, and additional carrying capacity and skill proficiency.
| High Half-Elf | Human |
|---|---|
| Fire Bolt Cantrip | Civil Militia |
| Civil Militia | Extra Skill Proficiency |
| Darkvision | Extra Carry Capacity |
| Fey Ancestry |
The Wizard’s racial choice will not influence ability score, as everyone should get a +2 and +1 to spend regardless. This frees your race choice up to not completely hinder yourself based on ability score, but race features. Each of these races offers unique advantages that can enhance your combat prowess, survivability, or utility. Additionally, consider the roleplaying opportunities and character concepts that resonate with you.
Recommended Skills for Conjuration Wizard Build

Investigation and Religion are the best skills for our Best Baldur’s Gate 3 Conjuration Wizard Build Guide because they complement your class abilities and enhance your effectiveness in various situations. In Baldur’s Gate 3, skills represent the abilities and proficiencies of your character that allow them to perform various actions and interact with the game world. Skills are associated with specific attributes and are used to determine the success or effectiveness of certain actions or abilities. They can be edited during character creation or with companions, during respec or reroll screen.
Here are the best skills for Conjuration Wizard in Baldur’s Gate 3:
- Investigation: is an Intelligence skill used to analyze clues and solve mysteries.
- Religion: is an Intelligence skill that helps recognize deities and holy rites.
In Baldur’s Gate 3, each skill is related to a specific ability score and its effectiveness scales with the level of that score. You want to choose skills for your character that they already have a high ability score in. For example, if you want to have high Persuasion (which is used to influence dialogue choices), you need to have correspondingly high Charisma. Ideally, you want a party composition that includes a variety of high-ability scores which can give you success in different skills.
Best Conjuration Wizard Ability Scores
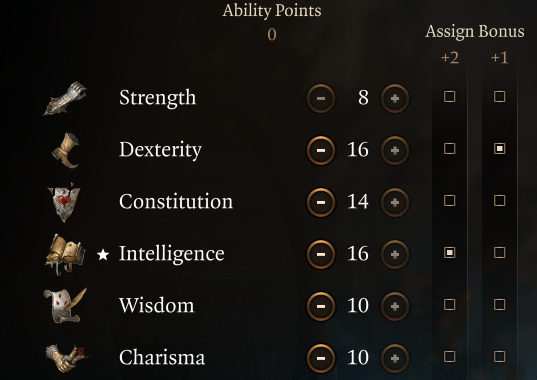
Below is the best ability score to unlock the full potential of our Best Baldur’s Gate 3 Conjuration Wizard Build Guide:
| Ability | Points Goal |
|---|---|
| Strength | 8 |
| Dexterity | 16 |
| Constitution | 14 |
| Intelligence | 16 |
| Wisdom | 10 |
| Charisma | 10 |
The best Conjuration Wizard ability score is 16 intelligence because it increases spells’ chance to land and damage along with 16 Dexterity. Dexerity and cloth will help with your Armour Class (AC), and combine 16 Dexerity with Mage Armour spell you have 16 AC at the level and a much better chance to avoid spells. Constitution will increase your health and help with concentration saving throws.
During character creation, the game will automatically distribute your abilities in the character creation abilities tab. You will need to reprioritize the stats for the chart for our Best Baldur’s Gate 3 Conjuration Wizard Build Guide. Simply use the plus-minus in the character creator and make sure you have the suggested race, or the numbers will be off.
Best Companions for Conjuration Wizard Build
The best companion for our Best Baldur’s Gate 3 Conjuration Wizard Build Guide is Lae’zeal because she’s a melee-focused damage dealer. She will engage enemies and take the pressure off your ranged-focused build, allowing you to free-cast spells. Having a heavy focus on melee will keep you in the distance while applying pressure, snaring, and debuffing the opposition.
- Lae’zeal (Fighter): damage, crowd control, and in-your-face aggression.
- Shadowheart (Cleric): buffs, healing, and control.
- Astarion (Rogue): specializes in stealth and range, disarming traps and picking locks
When putting your party together, consider companions for not only their combat prowess but also their outside ability and skills that can influence storytelling, dialogue, and exploration. A balanced party will fit the traditional RPG ‘holy trinity’: Tank, Healer, and DPS. Ideally, in Baldur’s Gate 3 you’re are going to want one tank, one healer, one melee DPS, and one range DPS. Some classes/subclasses can cover both roles, so feel free to experiment and find out what works best for you.
Conjuration Wizard Spell Slots
Here’s a chart that shows the levels and spell slots unlocked for the Wizard class in Baldur’s Gate 3:
| Wizard Level | 1st | 2nd | 3rd | 4th | 5th | 6th |
|---|---|---|---|---|---|---|
| Level 1 | 2 | 0 | 0 | 0 | 0 | 0 |
| Level 2 | 3 | 0 | 0 | 0 | 0 | 0 |
| Level 3 | 4 | 2 | 0 | 0 | 0 | 0 |
| Level 4 | 4 | 3 | 0 | 0 | 0 | 0 |
| Level 5 | 4 | 3 | 2 | 0 | 0 | 0 |
| Level 6 | 4 | 3 | 3 | 0 | 0 | 0 |
| Level 7 | 4 | 3 | 3 | 1 | 0 | 0 |
| Level 8 | 4 | 3 | 3 | 2 | 0 | 0 |
| Level 9 | 4 | 3 | 3 | 3 | 1 | 0 |
| Level 10 | 4 | 3 | 3 | 3 | 2 | 0 |
| Level 11 | 4 | 3 | 3 | 3 | 2 | 1 |
| Level 12 | 4 | 3 | 3 | 3 | 2 | 1 |
Conjuration Wizard Illithid Powers

Illithid Powers are unlocked later in the game when you learn more about the Mind Flayers and tadpoles. You can gain jars of Mind Flayer Parasite Specimens, and consume them to gain one point. This is essentially another skill tree advancement with some very strong powers. If you decide to advance this skill line, these are the choices we suggest.
Here are the best Illithid Powers for our Best Baldur’s Gate 3 Conjuration Wizard Build Guide:
| Illithid Powers | Description |
|---|---|
| Cull of the Weak | When you bring a creature down to fewer hit points than your number of evolved Illithid powers, it dies and all nearby creatures take 1-4 Psychic damage. |
| Psionic Backlash | When an enemy within 9m casts a spell, you can use your reaction to inflict ld4 Psychic damage to the caster per the spell’s level. |
| Blackhole | Area-based suck-in that slows targets. |
| Repulsor | Massive area knockback that can hit friendlies. |
| Charm | This is the priority power you want to obtain because you can force enemies to attack something else. |
Related:
Conjuration Wizard Level Progression
| Level | Class | Selection |
|---|---|---|
| 1 | Wizard | Fire Bolt, Blade Ward, Mage Hand, Light, Mage Armour, Find Familiar, Thunderwave, Sleep, Magic Missile, Chromatic Orb |
| 2 | Wizard | Subclass: Conjuration, Shield, Grease |
| 3 | Wizard | Flaming Sphere, Misty Step |
| 4 | Wizard | Feat: Ability Improvement Intelligence, Friends, Mirror Image, Scorching Ray |
| 5 | Wizard | Fireball, Animate Dead |
| 6 | Wizard | Counterspell, Hold Person |
| 7 | Conjure Minor Elemental, Sleet Storm | |
| 8 | Wizard | Feat: Magic Initiate Warlock, Eldritch Blast, Minor Illusion, Hellish Rebuke, Ice Storm, Dimension Door |
| 9 | Wizard | Conjure Elemental, Blight |
| 10 | Wizard | Dancing Light, Cone of Cold, Cloudkill |
| 11 | Wizard | Create Undead, Disintegrate |
| 12 | Wizard | Feat: Ability Improvement Intelligence, Arcane Gate, Stoneskin |
Alternative Conjuration Wizard Build
For our alternative Conjuration Wizard build, you’ll start at Level 1 by choosing the Warlock class with the Hexblade subclass. This gives you early access to two impactful cantrips, Eldritch Blast and Booming Blade, as well as proficiencies in medium armor, shields, and martial weapons. These proficiencies provide much-needed durability in the early game, allowing you to wear better gear than a standard Wizard. If you prefer to stick with traditional robes or clothing, make sure to take Mage Armour at Level 3 for added defense.
Although this guide focuses on the Conjuration school, we actually recommend pairing it with Evocation for better synergy with offensive cantrips and AOE spells. The main drawback is that you’ll miss out on an extra feat at Level 12 due to multiclassing. However, the early combat strength, added survivability, and long-term viability of your cantrips more than make up for that loss. This setup gives you a Wizard that can deal solid damage from the beginning and stay effective all the way through the endgame.
| Level | Class | Selection |
|---|---|---|
| 1 | Warlock | Subclass: Hexblade, Eldritch Blast, Booming Blade, Hex, Shield |
| 2 | Wizard | Firebolt, Mage Hand, Friends, Chromatic Orb, Magic Missile, Longstrider, Shield, Thunderwave, Find Familiar |
| 3 | Wizard | Subclass: Evocation, Mage Armour, Protection from Good and Evil |
| 4 | Wizard | Misty Step, Scorching Ray |
| 5 | Wizard | Bursting Sinew, Mirror Image, Blur, Feat: +2 Intelligence |
| 6 | Wizard | Fireball, Counterspell |
| 7 | Wizard | Haste, Glyph of Warding |
| 8 | Wizard | Conjure Minor Elemental, Ice Storm |
| 9 | Wizard | Banishment, Blight, Shocking Grasp, Feat: Spell Sniper |
| 10 | Wizard | Conjure Elemental, Cone of Cold |
| 11 | Wizard | Toll of the Dead, Hold Monster, Confusion |
| 12 | Wizard | Disintegration, Globe of Invulnerability |
Level 1

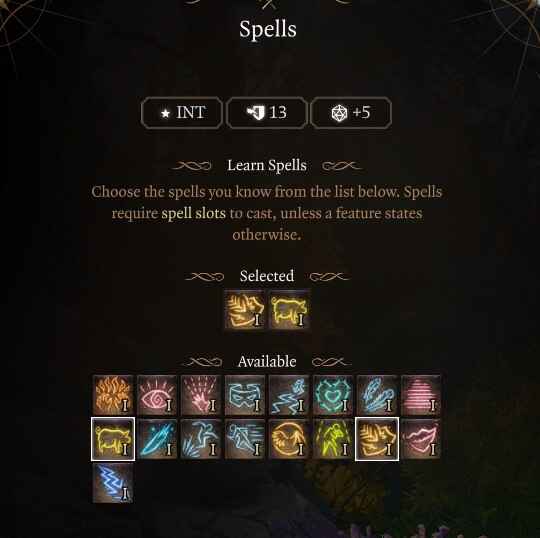
Starting at level one, follow our character creator to pick all correct background, race, skills, and ability distribution focusing on Intelligence and Dexterity. You want to use cloth armor and immediately unlock and use Mage Armor to increase Armour Class (AC). This will help you avoid attacks without wearing armour. Next, work towards finding a Quarterstaff and keep this weapon and armour loadout throughout your gameplay. You won’t be able to select your subclass on character creation and will select it at level 2.
Cantrip Selection
- Fire Bolt (racial cantrip): Hurls fireball dealing 1d10 fire damage 18m range.
- Blade Ward (cantrip selection): Take only half of the damage from Bludgeoning, Piercing, and Slashing attacks
- Mage Hand (cantrip selection): When you cast Mage Hand, the spectral hand is invisible and can carry out additional tasks
- Light (cantrip selection): Infuse an object with an aura of light. Lasts until Long Rest.
Spell Selection
- Mage Armour: Surround an unarmoured creature in a protective magical force.
- Find Familiar: Summon a familiar, fey spirit that takes an animal form of your choosing.
- Thunderwave: Release a wave of thunderous force that pushes away all creatures and objects (2d8 Thunder).
- Sleep: Put creatures into a magical slumber. Select targets up to a combined 24 hit points.
- Magic Missile: Create 3 darts of magical force, each dealing 1d4+1 Force to its target. The darts always hit their target.
- Chromatic Orb: Hurl a sphere that deals 3-24 elemental damage and possibly creates a surface on impact.
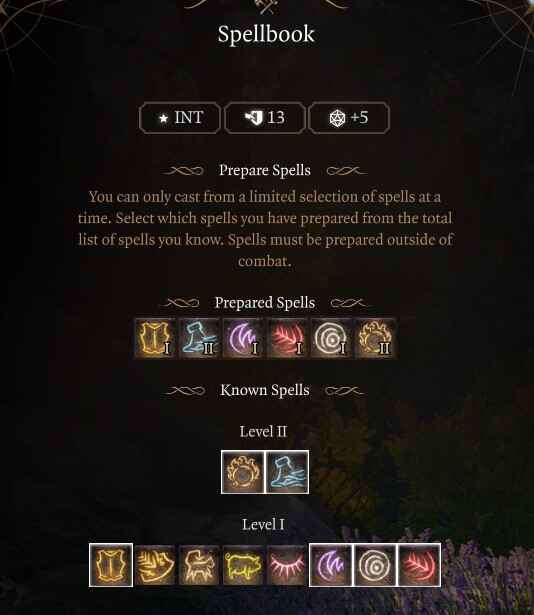
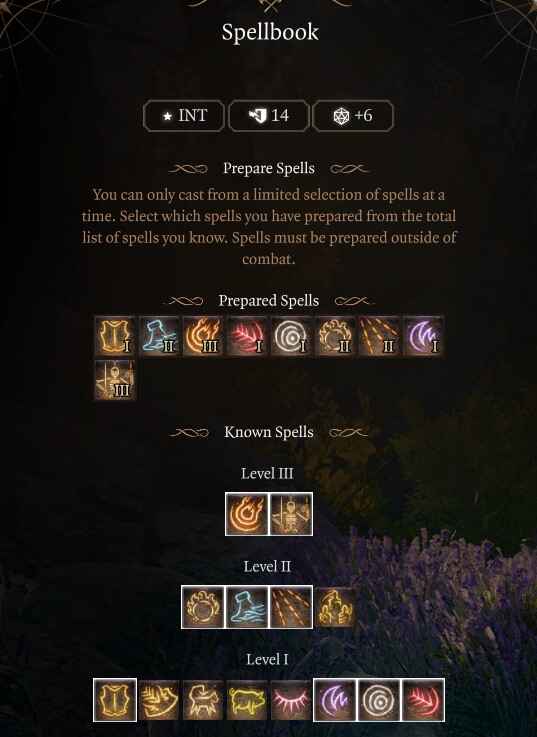
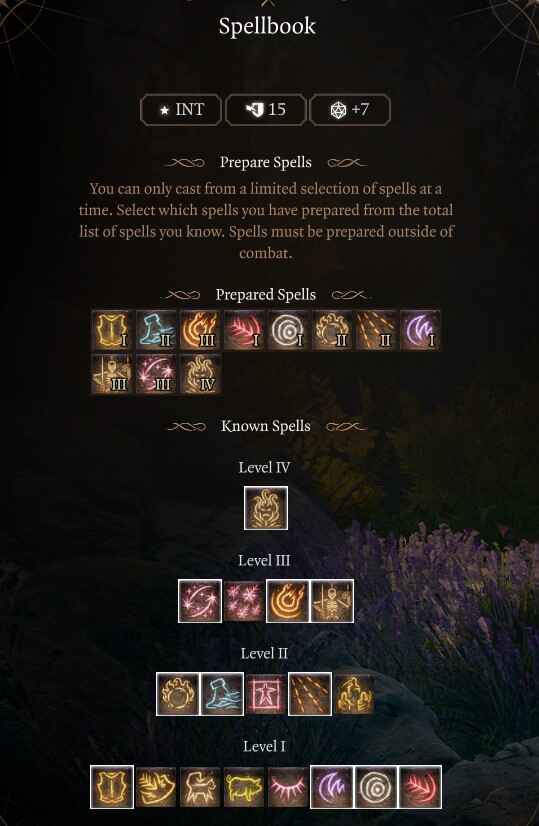
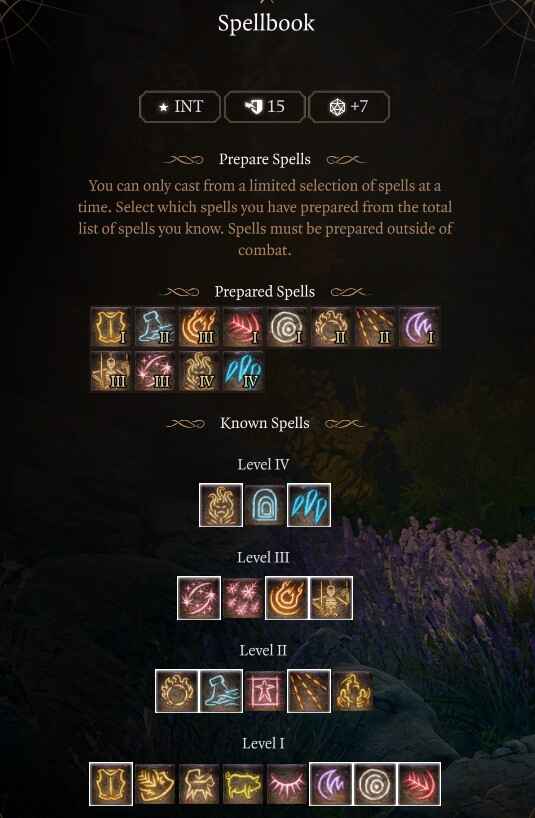
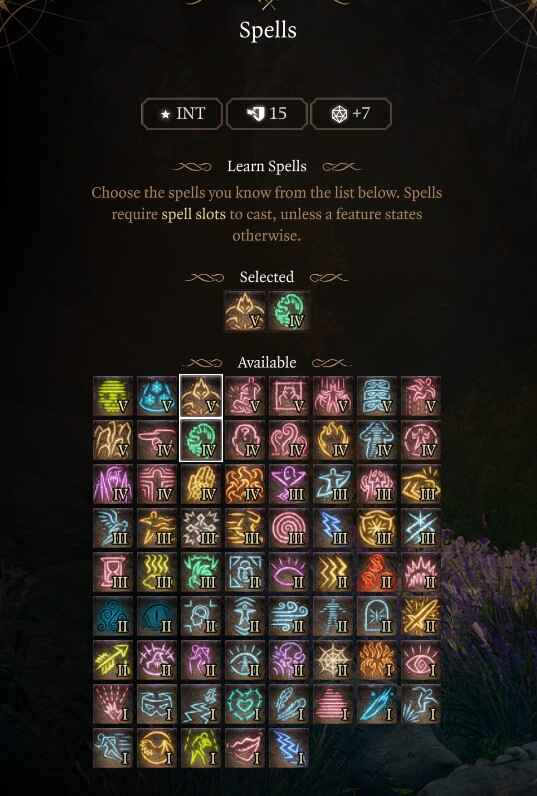
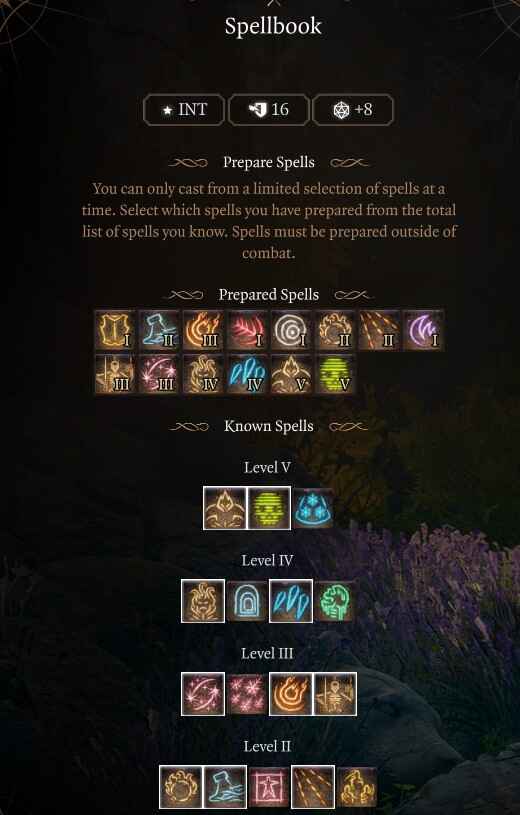
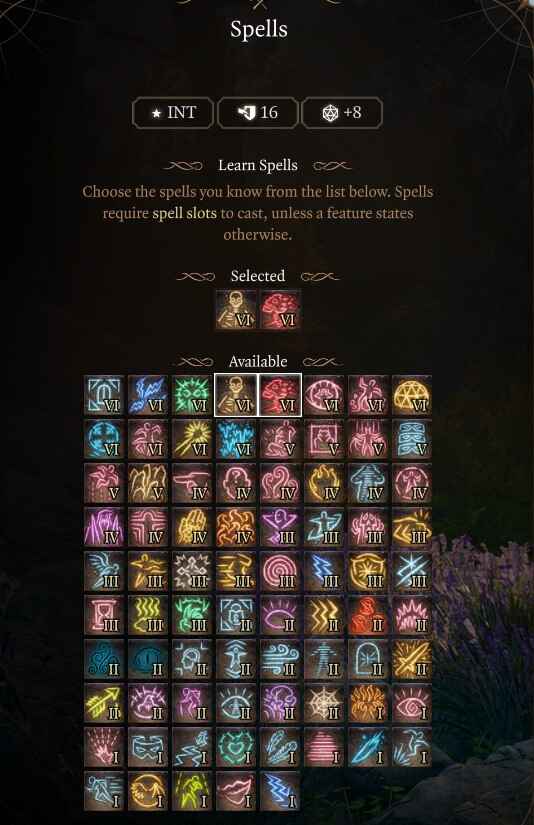
The Wizard gets a massive amount of spells and cantrips at level one and can prepare four at a time. This means you can use only four out of the six you can learn. Unlike other spellcasters, the Wizard can slot and unslot spells by opening the spellbook which gives you a lot of utility to enter in certain fights with different spell loadouts. Some fighters require more defensive spells like Shield and Mirror Image (more on them later), while others require more Mobily, area damage, single target, etc. All this to say, we list a well-rounded prepared spell loadout, but feel free to deviate from this when encountering specific fights.
Your main damage-dealing Cantrip will be Fire Bolt, which does decent damage when you don’t want to use a spell slot. Blade Ward is great for a defensive cantrip, while Mage Hand and Light are useful for utility spells generally outside of combat.
Conjuration Wizard Gameplay & Priorities
The most important thing to remember when playing a Wizard is that you use Mage Armour immediately following every long rest. This will boost your Armour Class to 16. Moreover, if you can also equip a shield, you’ll reach 18 AC. However, to equip a shield you need a race like Half-Elf or Human! Next, you want to focus on crowd control. This can be done with Sleep, Grease, and Fire Bolt combination. Additionally, you can use Thunderwave as a knockout, and Chromatic Orb for stuns. Chromatic Orb can be cast using Ice which can knock enemies prone, essentially skipping their turn. Wizards become much more powerful at level 5 but expect a slow start until you reach there. Your priorities early are:
- Complete Prologue
- Recruit Companions
- Unlock Withers, respec companions to proper class/ability score
- Collect the Necromancy of Thay (important in Act 3)
- Reached Hollowed City/Druid Grove
- Sell, Stock up, complete quests
- Unlock summons, Scratch, Shovel
- Progress to level 5
- Reach Underdark and Grymforge
- Check all Permanent Bonuses in Act 1 and the best Gear
- Act 1 Checklist for step-by-step completion
In summary, you want to have a knockback, area damage, single target damage and stuns. The default spell selection will give you this, but you can freely swap in and out spells as you learn what’s best for your party composition.
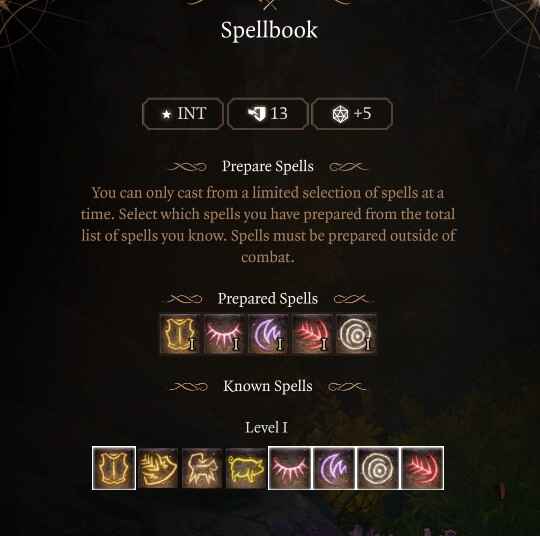
Level 1 Conjuration Prepared Spells: Mage Armour, Sleep, Thunderwave, Magic Missile
Level 2
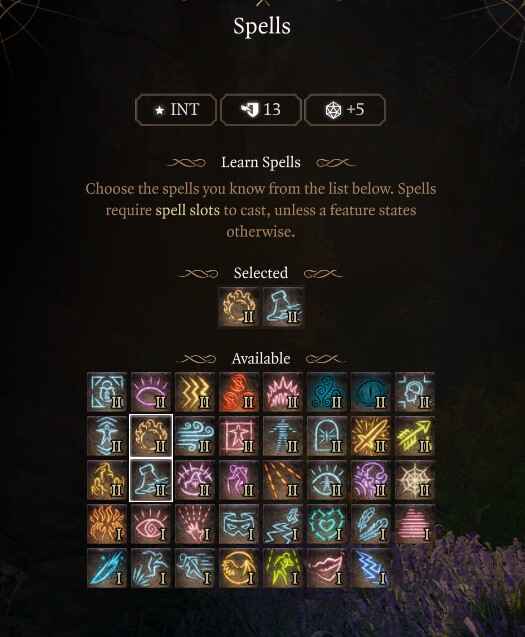
At level 2 you will get to choose your subclass, Conjuration, and should unlock two prepared spells, subclass feature and action.
- Conjuration Savant (subclass Feature): Learning Conjuration spells from scrolls costs half as much, becoming 25 gold pieces per spell level.
- Minor Conjuration: Create Water (subclass Feature): Call forth rain. It extinguishes exposed flames and forms a Water Surface.
- Shield (spell selection): When you are about to be hit by an enemy, increase your Armour Class by 5. You take no damage from Magic Missile.
- Grease (spell selection): Cover the ground in flammable grease which becomes Difficult Terrain and creatures within can fall Prone.
At this level, we add a few new tools to our Wizard. The Water spell seems weak but when you combine it with Chromatic Orb, it creates an electric effect throughout the entire area. You can also combine Chromatic Orb fire element with Grease for another huge area-based damage. Grease can be useful with Fire Bolt for the same combination along with the terrain-based chance to knock prone.
Shield is a very powerful defensive spell because it uses a reaction, not an action. When you get attacked, you can activate it for 5 more AC which will help with survival. You will see a lot of defensive spells throughout this build, but you need to swap them in or out of your prepared spellbook depending on the situation. Early in the game, the Githyanki Fighters present the biggest problem, so be prepared and focus on survival first, then damage second.
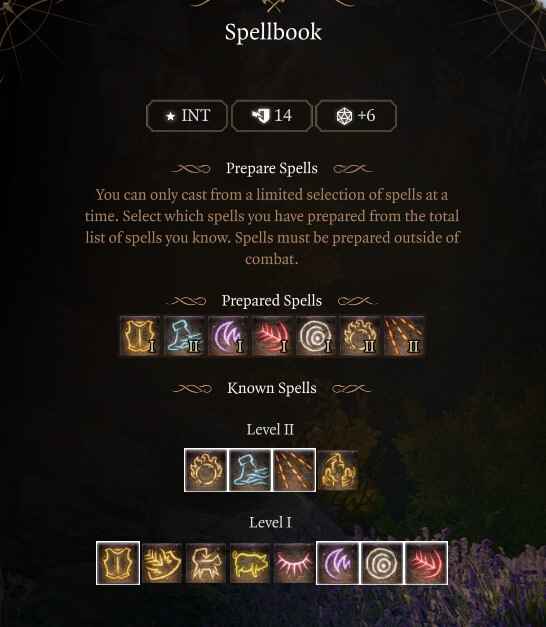
Level 2 Conjuration Prepared Spells: Mage Armour, Sleep, Thunderwave, Magic Missile, Chromatic Orb.
Level 3
Now at level 3 you will gain two level 2 spells, learn two spells, and choose one more prepared spell.
- Flaming Sphere (spell selection): Summon a flaming sphere that damages nearby enemies and objects. You can move the sphere. It emits a bright light.
- Misty Step (spell selection): Surrounded by silver mist, you teleport to an unoccupied space you can see.
We finally get access to more powerful spells and two great choices here. Drop the spell Sleep and slot both Flaming Sphere and Misty Step. Flaming Sphere is our first “summon,” and early on, this spell is powerful. The sphere acts as a distraction, can do decent damage, and plays independently of your Wizard. Flaming Sphere requires concentration, so keep in mind that you can only cast one concentration spell at a time, otherwise the previous effect, will fall off and be replaced by the new spell.
Misty Step is a powerful movement-based ability that allows you to teleport away. The strength of Misty Step is it consumes a bonus action, rather than an action. So, you can combine a powerful spell then zip away, or zip into battle, use Thunderwave to knock enemies off the ledge. Many combinations with this spell.
Level 3 Conjuration Prepared Spells: Mage Armour, Thunderwave, Magic Missile, Chromatic Orb, Flaming Sphere, Misty Step.
Level 4

Upon reaching level 4 you’ll learn one cantrip, two spells, one feat and have a total prepared spell list of seven.
- Ability improvement (feat selection): +2 to Intelligence.
- Friends (cantrip selection): Gain Advantage on Charisma Checks against a non-hostile creature. This spell can be cast while you are Silenced.
- Mirror Image (spell selection): Create 3 illusory duplicates of yourself that distract attackers. Each duplicate increases your Armour Class by 3. Whenever you successfully evade an attack, one of the duplicates disappears.
- Scorching Ray (spell selection): Hurl 3 rays of Fire, each deal 2d6 Fire damage at 18m range.
At level four we want to increase our intelligence to 18 which helps expand our spellbook. As soon as you accept this, you can slot another spell, giving us two new spell slots. You want to take Scorching Ray for a single target heavy ranged damage ability. Mirror Image is another defensive spell that can be preemptively cast and drastically increase your AC. Every time someone attacks and misses, you lose charge. This spell is very good to use when you know the pressure will be on you.
Prepare Scorching Ray and Shield at this level and experiment with what spell works better for you defensively, Shield (reaction) or Mirror Image (cast preemptively).
Level 4 Conjuration Prepared Spells: Mage Armour, Thunderwave, Magic Missile, Chromatic Orb, Flaming Sphere, Misty Step, Scorching Ray, Shield.
Level 5
When you reach level 5 as a Conjuration Wizard you gain two level 3 spells and learn two spells, with a total prepared slots of 9.
- Fireball (spell selection): Shoot a bright flame from your fingers that explode upon contact, torching everything in the vicinity 8d6 18m range 6m radius.
- Animate Dead (spell selection): Create an undead servant from a corpse. The target must be a Medium or Small corpse.
Conjuration Wizard Level 5 Gameplay
Level 5 is a big jump in power due to the spell selection. You get two spell slots for level 3 so select Fireball and Animate Dead. Drop Shield from your prepared spells and select both of these. If you encounter a tough fight where you need more defence, drop Magic Missile and Thunderwave for Shield and Mirror Image.
Fireball is a massive area-based damage spell and one of the best in the entire game. The issue is this, you can kill your friendlies with this spell unlike the Evocation Wizard. This is usually great to use turn one where enemies are clumped together and not surrounding your allies. Be careful casting, if you or teammates are highlighted in the spell radius, don’t cast!
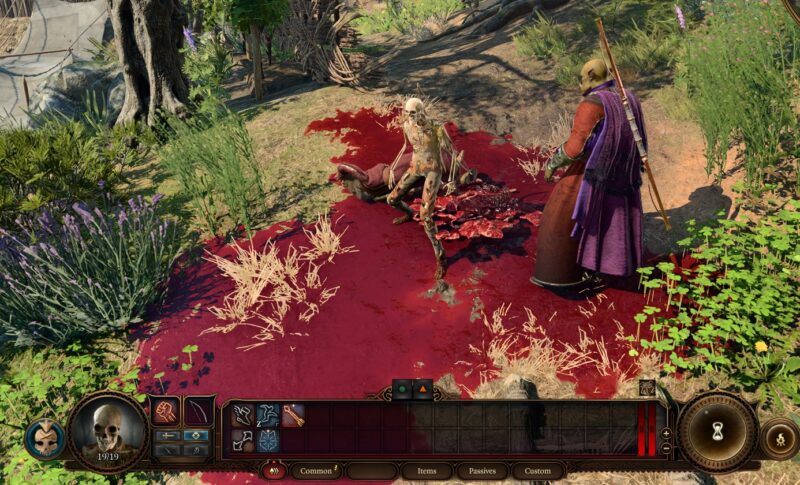
Next up is the Animate Dead spell which is “until long rest” summon skeleton. You will need to be out of combat, and it does not require concentration unlike the Flaming Sphere. Make it a practice to rest for a long time after a tough fight, then come back to the area with corpses and cast Animate Dead. A little skeleton will follow you until it dies or rests. This spell “stacks” with flaming sphere, meaning you can have both in play at once. At level 5, having two summons and Fireball drastically increases your power.
Level 5 Conjuration Prepared Spells: Mage Armour, Thunderwave, Magic Missile, Chromatic Orb, Flaming Sphere, Misty Step, Scorching Ray, Fireball, Animate Dead.
Level 6
Now that you’ve reach Level 6 you will unlock a subclass passive and two spells, with 10 prepared spells.
- Counterspell (spell selection): Nullify another creature’s spell as a reaction. The spell must be 3rd level or lower. If it is higher, you must succeed a Check to nullify it, the difficulty of which is based on the spell’s Level.
- Hold Person (spell selection): Hold a humanoid enemy still. They can’t move, act or react. Attacks from within 3m are always Critical Hits.
- Benign Transposition: Teleport (subclass feature): Teleport to a nearby, unoccupied space, or swap places with an ally.

Conjuration Wizard Level 6 Gameplay
Level 6 we get a powerful mobility tool from our subclass. The Benign Transportation Teleport action is like Misty Step except you can swap spots with enemies or allies. The range is 9m and it requires action, but this gives you a creative way to manipulate the battlefield. How I use it is finding a pesky ranged damage dealer, and swap places with them to bring them closer to a fighter or melee companion on my team. Note on how this spell replenish is from casting other conjuration spells, so you can use this multiple times. Spells like Find Familiar, Misty Step, etc. will replenish after a use.
We learn two new spells and the first is Counterspell. This is another reaction based spell and can shutdown an opposing spell caster. You have the chance to negate their spell which doesn’t seem powerful until your main character gets put to sleep or hold person and you lose a fight. Save a level 3 spell slot free just in case you have to cast this spell with a reaction.
The next spell is a crowd control spell Hold Person. Typically, we don’t cast many crowd control spells but this will be very helpful on specific targets that can wipe your group. It’s suggested to cast this with a 60% or higher chance so you don’t waste your turn. You are at the half way point in levels for the Best Baldur’s Gate 3 Conjuration Wizard Build Guide.
Ending Act 1 with a Conjuration Wizard
By Level 6 you should be close to completing Act 1 content. Make sure to visit vendors and stock up on camp and alchemy supplies. Additionally, look over the best Act 1 items. There are also permanent bonuses you can get Act 1. Lastly, Grymforge has powerful armor and weapons (Adamantine) that can aid you well into Act 3. Consider taking the time to craft some items before transitioning to Act 2, because you won’t be able to come back to this map.
Level 6 Conjuration Prepared Spells: Mage Armour, Thunderwave, Magic Missile, Chromatic Orb, Flaming Sphere, Misty Step, Scorching Ray, Fireball, Animate Dead, Counterspell.
Level 7

Once you’ve hit level 7 you’ll receive one level 4 spell slot, and can choose two new spells for a total of 11 prepared spells.
- Conjure Minor Elemental (prepared spell): Conjure a minor elemental to fight alongside you.
- Sleet Storm (prepared spell): Call forth a storm that disrupts the Concentration of spellcasters, douses fires, and creates an ice surface.
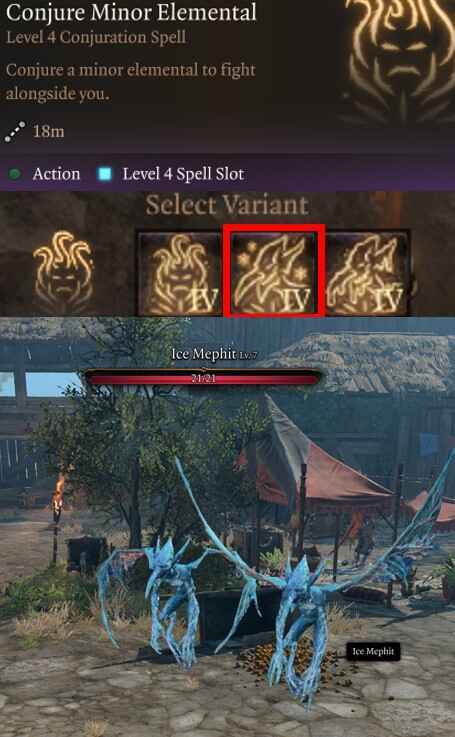
Level 7 gives us only one level 4 spell slot not two, so we will take one level 4 spell and one level 3. Conjure Minor Elemental is another summon spell that stacks with animate dead and flaming sphere. You can pick various monsters and I suggest Ice Mephits because they do range damage, can knock enemies prone, and explode when they die. These critters, just like your skeleton, will follow you until long rest. So, expect to spend some time summoning creatures every long rest and don’t forget Mage Armour!
Next is the Sleet Storm spell, which you can slot if you need more area-based damage. This spell requires concentration but can help lock down a massive area and its conjuration spell. This will help recharge your teleport and crowd control an area though Fireball is the general area-based damage spell.
Level 7 Conjuration Prepared Spells: Mage Armour, Thunderwave, Magic Missile, Chromatic Orb, Flaming Sphere, Misty Step, Scorching Ray, Fireball, Animate Dead, Counterspell, Conjure Minor Elemental.
Level 8

Unlock another level 4 spell slot, 2 spells, one feat, and 12 prepared spells.
- Ice Storm (spell selection): Impel a storm of hail ice to crash from the sky, covering the ground and striking all objects and creatures within range.
- Dimension Door (spell selection): Teleport yourself and up to 1 adjacent ally to a place you can see. The ally cannot be larger than medium.
- Magic Initiate Warlock (feat selection): You learn two cantrips and a Level 1 spell from the warlock spell list. You can cast the Level 1 spell once per Long Rest. Your Spellcasting Ability for all 3 spells is Charisma.
- Eldritch Blast (cantrip selection): Conjure 1 beam(s) of crackling energy for 1~10 of Force damage.
- Minor Illusion (cantrip selection): Create an illusion that compels nearby creatures to investigate.
- Hellish Rebuke (spell selection): React to your next attacker with flames that deal 2~20 Fire damage.
On Level 8 we unlock the important feat Warlock Initiate which gives us the Eldritch Blast cantrip and Hellish Rebuke. Eldritch Blast is a very powerful cantrip that helps when we need force damage, or we are out of spell slots. Hellish Rebuke is handy because it returns fire when attacked. You can have many reaction-based spells like Hellish Rebuke, Shield, Counterspell, and play very defensively even wearing clothes.
For spell selections, Ice Storm is another massive area-based damage spell while Dimension Door is a conjuration teleportation type of spell. I suggest preparing Ice Storm for more area damage, letting your summons do a lot of damage for you passively at this level.
Level 8 Conjuration Prepared Spells: Mage Armour, Thunderwave, Magic Missile, Chromatic Orb, Flaming Sphere, Misty Step, Scorching Ray, Fireball, Animate Dead, Counterspell, Conjure Minor Elemental, Ice Storm.
Level 9
At Level 9 a Conjuration Wizard will unlock one level 5 spell and learn two new spells, for a total of 13 prepared spells.
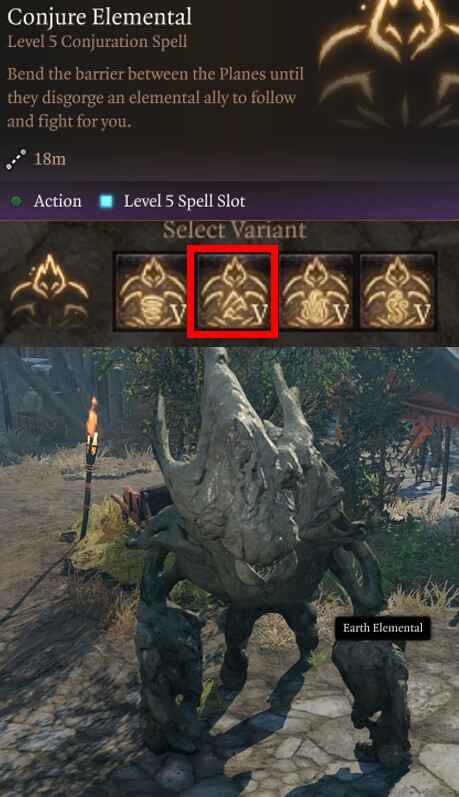
- Conjure Elemental (spell selection): Bend the barrier between the Planes until they disgorge an elemental ally to follow and fight for you.
- Blight (spell selection): Plants take maximum damage from this spell, and have Disadvantage on the Saving Throw against it.
At this level, we get yet another summon spell Conjure Elemental. This is an upgraded version of Minor Elemental, but you can cast both, alongside Animate Dead to have 4 summonses fighting for you. You can even cast Flaming Sphere for yet another, during combat. I suggest using the Earth Elemental because it has 126 health and area-based damage and a knockback. This thing can soak up massive damage for you cause havoc on the enemy and last until a long rest!
Since you only have one level 5 spell slot at this level, consider taking Blight. This is a helpful single-target spell, and if you feel the build lacks a single-target damage spell, slot Blight instead of an area-based spell. Again, feel free to change spells to suit your needs and adjust for the Best Baldur’s Gate 3 Conjuration Wizard Build Guide.
Level 9 Conjuration Prepared Spells: Mage Armour, Thunderwave, Magic Missile, Chromatic Orb, Flaming Sphere, Misty Step, Scorching Ray, Fireball, Animate Dead, Counterspell, Conjure Minor Elemental, Ice Storm, Conjure Elemental.
Level 10
Upon reaching Level 10 you will unlock a subclass feature, another level 5 spell slot, two spells, one cantrip, and have a total of 14 prepared spells.
- Dancing Light (cantrip selection): Illuminate a 9m radius. Requires concentration.
- Cone of Cold (spell selection): Make a flurry of frost, crisp air, and condensed snow crystals erupt from your hands.
- Cloudkill (spell selection): Craft a large cloud that inflicts 5∼40 Poison damage per turn. You can reposition the cloud every turn.
- Focused Conjuration (subclass feature): Damage taken while you are Concentrating on a Conjuration spell will not break your Concentration.
At level 10 we get another level 5 spell slot, and you can learn more spells. Cone of Cold is another area-based damage spell, but it shoots out from you and is easier to avoid friendly fire. Cloudkill is a conjuration spell that deals poison damage in a massive 6m radius. The nice thing about this spell is it persists after you cast it as long as you can maintain concentration and will completely disrupt the enemy if placed in the correct area.
Conjuration Wizard Level 10 Prepared Spells: Mage Armour, Thunderwave, Magic Missile, Chromatic Orb, Flaming Sphere, Misty Step, Scorching Ray, Fireball, Animate Dead, Counterspell, Conjure Minor Elemental, Ice Storm, Conjure Elemental, Cloudkill.
Level 11
At Level 11 you unlock one Level 6 spell slot and can learn two more spells.
- Create Undead (spell selection): Raise a corpse as a heinous mummy that fights by your side. The target must be a Medium or small corpse.
- Disintegrate (spell selection): Shoot a thin green ray from your finger. If the 50∼100 Force damage reduces the target to 0 hit points, it disintegrates into a crumbly ash.

Conjuration Wizard Level 11 Gameplay
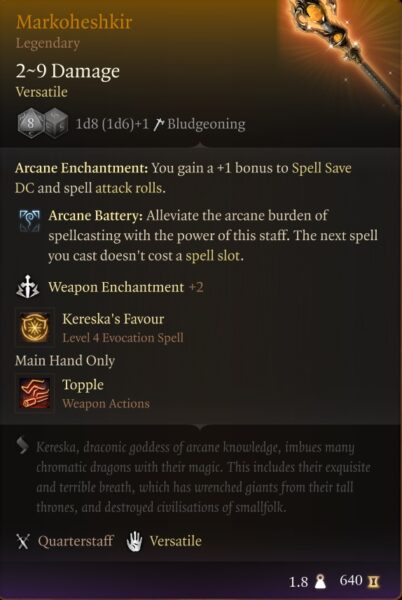
At level 11 you unlock level 6 spell slots and will only learn one throughout the game. However, the legendary staff in the beginning of Act 3 Markoheshki, can bypass this limitation. Markoheshki can negate a spell slot, essentially giving you two level 6 spell slots. This makes it one of the best weapons in the game because you can cast two ultra-powerful level 6 spells per long rest. You need to make it your priority at the end game to unlock this staff for this reason.
The spell we select at this level will naturally be Create Undead. This is an enhanced version of Animate Dead and all of the summons including this one stack. So expect a lot of work after every long rest, but the power of your summons and companions is staggering at this point plus you can use them until long rest.
The second spell to select here is Disintegrate which is the best single-target damage spell in the game. Our spell tool kit has many area based spells, so fitting this in with a level 6 spell is the go-to play here. You will only be able to use this if you collect the Markoheshki since every long rest you should be using Create Undead spell post-long rest.
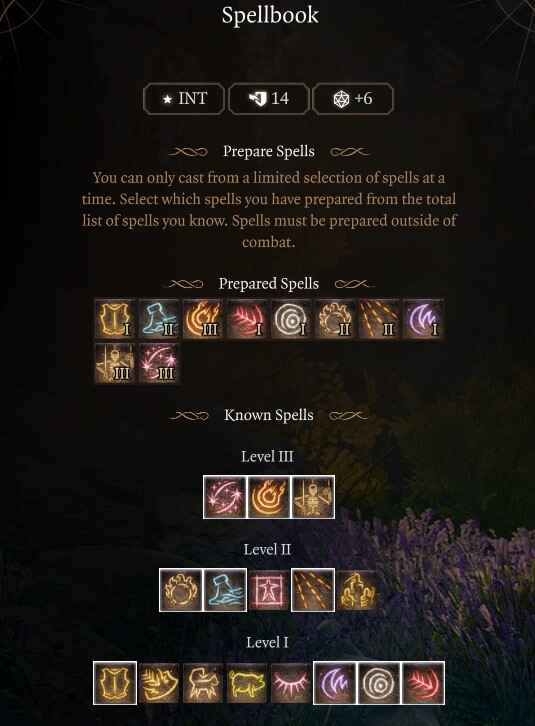
Level 11 Conjuration Prepared Spells: Mage Armour, Thunderwave, Magic Missile, Chromatic Orb, Flaming Sphere, Misty Step, Scorching Ray, Fireball, Animate Dead, Counterspell, Conjure Minor Elemental, Ice Storm, Conjure Elemental, Cloudkill, Create Undead.
Level 12

You’ve reached the final level with the Best Baldur’s Gate 3 Conjuration Wizard Build Guide! The Conjuration Wizard will learn 2 spells, 1 new feat, and have 17 prepared spells if you followed this guide.
- Arcane Gate (spell selection): Create two linked teleportation portals.
- Stoneskin (spell selection): Turn a creature’s flesh hard as stone. It takes only half the damage of all non-magical Bludgeoning, Piercing, and Slashing damage.
- Ability Improvement (feat selection): Add +2 Intelligence
You’ve reached the maximum level of 12 with your Conjuration Wizard in Baldur’s Gate 3! Select Arcane Gate as another utility spell and Stoneskin for another defensive spell. Stoneskin is a concentration-based spell and level 4 spell so you can use it immediately post long rest entering a tough fight with marital weapon-based users.
Here’s a summary of spells for your Conjuration Wizard:
- Single target damage: Magic Missile, Scorching Ray, Blight, Disintegrate
- Area damage: Chromatic Orb, Fireball, Ice Storm, Cloudkill
- Defensive: Shield, Mage Armour, Mirror Image, Counterspell
- Crowd Control: Hold Person, Sleep, Clouldkill
- Mobility: Misty Step, Benign Transposition Teleport
Make sure to scroll down to the gear sections for more details.
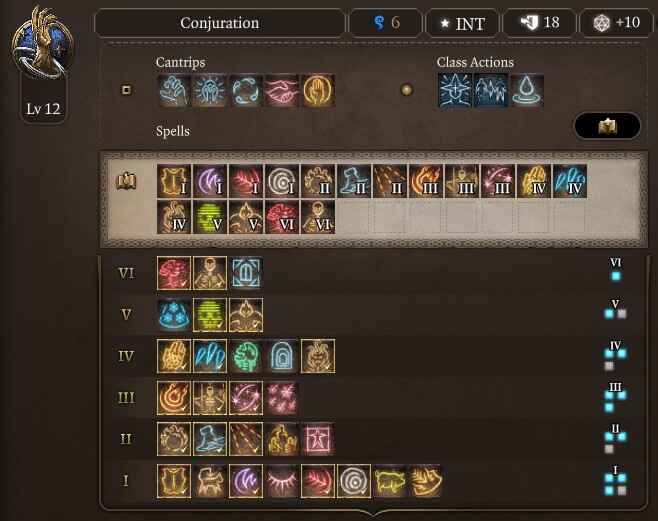
Level 12 Conjuration Prepared Spells: Mage Armour, Thunderwave, Magic Missile, Chromatic Orb, Flaming Sphere, Misty Step, Scorching Ray, Fireball, Animate Dead, Counterspell, Conjure Minor Elemental, Ice Storm, Conjure Elemental, Cloudkill, Create Undead, Disintegrate, Stoneskin.
Best Gear for Wizard Build
In Games like Baldur’s Gate 3, you’ll explore the world, loot chests and your enemies’ dead bodies, and complete quests, and all those activities can reward you with useful items, potions, armor, weapons, scrolls, and much more. Progression and finding new gear are part of the game, and you will organically get more powerful weapons during your journeys.
Beginner: Starting the Game

Here’s the best beginner gear for the Conjuration Wizard Build in Baldur’s Gate 3:
| Gear Slot | Best Gear Item | Effect |
|---|---|---|
| Head | Circlet of Blasting | Free Scorching Ray |
| Cape | – | |
| Chest | The Protecty Sparkswall | +1 Spell Saves |
| Gloves | Gloves of Cinder and Sizzle | Free Scorching Ray |
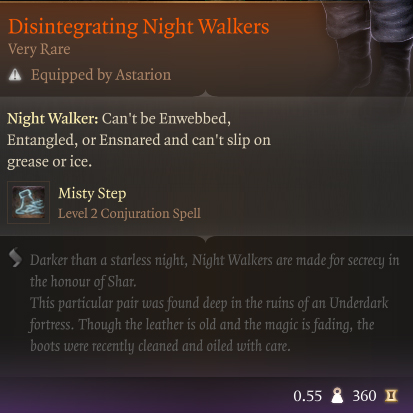
| Boots | Disintegrating Night Walkers | Mobility & Misty Step |
| Necklace | Amulet of Misty Step | Free Misty Step |
| Ring | Ring of Absolute Force | Free Thunderwave |
| Ring | Fetish of Callarduran Smoothhands | Free Invisibility |
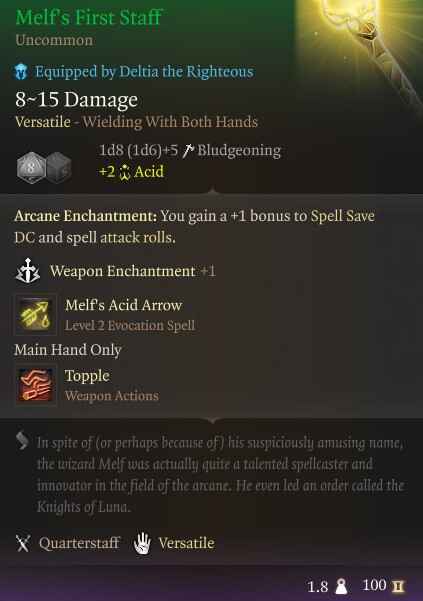
| Weapon 1 Main Hand | Melf’s First Staff | Free Acid Arrow |
| Weapon 1 Off-Hand | Adamantine Shield | +2 AC (Half-Elf or Human) |
| Weapon 2 Ranged | Bow of Awareness | +1 Initiative |
Below are the Best Act 1 Clothing, Weapons, and Equipment for the Conjuration Wizard in BG3:
- Circlet of Blasting: Sold by Blurg in the Myconid Colony (Alternative Haste Helm).
- The Protecty Sparkswall: Looted in Gilded Chest in Grymforge X: -645 Y: 360 (Alternative Poisoner’s Robe).
- Gloves of Cinder and Sizzle: Sold by Lady Esther at Rosymorn Monastery Trail (Alternative Gloves of Missile Snaring, or Gloves of Hail of Thorns).
- Disintegrating Night Walkers: Found in Underdark from Ne’re NPC (Alternative Cinder Shoes or Boots of Speed).
- Amulet of Misty Step: Found in a Gilded Chest (X386 Y8) in Defiled Temple (Alternative Moondrop Pendant).
- Ring of Absolute Force: Dropped by Sergeant Thrinn in Grymforge (Alternative Ring of Colour Spray).
- Fetish of Callarduran Smoothhands: Found in Grymforge Abandoned Refuge (Alternatives The Sparkswall, or Sunwalker’s Gift if Human).
- Melf’s First Staff: Sold by Blurg in the Myconid Colony (Alternatives The Spellsparkler, or Staff of Crones).
- Adamantine Shield Complete the Adamantine Forge Quest in Grymforge use if Human or Half-Elf Race (Alternatives Glowing Shield, or Wood Woad Shield).
- Bow of Awareness: Sold by Vendor Roah Moonglow in the Shattered Sanctum. You can use it even without proficiency for extra initiative!
Advanced: End-Game

The following table presents the best advanced and end-game gear for the Conjuration Wizard Build in Baldur’s Gate 3:
| Gear Slot | Best Gear Item | Effect |
|---|---|---|
| Head | Hood of the Weave | +2 Spell Save & Roll |
| Cape | Cloak of the Weave | +1 Spell Save & Roll |
| Chest | Robe of the Weave | +2 AC, Saving Throw |
| Gloves | Quickspell Gloves | Cantrips Bonus Action |
| Boots | Helldusk Boots | Mobility & Hellcrawler |
| Necklace | Spellcrux Amulet | Restore spell slot |
| Ring | Killer’s Sweetheart | Auto Critical |
| Ring | Shifting Corpus Ring | Free Invisibility and Blur |
| Weapon 1 Main Hand | Markoheshkir | Free Spells, +1 Roll |
| Weapon 1 Off-Hand | Viconia’s Walking Fortress | If Human/Half-Elf |
| Weapon 2 Ranged | Darkfire Shortbow | Free Haste Spell |
Below is the best Act 3 Armor, Weapons, and Equipment for Conjuration Wizard in BG3:
- Hood of the Weave: Sold by Mystic Carrion in Philgrave’s Mansion during Act 3 (Alternative Helldusk Helmet, or Mask of Soul Perception).
- Cloak of the Weave: Sold by Helsik at the Devil’s Fee (Alternative Cloak of Protection).
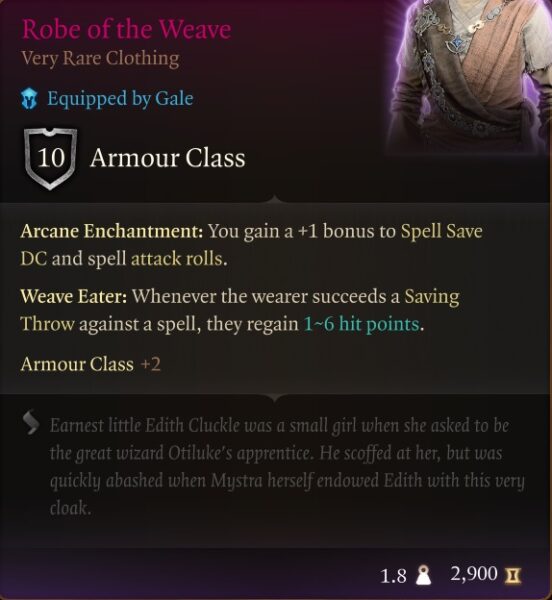
- Robe of the Weave: 1 At Ramazith’s Tower (Alternative Helldusk Armour, or Robe of Supreme Defences).
- Quickspell Gloves: Purchased at Lorroakan’s Projection at Sorcerors’s Sundries (Alternative Helldusk Gloves, or Gemini Gloves).
- Helldusk Boots: Gilded Chest on the top floor of Wyrm’s Rock Fortress (Alternative Disintegrating Night Walkers).
- Spellcrux Amulet: Drop by The Warden in Moonrise Towers Prison X: 569 Y: -650 (Alternative Amulet of Greater Health).
- Killer’s Sweetheart: Obtained from the Gauntlet of Shar in Act 2 (Alternative Ring of Protection, Risky Ring).
- Shifting Corpus Ring: Drop by Fist Marcus at the Last Light Inn (Alternative Ring Of Regeneration, or Crypt Lord Ring).
- Markoheshkir: At Ramazith’s Tower (Alternatives Staff of Spellpower, or Incandescent Staff).
- Viconia’s Walking Fortress: Looted from Viconia DeVir during Shadowheart’s companion quest (Alternative Shield of Devotion).
- Darkfire Shortbow: Sold by Dammon Last Light Inn Act 2 (Alternative Gontr legendary bow).
Best Wizard Consumables, Potions, and Items
The following list represents the best individual use consumable items that will aid in our Best Baldur’s Gate 3 Conjuration Wizard Build Guide:
- Potion of Greater Healing: 8d4 + 8 healing and removes burning.
- Potion of Invisibility: Become invisible for 1 minute. Attacking or casting spells ends the status.
- Potion of Flying: 10 turns of flying.
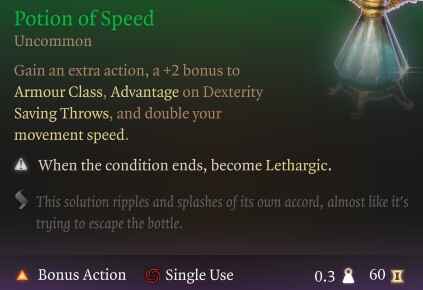
- Potion of Speed: 3 turns of an increased action via the Haste condition.
- Potion of Angelic Slumber: fall asleep for two turns, then restore all spell slots, hit points, and abilities.
- Elixir of Bloodlust: Once per turn when you kill a foe, you gain HP 5 temporary hit points and an additional action.
- Elixir of Peerless Focus: gain advantage on concentration saves (ingredients Sublimate of Belladona, and any ashes).
- Elixir of Vigilance: gain +5 bonus initiative and you cannot be surprised (ingredients sublimate of bloodstained hook, any ashes).
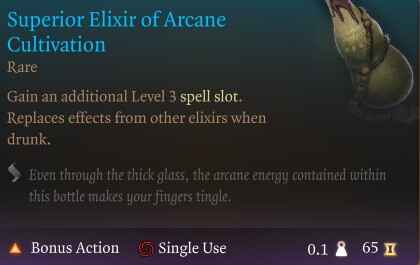
- Superior Elixir of Arcane Cultivation: gain a level 3 spell slot (ingredients Solution of Night Orchid, any Vitriol).
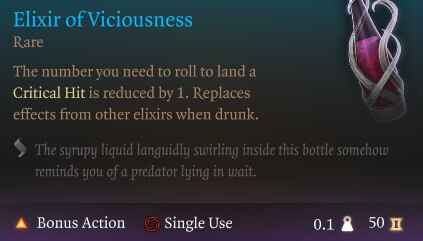
- Elixir of Viciousness: increase your critical hit chance (ingredients Vitriol of Shadowroot Sac, any Ashes).
- Elixir of Universal Resistance: gain resistance to all damage (ingredients Vitriol of Divine Miasma, any Sublimate).
Permanent Bonuses

Throughout Baldur’s Gate 3, you will have the ability to gain permanent bonuses to your character. These can grant additional spells, ability scores, and other bonuses. Permanent Bonuses are not displayed throughout the campaign but are vital to increase overall combat performance. We have all permanent bonuses here in a guide, but the most important ones for you to collect are listed below.
| Act 1 | Act 2 | Act 3 |
|---|---|---|
| Auntie Ethel’s Hair: Gain +1 to an Ability Score. | Potion of Everlasting Vigour: Gain +2 Strength. | Mirror of Loss – +2 to an Ability Score of your choice. |
| Awakened: Use illithid powers as a Bonus Action. | Slayer Form: Ability to transform into the Slayer. | Partial Ceremorphosis: Access to tier 3 illithid Powers. |
| Scratch: Gain Find Familiar Scratch. | Summon Us: Allows you to summon Us. | Sweet Stone Features: Blessed permanent. |
| Cheeky Quasit: Gain Summon Quasit Shovel. | Statue of the Gods: +2 to Saving Throws | |
| Loviatar’s Love: 30% Hit Points or less, you gain a +2 bonus to Attack Rolls and Wisdom saving throws. | ||
| Necromancy Of Thay: access to powerful spells in Act 3. | ||
| Volo’s Ersatz Eye: See Invisibility |
Best Permanent Bonuses for Conjuration Wizard in Baldur’s Gate 3
Conjuration Wizard Gameplay Tips and Tricks
Below is a list of 10 gameplay tips and tricks for the Best Baldur’s Gate 3 Conjuration Wizard Build Guide:
- Summon: make sure to summon allies to fight for you as it’s the premise of the build!
- Mobility: Misty Step is your best mobility tool so save a level 2 spell slot for it.
- Teleport: You can gain another teleport with your subclass at level 6 and it recharges by using conjuration spells.
- Potions: Consider potion of speed a game changer because you get an additional action for 3 turns.
- Stack Summons: as you level, cast multiple elementals and dead because they stack together.
- Elements: Use different elements to light the ground on fire or electrocute the area.
- Prepare: Feel free to change your spells in between fights depending on your playstyle and needs.
- Cantrips: Use cantrips frequently when starting because your spell slots will be limited.
- Long Rest: cast your summons and Mage Armour post every long rest.
- Cloth: Make sure to never wear armour or it will lower your AC and mess up set bonuses.
Remember, this build guide serves as a foundation, and you can always adapt it to suit your preferences and the needs of your campaign. Enjoy playing as a formidable Best Baldur’s Gate 3 Conjuration Wizard Build Guide!
Conjuration Wizard Changes in Patch 7 for BG3
The release of Patch 7 for BG3 brought with it no significant combat, gameplay, or build-related change for the Conjuration Wizard. Furthermore, the game now features a modding toolkit and an in-game mod manager, allowing players to create and install mods directly within the game. It enables players to produce unique content and continue the story in new ways.
Baldur’s Gate 3 Conjuration Build Summary Guide
Subclass: Conjuration School
Armor: Cloth
Weapons: Quarterstaff & Shield
Background – Sage
- Strength – 8
- Dexterity – 16
- Constitution – 14
- Intelligence – 16
- Wisdom – 10
- Charisma -10
Level Progression
- Level 1 – Chromatic Orb Spell
- Level 2 – Shield Spell
- Level 3 – Flaming Sphere and Misty Step Spells
- Level 4 – Feat +2 Intelligence
- Level 5 – Fireball Spell
- Level 6 – Counterspell
- Level 7 – Conjure Minor Elemental Spell
- Level 8 – Feat Magic Initiate: Warlock
- Level 9 – Conjure Elemental Spell
- Level 10 – Cone of Cold Spell
- Level 11 – Disintegrate Spell
- Level 12 – Feat +2 Intelligence
Looking For More About Baldur’s Gate 3?
Thank you for reading Best Baldur’s Gate 3 Conjuration Wizard Build Guide. We provide the latest news and create guides for Baldur’s Gate 3. Also, watch me play games on Twitch or visit my YouTube channel!