Facebook
 Reddit
 Email
Email
This guide focuses on the best Monk build in Baldur’s Gate 3, the Way of the Four Elements subclass, and includes all components to build a powerful character.

This build page has been updated for the Patch 8 version of Baldur’s Gate 3.
Monk Class Guide
The Monk build Baldur’s Gate 3 is a skilled and disciplined martial artist, who harnesses their body’s inner energy to perform incredible feats of physical prowess and spiritual enlightenment. Monks are known for their unarmed combat, swift movement, and unique mystical abilities.
For the Best Baldur’s Gate 3 Way of the Four Elements Monk Build Guide, we will select the Way of the Four Elements subclass which unlocks spell casting. The Way of the Four Elements Monk is a powerful class, but it can be difficult to master. You need to carefully manage your ki points and choose your elemental disciplines wisely. If you can do this, you can become a force to be reckoned with.
Patch 8 Changes to Way of the Four Elements Monk for BG3
Patch 8 introduced major changes to the Monk class in Baldur’s Gate 3, including a series of balance tweaks and the exciting addition of a brand-new subclass. The Way of the Drunken Master brings a fresh, chaotic playstyle that revolves around unpredictable movement and disorienting enemies. This subclass amps up a Monk’s mobility and crowd control, with abilities like “Drunken Technique” for smooth evasive maneuvers and “Tipsy Sway” making them harder to pin down during battle, creating a truly dynamic and slippery fighter on the field.
Overall, there are no changes to the playstyle or build for a Way of the Four Elements Monk in BG. Our build below is still effective for players who enjoy the mix of fisticuffs and spellcasting. However, we’ve add in an alternate build below with another option that run along more traditional unarmed Monk lines, but is an offensive powerhouse.
Monk Class Features & Mechanics

The following list presents class mechanics and features for Baldur’s Gate 3 Monk Way of the Four Elements Build:
- Primary Ability: Dexterity
- Saving Throws: Strength, Dexterity
- Subclass: Way of the Four Elements
- Armor Proficiency: None
- Weapon Proficiency: Simple Weapons, Shortswords
- Preferred Armor: Clothing
- Preferred Weapon: Unarmed (no weapon equipped)
- Ki: resource points to use special Monk attacks.
- Flurry of Blows: punch twice in quick succession.
- Unarmed Strike: After attacking with a Monk Weapon or while unarmed, you can make another unarmed attack as a bonus action.
The Monk build and mechanics are very different from typical melee builds. Your armor, with Unarmored Defense, gives AC for having high Wisdom. That’s why our ability score will reach 16 during character creation. It’s important to use “clothing” for this reason. Additionally, Dexterity NOT Strength increases our damage with melee attacks. Another reason why the ability score will look different than other builds. Below we will explain more about this class and its unique subclass in the Best Baldur’s Gate 3 Way of the Four Elements Monk Build Guide.
Monk Ki Points Explained
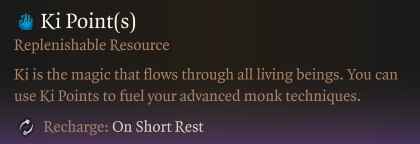
Ki points are a resource that monks use to power their special abilities. Monks can replenish their Ki Points via short rest. Ki points are a limited resource, so monks must use them wisely. These points are unlocked at level 1, and as you level, you earn more and more. They are core to the damage, crowd control, and spell casting so make sure to short rest after every combat engagement.
Way of the Four Elements Monk Subclass Explained
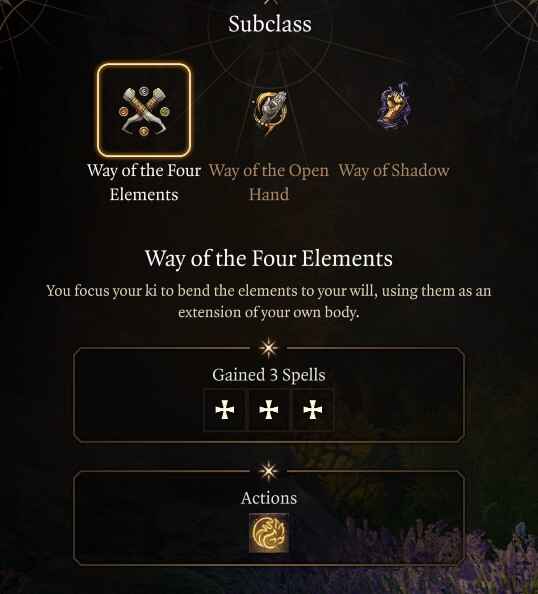
The Way of the Four Elements Monk subclass in Baldur’s Gate 3 is a versatile class that allows you to harness the power of the elements. You can use your ki points to cast elemental spells, create elemental effects, and enhance your unarmed strikes. As you level up, you gain access to more powerful elemental disciplines. You also learn how to combine your elemental powers to create even more devastating effects.
Below is a list of the Way of the Four Elements Monk subclass progression, features, and spells:
- Disciple of the Elements (Level 3) – Choose three spells
- Harmony of Fire and Water (Level 3) – While not in combat, regain half your Ki Point (rounded down). Restores on Long Rest.
- Disciple of the Elements (Level 6) – Select one spell.
- Improved Elemental Casting (Level 9) – Your affinity with elemental Ki deepens. Several of your offensive Four Elements features deal an additional dice of damage, your Clench of the North Wind can hold an additional creature, and your Embrace of the Inferno fires an extra ray.
- Disciple of the Elements (Level 9) – Select one spell.
- Disciple of the Elements (Level 11) – Select one spell.
Character Creation
| Category | Selection |
|---|---|
| Character | Origin – Custom character |
| Race | Githyanki |
| Racial Bonus | Astral Knowledge, Githyanki Psionics, Martial Prodigy |
| Class | Monk |
| Subclass | Way of Shadow |
| Cantrips | Minor Illusion |
| Background | Urchin |
| Ability Score | STR: 8 DEX: 16 CON: 15 INT: 8 WIS: 16 CHA: 10 |
| Skill Proficiencies | Acrobatics and Insight |
Recommended Background
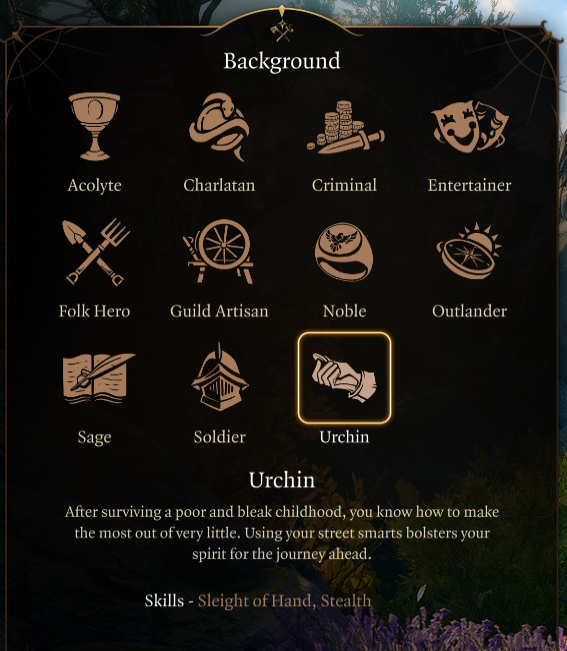
Urchin is the best background for the Way of the Four Elements Monk because it gives skill proficiency in Sleight of Hand and Stealth both are Dexterity-based. Significantly, these two skills are high due to our ability score and help in dialogue and exploration. Background primarily plays a role in outside-of-combat dialogue and exploration checks. Below are our background recommendations:
- Urchin: Proficiency in Sleight of Hand (dexterity) and Stealth (dexterity). After surviving a poor and bleak childhood, you know how to make the most out of very little.
- Folk Hero: Proficiency in Animal Handling (wisdom) and Survival (Wisdom). You’re the champion of the common people, challenging tyrants and monsters to protect the helpless. Folk Hero companions are Wyll and Minsc.
- Entertainer: Proficiency in Acrobatics (dexterity) and Performance (charisma). You live to sway and subvert your audience, engaging common crowds and high society alike.
Best Race Choice for Way of the Four Elements Monk Build

Wood Half-Elves are the best choice for the Best Baldur’s Gate 3 Monk Way of the Four Elements Build Guide because they get Civil Militia weapon proficiency, 12-meter Darkvision, and the best movement speed of all races. A secondary option would be the Githyanki because of Misty Step, Astral Knowledge, and Enhanced Leap. This race also has incredible mobility, vital to a Monk’s survivability.
Here is the best race choice for a Way of the Four Elements Monk build in Baldur’s Gate 3:
| Wood Half-Elf | Githyanki |
|---|---|
| Darkvision | Astral Knowledge |
| Fey Ancestry | Githyanki Psionics |
| Fleet of Foot | Martial Prodigy |
The Monk’s racial choice will not influence ability score, but everyone should get a +2 and +1 to spend regardless. Thankfully, this frees your race choice up to not completely hinder yourself based on ability score, but race features. Each of these races offers unique advantages that can enhance your combat prowess, survivability, or utility. Additionally, consider the roleplaying opportunities and character concepts that resonate with you.
Recommended Skills for Monk Build

Acrobatics and Insight are the best skills for the Monk Way of the Four Elements build in Baldur’s Gate 3. Select skills that skill in effectiveness based on your highest ability score like Dexterity and Wisdom. Note, you get different scores depending on the background you selected.
Here are the recommended skills for a Monk Way of the Four Elements:
- Acrobatics: Dexterity Skill that helps resist being shoved.
- Insight is a Wisdom skill used in dialogue and exploration.
In Baldur’s Gate 3, each skill is related to a specific ability score, and its effectiveness scales with the level of that score. You want to choose skills for your character that they already have a high ability score in. For example, if you want to have high Persuasion (which is used to influence dialogue choices), you need to have correspondingly high Charisma. Ideally, you want a party composition that includes a variety of high ability scores which can give you success in different skills for your Best Baldur’s Gate 3 Way of the Four Elements Monk Build Guide.
Best Way of the Four Elements Monk Ability Scores

The best ability score for the Way of the Four Elements Monk is 16 Dexterity, 16 Wisdom, and 15 Constitution. You can lower Strength and Intelligence to 8 because you won’t need it with this build, while Charisma is kept at 10. Strength can be increased to 23 or 27 with Elixirs that last until a long rest, thus you want it lower to free up a higher score.
Below is the best ability score for a Way of the Four Elements Monk Build in Baldur’s Gate 3:
| Ability Score | Points Goal |
|---|---|
| Strength | 8 |
| Dexterity | 16 |
| Constitution | 15 |
| Intelligence | 8 |
| Wisdom | 16 |
| Charisma | 10 |
For this build, we recommend 15 Constitution and will reach 16 with a feat at level 4 (Tavern Brawler). Typically you don’t want odd numbers, because only even numbers improve your rolls (saving and attack). However, very early on we will reach 16. Make sure to check out our Permanent bonus guide on how you can boost your ability score through quests.
Strength Ability Score & Monk


Strength is also important due to the Tavern Brawler feat which we will select at level 4. However, we use the Elixir of Hill Giant Strength which increases our strength to 21 passively. This allows you to gain a higher ability score, without having to spend points on strength. Keep in mind, that you will need to constantly craft, buy, and consume Hill Giant (or Cloud Giant) strength elixirs which last until a long rest.
Consider the ability score loadout geared towards optimal damage on higher difficulty and we assume you will use Hill Giant elixirs on tough encounters.
Way of the Four Elements Monk Companions
The best companion for a Monk Build in Baldur’s Gate 3 is Lae’zeal because she’s a melee-focused damage dealer. When you combine the Monk and another front-line fighter in cooperation the pressure and crowd control on the group is great.
- Lae’zeal (Fighter): damage, crowd control, and in-your-face aggression.
- Shadowheart (Cleric): buffs, healing, and control.
- Gale (Wizard): Used for area base damage, crowd control, and range.
When putting your party together, consider companions for not only their combat prowess but also their outside abilities and skills that can influence storytelling, dialogue, and exploration. A balanced party will fit the traditional RPG ‘holy trinity’: Tank, Healer, and DPS. Ideally, in Baldur’s Gate 3, you are going to want one tank, one healer, one melee DPS, and one range DPS. Some classes/subclasses can cover both roles, so feel free to experiment and find out what works best for you.
Way of the Four Elements Monk Spellcasting
The Way of the Four Elements Monk subclass in Baldur’s Gate 3 allows you to cast elemental spells using your ki points. To cast an elemental spell, you must spend the appropriate number of ki points. Your Wisdom modifier is your ability score that influences casting alongside the amount of Ki Points.
Here’s a chart that shows the levels at which you learn spell and Ki Points for the Way of the Four Element Monk Baldur’s Gate 3:
| Monk Level | Ki Points | Spells Known |
|---|---|---|
| Level 3 | 4 | 3 |
| Level 4 | 5 | 3 |
| Level 5 | 6 | 4 |
| Level 6 | 7 | 4 |
| Level 7 | 8 | 4 |
| Level 8 | 8 | 5 |
| Level 9 | 10 | 5 |
| Level 10 | 11 | 5 |
| Level 11 | 12 | 5 |
| Level 12 | 13 | 6 |
Way of the Four Elements Monk Illithid Powers

Illithid Powers are unlocked later in the game when you learn more about the Mind Flayers and Tadpoles. You can gain jars of Mind Flayer Parasite Specimens, and consume them to gain one point. This is essentially another skill tree advancement with some very strong powers. If you decide to advance this skill line, these are the choices we suggest.
Here are the best Illithid Powers for the Monk Build:
| Illithid Powers | Description |
|---|---|
| Psionic Backlash | When an enemy within 9m casts a spell, you can use your reaction to inflict ld4 Psychic damage to the caster per the spell’s level. |
| Psionic Dominance | When an enemy within 18m targets you with a spell of a Level that is lower than or equal to your Proficiency Bonus, you can use your reaction to nullify the spell. |
| Shield of Thralls | Conjure a volatile shield around yourself or an ally, granting the target 10 temporary hit points. |
Related:
Monk Level Progression
| Level | Class | Selection |
|---|---|---|
| 1 | Monk | Ki, Unarmored Defense, Dexterous Attacks |
| 2 | Monk | Unarmoured Movement, Patient Defense, Step of the Wind |
| 3 | Monk | Subclass: Way of the Four Elements, Fist of Unbroken Air, Water Whip, Blade of Rime |
| 4 | Monk | Feat: Tavern Brawler, Slow Fall |
| 5 | Monk | Extra Attack, Stunning Strike |
| 6 | Monk | Improved Unarmoured Movement, Ki Empowered Strike, Clench of the North Wind |
| 7 | Monk | Evasion, Stillness of Mind |
| 8 | Monk | Feat: Ability Improvement Dexterity |
| 9 | Monk | Improved Elemental Casting, Embrace of the Inferno |
| 10 | Rogue | Acrobatics and Sleight of Hand |
| 11 | Rogue | Cunning Actions |
| 12 | Rogue | Subclass: Thief |
Alternative Way of the Four Elements Monk Build
In our alternative Solo Monk build we recommend choosing the Way of the Open Hand and later combining it with Rogue for a highly mobile, strong fighter. Additionally, we’ll transition to Rogue one level earlier, which allows you to get another feat. With this you can dedicate two Ability Improvements to increase your Dexterity score to 20, or swap one out for an Alert feat.
| Level | Class | Selection |
|---|---|---|
| 1 | Monk | Ki, Unarmored Defense, Dexterous Attacks |
| 2 | Monk | Unarmoured Movement, Patient Defense, Step of the Wind |
| 3 | Monk | Subclass: Way of the Open Hand |
| 4 | Monk | Feat: Tavern Brawler |
| 5 | Monk | Extra Attack, Stunning Strike |
| 6 | Monk | Improved Unarmoured Movement, Ki Empowered Strike, Wholeness of Body |
| 7 | Monk | Evasion, Stillness of Mind |
| 8 | Monk | Feat: Ability Improvement Dexterity |
| 9 | Rogue | Skills: Stealth and Sleight of Hand, Sneak Attack (Ranged & Melee) |
| 10 | Rogue | Cunning Actions |
| 11 | Rogue | Subclass: Thief |
| 12 | Rogue | Feat: Ability Improvement Dexterity |
Level 1

Follow our character creator to pick all correct background, race, skills, and ability scoring focusing on Dexterity, Wisdom, and Constitution. You won’t be able to select a subclass until level 3, so expect the Monk class to start slow. You want to wear clothing NOT armour due to the passive Unarmored Defense. The higher your Wisdom, the more AC you will have which can be added to via armour and accessories.
At Level 1, the Monk unlocks Flurry of Blows. This will be your primary damage source and can use it as a bonus action. Even right away, you can use an action for a weapon attack and Flurry of Blows for an additional attack even at level one. Additional passives granted at Level 1 as a Monk:
- Ki: resource points to use special Monk attacks can be replenished on short rest.
- Unarmored Defense: While not wearing armour, you add your Wisdom Modifier to your Armour Class. This is why we want high Wisdom and only use clothing not armor unless it gives more Armour Class (AC).
- Dexterous Attacks: Attacks with Monk Weapons and unarmed attacks scale with your Dexterity instead of your Strength if your Dexterity is higher. This is the reason our primary offense stat is Dexterity, not Strength.
- Deft Strikes: Attacks with Monk Weapons and unarmed attacks deal 1~4 Bludgeoning damage unless their normal damage is higher.
- Unarmed Strike: After attacking with a Monk Weapon or while unarmed, you can make another unarmed attack as a bonus action.
You will get your subclass at level 3, so don’t expect it during character creation. Gameplay at the start is very simple, move in and use an action for the unarmed attack, then unarmed strike with a bonus action. At level 3, you get spells, at level 5 you get an extra attack. These two levels are important for overall power and progression.
Way of the Four Elements Monk Gameplay & Priorities
During the early stages of BG3, look to just unarmed attacks for damage without the need to equip any weapons. Your main challenge will be mobility, though through leveling you will get increased mobility options. Additionally, your primary goal should be to equip the Haste Helm as soon as possible. Moreover, look to acquire the Elixir of Bloodlust or Potion of Invisibility. Bloodlust helps trigger an extra action on kill and Invisibility helps you stay alive if you’re in trouble.
Your overall priority with the Way of the Four Elements Monk build is the following:
- Complete Prologue
- Recruit Companions
- Unlock Withers, respec companions to proper class/ability score
- Collect the Necromancy of Thay (important in Act 3)
- Reached Hollowed City/Druid Grove
- Sell, Stock up, complete quests
- Unlock summons, Scratch, Shovel
- Progress to level 5
- Reach Underdark and Grymforge
- Check all Permanent Bonuses in Act 1 and the best Gear
- Act 1 Checklist for step-by-step completion
Following these steps ensures a strong foundation, especially if you plan on playing solo or on Honour Mode difficulty.
Level 2

At level 2, the Monk unlocks a lot of class features and actions including an additional Ki point. Here’s what to expect as a level two Monk:
- Unarmoured Movement: Your movement speed increases by 3m while you are not wearing armour or using a shield.
- Patient Defense: using a bonus action and a Ki Point, Attack Rolls against you have Disadvantage, and you have Advantage on Dexterity Saving Throws.
- Step of the Wind: Dash (Action): using a bonus action and a Ki point, Double your movement speed. Jump no longer requires a bonus action.
- Step of the Wind: Disengage (Action): using a bonus action and a Ki point, Retreat to safety by Disengaging. Jump no longer requires a bonus action.
If we unpack these additional class features and actions, it gives us more incentive to use clothing not armor due to the movement speed increase. With Patient Defense, you can give disadvantage. This forces the enemy to roll two d20 and take the lowest. It basically gives you a big offensive and defensive advantage against an enemy. You will also have much higher mobility with Step of the Wind Dash and Disengage. The Dash in particular is extremely useful because it can be used as a bonus action. You are one level away from subclass selection, then level 4 is a feat, with 5 giving extra attack. Level 5 you start feeling very powerful so if the build feels underwhelming now, just make it to level 5.
Level 3
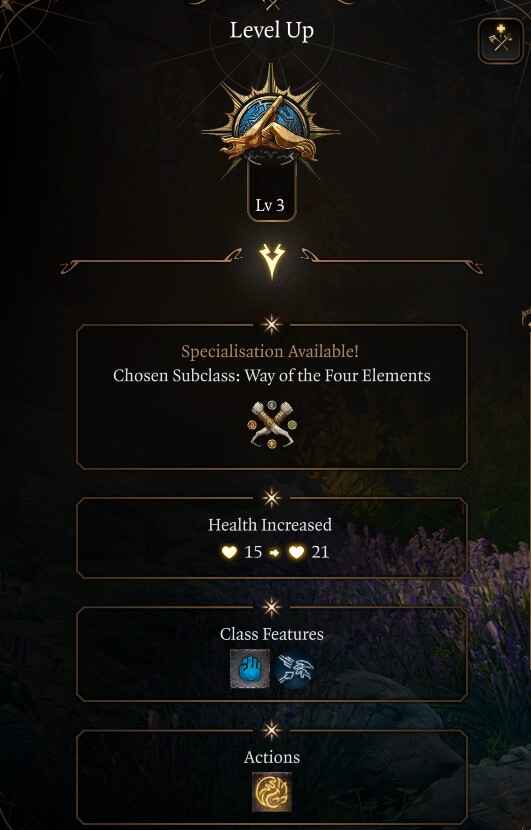
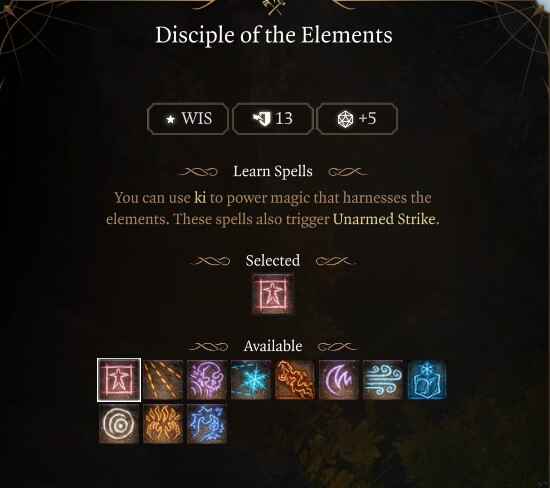
At level 3 of Monk, you can pick your subclass and we’ll be choosing Way of the Four Elements. As a subclass feature, you’ll then be able to choose three new spells.
- Disciple of the Elements (subclass feature) – Choose three spells
- Harmony of Fire and Water (subclass feature) – While not in combat, regain half your Ki Point (rounded down).
- Fist of Unbroken Air (spell selection): Push the target back 6m and knock it Prone.
- Water Whip (spell selection): Possibly pulls the target towards you or knocks it Prone.
- Blade of Rime (spell selection): Throw a shard of ice that deals 1~10 Piercing damage. It explodes and deals 2~12 Cold damage to anyone nearby. It leaves an ice surface.
- Githyanki Psionic: Jump (race feature): Jump in a long arc, depending on your strength modifier.

The harmony of Fire and Water subclass feature allows you to regain half of your Ki Points when you’re not in combat. This is a great way for you to regain some of your spell slots without having to use a Short or Long Rest. Fist of Unbroken Air is our big damage ability and offers great crowd control with its knock-back and possibility to drop the enemy Prone. The Water Whip spell is a great way to pull enemies to you when you run out of movement to reach them. Blade of Rime is similar to Ice Knife, a spell that can be used at a distance and gives us access to ranged DPS. Use actions for unarmed strikes or spells, and bonus actions for the flurry of blows or movement.
Level 4

At level four, you get to pick a Feat along with Ki Point and Slow Fall. Slow Fall (class feature): When you fall, you can use your Reaction to gain Resistance to Falling damage.
Tavern Brawler Feat: When you make an unarmed attack, use an improvised weapon, or throw something, your Strength Modifier is added twice to the damage and Attack Rolls. Also, lets you choose a +1 ability score in Strength or Constitution. With our +1 selection, we will reach 14 Constitution giving us an even number and more health.
Now Strength becomes a very powerful ability score giving a 2x bonus to damage and attack rolls. You want to look for gear sets like Mighty Cloth or potions like Elixir of Hill Giant Strength. The benefit of Hill Giant’s strength is it lasts until a long rest. Therefore, look to consume this potion as a buff for hard fights after your long rest. This will radically increase your damage, and it only gets better next-level Extra Attack with the Best Baldur’s Gate 3 Way of Open Hand Monk Build.
Level 5

As a level 5 Monk, our power dramatically increases via a new class feature along with some extra utility.
- Extra Attack: can make an additional free attack after making an unarmed or weapon attack.
- Stunning Strike (Melee): use action to possibly stun the target.
- Stunning Strike (Unarmed): use action to possibly stun the target.
- Misty Step (Githyanki Race): Surrounded by silver mist, you teleport to an unoccupied space you can see.
You can now use an action and a bonus action to stun a target. This gives the Monk tons of single-target crowd control, and if you miss attempt number one you can try again. You get two attacks with one action thanks to Extra Attack and can still use a bonus action for another attack. This opens up a lot of offensive possibilities. The easiest thing to do is target the hardest-hitting enemy and simply lock them down with constant stuns, knockback, and prone status effects.
You want to attack with action first, using a stun if needed, and keep an eye out on Ki Points. You can also use spells if needed at this level, but remember, extra attack gives you incentives to move into melee range and attack. The spells are very useful for ranged damage where melee isn’t possible or crowd control. After your melee attack, use a bonus action for an extra attack. This gives you 3 attacks per round and this can be further amplified later with multi-classing. You should start seeing a lot more damage, and if you don’t, make sure you are unarmed and clothed. Prioritize getting gloves that increase unarmed damage, there are plenty in every act.
Level 6
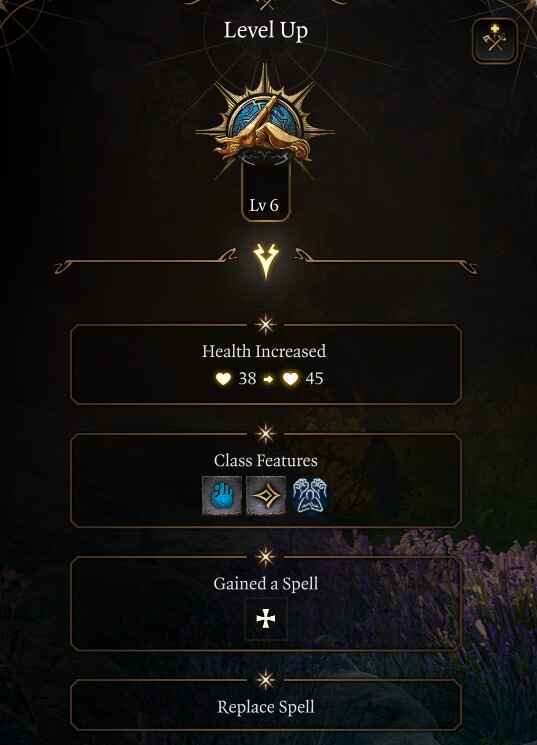
At level 6, expect even more to unlock for your class and subclass. Here’s the breakdown of the Monk at level 6 in Baldur’s Gate 3:
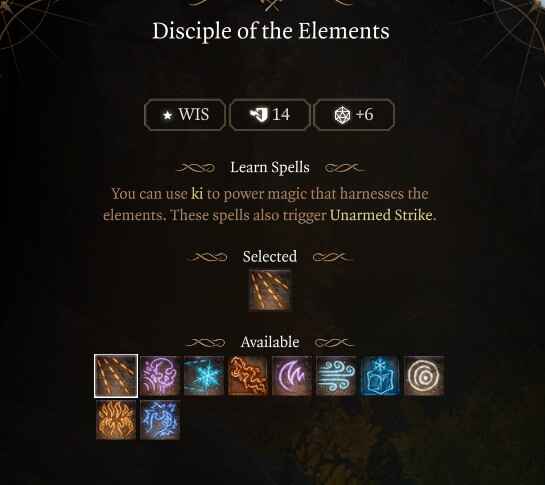
- Disciple of the Elements (Level 6) – Select one spell.
- Improved Unarmoured Movement: Your movement speed increases by 4.5m while you are not wearing armor or using a shield.
- Ki Empowered Strikes: Your unarmed attacks count as magical to overcome enemies’ Resistance and Immunity to non-magical damage.
- Clench of the North Wind (spell selection): Hold a humanoid enemy still. They can‘t move, act, or react. Attacks from within 3m are always Critical Hits.
We’re choosing this spell because damage on other abilities is very low in comparison to unarmed attacks, also the range damage won’t be that helpful and we can use Misty Step to close the distance, this helps with ranged crowd control.
Ending Act 1 as a Way of the Four Elements Monk
Around Level 6 you should be close to finishing Act 1 content. Be sure to visit merchants and buy up needed camp and alchemy supplies. Additionally, make sure to look over what the best Act 1 items are. Furthermore, make sure you haven’t missed out on the permanent bonuses you can find in Act 1. Finally, the Grymforge has powerful armor and weapons (Adamantine) which can be used well into Act 3. Consider taking the time to collect the Mithral, Mould, and Craft items before moving on to Act 2. The game will alert you when this is about to happen, but once you move onto the Shadow-Cursed Lands you can’t go back.
Lastly, look to acquire the Elixir of Hill Giant Strength and Potion of Speed. You can combine these two for huge damage increases and your Way of the Open Hand Monk will feel very powerful immediately.
Level 7

As a Level 7 Monk, you unlock more Ki points and some defensive class features.
- Evasion (class feature): When a spell or effect would deal half damage on a successful Dexterity Saving Throw, it feels no damage if you succeed, and only half damage if you fail.
- Stillness of Mind (class feature): If you are Charmed or Frightened, you automatically cast Stillness of Mind to remove the condition.
The gameplay remains the same at this level, you’ve just received more defensive capabilities.
Level 8

At level 8, you get another feat selection and I suggest taking the Ability Improvement. Ability Improvement Dexterity: Increase your Dexterity to +2 which will help with damage. This will be the last feat we take for this build, but ability improvements are always solid choices and it’s harder to increase Dexterity than say Strength due to consumables. Hitting 18 in Dexterity means big damage, a higher percentage to hit, and zero complex gameplay mechanics. Not much else happens at this level besides gaining more Ki Points.
Level 9
At level 9 the Way of Elements Monk receives a few class features along with a new spell selection.
- Advanced Unarmoured Movement (class feature): Difficult Terrain doesn’t slow you down and you can Jump an additional 6m while you are not wearing armour or using a shield.
- Improved Elemental Casting (Level 9) – Your affinity with elemental Ki deepens. Several of your offensive Four Elements features deal an additional dice of damage, your Clench of the North Wind can hold an additional creature, and your Embrace of the Inferno fires an extra ray.
- Disciple of the Elements (Level 9) – Select one spell.
- Embrace of the Inferno (spell selection): Expel the fire burning through your veins as 3 flaming rays. Each ray deals 2~12 Fire damage.
You’ll want to take Embrace of the Inferno as your spell selection. This spell gives 4 rays each 2-12 possible 8-48 damage due to the Improved Elemental Casting passive. This damage isn’t extraordinary but it’s helpful if you cannot reach a target. Overall, this will provide the Monk with a little more versatility.
Level 10
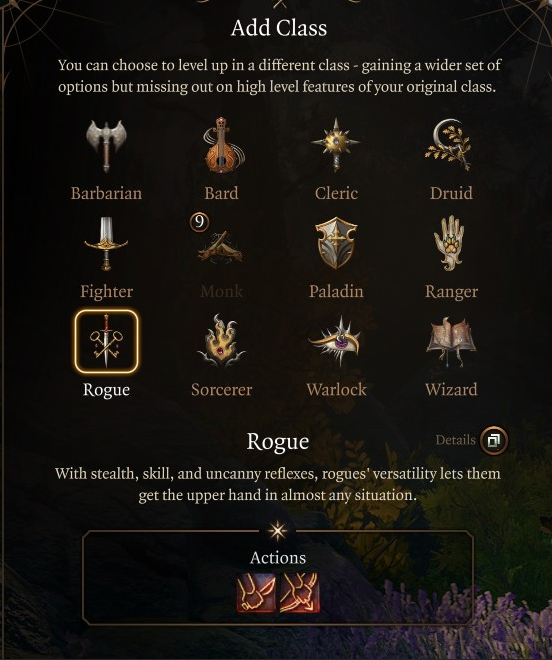
We have three more levels to go with the Monk and we need to make an important decision. For the next three levels, the Way of the Four Elements Monk receives only a bonus to movement and one new spell. The power wanes substantially, and with a bonus action-heavy class, there is a better option to optimize the build. I suggest at this point to multi-class the last three levels to get another bonus action with the Rogue and Thief subclass.
The Thief Rogue with 3 levels will give you the following:
- Sneak Attack: (not useful for this build)
- Cunning Action Hide, Dash, or Disengage
- Fast Hands (two bonus actions)
- Second-Story Work (Resistance to fall damage)
When you hit max level with this build, you would then be able to attack twice with your action and use two bonus actions giving you four attacks in one turn. If remain in the Monk class, you will gain another feat which can be helpful to improve Dexterity to 20, but the extra bonus action makes the build do much more damage. Note, this will max out our Ki Points at 10, which is plenty for spell casting.
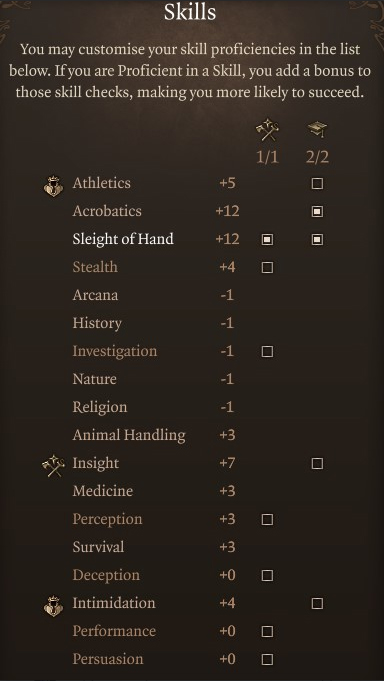
You can amplify two skills, which I recommend Acrobatics and Sleight of Hand if you use this Monk in replacement for a Rogue or Ranger.
Level 11
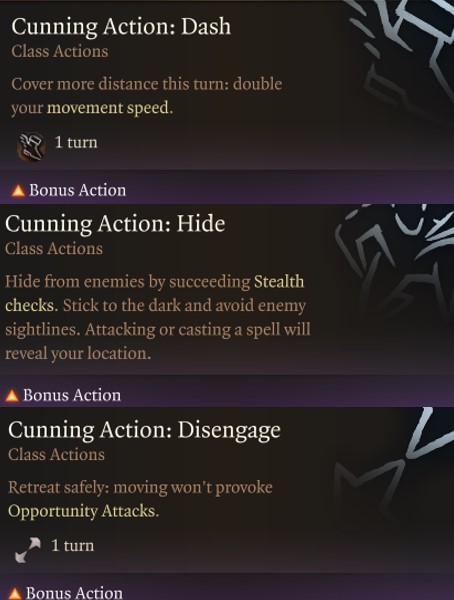
Level 11 will seem a bit lackluster because our bonus action won’t be used for hiding or running away but it will get much more useful at level 12. The second level in Thief gives you:
- Cunning Action Hide: Hide from enemies by succeeding Stealth checks. Stick to the dark and avoid enemy sightlines. Attacking or casting a spell will reveal your location.
- Cunning Action Dash: Cover more distance this turn: double your Movement Speed.
- Cunning Action Disengage: Retreat safely: moving won’t provoke Opportunity Attacks.
The benefit of Cunning Action is having Dash be a bonus action rather than an Action. This allows you to use the bonus action and cover a massive distance with the Monk’s high movement speed.
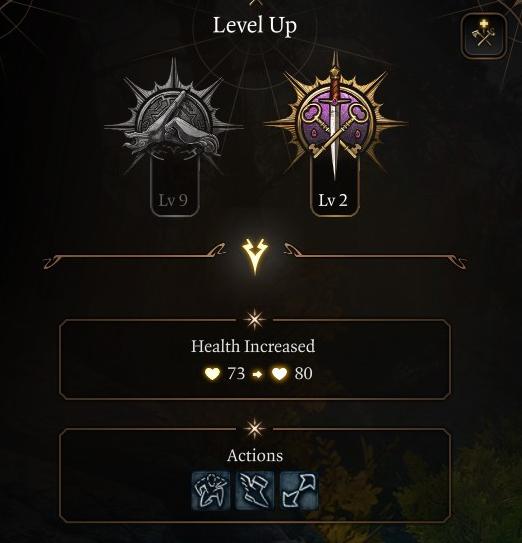
Level 12
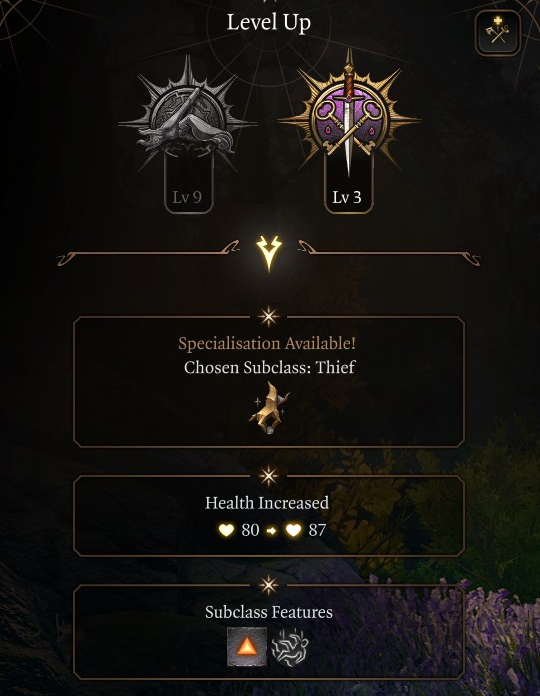
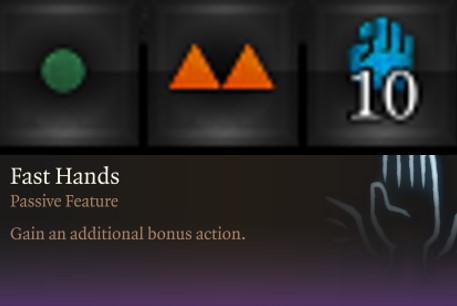
Now you’ve reached max level 12 in Baldur’s Gate 3 as a Monk, congratulations! With three levels into Rogue, we want to take another level in the Thief Subclass giving us Fast Hand and an extra bonus action. Now, each turn if you attack with your action, you should get two attacks, two bonus actions for four in total! At max level, you primarily want to use actions and bonus actions for damage. The spells come in handy for crowd control and ranged damage when melee isn’t possible. Look below for how to optimize your gear getting more damage out of the Best Baldur’s Gate 3 Way of the Four Elements Monk Build Guide!
Way of the Four Elements Monk Recommended Gear
In Games like Baldur’s Gate 3, you’ll explore the world, loot chests and your enemies’ dead bodies, and complete quests and all those activities can reward you with useful items, potions, armour, weapons, scrolls, and much more. There are three Acts in BG3, and Best Baldur’s Gate 3 Way of Four Elements Monk Build Guide includes suggested sets and alternatives for Act 1 and Act 3.
Beginner: Act 1

Here’s the best beginner gear for the Way of the Four Elements Monk Build in Baldur’s Gate 3:
| Gear Slot | Best Gear Item | Effect |
|---|---|---|
| Head | Haste Helm | Increased Movement |
| Cape | – | |
| Chest | Armour of Uninhibited Kushigo | Defense |
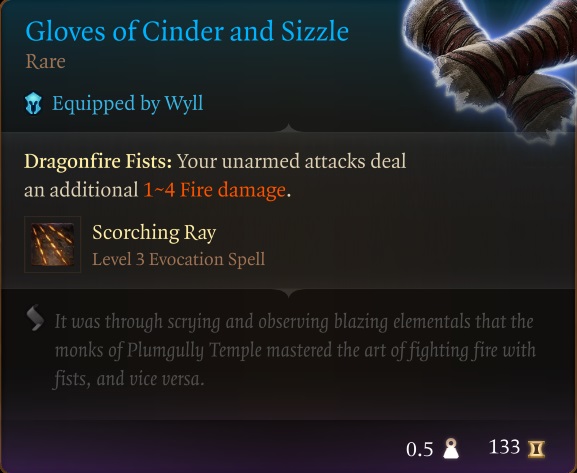
| Gloves | Gloves of Cinder and Sizzle | Fire Damage |
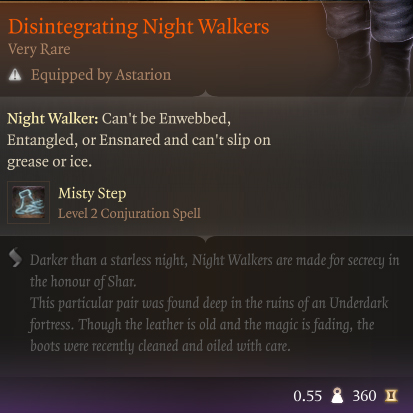
| Boots | Disintegrating Night Walkers | Mobility |
| Necklace | Amulet of Misty Step | Misty Step |
| Ring | Crusher’s Ring | Increased Movement |
| Ring | Sunwalker’s Gift | Darkvision |
| Weapon 1 Main Hand | Unarmed | – |
| Weapon 2 Ranged | Bow of Awareness | +1 Initiative Roll |
Here is a list of the best Act 1 items for the Way of Four Elements Monk:
- Haste Helm: Chest in the Blighted Village X 32, Y 403 (Alternative Cap of Wrath).
- Armour of Uninhibited Kushigo: Find the Missing Boots quest reward from Sergeant Thrinn in Grymforge Act 1 (Alternative The Protecty Sparkswall, or Bloodguzzler Garb).
- Gloves of Cinder and Sizzle: Sold by Lady Esther at Rosymorn Monastery Trail (Alternatives The Sparkle Hands, or Bracers of Defence).
- Disintegrating Night Walkers: Dropped by True Soul Nere at the Grymforge (Alternatives Boots of Genial Striding, or Boots of Striding).
- Amulet of Misty Step: Chest behind the ogre Polma in the Defiled Temple within the Goblin Camp (Alternatives Moondrop Pendant, Amulet of Branding, or Amulet of Restoration).
- Crusher’s Ring: Can be looted or stolen from Crusher in the Goblin camp (Alternatives Ring of Flinging, or Fetish of Callarduran Smoothhands).
- Sunwalker’s Gift: Buy it from Blurg in Myconid Colony in the Underdark (Alternatives Ring of Absolute Force, or The Sparkswall).
- Unarmed: Damage comes from gloves, not weapons.
- Bow of Awareness: Sold by Roah Moonglow in the Shattered Sanctum.
Advanced: End-Game


This table presents the best advanced and end-game gear for the Way of the Four Elements Monk Build in Baldur’s Gate 3:
| Gear Slot | Best Gear Item | Effect |
|---|---|---|
| Head | Mask of Soul Perception | +2 Attack Roll |
| Cape | Fleshmelter Cloak | Acid Damage |
| Chest | Vest of Soul Rejuvenation | Unarmed Strike |
| Gloves | Gloves of Soul Catching | Unarmed Damage |
| Boots | Boots of Uninhibited Kushigo | Wisdom Modifier |
| Necklace | Surgeon’s Subjugation Amulet | Stun on Crit |
| Ring | Killer’s Sweetheart | Auto Crit |
| Ring | Ring of Regeneration | Free Healing |
| Weapon 1 Main Hand | Unarmed | – |
| Weapon 2 Ranged | Darkfire Shortbow | Fire & Cold Resistance |
| Throwable | Nyrulna | Throwable Damage |
Here is a list of the best Act 3 items for the Way of Four Elements Monk:
- Mask of Soul Perception: The upstairs at the Devil’s Fee, locked in a Gilded Chest, Act 3 (Alternatives Horns of the Berserker, or Helldusk Helmet).
- Fleshmelter Cloak: Found in the House of Healing Morgue (Alternatives Cloak of Protection).
- Vest of Soul Rejuvenation: Can be purchased from Sorcerous Sundries, Act 3 (Alternatives The Graceful Cloth, or The Mighty Cloth).
- Gloves of Soul Catching: Save Hope in the House of Hope (Alternatives Helldusk Gloves, Gauntlet of the Tyrant, or Seraphic Pugilist Gloves).
- Boots of Uninhibited Kushigo: Dropped by Prelate Lir’i’c in Astral Plane, Act 2 (Alternatives Helldusk Boots, or Disintegration Night Walkers).
- Surgeon’s Subjugation Amulet: Looted from Malus Thorm at the House of Healing, Act 2 (Alternatives Amulet of Greater Health, or Sentient Amulet).
- Killer’s Sweetheart: Found inside the Gauntlet of Shar ( X: -833 Y: -729). (Alternative Shifting Corpus Ring).
- Ring Of Regeneration: Sold by Rolan at Sorcerous Sundries (Alternative Ring of Free Action).
- Darkfire Shortbow: Sold by Dammon in the Last Light Inn.
- Nyrulna: Stole from Akabi in Circus of the Last Days in Rivington, Act 3.
Best Consumable Items and Potions

Consumables are items that can be used once and then destroyed. They are typically used to restore health or other resources. Some common types of consumables include potions, scrolls, food, drinks, and arrows.
The following list represents the best individual use consumable items that will aid in our Best Baldur’s Gate 3 Way of the Four Elements Monk Build:
- Elixir of Hill Giant Strength: Increases Strength ability score to 21 until Long Rest.
- Elixir of Bloodlust: Once per turn when you kill a foe, you gain HP 5 temporary hit points and an additional action.
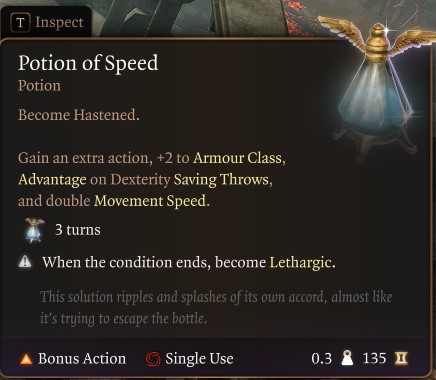
- Potion of Speed: Gain extra action, +2 AC, Advantage on Dexterity Saving Throws, and double movement speed.
- Drow Poison: Weapon poison that adds Constitution Saving Throw or becomes Poisoned and falls Asleep.
- Potion of Flying: Drink to gain a flying speed of 60ft for one hour.
- Elixir of Heroism: Gain 10 temp HP and become Blessed until a long rest.
- Potion of Greater Healing: 4d4 + 4 hit points restored.
- Oil of Accuracy: Coat Weapon. Bonus of +2 in Attack Rolls.
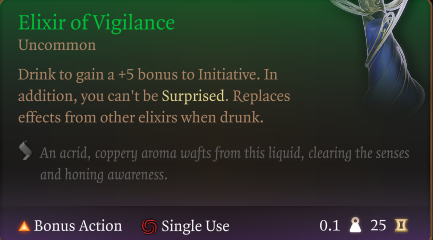
- Elixir of Vigilance: Drink to gain a +5 bonus to Initiative and you can’t be Surprised.
- Elixir of Darkvision: (only non-Darkvision race): Drink to gain the ability to see in the dark up to 12m.
Permanent Bonuses

Throughout Baldur’s Gate 3, you will have the ability to gain permanent bonuses to your character. These can grant additional spells, ability scores, and other bonuses. Permanent Bonuses are not displayed throughout the campaign but are vital to increase overall combat performance. We have all permanent bonuses here in a guide, but the most important ones for you to collect are listed below.
| Act 1 | Act 2 | Act 3 |
|---|---|---|
| Auntie Ethel’s Hair: Gain +1 to an Ability Score. | Potion of Everlasting Vigour: Gain +2 Strength. | Mirror of Loss – +2 to an Ability Score of your choice. |
| Awakened: Use illithid powers as a Bonus Action. | Slayer Form: Ability to transform into the Slayer. | Partial Ceremorphosis: Access to tier 3 illithid Powers. |
| Scratch: Gain Find Familiar Scratch. | Summon Us: Allows you to summon Us. | Sweet Stone Features: Blessed permanent. |
| Cheeky Quasit: Gain Summon Quasit Shovel. | Statue of the Gods: +2 to Saving Throws | |
| Loviatar’s Love: 30% Hit Points or less, you gain a +2 bonus to Attack Rolls and Wisdom saving throws. | ||
| Necromancy Of Thay: access to powerful spells in Act 3. | ||
| Volo’s Ersatz Eye: See Invisibility |
Best Permanent Bonuses for Way of the Four Elements Monk in Baldur’s Gate 3
Way of the Four Elements Monk Gameplay Tips and Tricks
Here is a list of 10 gameplay, combat, tips, and tricks when playing the Monk in Baldur’s Gate 3:
- Mobility: Monks have one of the highest movement speeds for a melee build so take advantage of it offensively and defensively.
- Bonus Actions: make sure to use your bonus action every turn for an extra attack or utility.
- Stuns: the Monk excels at single-target crowd control, and in later levels, you can make multiple attempts.
- Armor: make sure to use clothing not light, medium, or heavy armor as it’ll destroy your mobility.
- Spells: use spells for ranged damage and crowd control
- Consumables: Using a potion of speed gives you a secondary action for 3 turns and is very helpful.
- Mist Step: close the distance with Misty Step, scroll, or Githyanki bonus spell for massive movement.
- Ki Points: make sure to refresh these points after combat so you don’t run out during each encounter.
- Opening Turn: attempt to reach a target for attack or use bonus action for double movement speed.
- Throw: you can throw objects when not in melee range to help keep damage high.
Remember, this build guide serves as a foundation, and you can always adapt it to suit your preferences and the needs of your campaign. Enjoy playing as a formidable Best Baldur’s Gate 3 Monk Way of the Four Elements Build Guide!
Best Baldur’s Gate 3 Monk Way of the Four Elements Build Guide Summary
Subclass: Way of the Four Elements
Armor: Clothing
Weapons: Unarmed
Background – Urchin
- Strength – 8
- Dexterity – 16
- Constitution – 15
- Intelligence – 8
- Wisdom – 16
- Charisma – 10
Level Progression
- Level 1 – Flurry of Blows
- Level 2 – Unarmoured Movement
- Level 3 – Way of the Four Elements Subclass
- Level 4 – Tavern Brawler Feat
- Level 5 – Extra Attack
- Level 6 – Ki Empowered Strikes
- Level 7 – Evasion
- Level 8 – Dexterity +2
- Level 9 – Advanced Unarmoured Movement
- Level 10 – Multiclass to Rogue
- Level 11 – Cunning Actions
- Level 12 – Fast Hands
Looking For More About Baldur’s Gate 3?
Thank you for reading Best Baldur’s Gate 3 Way of the Four Elements Monk Build Guide. We provide the latest news and create guides for Baldur’s Gate 3. Also, watch me play games on Twitch or visit my YouTube channel!