Facebook
 Reddit
 Email
Email
This guide will explain the best Jaheira Companion Build in Baldur’s Gate 3, the Druid Class, and the Circle of the Moon subclass, for the optimal setup.

This build has been updated for the Patch 8 version of Baldur’s Gate 3.
Jaheira Companion Introduction
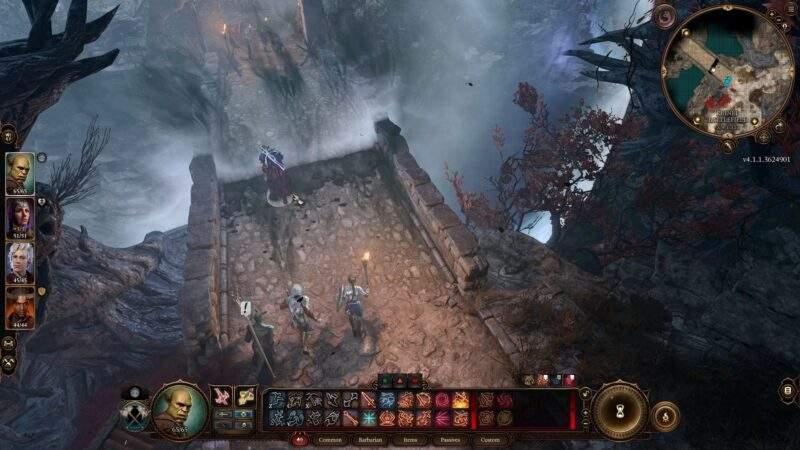
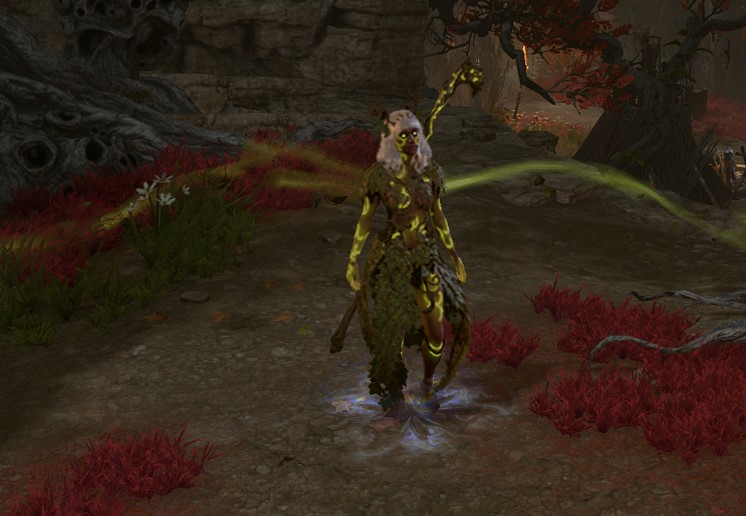
Jaheira is a Half High Elf Companion, who can join your party in Act 2. In the Shadow-Cursed Lands, she’s guarding Last Light Inn and will help you uncover the mysteries of the absolute cult. During her introduction, Jaheira is a Druid using Circle of the Moon spells and Wild Shape. While you can change her class, we kept to this Druid origin character story and provide a basis for you to play her as an optimal Druid build.
This Druid Circle of the Moon Build for Jaheira is focused on transferring via Wild Shape and is primarily a damage dealer. There are other forms of support, and you can heal to some extent. But this build Wild Shapes, provides great damage, crowd control, and high survivability.
Companions in BG3
Companions in Baldur’s Gate 3 are a group of non-player characters (NPCs) who join the player’s party and accompany them throughout their journey in the game. These companions are essential characters that offer various benefits, such as providing additional combat support, contributing to the story, and offering different perspectives on the events unfolding in the game world.
Companions can be avoided entirely, die, be romanced, and have their own sprawling background. In this build guide for Jaheira, we will explore her character and how to make a powerful Druid Build with her. We also suggest using the Respec or Reroll feature to change Jaheira’s default subclass to a much more powerful one. This will be explained later. This build is being updated as we progress to the max level of 12. Check back frequently for updates.
| Jaheira Pros | Jaheira Cons |
|---|---|
| Wild Shape | Limited Armor Proficiency |
| Nature Magic | Complex Spellcasting |
| Versatile Playstyle | Wild Shape Limitations |
Druids can transform into animals, granting them unique abilities and tactical advantages, and have access to spells that control the environment, summon creatures, and heal allies. Jaihera’s versatile playstyle and ability to fill a variety of roles, such as melee combatant, spellcaster, and support is one of the biggest advantages of this build.
On the other hand, Jaheira has limited Armor Proficiency, is restricted to light and medium armor, and has complex spellcasting with a diverse range of spells, but their unique spell list and nature-focused abilities can be more challenging to navigate. Lastly are the Wild Shape limitations. The effectiveness of shape-shifting can depend on the situation and available forms, limiting its utility in certain encounters.
We will be making changes live as we learn more about how Baldur’s Gate 3 plays out at the end game, including gear, multi-class, and level progression.
Patch 8 Changes to Jaheira Druid for BG3
The most significant change to the Druid class in Patch 8 of Baldur’s Gate 3 is the addition of the Circle of Stars subclass. This variant stands out by granting access to Guiding Bolt and a passive bonus that adds 1d6 to attack rolls, giving it the feel of a spellcasting archer. It pairs well with armor and jewelry found in Act 1, offering strong early-game performance with minimal complexity. However, its effectiveness tapers off in later levels, particularly by Act 3.
Significantly, the Circle of the Moon subclass still remains the strongest for Druids in BG3. While Jaheira joins your party as a Circle of the Land Druid, it’s highly recommended that you reroll her class. Circle of the Moon remains incredibly powerful even without subclassing, and with the right build you could even conceivably solo the game.
Jaheira Companion Build Features & Mechanics
With their high damage output, shapeshifting abilities, and healing spells, Druids are a great addition to any party. The class also feels and plays very unique, fun, and different from others in Baldur’s Gate 3.
Druid Class Mechanics
The following list presents all the essential Jaheira Companion Mechanics and Features in Baldur’s Gate 3:
- Class: Druid
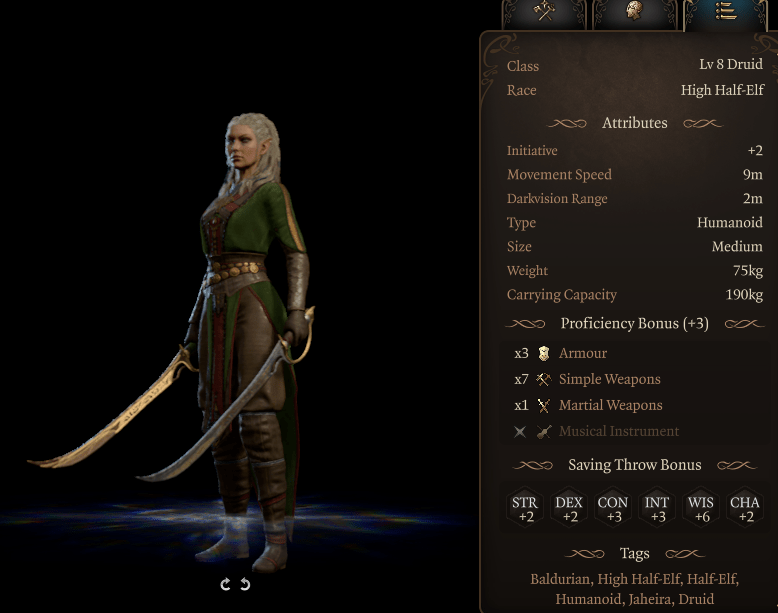
- Race: High Half-Elf
- Background: Unknown
- Subclass: Reroll to Circle of the Moon
- Base Proficiencies: Unknown
- Best Build: Druid, Circle of the Moon, Medium Armor
- Origin Character: No
- Romance: Yes
- Location: In the Shadow-Cursed Lands, she’s guarding Last Light Inn, Act 2
- Primary Ability: Wisdom
- Secondary Ability: Constitution
- Armour Proficiency: Light and Medium Armour
- Weapon Proficiency: Simple Weapons & Shields
- Combat Wild Shape: As a Bonus Action, you can assume the form of a beast.
- Lunar Mend: Expend spell slots to regain hit points while wild-shaped.
- Primal Strike: While in beast form, your attacks count as magical for the purpose of overcoming Resistance.
- Wild Shape: creature transformation
Your companion can be respecced or rerolled early in the game. This means you can change their class, subclass, ability score, and more. The only feature that cannot be adjusted is their race and story. We suggest using Withers at Camp after he’s unlocked in order to optimize the build.
Druid Class Guide
Druids are spellcasters who wield and manipulate nature magic and can transform into various animals thanks to the Wild Shape ability. They shape-shift into a wolf, bear, spider, and much more, each granting them unique tactical advantages. Druids excel at support roles, crowd control, and summoning, making them valuable assets to any party. Consider Druid’s survivability high due to Wild Shape and healing.
Druid Wild Shape Explained
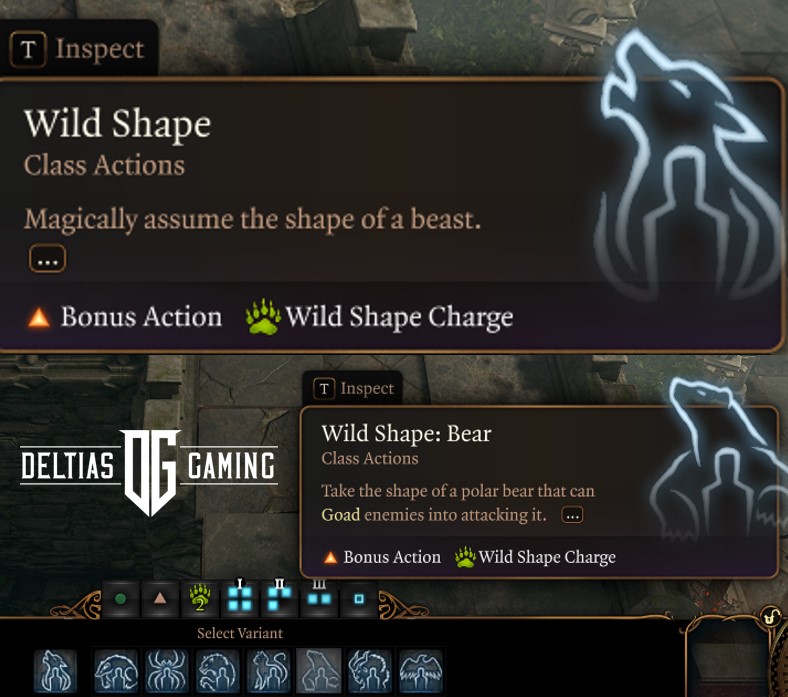
In Baldur’s Gate 3, Druids can use the Wild Shape ability to transform into a beast form. This ability is available once the Druid reaches level 2, and they have two charges of Wild Shape that they can replenish with each short rest.
When a druid Wild Shapes, they take on the game statistics of their beast form, including their hit points, armor class, movement speed, Strength, Dexterity, and Constitution scores. They also gain the special abilities of their beast form, such as the ability to climb walls, fly or breathe underwater.
However, there are some limitations to Wild Shape. The Druid’s Intelligence, Wisdom, and Charisma scores remain the same, so they cannot cast spells or speak in animal form. Additionally, the druid’s equipment merges into their animal form and cannot be used until they revert to their humanoid form. The type of beast form that a druid can Wild Shape into depends on their subclass.
Related:
Notes about Wild Shape:
- Cost Bonus Action
- Wild Shape Doesn’t Drop concentration
- While in Wild Shape, if you use all HP, return to human form
- While in Wild Shape, gain access to a self-heal
While Wild Shape is great, but also limits your ability to heal allies which can be critical. The idea on how to use it is, to use a powerful spell, even one that costs concentration as your action on your first turn. Then use your bonus action to Wild Shape. Also of note, the creatures you Wild Shape into will have their own set of skills, ability scores, and so forth. You can even drink potions in their form. The creature attacks scale in damage from Strength on most, but pumping up your strength won’t make them hit harder. So, stick to stacking Wisdom and Constitution and rely on the individual Shape’s ability score for offensive and defensive potential.
Druid Wild Shape Forms
| Shape | HP | Skills |
|---|---|---|
| Cat | 2 | Claws Meow |
| Badger | 13 | Bite Claws Burrow |
| Bear | 30 | Goading Roar Claws |
| Wolf | 18 | Inciting Howl Bite Exposing Bite |
| Spider | 20 | Web Venomous Bite |
| Dire Raven | 21 | Beak Attack Rend Vision |
| Deep Rothé | 23 | Gore Charge |
| Owlbear | 65 | Enrage, Rupture |
| Panther | 45 | Jugular Strike, Prowl, Pounce |
| Sabre Toothed Tiger | 62 | Shred Armour, Jugular Strike |
Wild Shape Forms Explained
- Cat: shape gets 2 hit points and a simple melee attack and Meow which acts as a distraction. This form isn’t recommended for combat but is great for getting into small spaces!
- Badger: shape gets 13 hit points, a bite melee attack, a Claw action knockback, and a Burrow attack. This is great because it can knock enemies Prone. Use this if you need CC in your party.
- Bear: shape gets a massive 30 hit points to start, a claw attack, and a Roar. Roar acts like a taunt, forcing targets to attack you, and is a great move if you have a squishy Wizard taking a lot of pressure.
- Wolf: can increase its allies’ movement speed and leave its enemies by guaranteeing a critical strike. While you start with less HP than the Bear, consider this a high-damage form with a Bite attack. Howl increases allies’ movement and Exposing Bite guarantees the next attack to critical strike.
- Spider: starts with 20 hit points and has Venomous Bite action that does damage and possibly poisons targets. The Spider can also cover the ground with flammable webbing and impare movement which is a great CC.
- Dire Raven: shape starts with 21 HP, a peck attack, and Rend Vision which can Blind enemies. The Raven can also fly and reach hard-to-get locations.
- Deep Rothé: shape starts with 23 HP, has a force attack, Gore. Charge is a great crowd control area ability that can knock enemies prone.
- Owlbear: High Hit points with fantastic Aoe damage and stun ability.
- Panther: Can turn invisible and attack from shadows, gaining an advantage. With good hit points it’s a powerful Wild Shape.
- Sabre Toothed Tiger: Prone Enemies will receive huge damage. With the shred Armor ability, it can also weaken enemies.
Druid Spell Mechanics
- Cantrips: are like spells, but you can cast them infinitely, and they don’t require spell slots.
- Spell Slots: these are the limited resource for casting spells that can be replenished on long rest.
- Spell Levels: this refers to the potency and level of the spell, in BG3 they will go up to level 6.
- Prepared Spells: allow you to swap in and out spells in between combat.
- Concentration: is a spell mechanic that requires you to maintain concentration otherwise, the spell effect ends.
- Replacement Spells: Upon leveling up, you can learn and unlearn spells if you made a mistake in spell selection.
How to Find and Recruit Jaheira in Bg3
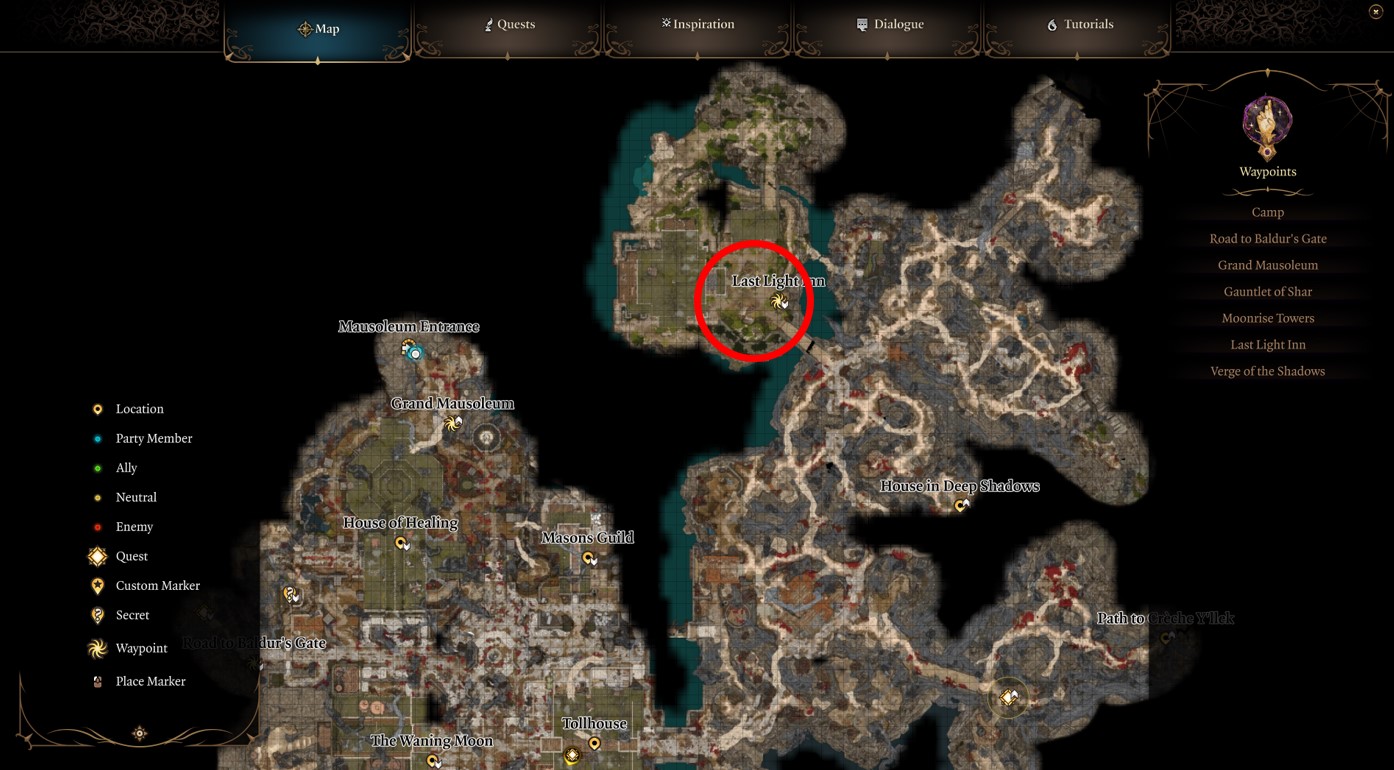
Follow these steps in Act 2 to recruit Jaheira in Baldur’s Gate 3:
- Complete Prologue and Act 1
- Travel to Shadow-Cursed Lands via Underdark or Githyanki Creche
- Take the Crech Ye’llek exit and move North West to Last Light Inn
- Cross the bridge which will trigger a cut scene and introduction
- Complete a mission and side, protect the Harpers
- Jaheira will join your camp
- Progress the Act 2 Story until you fight Ketheirc Thorm
- Ask her to join before you descend into the tower and she will agree, but won’t come with you until Act 3.
Some important notes about Jaheria’s recruitment. You need to keep Cleric Isobel alive during the monster encounter. You also need to keep the Nightsong alive. And as you descend for the final fight of Act 2, make sure she joins you as a companion, not an AI-controlled friendly. Complete the fight with Ketheric Thorm and she will continue to stay in your party.
Recommended Jaheira Subclass – Circle of the Moon
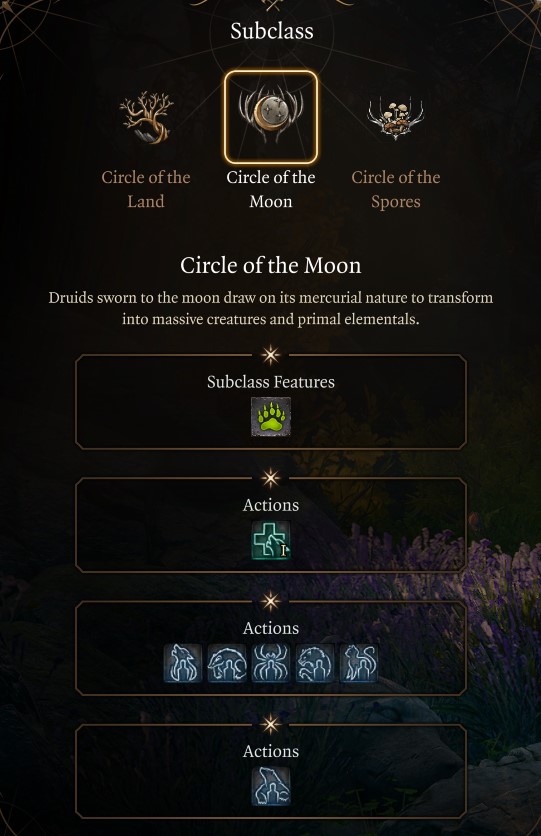
The Best Subclass for Baldur’s Gate 3 Best Jaheira Companion Build Guide is Circle of the Moon, focusing on transforming into Beast using the Wild Shape Ability to do high damage and still cast spells. At level two, you can make your decision on which to pick. Here’s a brief description of the Druid’s subclasses and their strengths:
- Circle of the Moon: This subclass emphasizes the Druid’s ability to transform into powerful beasts.
- Circle of the Land: This subclass focuses on the connection between the Druid and the natural world.
- Circle of Spores: Focuses on using the power of decay and fungi to fight their enemies.
Baldur’s Gate 3 Circle of the Moon Druid Features & Progression
We are focused on high damage, survivability, and group utility so Circle of the Moon makes the best choice for Jaheira. This will allow us to optimize Wild Shape usage and focus on becoming wild creatures which get much more powerful later in the game.
The Circle of the Moon Druid subclass unlocks the following features and spells:
- Lunar Mend (Level 2): Expend spell slots to regain Hit Points while in Wild Shape.
- Combat Wild Shape (Level 2): Wild Shape now uses a Bonus Action instead of an Action.
- Available Wild Shapes (Level 2): Badger, Bear, Cat, Spider, Wolf
- Available Wild Shapes (Level 4): Dire Raven and Deep Rothé
- Wild Strike (Level 5): You can make an additional attack after making an unarmed strike while in Wild Shape.
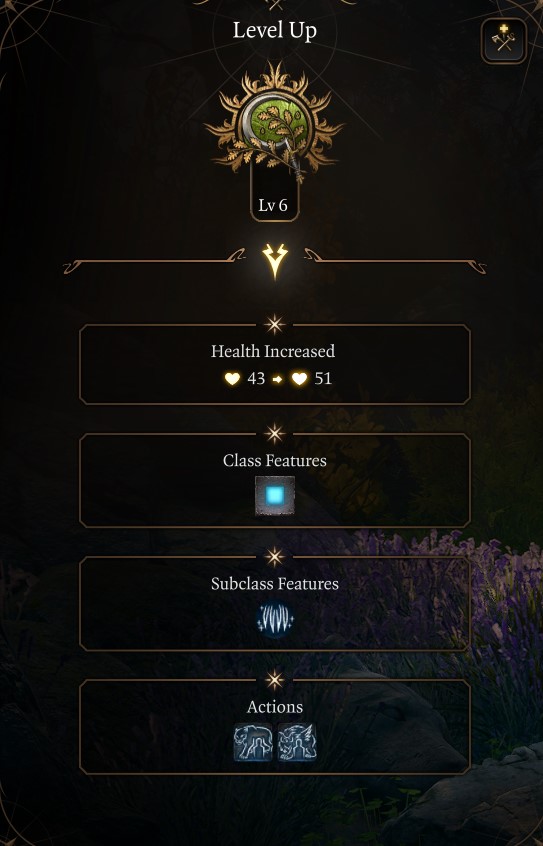
- Primal Strike (Level 6): While in beast form, your attacks count as magical to overcome resistance and immunity to non-magical damage.
- Available Wild Shapes (Level 6): Panther and Owlbear
- Available Wild Shapes (Level 8): Sabre-Toothed Tiger
- Improved Wild Strike (Level 10): You can make 2 additional attacks after making an unarmed strike while in Wild Shape.
- Available Wild Shapes (Level 10): Dilophosaurus, Air Myrmidon, Earth Myrmidon, Fire Myrmidon, Water Myrmidon
Character Creation for Jaheira Companion Build
| Category | Selection |
|---|---|
| Character | Origin – Jaheira |
| Race | High Half-Elf |
| Racial Bonus | Darkvision, Fey Ancestry, Extra Cantrip |
| Class | Druid |
| Subclass | Circle of the Moon |
| Cantrips | Shillelagh, Thorn Whip, Guidance, Poison Spray |
| Spells | Healing Word, Ice Knife, Thunderwave, and Cure Wounds |
| Background | Soldier |
| Ability Score | STR: 10 DEX: 14 CON: 16 INT: 10 WIS: 16 CHA: 8 |
| Skill Proficiencies | Animal Handling and Perception |
Jaheira Race Choice
Jaheira by default is a High Half-Elf. A touch of the Feywild remains in half-elves with this bloodline, and even those untrained in magic possess a hint of wild power. Here are the following bonuses:
- +2 and +1 to any ability score of your choosing.
- Fey Ancestry: Advantage on saving throws when an enemy attempts to charm you, and prevents you from being put to sleep by potions, scrolls, and spells.
- Darkvision: see up to 12m in dark locations.
- Extra Cantrip: Firebolt which can do decent damage and blow up oil or grease to cause fire explosions.
High Half-Elf makes a great Druid character and with flexibility in ability score it’s a natural fit for the Baldur’s Gate 3 Best Jaheira Companion Build Guide
Read More – Top 10 builds for Baldur’s Gate 3
Recommended Skills for Druid Circle of the Moon Build
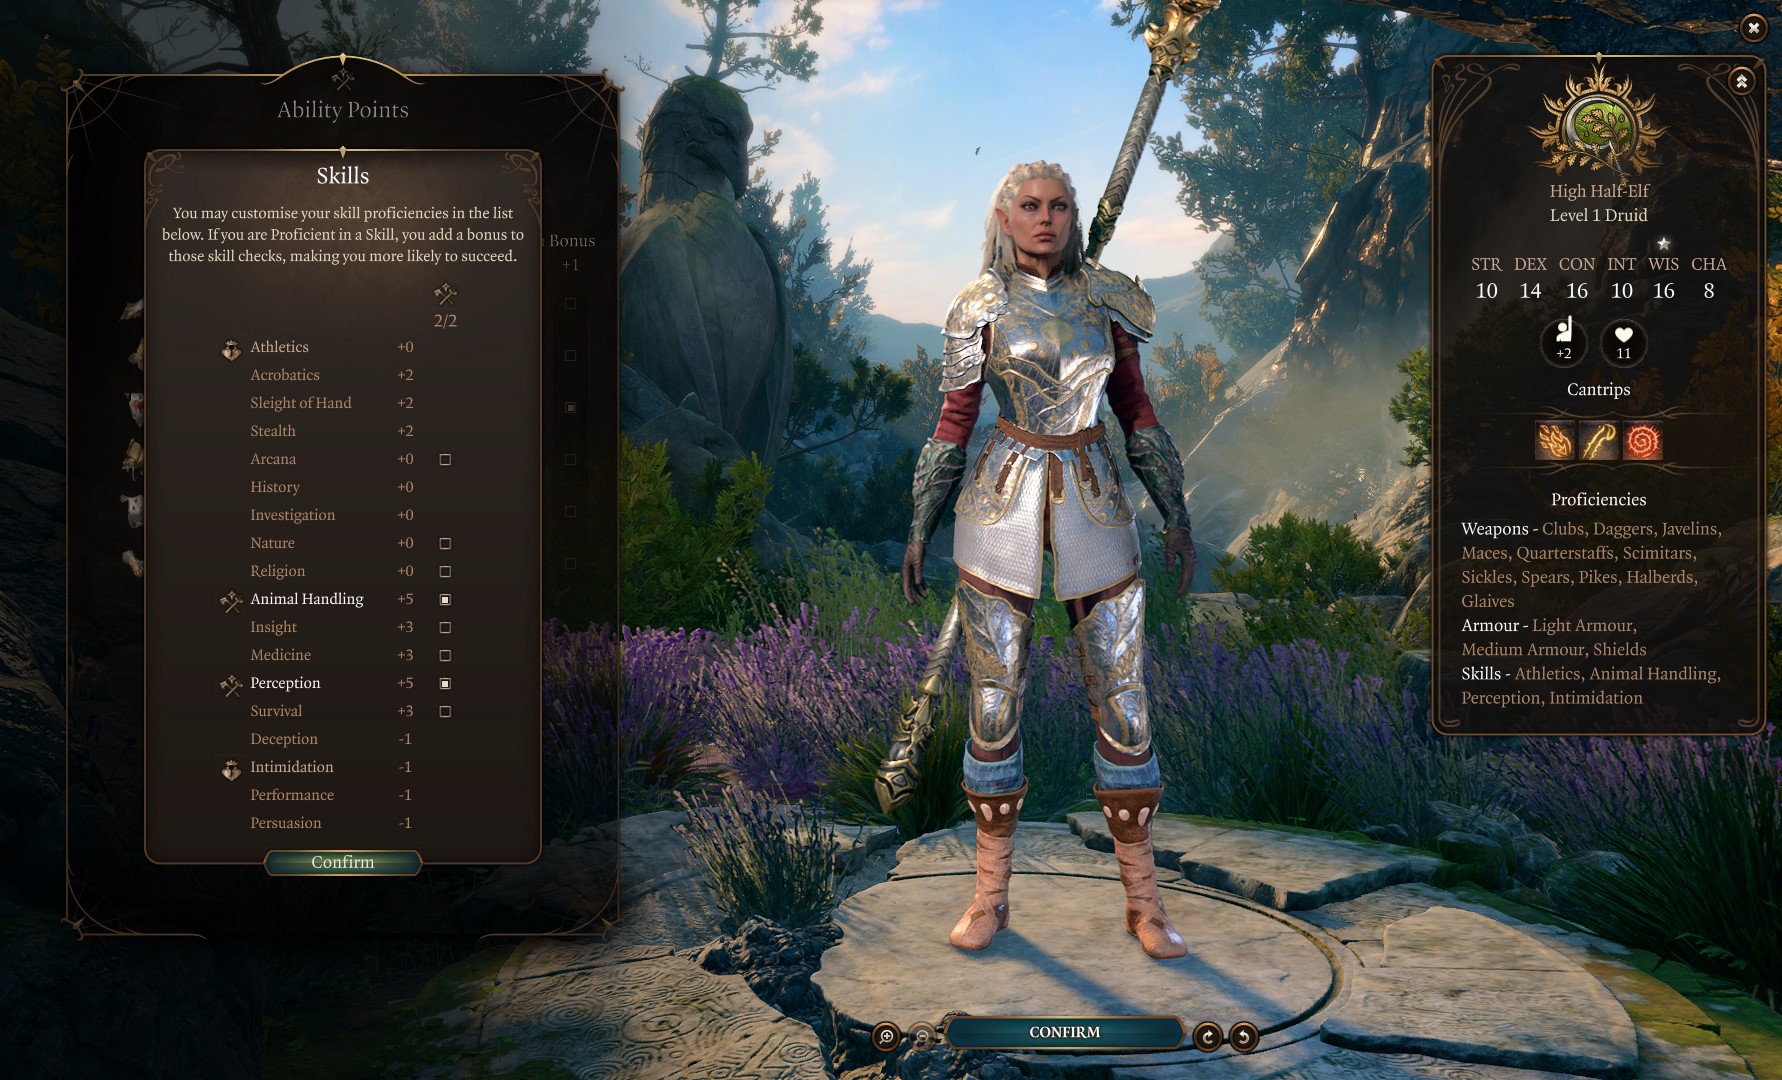
Animal Handling and Perception are the best skills for the Baldur’s Gate 3: Best Jaheira Companion Build Guide because they complement your class abilities and enhance your effectiveness in various situations. In Baldur’s Gate 3, skills represent the abilities and proficiencies of your character that allow them to perform various actions and interact with the game world. Skills are associated with specific attributes and are used to determine the success or effectiveness of certain actions or abilities. They can be edited during character creation or with companions, during respec or reroll screen.
Also Check:- BG3 Interactive Map
Here are the skills for Druid in Baldur’s Gate 3:
- Animal Handling is a Wisdom Skill.
- Perception is a Wisdom Skill.
Best Jaheira Ability Scores
In Baldur’s Gate 3, ability scores are the six core stats that determine a character’s capabilities. For companions, the game automatically distributes them without the ability to change initially. However, later you can change their default ability scores in your camp via the NPC Withers for 100 gold.
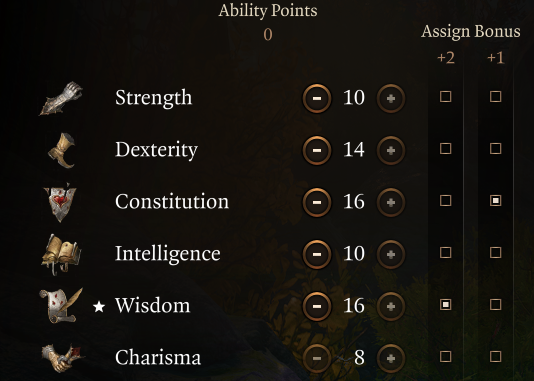
Here’s the best ability score for the Baldur’s Gate 3: Best Jaheira Companion Build Guide:
| Ability | Points Goal |
|---|---|
| Strength | 10 |
| Dexterity | 14 |
| Constitution | 16 |
| Intelligence | 10 |
| Wisdom | 16 |
| Charisma | 8 |
The best ability score for Jaheira reaches 16 Wisdom to increase spellcasting potency, then 16 Constitution which helps with concentration spells and health. 14 Dexterity is the next priority because this can add to your Armour Class (AC) while wearing medium armor. This will give you a great blend of survivability and damage, while the Wild Shape creatures will have their own ability score when you transform.
Read More – Baldur’s Gate 3 Shadow Magic Sorcerer Build
After you choose the Druid, Circle of the Moon, race, and background, the game will automatically distribute your abilities in the character creation abilities tab. You will need to reprioritize the stats for the chart for the best druid build. Simply use the plus-minus in the character creator and make sure you have the suggested race, or the numbers will be off.
Druid Spell Slots
Here’s a chart that shows the levels and spell slots unlocked for the Baldur’s Gate 3: Best Jaheira Companion Build Guide:
| Druid Level | 1st | 2nd | 3rd | 4th | 5th | 6th |
|---|---|---|---|---|---|---|
| Level 1 | 2 | 0 | 0 | 0 | 0 | 0 |
| Level 2 | 3 | 0 | 0 | 0 | 0 | 0 |
| Level 3 | 4 | 2 | 0 | 0 | 0 | 0 |
| Level 4 | 4 | 3 | 0 | 0 | 0 | 0 |
| Level 5 | 4 | 3 | 2 | 0 | 0 | 0 |
| Level 6 | 4 | 3 | 3 | 0 | 0 | 0 |
| Level 7 | 4 | 3 | 3 | 1 | 0 | 0 |
| Level 8 | 4 | 3 | 3 | 2 | 0 | 0 |
| Level 9 | 4 | 3 | 3 | 3 | 1 | 0 |
| Level 10 | 4 | 3 | 3 | 3 | 2 | 0 |
| Level 11 | 4 | 3 | 3 | 3 | 2 | 1 |
| Level 12 | 4 | 3 | 3 | 3 | 2 | 1 |
Jaheira Level Progression
| Level | Class | Selection |
|---|---|---|
| 1 | Druid | Shillelagh, Thorn Whip, Healing Word, Ice Knife, Thunderwave, and Cure Wounds |
| 2 | Druid | Subclass: Circle of the Moon |
| 3 | Druid | Flaming Sphere |
| 4 | Druid | Feat: Ability Improvement Wisdom, Guidance, Heat Metal |
| 5 | Druid | Call of Lightning, Sleet Storm |
| 6 | Druid | Owlbear, Gust of Wind |
| 7 | Druid | Ice Storm, Conjure Woodland Beings |
| 8 | Druid | Feat: War Caster, Confusion |
| 9 | Druid | Conjure Elemental, Mass Cure Wounds |
| 10 | Druid | Poison Spray, Insect Plague, Improved Wild Strike |
| 11 | Druid | Heroes’ Feast, Heal |
| 12 | Druid | Feat: Ability Improvement Wisdom, Stoneskin |
Alternative Jaheira Druid Build
For our alternative Jaheira build, we’re introducing a multiclass option that dips into Wizard at Level 8. This setup blends the Circle of Spores subclass with the Evocation Wizard, creating a high-impact spellcaster focused on damage. With Evocation’s Sculpt Spells feature, you can unleash powerful area-of-effect magic without harming allies, making this build ideal for players who want a more aggressive, spell-focused take on the Druid. It’s a different playstyle where you trade healing and shapeshifting for raw magical firepower.
| Level | Class | Selection |
|---|---|---|
| 1 | Druid | Shillelagh, Thorn Whip, Ice Knife, Thunderwave, Cure Wounds, Healing Word |
| 2 | Druid | Subclass: Circle of the Spores, Wild Shape, Bone Chill, Speak with Animals |
| 3 | Druid | Flaming Sphere, Blindness, Detect Thoughts |
| 4 | Druid | Feat: War Caster, Poison Spray, Heat Metal |
| 5 | Druid | Wild Strike, Animate Dead, Gaseous Form, Sleet Storm |
| 6 | Druid | Fungal Infestation, Call Lightning |
| 7 | Druid | Conjure Woodland Beings, Ice Storm, Blight, Confusion |
| 8 | Wizard | Minor Illusion, Mage Hand, Blade Ward, Fire Bolt, Shield, Find Familiar, Chromatic Orb, Tasha’s Hideous Laughter, Magic Missile, Feather Fall |
| 9 | Wizard | Subclass: Evocation, Burning Hands |
| 10 | Wizard | Misty Step, Scorching Ray |
| 11 | Wizard | Feat: Ability Improvement Wisdom, Light, Mirror Image, Invisibility |
| 12 | Wizard | Fireball, Counterspell, Conjure Minor Elemental |
Level 1

Remember companions come with default class and ability score. If you can, unlock Withers as early as level 2 just after the prologue, and respec Jaheria’s skills and ability score which is listed above. Moreover, her default class is a Druid who frequently Wild Shapes. We decided to keep her in that role identity and class for the sake of the story and gameplay feel. Below are our suggestions on how to level him up as a Druid effectively.
At level one, you will select the ideal Cantrips and Spells. You can select two cantrips and four spells. Here are two cantrip suggestions:
- Shillelagh Cantrip: Imbue your staff or club with nature’s power. It becomes magical, deals 1d8+2 Bludgeoning damage, and uses your Spellcasting Ability for Attack Rolls. This is great because it uses a bonus action, not an action, and does not require concentration.
- Thorn Whip: Strike at a creature with a thorny, vine-like whip and pull it 3m closer to you. This acts as a way to control targets, mainly casters or someone you need to pull closer. Swap to Guidance if you do not have a Cleric or another spellcaster with this Cantrip. It’ll make speech checks much easier.
Suggested spells for Druid:
- Thunderwave: Release a wave of thunderous force that pushes away all creatures and objects (2d8 Thunder). This spell acts as a knockback and should be offensive to get instant kill-off ledges.
- Cure Wounds: Touch a creature to heal it. Costs an action and needs to be in the melee range to heal, but you can pair them together with the Healing Word.
- Healing Word: 18m range heal 1d4. This spell is great because it requires a bonus action rather than an action and a level 1 spell slot.
- Ice Knife: Throw a shard of ice that deals 1∼10 Piercing damage. It explodes and deals 2∼12 Cold damage to anyone nearby. This is a great range damage dealing spell at the start of the game that can cause the prone status effect.
- Enhanced Leap: Triple a creature’s jumping distance. Rarely used, but can be helpful outside of combat to reach hidden areas.
Gameplay: you won’t be able to Wild Shape just yet so rely on your spells and cantrips for damage at this level. The main damage skill is Ice Knife and Shillelagh cantrip. Thankfully you won’t be at this level long, and then you can Wild Shape using spells in conjunction with animal abilities.
Jaheira Gameplay & Priorities
During the early phase of BG3, you will want to equip Jaheira with anything at the start of the game. Transition to medium armour and quarterstaff with a shield at level 3 after selecting your subclass. It’s not until later in Act 3 that you will find and equip powerful Light Armour sets that aid in Wild Shape. Until then, keep your AC high outside of Wild Shape form.
Your overall priority with this build is the following:
- Complete Prologue
- Recruit Companions
- Reached Hollowed City/Druid Grove
- Sell, Stock up, complete quest
- Unlock Withers, respec companions if needed
- Progress to level 5
- Reach Underdark and Grymforge
Following these steps ensures a strong foundation for her especially if you plan on playing solo or on Honour Mode difficulty.
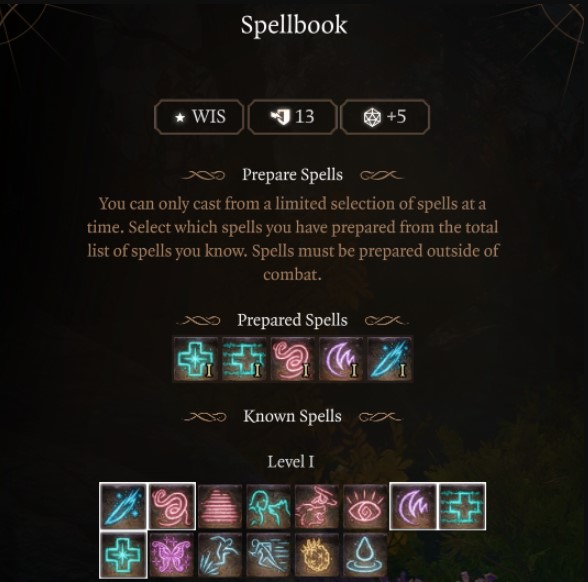
Level One Prepared Spells: Healing Word, Ice Knife, Thunderwave, and Cure Wounds.
Level 2
At level two, you will want to pick the Circle of the Moon subclass. This subclass gives you two important perks to help with Wild Shape:
- Combat Wild Shape: use a bonus action to assume the form of a beast. You may transform twice per short rest.
- Lunar Mend: Expend spell slots to regain hit points while wild-shaped. You regain 1d8 hit points per level of the spell slot.
Level two will also unlock another level 1 spell slot.
- Entangle: Vines sprout from the ground, slowing creatures within and possibly Entangling them. This acts as a concentration-based single-target crowd control ability.
Using Wild Shape at Level 2
You want to use the Wild Shape forms for various combat situations. At this level, the Wolf is your damage dealer, the Spider is great for snares and immobilization and the Badger is great for utility and damage because it has 3 attacks. If you “die” or reach 0 HP in Wild Shape form, you will revert to your physical form. So, you can use this as an extra health bar if you are in trouble.
The downside to going into Wild Shape is losing access to all your spells. You will have the animal’s abilities, spells, and access to self-heal. This is why the build is more of a damage dealer than support. So be wary, if you want to off-heal teammates, you can exit the Wild Shape form and do it manually.
Gameplay: On your first turn try to open up with a damage spell using your action first. Typically this Ice Knife or Thunderwave if enemies surround you. Then use your Bonus Action to transform into a Wild Shape. Typically the Badger at this level. Now go offensive and use the Badger skills. Burrow is a great crowd-control effect if your team needs control. Also, consider going out of Wild Shape manually when you need to cast another ability. This method of casting, and transforming will be the gameplay loop from this point forward.
Jaheira Level Two Prepared Spells: Healing Word, Entangle, Thunderwave, Cure Wounds, and Ice Knife.
Level 3
Reaching Level three unlocks the ability to cast level 2 spells along with more slots for level 1. Our suggestion is to select the Flaming Sphere spell.
- Flaming Sphere: Summon a flaming sphere that damages nearby enemies and objects. The sphere sheds bright light in a 6m radius, and dim light for an additional 6m.
- While this doesn’t look impressive, it’s a god-tier spell. The sphere can be summoned at range, has a lot of health, and oftentimes soaks up all the damage for your party. It requires concentration so you’ll want to avoid using another concentration spell. Cast it ahead when you expect big damage coming from multiple sources. You can also cast Flaming Sphere with your action, then use a bonus action to Wild Shape. This will not drop concentration and is very helpful at this level.
Gameplay at this level is somewhat similar to before. Cast Flame Sphere, get into your preferred Wild Shape, and do damage!
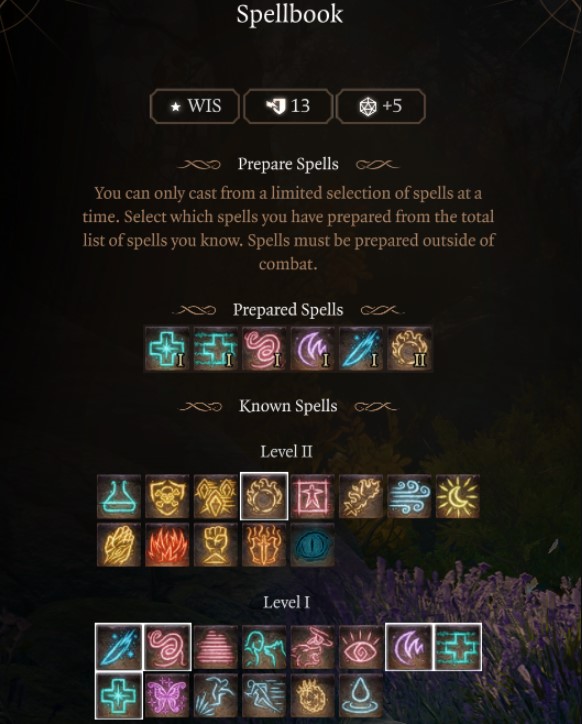
Jaheira Level 3 Prepared Spells: Healing Word, Entangle, Thunderwave, Cure Wounds, Ice Knife, Flaming Sphere.
Level 4

At level four you can choose between a feat (feature) or an increased ability score, specifically Wisdom. Increase Wisdom by two to reach 18 as the feats for Druids aren’t that impressive. You will get another Cantrip and another level 2 spell slot.
Cantrip
- Guidance Cantrip: Bestow guidance upon an ally. They gain a +1d4 bonus to Ability Checks. This is a great spell to use during dialogue and helps support conversation dice rolls.
Spell
- Heat Metal: the TLDR on this is a skill, if someone is wearing a metal weapon or armor, they can drop their armor and take damage. This requires concentration and has an 18m range. It’s essentially a must-have skill against hard-hitting Fighters and Barbarians and completely shuts them down and does damage.
Deep Rothe Shape: this will be unlocked at this level. This form is amazing for crowd control. Being able to charge ahead and knock a group of enemies in prone is awesome for the group. Use this form when you need mobility, melee damage, and stuns.
Gameplay at this level gives you some flexibility in your opening spell. Typically it’s Flame Sphere unless you need to drop an enemy’s weapon with Heat Metal. Wild Shape into Deep Rothe gore is your skill for damage, while Charge is your crowd control skill.
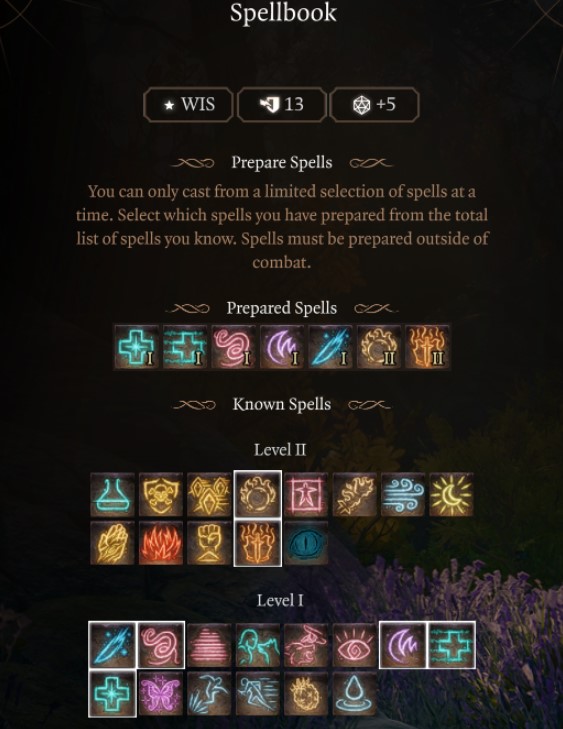
Level 4 Prepared Spells: Healing Word, Entangle, Thunderwave, Cure Wounds, Heat Metal, Flaming Sphere, Ice Knife.
Level 5
At level five, the Baldur’s Gate 3: Best Jaheira Companion Build Guide gets access to two level 3 spells which are very powerful. What you select will depend on your group composition. Meaning, that if you have a Wizard in the group focused on heavy area damage, you may want to make a different selection. Typically, the level 3 spells have a huge jump in power and can damage massive groups at once so that will be our focus. Additionally, you unlock Wild Strike while in Wild Shape form.
Spells
- Call of Lightning: Call down lightning to hit all targets within range. Each turn can call down lightning again without expending a spell slot. The strength of this spell is the massive damage and that you can apply the spell with an action. This gives the Druid a huge range area damage nuke that can be used in conjunction with other range spells.
- Sleet Storm: Call forth a storm of sleet that douses fires, creates an ice surface, and disrupts the concentration of spellcasters. This spell allows you to create an elemental damage spell in a massive 9m area. It also disrupts casters and is a ranged spell. Cast this at a choke point with heavy melee aggressors with ice and watch them fall prone. Or shut down the range caster and protect your group.
Wild Strike: make an additional attack after making an unarmed strike while in Wild Shape. This is essentially like an extra attack for Rangers, Fighters, Barbarians, etc.
Gameplay at this level expects a big jump in damage with spells, both of which are area-based. Also, your Wild Shape damage will be much higher allowing you to attack twice. Ideally, you want to use your big area-based damage or Flame Sphere first, then Wild Shape and prepare for melee battle on turn two.
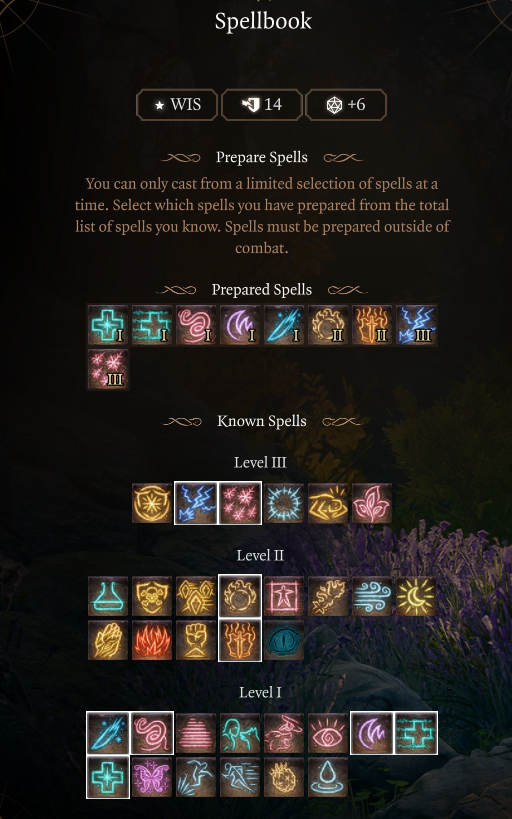
Level 5 Prepared Spells: Healing Wound, Entangle, Thunderwave, Cure Wounds, Ice Knife, Heat Metal, Flaming Sphere, Call of Lighting, and Sleet Storm.
Level 6
At level 6 you get one additional spell and two new forms. The spell choice is up to you, Ice Knife defaults back in this position, and it’s a solid choice for range damage when we have limited level 3-4 spell slots.
- Wild Shape: Panther: consider this the damage dealer of the two new entries. It has a unique attack Juglar strike, which deals extra damage to prone enemies. This is easy to proc with ice spells or other crowd control. The combo you can use to take advantage of is having someone shoot an Ice Arrow at range with a high probability of being prone. Then on your turn, you can pounce doing much more damage.
- Wild Shape: Owlbear: consider this form great area damage and crowd control CC. This form also has a ton of damage and should be used when you need to rush into a large group of enemies and stun them to relieve pressure from your group.
Spell
- Gust of Wind: Summon a strong wind that clears all sounds and pushes creatures back 5m, forcing them Off Balance. This can be helpful as a strong area knockback similar to and a bit better than Thunderwave.
At this level, you have more options in Wild Shape and Spells. Combine area damage spells with whatever needs you have for Wild Shape like single target damage or area. I typically used the Owlbear because the Enrage Action area skill can frighten enemies in a radius. This shape also has a ton of health as well.
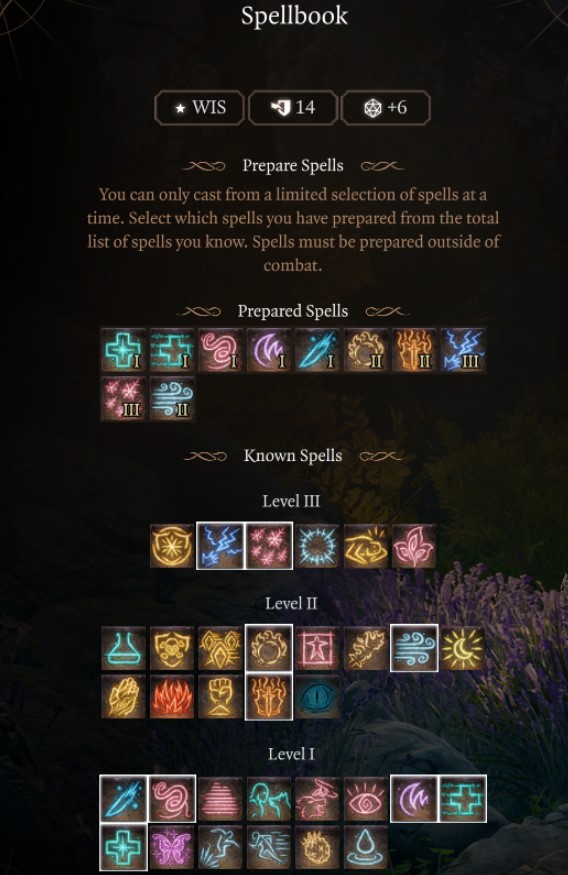
Level 6 Prepared Spells: Healing Wound, Entangle, Thunderwave, Cure Wounds, Ice Knife, Heat Metal, Flaming Sphere, Call of Lighting, Sleet Storm, Gust of Wind.
Level 7
At level 7, you get access to level 4 spells. You can select more than one if you wish and we suggest taking two:
- Ice Storm: deals 2d8 bludgeoning damage and +4d6 cold damage in a massive 6m radius.
- Conjure Woodland Beings: summons a fey creature friendly.
Ice Storm acts as another massive area of damage, that can trigger status effects. Conjure Woodland is useful because it doesn’t require concentration. In essence, you could use both Flame Sphere and Conjure Woodland for two companions aiding you. The Woodland creatures also have a lot of spells and skills useful for damage and crowd control. They can fulfill that role, while you Wild Shape into a damaged form.
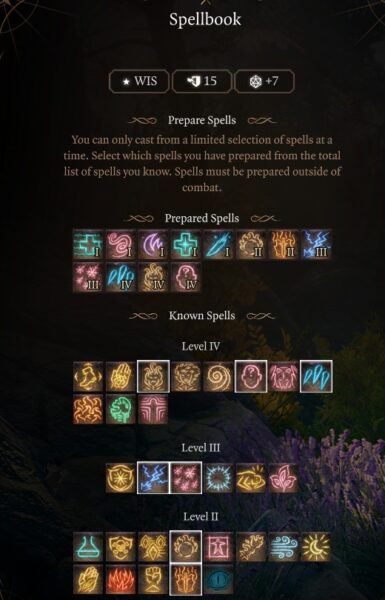
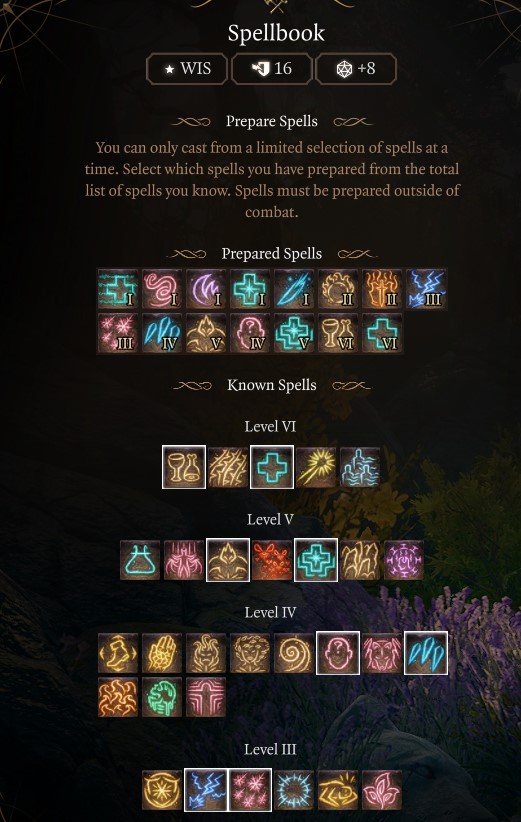
At this level, drop Gust of Wind select both level four spells, and use one during combat. The picture prepared spells is slightly off, don’t take Flame Blade, instead use Ice Knife. On tough fights, I use my spell slot for Conjure Woodland Being rather than Ice Storm.
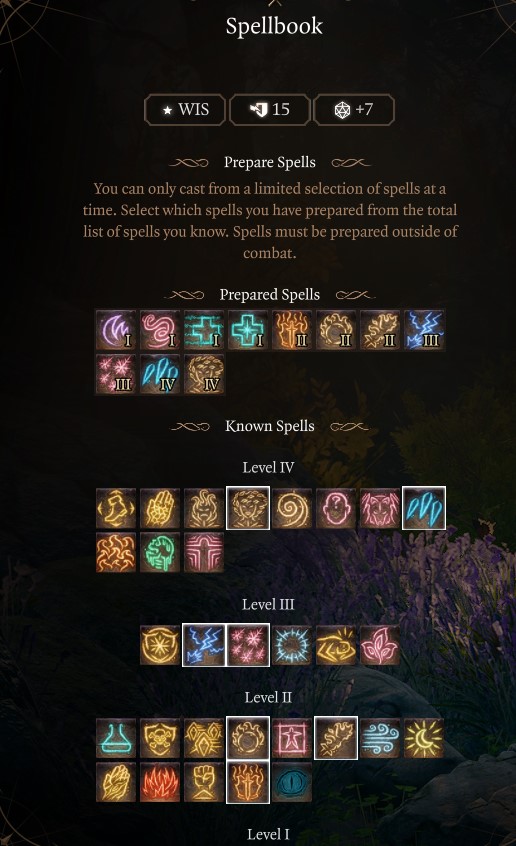
Level 7 Prepared Spells: Healing Wound, Entangle, Thunderwave, Cure Wounds, Ice Knife, Heat Metal, Flaming Sphere, Call of Lighting, Sleet Storm, Ice Storm, Conjure Woodland Being.
Level 8
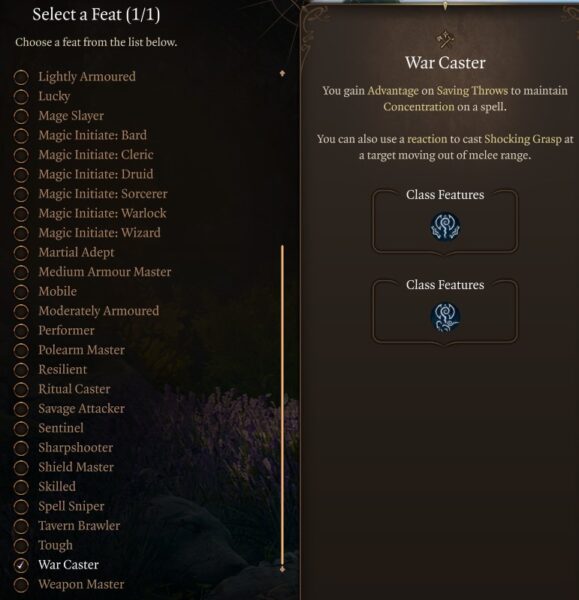
Level 8 you get another Wild Shape, an additional spell slot, and a feat. We suggest taking the War Caster feat, Confusion Spell, and explaining the Saber Tooth Tiger Wild Shape form.
- War Caster: You gain Advantage on Saving Throws to maintain Concentration on a spell. You can also use a reaction to cast Shocking Grasp at a target moving out of melee range. War Caster helps dramatically maintain concentration which is almost always active for our build. We will use the level 12 feat to push our Wisdom to 20, but after testing this was more helpful at level 8.
- Confusion: Befuddle a group of creatures, causing them to attack at random, wander around aimlessly, and occasionally skip turns in the stupor. Usage: a massive crowd control skill and one of the best because it can make enemies attack each other and has a massive area.
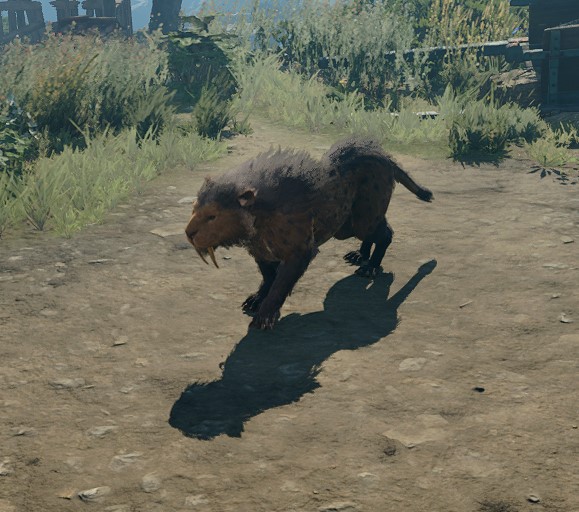
Wild Shape: Sabre-Toothed Tiger: this is just a better version of the Panther with similar damage and skills (jugular). To make the most out of the damage, you want to attack Prone (knocked down) targets. You can proc this effect with cold damage and even cast your cold spells prior to transforming. Companions and allies can proc this as well, and focus on those targets for extra damage.
Level 8 Prepared Spells: Healing Wound, Entangle, Thunderwave, Cure Wounds, Ice Knife, Heat Metal, Flaming Sphere, Call of Lighting, Sleet Storm, Ice Storm, Conjure Woodland Being, Confusion.
Level 9
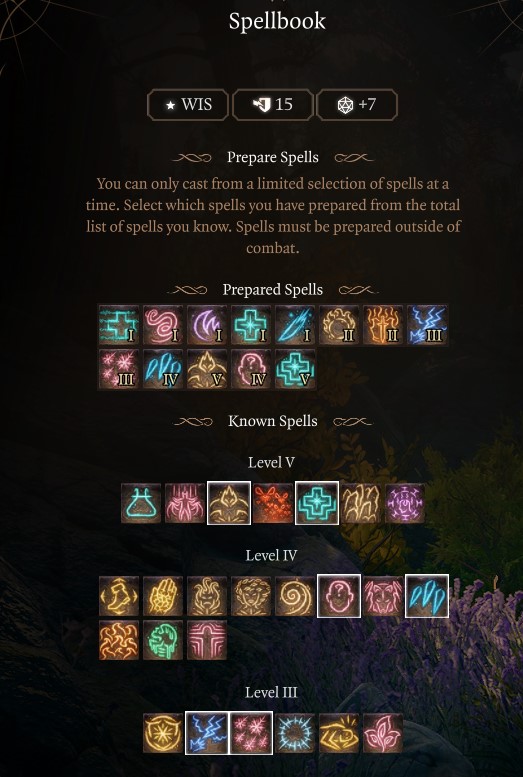

At level 9 the Druid gains access to level 5 spells. We want to drop Conjure Woodland Being and pick up Conjure Elemental and Mass Cure Wounds.
- Conjure Elemental: Bend the barrier between the Planes until they disgorge an elemental ally to follow and fight for you. This will summon one of possibly four different Elemental creatures to fight for you. I prefer the Earth Elemental because it can stun opponents. Whatever you summon, will follow you around and fight for you and not require concentration. The amount of damage and pressure these things can handle is staggering and I highly recommend using it. You can pre-cast this before combat after a long rest and keep the elemental the entire time even when you Wild Shape.
- Mass Cure Wounds: Up to 6 creatures regain 3d8+Spell Ability modifier. This spell acts as a massive group heal rather than single target. You can select up to 6 allies making it great when your entire team needs a big heal. The radius is generous and the healing is good. You can combine this with bonus action Healing Word and double the healing potential within one turn.
Level 9 Prepared Spells: Healing Wound, Entangle, Thunderwave, Cure Wounds, Ice Knife, Heat Metal, Flaming Sphere, Call of Lighting, Sleet Storm, Ice Storm, Confusion, Mass Cure Wounds, Conjure Elemental.
Level 10
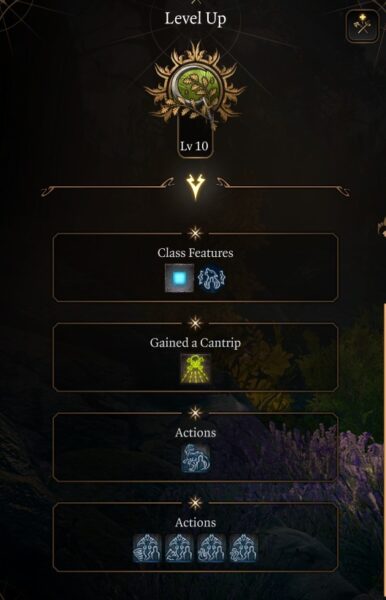
Level 10 the Druid unlocks multiple Wild Shape Forms, a Cantrip, new Wild Shapes, and a new spell.
- Poison Spray Cantrip: Project a puff of noxious gas dealing 1-12 Poison damage in a 3m radius. Simple Poison cantrip we are most likely not going to use at this level.
- Insect Plague: Locusts attack everyone within range, make the area Difficult Terrain, and impose a Disadvantage on Perception Checks.
- Improved Wild Strike: You can make 2 additional attacks after making an unarmed strike while in Wild Shape. This mimics the Extra Attack Fighters and other melee classes, giving you two more attacks.
Wild Shape Dilophosaurus: Take the shape of a dilophosaurus whose Corrosive Spit can dissolve a target’s Armour Class. This is a decent Wild Shape form, but we get better ones with the Moon subclass so I usually don’t use this.
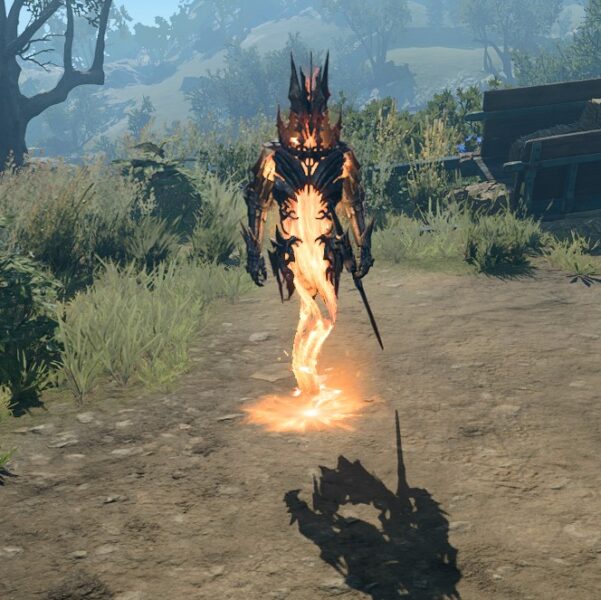
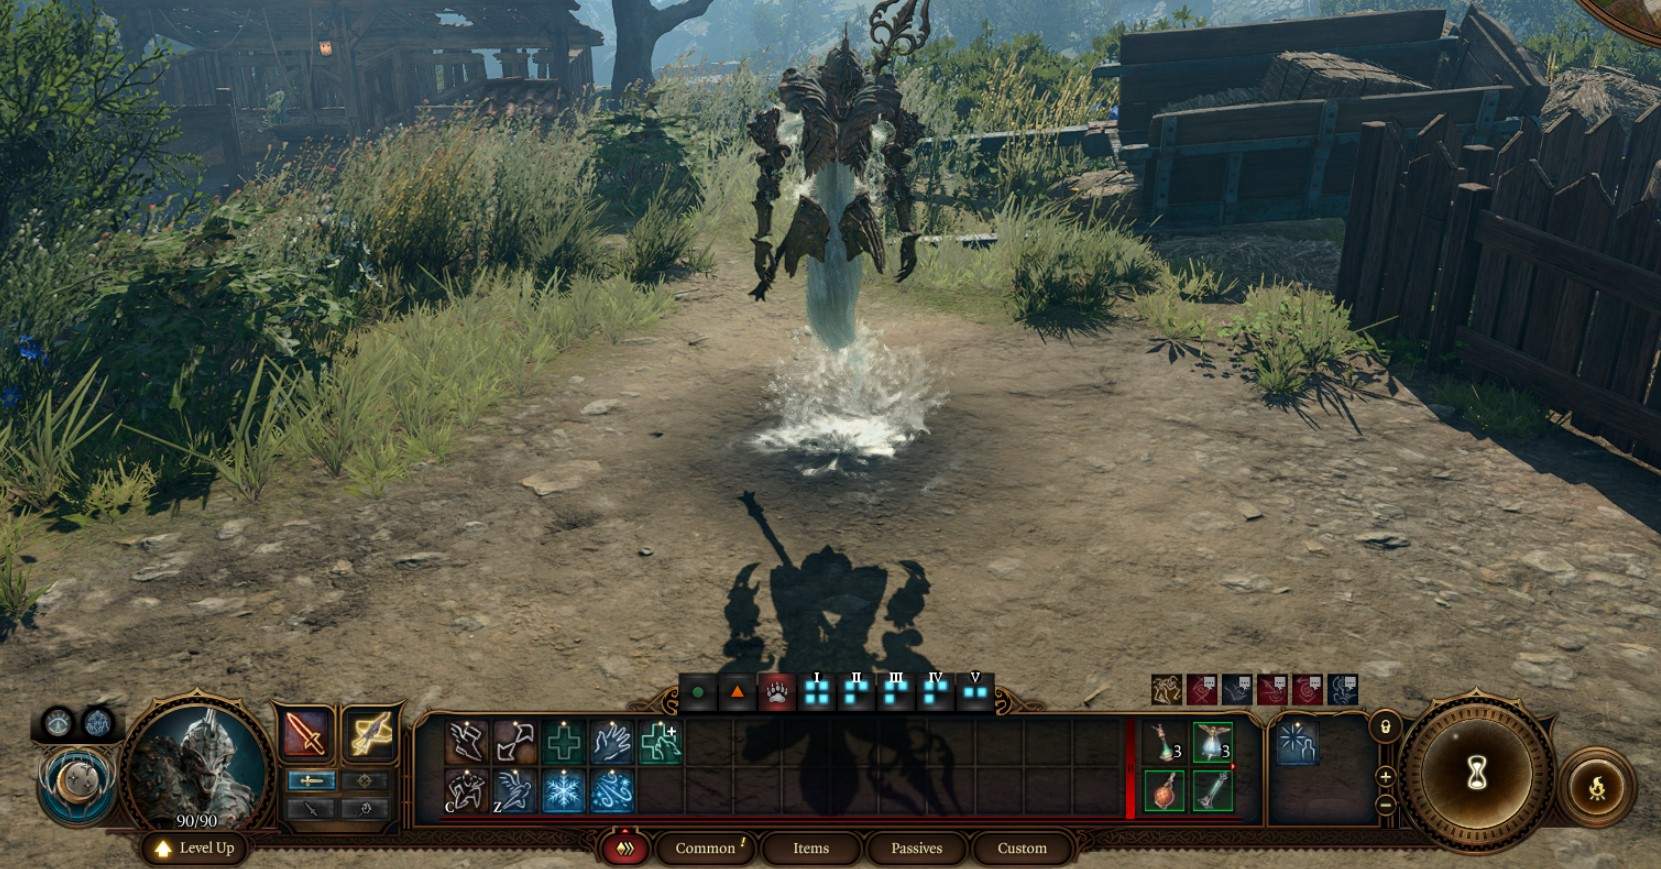
Wild Shape Myrmidon (subclass feature: with the Circle of the Moon subclass) We can summon one of four different Myrmidon creatures; Air, Earth, Fire and Water. Each comes with its three skills or spells. The Water Mymidon is my favorite because it has ice damage and a healing spell. This means you can stay in Wild Shape form doing damage while off-healing which the other Wild Shapes cannot do. These Myrmidon also cost two Wild Shape charges, not one but they are considerably more powerful.
At level 10 you can now cast Insect Plague and then Wild Shape into a Water Myrmidon. Don’t forget to maintain your summon during combat and it doesn’t require concentration giving you a massive advantage.
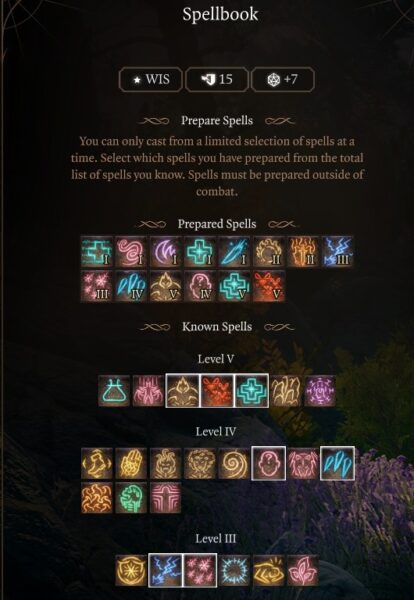
Level 10 Prepared Spells: Healing Wound, Entangle, Thunderwave, Cure Wounds, Ice Knife, Heat Metal, Flaming Sphere, Call of Lighting, Sleet Storm, Ice Storm, Confusion, Mass Cure Wounds, Conjure Elemental, Insect Plague.
Level 11
At level 11 the Druid unlikes the final tier of spells, level 6 spell slots. We are going to drop Insect Plague and pick up both Heroes’ Feast and Heal.
- Heroes’ Feast: Produce a feast for 12 guests that cures diseases, immunizes to poison, and increases hp by 2d10 for 24 hours. Utility skill for help with status effects and increase health pool. The strength of this skill is it lasts until a long rest, and you can cast your Conjure Elemental immediately following a long rest and not fall off.
- Heal: heal for 70 damage, and heal a target’s wounds, and remove Blindness and any diseases. Simply put the best single target heal in the game. You only get one spell slot of level 6, so you will need to choose a burst to heal or buff with Heroes’ Feast, but this will give you some flexibility.
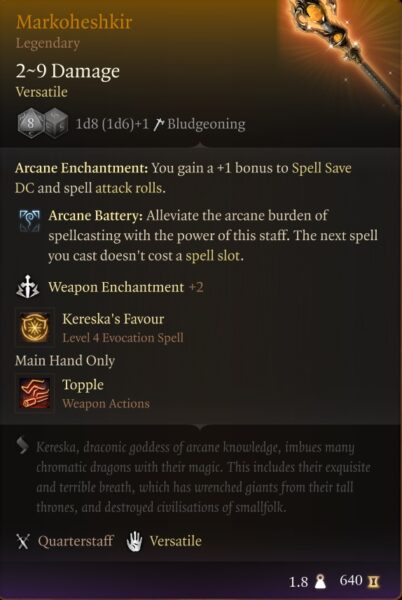
Keep in mind, that you will only get 1 level 6 spell slot per long rest. However, you can use the Markoheshkir legendary quarterstaff or Staff of Spellpower to negate the cost of one spell. Thus, you can negate Heroe’s Feast giving your team a massive buff, then use Heal when a teammate is in need. Consider these two items important to obtain for this build.
Level 11 Prepared Spells: Healing Wound, Entangle, Thunderwave, Cure Wounds, Ice Knife, Heat Metal, Flaming Sphere, Call of Lighting, Sleet Storm, Ice Storm, Confusion, Mass Cure Wounds, Conjure Elemental, Heroes’ Feast, Heal
Level 12
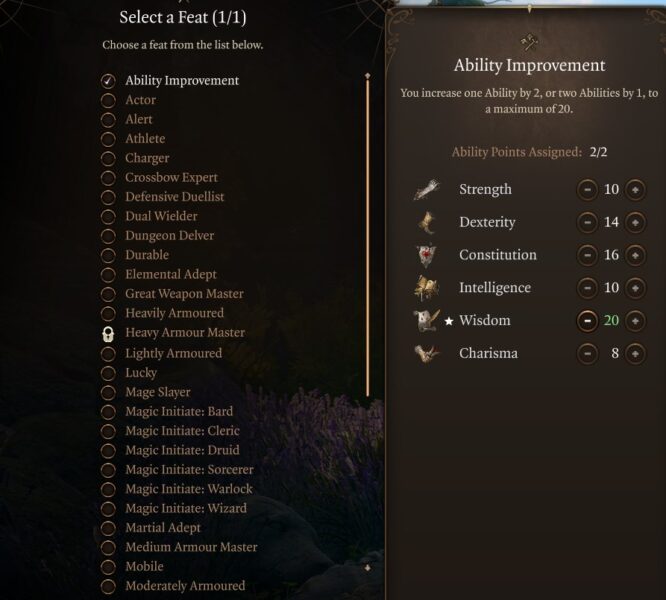
Congratulations on reaching the maximum level as a Druid in Baldur’s Gate 3. At level 12 the Baldur’s Gate 3 Best Jaheira Companion Build Guide will gain access to another spell slot. I suggest taking an earlier game spell Stoneskin. We will use our level 6 spell slot for a burst heal and Heroes’ Feast after a long rest, so the skill is a flexible choice.
- Feat: Take Ability Improvement for +2 to Wisdom increasing it to 20. This will give you great damage when casting spells before you Wild Shape or when you come out.
- Stoneskin: Turn a creature’s flesh hard as stone. It gains Resistance (half the damage) of all non-magical Bludgeoning, Piercing, and Slashing damage lasts until a long rest, and requires concentration. The benefit of this spell is it lasts until a long rest. Meaning, as soon as you finish a long rest, you can cast this similar to other spellcasters using Mage Armour. The more spells and buffs you have that last until a long rest, the more you can pre-cast and not use actions in combat. This makes a great durability skill to cast on yourself or a friend before jumping into combat.
Level 12 Prepared Spells: Healing Wound, Entangle, Thunderwave, Cure Wounds, Ice Knife, Heat Metal, Flaming Sphere, Call of Lighting, Sleet Storm, Ice Storm, Confusion, Mass Cure Wounds, Conjure Elemental, Heroes’ Feast, Heal, Stoneskin
Best Items For Jaheira (Weapons and Armor)
In Games like Baldur’s Gate 3, you’ll explore the world, loot chests and your enemies’ dead bodies, and complete quests and all those activities can reward you with useful items, potions, armor, weapons, scrolls, and much more. Progression and finding new gear are part of the game, and you will organically get more powerful weapons during your journeys.
Beginner: Act 1
Below is the best beginner gear for the Baldur’s Gate 3: Best Jaheira Companion Build Guide:
| Gear Slot | Best Gear Item | Effect |
|---|---|---|
| Head | Haste Helm | Increased Movement |
| Cape | – | |
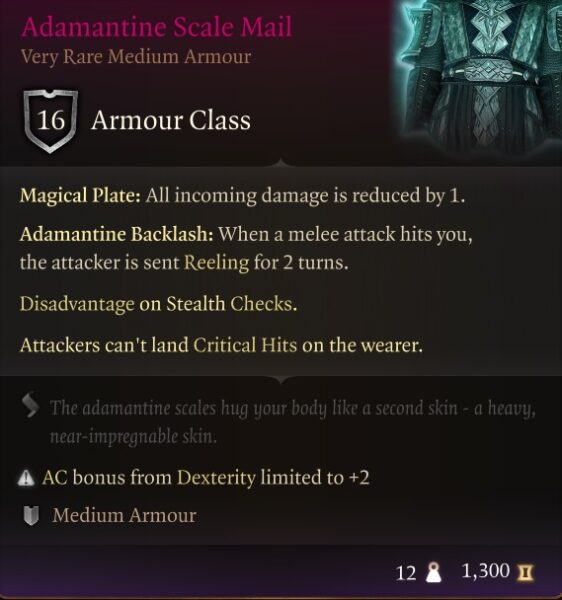
| Chest | Adamantine Scale Mail | 16 AC |
| Gloves | Hellrider’s Pride | Heals give resistance |
| Boots | Disintegrating Night Walkers | Misty Step Spell |
| Necklace | Amulet of Misty Step | Misty Step Spell |
| Ring | Ring of Absolute Force | Thunderwave Spell |
| Ring | The Whispering Promise | Healing gives Blessed |
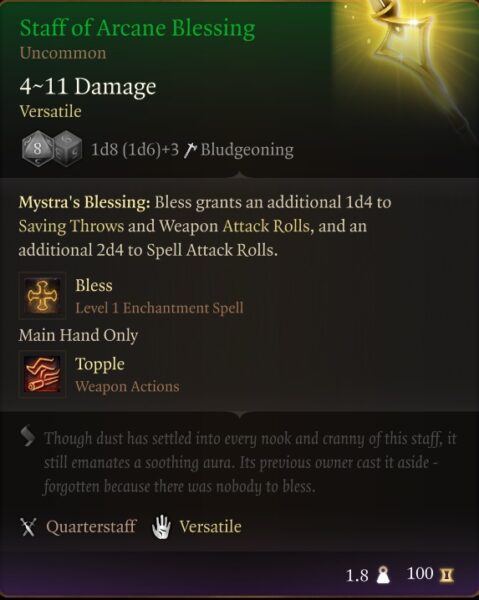
| Weapon 1 Main Hand | Staff of Arcane Blessing | Enhanced Blessed Spell |
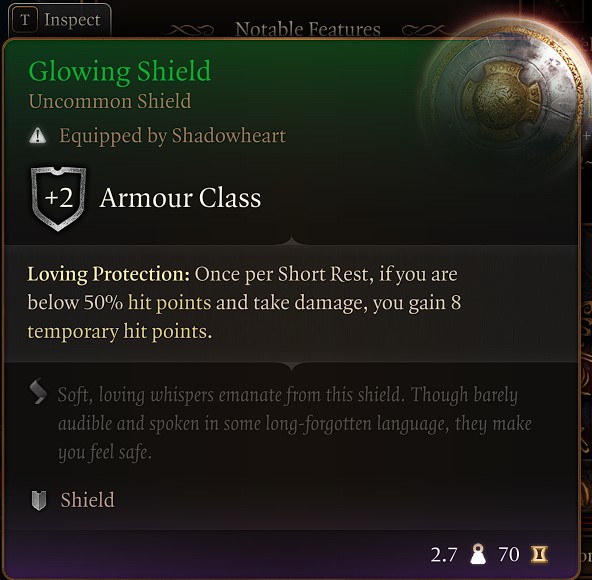
| Weapon 1 Off-Hand | Glowing Shield | HP When Low |
| Weapon 2 Ranged | Hunting Shortbow | Free Hunter’s Mark |
Below is the best Act 1 Armor, Weapons, and Equipment for Jaheira Companion in BG3:
- Haste Helm: Chest in the Blighted Village X 32, Y 403 (Alternatives Wapira’s Crown or Grymskull Helm).
- Adamantine Scale Mail: Crafted in Adamantine Forge (Alternative Hedge Wanderer Armour, or Hide Armour +2).
- Hellrider’s Pride: Can be bought, stolen, or earned from Zevolr (Alternative Gloves of Missile Snaring).
- Disintegrating Night Walkers: Can be looted from True Soul Nere in Grymforge (Alternative Boots of Aid and Comfort).
- Amulet of Misty Step: Found in a Gilded Chest in Defiled Temple (Alternative Amulet of Silvanus, or Absolute’s Talisman).
- Ring of Absolute Force: Dropped by Sergeant Thrinn in Grymforge (Alternative Crusher Ring).
- The Whispering Promise: From Traders in Act 1 or Volo in Druid’s Grove (Alternative Ring of Colour Spray).
- Staff of Arcane Blessing: (Alternatives Melf’s First Staff, Staff of Crones, or Spellsparkler).
- Glowing Shield: Found in a chest on a slope behind the goblin camp. (X: -54, Y: 462) (Alternative Adamantine Shield, or Wood Woad Shield).
Advanced: Act 3 End Game
Below is the best-advanced gear for the Baldur’s Gate 3: Best Jaheira Companion Build Guide:

| Gear Slot | Best Gear Item | Effect |
|---|---|---|
| Head | Shapeshifter Hat | +1 Wild Shape |
| Cape | Mantle of the Holy Warrior | Free Crusader’s Mantle Spell |
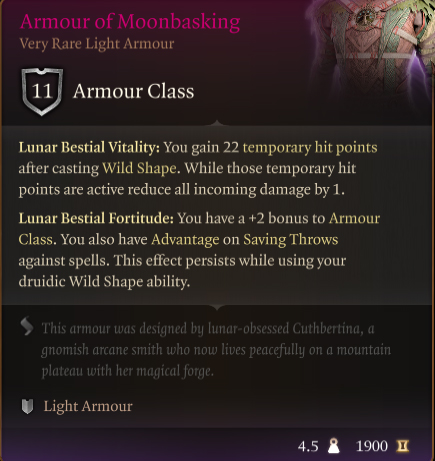
| Chest | Armour of Moonbasking | HP On Wild Shape |
| Gloves | The Reviving Hands | Healed Gain Blade Ward |
| Boots | Helldusk Boots | Cannot be Moved |
| Necklace | Amulet of Greater Health | 23 Constitution |
| Ring | Crypt Lord Ring | Free Create Undead |
| Ring | Ring of Regeneration | Automatic Healing |
| Weapon 1 Main Hand | Markoheshkir | Free Level 6 Spell |
| Weapon 1 Off-Hand | Viconia’s Walking Fortress | 3 AC, Reflect Spell |
| Weapon 2 Ranged | Darkfire Shortbow | Free Haste Spell |
Below is the best Act 3 Armor, Weapons, and Equipment for Jaheira Companion in BG3:
- Shapeshifter Hat: Sold by Helsik at the Devil’s Fee (Alternative Helm of Balduran, Helldusk Helmet).
- Mantle of the Holy Warrior: Sold by Vicar Humbletoes in Stormshore Tabernacle (Alternative Cloak of the Weave, or Cloak of Protection).
- Armour of Moonbasking: Sold by Voiceless Penitent Bareki in Act 3 (Alternative Helldusk Armour, Adamantine Scale Mail, Flame Enamelled Armour).
- The Reviving Hands: Sold by Vicar Humbletoes (Alternative Gloves of Dexterity, or Jhannyl’s Gloves)
- Helldusk Boots: Chest on the top floor of Wyrm’s Rock Fortress (Alternative Disintegrating Night Walkers).
- Amulet of Greater Health: Archive in the House of Hope (Alternative Surgeon’s Subjugation Amulet, or Spellcrux Amulet).
- Crypt Lord Ring: The Mystic Carrion’s Servant quest (Alternative Killer’s Sweetheart, or Shifting Corpus Ring).
- Ring of Regeneration: Sold by Rolan at Sorcerous Sundries(Alternative Ring of Free Action).
- Markoheshkir: Found At Ramazith’s Tower Act 3 (The Blood of Lathander, Staff of Spellpower, or Selûne’s Spear of Night).
- Viconia’s Walking Fortress: Looted from Viconia DeVir in Act 3 (Alternative Shield of Devotion)
- Darkfire Shortbow: Sold by Dammon Last Light Inn Act 2.
Best Consumables and Items

The following list represents the best individual use consumable items that will aid in the Baldur’s Gate 3: Best Jaheira Companion Build Guide:
- Elixir of Bloodlust: Once per turn when you kill a foe, you gain HP 5 temporary hit points and an additional action.
- Potion of Invisibility: Become invisible for 1 minute. Attacking or casting spells ends the status.
- Potion of Flying: 10 turns of flying.
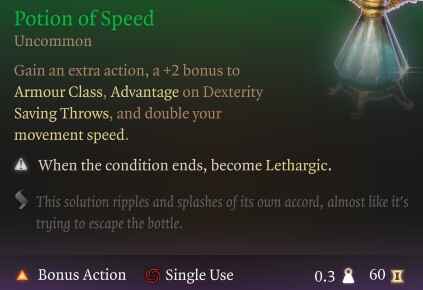
- Potion of Speed: 3 turns of an increased action via the Haste condition.
- Potion of Angelic Slumber: fall asleep for two turns, then restore all spell slots, hit points, and abilities.
- Elixir of Peerless Focus: gain advantage on concentration saves (ingredients Sublimate of Belladona, and any ashes).
- Elixir of Vigilance: gain +5 bonus initiative and you cannot be surprised (ingredients sublimate of bloodstained hook, any ashes).
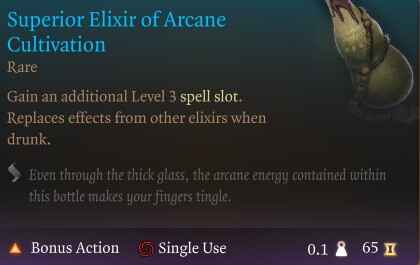
- Superior Elixir of Arcane Cultivation: gain a level 3 spell slot (ingredients Solution of Night Orchid, any Vitriol).
- Elixir of Viciousness: increase your critical hit chance (ingredients Vitriol of Shadowroot Sac, any Ashes).
- Elixir of Universal Resistance: gain resistance to all damage (ingredients Vitriol of Divine Miasma, any Sublimate).
Jaheira Gameplay Tips and Tricks
Here are 10 gameplay, combat tips, and tricks for using the Baldur’s Gate 3: Best Jaheira Companion Build Guide:
- Use Bonus Actions: use your bonus action to Wild Shape and heal yourself and don’t let it go to waste.
- Wild Shape: If a party member needs a heal, come out of the form and support them, then go back on the offensive.
- Pick Right Form: Use Wild Shape to select a creature with the desired effect like the Bear when you need a tank or Deep Rothé for cc.
- Rest: Make sure to use quick rest and long rest to replenish your spell slots before important fights.
- Flame Shape: Drop this ability in the fray and let it soak up all the damage for your party.
- Double Healing: Use spells like Goodberries and Healing Word to provide healing in one turn.
- Use Consumables: In critical situations, you can use a Potion of Speed or an ally to shoot a Fire Arrow to turn the tide of battle.
- Prone: Try to use ice spells to proc the prone status effect so late-game wild-shape forms can do better damage.
- Extra Attack: Make sure to attack twice in Wild Shape form after level 5 to get the most damage out of the build.
- Opening Turn: Use your hard-hitting damage spells as an opener and use a bonus action to go into Wild Shape.
Remember, this build guide serves as a foundation, and you can always adapt it to suit your preferences and the needs of your campaign. Enjoy playing as the formidable Circle of the Moon Druid!
Jaheira Companion Changes in Patch 7 for BG3
Jaheira received mostly minor changes to dialogue and some bug fixes in Patch 7 of Baldur’s Gate 3. Outside of the combat, gameplay, and story remain largely the same surrounding Gale’s character.
Larian Studios’ main focus in this patch is mods and some new cinematic evil endings. The game now features a modding toolkit and an in-game mod manager, allowing players to create and install mods directly within the game. This update is intended to hand over creative control to the community, enabling players to produce unique content and continue the story in new ways. This best Cleric Build Guide remains unchanged, mainly in Baldur’s Gate 3 Patch 7.
Baldur’s Gate 3 Jaheira Build Summary Guide
Recruit Jaheira
- In the Shadow-Cursed Lands, Last Light Inn in Act 2
Subclass – Circle of the Moon
Preferred Weapon: Quarterstaff
Preferred Armor: Light
Race – High Half-Elf
Best Early Spell – Flaming Sphere
Best Late Spell – Heroes’ Feast
Jaheira Abilities Score
- Strength 10
- Dexterity 14
- Constitution 16
- Intelligence 10
- Wisdom 16
- Charisma 8
- Level 4 – +2 Wisdom
- Level 8 – War Caster
- Level 12 – +2 Wisdom
Looking For More About Baldur’s Gate 3?
Thank you for reading Baldur’s Gate 3: Best Jaheira Companion Build Guide. We provide the latest news and create guides for Baldur’s Gate 3. Also, watch me play games on Twitch or visit my YouTube channel!