Facebook
 Reddit
 Email
Email
This guide looks at some of the important beginner’s tips for Roblox Studio, which is a software you’ll need to master to create Roblox games.
Roblox Studio is the exclusive game engine where all of your favorite Roblox experiences are crafted from scratch. And, while you might think that developers have to pay millions of dollars just to use that engine, you’d be wrong. Anybody, even users with no game development experience, can hop on to Roblox Studio and begin utilizing it to create the game of their dreams. Perhaps the best feature of the engine in question is that it’s extremely beginner friendly and far easier to master than other game engines in existence. With that being said, you might still need some help when you start out. So, here are a few beginner’s tips for Roblox Studio.
Beginner’s Tips for Using Roblox Studio
The first thing that you should know is that Roblox Studio is completely free. You can simply download and begin using the software without needing to spend a single dime. Now, let’s take a look at how you can start out with your first creation.
Downloading and Installing Roblox Studio
The first step is to download and install Roblox Studio on your PC or MacBook. Currently, you can only run the software on Windows and MacOS compatible devices. However, the creators of Roblox Studio have plans to release it in Android and iOS devices in the future. You can click this link to begin downloading the engine. Before you do that, also make sure to check whether your system complies with the requirements to run Roblox Studio:
- For PC – Windows 7 or higher, running IE 11 or higher
- For Mac – macOS 10.11 or higher
- Processor – 1.6 GHz or better
- Memory – at least 1GB of system memory
- Internet access
Getting Started
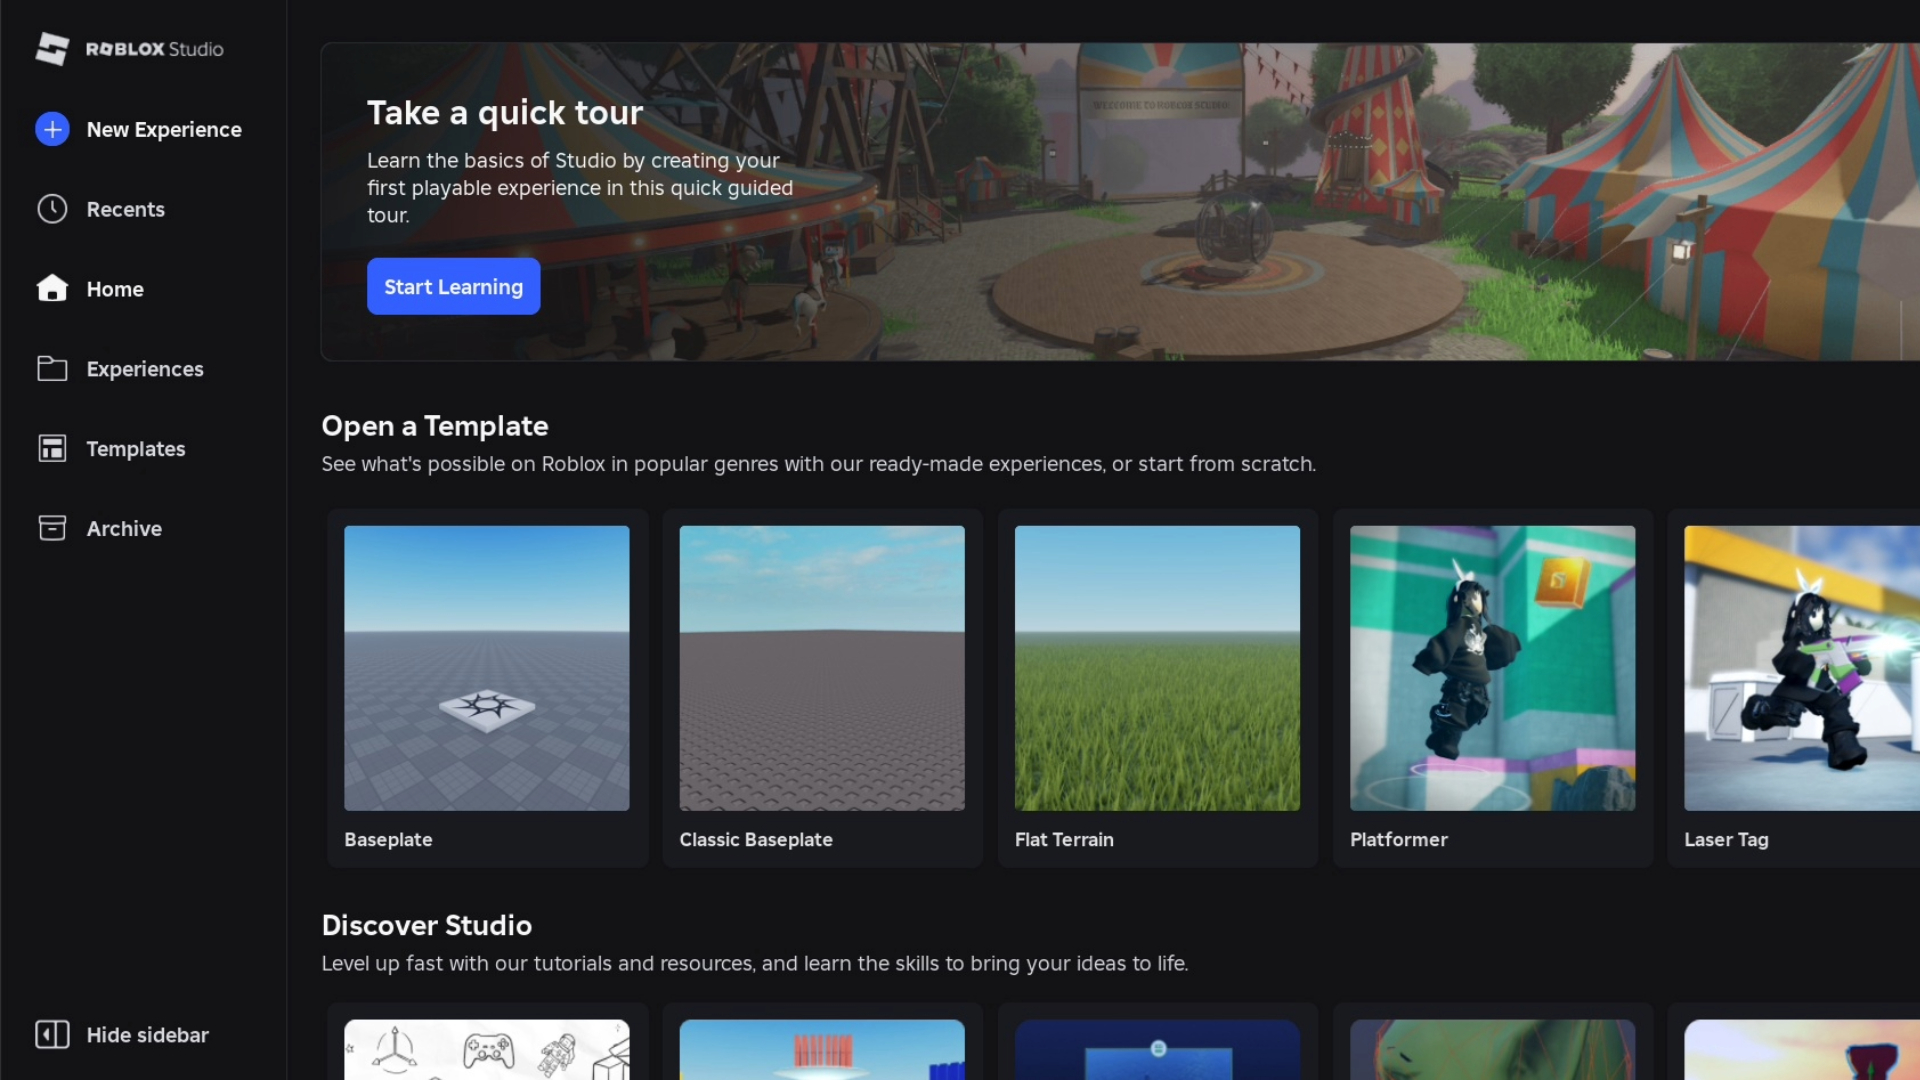
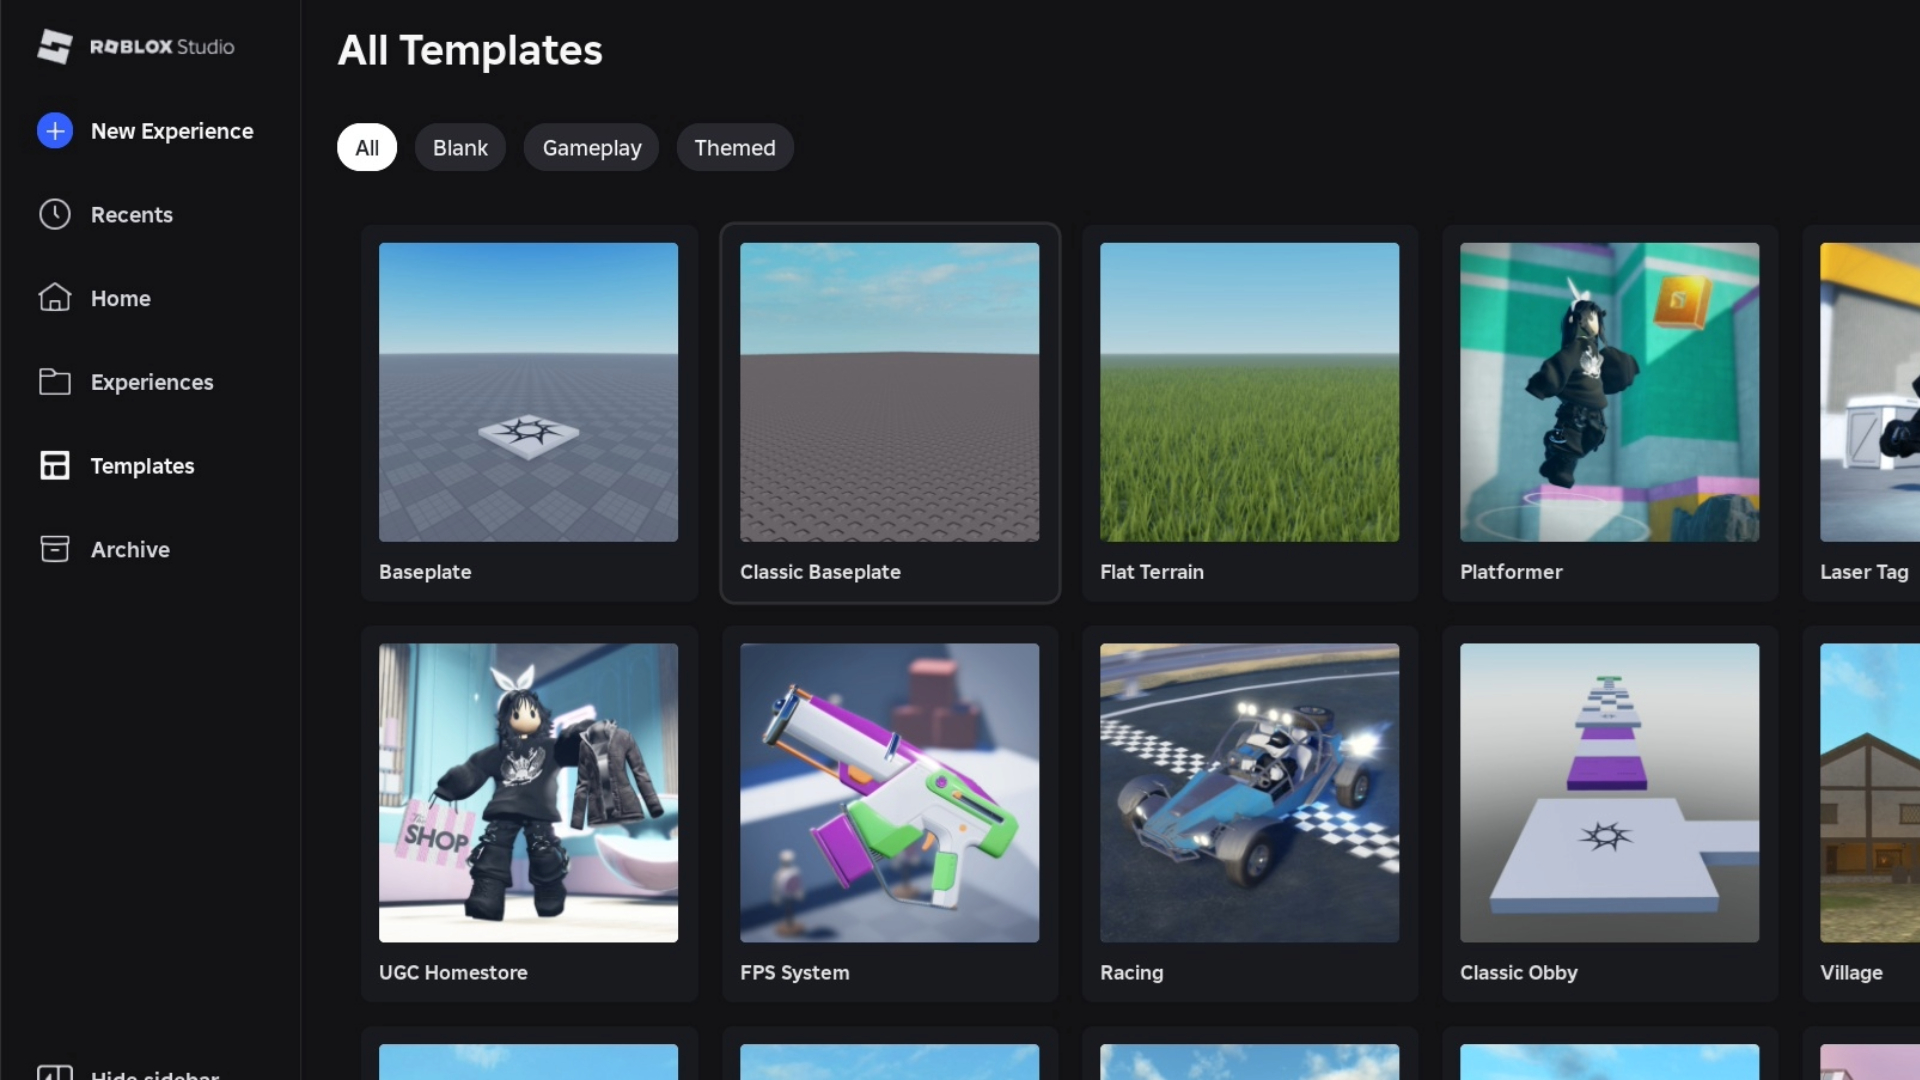
After the installation process is complete, launch the program on your computer. As soon as you do, you’ll be taken to the Home Page. Here, you’ll see a bunch of templates, most of which has some assets preloaded. They are great starting points for your game development. We suggest going with the Baseplate on your first try. When you click Baseplate or any of the other templates, the program creates a new project. Now, you can begin adding further elements to that template, moving around, and changing all kinds of things.
Mastering the Controls
The next part of our beginner’s tips for Roblox Studio will familiarize you with the basic controls while creating:
- W: Shifts camera forward
- S: Shifts camera backward
- Q: Shifts camera to the left
- E: Shifts camera to the right
- Hold right click: Move the camera in any direction
- Mouse scroll: Scroll up to zoom in, and scroll down to zoom out
- Alt: Keeps the camera in place
- Left click: Choose an asset
- Hold down left mouse button: Selects multiple assets.
- CTRL + D: Creates a duplicate of an asset.
- Delete: Chosen asset is deleted
- F: Focus
- ALT + S: Opens the settings menu from where you can customize camera speed.
Before proceeding with the development phase, make sure you get used to these controls.
Navigating the Tools
When you select any of the templates and it opens up, you can immediately notice a toolbox appear on the left hand side of the screen. On top of the creation area is the entire set of tools available to you. As a beginner, the following are some of the tools you should familiarize yourself with:
- Select
- Move
- Rescale
- Rotate
- Editor
- Toolbox
- Part
- Material Manager
- Color
Creating Your First Roblox Experience Scene
Now, let’s proceed to the final part of our beginner’s tips for Roblox Studio. After going through all of the toolbox options, you can finally begin creating. As you might have noticed, there’s a single base when you open up a template. This base shows where players will spawn in your current scene. However, the base won’t hamper any of your assets that you’re going to design. To begin, simply click on the small arrow pointing down just below Part in the toolset. Select a Block from the dropdown, and choose the Scale option.
This will enable you to make the newly added Block bigger or smaller as per your requirement. Hold down the Control button and extend the red and blue points to as much of the grid as you want to be covered by the Block. Keep in mind that the Block acts as part of the terrain, so position is just above the grid. Once the scale is set, you can color the terrain in a specific shade. Or, you can browse the various models and designs on the toolbox to give your terrain a particular look. You can also remove any such model or design asset from your scene using the Explorer tab.
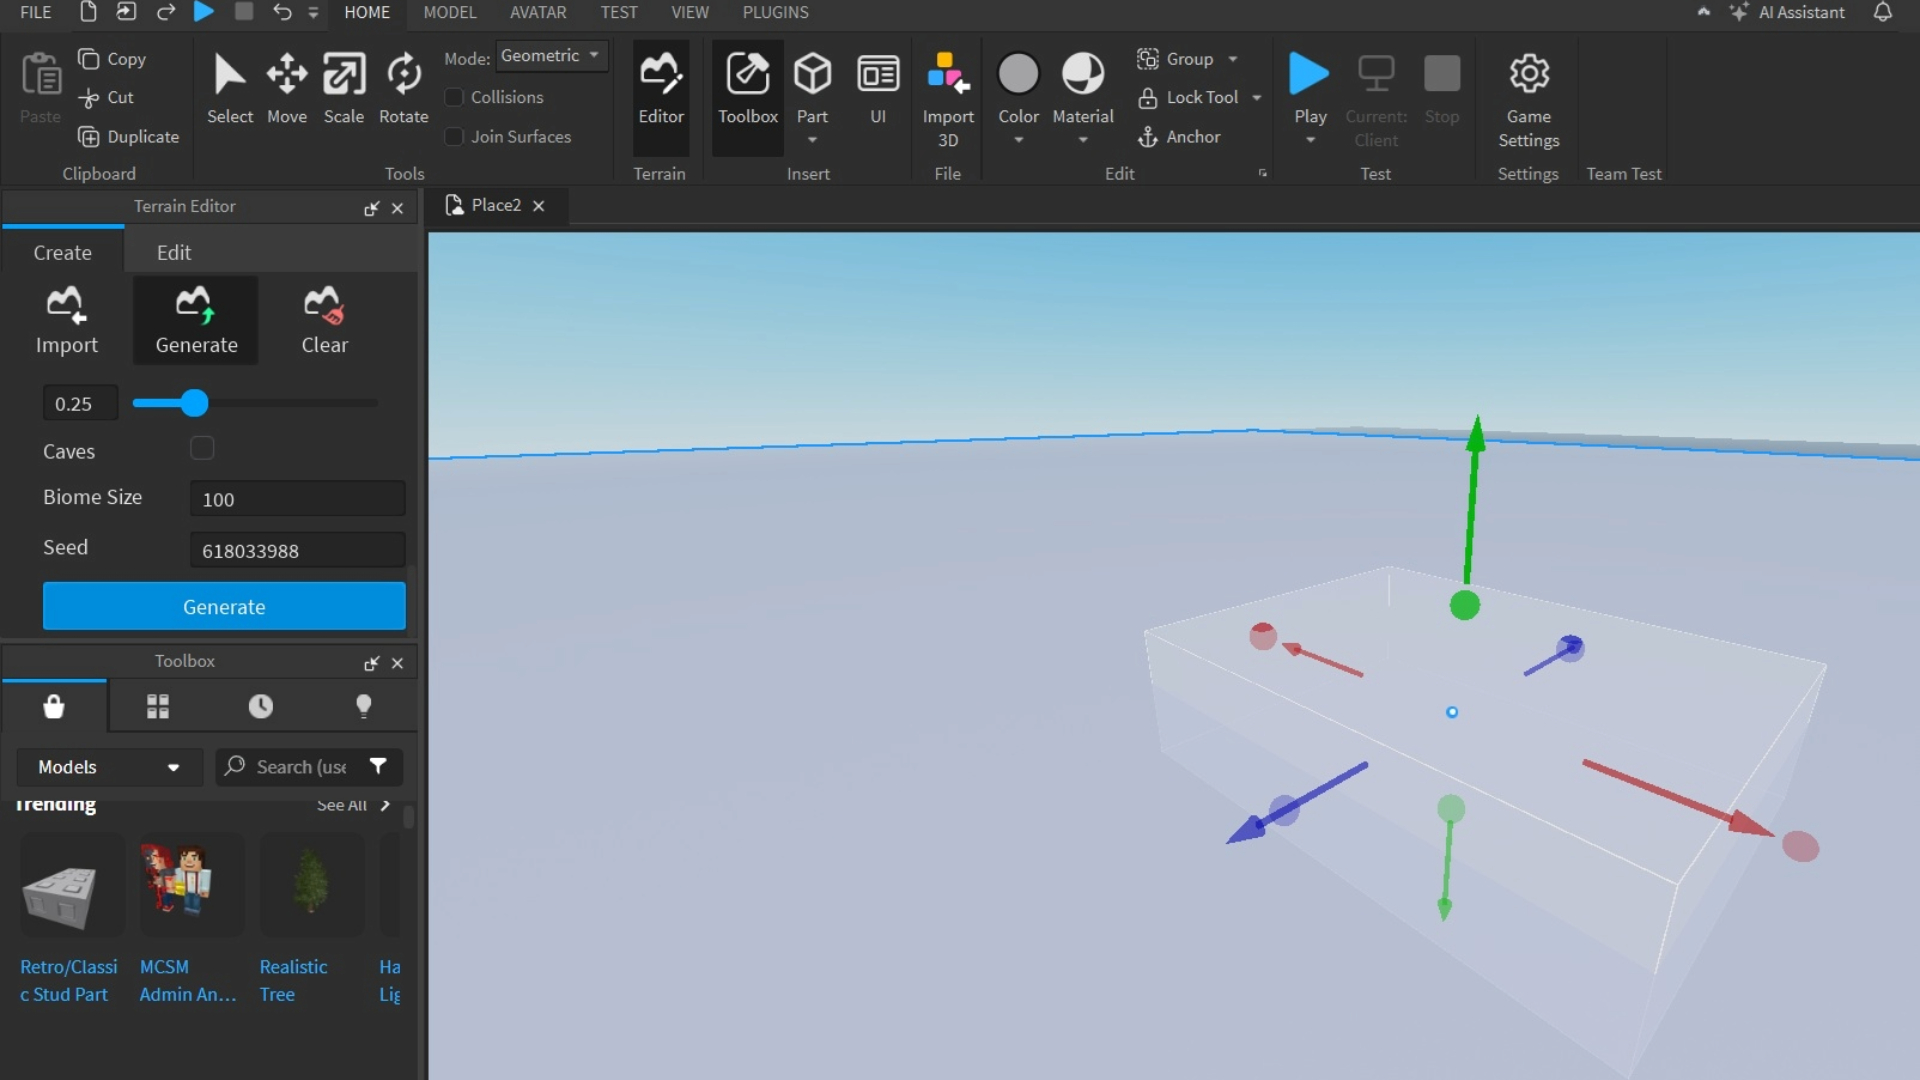
If you’re looking to create a realistic scene, follow these steps:
- Click on the Editor next to the Toolbox.
- Select Import.
- Scroll down and choose Material Settings.
- Add the material you want to the scene.
- Just to the left of import is a Generate button. Click on it after choosing your preferred material.
- Scroll down and choose the biomes necessary for the scene.
- Hit Generate once again.
The scene should now load up. You can use the blue Play button symbol to test out the scene with your own avatar. Walk around the scene you created and check whether everything’s to your liking. This concludes our beginner’s tips for Roblox Studio.
We provide the latest news and create guides for Roblox games. Meanwhile, you can check out the following Roblox articles: