Facebook
 Reddit
 Email
Email
When playing FPS games, each advantage counts. Here are the best monitor settings for FPS games like Valorant, CS:GO, etc.
If you own a gaming monitor, you may not be currently using the best settings for it. To enhance your gameplay experience on FPS games, we have created this monitor settings guide. You will get to know about important settings of a gaming monitor that must be changed for a properly optimized setup.
Some of the suggested settings are available within the Windows operating system itself; however, others need to be accessed via the monitor. You may not be able to perform all the optimizations mentioned in this guide, which is completely fine. You only need to change the settings that are available to you on your current setup. With that said, let’s dive into this guide explaining the best monitor settings for FPS games.
1. Set Native Resolution & Refresh Rate
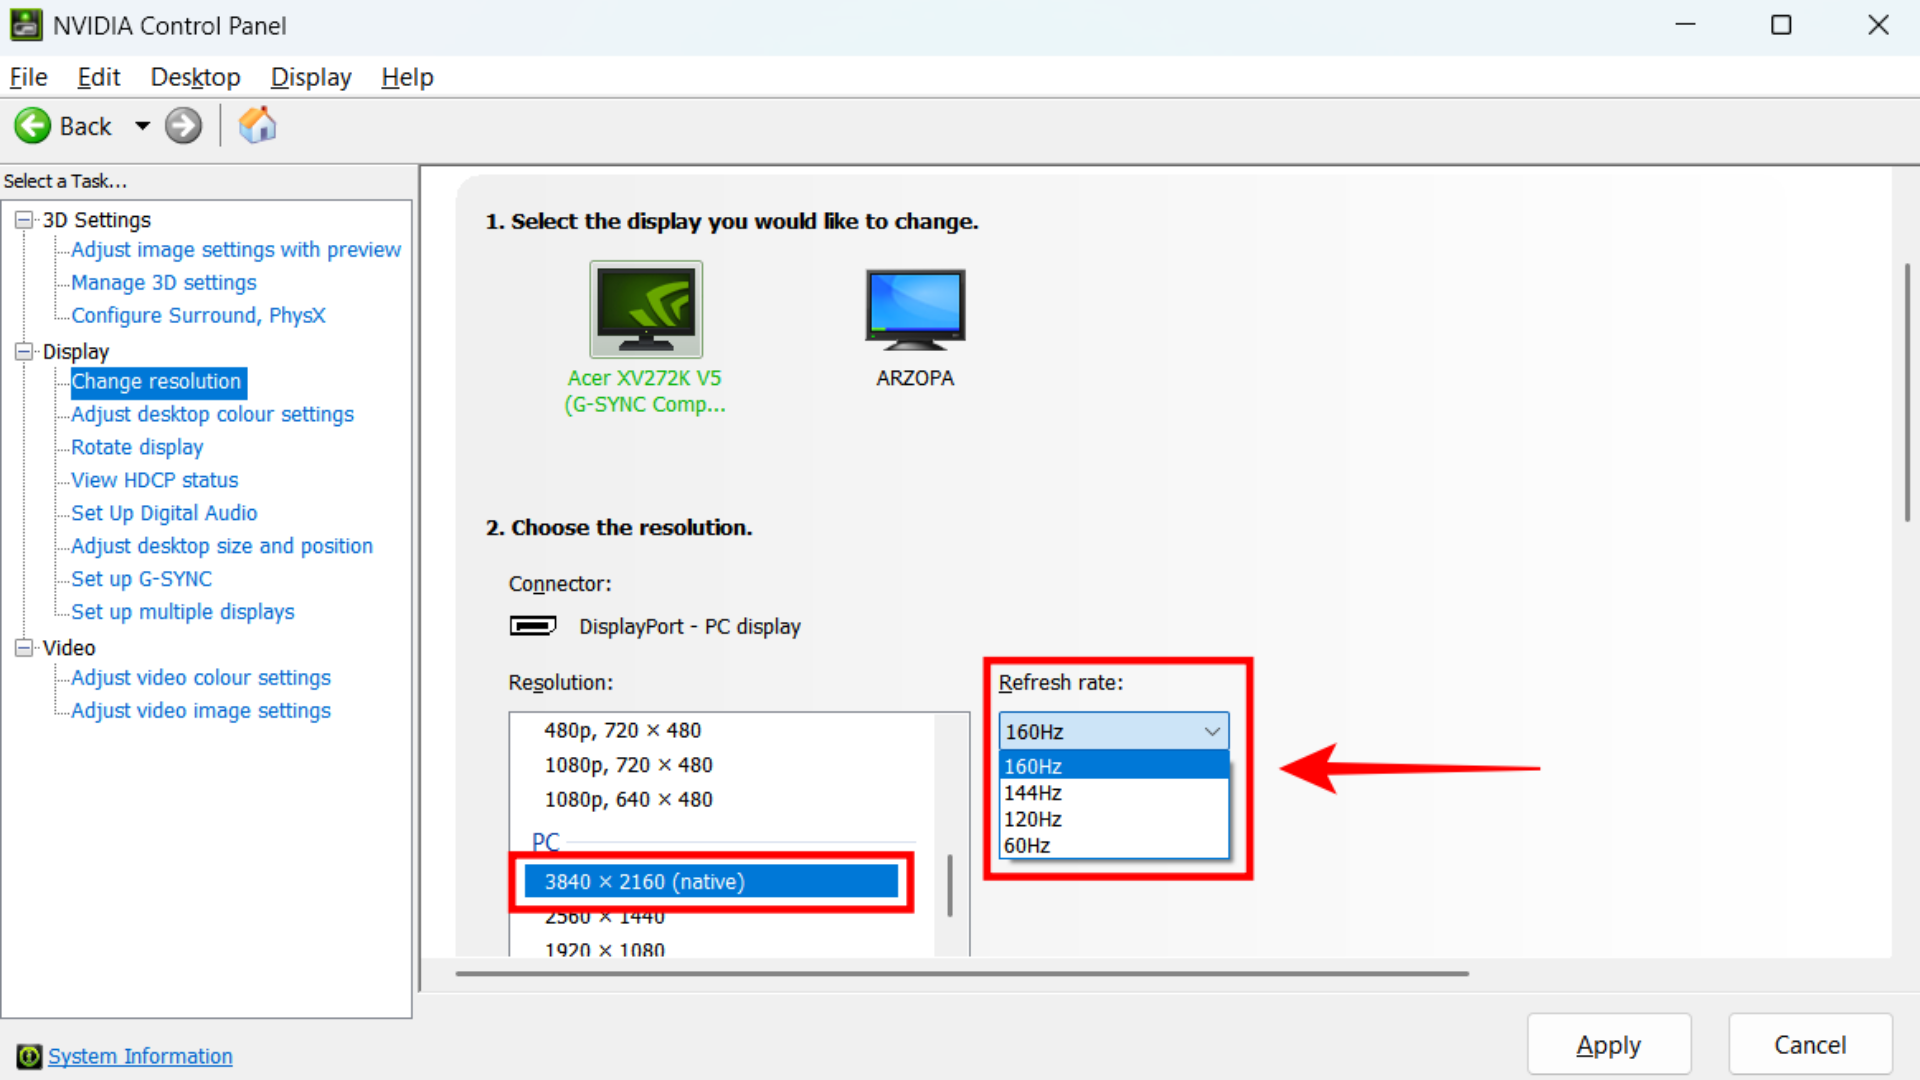
Many gamers end up playing on a non-native resolution and insufficient refresh rate. If you have a proper gaming monitor, there is a chance your PC may have defaulted back to a lower refresh rate rather than the maximum supported option. To fix this, press the Windows button + S keyboard shortcut to open Windows Search. Here, type Nvidia Control Panel and open the software. Under Display settings, navigate to Change Resolution.
As we showed in the above screenshot, scroll down to the list of resolutions under “PC.” Select the highest resolution option available; in this case, it is 3840×2160. Ensure that it is stated as “Native” next to this resolution.
Moreover, go to the refresh rate dropdown at the right side. Here, select the highest refresh rate available, which is 160Hz for this monitor. Next, click on Apply. After you have done this step, you will have successfully configured your monitor to the optimal resolution and refresh rate! As an alternative, you can also configure your native resolution and refresh rate using Windows Display Settings.
2. Use NVIDIA Color Settings
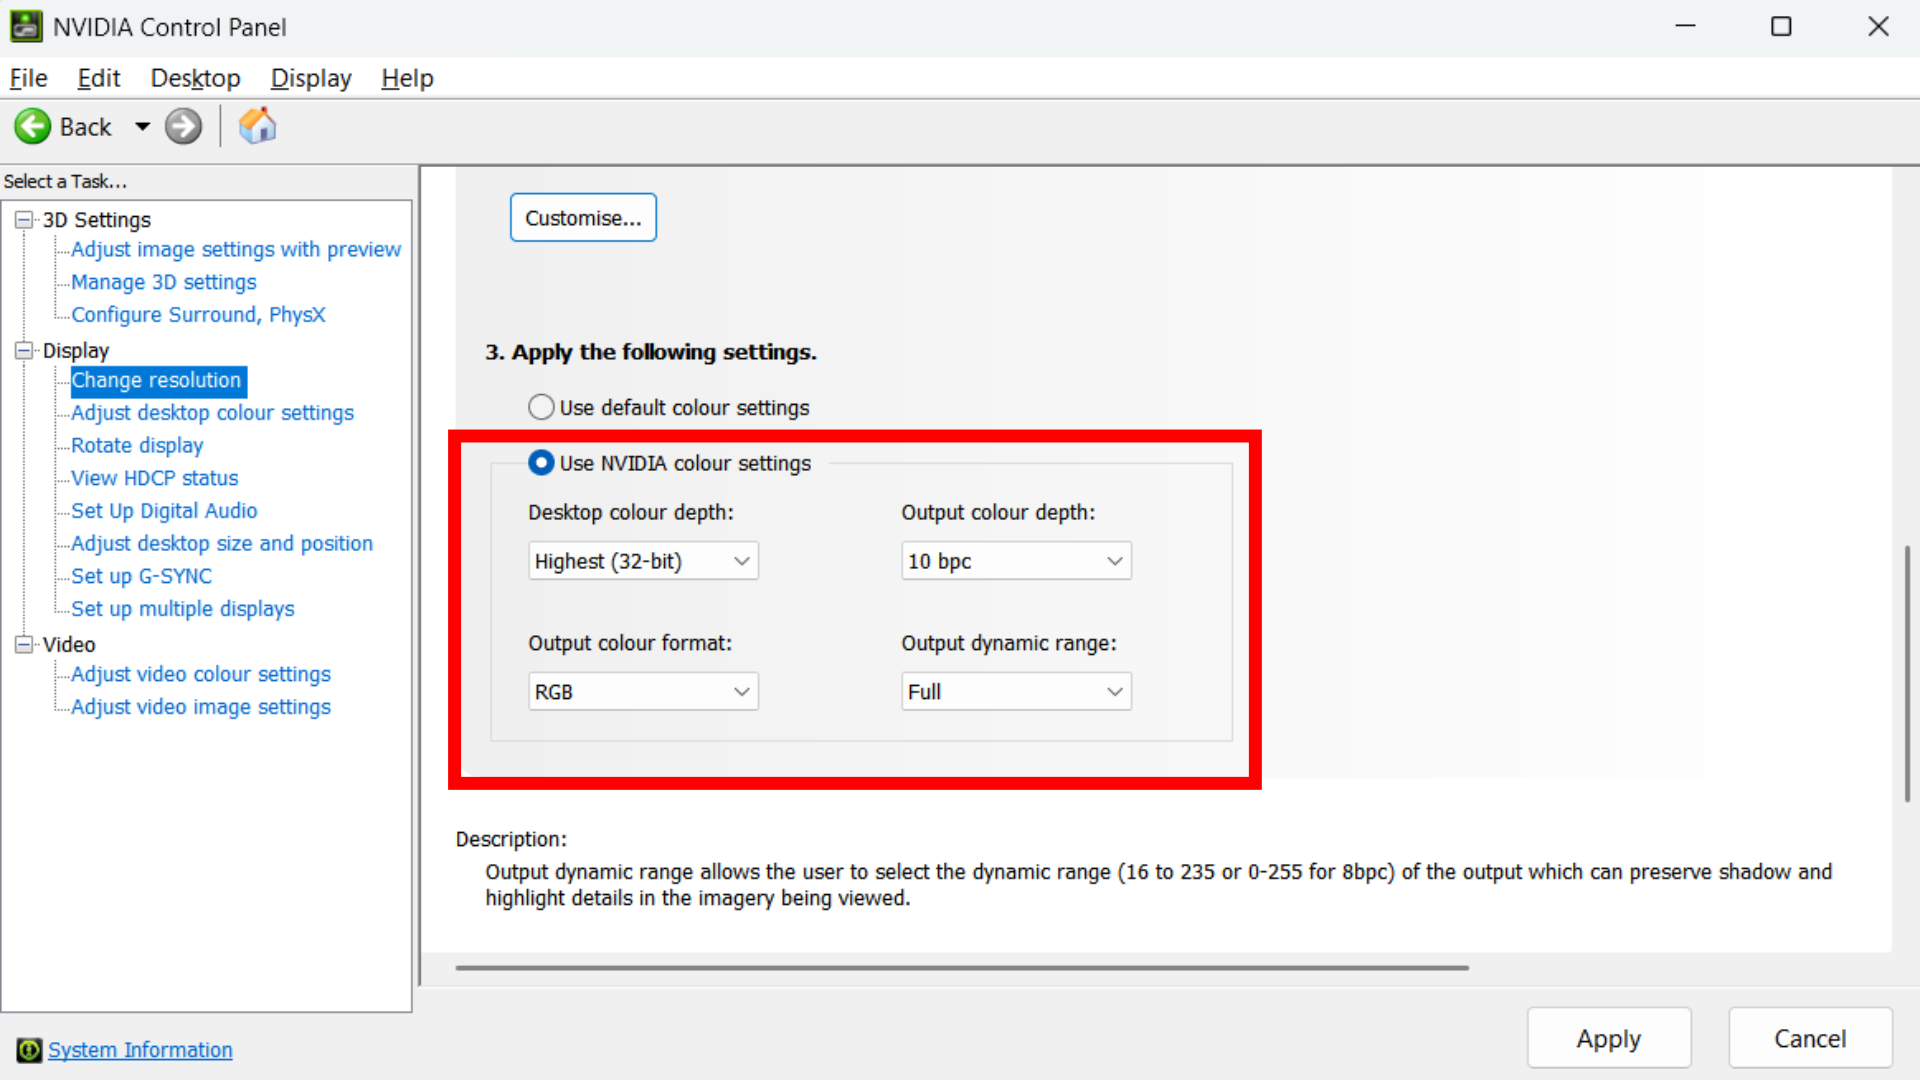
Nvidia Color Settings is an option within the Nvidia Control Panel, which you can access by right-clicking on your desktop and going to ‘Show more options’ or by searching for it in the Windows Start Menu. You will find Nvidia Color Settings at the bottom of the Change Resolution page. Once you find it, select the option “Use NVIDIA Color Settings” and follow the instructions below.
Next, select the highest desktop color depth, as well as the best output color depth. Ensure to set the output color format to RGB and the output dynamic range to Full. This ensures your display is outputting the best possible colors for your enjoyment! If you do not have options like 10 bpc color available, be sure to select the best possible option here. After finishing this, you will have optimized the colors of your gaming monitor.
3. Enable FPS Mode for Optimized Colors
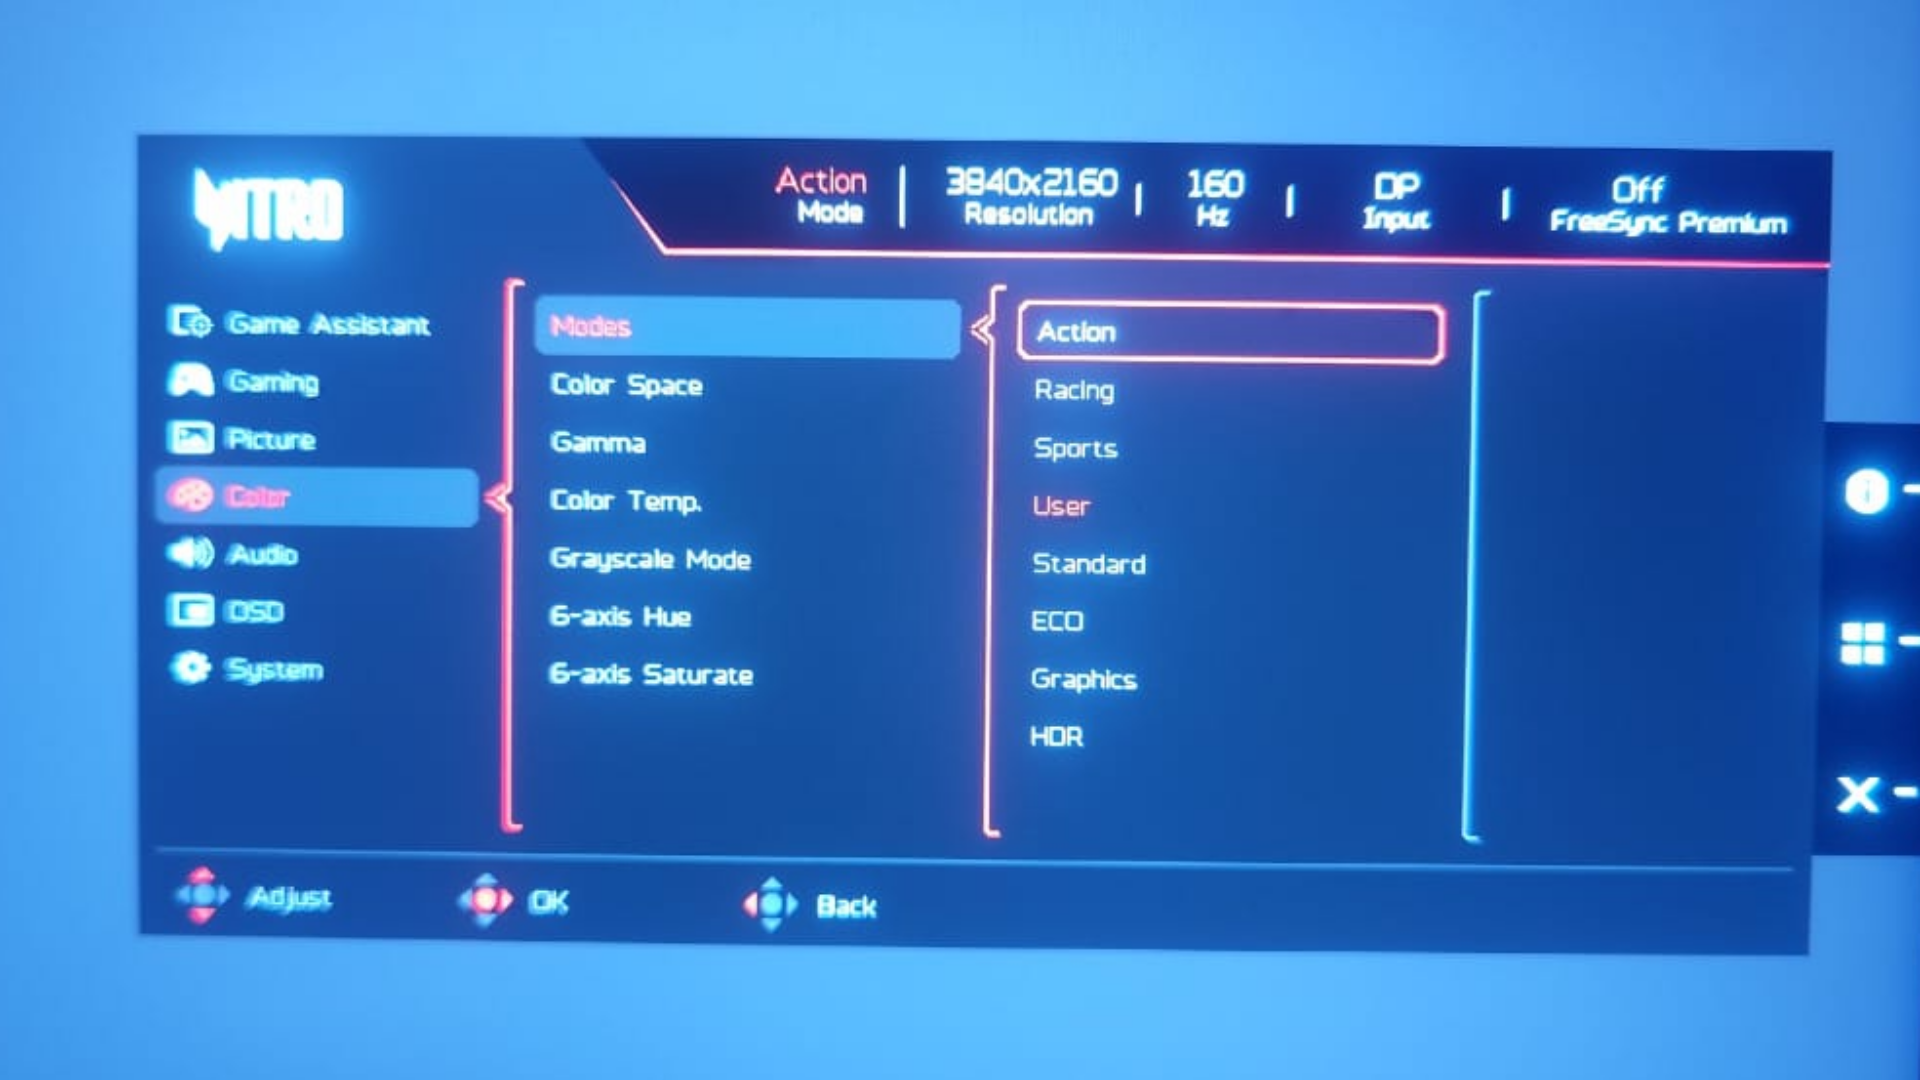
There are buttons on every gaming monitor that you can use to access its settings. Go ahead and access your monitor menu. Then, navigate to the settings page where you change the display profiles. Usually, this is called Picture settings on many gaming monitors. Once you are here, select the FPS or Action mode, whichever is available.
Using the FPS mode in your gaming monitor increases the viewability. Enemies pop out better and become easier to shoot. The mode also tends to have lower lag compared to other picture modes. Colors and contrast become optimized accordingly for the best competitive FPS experience.
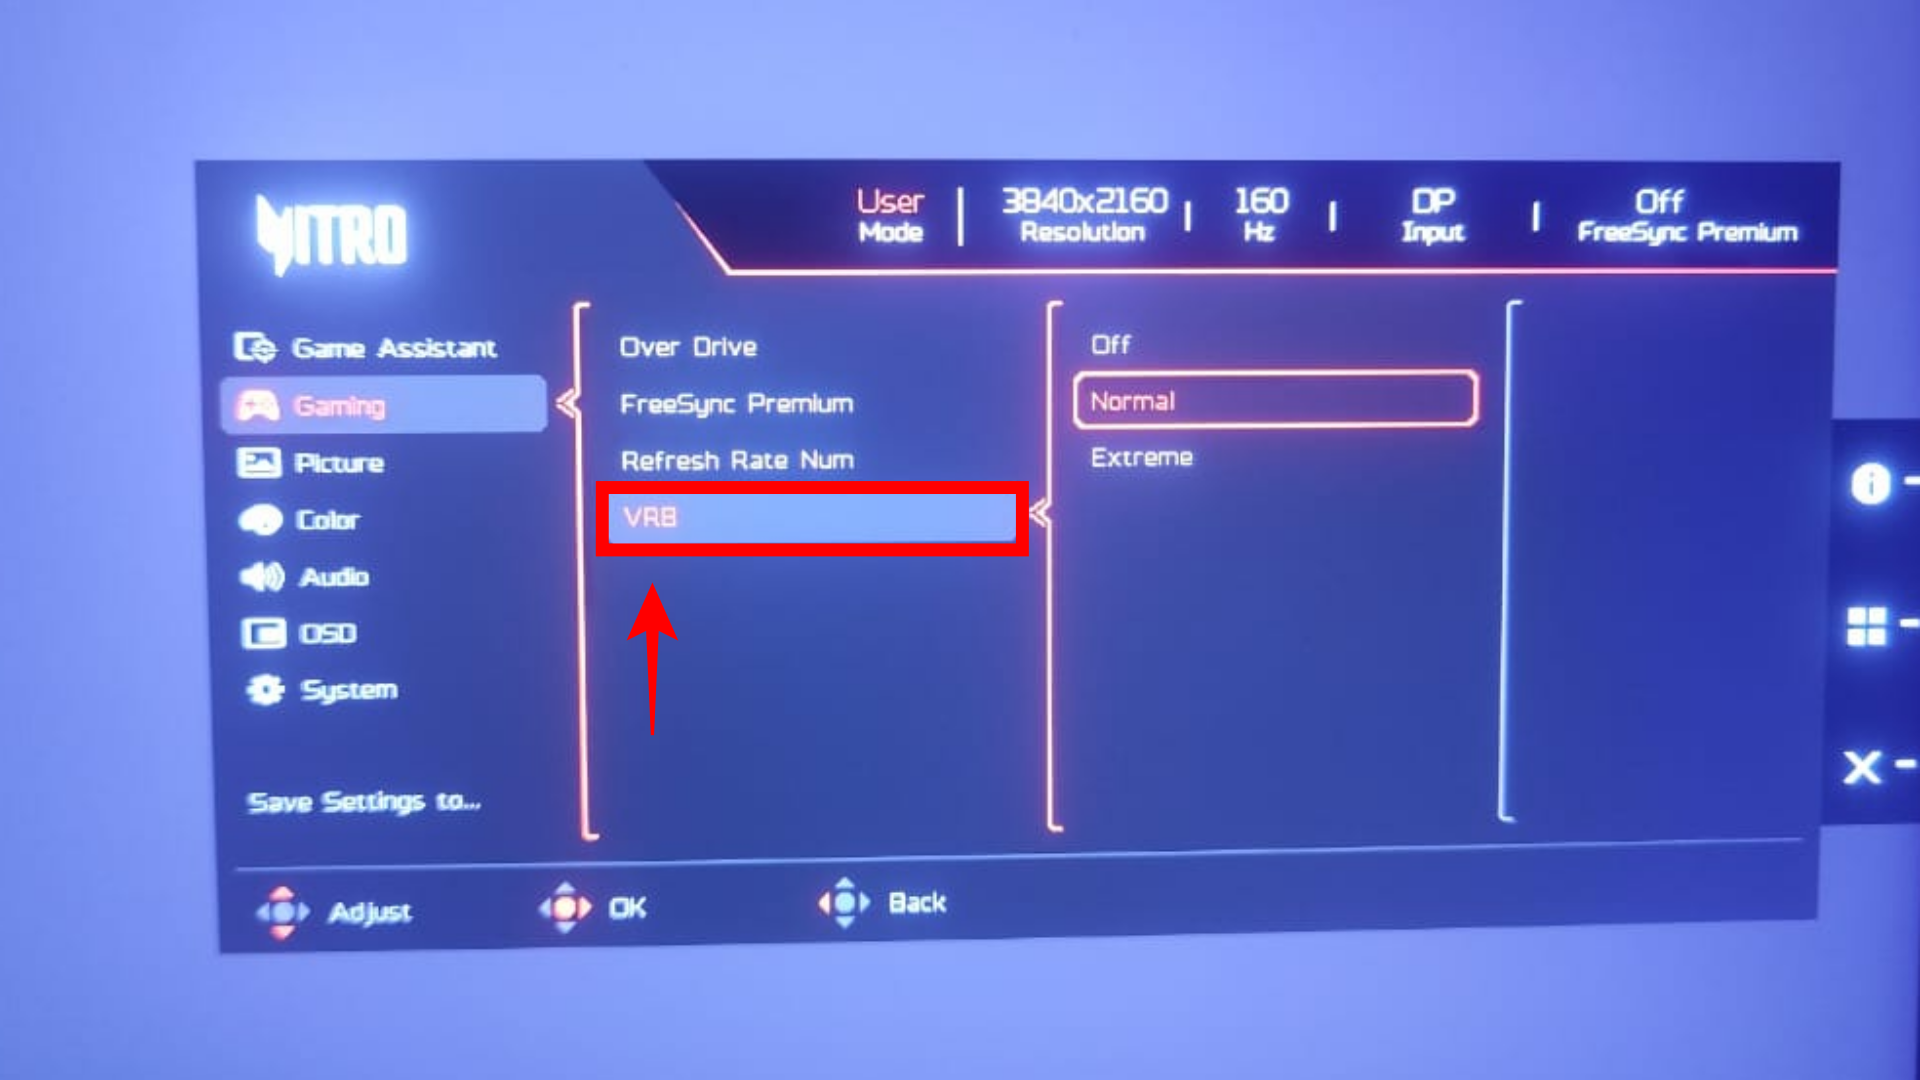
4. Enable Motion Blur Reduction
This is an interesting setting, but it may not be appreciated by all gamers. So, after experimenting with it, you can also consider turning it off, as it does not make too much of a difference.
Motion Blur Reduction (MBR) is a technology that can drastically impact the motion smoothness. But it comes with trade-offs to the maximum display brightness, which in turn decreases viewability. You can consider using this setting if you are fine with playing at lower brightness levels, as it does benefit FPS gameplay – enemies will look smoother in motion and be much easier to track.
In some monitors, MBR can also be called Aim Stabilizer, ELMB, ULMB, VRB, DyAc, and PureXP. You need to access the monitor menu and explore the settings to find the correct place for this setting. Usually, this is under Gaming. Once found, you can enable motion blur reduction. Not all gaming monitors support it, but plenty of high refresh rate options do have this feature available.
5. Enable G-Sync or FreeSync
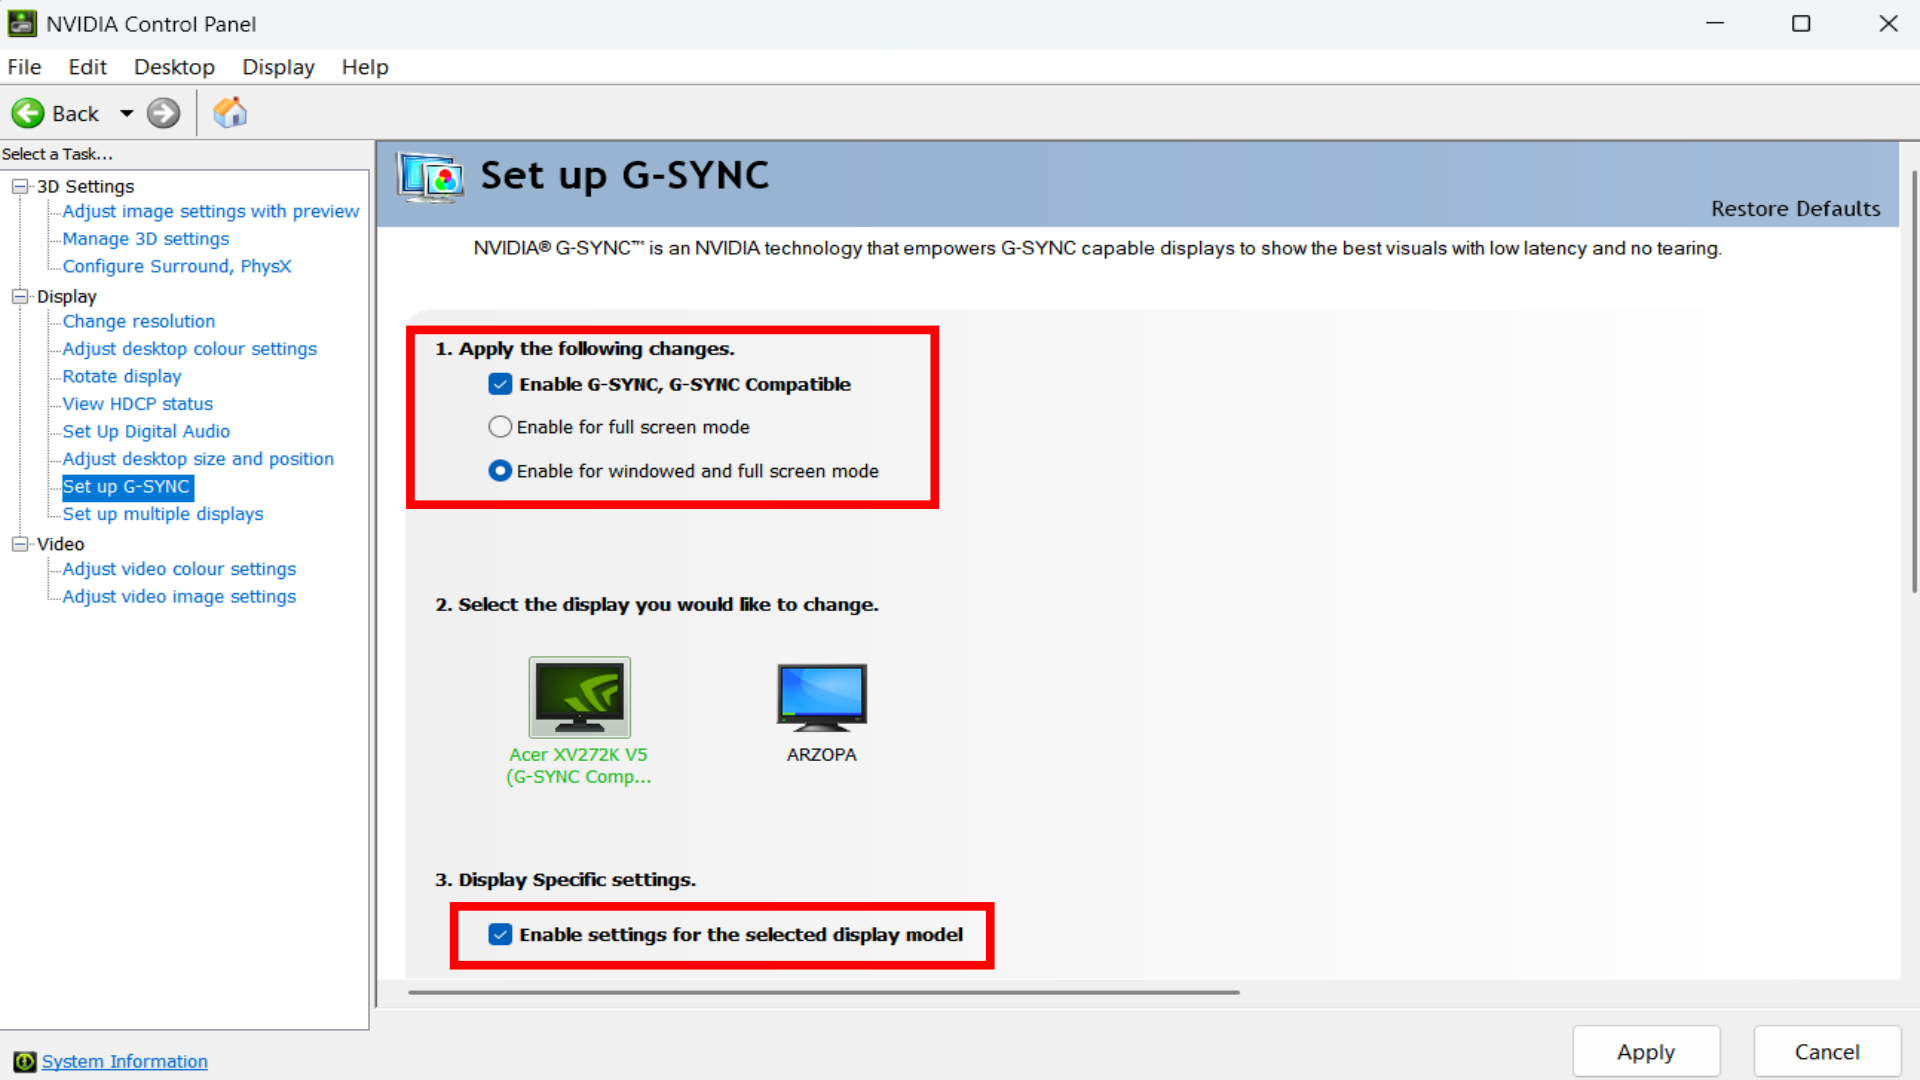
For Nvidia graphics cards, open the Nvidia Control Panel by right-clicking on your desktop to find the option to launch it. Otherwise, you can simply search for it by pressing the Windows button + S keyboard shortcut. After opening the Nvidia Control Panel, find the G-Sync settings, which are under the Display options. Note that G-Sync is better supported on DisplayPort, so change your monitor cable if needed.
Here, navigate to “Set Up G-Sync,” which is visible on the left side if your monitor and graphics card support the technology. Now, click on Enable G-Sync and G-Sync Compatible, along with Enable for windowed and full-screen mode. Moreover, ensure you click on the tickbox next to Enable settings for the selected display models. You should do this for all the gaming monitors plugged into your PC. Similarly, you can find settings for enabling Freesync in the Radeon software if you have an AMD graphics card.
Your in-game frame rate is always changing depending on the scenario. Because of this, the viewing experience differs based on whether or not your current frames per second is above the monitor’s refresh rate. With these two not being in sync, you can experience a phenomenon known as screen tearing. This does not look good, and to fix it, you can enable G-Sync or FreeSync, based on what is available to you. You cannot enable G-Sync together with MBR, so you need to experiment and decide which set of settings provides a more comfortable experience for you.
We provide the latest news and “How To’s” for Tech content. Meanwhile, you can check out the following articles related to PC GPUs, CPU and GPU comparisons, mobile phones, and more:
- 5 Best Air Coolers for CPUs in 2025
- ASUS TUF Gaming F16 Release Date, Specifications, Price, and More
- iPhone 16e vs iPhone SE (3rd Gen): Which One To Buy in 2025?
- Powerbeats Pro 2 vs AirPods Pro 2: Which One To Get in 2025
- RTX 5070 Ti vs. RTX 4070 Super: Specs, Price and More Compared
- Windows 11: How To Disable Lock Screen Widgets