Facebook
 Reddit
 Email
Email
In this guide, we shall go over how to solve the complicated Laboratory Periodic Table puzzle in Blue Prince.
The puzzles in Blue Prince are no joke and all require you to scan the environment for clues. The solution may or may not be in the same room, and you constantly have to keep your eyes out for any possible clue. While some of the tougher clues may be optional, the Laboratory Periodic Table puzzle is not.
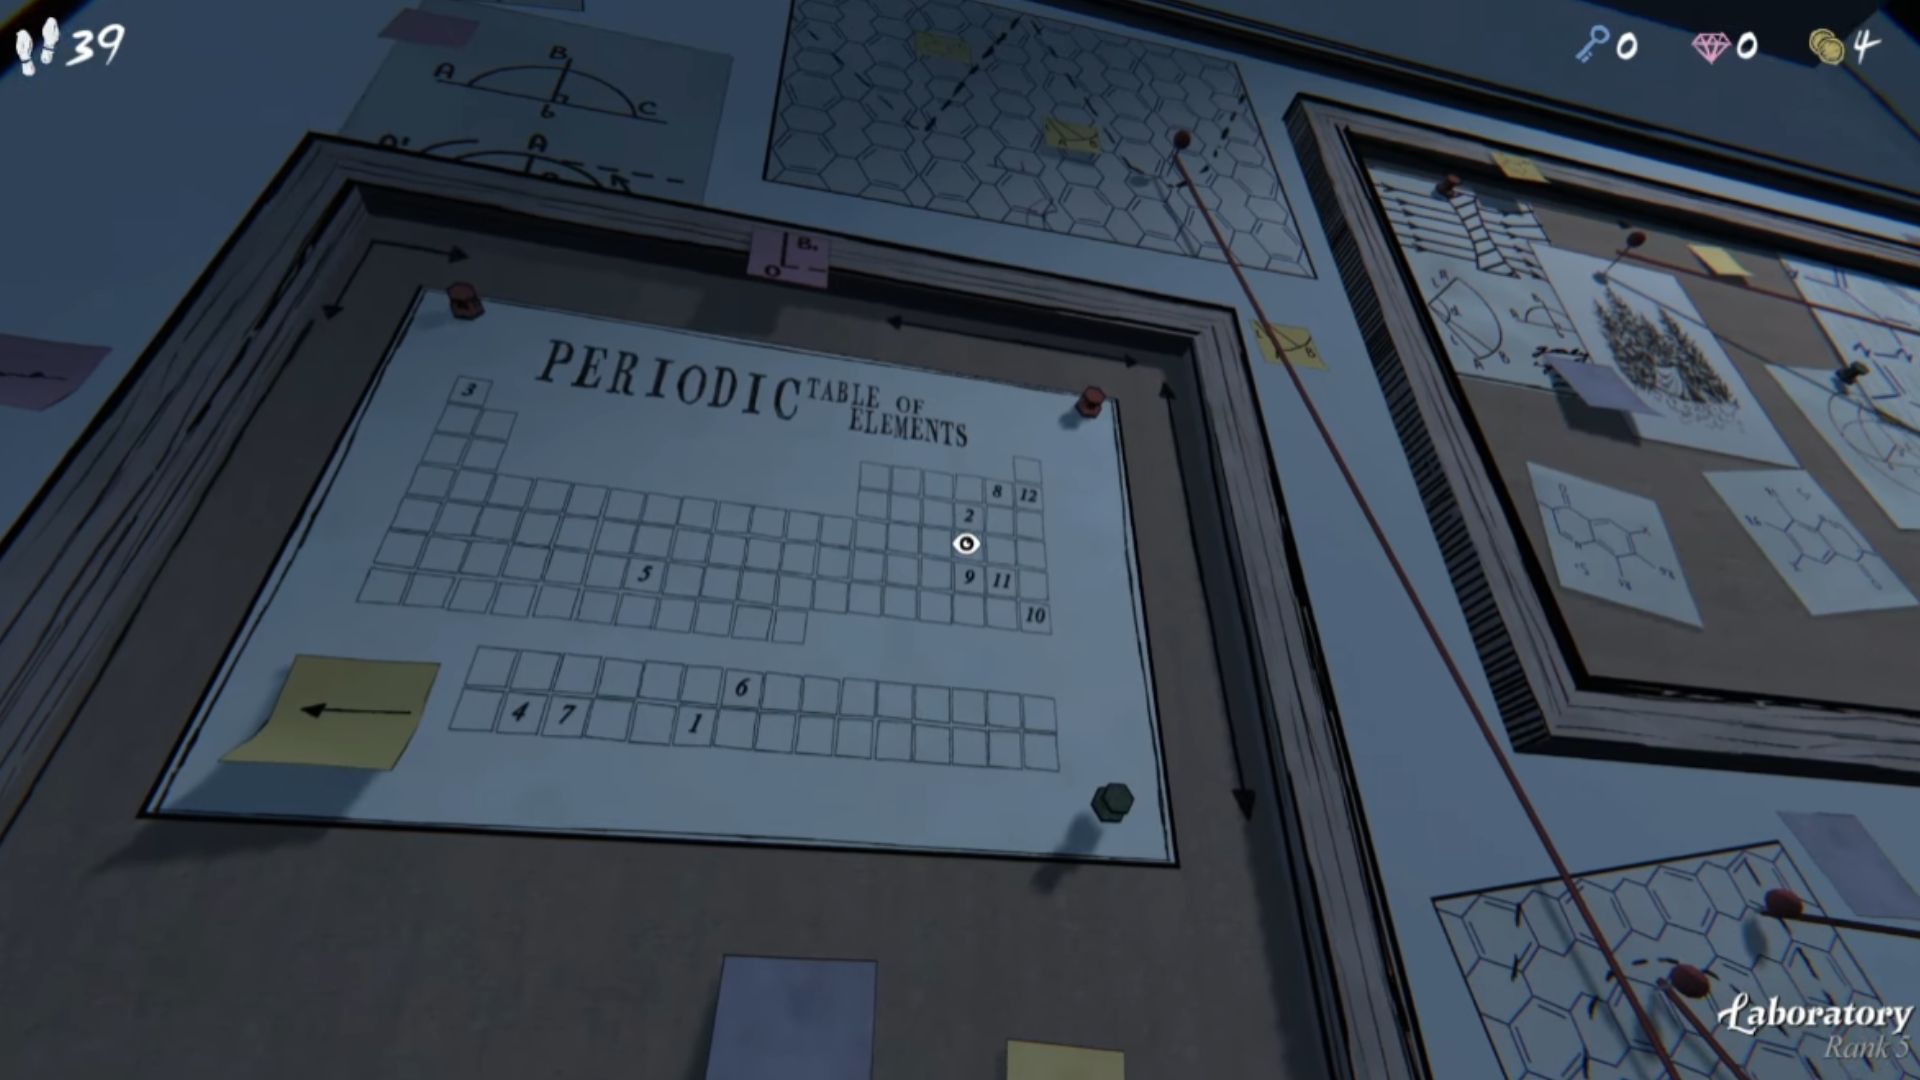
As you enter the laboratory and explore the area, you learn that you have to modify the machine’s voltage at the corner. The machine has numbers one through ten printed on it, each number tied to a switch on the machine. Right next to the machine, you see a Periodic Table chart. The elements on this chart are missing, and all you see are numbers. This is your first major clue to solving the puzzle and adjusting the voltage.
If you’re looking to adjust the voltage on the laboratory machine, you need to solve the Periodic Table puzzle. If you don’t know how to go about doing so, we’re here to help. In this guide, we shall go over how to solve the Laboratory Periodic Table puzzle in Blue Prince.
Related: Blue Prince Chess Puzzle Solution Guide
How To Solve the Laboratory Periodic Table Puzzle in Blue Prince
Also Read: Blue Prince: How To Get Campsite Lock Code
As stated earlier, to tinker with the machine and its voltage, you first need to interact to solve the Periodic Table puzzle. The chart beside the machine shows you a list of numbers in specific positions. What these numbers represent, you don’t know.
Ignore the chart for now and head over to the other corner of the room to find another Periodic Table chart. This chart is complete with all the elements in place. A look at this chart reveals all the periodic elements. Now, head back over to the original chart and start working your way up from the number 1. The number 1 has a certain spot on this chart. Note down this spot and head over to the completed chart to find the corresponding element.
Pu would be 1 in this case. Then, 2 is S, and 3 is H. Put these three numbers together, and you get the word “PuSH.” Do this for all the numbers and you will get the following message: “PuSHThReEuPaFTeRnINe.” Sort this message out with the appropriate spaces, and it becomes “Push Three Up After Nine.” Use this knowledge to push the corresponding switches and solve the puzzle.
Looking For More?
Thank you for reading the article. We provide the latest news and create guides for Baldur’s Gate 3, Starfield, ARK Survival Ascended, and more. Also, watch Deltia play games on Twitch or visit his YouTube channel!