Facebook
 Reddit
 Email
Email
Learn about how the Photo Mode works in Death Stranding 2, all available settings, different controls, and more to take the perfect pictures.
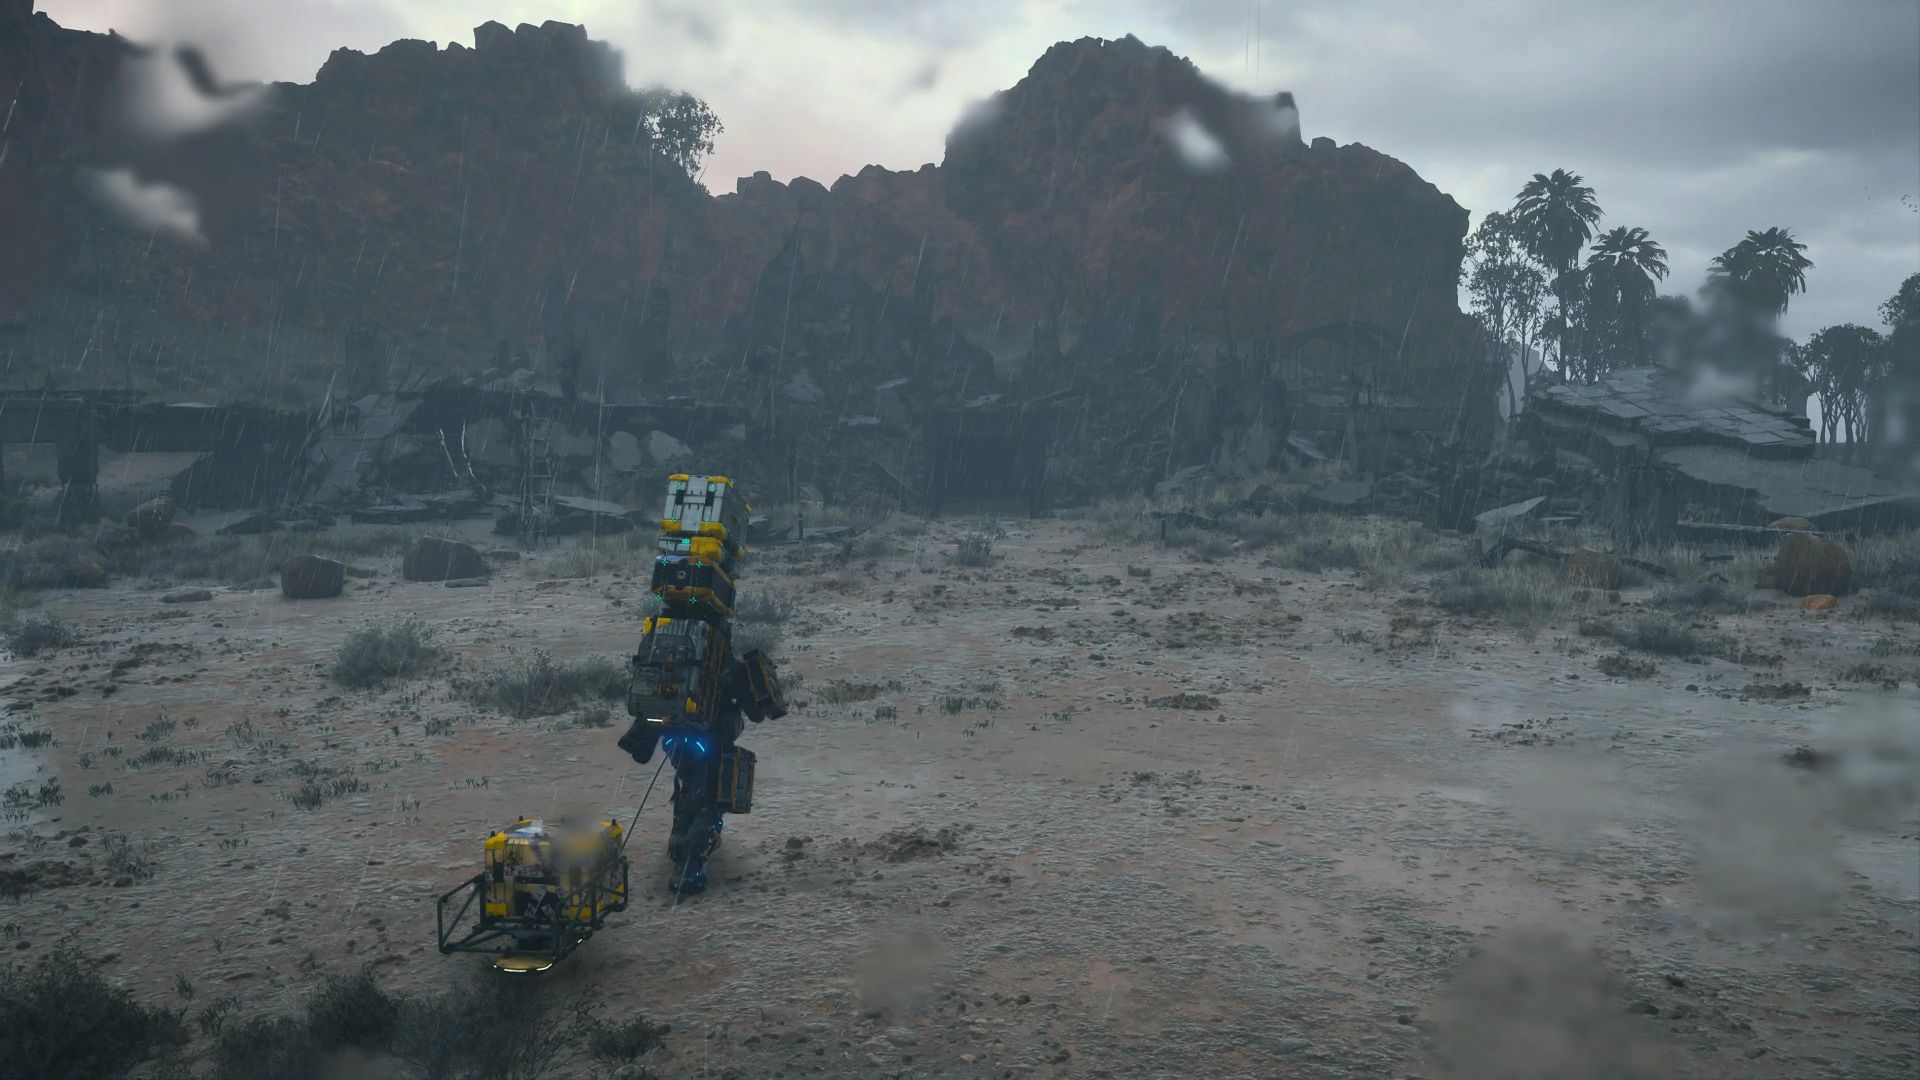
![Death Stranding has a Photo Mode [Source: Kojima Productions]](https://static.deltiasgaming.com/2025/06/Screenshot-5234.png)
Death Stranding 2’s Photo Mode allows you to take a variety of pictures in the game’s beautiful vistas and locales. Carrying the legacy of the first chapter of the franchise, DS2’s visuals will definitely catch your eye and allure you. So it’s no surprise that players will want to take snaps during their journey in the Americas or in the Land Down Under to remember their adventures by.
Death Stranding 2: How To Use Photo Mode?
How To Bring Up Photo Mode in Death Stranding 2
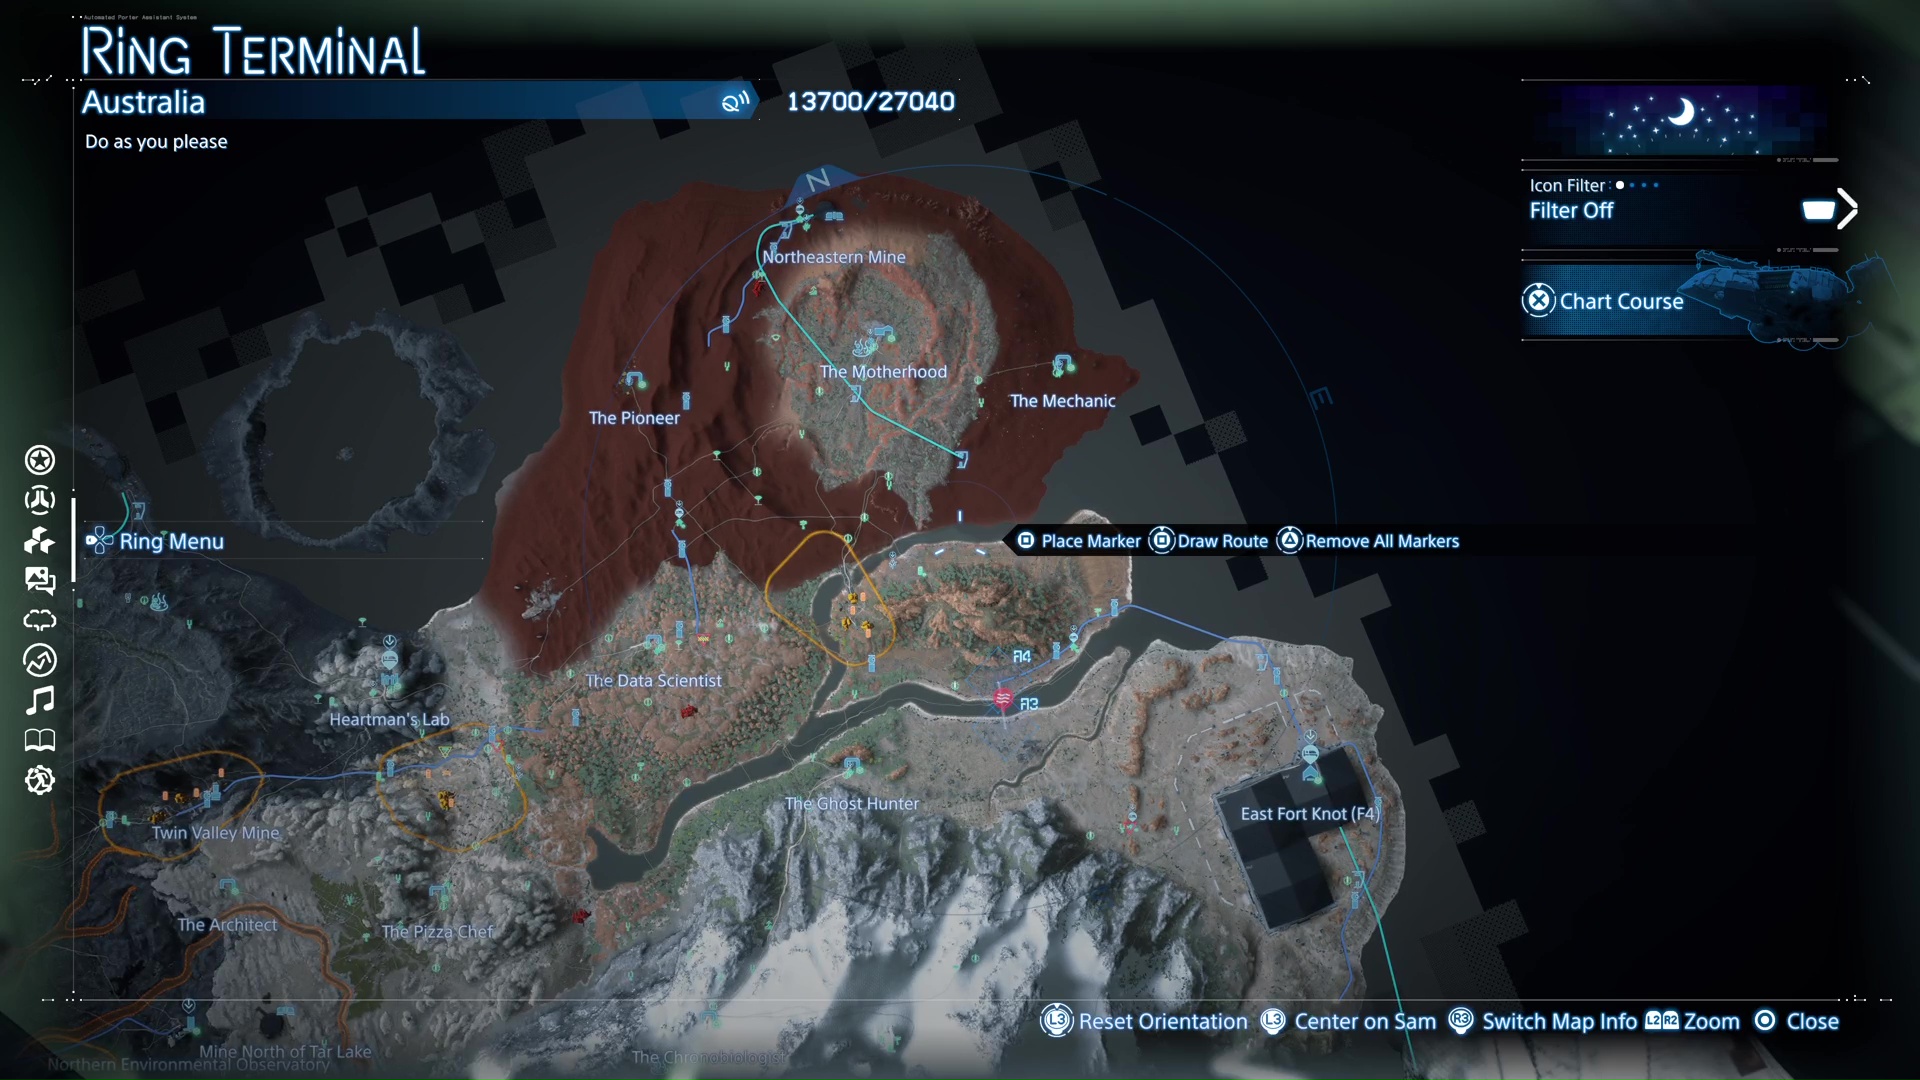
You will need to press the left side of the Touchpad on your controller to bring up the Photo Mode in Death Stranding 2.
You can learn more about other buttons in our Death Stranding 2 controls guide. Keep in mind, the right side of the Touchpad is for Communication, making Sam holler out into the open. This can be a recipe for disaster if you want to bring up the Photo Mode in a BT-infested area and hit the right side by mistake.
Death Stranding 2 Photo Mode Controls
The following controls are available in the game’s Photo Mode:
- X: To take the picture
- L2/R2: Move camera up/down
- Left Joystick: Move camera
- L3: Increase Camera Speed
- R3: Show Grid
- Square: Hide Menu
- Triangle: Reset
- Circle: Cancel
- L1/R1: Scroll between Photo Mode Settings
![Death Stranding - Photo Mode Options [Source: Kojima Productions]](https://static.deltiasgaming.com/2025/06/Screenshot-5233.png)
All Photo Mode Settings in Death Stranding 2
The following Photo Mode Settings are available in DS2:
Game
- Show UI
- Show Signs
- Show Odradek Scan
Camera
- Focal Length
- Roll
- Change Depth of Field
- Autofocus
- Focus
- Aperture
Brightness/Filter
- Exposure
- Contrast
- Color Filters
- Filter Type
- Filter Strength
- Noise
Lens Effect
- Vignette
- Vignette Size
- Vignette Strength
- Lens Distortion
- Chromatic Aberration
Sam
- Show Sam
- Sam’s Expression
- Sam’s Eyeline
- Turn Sam’s Face Toward Camera
- Turn Sam’s Body Toward Camera
- Tilt Weight
- Detailed Tilt Settings
- Face & Body Tilt (Vertical)
- Face & Body Tilt (Horizontal)
Lou and Dollman
- Lou’s Pose
- Lou’s Expression
- Lou’s Eyeline
- BB Pod Light
- Dollman’s Pose
- Dollman’s Expression
- Dollman’s Eyeline
Frame
- Frame
- Logo
- Logo Color
- Logo Position Horizontal
- Logo Position Vertical
- Logo Rotation
Light
- Light
- On/Off
- Show Shadows
- Intensity
- Hue
- Saturation
- Spread
- Softness
Once you are satisfied with how the frame is looking, hide the menu and take your snap. As already mentioned before, Death Stranding 2 has some gorgeous vistas that you can take pictures of and fill your albums with.
We provide the latest news and create guides for Death Stranding 2. Meanwhile, you can check out the following Death Stranding 2 articles or catch us playing games on Twitch and YouTube: