Facebook
 Reddit
 Email
Email
Learn how to share files over a LAN between two PCs, with key considerations such as network discovery, file sharing, and more.
Sharing files over a local area network (LAN) has been a common practice for a very long time. Back in the 2000s, the internet was expensive, and this tech was an outright excitement among people back then. Setting it up and implementing it was challenging, but it was gratifying. Surprisingly, the core fundamentals remain unchanged today, and this is also true for Windows 10 and Windows 11. Yes, there are a few new technologies involved, such as IPv6 and all, but the basics remain the same.
That said, below is a quick and easy guide on how to set up and complete this process correctly, without losing your internet connection during the setup.
Share Files Over LAN – Prerequisites
Before setting up a file transfer, ensure that both of your devices are connected to the same router and are on the same subnet. Earlier, a direct connection was established, which compromised internet connectivity. It was simply a matter of setting up a LAN connection, assigning an IP address, and configuring subnets, and you were good to go.
Now, things are different; an internet connection is a basic necessity for Windows to function correctly. This guide remains updated according to today’s standards. Ensure that the following requirements are met:
- Both PCs must be connected to the same network and subnet (Wi-Fi or Ethernet) via the router.
- Identical operating system
- Administrative privileges on both computers.
- The network profile is set to “Private” rather than “Public”.
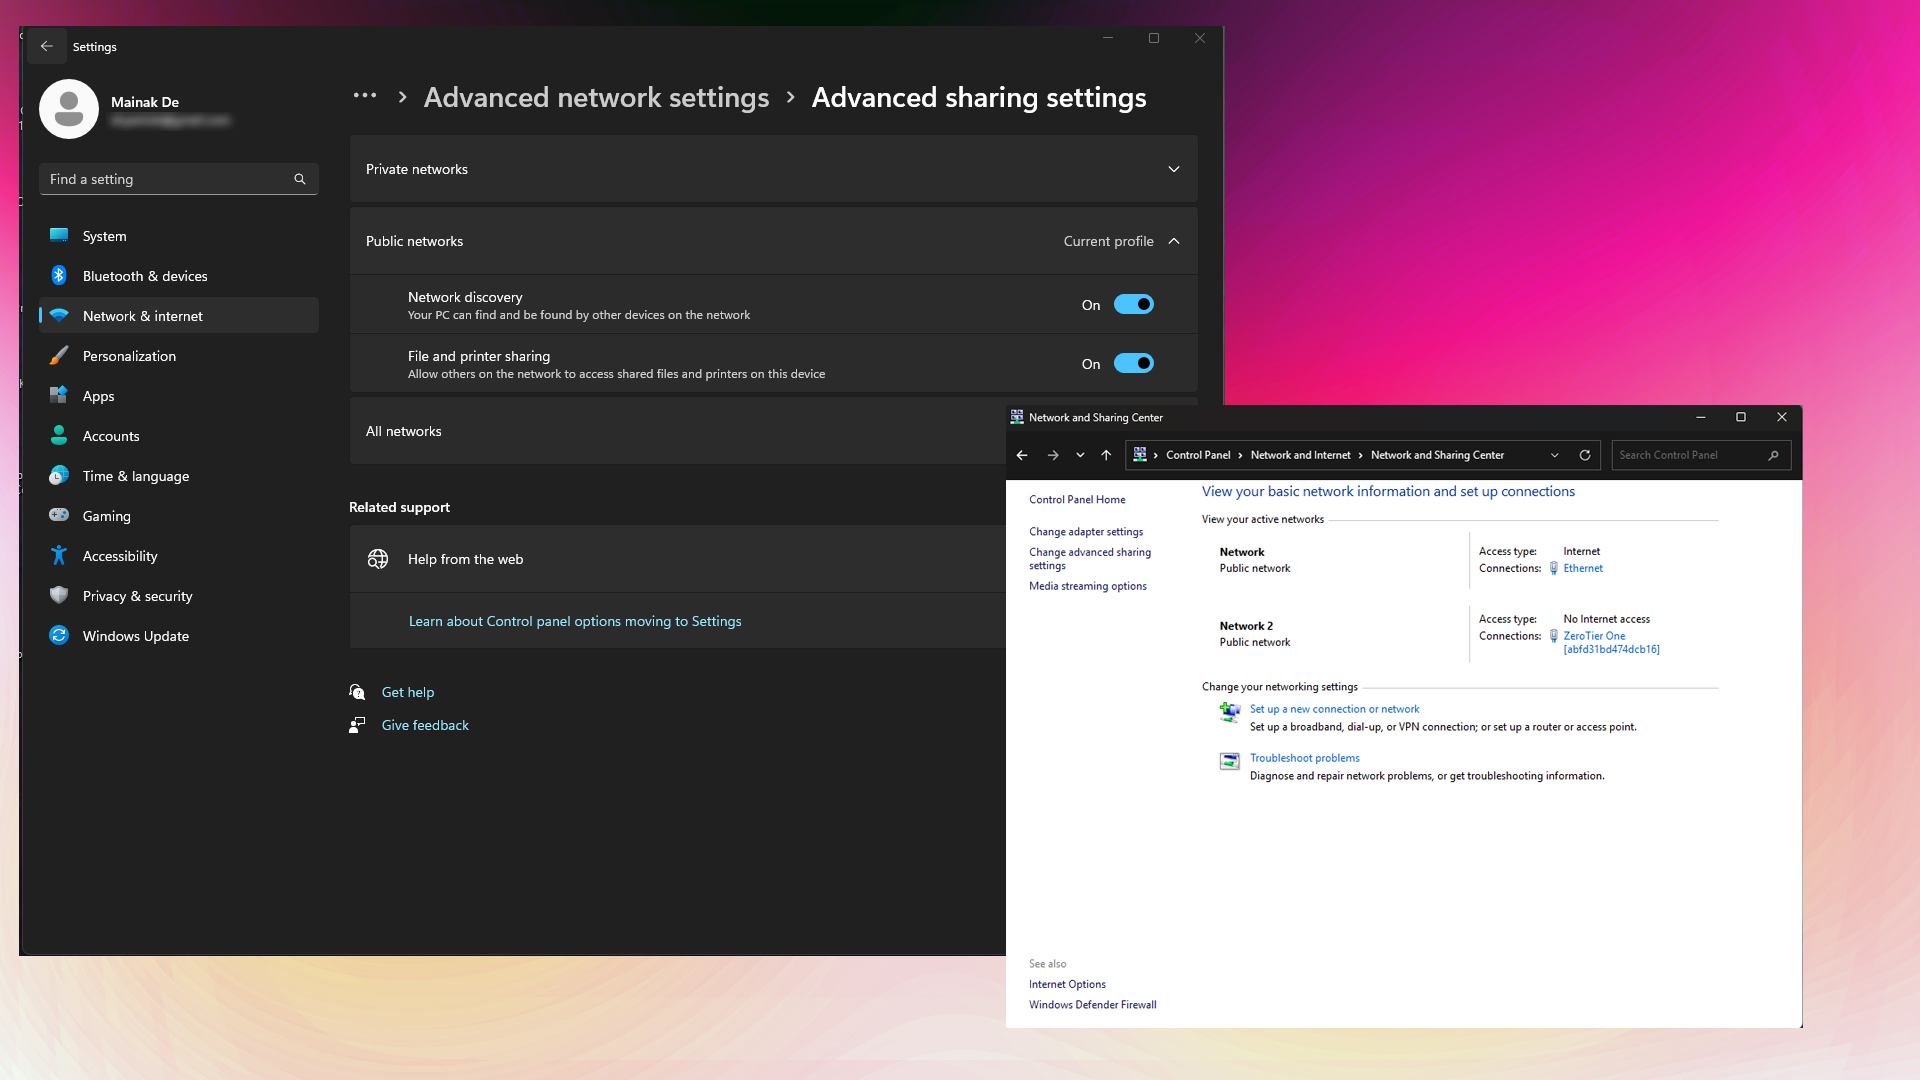
Method 1: Enable Network Discovery and File Sharing
After the basic requirements are taken care of, enable network discovery on both PCs so they can detect each other on the network. Here is a guide on how to do so:
- Open the Control Panel, then go to “Network and Internet” and select “Network and Sharing Center”
- Select “Change advanced sharing settings” from the options on the left side of the window
- Expand the Private network profile (current profile)
- Select Turn on network discovery and Turn on automatic setup of network-connected devices
- Enable Turn on file and printer sharing
- Click Save changes
After you’ve done this, you need to turn off the password settings so that access is seamless:
- Within the Advanced sharing settings, find and expand the “All Networks” section.
- Select Turn off password-protected sharing
- Enable public folder sharing
- Click Save changes
Method 2: Share a Specific Folder
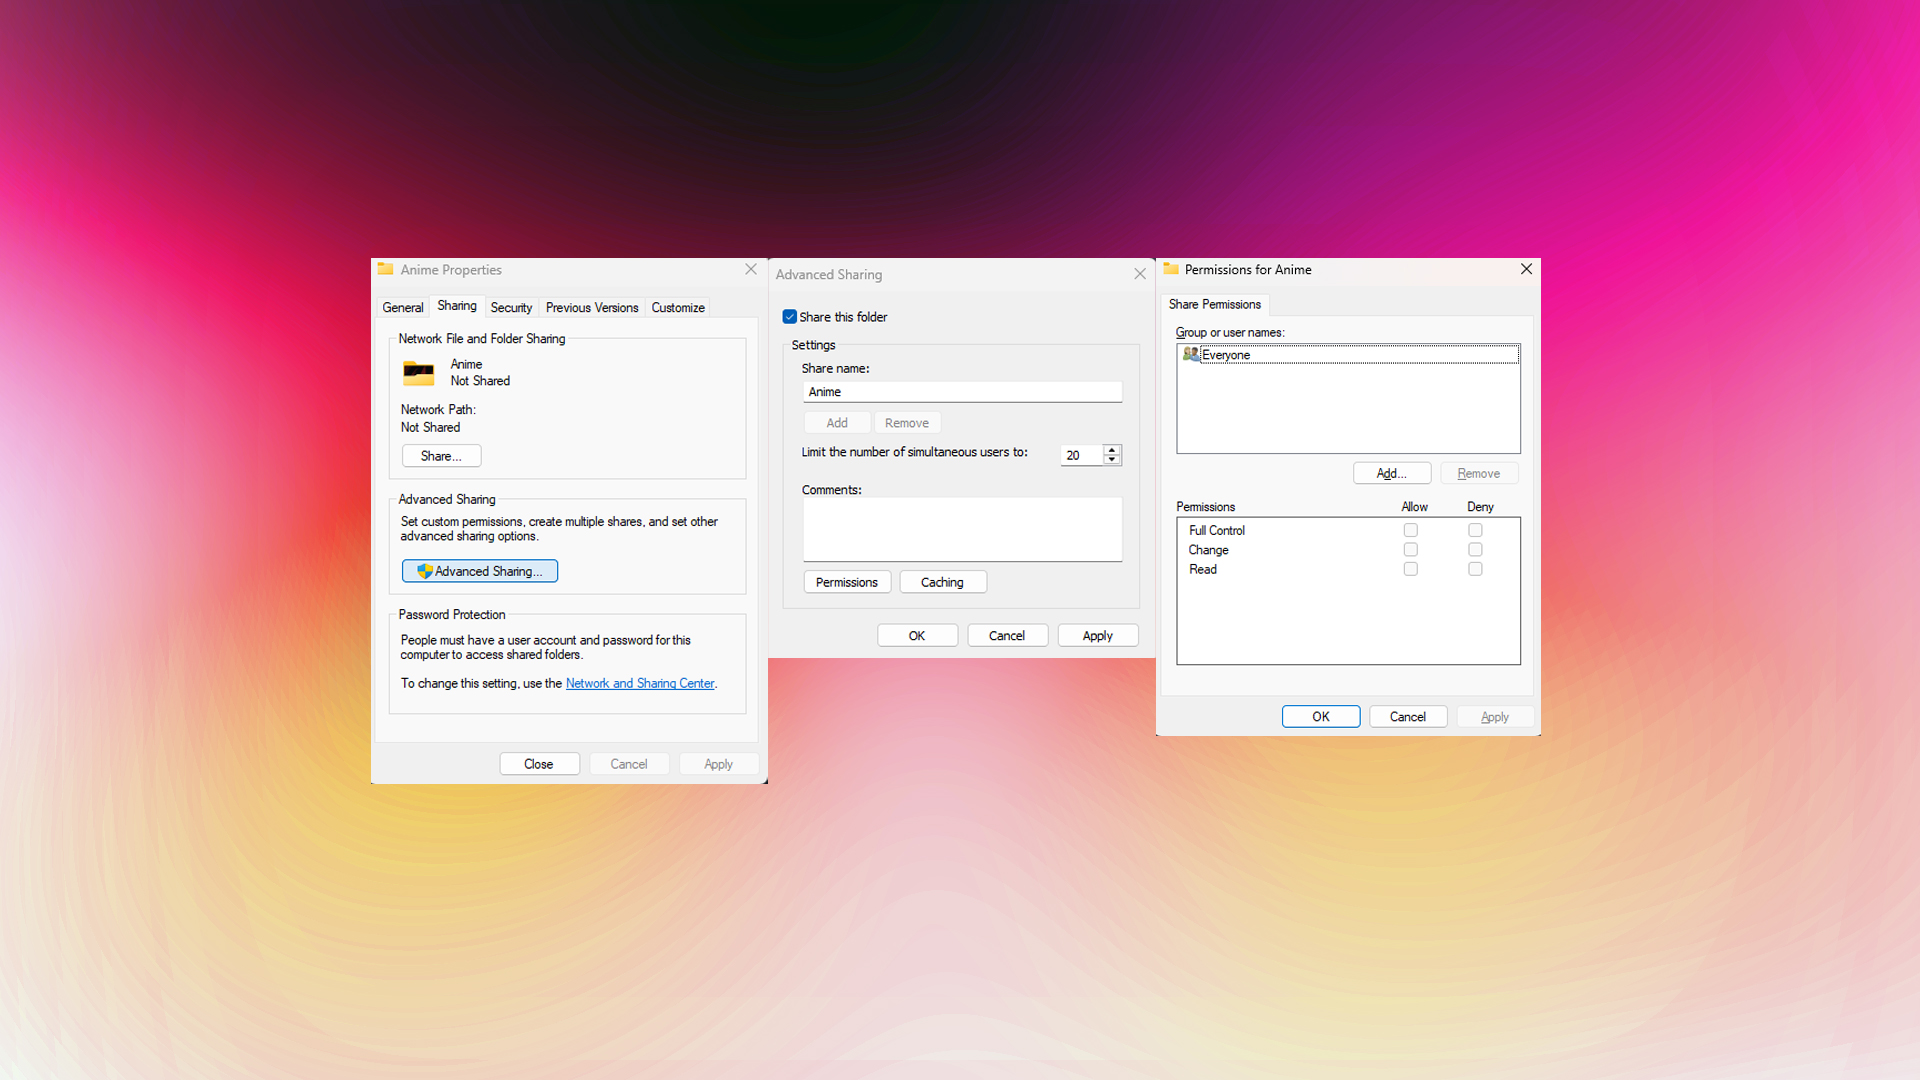
Let’s say you want to share a specific folder instead of everything. For that, you need to tackle things differently. You need to make a folder where you will share data, and that folder will only be visible to other PCs within your network. Here is how you can do it:
- Create a new folder or choose an existing one that you want to share
- Right-click the folder and select Properties
- Click on the Sharing tab
- Select Advanced Sharing
- Check Share this folder
- Click Permissions to set access levels
After you have completed this, you will need to perform a few additional steps. Such as:
Setting Permissions
- Read: Users can view and open files only
- Change: This permission lets users view, edit, and delete files.
- Full Control: Complete access, including permission management
Select “Everyone” from the dropdown and assign the desired permissions, then click “OK.” Now, others can easily open the shared folder, upload files for you to access, and perform other allowed actions depending on the permissions you set.
Accessing Shared Files
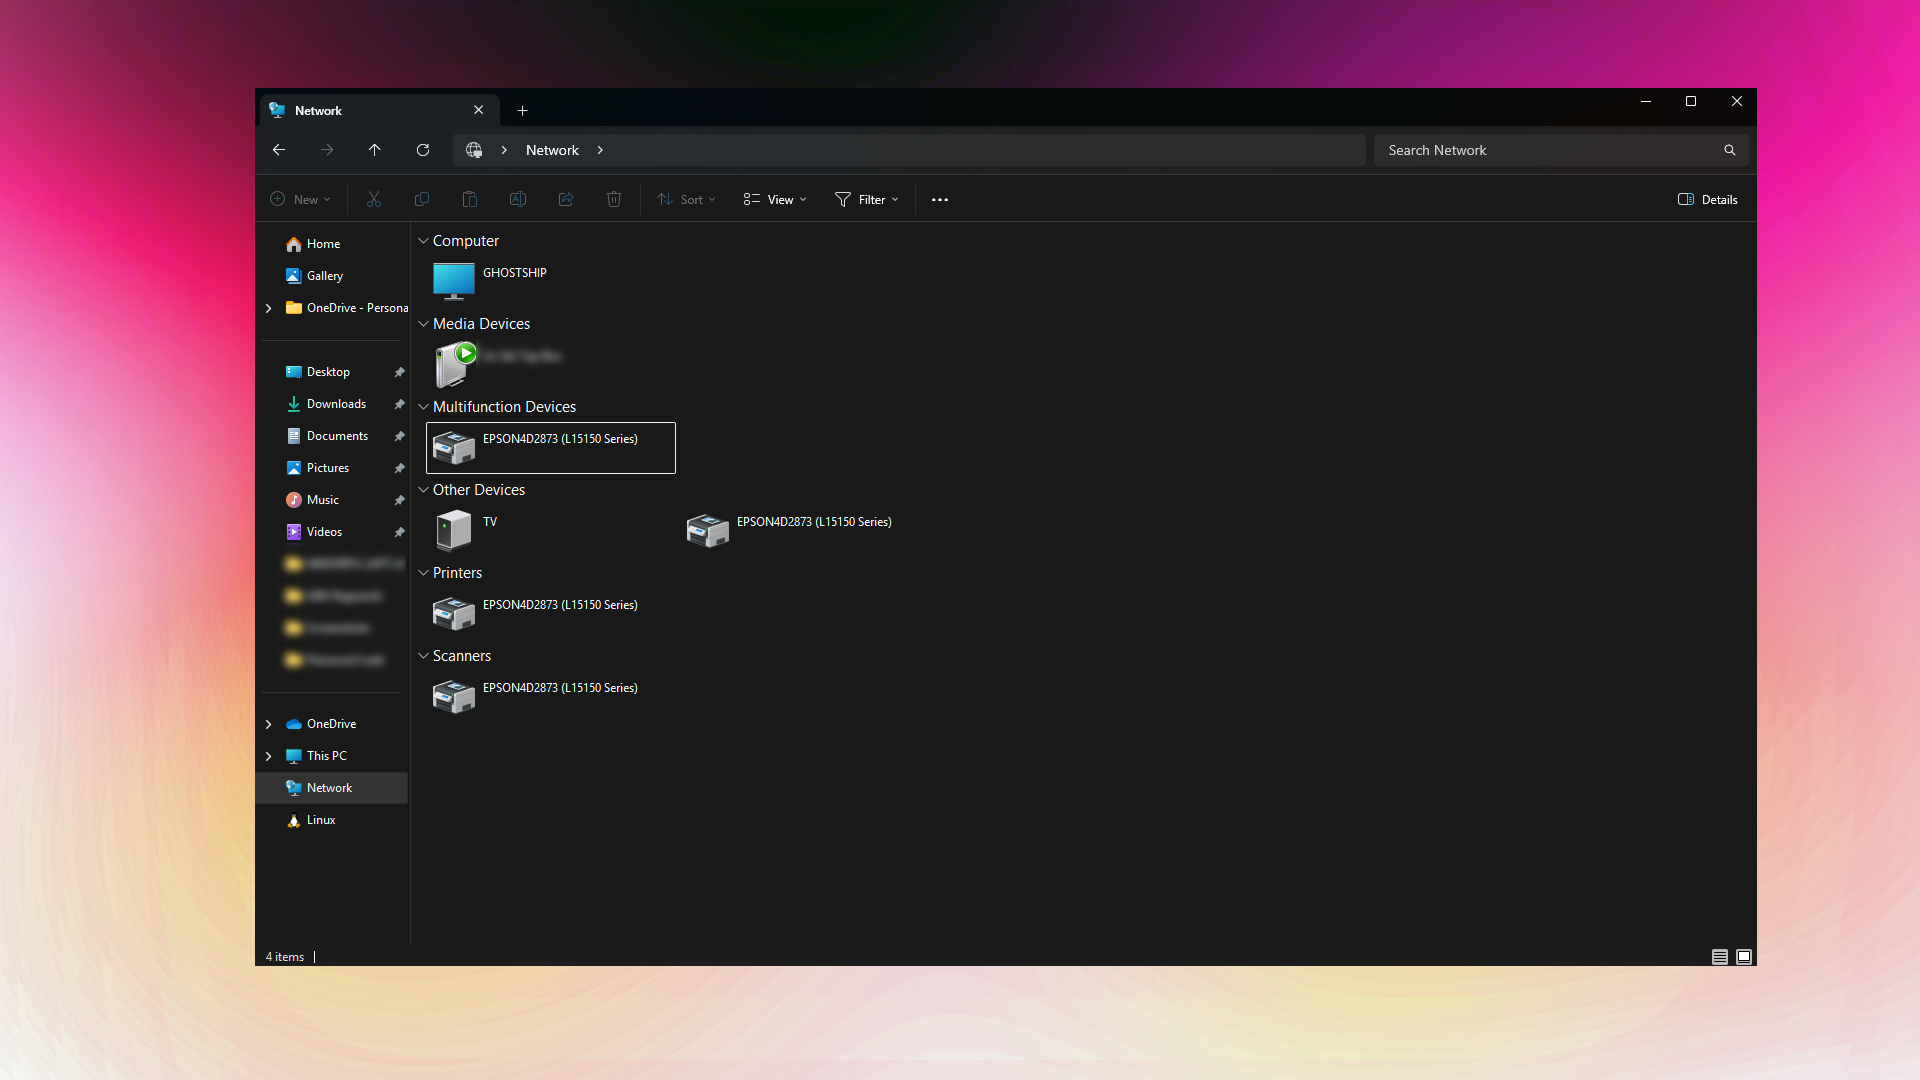
Once you have completed the above steps, you should be able to see the other PC as shown in the picture above. You can double-click to open it, then access files and all their contents from the regular Explorer. Typing in the network path in File Explorer’s search section also works, but that’s an older method.
However, if you need shortcuts, such as mapping, follow the guide below.
- Open File Explorer and select This PC
- Click Map Network Drive from the ribbon
- Choose an available drive letter
- Enter the network path (\ComputerName\SharedFolder)
- Check Reconnect at sign-in for persistent access
- Click Finish
Verdict
This concludes the file-sharing guide for LAN connections between two PCs. If you cannot see your other PC or are experiencing connectivity issues, it could be due to a firewall blocking access or specific settings not being enabled. For firewall-related issues, check if network discovery is enabled on both machines. Check if the firewall isn’t blocking file sharing. Ensure that password protection is turned off; sometimes, this also hinders file transfer.
We provide the latest news and “How To’s” for Tech content. Meanwhile, you can check out the following articles related to PC GPUs, CPU and GPU comparisons, mobile phones, and more:
- 5 Best Air Coolers for CPUs in 2025
- ASUS TUF Gaming F16 Release Date, Specifications, Price, and More
- iPhone 16e vs iPhone SE (3rd Gen): Which One To Buy in 2025?
- Powerbeats Pro 2 vs AirPods Pro 2: Which One To Get in 2025
- RTX 5070 Ti vs. RTX 4070 Super: Specs, Price and More Compared
- Windows 11: How To Disable Lock Screen Widgets