If you want to earn as much as 1 million or more per job, here is how to solo Cayo Perico Heist in GTA Online.
The Cayo Perico Heist is arguably one of the best ways to earn a ton of in-game cash in GTA Online. Despite countless nerfs in previous patch updates, many players still choose this over other jobs in the game. This is due to its lucrative payout every run, especially if you are efficient when playing solo. Furthermore, it is also one of the easiest heists to play in the game as the finale can be cleared without initiating combat. This is why almost every player who has spent hours playing the game would recommend running this job to save up and purchase other businesses in the game.
If you are curious, here is a guide on how you can solo Cayo Perico Heist in GTA Online.
Table of contents
How To Solo Cayo Perico Heist in GTA Online?
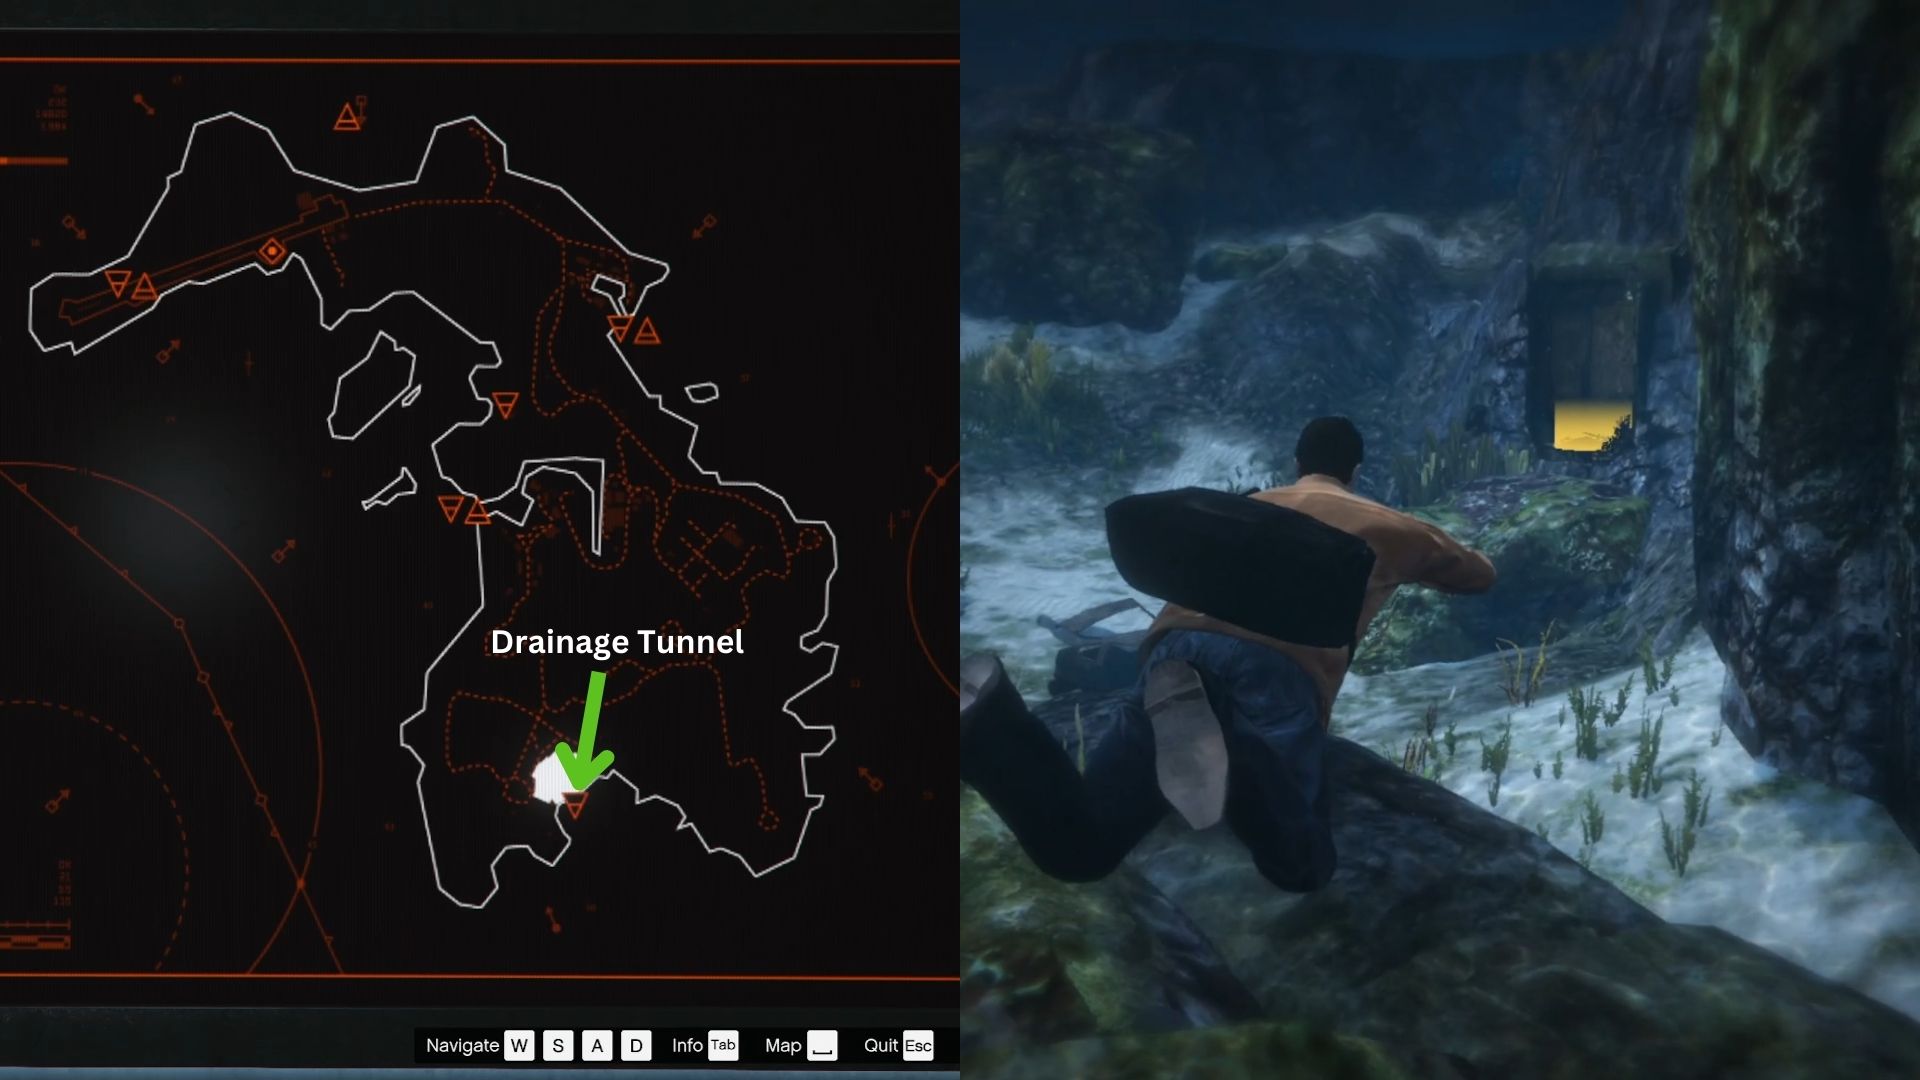
Before you can access this mission, you first need to purchase the Kosatka submarine from Warstock Cache & Carry for $2,200,000. You don’t need to purchase any upgrades for now. After this, Pavel should contact you about a job offer and start your first Cayo Perico Heist run in GTA Online. On your first run, the most important intel you need to gather is to capture an image of the drainage tunnel at the edge of the island. This is the easiest entry point you can choose if you wish to solo the game.
For your first run, almost everything is provided to you. However, on your subsequent runs, you will have to pay $100,000 in-game cash every time you want to start the job, and you will be doing most of the tasks. Here are more details about each of the missions and how you can be efficient at doing them.
Gather Intel
You won’t get a free ride to Cayo Perico this time around. What you will do is steal a Velum from a randomized location. Once you have your aircraft, fly as far as you can south of the map until you trigger a cutscene. Simply follow the yellow marker to get to the location. Do not try to fly very high, or the cutscene might not trigger.
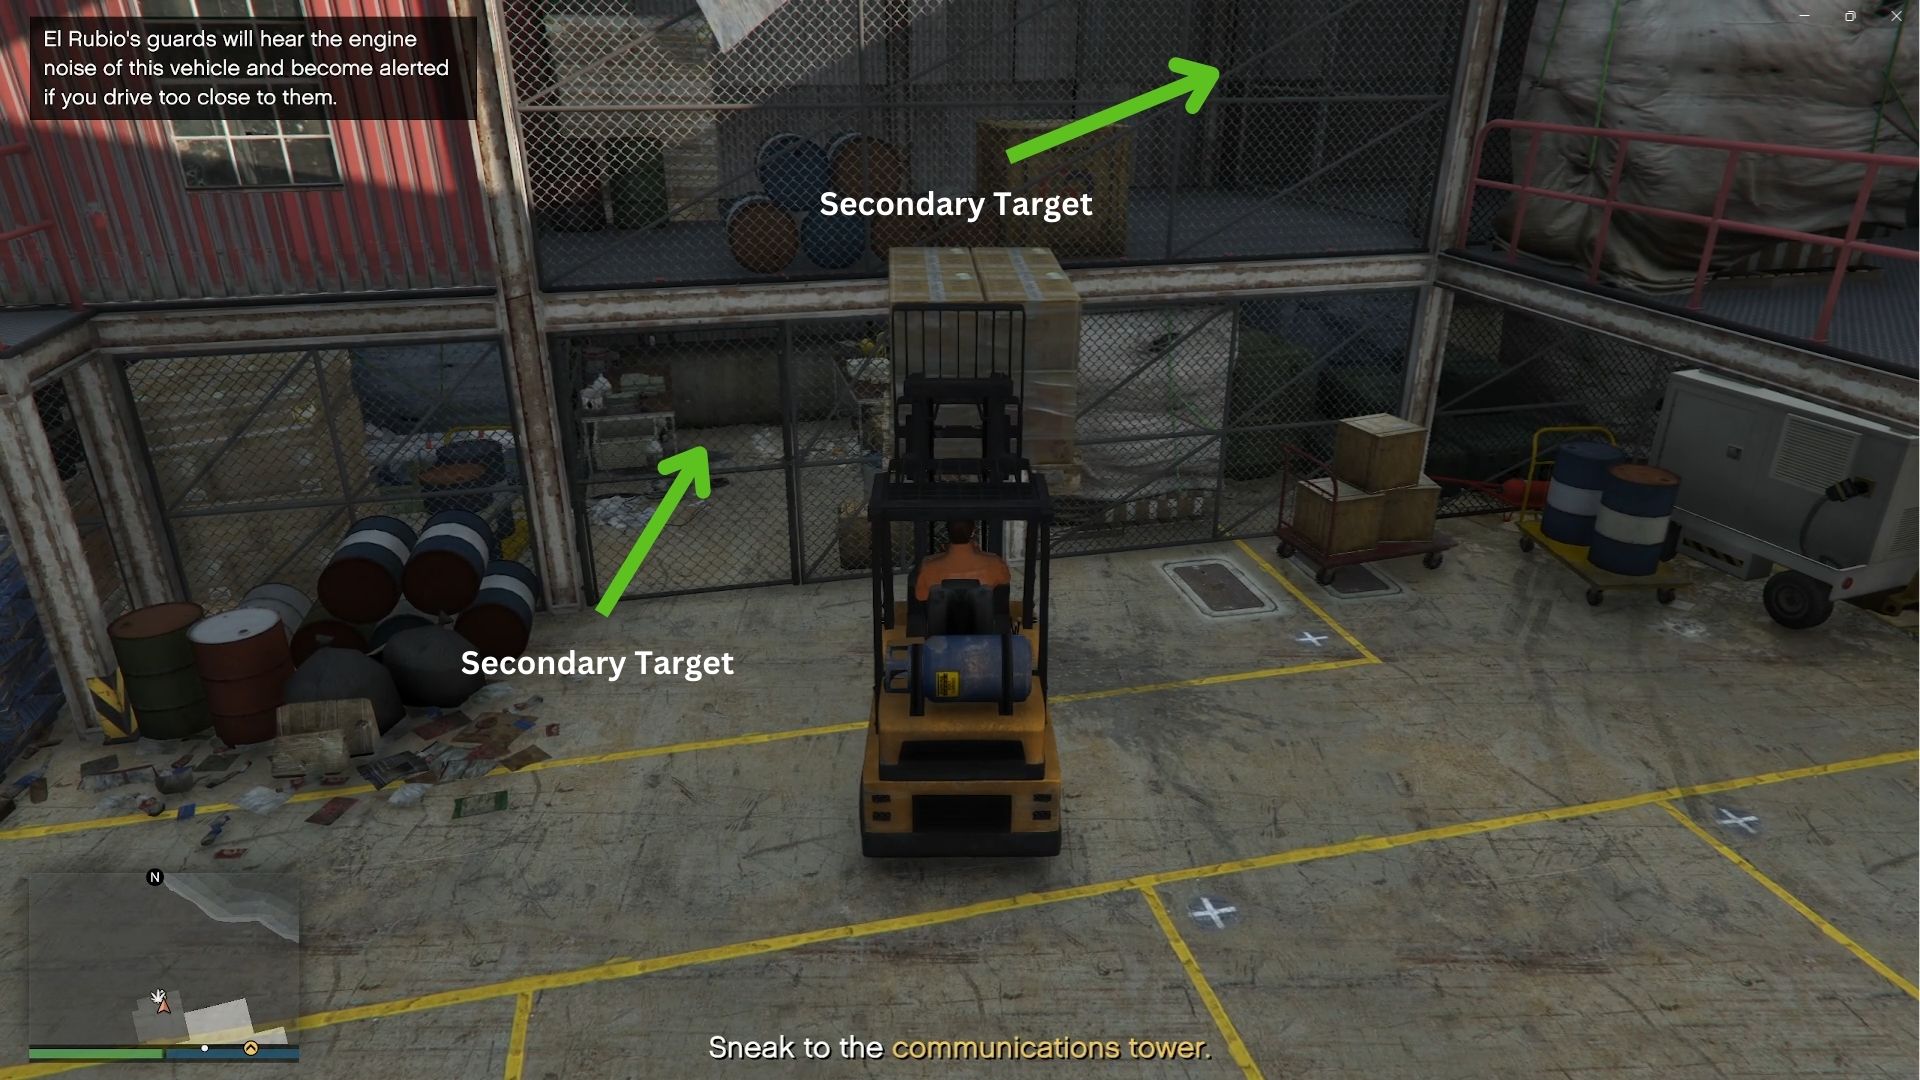
Once you are on the island, your next goal is to check the nearest secondary target locations at the airstrip. The first two stashes of loot are found inside the hangar. The first one is just in front of the entrance, while the second one is right above the first stash room. You will need to use a forklift, grab the nearest pallet with some boxes, and lift it to climb up to the next loot. Take a picture of all the stashes of loot you can find.
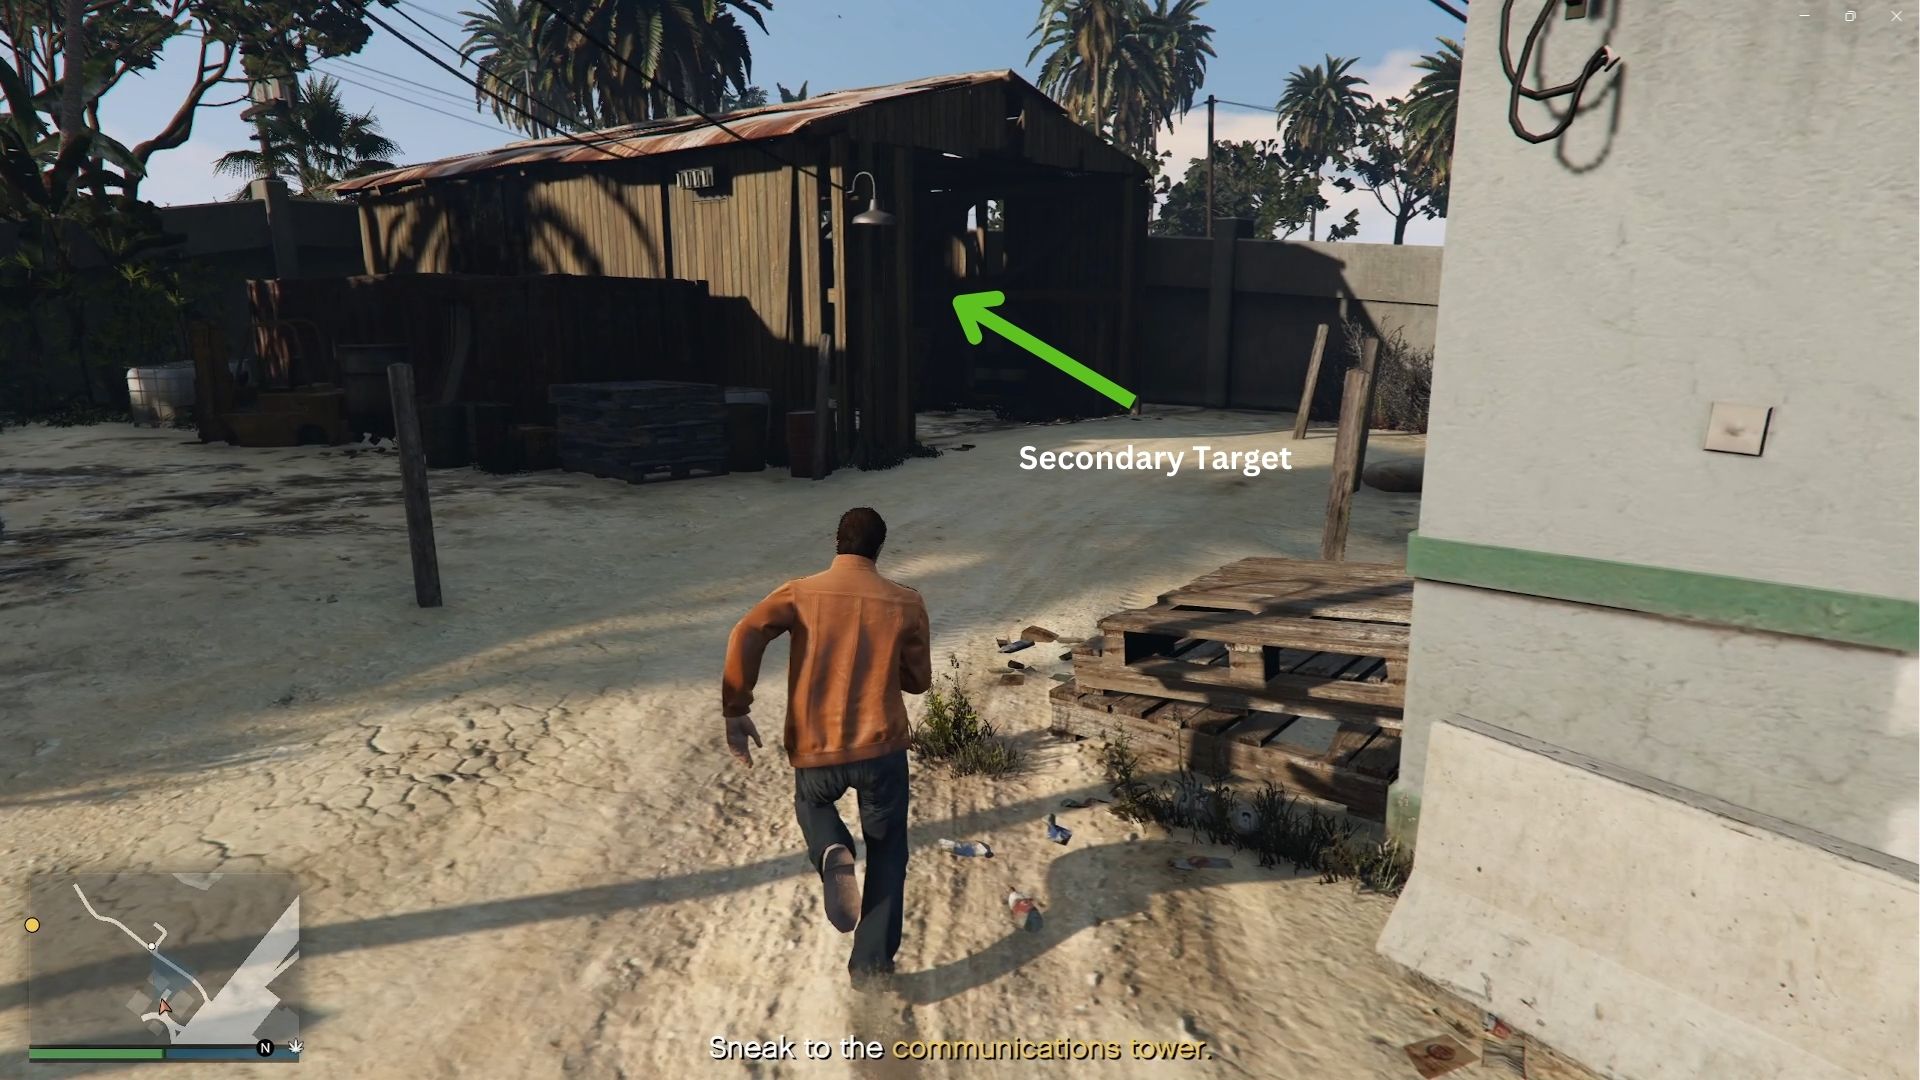
Once you mark the two locations, head outside the hangar and across the runway. Follow the path in the middle to a small open shed on the right side. A third stash of loot can be found there. Take a picture so Pavel can mark it for you.
Once you check all three locations, you can proceed to leave the airstrip. Grab the nearest motorbike and head to the communications tower. There is a path that allows you to bypass most of the guards using a bike. Simply follow the green line below, and you’ll be able to reach the marked location in less than a minute.
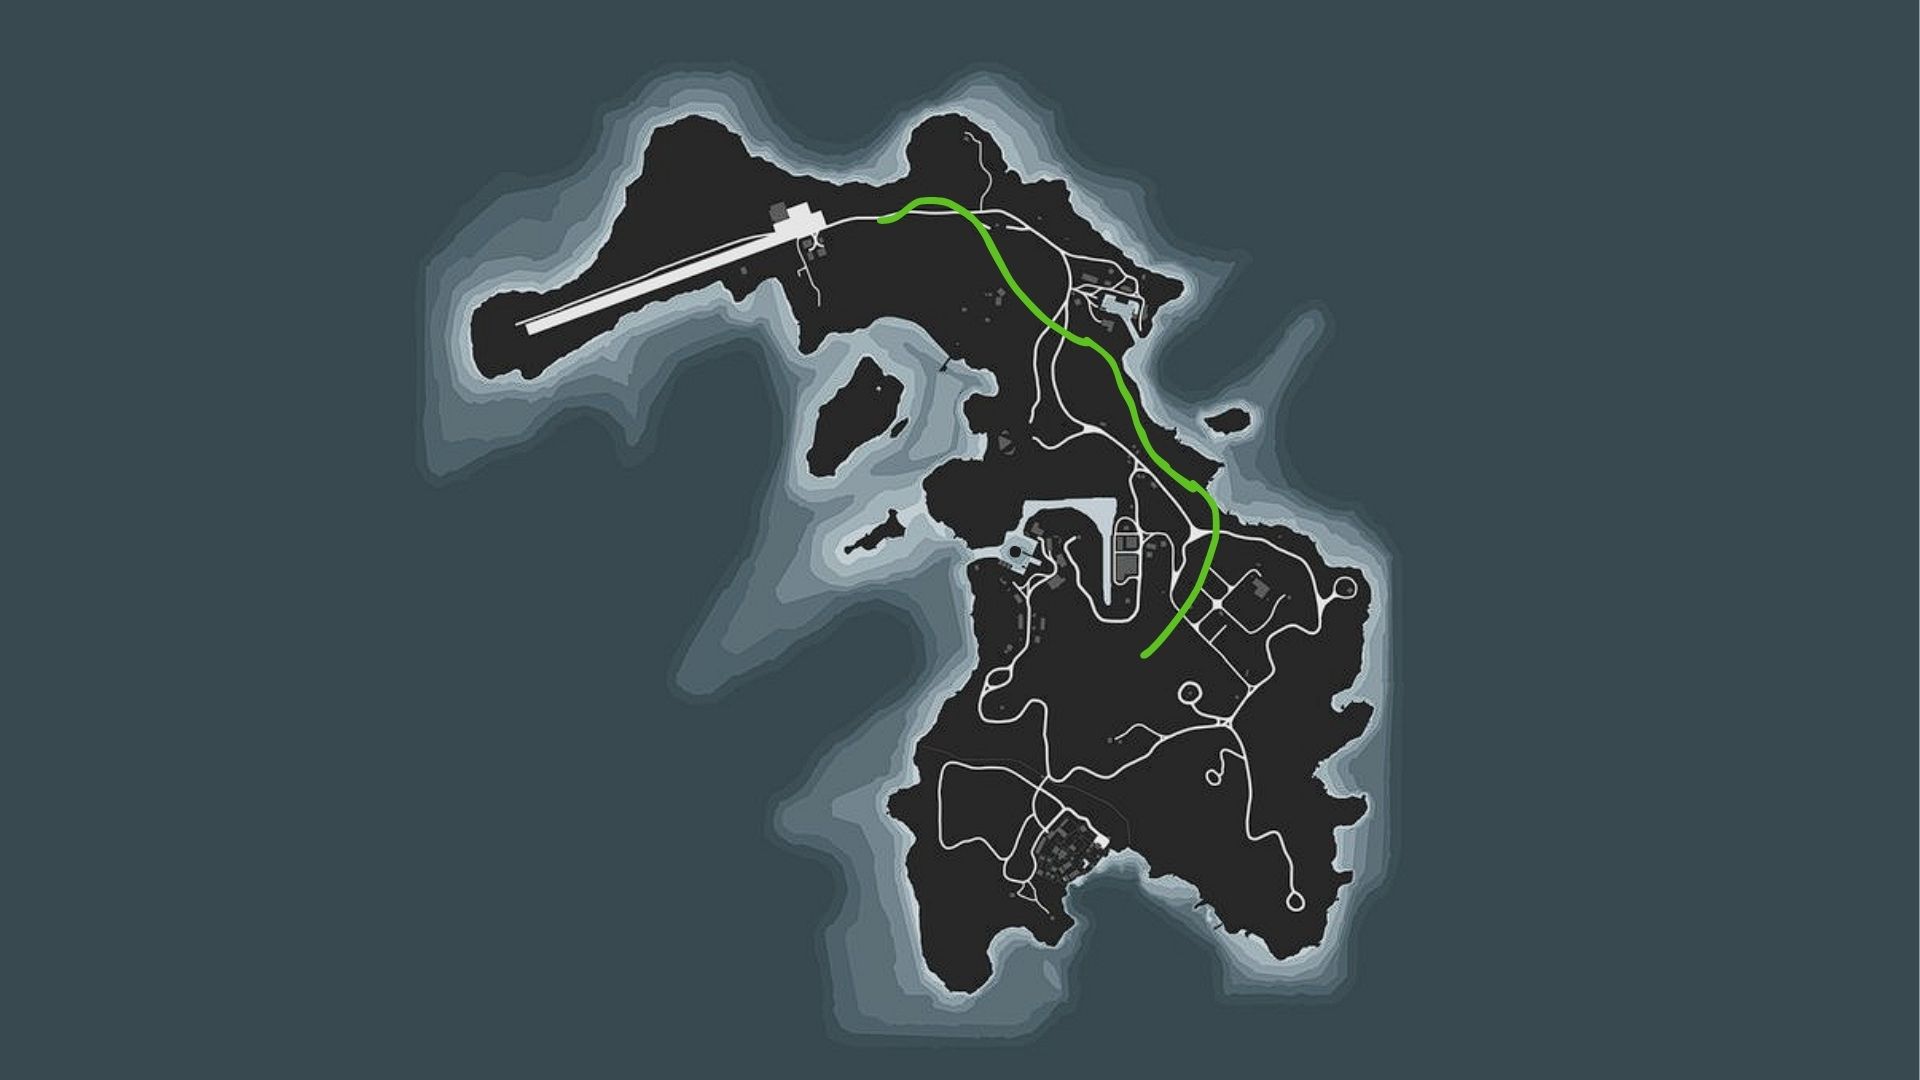
However, you’ll have to pull off a jump, which can be hard at first. It takes a bit of practice, but once you figure it out, it will be easy and quick. Make sure no one is looking in your direction while making the jump, or you will be sent back to the airstrip without your bike.
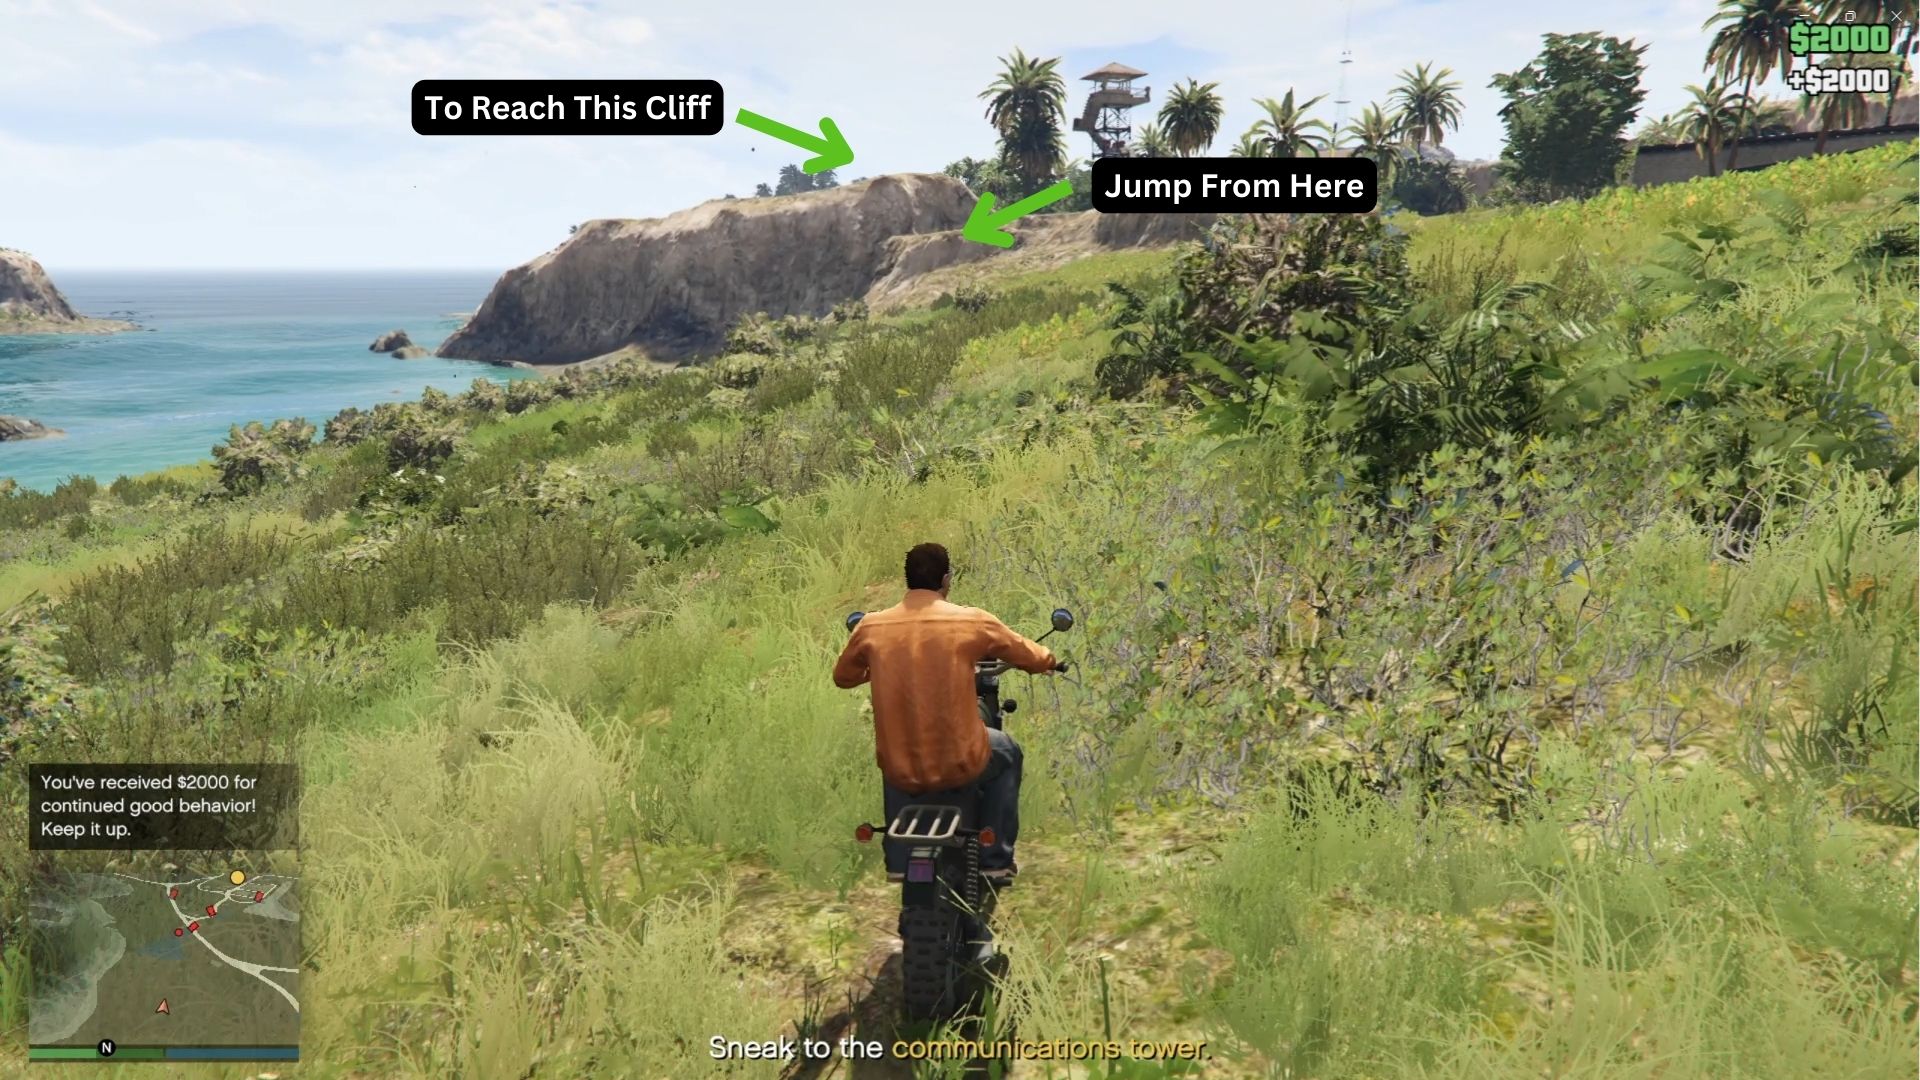
Once you reach the communications tower, check for guards in the area. If there is a guard stationed near the tower and does not move, the signal box you are looking for should be at the top. If there are no guards nearby, the signal box is just below the tower. Taking note of this makes it more convenient as you don’t have to guess where the signal box spawns in your run.
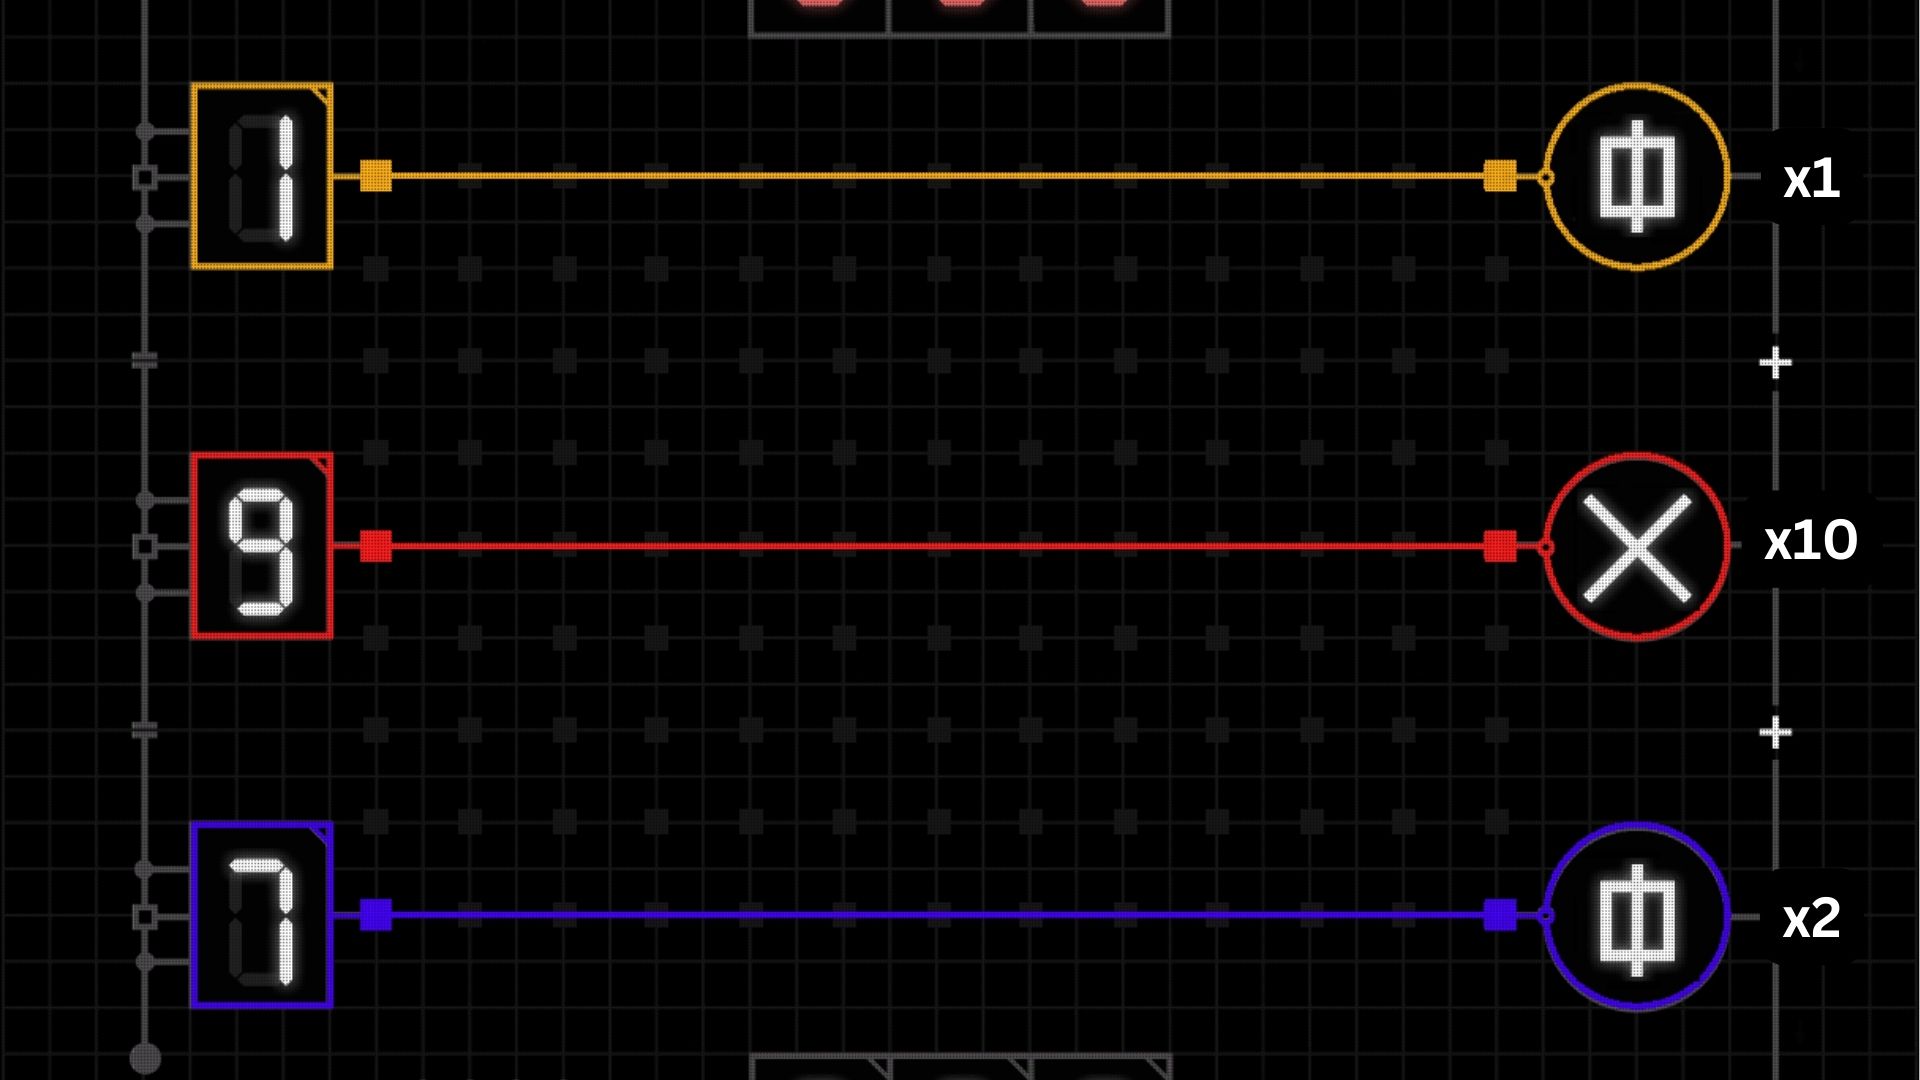
Once you open the signal box, you will have to solve a puzzle. Each symbol corresponds to a multiplier. You will have to connect each number to these symbols to match the total of the value present at the top of the screen.
Once you gain access to the security cameras, you can head straight to the basement level and hope the glass case will have anything but the Sinsimito Tequila, the cheapest of all the primary targets in this heist job. Once the target has been marked, you can climb down the tower or jump from the top and use a parachute. Find a nearby guard and get detected by them so you get teleported back to the airstrip. Ride the plane and finish the first part of the job.
If you don’t mind switching sessions, you can set Kosatka as your spawn point in the interaction menu and switch to a new session. This will teleport you back to Kosatka, so you won’t have to travel far to start the next mission.
Approach Vehicle – Longfin
For the Prep phase, you will need to choose an approach vehicle to use in the heist. The best option is the Longfin because its mission is easy, and it allows you to skip the guards and head straight to the drainage pipe after filling up your bags at the airstrip with secondary loot. You only need to steal the Longfin from one of the LSPD parking garages using a Phantom truck.
Pavel will mark three trucks on the map that you can steal and use to transport the Longfin. For maximum efficiency, we recommend using the Phantom Wedge. Its power allows you to plow through traffic effortlessly, eliminating any concerns about roadblocks. You’ll find the Phantom Wedge marked separately on the map, away from the other two trucks, which are located together.
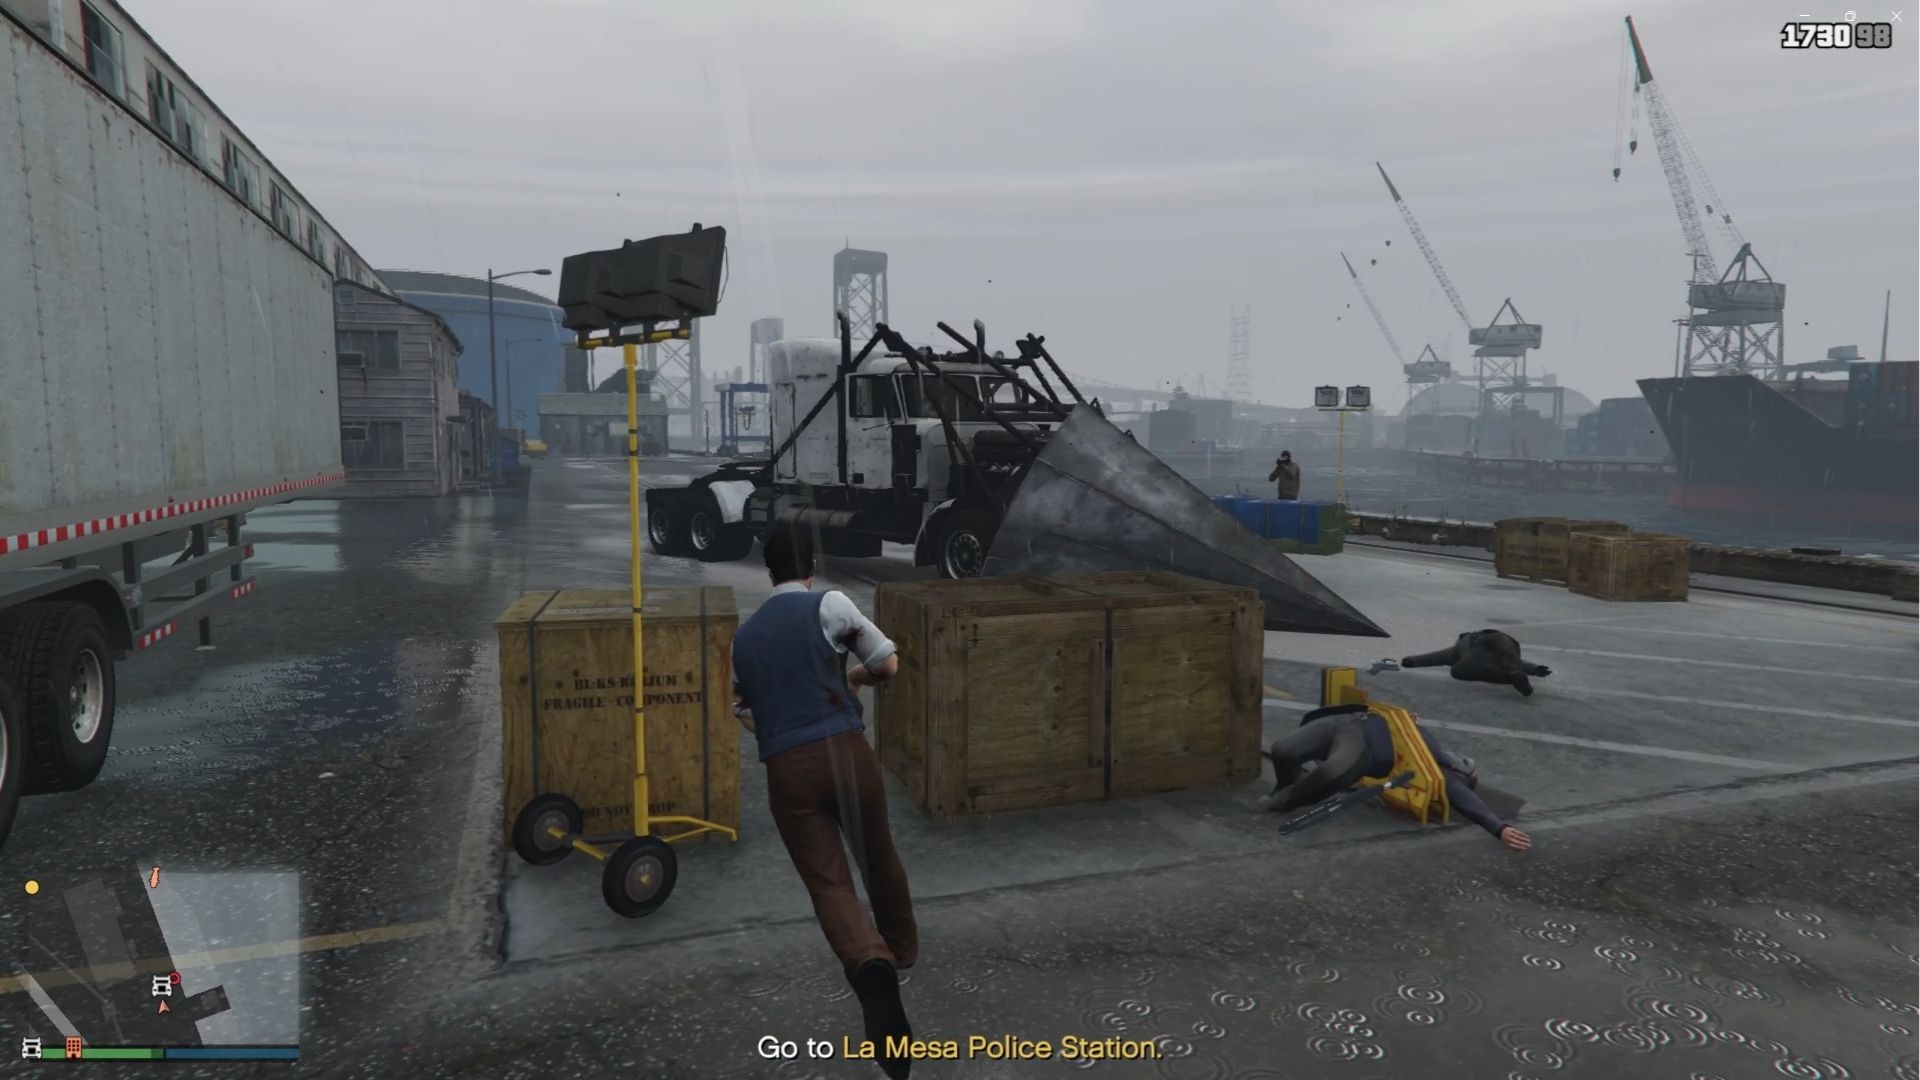
After acquiring your truck, simply drive to the location and take the Longfin. There will be police guarding the area, and you will get a wanted star level for breaking in. You can take out all the guards in the area and blow yourself up to remove the wanted stars and prevent more police from spawning. Once the area is cleared, you can head back and take the Longfin with you to a marked warehouse to end the Prep mission.
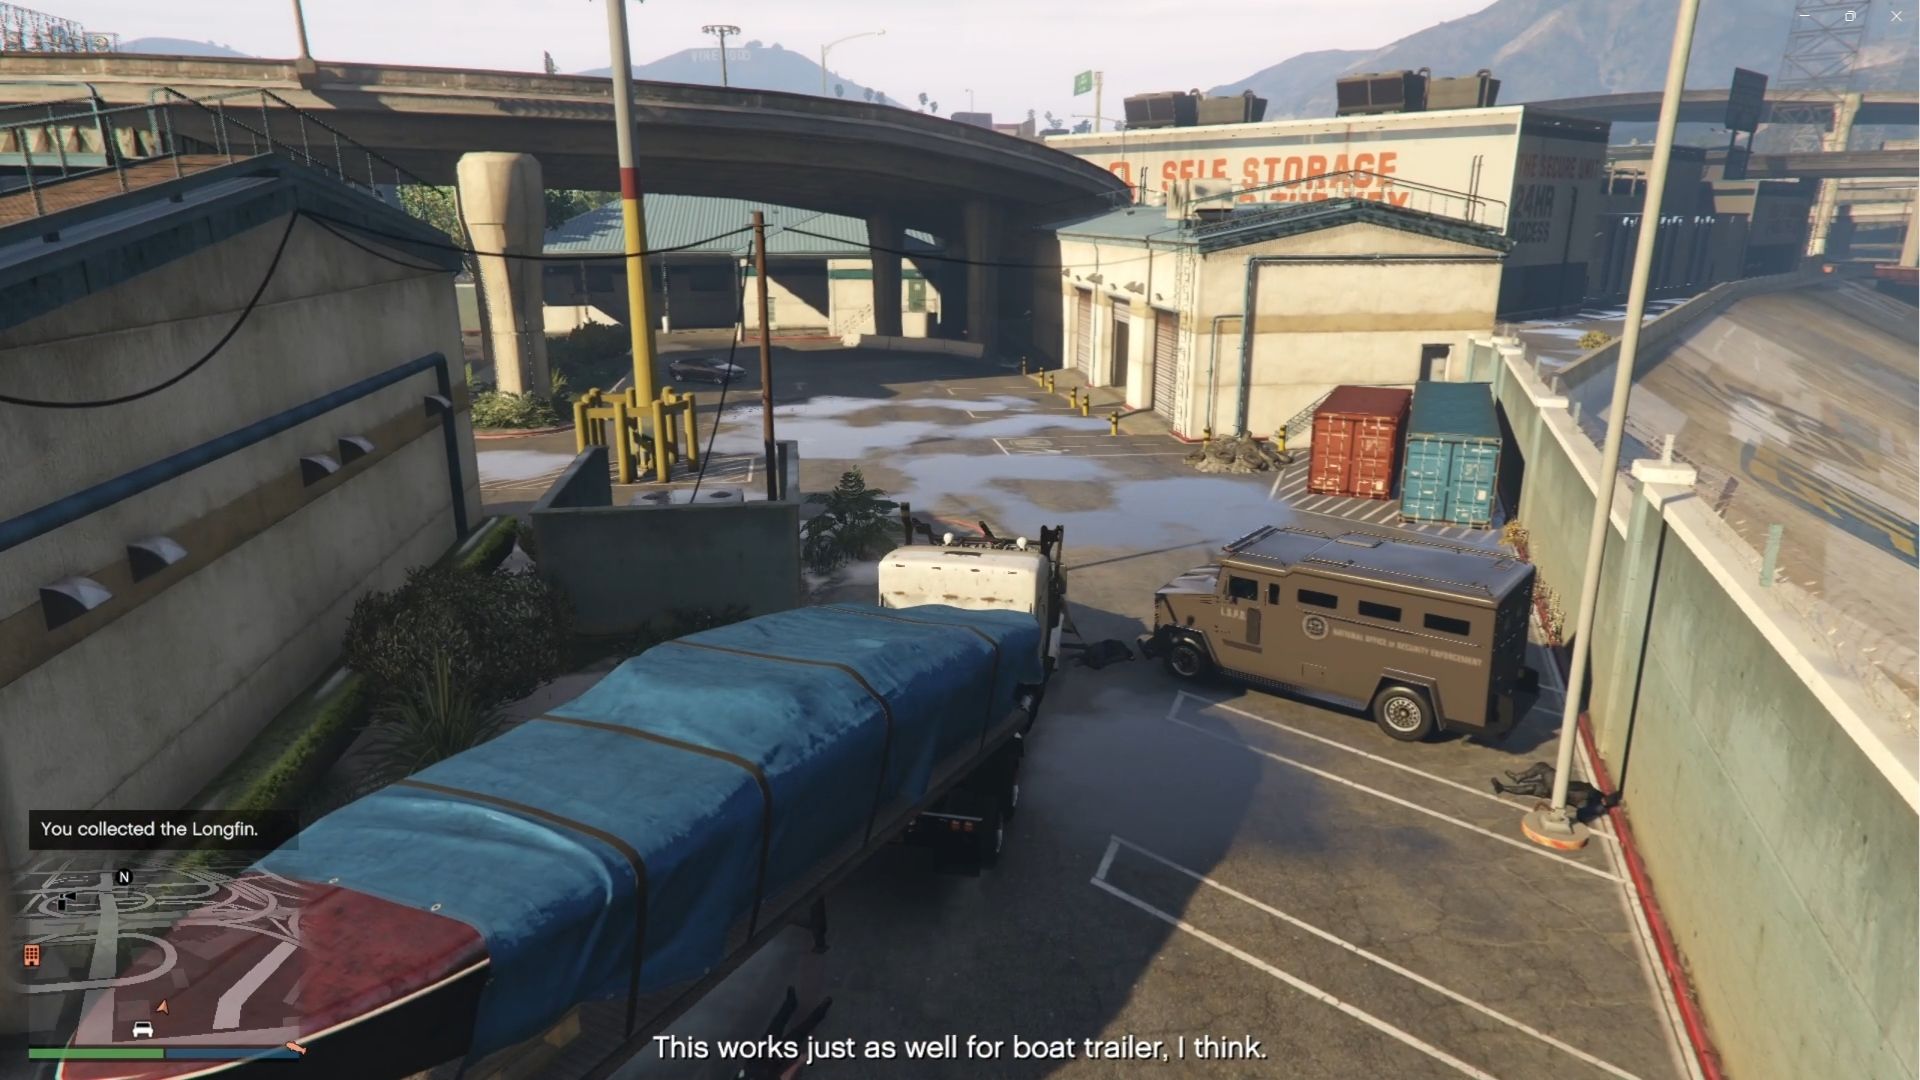
Switch the session again to immediately get back to the Kosatka and start the next phase of the plan. If you don’t mind the time, you can travel using a plane or boat to get to the submarine.
Equipment – Cutting Torch
I prefer going for the easiest to the more challenging Prep missions, so I chose to do the Cutting Torch first. However, you can do the equipment Prep missions in any order. In this mission, you will need to steal a cutting torch from one of the random construction sites in Los Santos. This is easy and does not necessarily involve combat. You can stealth your way into acquiring the equipment by disguising yourself.
You can always find a hard hat near the marked location. Make sure to keep an eye out and equip it, as it can make finding the Cutting Torch easier than shooting your way to retrieve it.
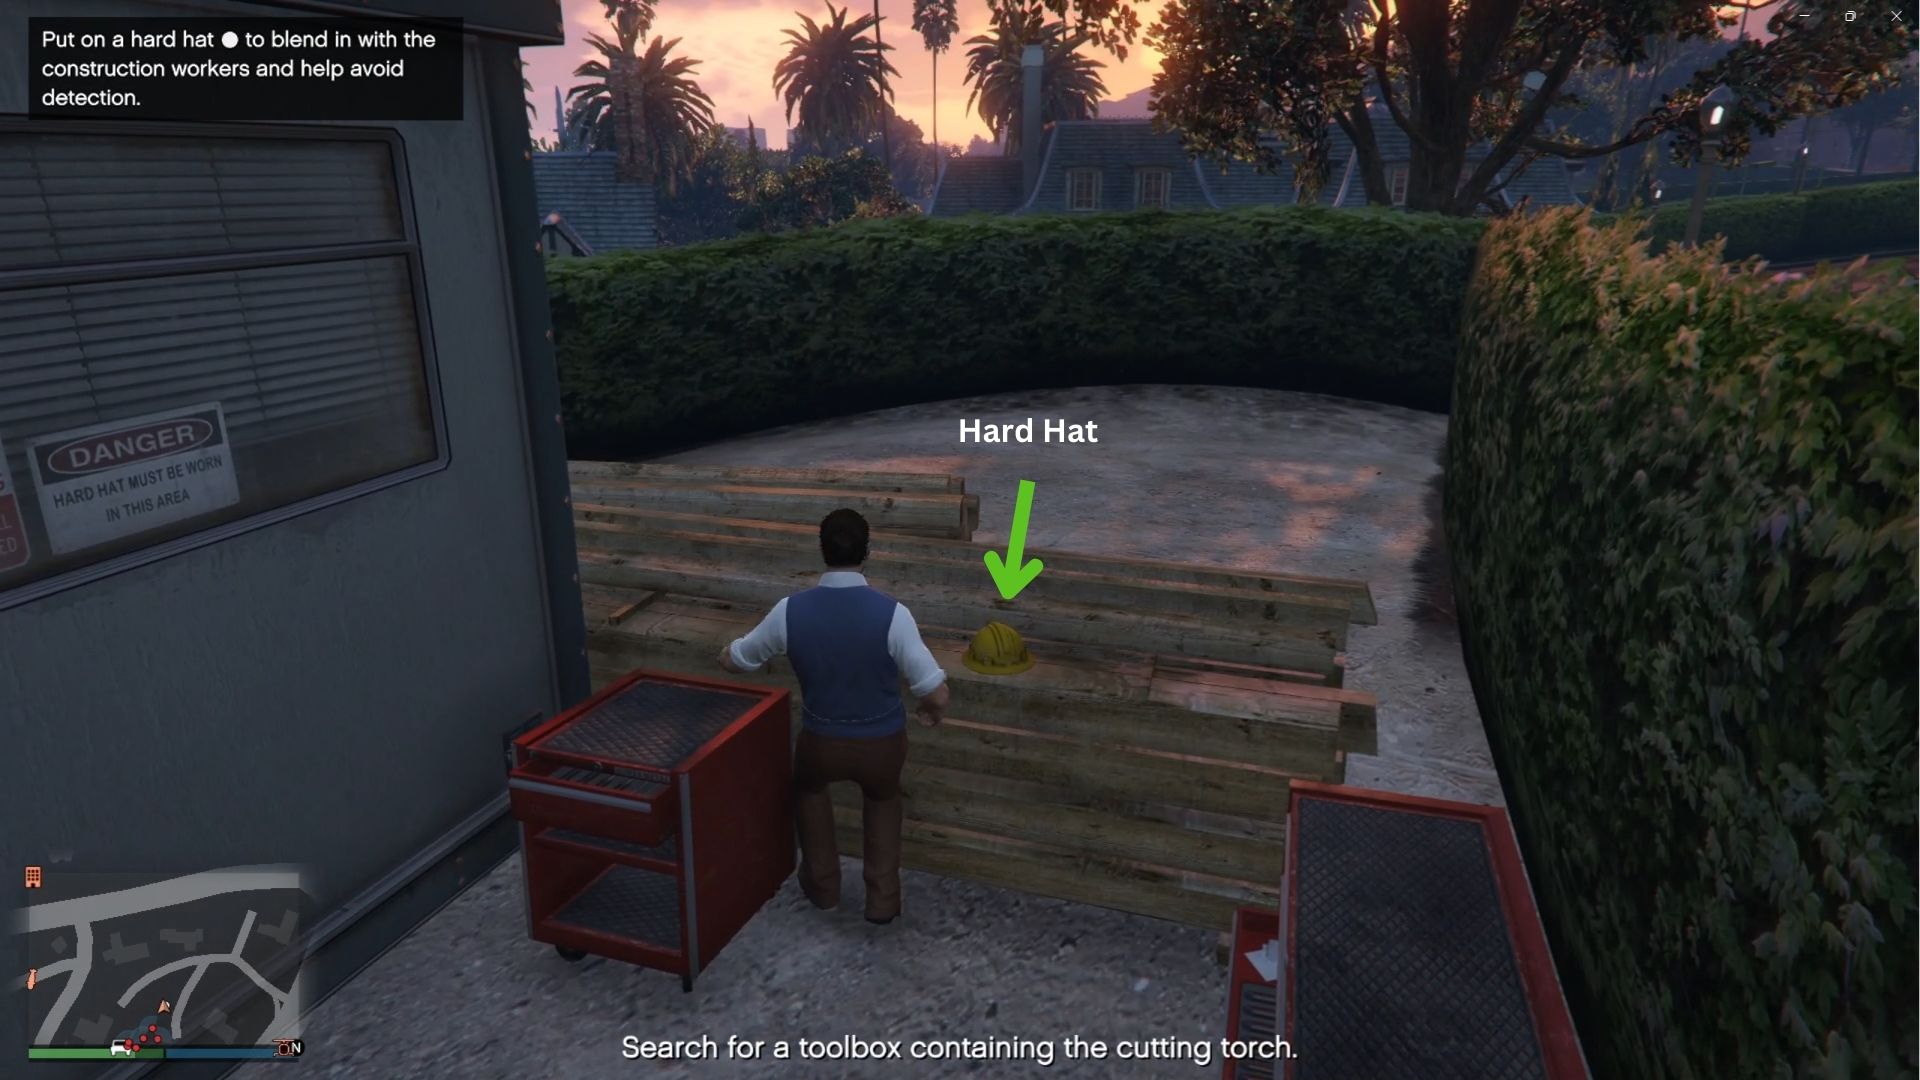
Once you have the hard hat, head to the location and search the area for marked toolboxes containing the equipment. Avoid bumping into anyone, or they will see through your disguise. They won’t react unless you are too close to them. The cutting torch should be purple and easy to spot inside a toolbox.
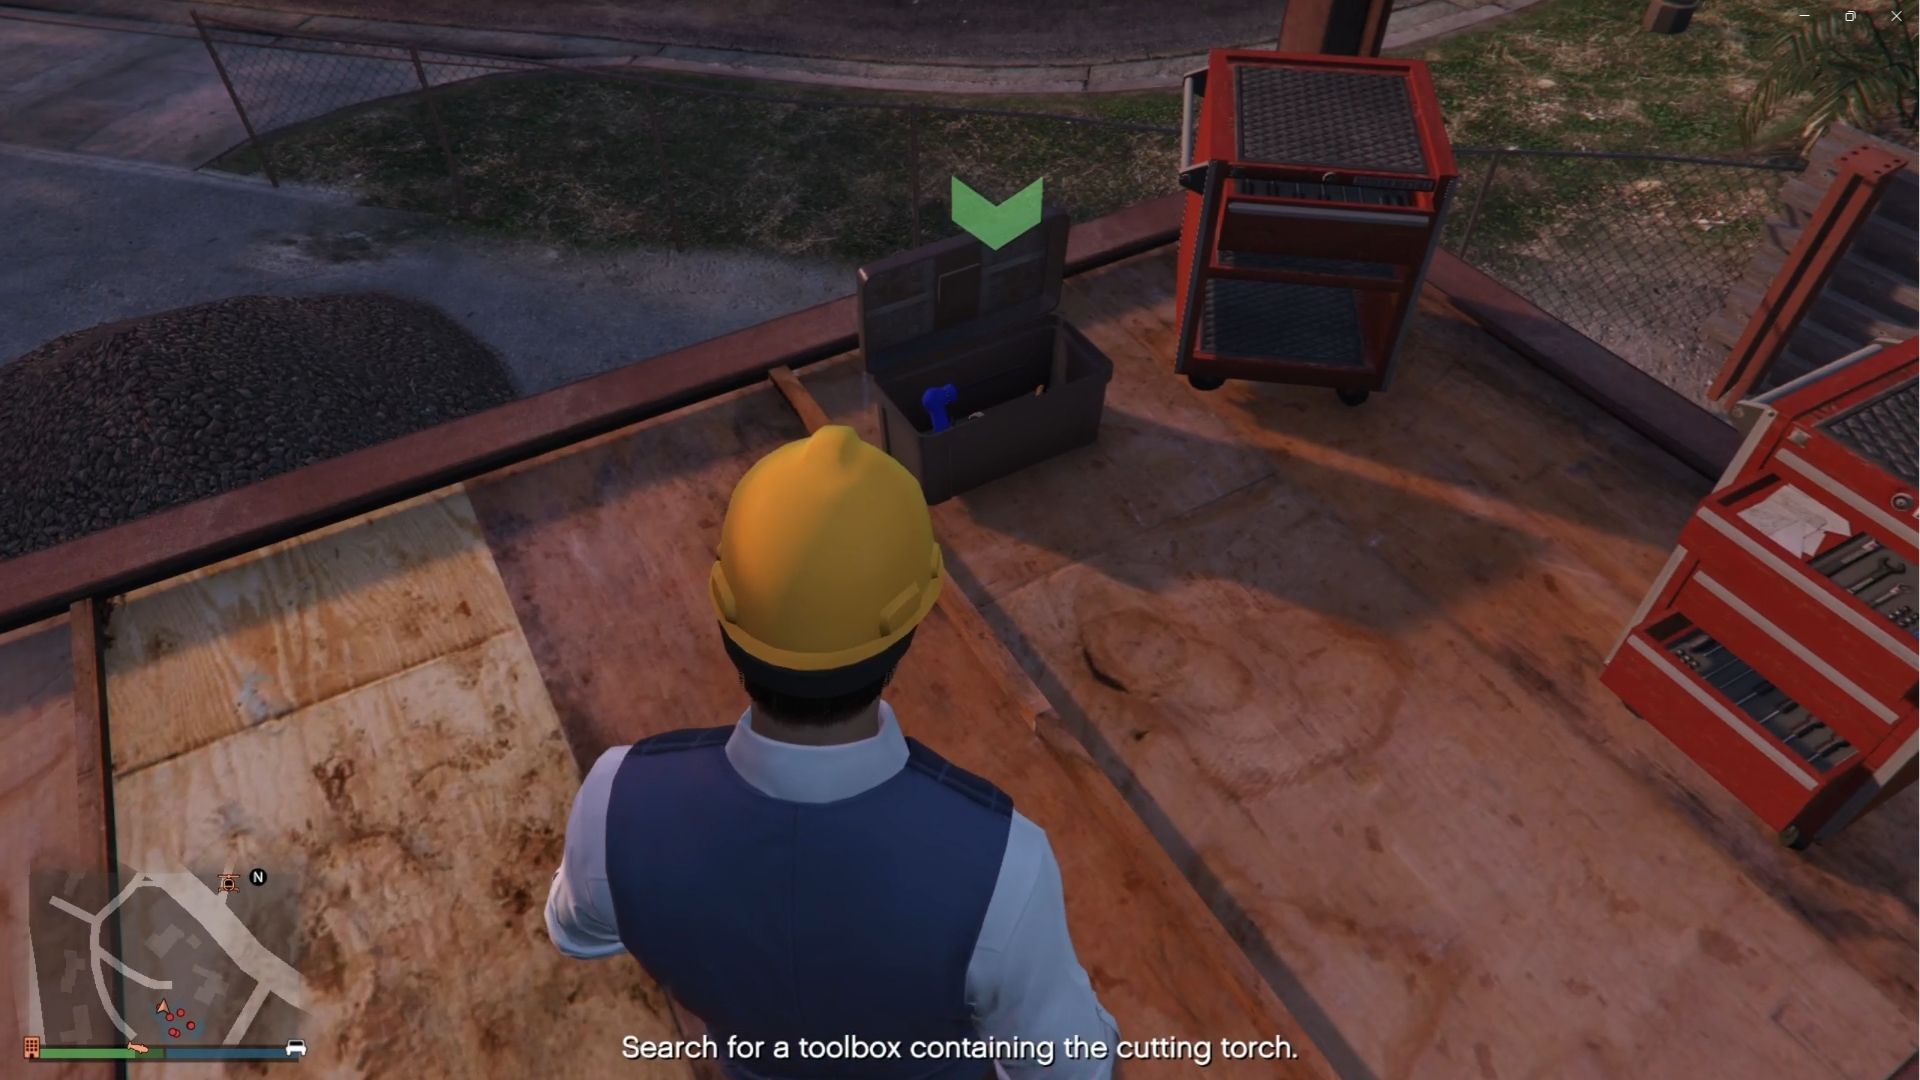
Once you have acquired the cutting torch, drive your way back to the Kosatka. You will have to get there manually without swapping sessions, as you are still on a mission. It will be easier if you purchased the Sparrow Helicopter, which is an add-on to the submarine in Warstock Cache & Carry for $1,815,000. The Prep mission is completed once you enter the Kosatka. Alternatively, just get a fast armored car. The Armored Karin Kuruma is a good starter car and is only $698,250 in the San Andreas Super Autos shop.
Equipment – Fingerprint Cloner
The next Prep mission is stealing a Fingerprint Cloner. The first part of this mission is to get the location of the device by infiltrating a warehouse. There will be security cameras in the area, so you need to turn them off using a nearby switch. If you get detected by the cameras or shoot them down, the guards inside will be alerted.
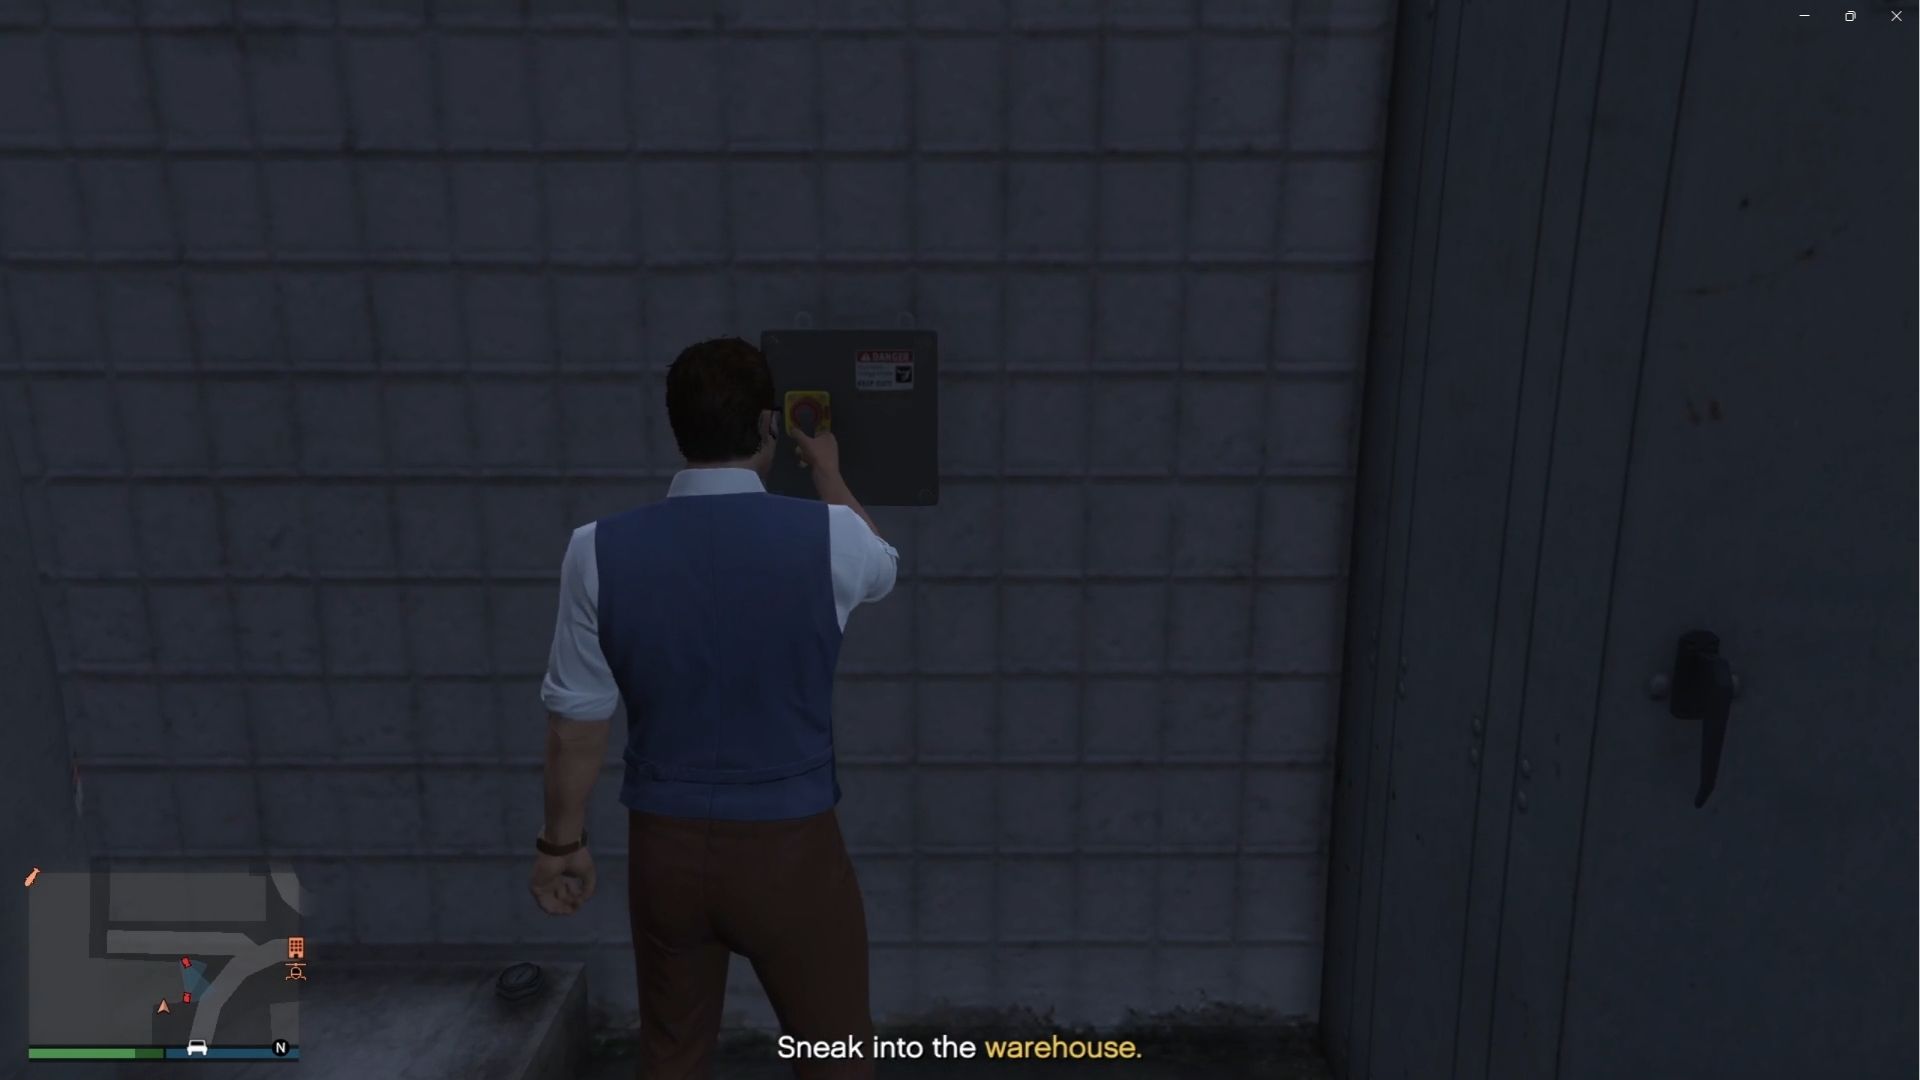
Once you are inside, take down the guards and head to the computer. You will need to solve a puzzle to hack into the device. The puzzle is simple: you only need to align the letters in the middle to spell the word “PANTHERS.”
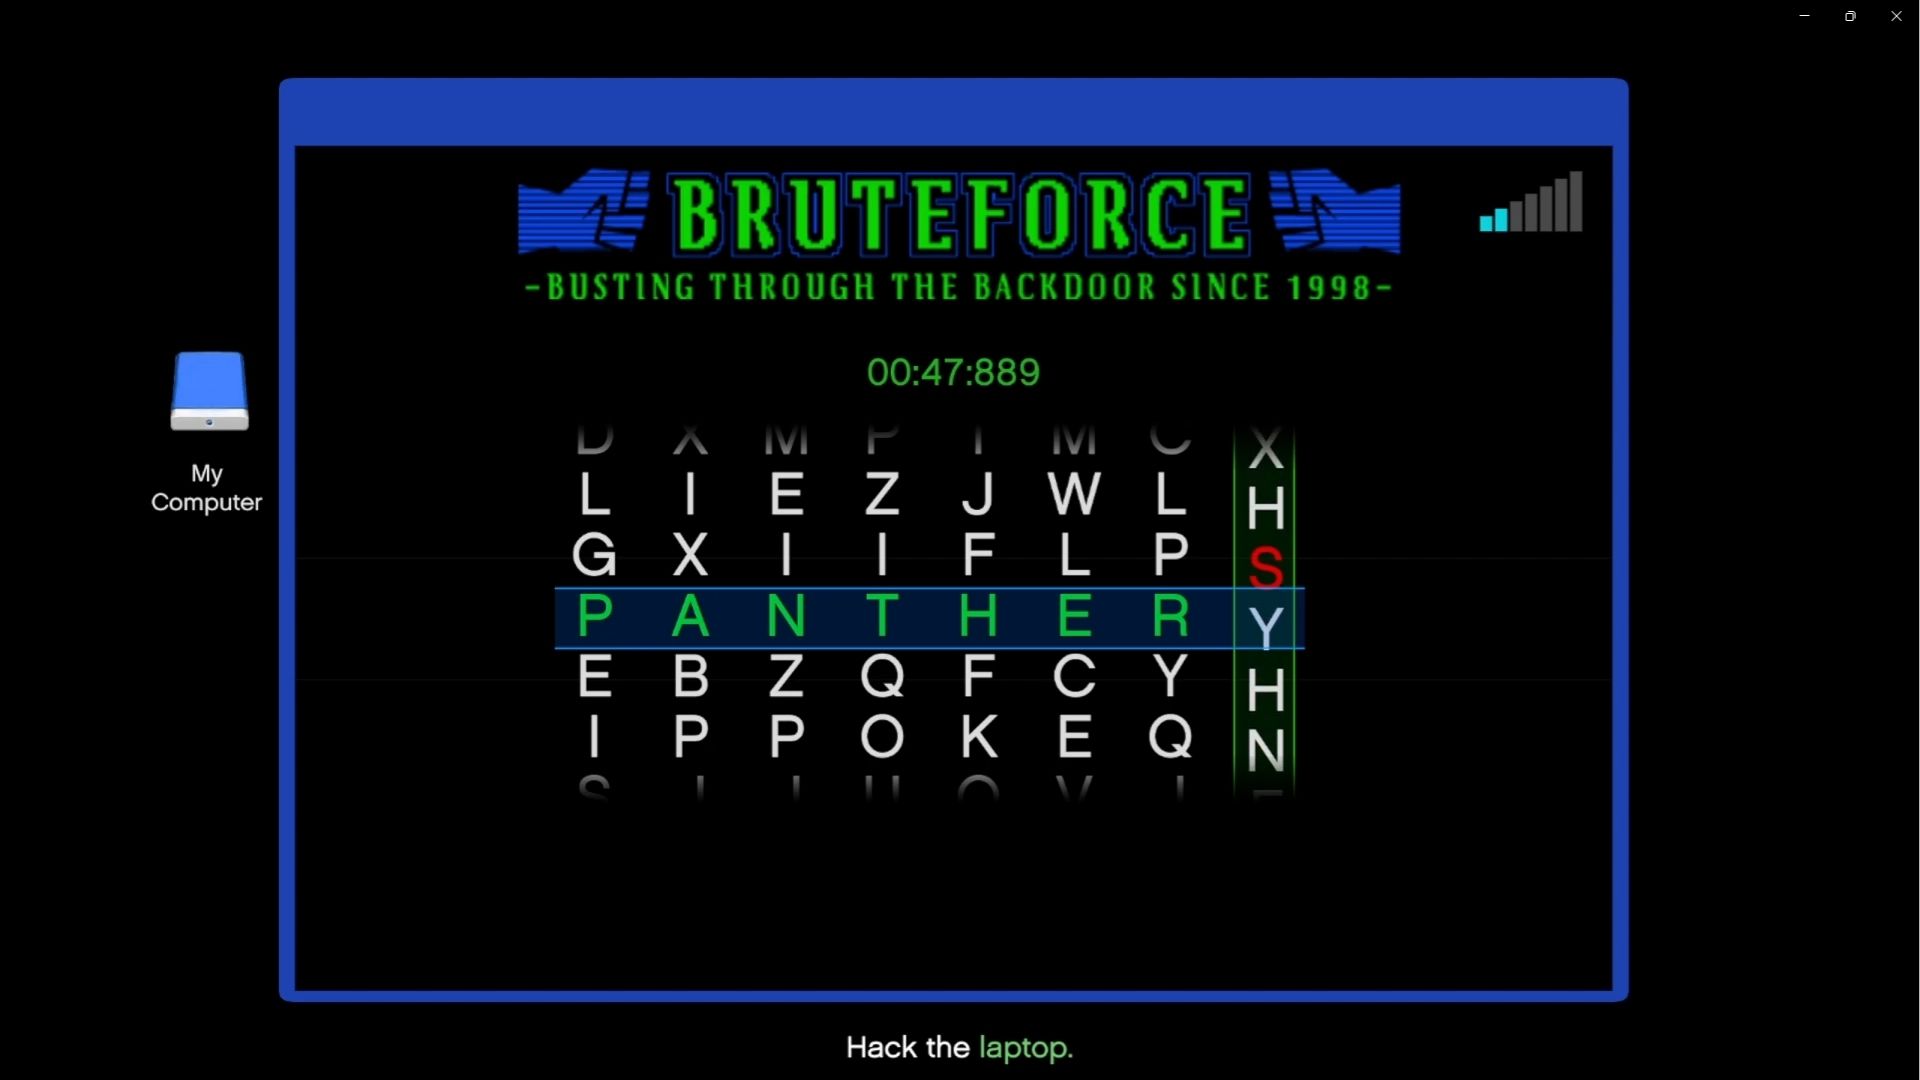
After you get the archive on the laptop, leave the area and head to a newly marked location on the map. There will be security cameras on the door of the room you need to infiltrate. This time, you simply need to shoot down the camera, as there will be no power switch nearby. There are no enemies inside, so you can just get the Fingerprint Cloner near one of the computers and leave without a gunfight.
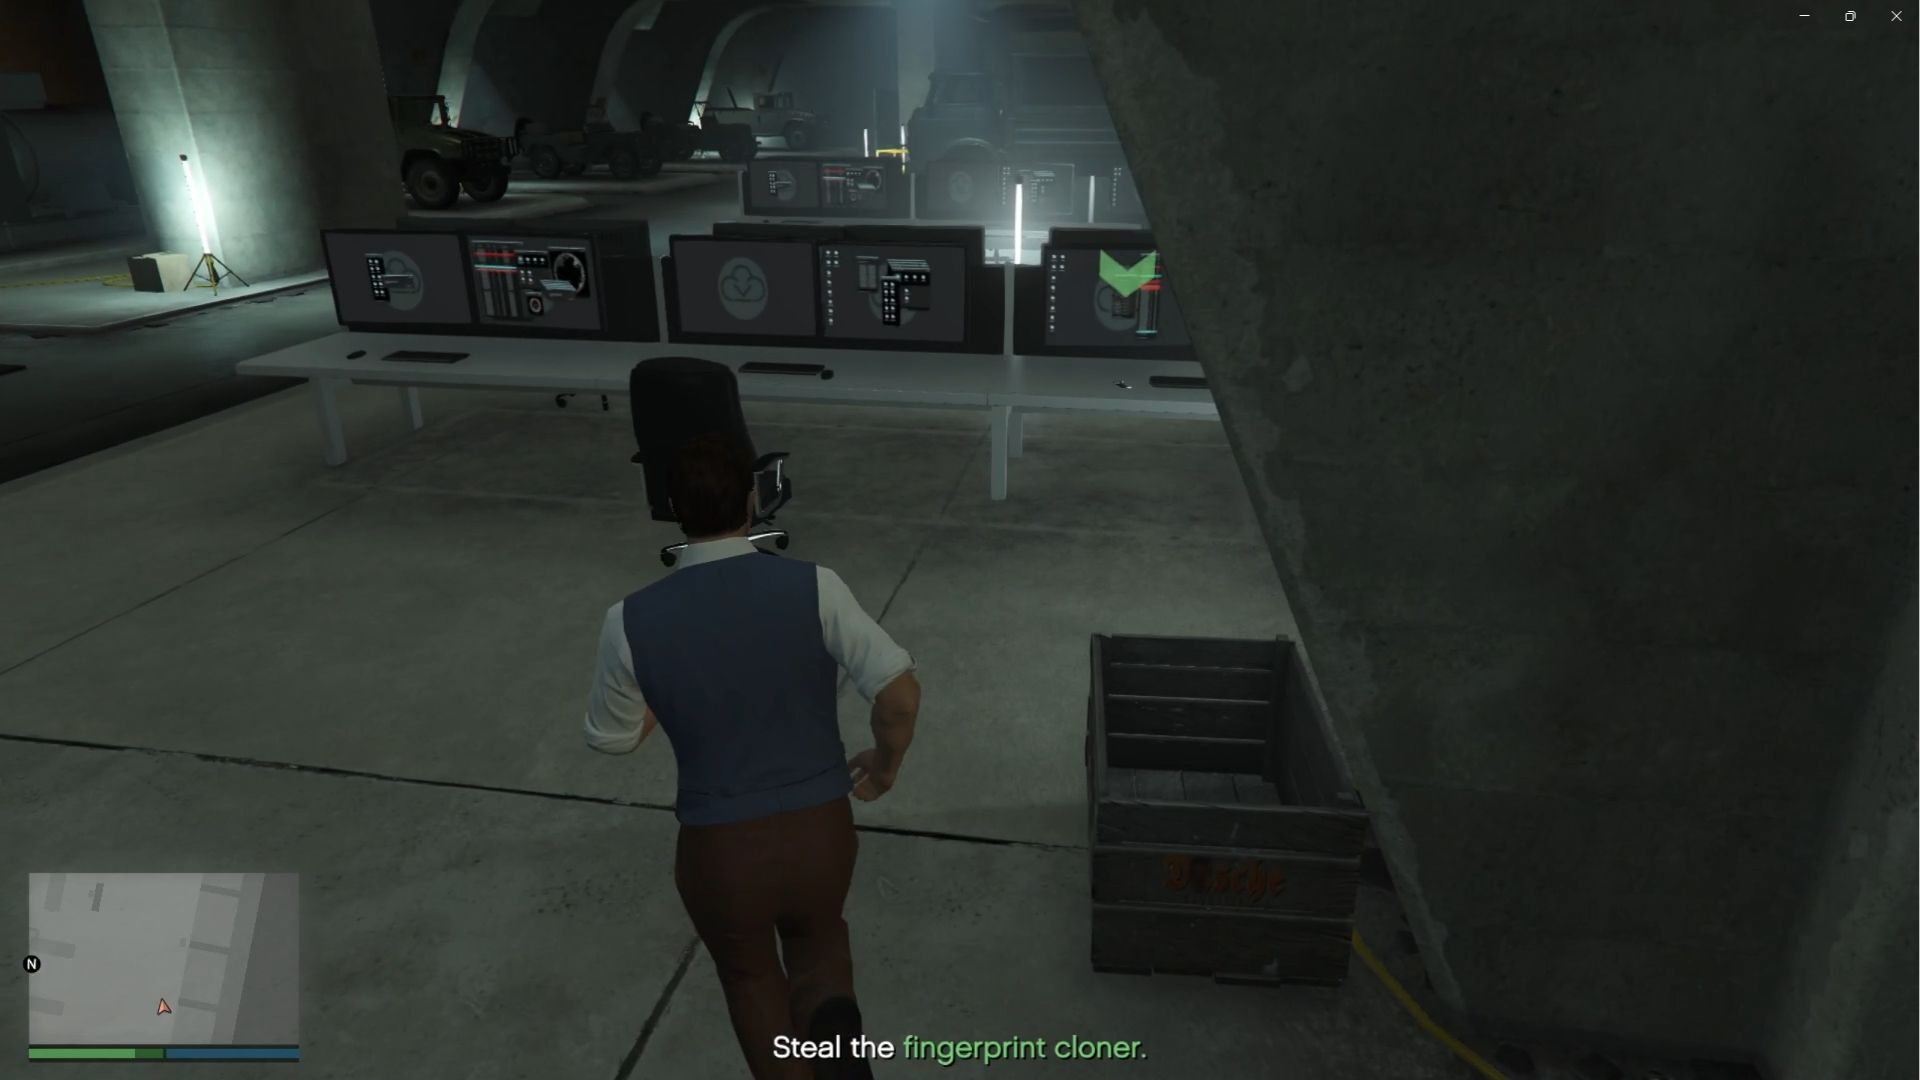
Once you leave the room, there will be no enemies waiting for you if you destroy the cameras. Simply head back to the Kosatka using a vehicle and deliver the device. Once again, you cannot use the session switch method for this one because you are on an active mission.
Equipment – Plasma Cutter
For the next Prep mission, you need to steal a Plasma Cutter to break the glass case of the primary objective. The first part of the mission is to head to a marked warehouse. There are no enemies in the area, so you can easily enter the building. To make things faster, don’t wait for Pavel to finish talking. Head inside, take a picture of the planning board using your in-game phone, send it to Pavel, head outside, and move on to the next objective.
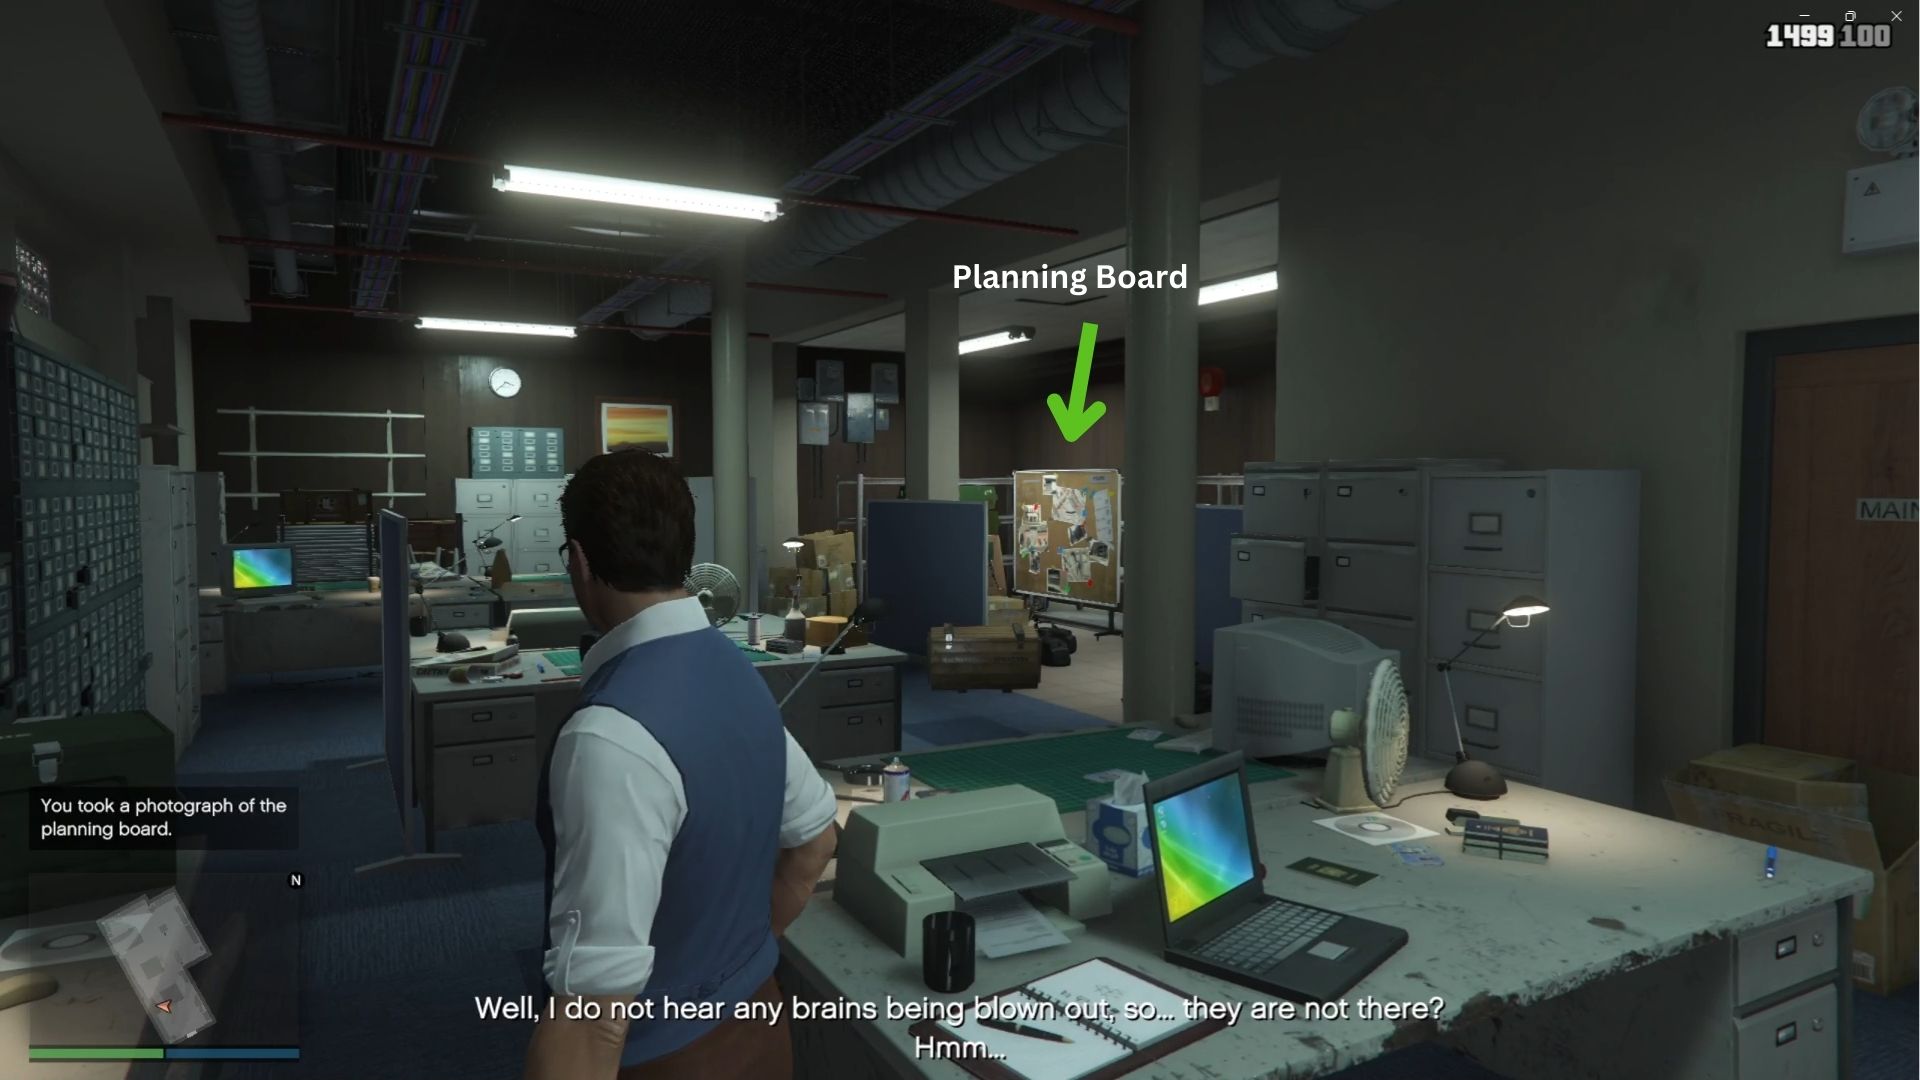
Once Pavel receives the image, he will give you a new marked location. There will be gunfight in this area so make sure you are well equipped. An armored car like the Kuruma (Armored) and a drive-by weapon like a pistol or SMG are recommended here, as you can safely fight the enemies inside your car. If you have an armored car, simply drive towards the nearby marked bag to get the Plasma Cutter and drive away. If you don’t have one, you will need to clear out the enemies before more enemies start spawning and retrieve the bag.
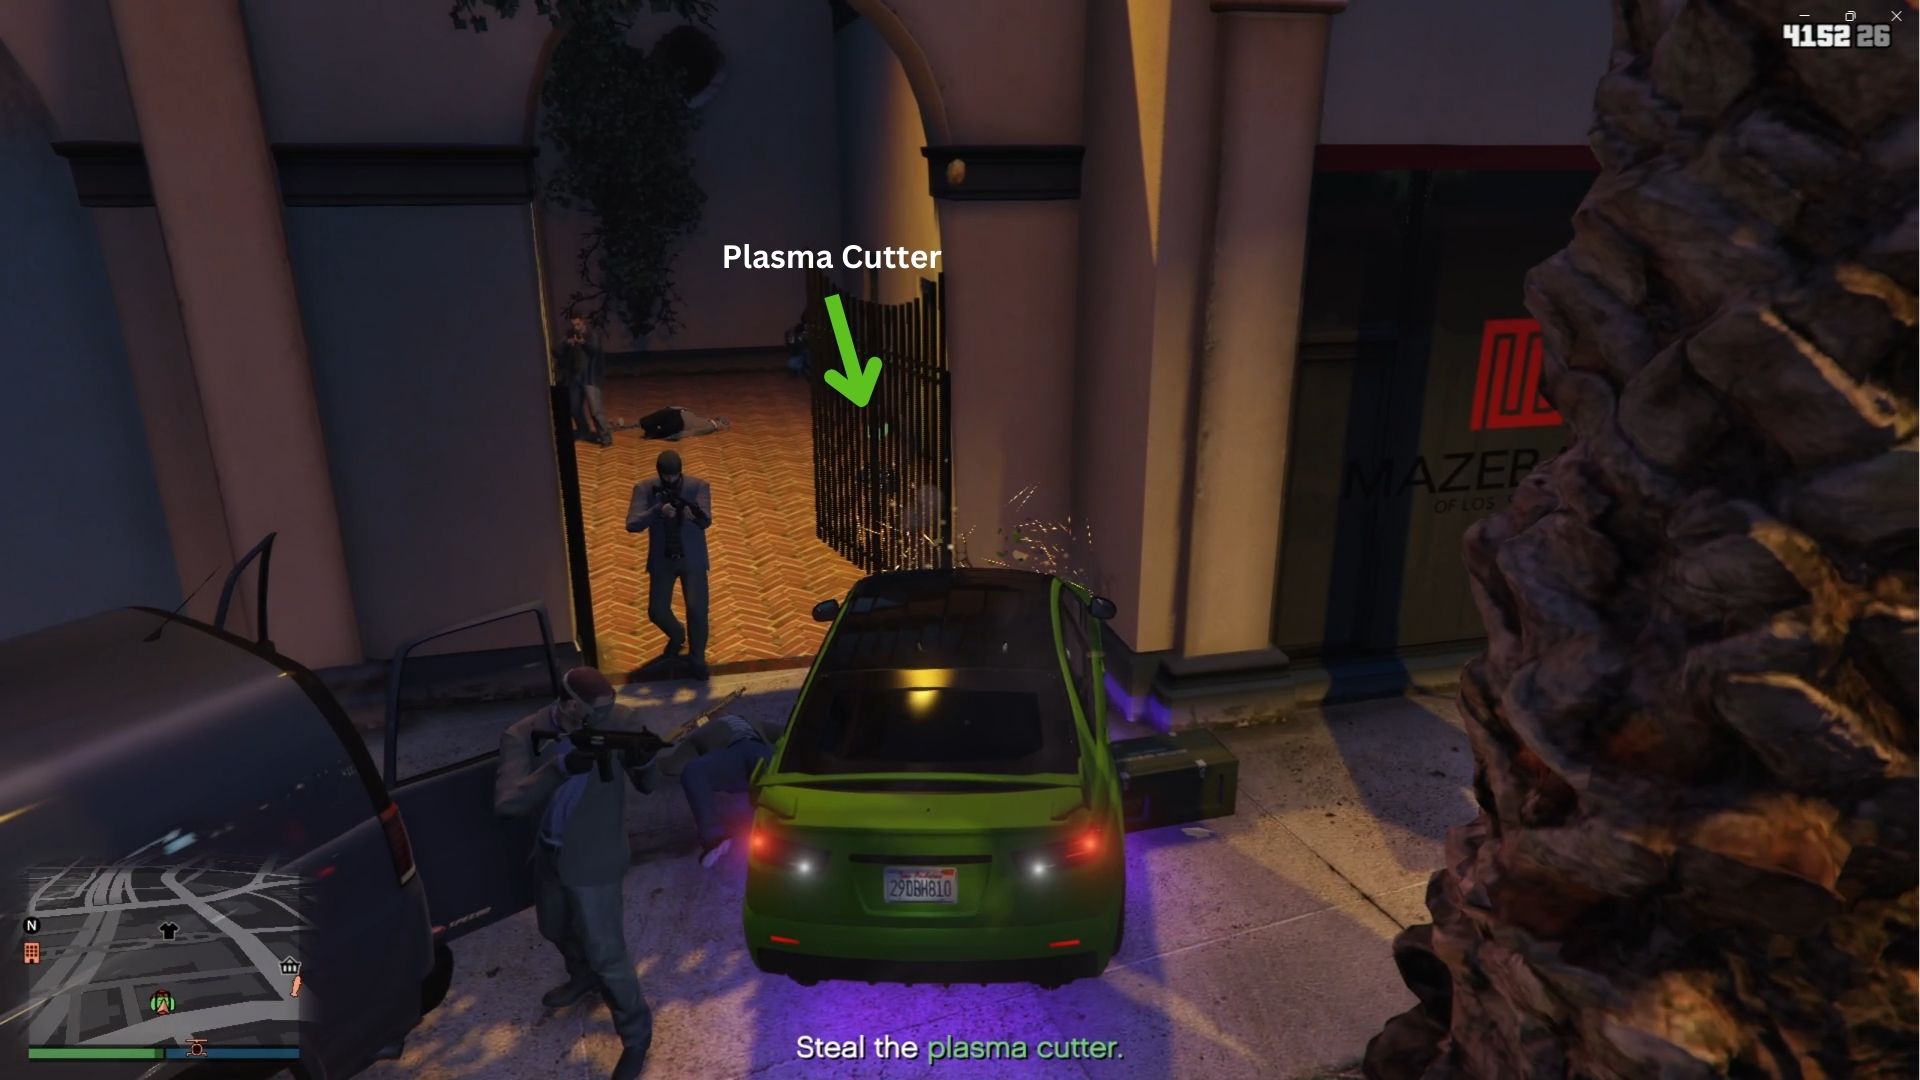
Once you have the equipment, head straight back to the Kosatka and end the mission. This will be much easier if you have a Sparrow, as you can fly past enemies. Be careful not to die, as you will drop the bag and will need to retrieve it while the enemies protect the area where the bag was dropped.
Weapon Loadout – Suppressors
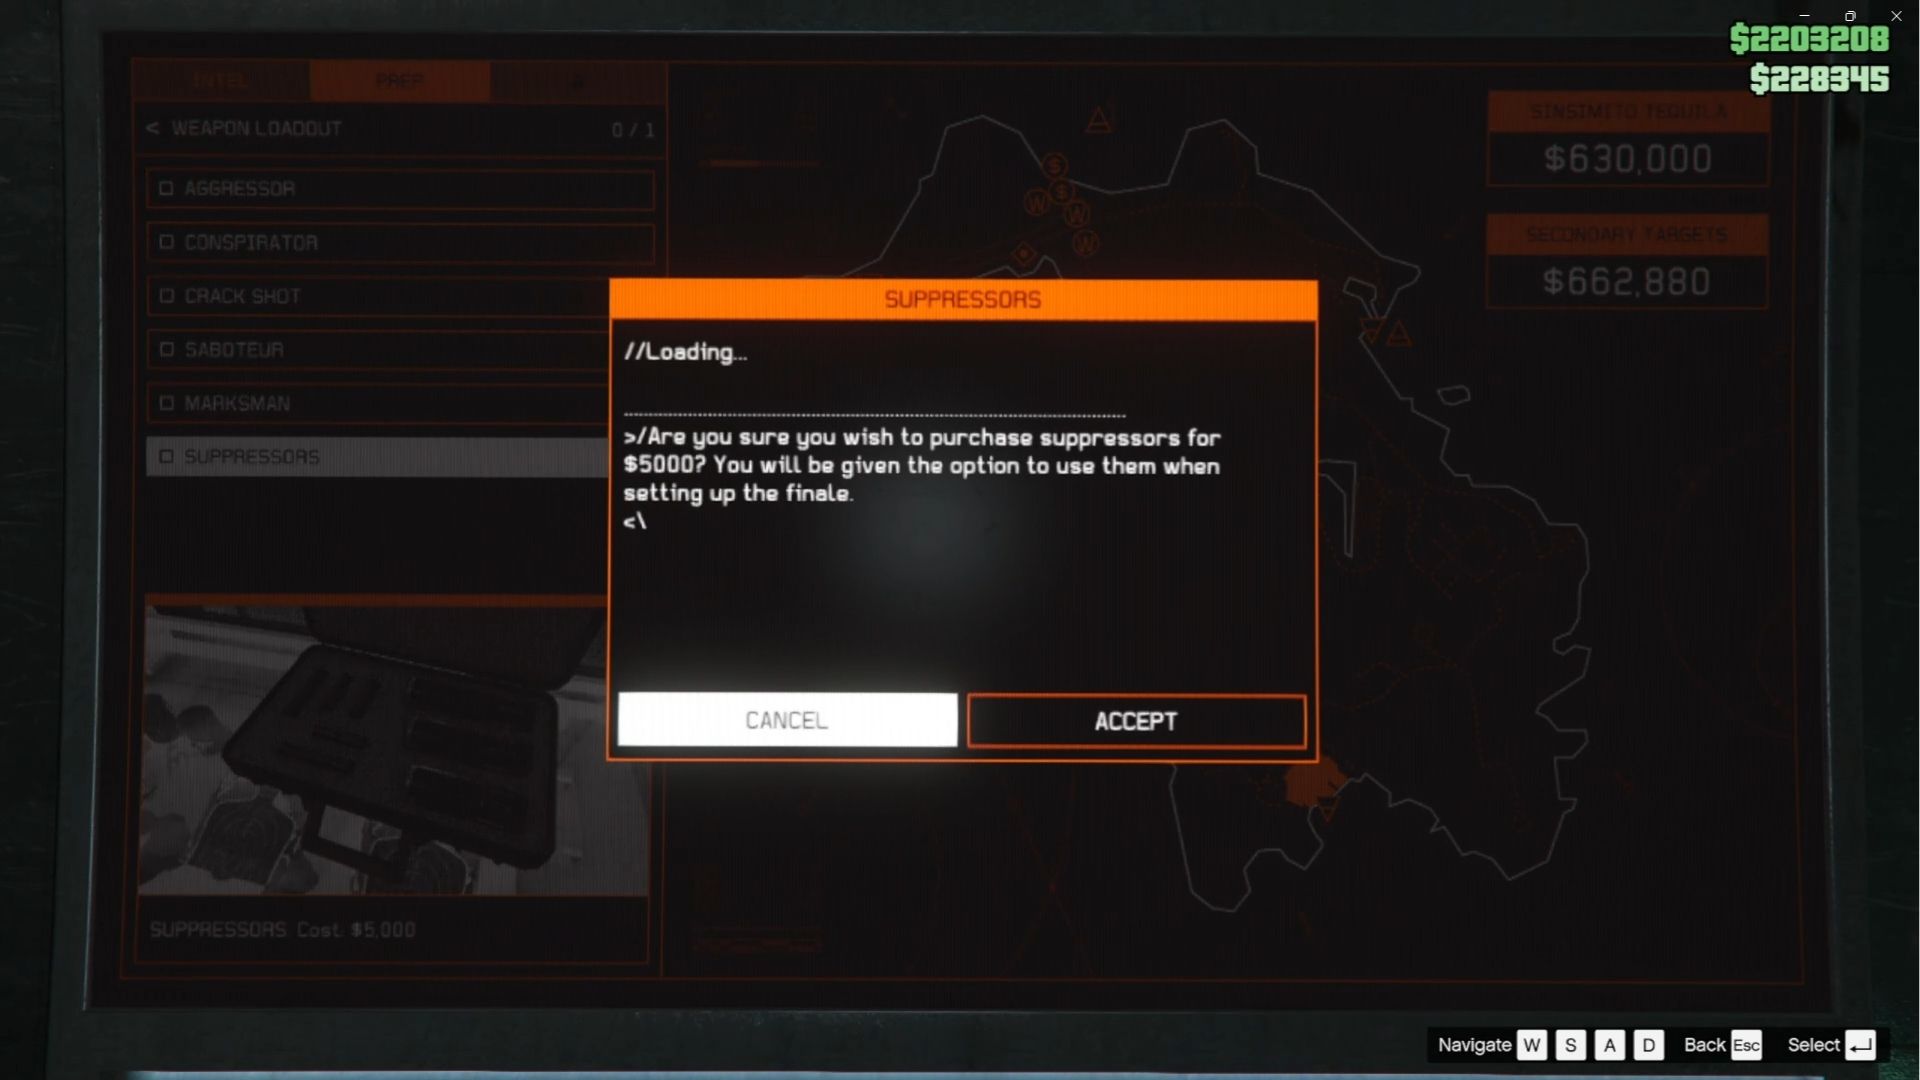
This is the easiest Prep mission as you only need to purchase the suppressors for $5,000 to complete it. You won’t need to do anything and can simply head straight to the next Weapon Loadout Prep mission. Keep in mind that you can ignore this, but you can’t use any loud weapons on nearby enemies during the Finale.
Weapon Loadout – Conspirator or Crack Shot
The next Prep mission will be based on your preference. Conspirator is the best in terms of rapid-fire weapons, while the Crack Shot is good for players who excel at using sniper rifles in the game. Either way, you will do a randomized mission where you need to steal these weapons. You only need one weapon loadout on top of the suppressor. You will only be using weapons in the Finale to take out targets near the third secondary loot location.
Once you finish the weapon loadout Prep mission, the Finale section can then be accessed.
Finale
Before you head back to the island, you will need to set up markers for your solo Finale run in the Cayo Perico Heist in GTA Online. Here are the preferred selections:
- Approach Vehicle: Longfin
- Infiltration Point: Main Dock
- Compound Entry Point: Drainage Tunnel
- Escape Route: Any Location (You won’t need this marker anyway.)
- Time of Day: Day
- Weapon Loadout: Preferred Weapon With Suppressor
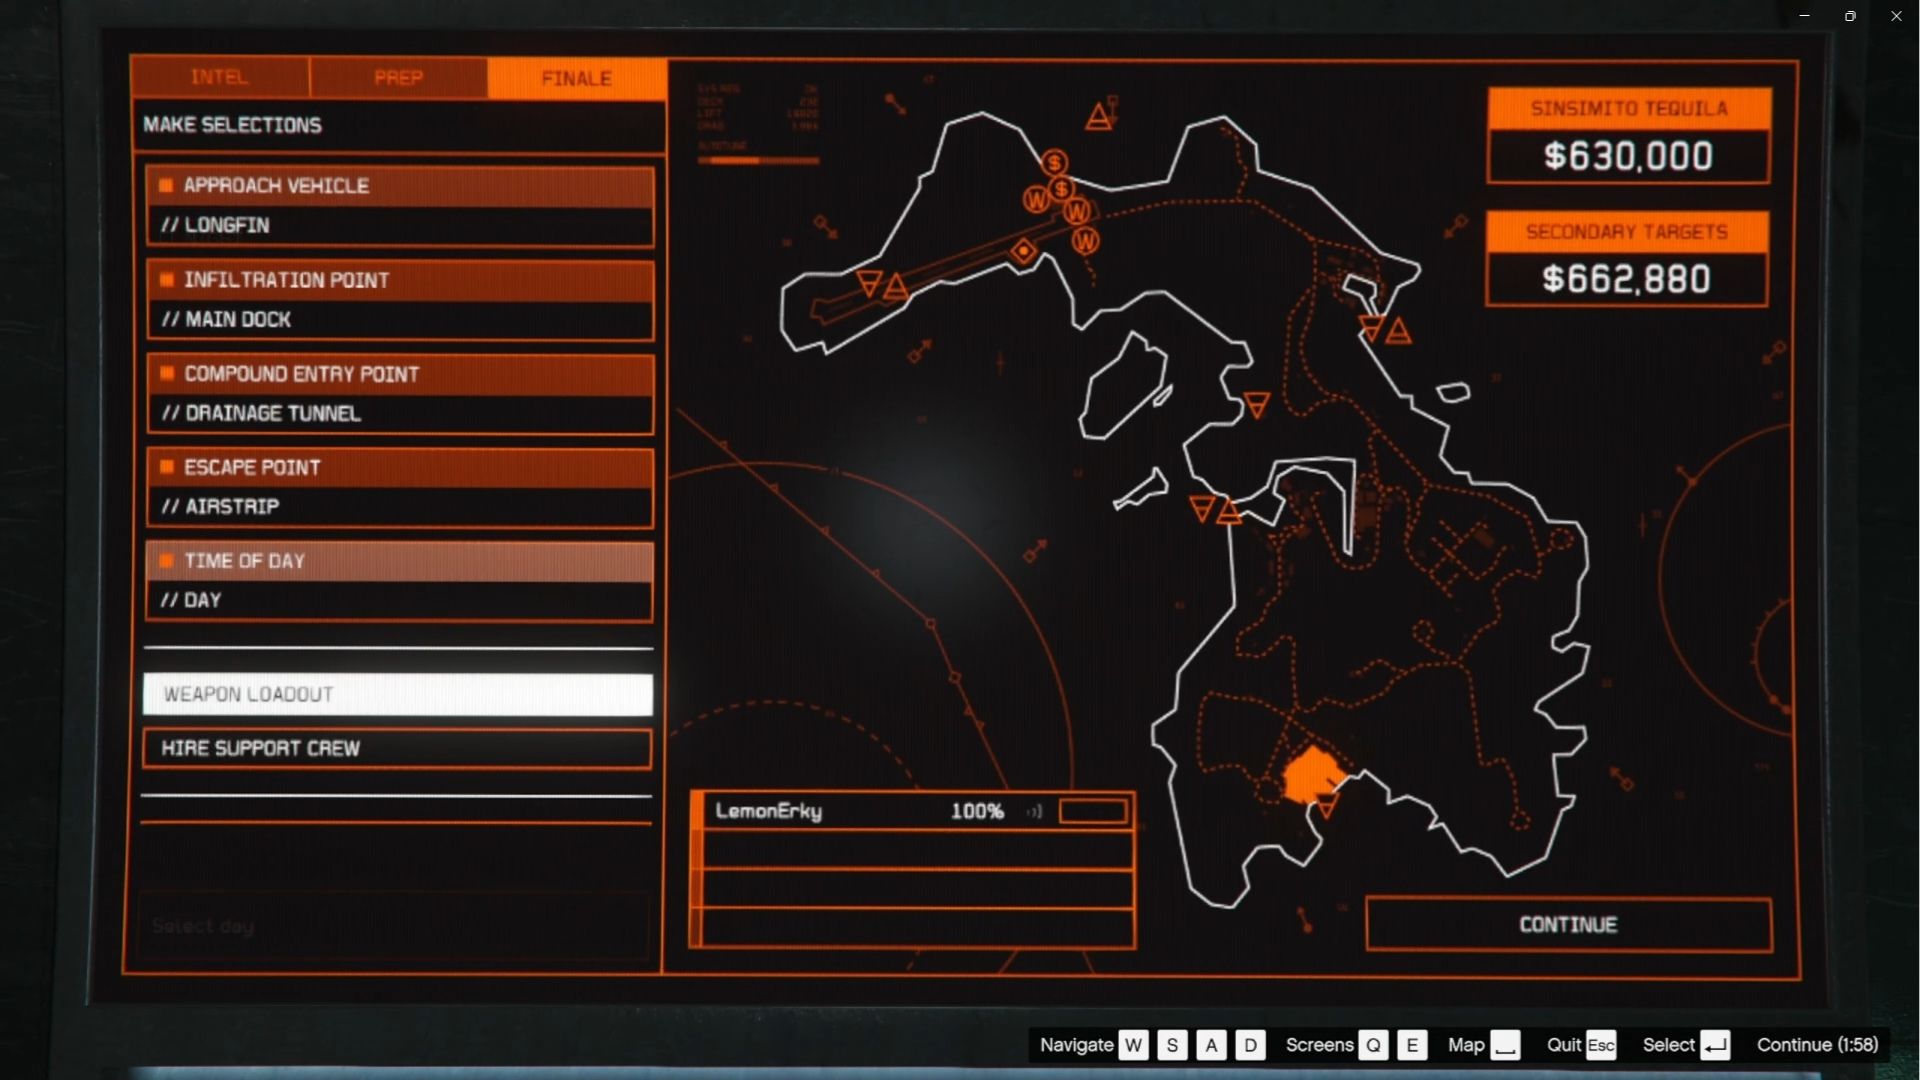
You don’t need a support crew or to assign crew cuts. You will be doing this alone and won’t need anything else other than your weapon loadout. Once it’s done, hit the continue button, choose your outfit options, and then select “Ready to Play.”
You will spawn on the island riding the Longfin. Your first goal is to reach the airstrip and fill up your bag with secondary loot. Head to your left side and drive towards a blue watchtower. Park your Longfin at the shore and head straight to the hangar where you can find some loot stashes. Be careful not to get your boat stuck on land, or you will have to reset the Finale.
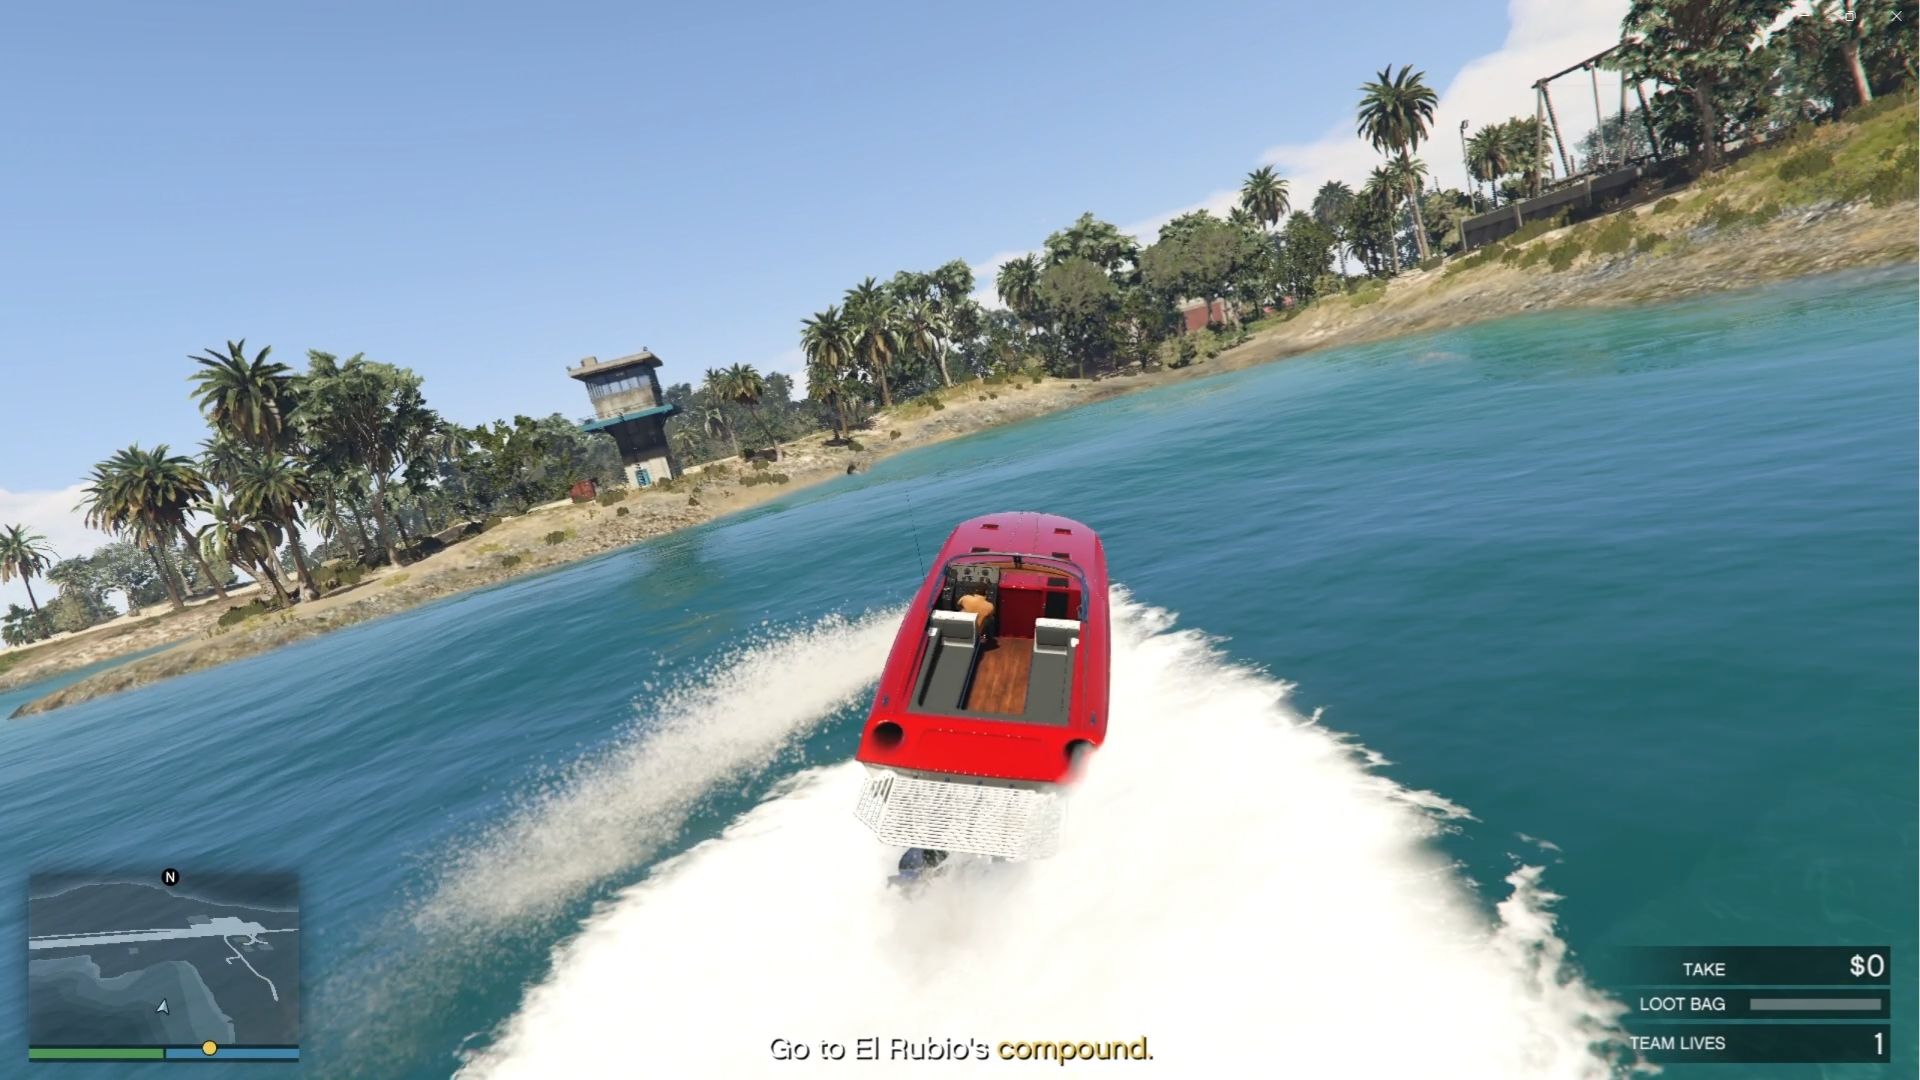
Once you are on land, walk straight to find the hangar with one guard stationed nearby. You can shoot the guard, but make sure you get a headshot and kill him immediately, or the other guards will be alerted. Alternatively, you can wait until he looks away and enter the hangar to avoid detection.
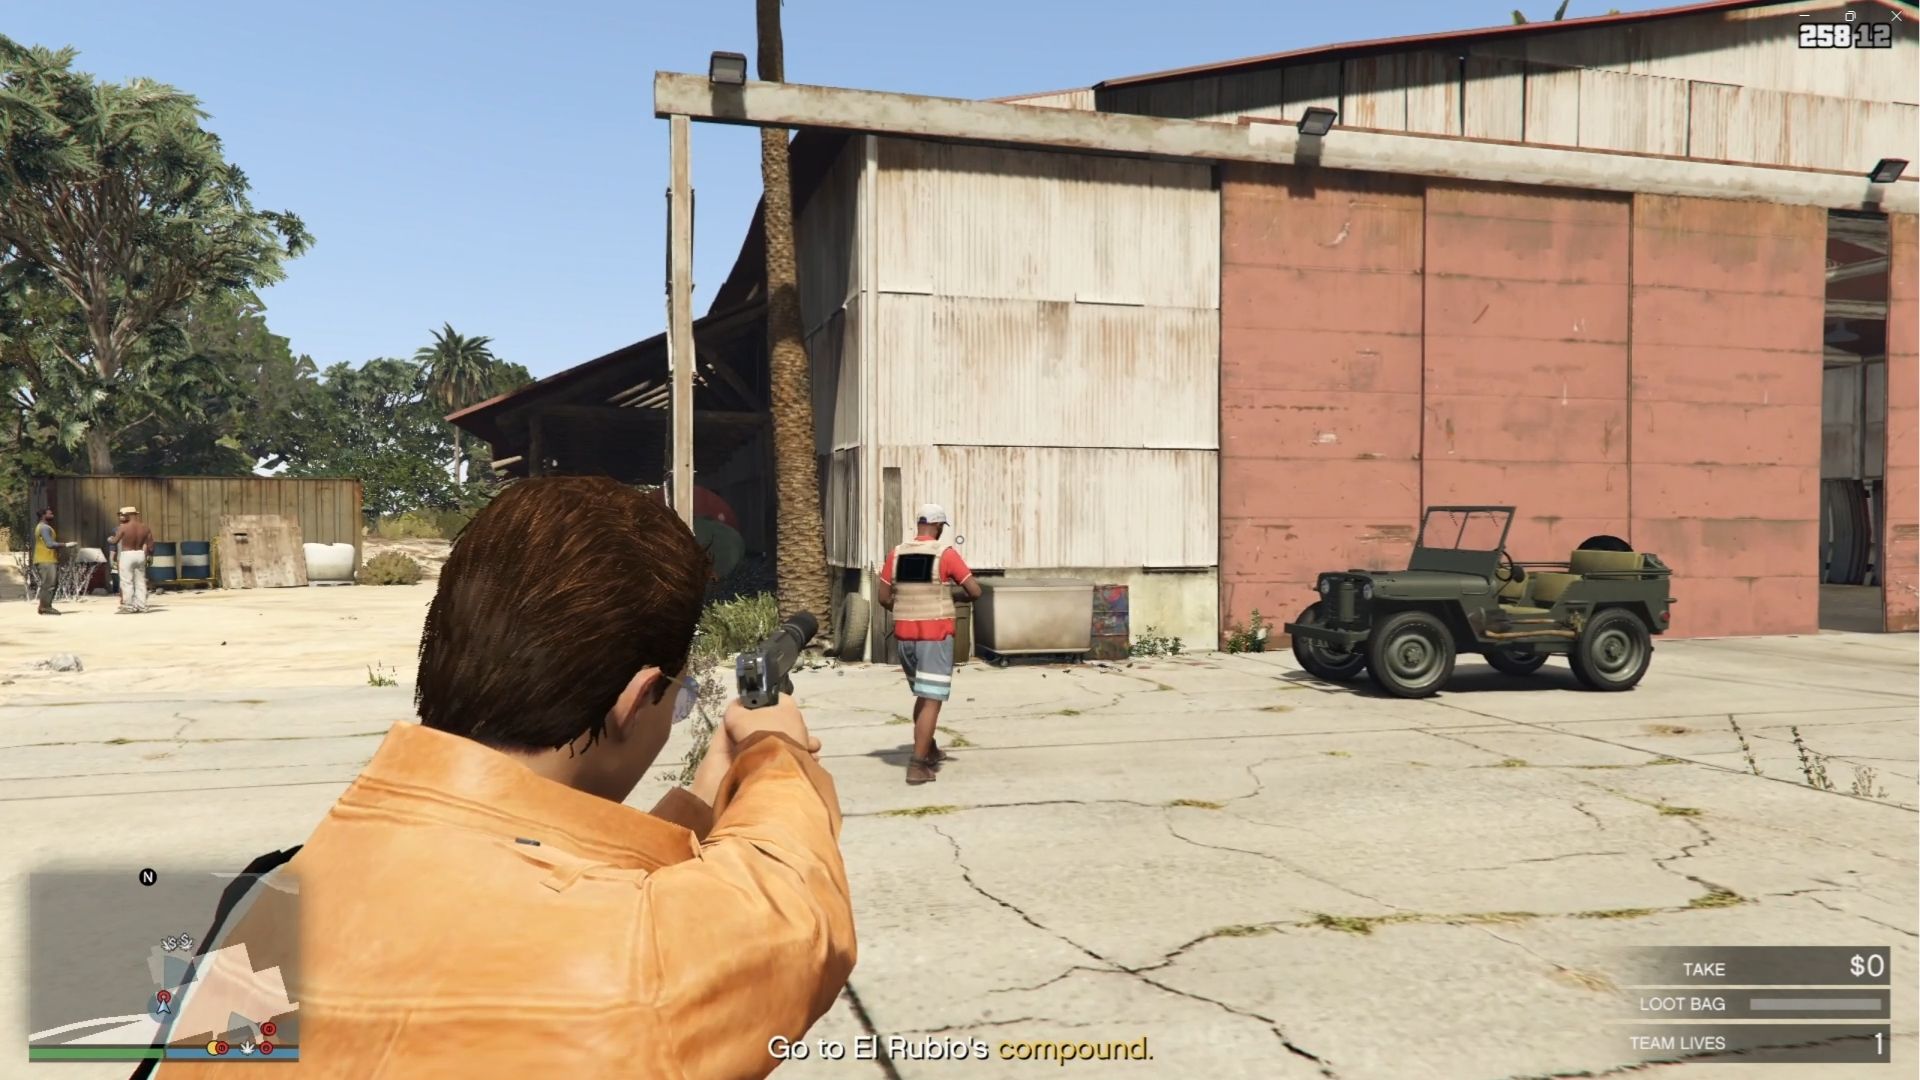
Once you are inside, you can now open the locked areas with a cutting torch. Each type of loot has its own value and carry weight. Make sure you prioritize cocaine, as it has the most value of the loot you can find in this area, around $220,500–$225,000 per stash, and fills 50% of your bag. The next priority is weed, which is worth around $145,980–$149,265 per stash and fills 37.5% of your bag. The lowest value is cash, which is $78,480–$89,420 per stash and fills 25% of your bag.
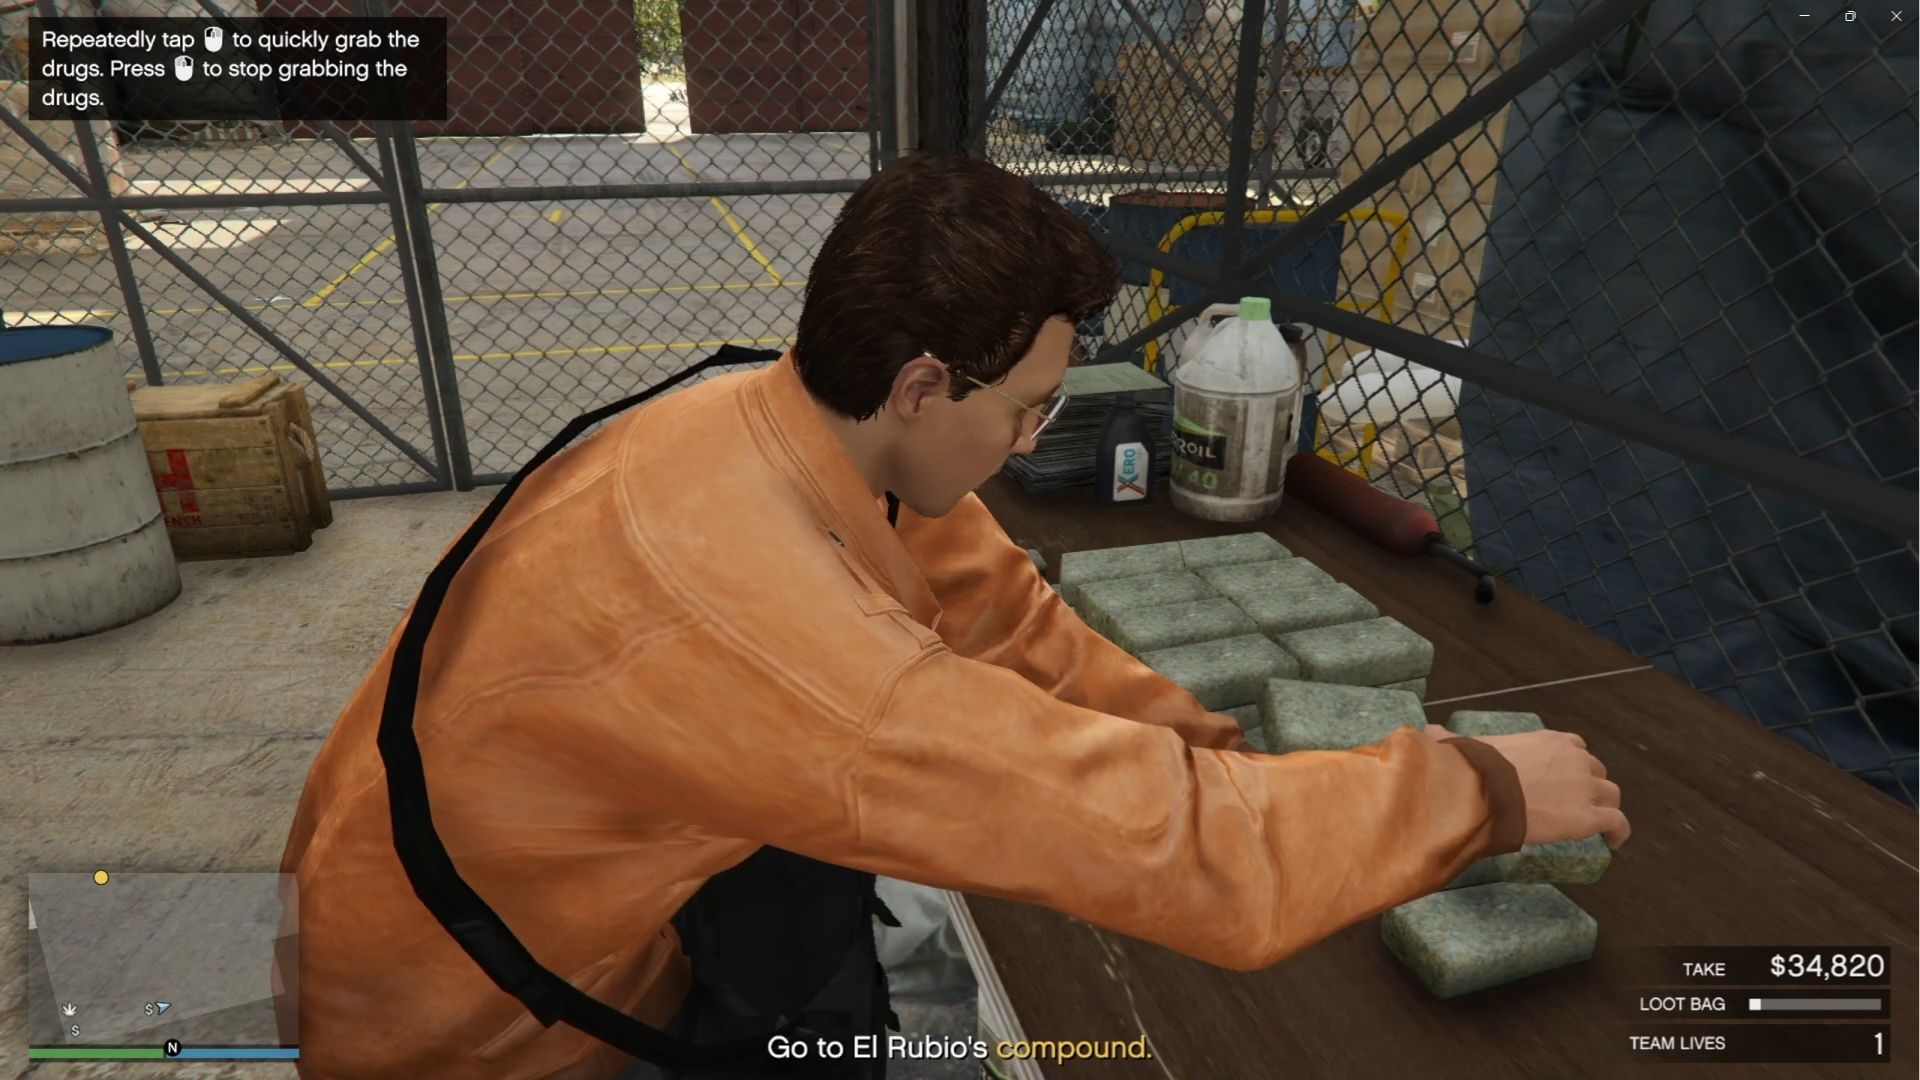
Take note of what loot you want to take on this trip. If you find at least two stashes of cocaine, make sure to loot only the two stashes to maximize the value and ignore the rest. Otherwise, mix and match and focus on getting the most value to fill your loot bag.
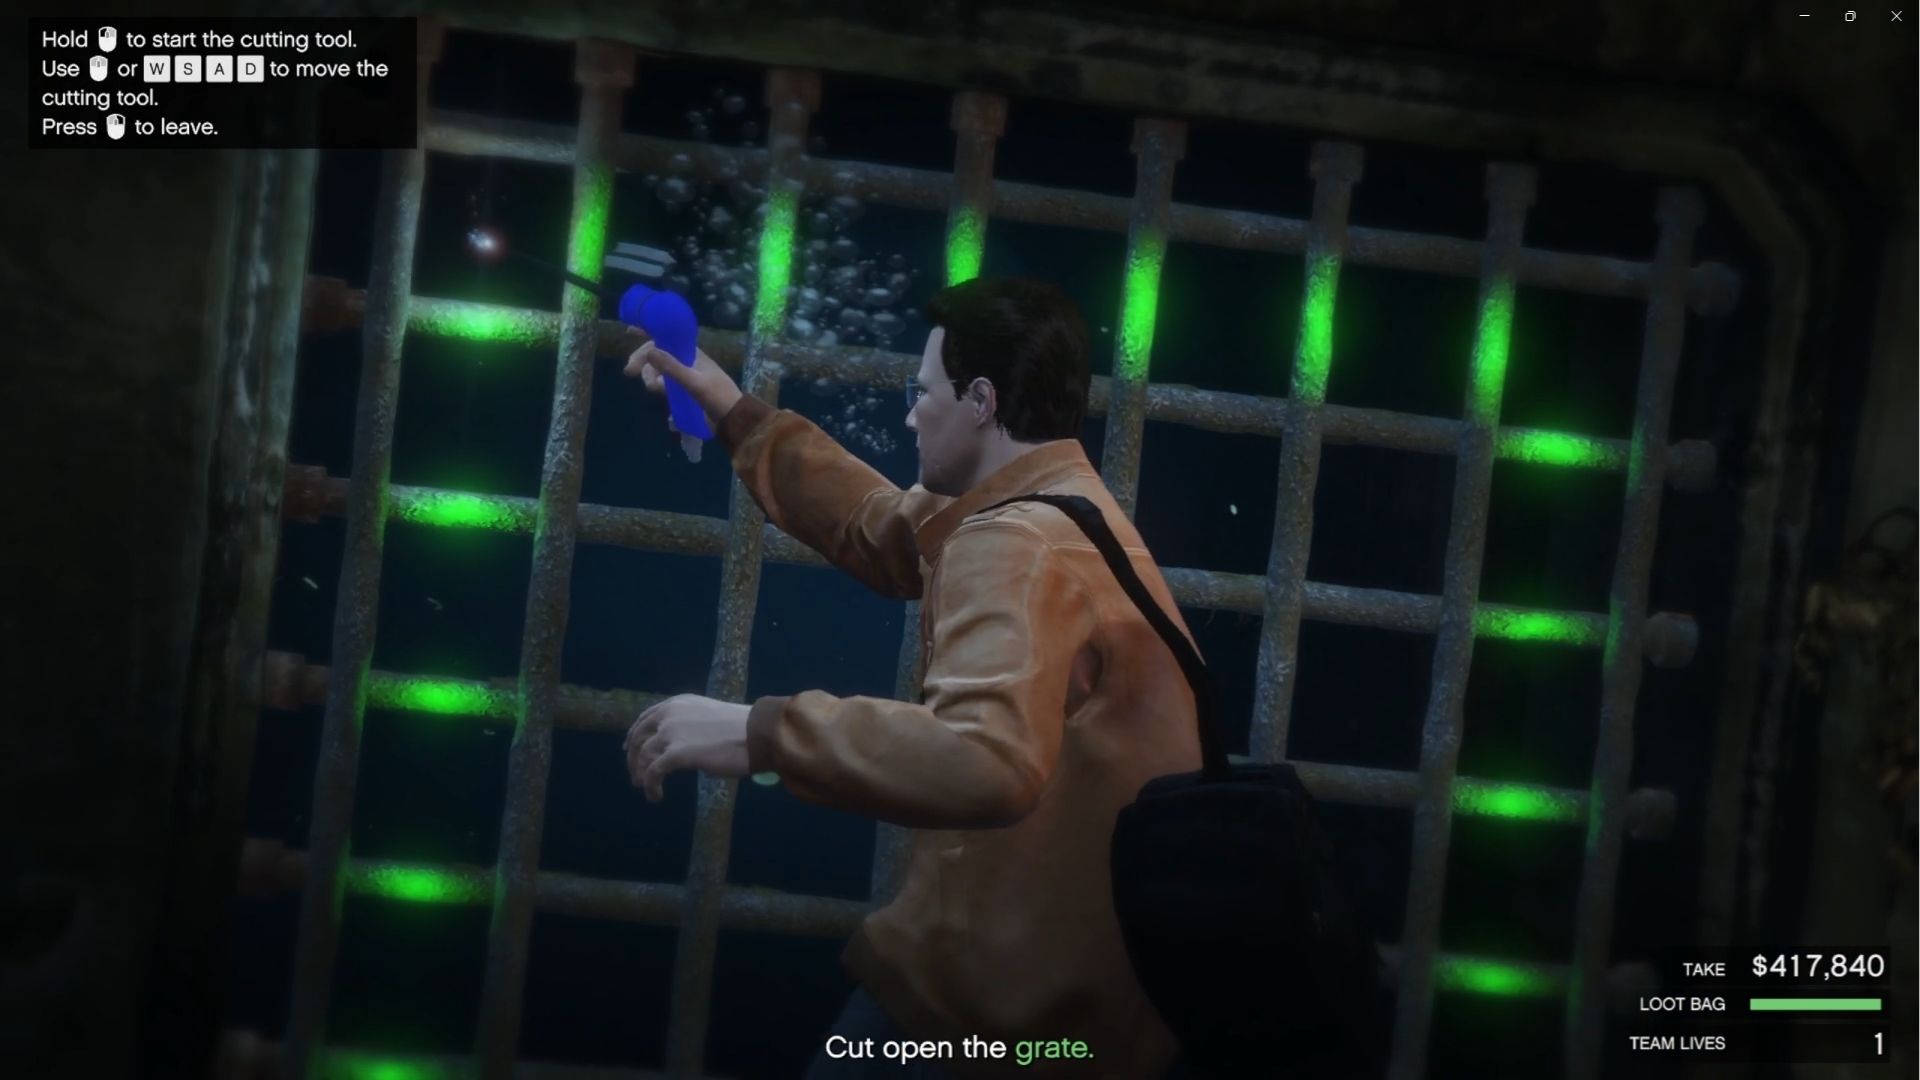
Once your bag is full, go back to your Longfin. You might need to swim a bit if the boat drifts away while you are collecting secondary targets. Once you make it to your boat, travel to the location of the drainage pipe. Swim down and activate your rebreather (Press “G” for Keyboard Users) so you won’t drown. Head to the yellow circle and start the minigame where you use the cutting torch to cut through the metal barrier. Once you are inside the drainage pipe, swim to the end of the tunnel and open the hatch leading up to the mansion.
Once you are inside the mansion, you need to reach the office that leads to the underground area where the primary target is located. Make sure you don’t get detected by guards while making your way to the location. Watch the video to learn the proper path you need to take to remain undetected. Don’t forget to check the secret safe that contains a bit of cash that will be added to your overall payout.
Once you are inside the office, you can proceed to hack the secret elevator at the fireplace with your Fingerprint Cloner. The puzzle is very simple to solve. You have to make sure the fingerprint on the left matches the one on the right. You don’t have to guess the correct placement, as there is a trick on how to do it quickly.
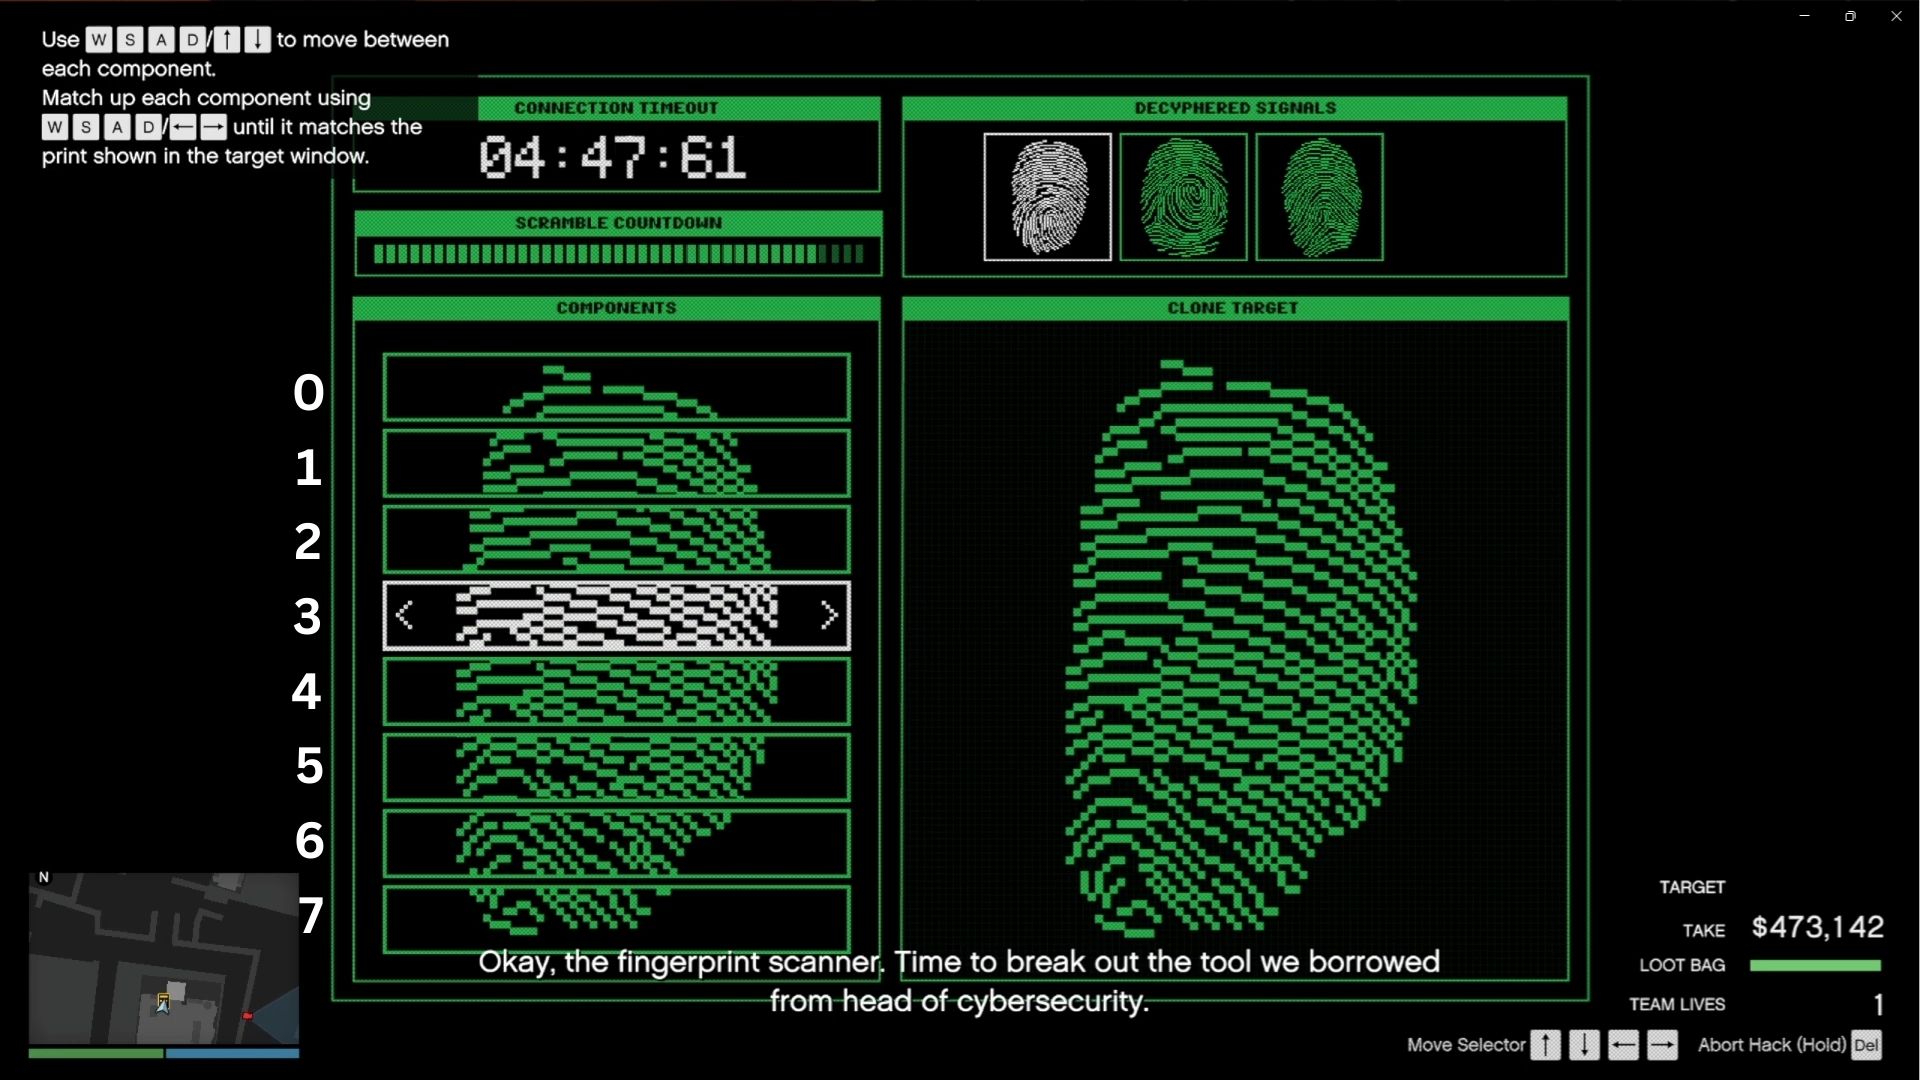
The trick is to set up the first one at the top, then make your way down by counting how many right taps you need to do. This means the second slot would require one more tap, the third would require two taps, and so on. You can do this in reverse if you are close to solving it with the bottom slot as your reference.
You will need to do this three times on normal runs. There are four fingerprint puzzles to solve in Hardcore Mode. However, if you use this trick, it will only take a few minutes to solve.
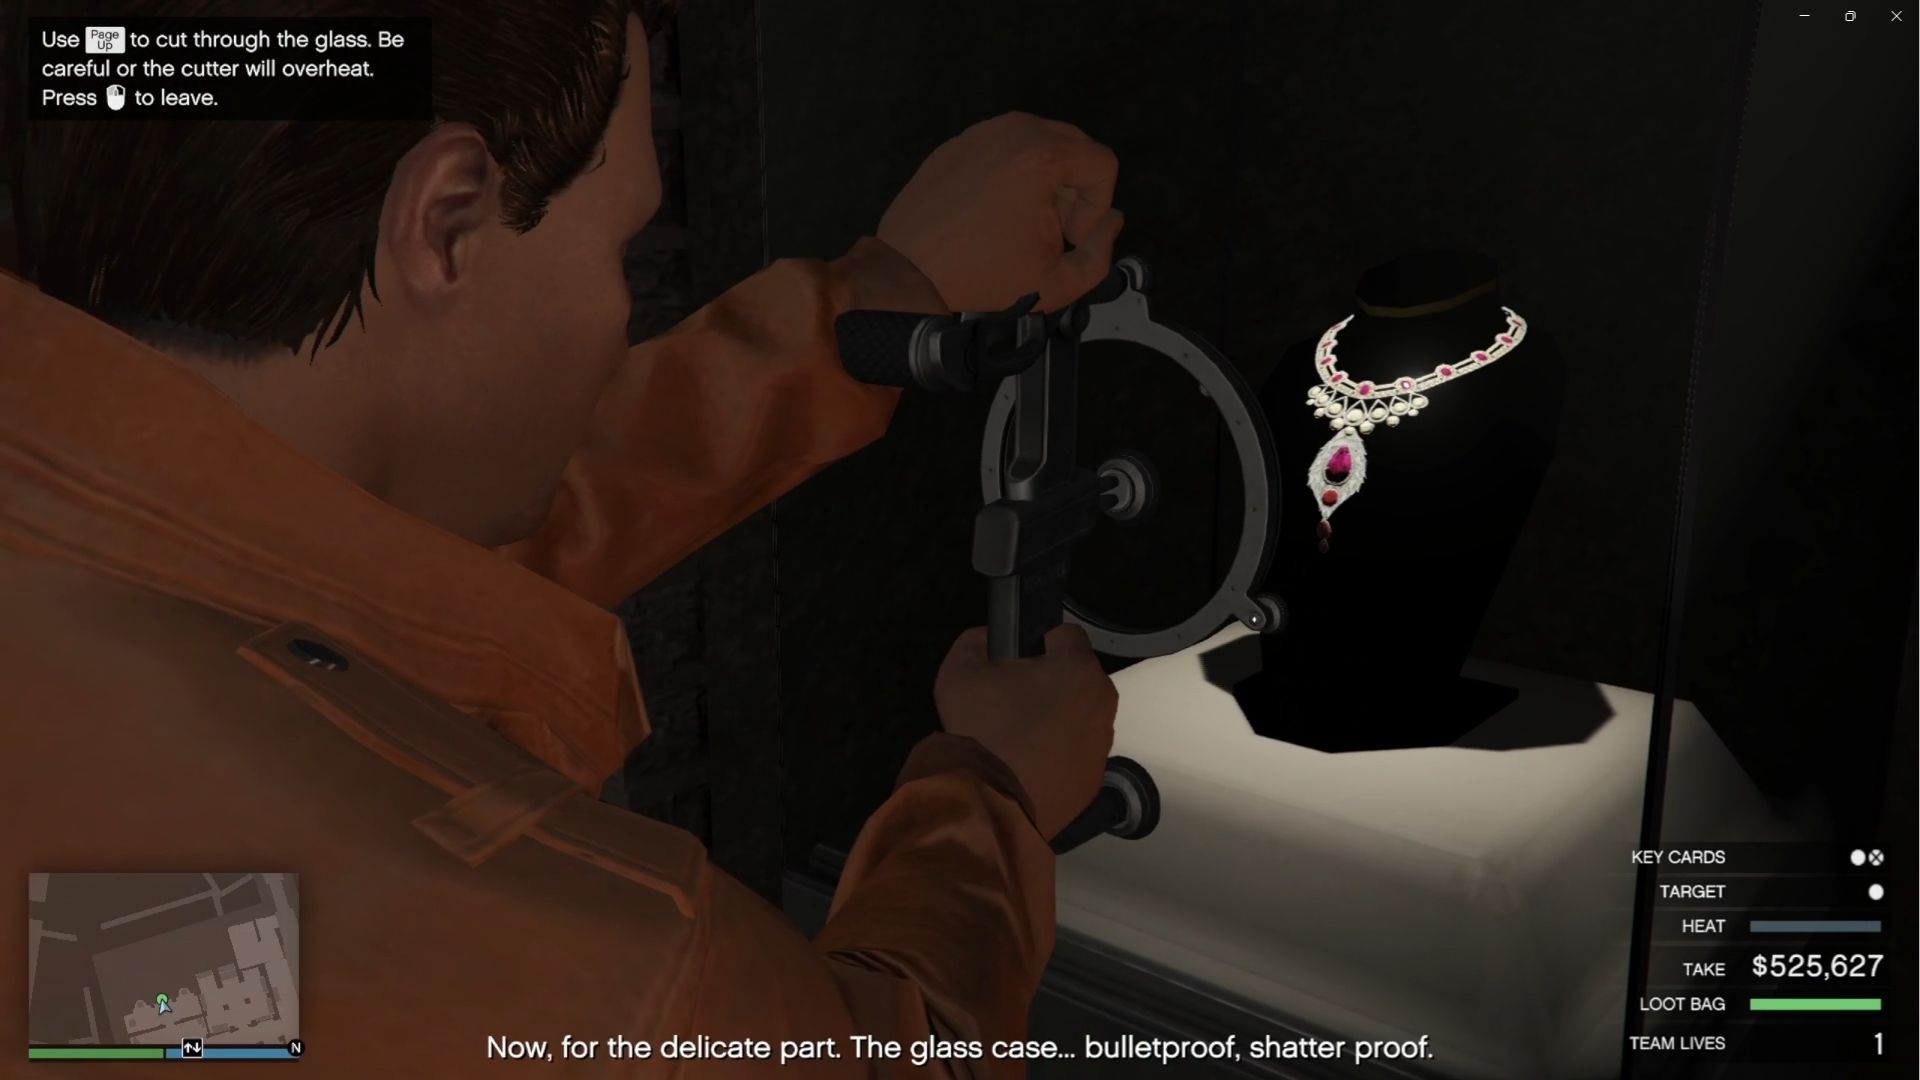
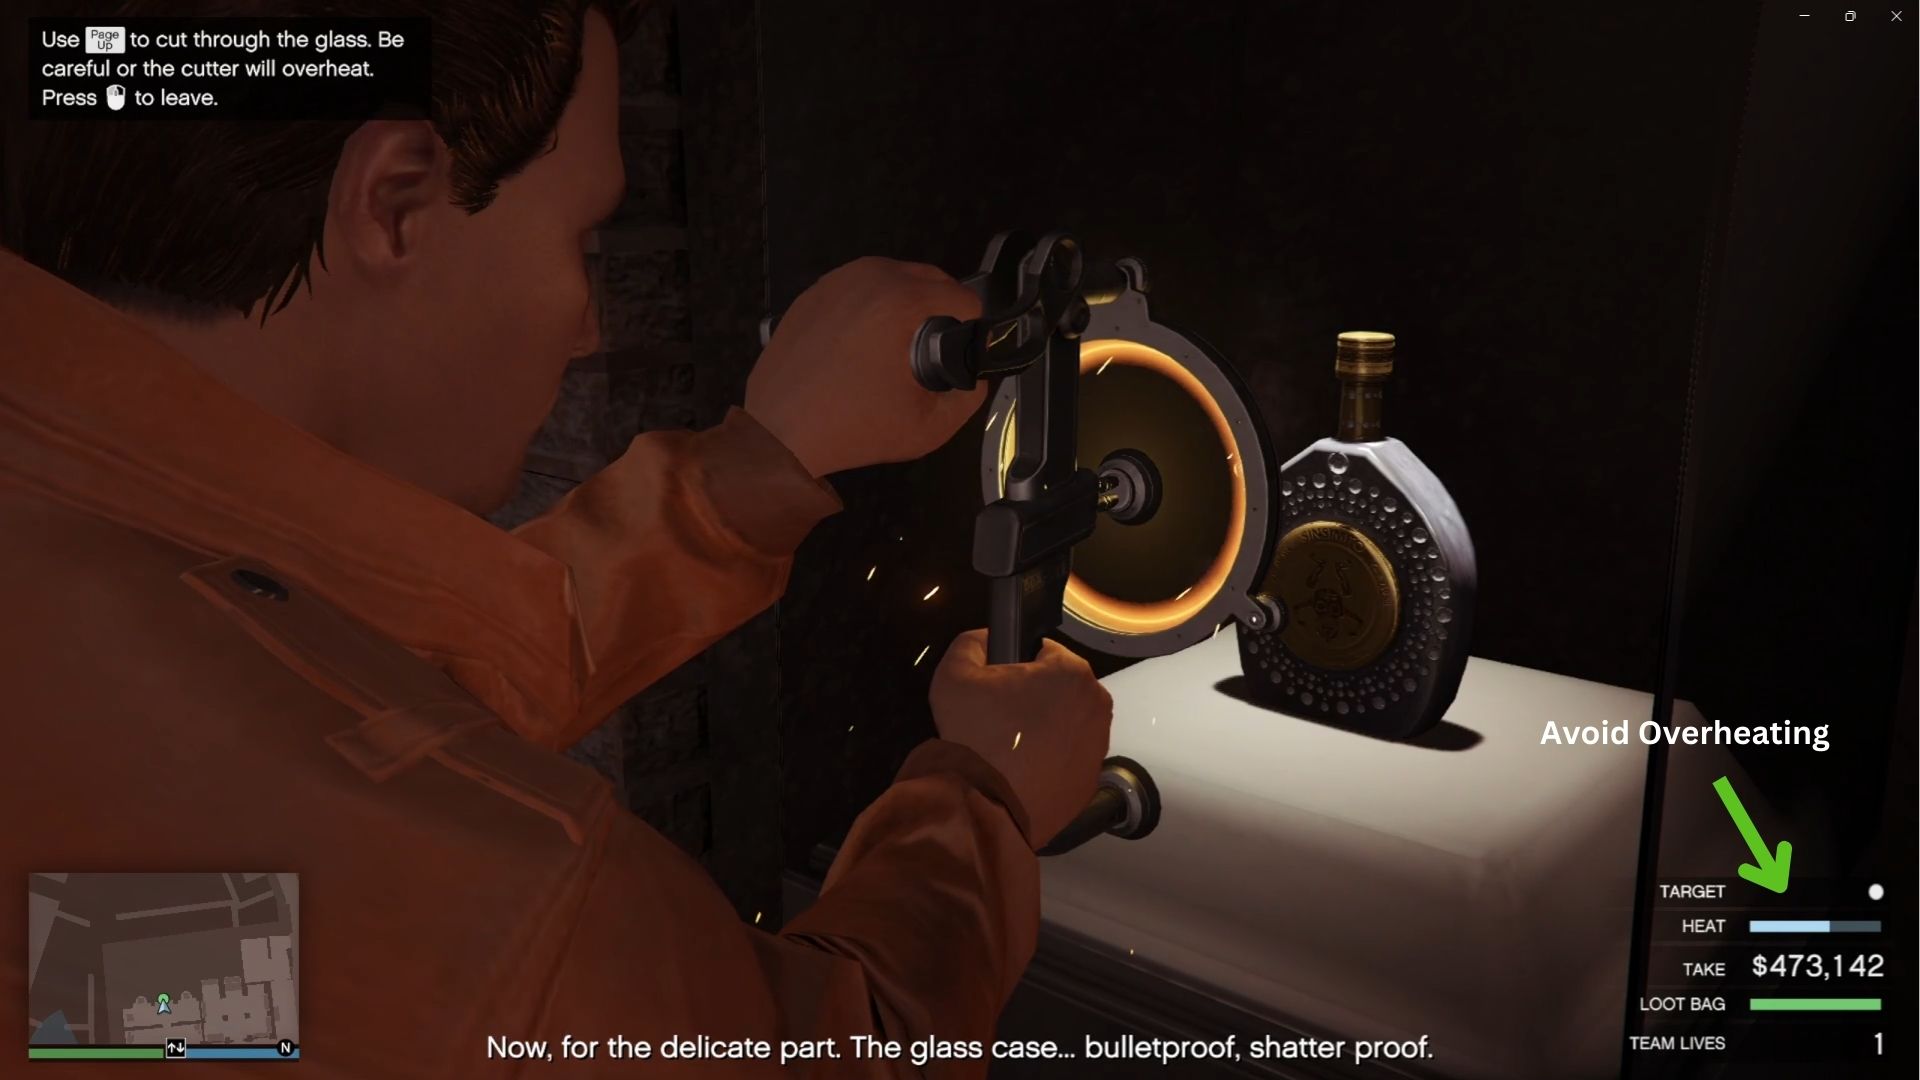
Once you open the elevator and access the underground area where the primary target is located, use your cutting torch to break the chains and proceed to use your Plasma Cutter to poke a hole in the glass case. This minigame is simple—you have to make sure you don’t overheat your Plasma Cutter. Stop using it when the bar turns red and let it cool down for a bit before using it again until the process is complete.
Once you successfully steal the primary target, it’s time to escape the island and end the Cayo Perico Heist run in GTA Online. Head back to the elevator and out of the office. Retrace your steps and make it out through the giant metal gate. However, be careful not to get caught before you reach the gate.
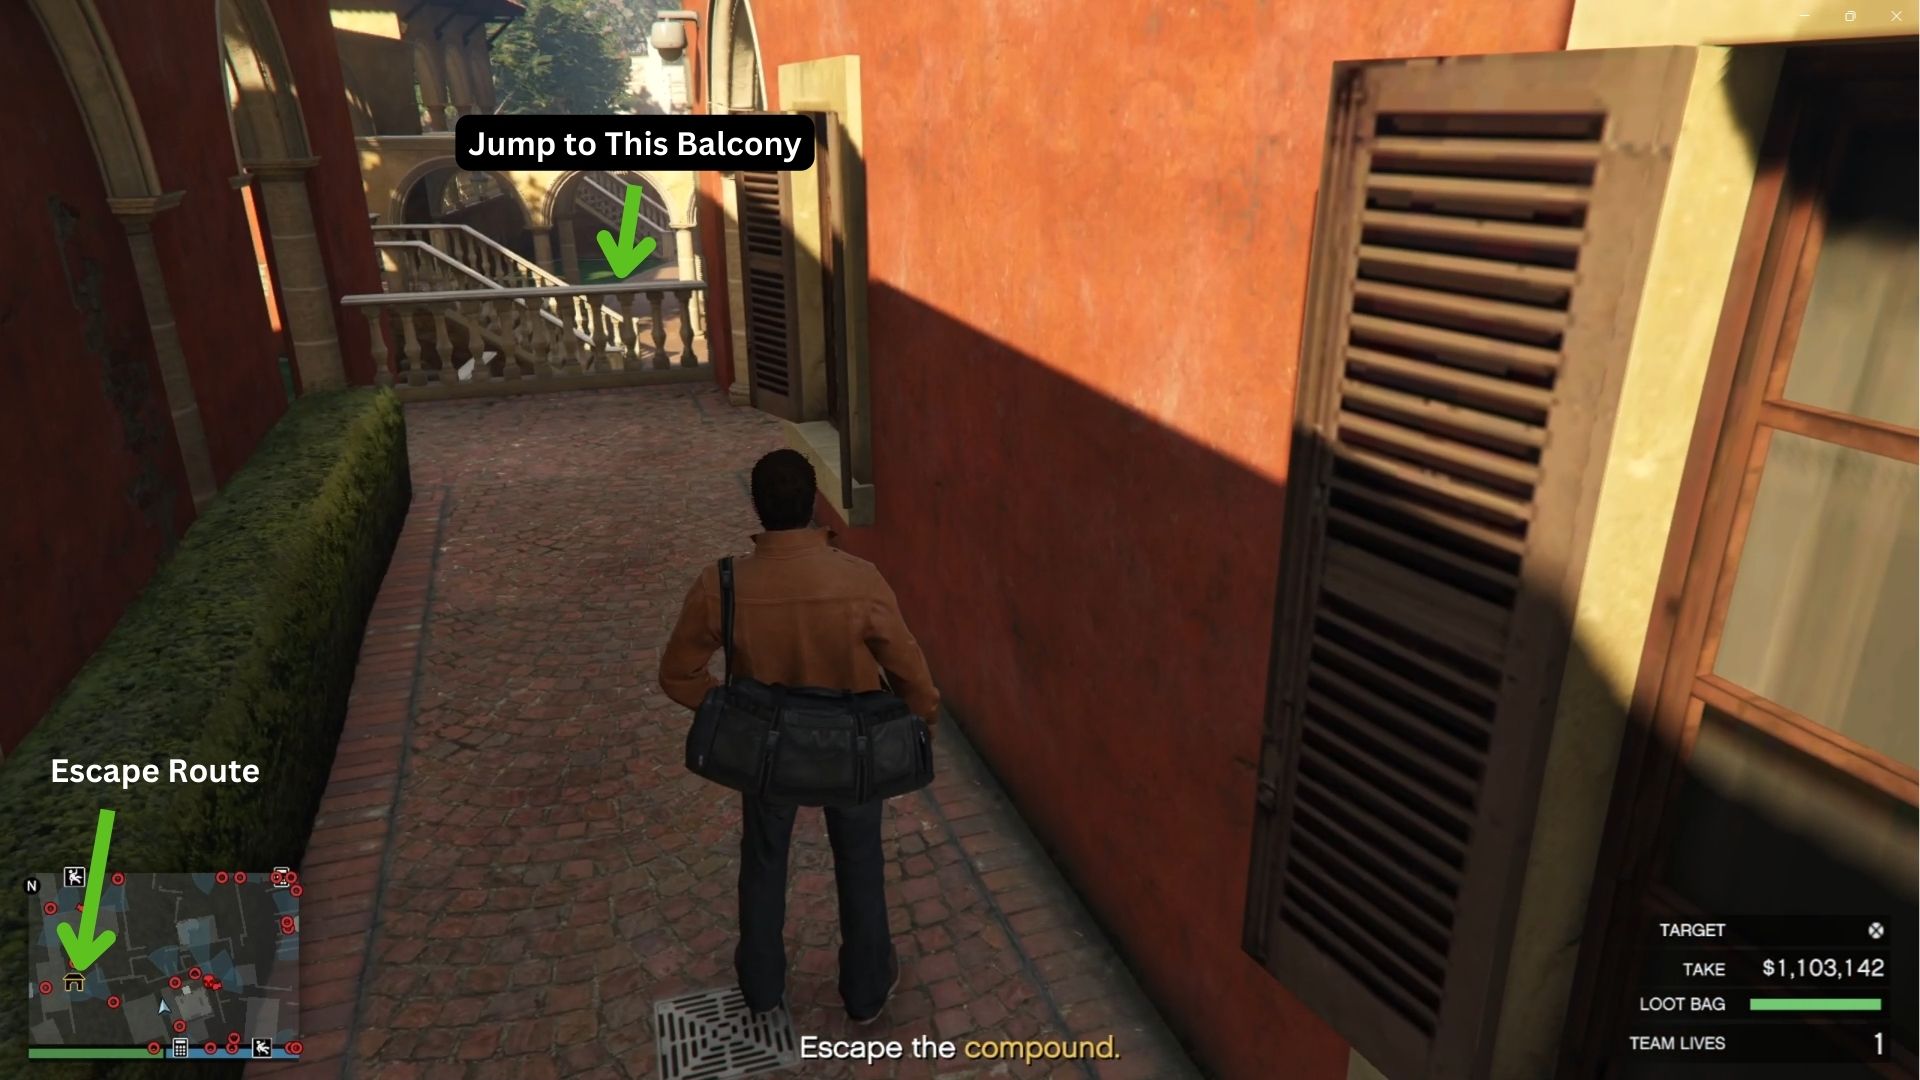
Once you are out of the compound, use your pistol to take down a nearby guard and ride his motorbike. Use the motorbike to jump to the edge of the island and swim away as fast as you can until the screen goes black and the heist is complete. Additionally, make sure you stay underwater so the enemies won’t be able to hit you. You don’t need to go back to the airstrip to complete the Finale. You only need to get far enough from the island to trigger the ending.
Follow this video to learn how to escape Cayo Perico Island and complete the run.
How To Play Cayo Perico Heist Hard Mode?
To activate Hard Mode for the Cayo Perico Heist, you’ll need to replay the mission after completing it once it’s available. You have approximately 2 hours and 25 minutes after finishing the heist to start it again. Once it becomes available, you’ll have a 48-minute window to activate Hard Mode before it reverts to the normal difficulty. While waiting for the cooldown, you can focus on other content like managing your businesses for quick money.
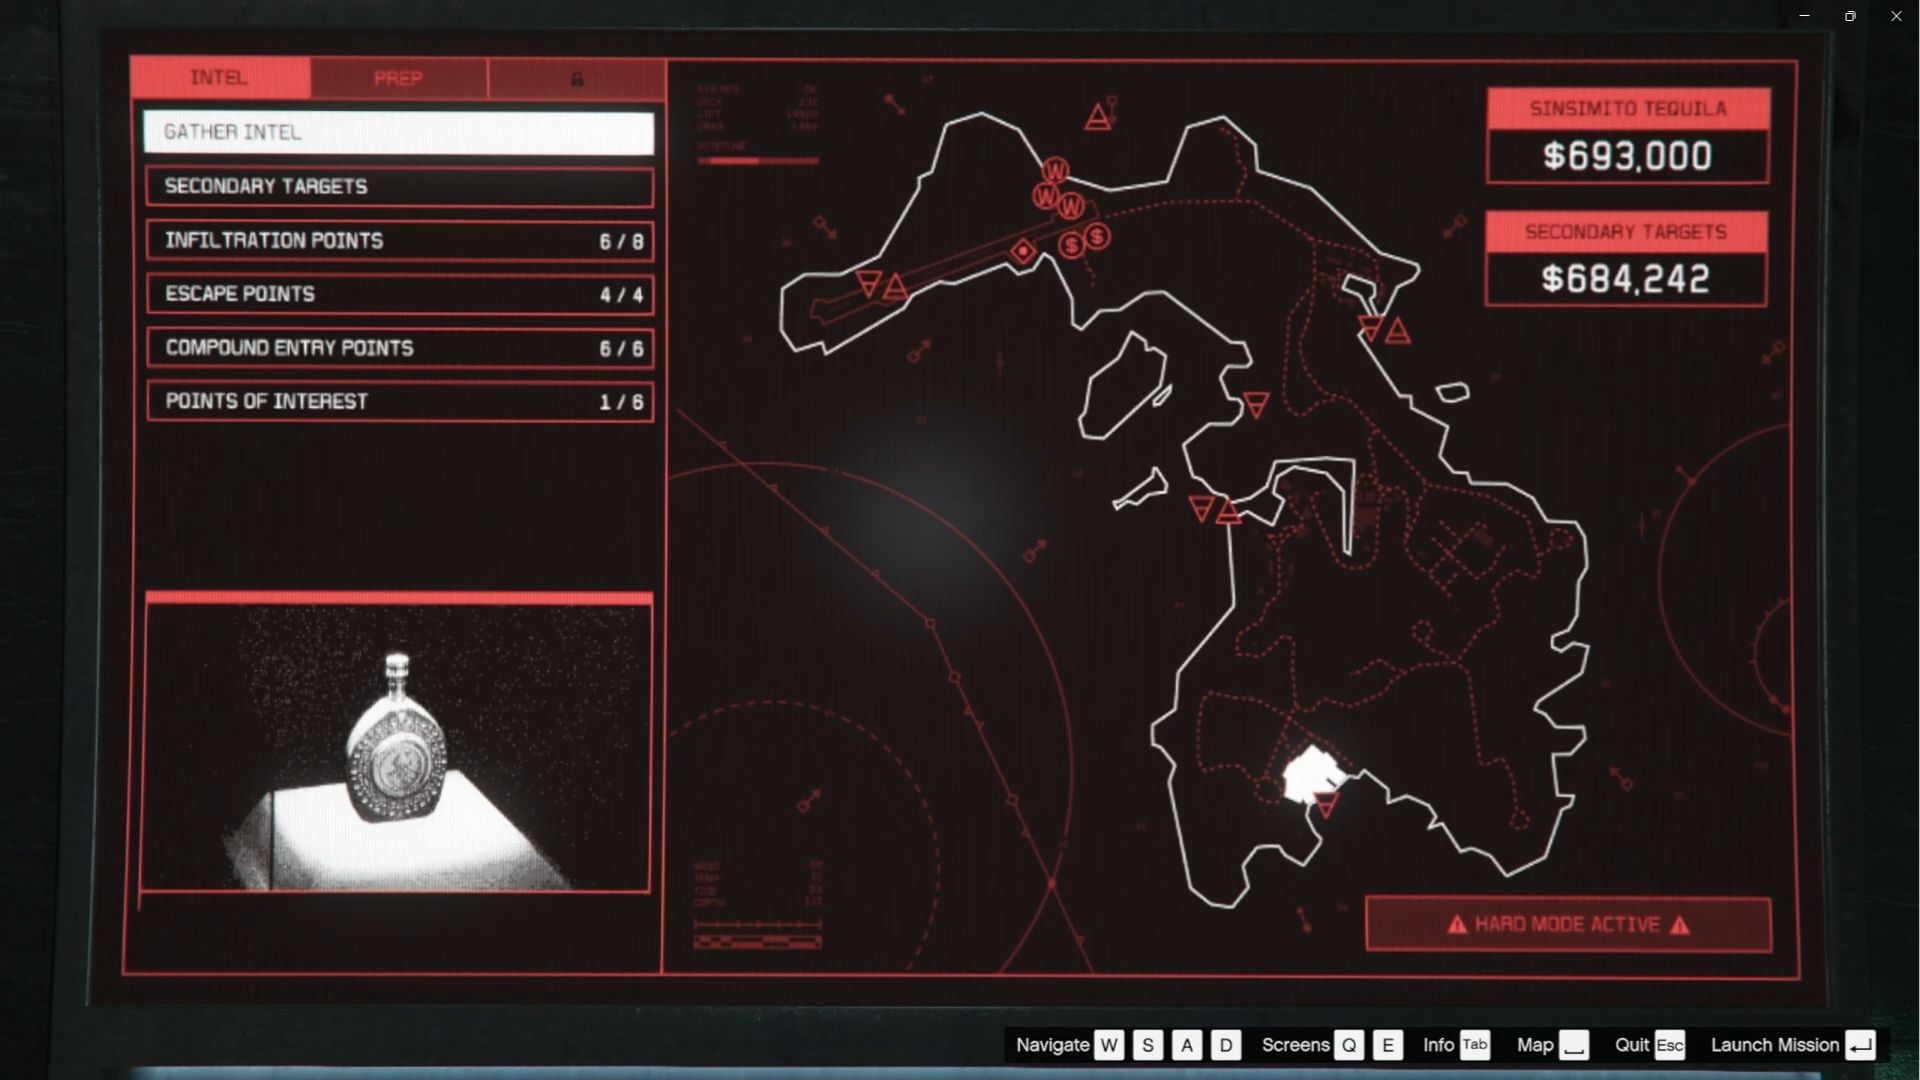
If keeping track of the timer feels like a hassle, you can set an alarm or reminder to jump back into the game and activate the heist in Hard Mode. Once activated, there’s no rush. You can exit the game and complete the mission later. The heist will remain in Hard Mode until you finish it.
The difference when you run GTA Online Cayo Perico Heist in Hard Mode is that there is a 10% value increase for the primary target. You also get an additional $100,000 when completing the Elite Challenge instead of just $50,000. The only added difficulty in this mode is that you need to solve four fingerprint puzzles. It’s not even difficult once you know the trick. Additionally, you only have one life, so you fail the mission if you die. However, you can just restart the mission if you fail, and you shouldn’t engage in combat when you are playing solo. This means one life is enough for you to complete the job.
Full List of GTA Online Cayo Perico Heist Primary Target Value
The primary target has the biggest payout in the GTA Online Cayo Perico Heist. Every run, a random item is placed on the glass case that you need to steal in order to get a higher payout and complete the job. Here is a list of each primary target and their updated values:
| Primary Target | Value (Normal Difficulty) | Value (Hard Mode) |
| Sinsimito Tequila | $630,000 | $693,000 |
| Ruby Necklace | $700,000 | $770,000 |
| Bearer Bonds | $770,000 | $847,000 |
| Pink Diamond | $1,300,000 | $1,430,000 |
| Panther Statue (Only Available During Events) | $1,900,000 | $2,090,000 |
| Madrazo Files (First Time Run) | $1,100,000 | None |
Looking For More?
Thank you for reading the article. We provide the latest news and create guides for GTA and GTA Online. Also, watch Deltia play on Twitch or visit his YouTube channel!
 Reddit
 Email
Email
