Facebook
 Reddit
 Email
Email
In this comprehensive guide, we will take a look at how to use a 3D Printer in InZoi and what you can use it for.

Life simulation title InZoi provides players with a lot of freedom. Apart from pursuing various careers and forming relationships, you can even make custom decorative items and accessories in the game. You can use the 3D Printer for this.
However, if you are not familiar with how the 3D printer works in the game, you are at the right place. Read further to find out everything you need to know about 3D Printing in InZoi
Making Custom Objects Using a 3D Printer in InZoi
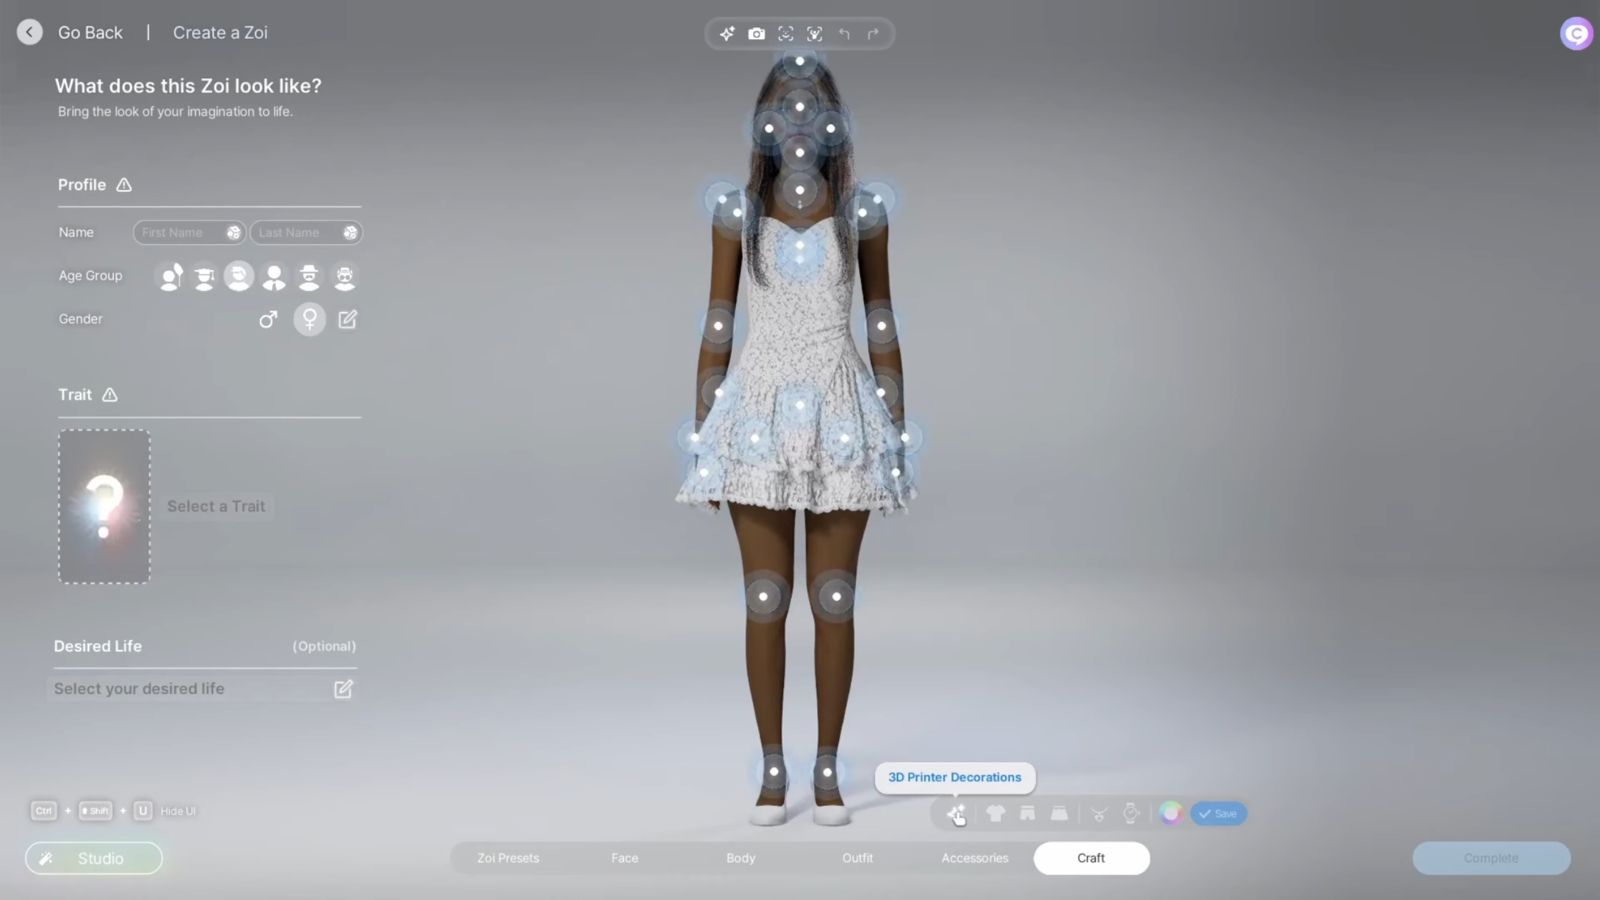
To provide your home with an even custom feel, we suggest using a 3D printer. For this, you need to open the build mode and then select the ‘Craft’ tab. From here, select the 3D printer and then upload an image of any object of your choice. Wait for a few seconds, and your product will be ready.
Also Read: InZoi: How To Do Yoga at Cahaya Temple
How To Make Accessories
A 3D printer will cost you 629 Meows (in-game currency), and every item that you make from it will be priced at 100 Meows. To make accessories, you will need to do it via the craft clothes menu. Select the desired body part where you need to add the accessory, and finally, your character will rock a completely unique ornament.
For the best results, it is suggested to use images with only one object in the frame. Moreover, do keep in consideration that objects that are too complex might be a little difficult to make. Fortunately, you can edit the object if needed.
Using the X, Y, and Z-axis bars, you can adjust the image’s placement. The X bar will help you adjust the object’s size, use the Y bar to move the object left or right, and the Z bar can be used to move it up or down.
Thank you for reading the article. We provide the latest news and create guides for new and old titles, including Death Stranding 2, Baldur’s Gate 3, Roblox, Destiny 2, and more.