Facebook
 Reddit
 Email
Email
This walkthrough for DOOM The Dark Ages covers Chapter 7 Siege Part 2, focusing on DOOM Slayer’s efforts to defend the Sentinel Stronghold.
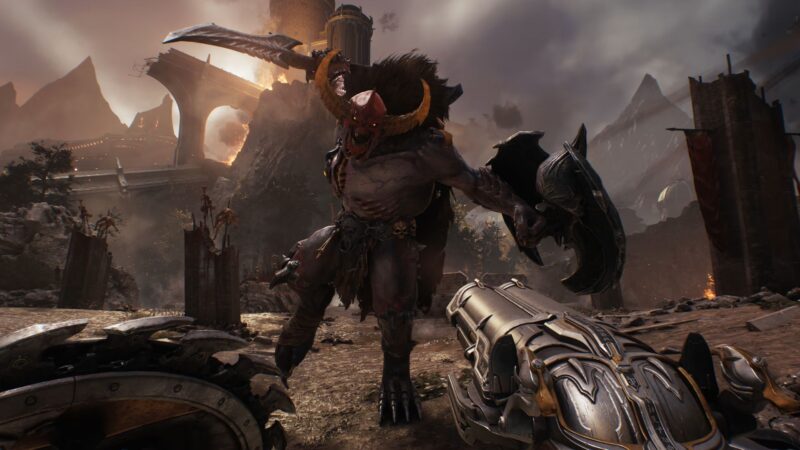
After King Novik retrieves the Heart of Argent, Prince Ahzrak leads a massive army of demons to assault the Sentinel base and capture the artifact. As the Sentinels evacuate, Ahzrak and his forces continue to breach the castle walls. As the title suggests, Chapter 7 Siege Part 2 serves as the direct continuation of Chapter 6, which ended with a powerful titan emerging from a demonic portal and breaking the city shield barrier.
Learn the order of events and how to complete the Chapter 7 Siege Part 2 in this DOOM The Dark Ages walkthrough.
Related: Do You Need To Play the Previous Titles Before Doom: The Dark Ages
Siege Part 2 Full Chapter Walkthrough in DOOM The Dark Ages
Eliminating the Titan
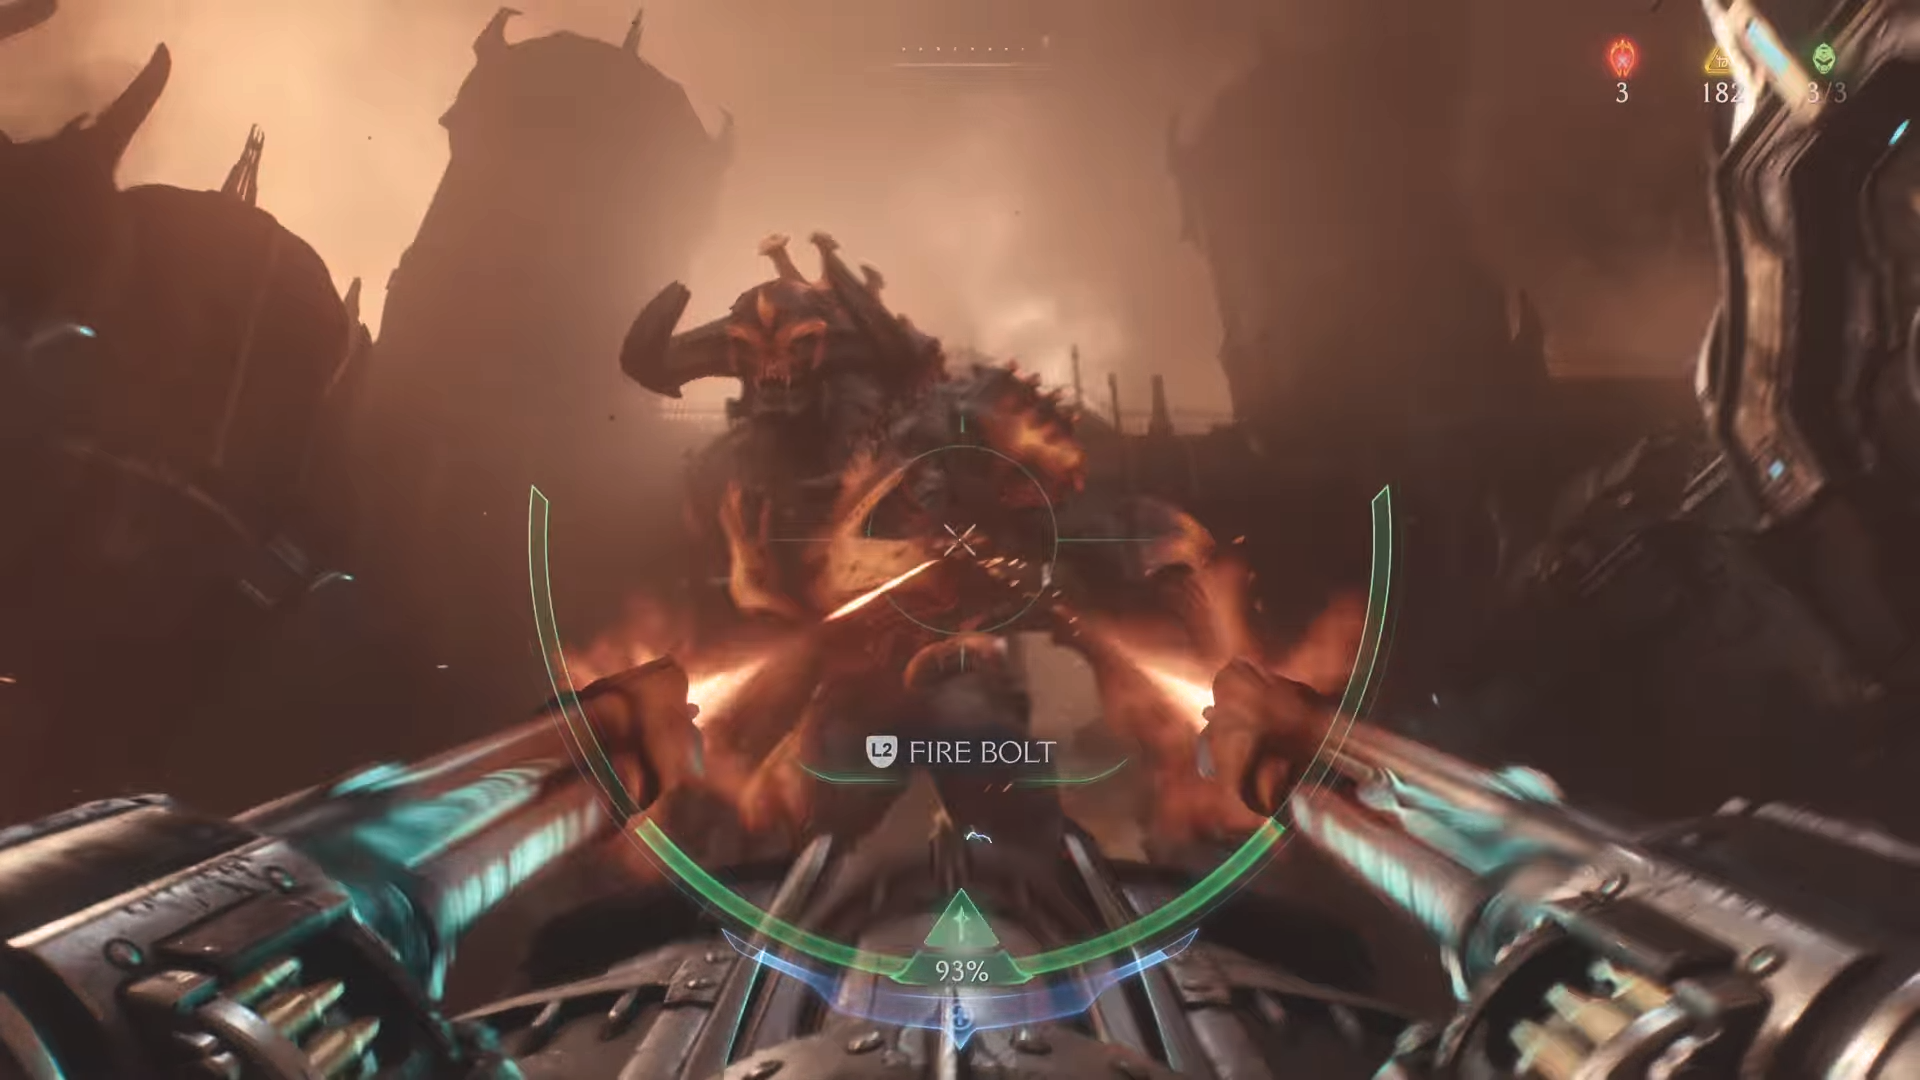
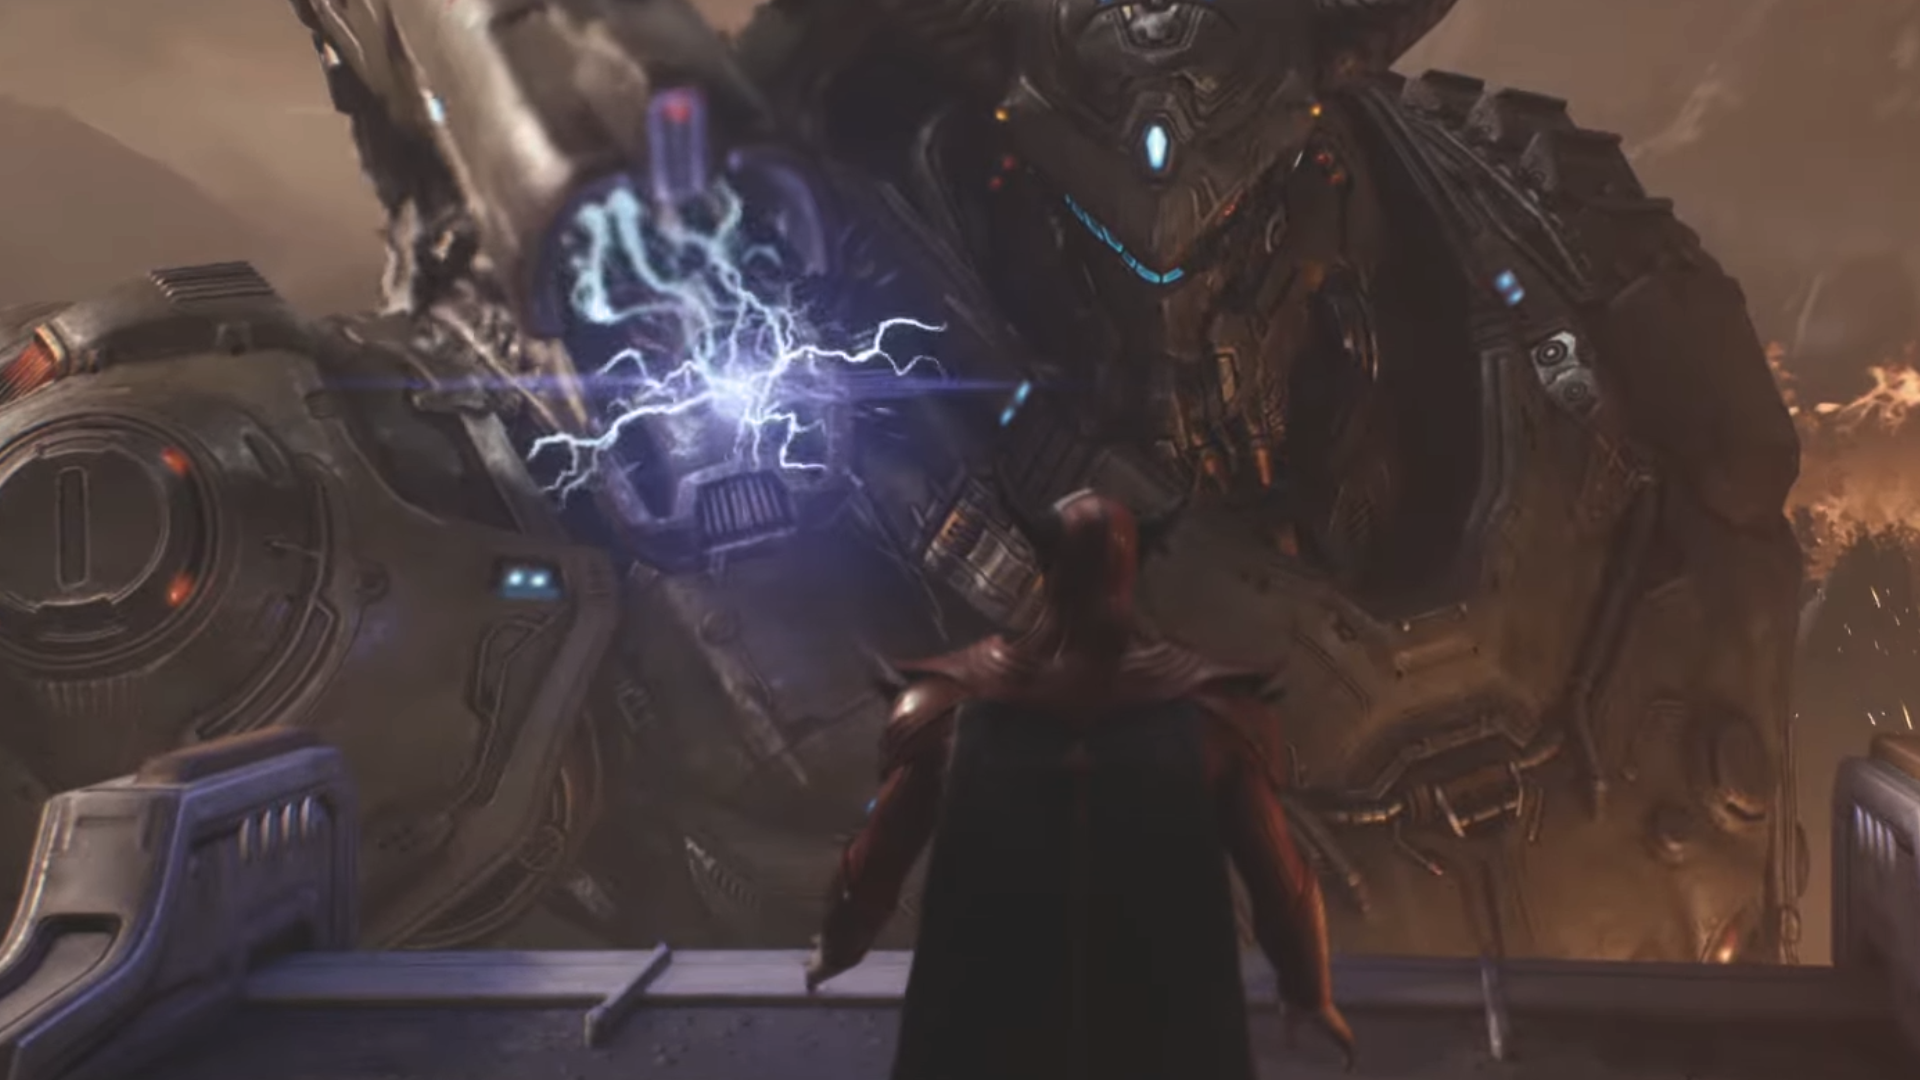
With the city shield barrier destroyed, and a titan spawns inside the city, it’s up to the DOOM Slayer to protect and defend the city. Use the turret in the courtyard to fend off a wave of different types of enemies. Once you finish off most enemies, the titan arrives in the courtyard. Shoot the turret to charge the Fire Bolt. Use the Fire Bolt on the titan several times to neutralize it.
Falling Back to Hangar
After eliminating the titan, head to the Hangar by following the objective marker. Perform several Environmental Shield Charges to make your way to the top. After clearing the area, pull the lever. Now jump down to face another set of enemies. After defeating them, throw the shield at the super-heated metal to bring down a scramble wall and make your way to the top.
Continuing along the objective marker leads you to a Point of No Return checkpoint. On your way, breaking a door leads you to the Secret Key, which you can use to open the secret area gate. One secret area contains a Ruby, a crucial material for upgrading, and another secret area hides a codex. Continue onward until you reach another Point of No Return area.
Defeating the Demonic Leader
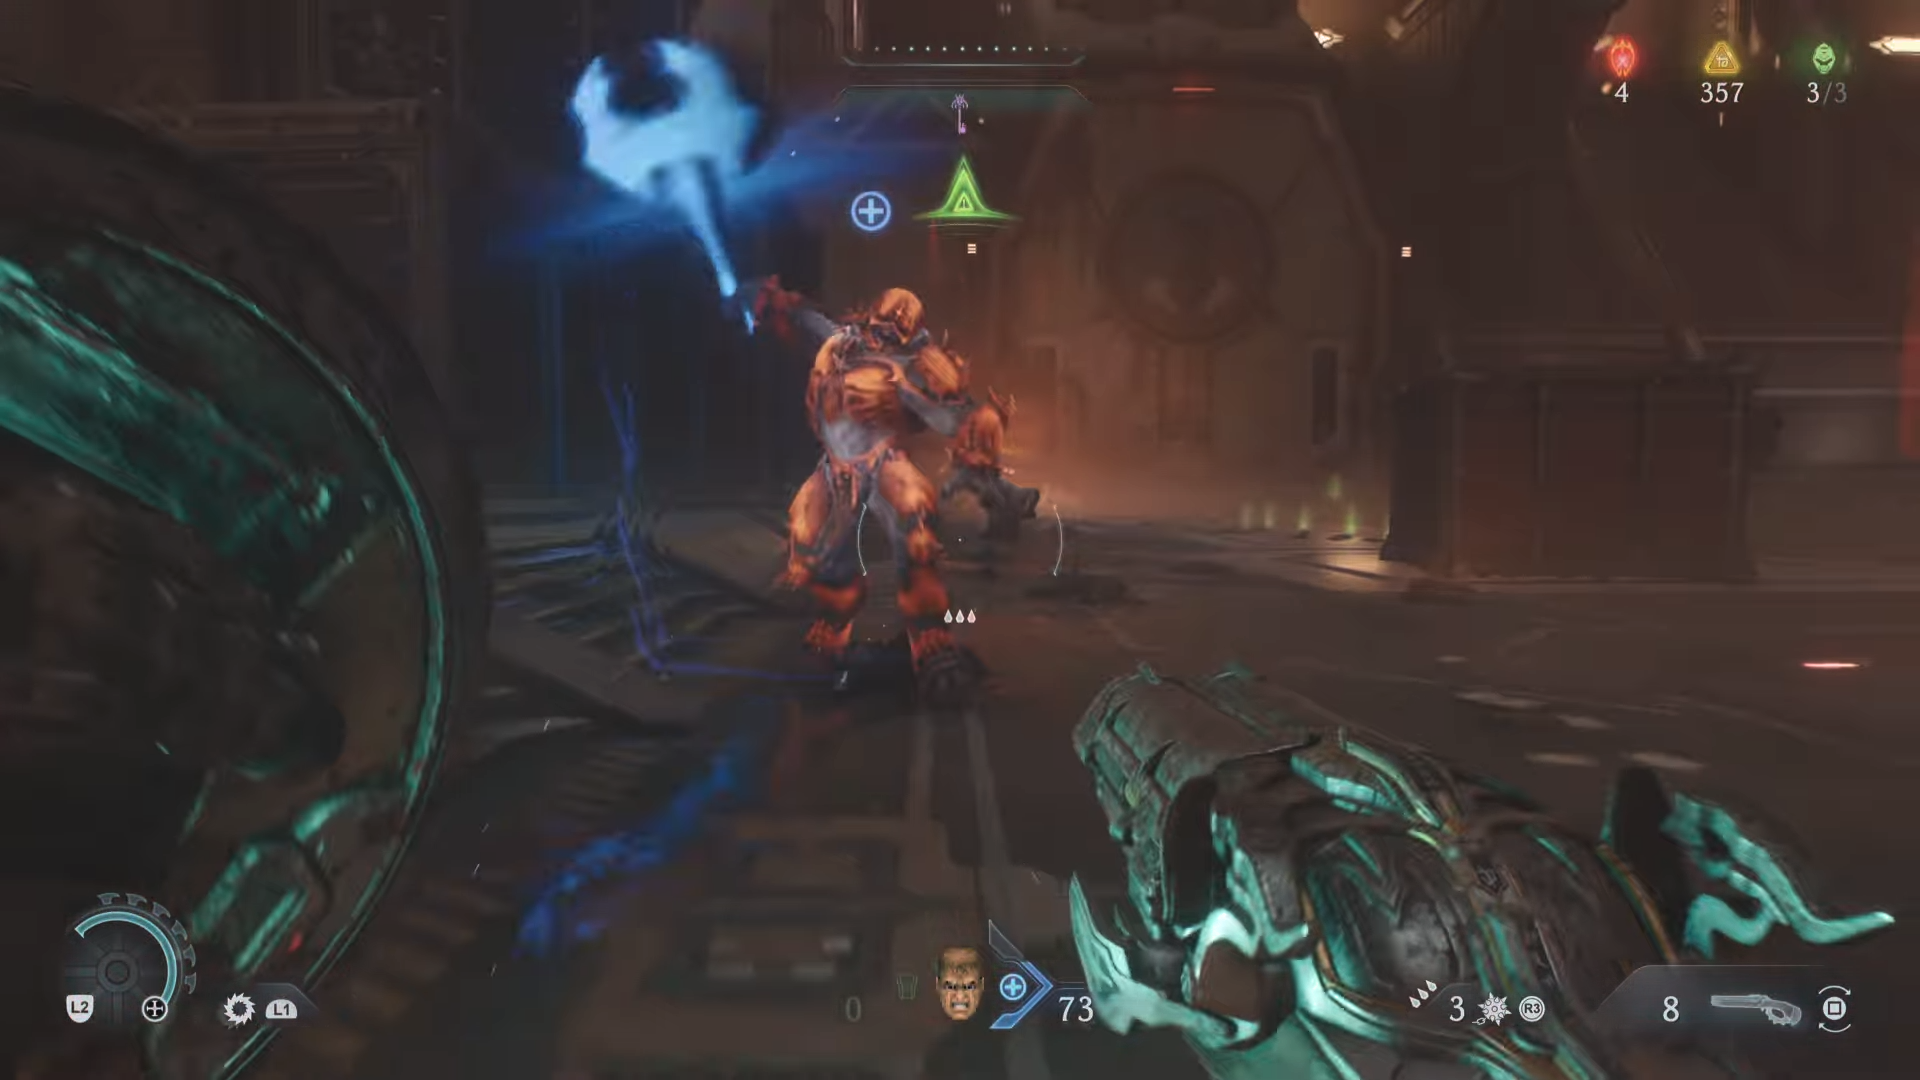
You will find numerous enemies on your way. Clear them and drop down to reach the next Point of No Return area. You will find a super-heated metal inside a broken section. Throw the shield at the metal, which brings down the scrabble wall. Then, climb the subsequent scramble walls to reach the top section. After eliminating the incoming waves of enemies, defeat the Demonic Leader to obtain the Demonic Essence, which increases your maximum health.
Rescuing King Novik
After defeating the Demonic Leader, Commander Thira requests you to help King Novik, as Prince Ahzrak and his forces are approaching his position. Climb the scramble wall and use the Shield Recall Jump to cross the area. You will also discover a Sentinel Shrine in the area. Use the Shrine to purchase upgrades. Then, proceed to the End of the Chapter objective, which triggers the final cutscene.
Final Cutscene

In the cutscene, Prince Ahzrak captures King Novik and threatens him for the Heart of Argent. At the right moment, DOOM Slayer arrives, but is ambushed and thrown off a platform by the Witch. Ahzrak finds the artifact worn by King Novik is empty and demands its location. Suddenly, DOOM Slayer reappears piloting his Atlan and says King Novik ‘Run’ before launching the attack. The Witch and Prince Ahzrak flee and vanish, while King Novik escapes from the area. You will find a total of 183 Gold, 2 Ruby, 1 Demonic Essence, 9 Secret, 1 Codex, and 1 Toy scattered throughout the chapter.
Looking For More?
Thank you for reading the article. We provide the latest news and guides for DOOM: The Dark Ages. Also, visit our YouTube channel!