Facebook
 Reddit
 Email
Email
Here is a guide on how to craft a powered rail, set it up, and activate it for a boost on the tracks in Minecraft.
Rail tracks are one of the best things you can use in Minecraft if there is a path in your area that requires constant up-and-down traveling. While setting it up makes you spend time and resources, it helps in the long run, saving you ample time for quick travel runs. In this article, we are going to be looking at how to craft the powered rail, which is one variant of the rails in Minecraft.
Crafting a Powered Rail in Minecraft
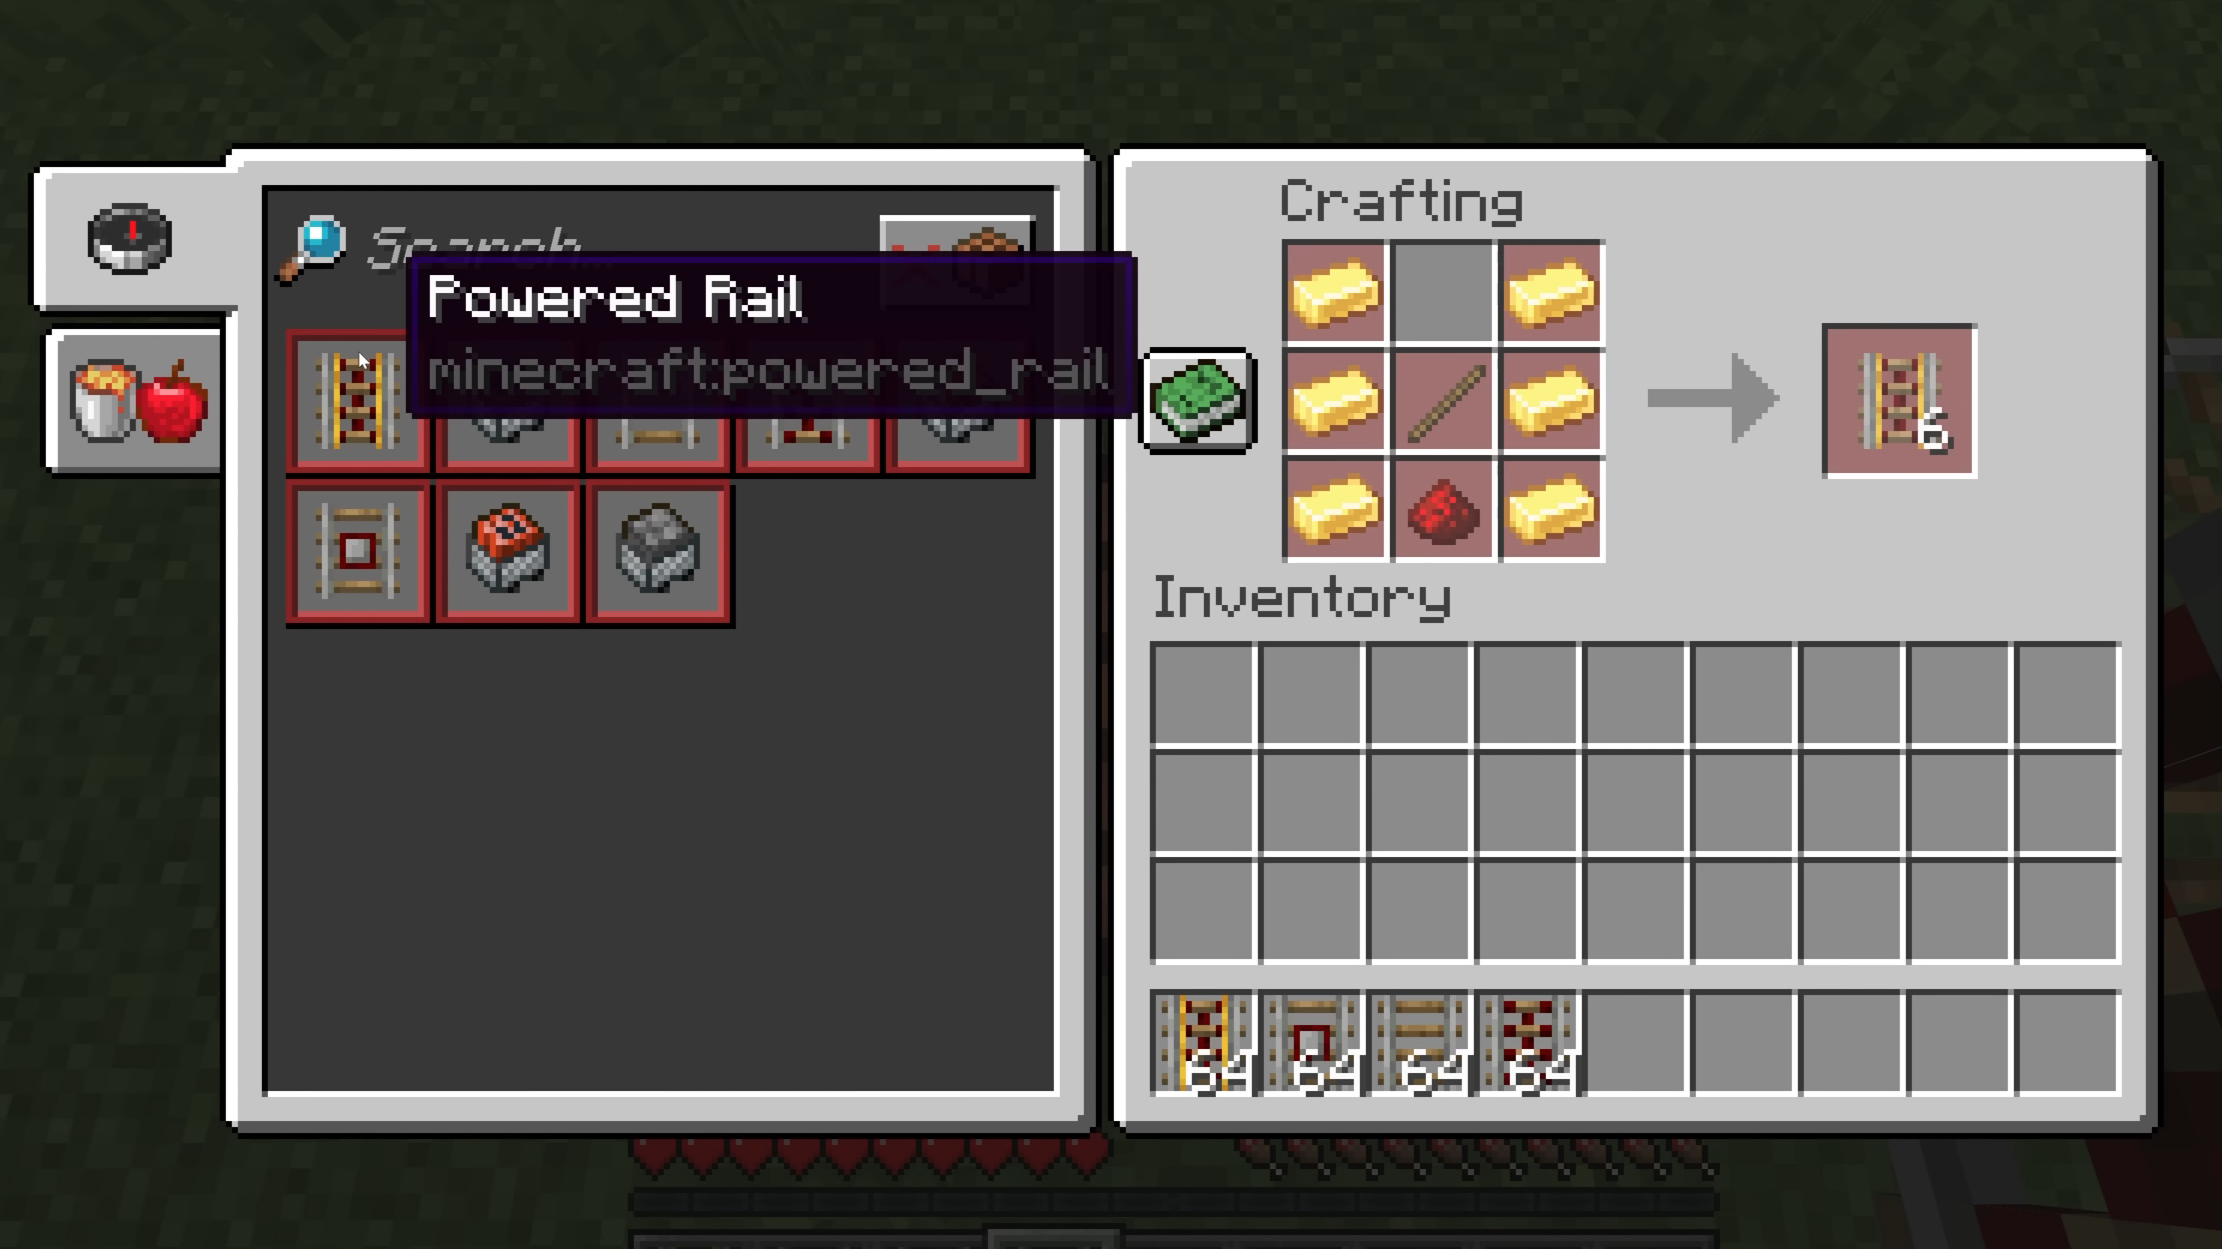
Any type of rail is expensive to construct. While the normal rail requires six iron ingots and a stick, the powered rail takes it up a notch. For this rail, you would need a total of six gold ingots and one stick. As it doesn’t need to be placed that frequently to create a track, it compensates for its cost.
So, once you have collected your materials, place three gold ingots in the left column and three in the right column. Now, place the stick in the middle. It should be in the shape of the letter ‘H’. Now place the last Redstone dust right below the stick, leaving just one tile empty in the crafting grid. Once that is done, your six powered rails will be ready to collect.
How To Set Up a Powered Rail in Minecraft
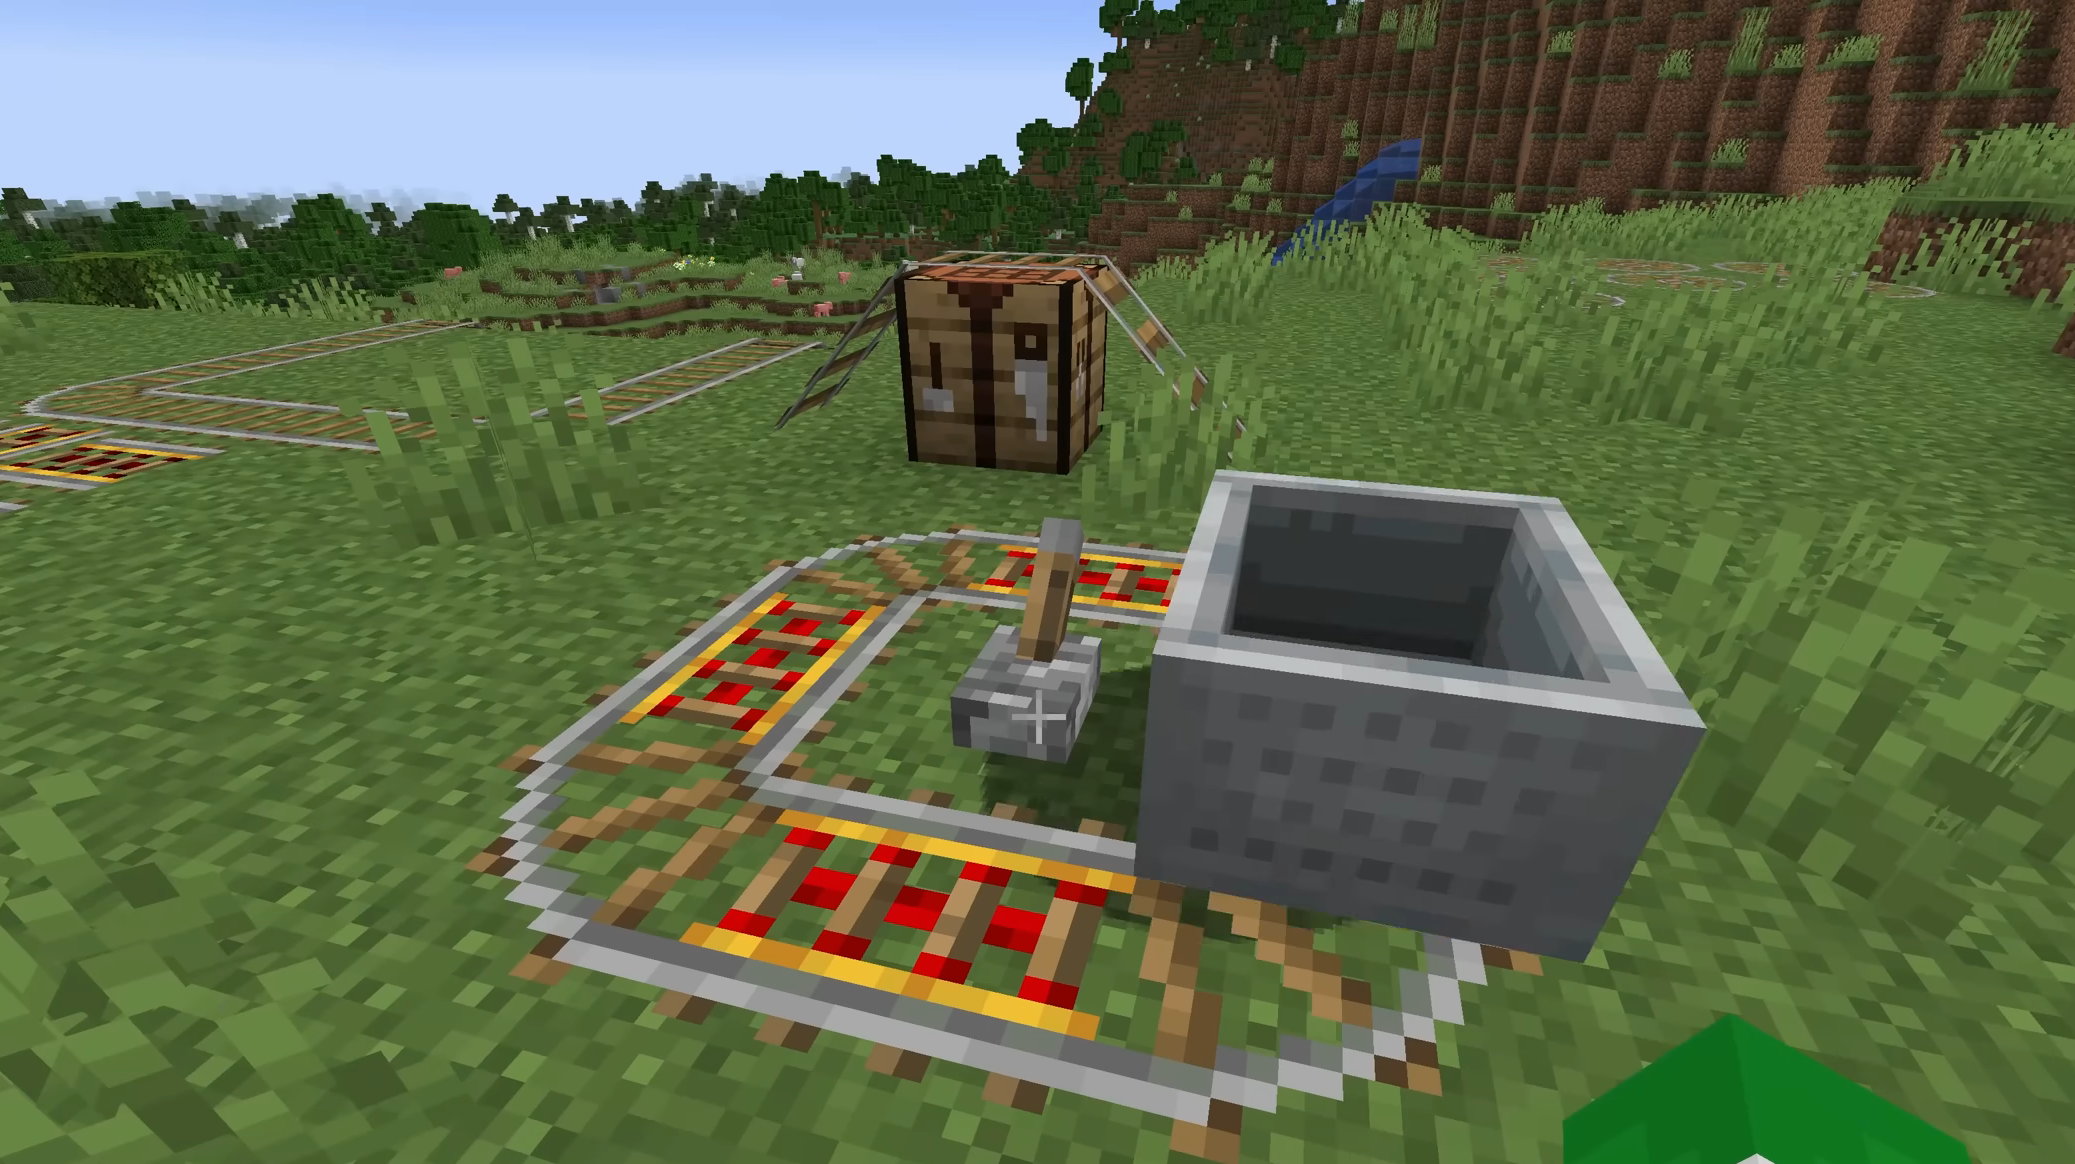
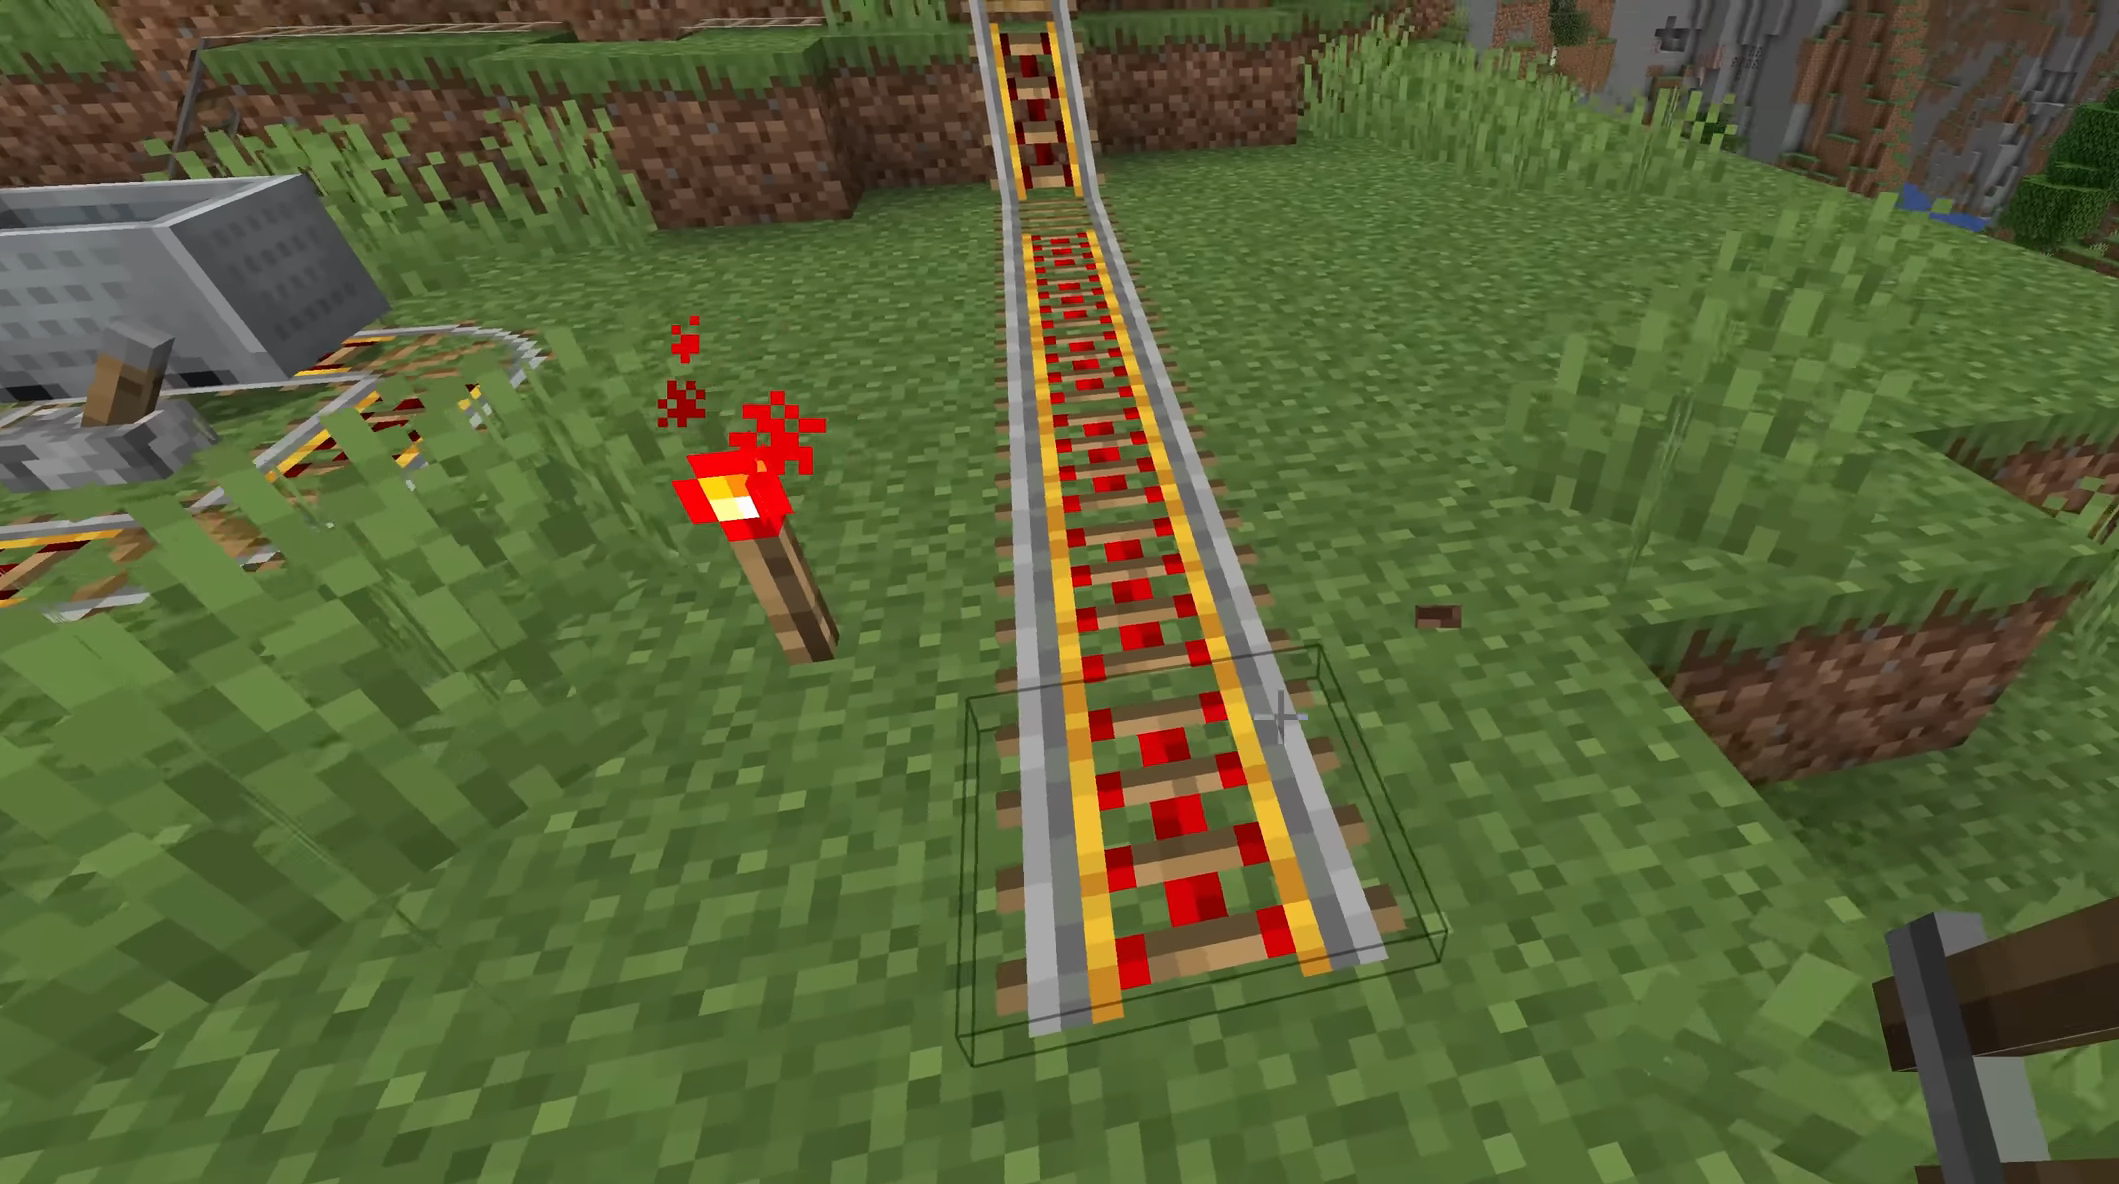
Once it is ready, you can place it in the middle of the tracks. This type of rail does not work on its own and needs to be activated. This can be done using a Redstone torch.
Crafting a Redstone torch is simple. All you need is one stick and one Redstone dust. In the crafting grid, place the stick in the middle and the Redstone dust right above it. Once ready, you can grab your Redstone torch. Now you can choose to place the Redstone torch either to the side of it or right under it. You will notice that the rail is now glowing. This indicates that the rail is active, and a minecart on it will be boosted ahead.
You can also use a lever to control the rails. If using a lever, you wouldn’t need to break the Redstone torch whenever you want to power on or off your rails. The lever can simply be toggled to control the rail.
How To Use Powered Rail in Minecraft
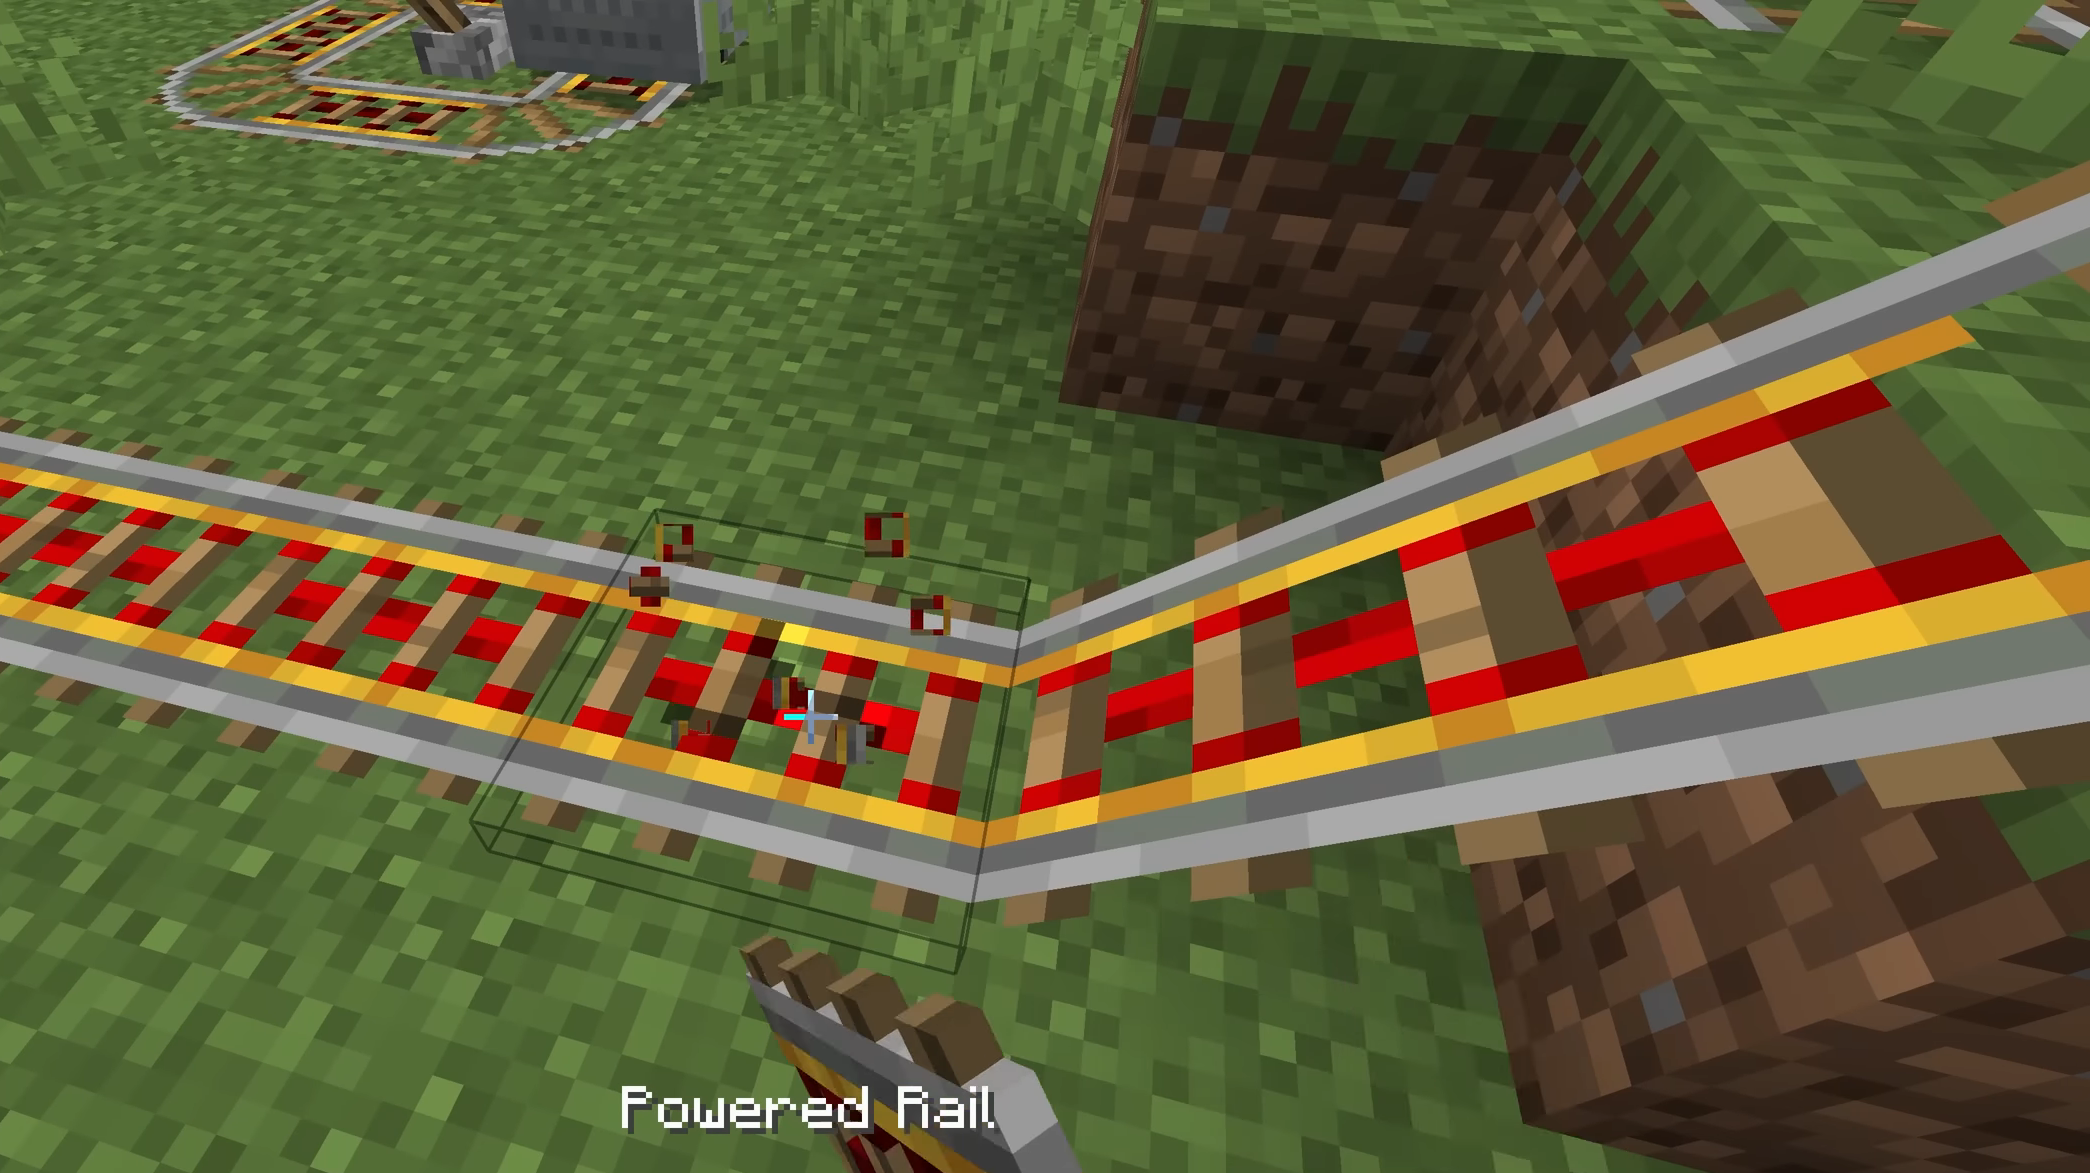
The best way to make the best use of a powered rail is by placing a block behind the first one on the track. Placing a minecart over there will cause it to boost forward in the direction it faces.
If there are tracks ahead and behind the rail with no space to place a block, you can do another thing. Slope mechanisms work perfectly in providing pace as well as longevity. The duration of the powered rail effect lasts longer, enabling you to travel further with the same boost. All you have to do is place the powered rail in the middle or on top of the slope. This gives the minecart the necessary push it needs to travel far and fast.
Looking For More?
Thank you for reading the article. We provide the latest news and create guides for Baldur’s Gate 3, Starfield, ARK Survival Ascended, and more. Also, watch Deltia play games on Twitch or visit his YouTube channel!