Facebook
 Reddit
 Email
Email
Find out how to complete Chapter 10’s Nightmare Deja Vu quest in Throne and Liberty as we explain every part of it in this detailed guide.
Throne and Liberty has a ton of story content to offer if you want to take a break from the MMO aspect. While some of these quests are straightforward, others might be a bit more cryptic. In these quests, you will have to put not just your combat prowess, but also solve puzzles to progress through. Nightmare Deja Vu is Chapter 10’s main quest and is one of the more complex ones that you can come across in Throne and Liberty.
This quest is considered to be late-game content and will need you to use a variety of skills. You will need to solve puzzles, rely on some parkour, and finally fight a difficult boss to finally come out victorious. In this detailed guide, we will break down the Nightmare Deja Vu quest and explain all of the parts.
How To Start Nightmare Deja Vu in Throne and Liberty?
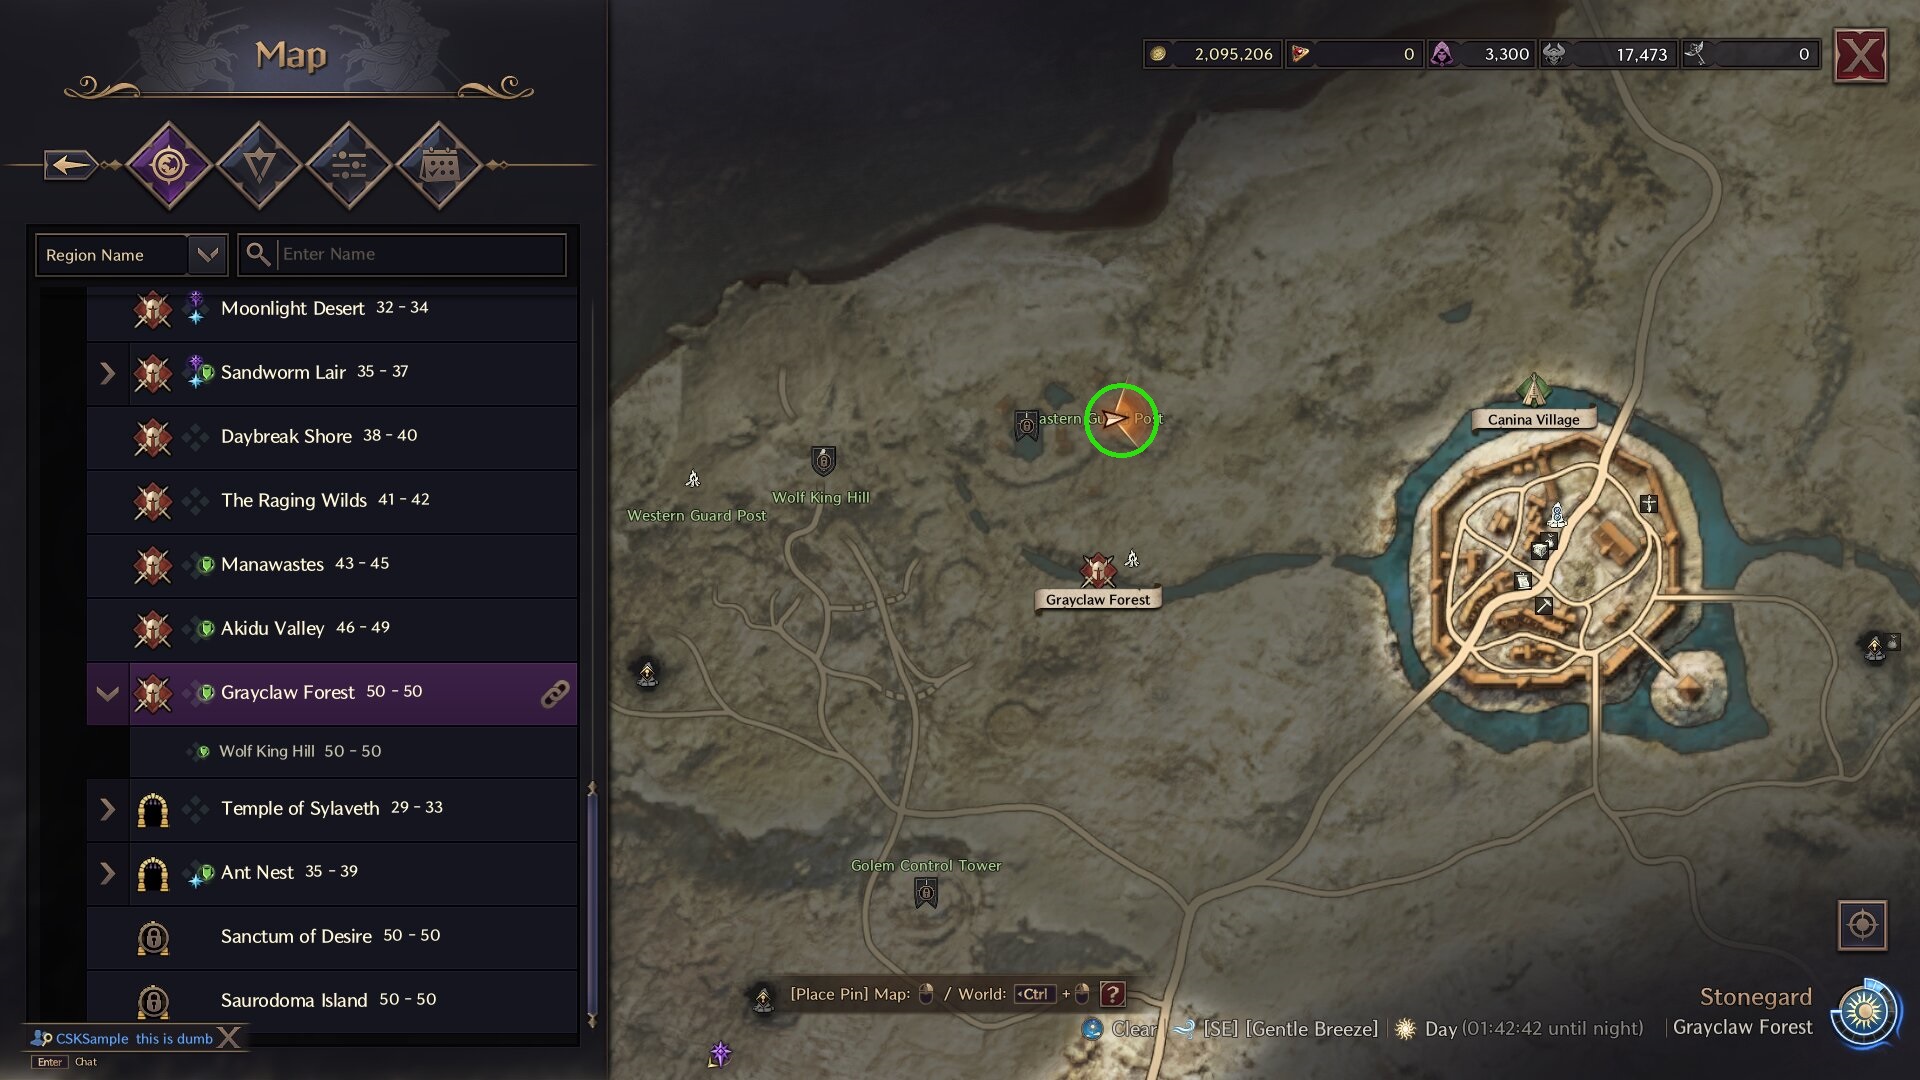
You will have to find “Someone’s Journal” in Grayclaw Forest to start the Nightmare Deja Vu Quest in Throne and Liberty. This journal will tell you to go and investigate at the Lycan’s Hall. This is where the main Nightmare Deja Vu quest starts. This is also the main story quest of Throne and Liberty’s Chapter 10.
Steps to Complete Nightmare Deja Vu in Throne and Liberty
Here are the steps to complete the Nightmare Deja Vu quest in Throne and Liberty:
- Head to Lycan’s Hall and talk to Clay.
- Solve both Moon Puzzles at Lycan’s Hall.
- Interact with the Black Rift in Shadowed Crypt.
- Head to Purelight Tower and talk to Clay again.
- Talk to One-Eyed Hawk Henson at the Besieged Shattered Temple.
- Avoid Berge’s Gaze and head to Temple 1.
- Head to Temple 2.
- Defeat Berge (Boss fight).
- Head to Clay’s study in Purelight Tower again.
- Interact with Lunar-0.
Here is a step-by-step guide to complete Chapter 10: Nightmare Deja Vu in Throne and Liberty:
Step 1: Head to Lycan’s Hall and Talk to Clay
Your first step after reading the journal is to head to Lycan’s Hall in Wolf King Hill. Once you reach there, you will find a temple-like structure that will have markers on the ground for you to investigate. These will eventually lead you to down the stairs to an altar. Clay will be already here, and you need to talk to this NPC to continue the quest.
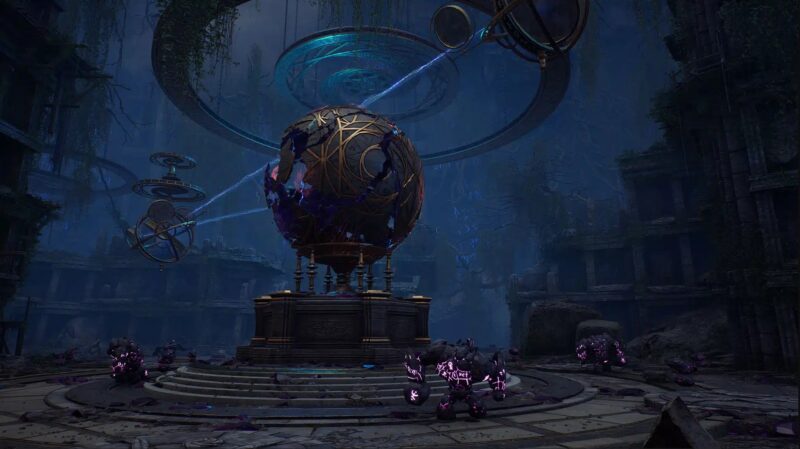
Step 2: Solve both parts of the Moon Puzzle in Lycan’s Hall
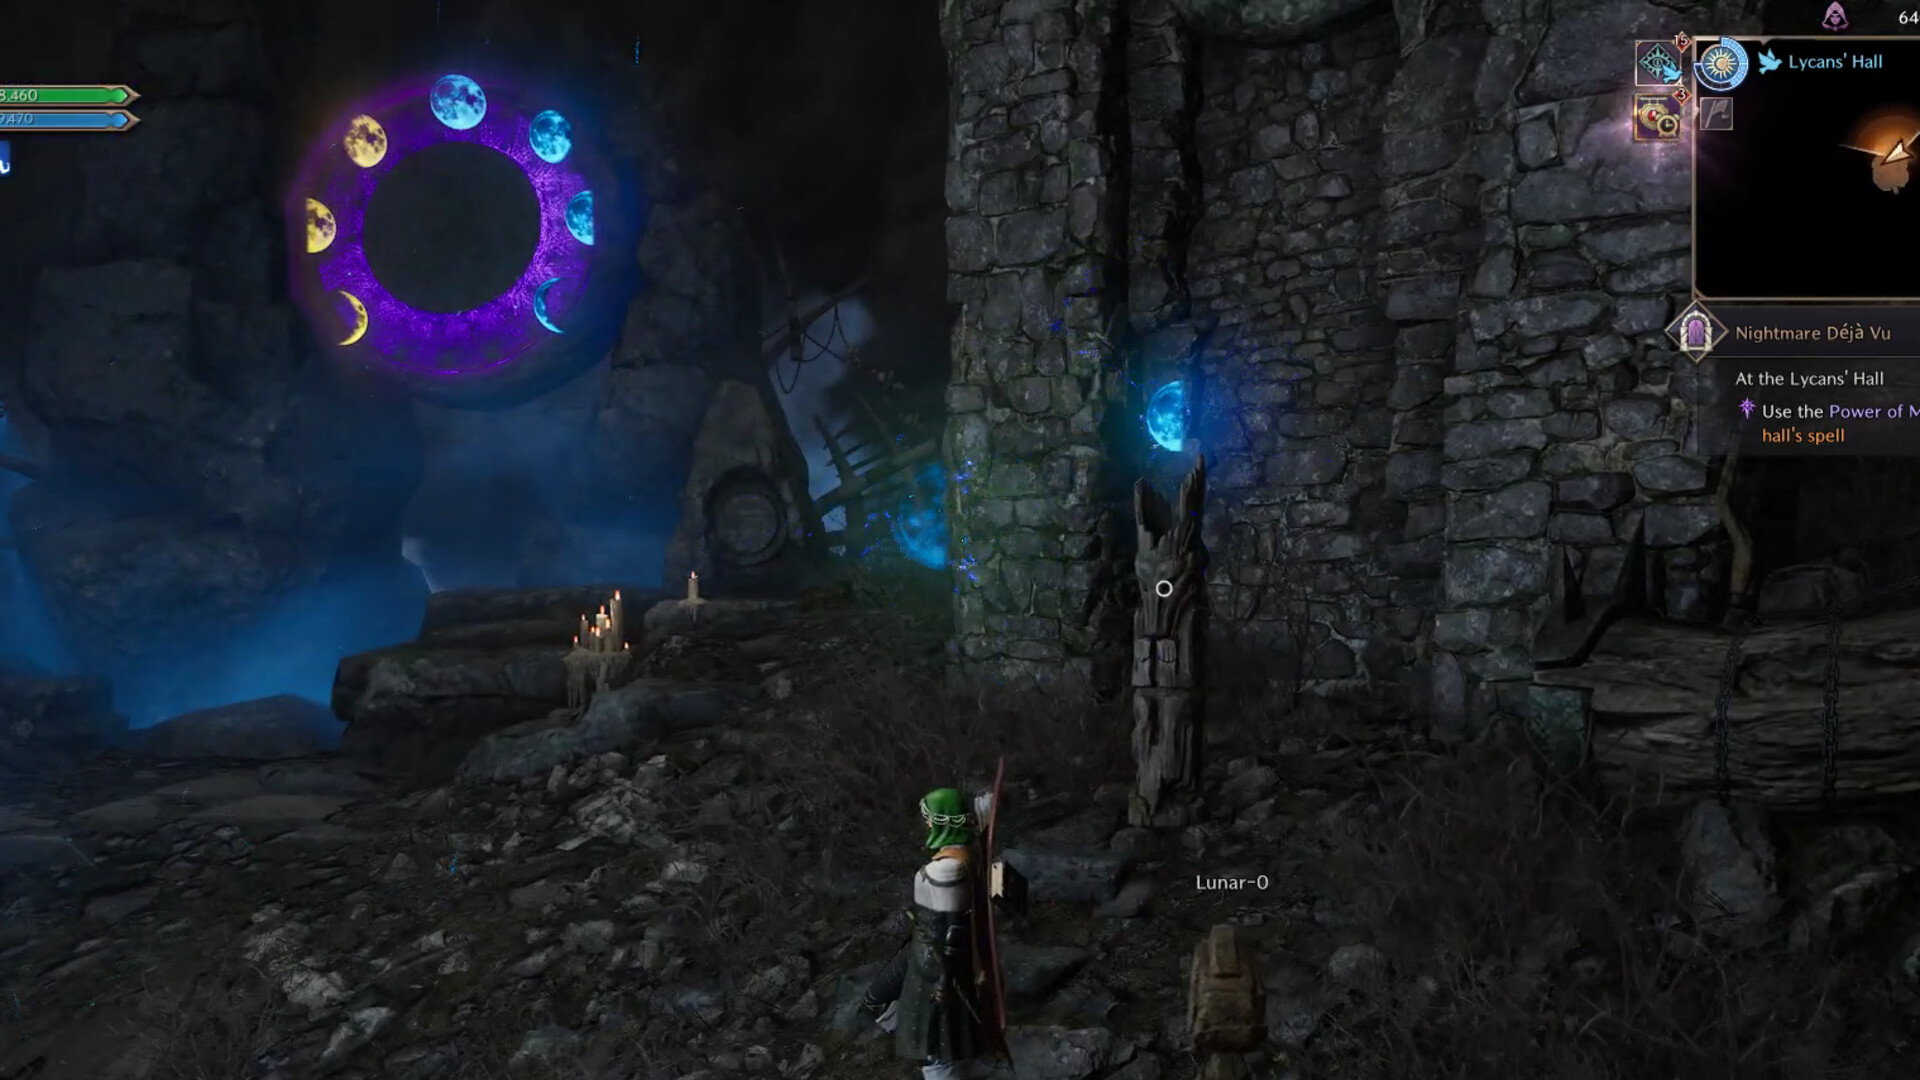
This is one of the most complicated sections of the Deja Vu Nightmare quest in Throne and Liberty. There are two moons here – blue and yellow. You can consider these to be two halves, and combining them is the correct solution. When you activate the center book, the pillars will briefly show you the individual moons. Then, you want to select the opposite. The room will rotate, and again try to select one yellow and one blue.
After this is complete, the same sort of puzzle will appear but the wall will have a hanging sign with the symbols. You activate the center book then sprint to activate the opposite color above your head.
Completing these puzzles will unlock the area behind the moon altar, and there will be an unconscious mysterious man laying down. This nam will also radiate a weird aura, and interacting with him will complete this part of the Nightmare Deja Vu quest in Throne and Liberty.
Step 3: Interact With Black Rift in Shadowed Crypt
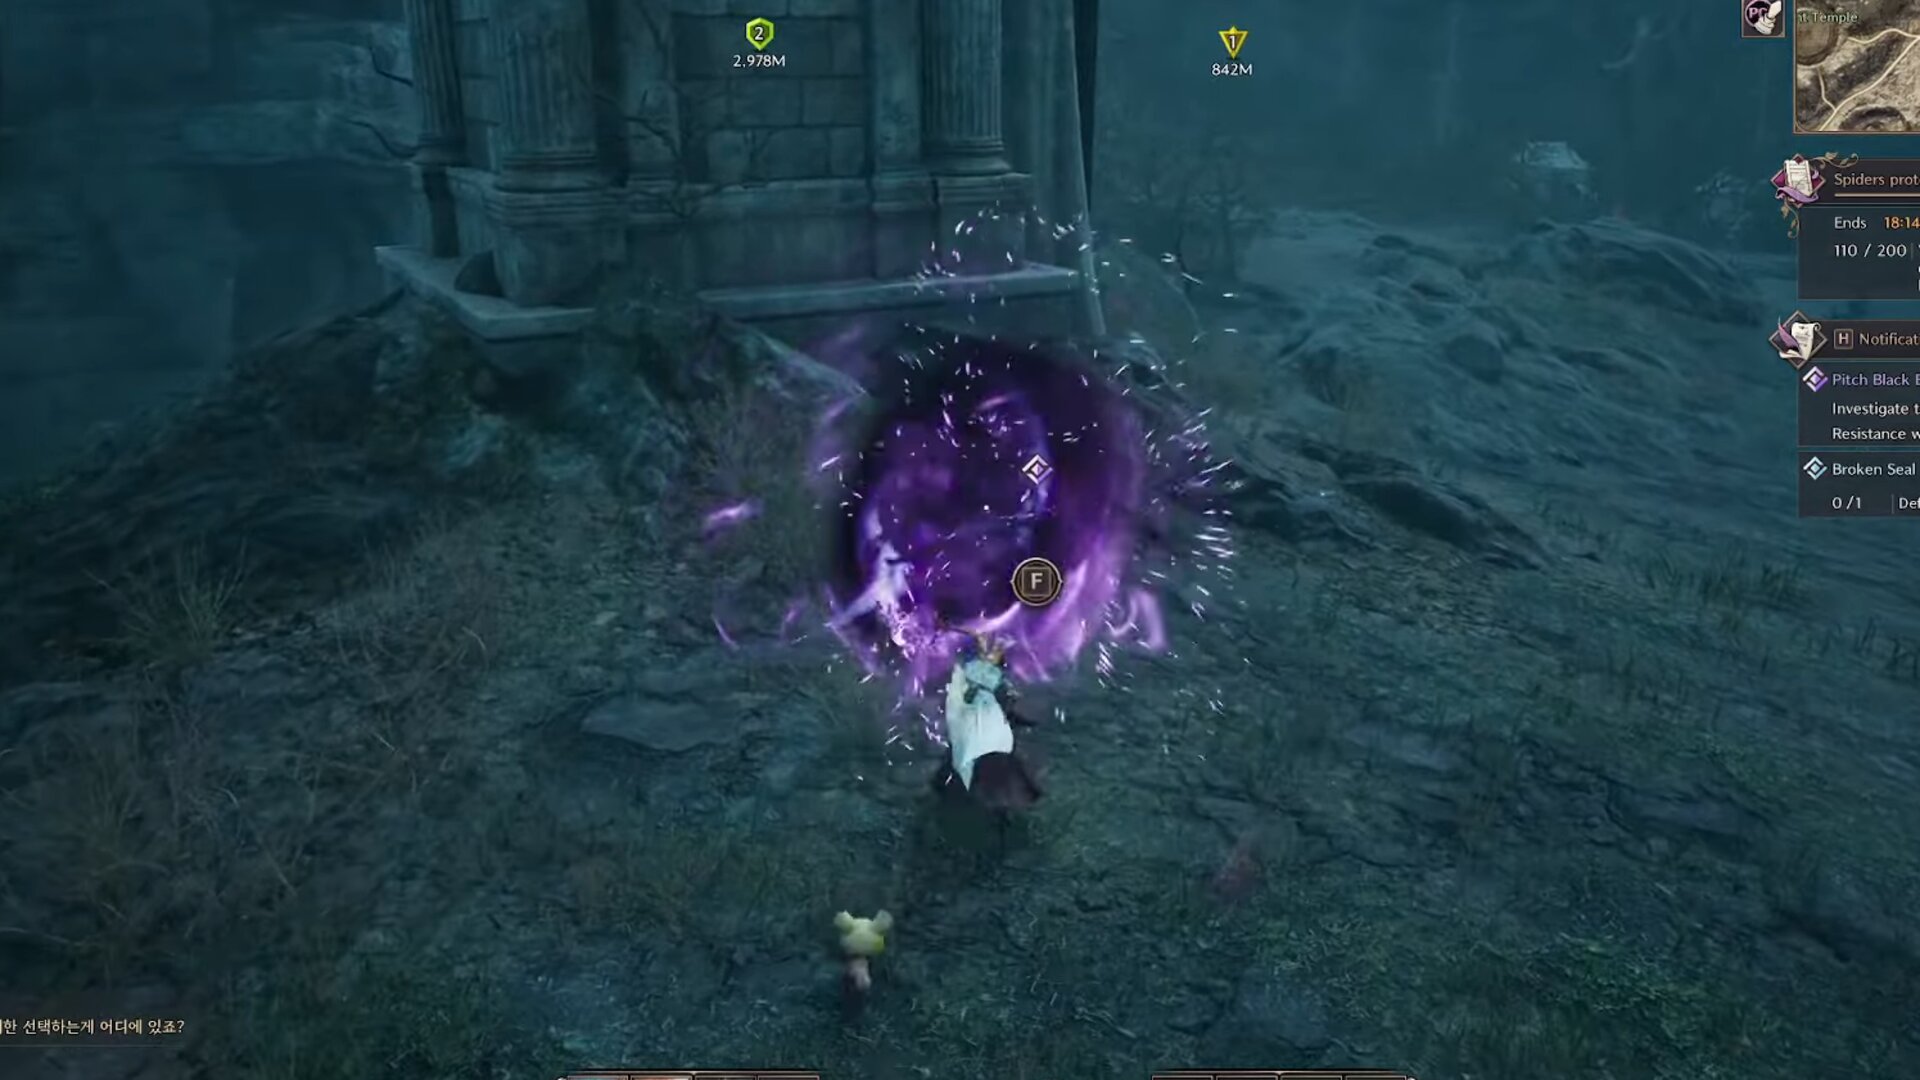
Look around the Shadowed Crypt area to find a purple-black rift. Interacting with this will automatically pull you to a dark dimension, and you will have to fight some mobs of monsters here. Following this, you will be brought out back to the real world, and Clay will be waiting for you. Interact with him and exhaust his dialogue sequence.
Step 4: Go to Purelight Tower and Talk to Clay again
Teleport to the Purelight Tower, and head to Clay’s study. Interact with him and complete all the actions here. You will once again have to fight some enemies before boarding the Gigantrite.
Step 5: Talk to One-Eyed Hawk Henson at the Besieged Shattered Temple
You will automatically find yourself at this location after the previous step. Head towards the resistance group and talk to One-Eyed Hawk Henson. There will be some mob fights before you can reach this NPC and his group, however. At the end of this sequence, Berge will appear himself, although you do not get to fight him just yet. You must now get to Temple 2 to proceed.
Step 6: Avoid Berge’s Gaze and head to Temple 1
Although your target is Temple 2, the path is blocked by Berge’s eye, which will turn you into stone if you are caught in its view. To disable this, you must move in the shadows and reach Temple 1, from which you can disable Berge’s Gaze.
You can understand when Berge’s Gaze is on you by a red eye-marker at the top-center of your screen. If the eye is closed, it means you are safe to cross. However, when the eye is open, you must be hidden by some pillar or structure, otherwise you will be turned into stone.
Here is the path that you should take to reach Temple 1 easily:

Morph into a wolf and follow the path behind the walls as shown in the image above. You may have to fight one or two enemies here, but make sure to not move out of shade.
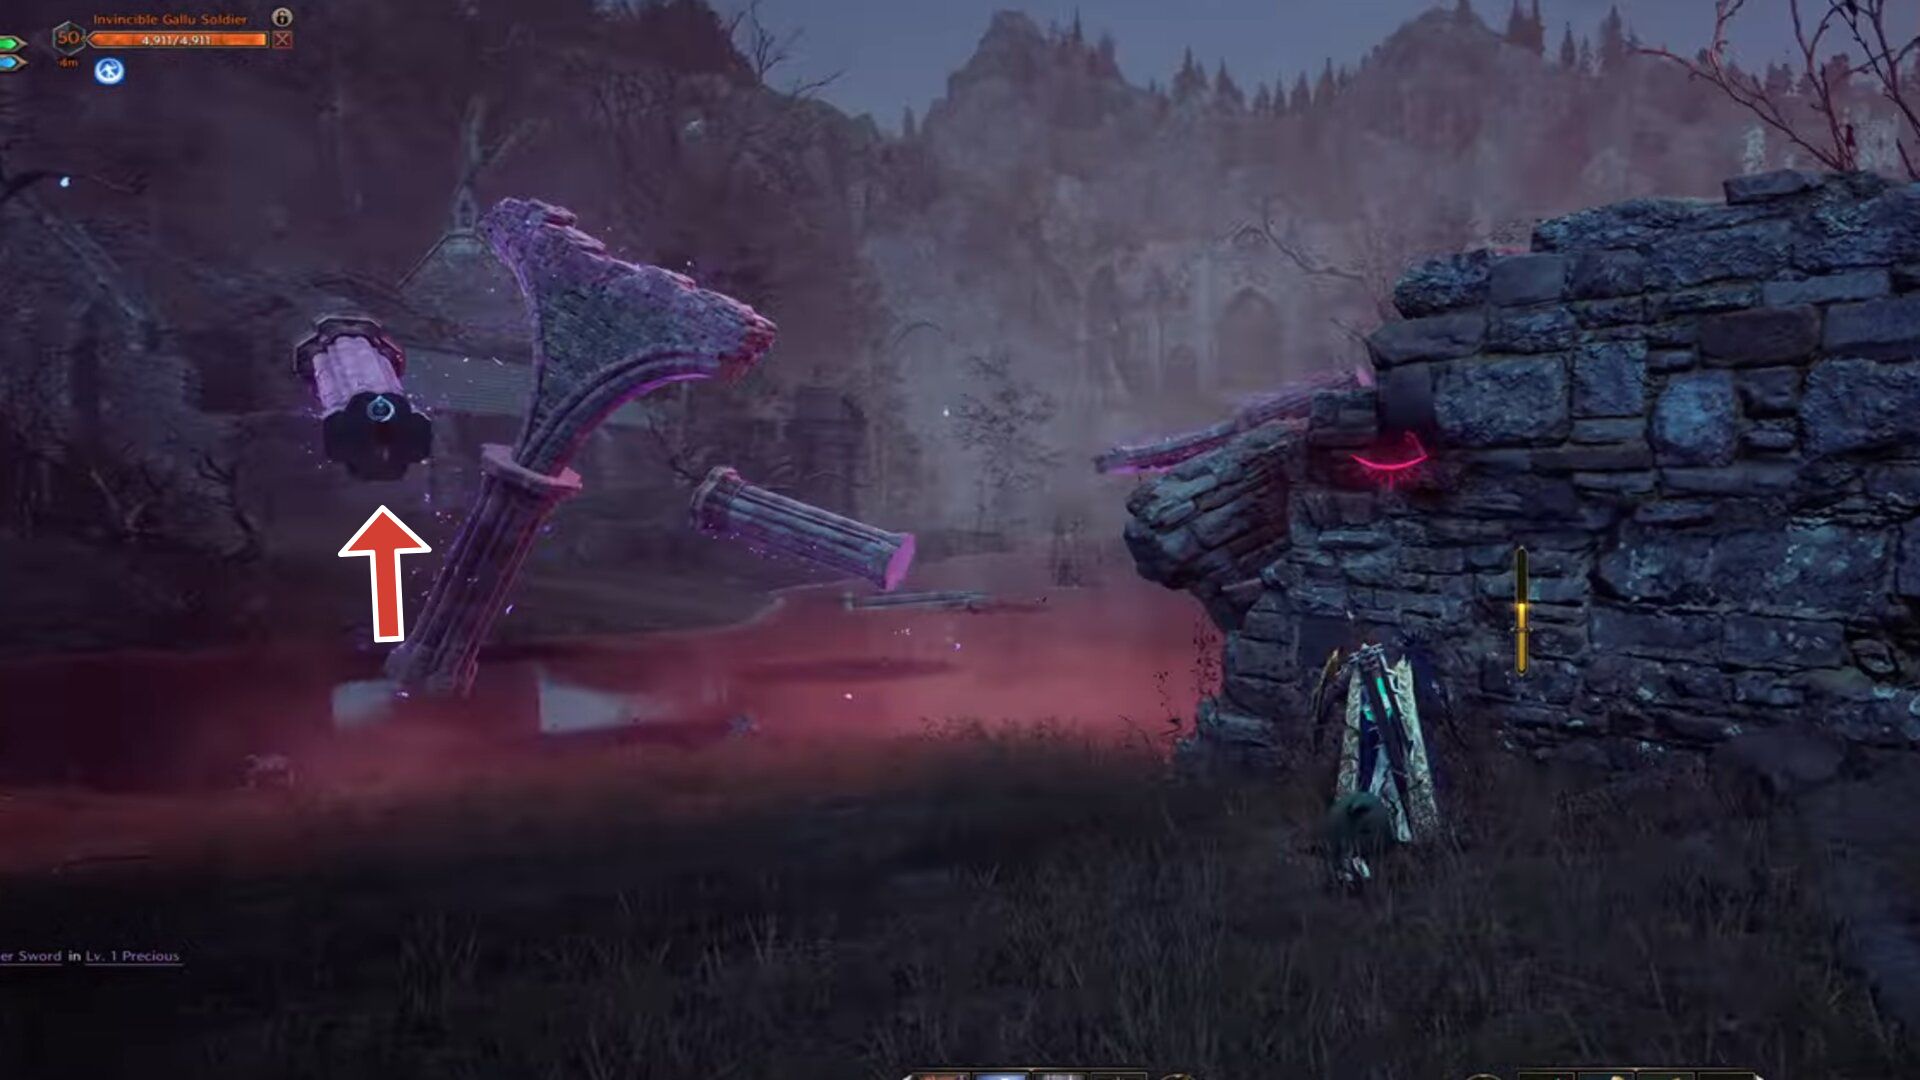
Next, latch on to this floating pillar as shown in the image above. Wait in the shade for the eye to be inactive, then jump from the edge and morph to any aerial unit. Reach the ground, and run to the temple in front of you. Interact with the NPCs here, and Berge’s Gaze will automatically disappear. Now, you can freely head to Temple 2.
Step 7: Head to Temple 2
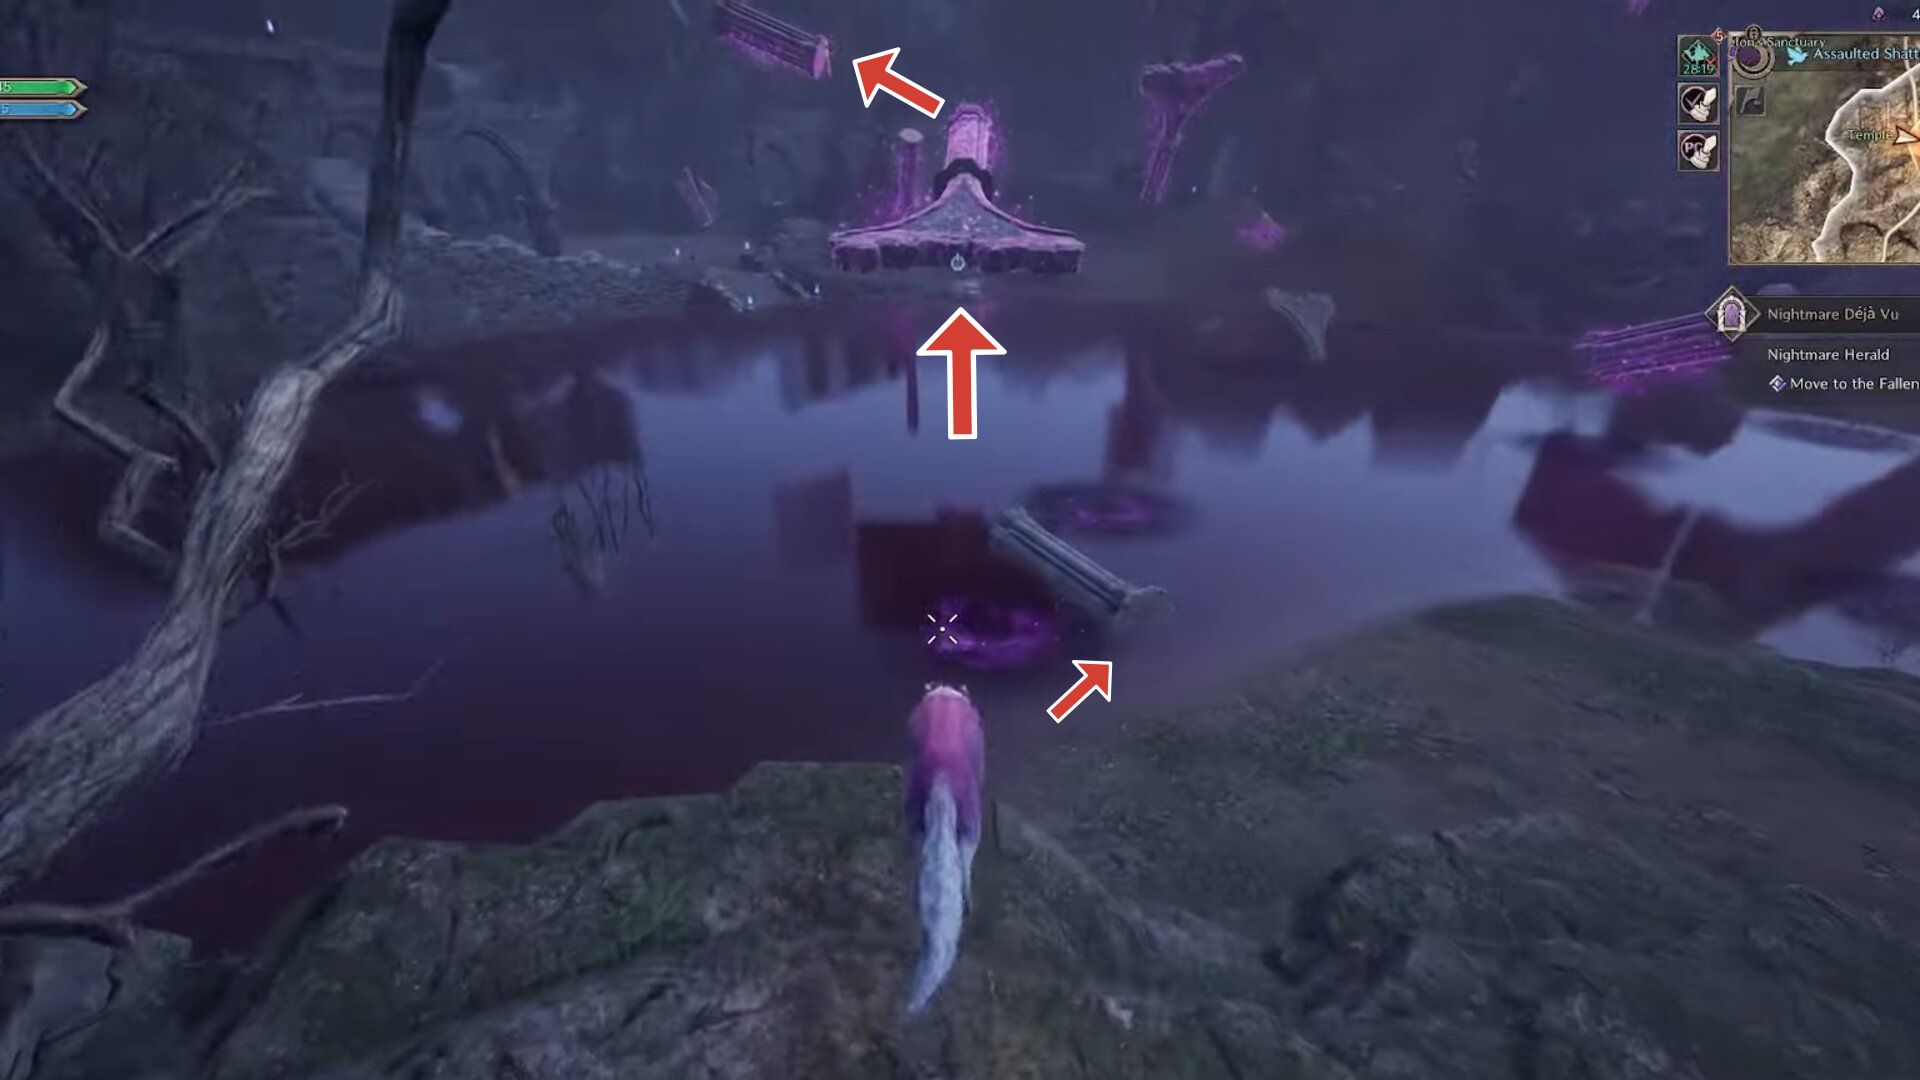
Jump to the first pillar on the water as shown in the image. Next, hook onto the ledge of the floating pillar, and get to its far edge. Jump and morph into a flying unit, and when the promp appears to hook onto the final pillar, use it to get a boosted super-jump. From here, use a flying morph again to safely reach the stairs of Temple 2. This is the maximum amount of parkour you have to do to complete Nightmare Deja Vu in Throne and Liberty.
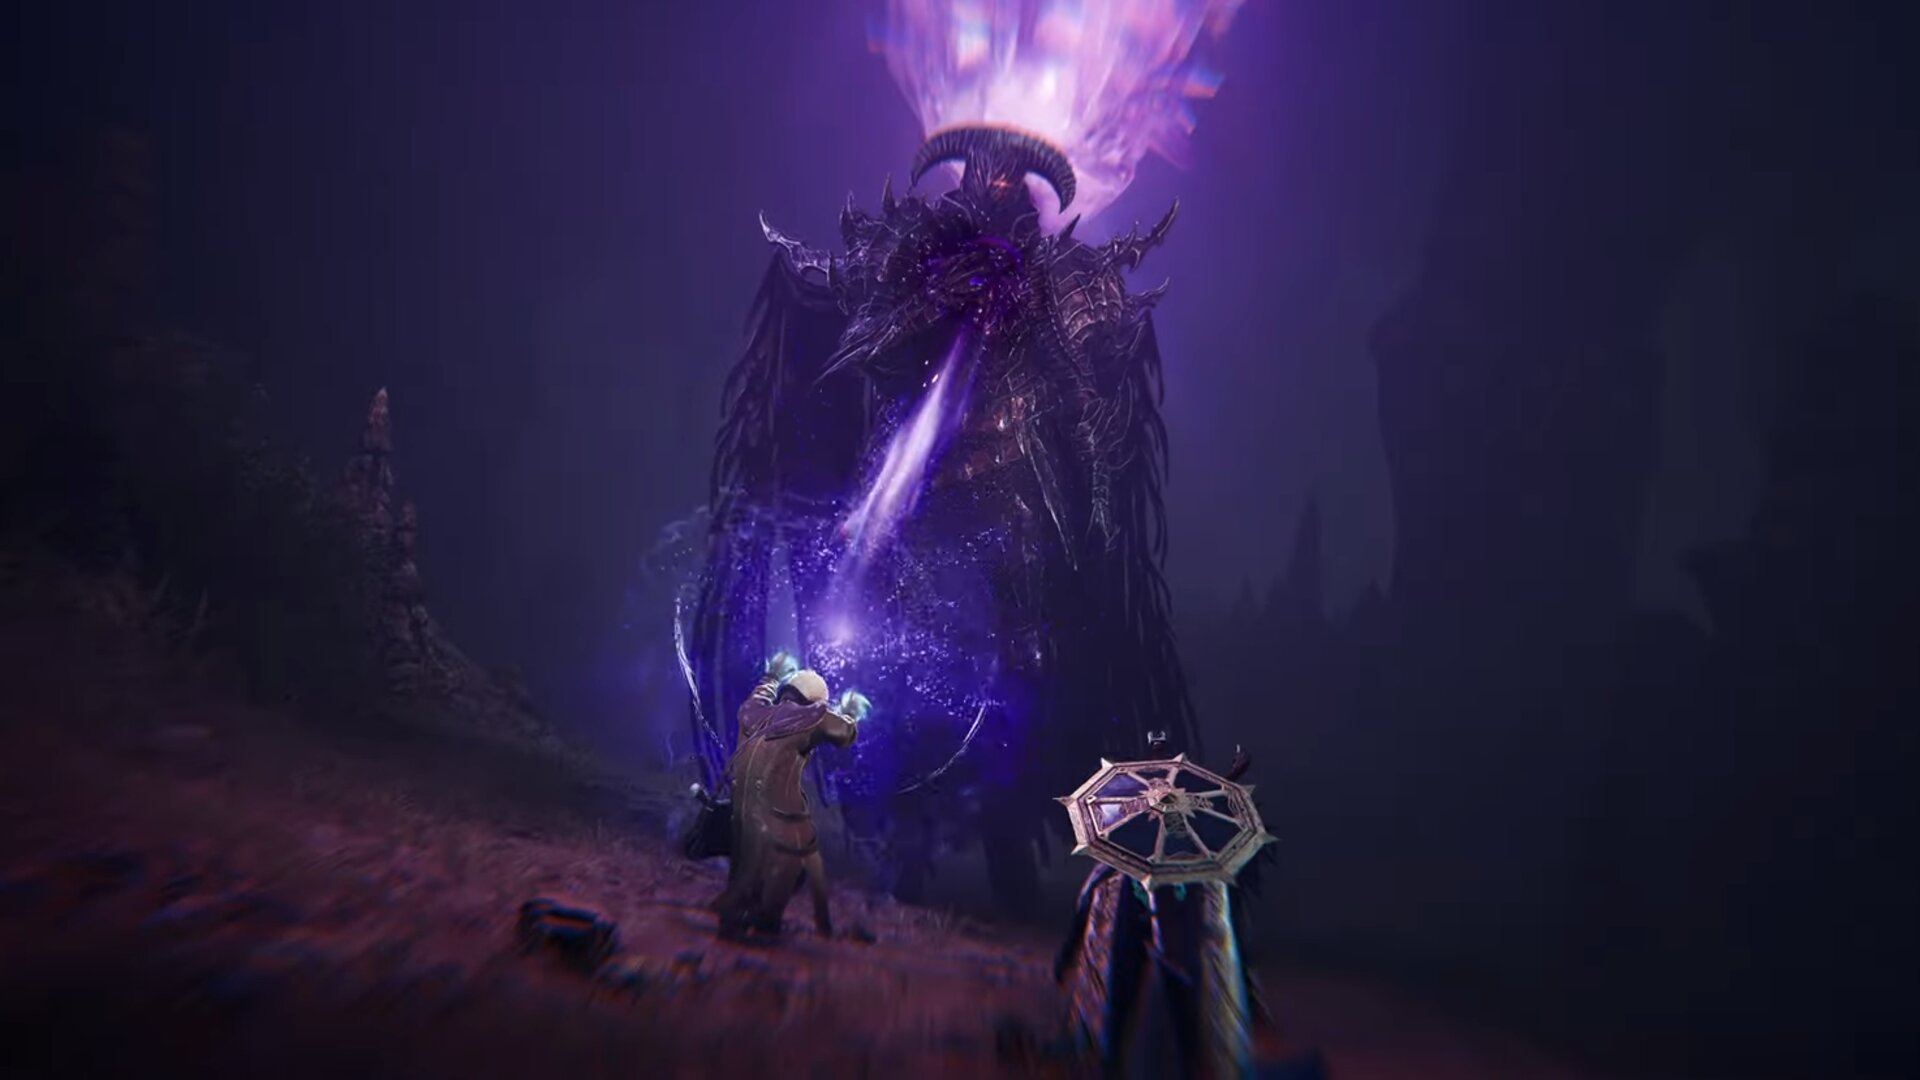
Step 8: Defeat Nightmare Herald Berge
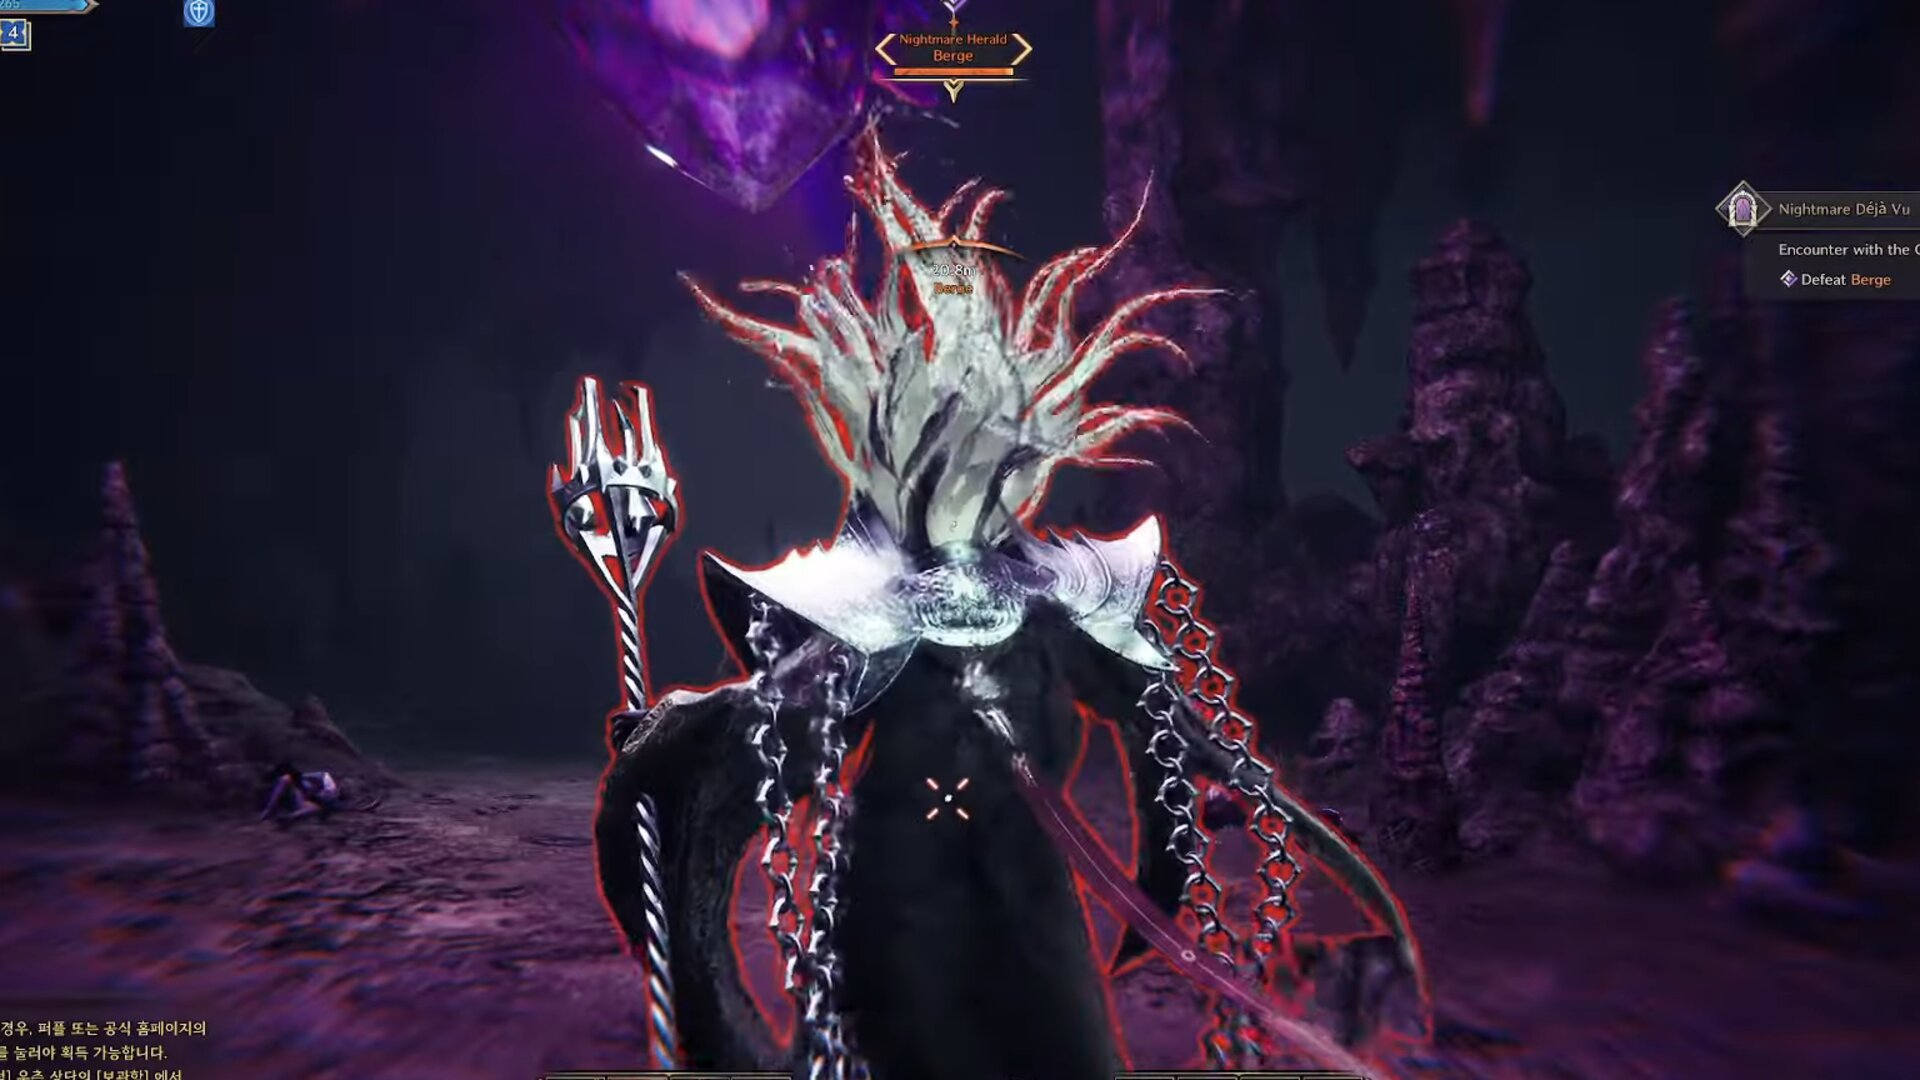
After you reach Temple 2, talk to Clay and fight the mobs in the area. Then, interact with the purple-black rift in front of the statue. This will take you to an arena where the boss fight awaits.
You will finally fight Berge in this part, and it will be a lengthy fight. WIth some tenacity, the right build, and the right mechanics, you will be able to overcome this adversary eventually. At the end of the fight, Clay will seemingly sacrifice himself to push you into the rift that takes you to safety.
Step 9: Head back to Clay’s Study
After coming out of the rift, you will find a lonely Lunar-0 and Clay’s bag lying on the ground. Pick up the bag and itneract with Lunar-0, and then further interact with One-Eyed Hawk Henson. Finally, teleport back to Purelight Tower into Clay’s Study. Here, place his bag at the location marked.
Step 10: Interact with Lunar-0
For the final step of Nightmare Deja Vu in Throne and Liberty, interact with Lunar-0 at the desk. This will start an epic cutscene which will further explain the lore of the land, and how the resistance came to be. Theorycrafters and lore-enthusiasts will love this bit of this quest.
Rewards For Completing Nightmare Deja Vu in Throne and Liberty
You will be able to choose one of four epic-tier armors as a reward after completing the Nightmare Deja Vu in Throne and Liberty. The choices that you will get are:
- Special Resistance Tactical Armor
- Special Resistance Hawk Armor
- Special Resistance Magic Garb
- Special Resistance Ancient Dragon Armor
All the armors have unique effects and stats, so take your time and choose your reward wisely.
With that, you have completed the Chapter 10 Nightmare Deja Vu quest in Throne and Liberty. This is a long quest, and you should be ready to spend a significant amount of time to complete it. Furthermore, having the right build to tackle the mobs and Berge is also recommended since they will make this much easier for you.
Looking For More About Throne and Liberty?
Thank you for reading the Throne and Liberty: Best Solo Sword and Shield build Guide. We provide the latest news and create guides for Throne and Liberty, Enshrouded, ESO, Baldur’s Gate 3, and More. Also, watch me play games on Twitch or visit my YouTube channel!