Facebook
 Reddit
 Email
Email
There are some BIOS settings you must change, or there could be a significant performance drop, especially if you own Intel Arc GPUs.
Most users forget to configure their PC’s BIOS settings after buying a new PC. It could lead to some issues or even a sizable performance loss, depending on the hardware components inside your PC. For example, Intel Arc GPUs require you to enable Resizable Bar and one other setting in the BIOS, without which you could leave some serious performance on the table.
That’s why we took the time to prepare a list of 10 BIOS settings you must change after buying or building a new PC, which are provided below. Read on to find out.
Note: Some aspects of this article are subjective and reflect the writer’s opinions.
What Are the 10 BIOS You Need To Change?
1) Resizable Bar Support
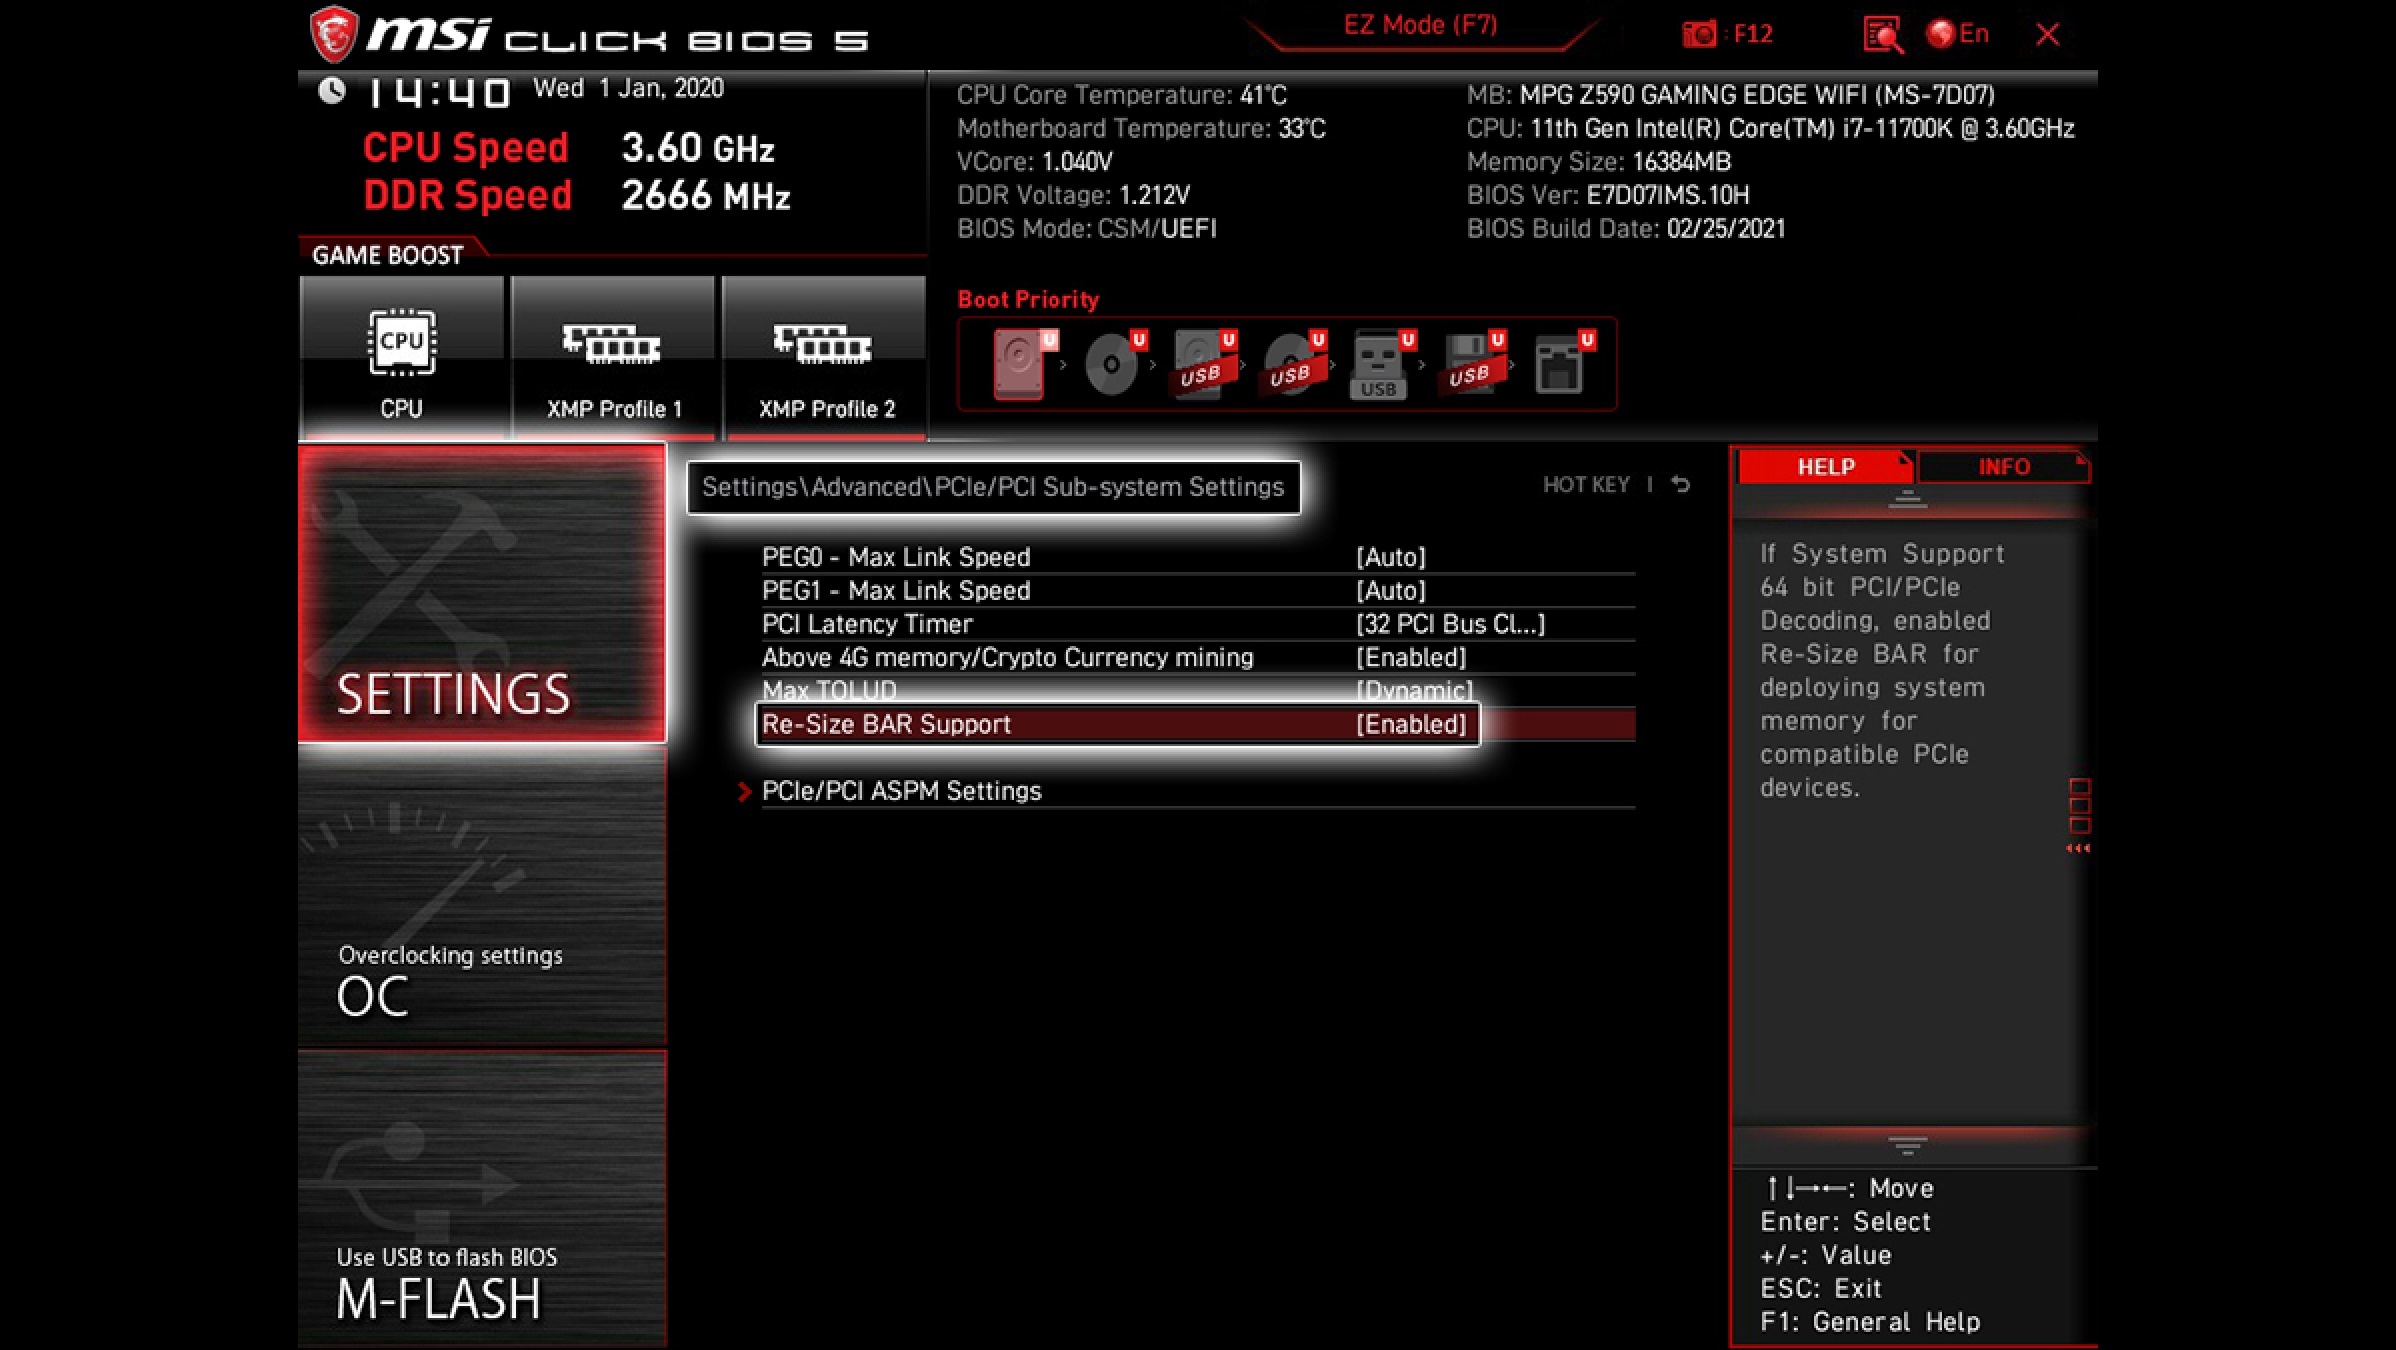
The Resizable Bar setting is one of the most critical settings in BIOS that every user must enable. It allows a graphics card to access the full VRAM in a single call. Resizable Bar is available for very modern GPUs and can deliver sizable performance improvements in some games. It is actually mandatory for Intel Arc GPUs.
If you forget to enable it, Intel graphics cards will only provide half the performance. Resizable Bar is also called Smart Access Memory on some AMD motherboards.
2) Above 4G Decoding Setting
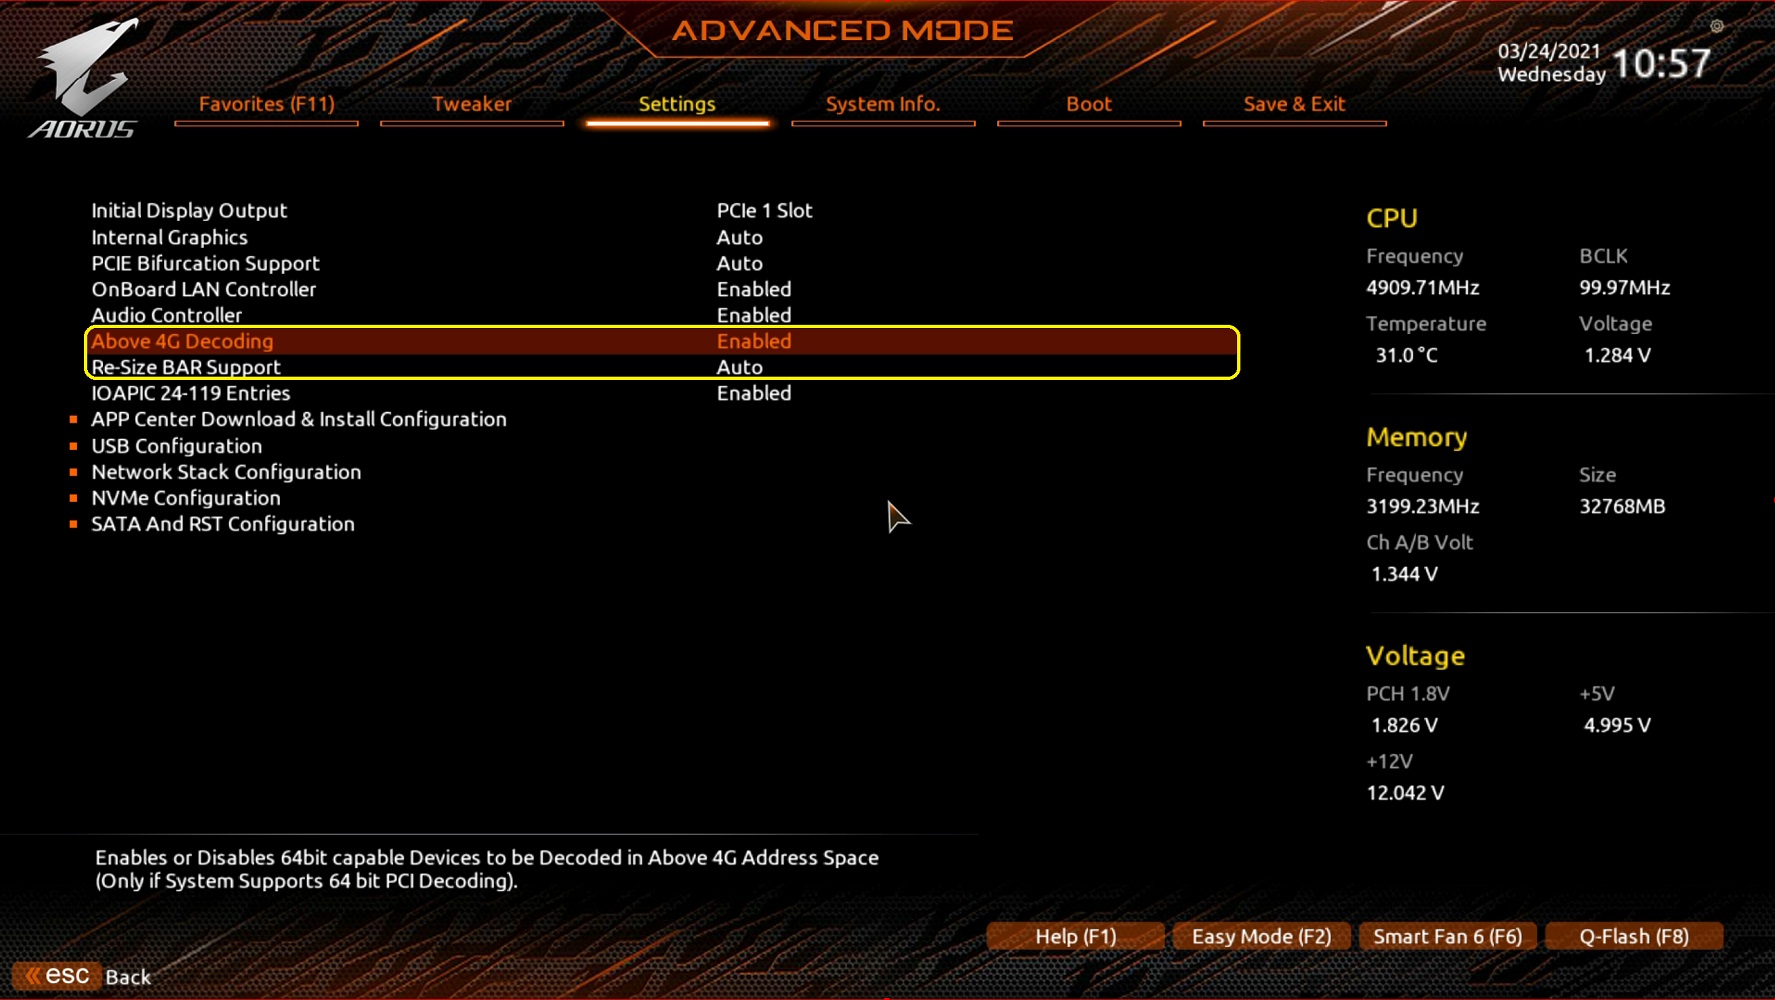
The Above 4G Decoding setting works with the Resizable Bar setting to provide GPUs access to the full memory capacity in one call. If this is not enabled, your graphics card will have access to only 4GB in a single call. Enabling this setting will provide full access. It can improve the 1% and 0.1% Lows in your games.
3) Configure Precision Boost Overdrive on AMD Motherboards
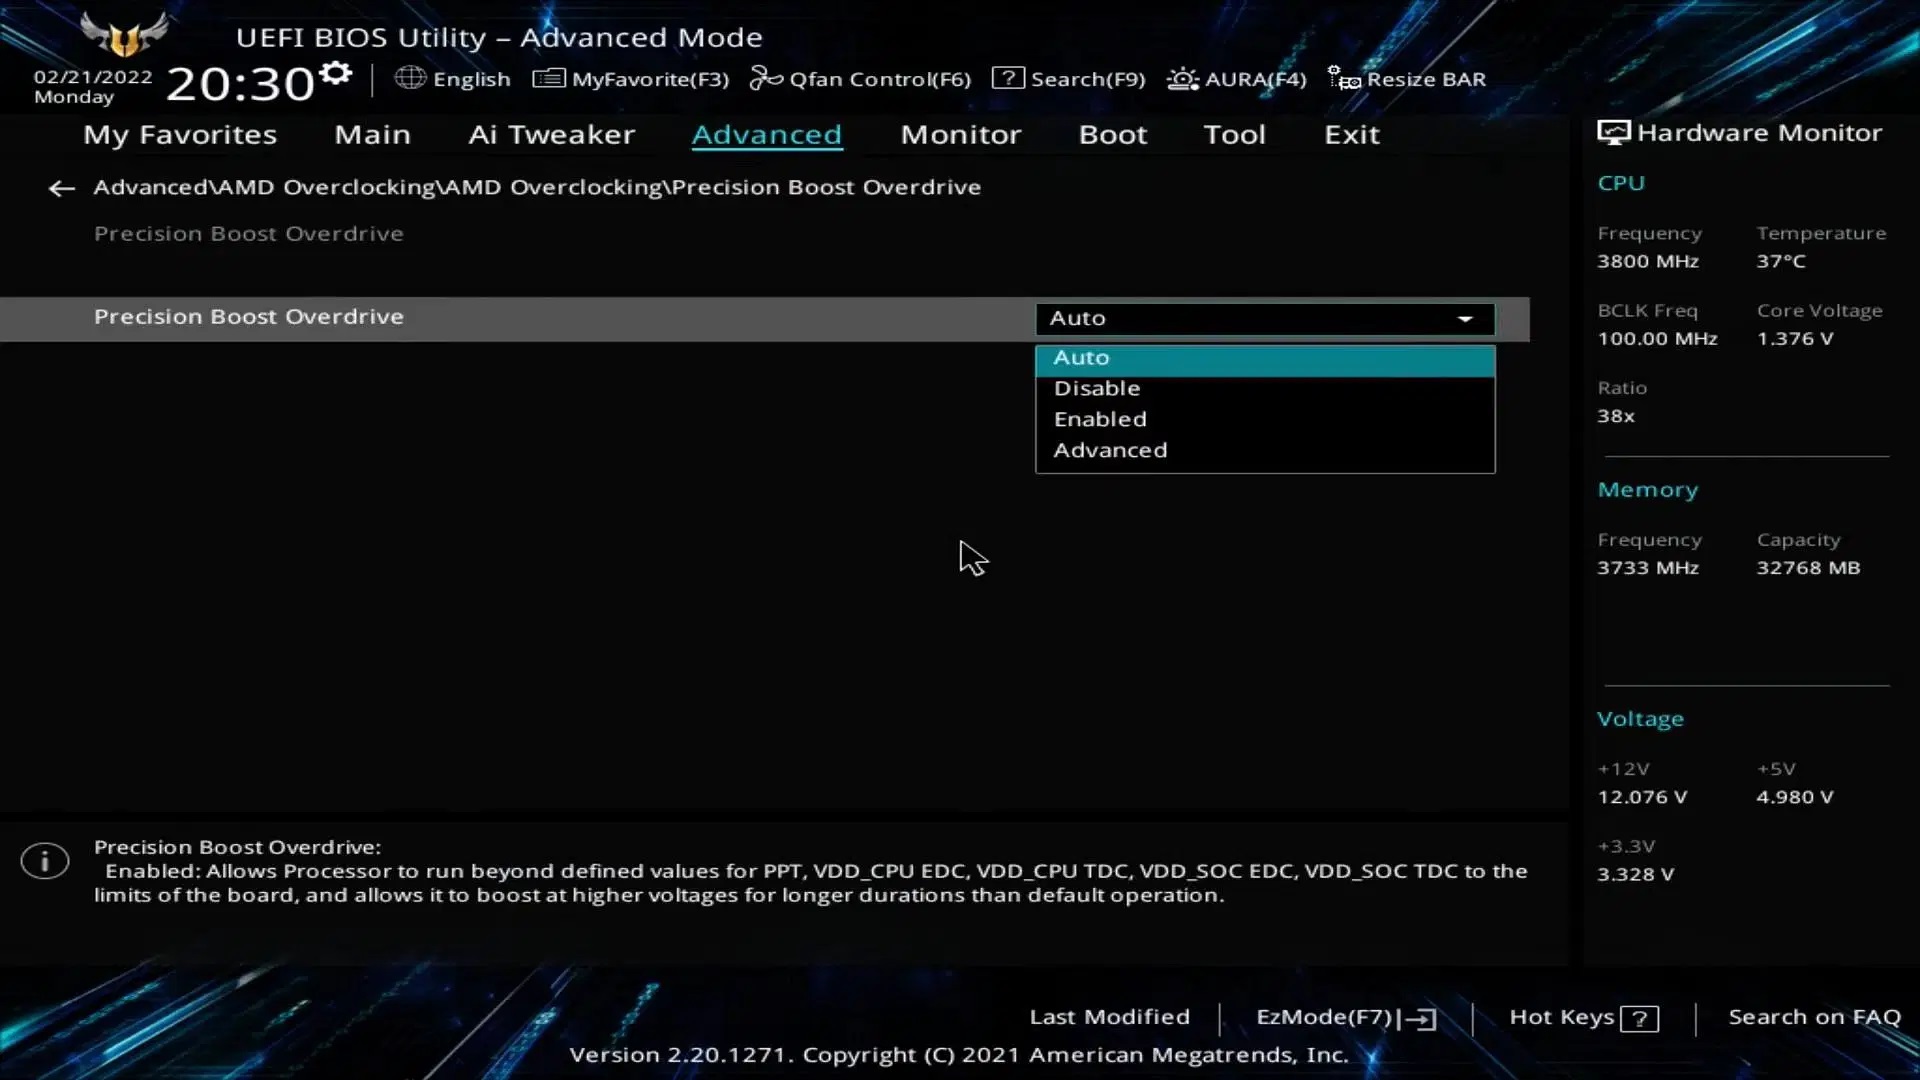
Precision Boost Overdrive is an exclusive feature for AMD Ryzen CPUs. It allows the processor’s maximum clock speed to go past its rated specs, which could lead to higher performance in both productivity applications and games. Enable this feature for better performance.
4) Remove Power Limits on Intel Motherboards
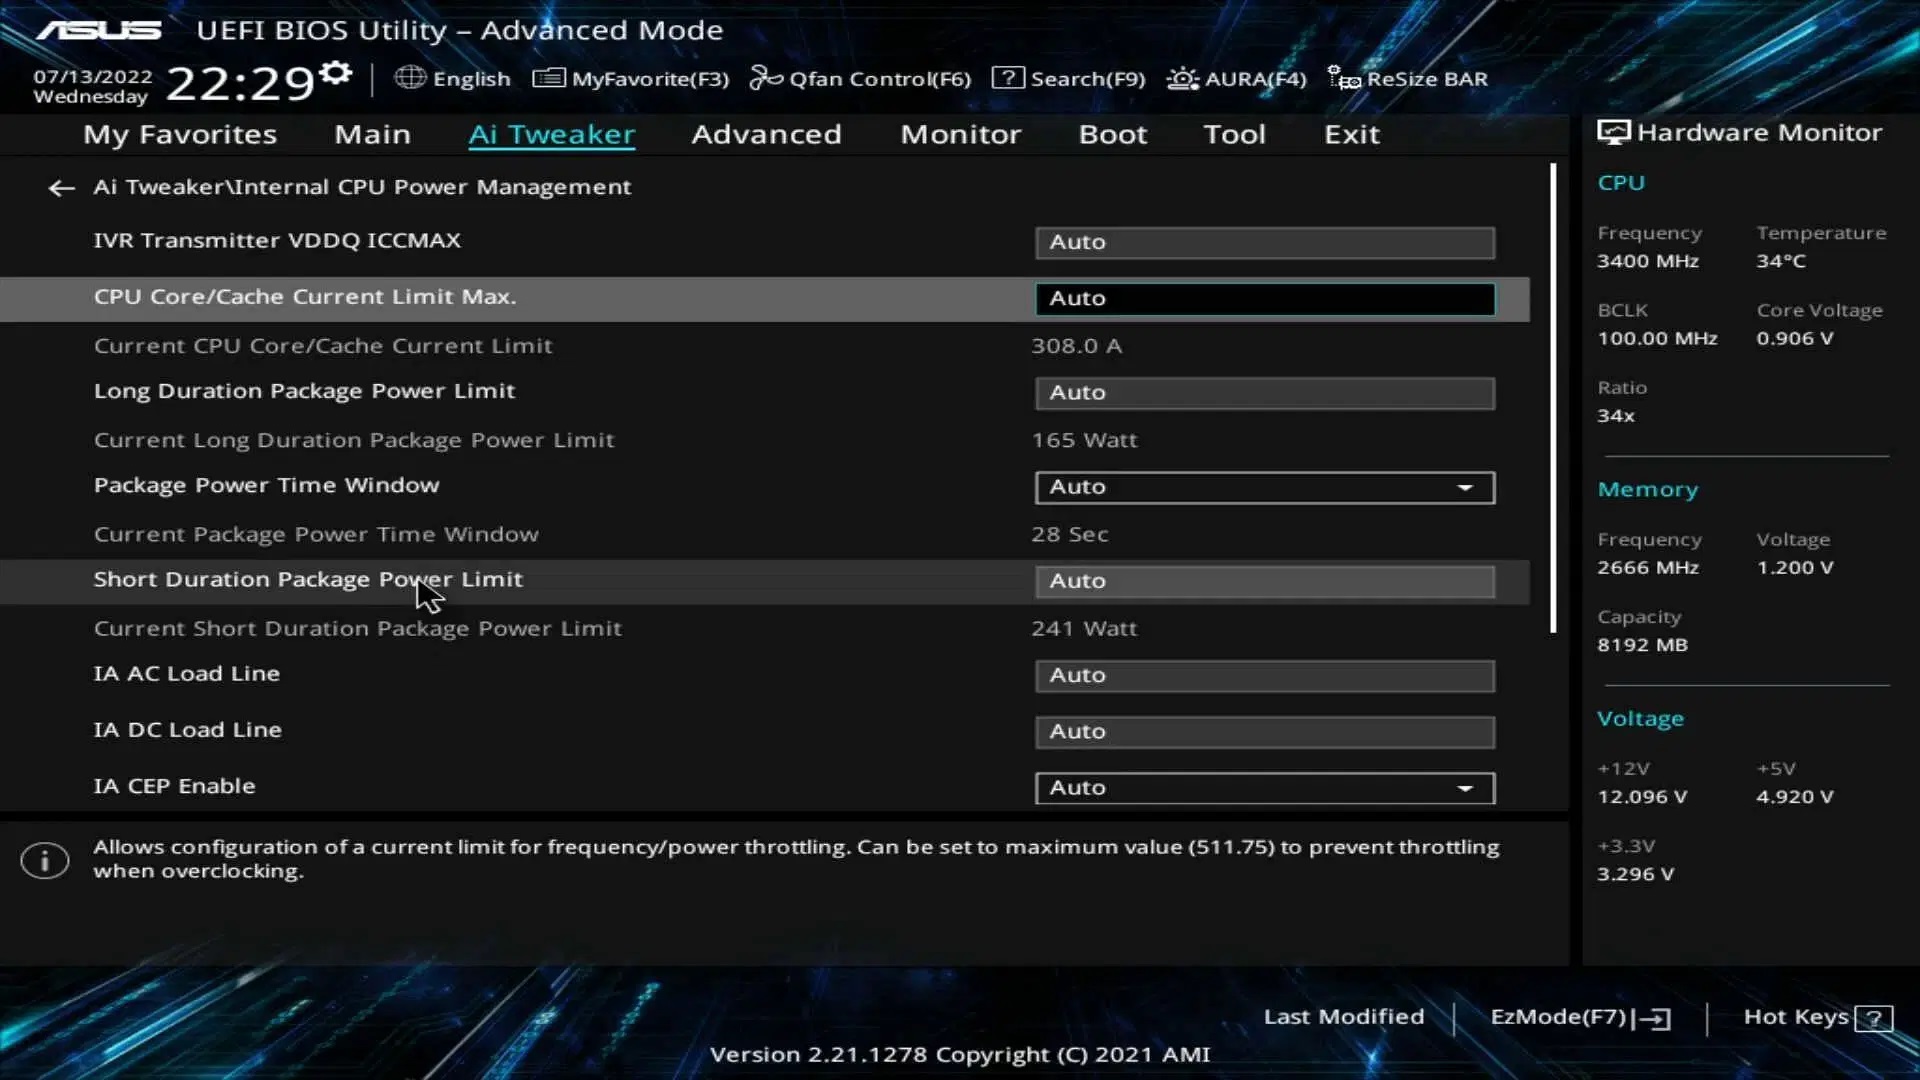
All Intel motherboards have different power limits set according to the specific processor installed. Some of Intel’s Z and B-series boards can boost the CPU’s base frequency if you disable the power limits, which can lead to better performance in both productivity and gaming. However, make sure you update your BIOS to the latest version before changing the power limits.
5) Custom Fan Curve
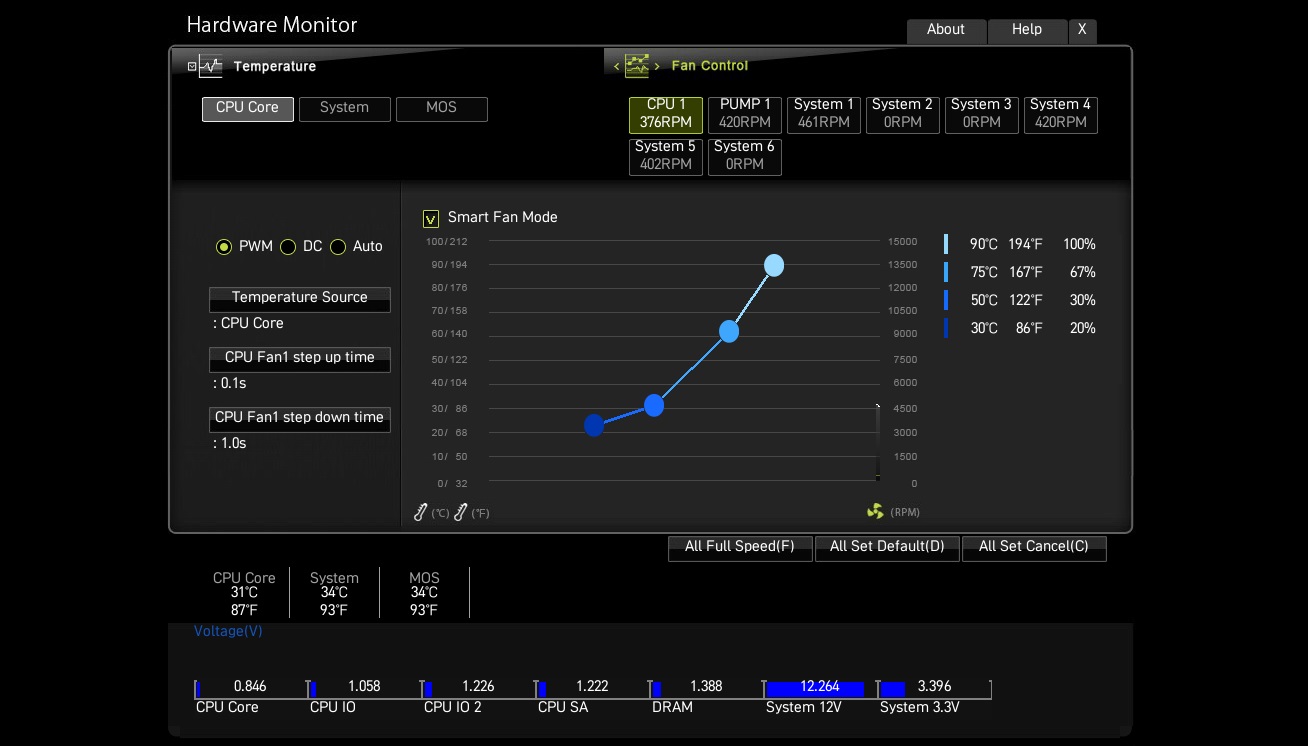
When there’s a heavy load on your PC, your CPU will start to heat up, which will increase the fan speed dramatically to lower the temperature. This can lead to a noticeable increase in noise, which is not ideal during gaming. Besides, if the fan runs at a high speed continuously, it will wear out the fan bearings quickly and reduce its lifespan. Setting a custom fan curve will lower fan speeds can remedy these issues, but make sure to buy a good fan heatsink first.
6) TPM Setting for Windows 11
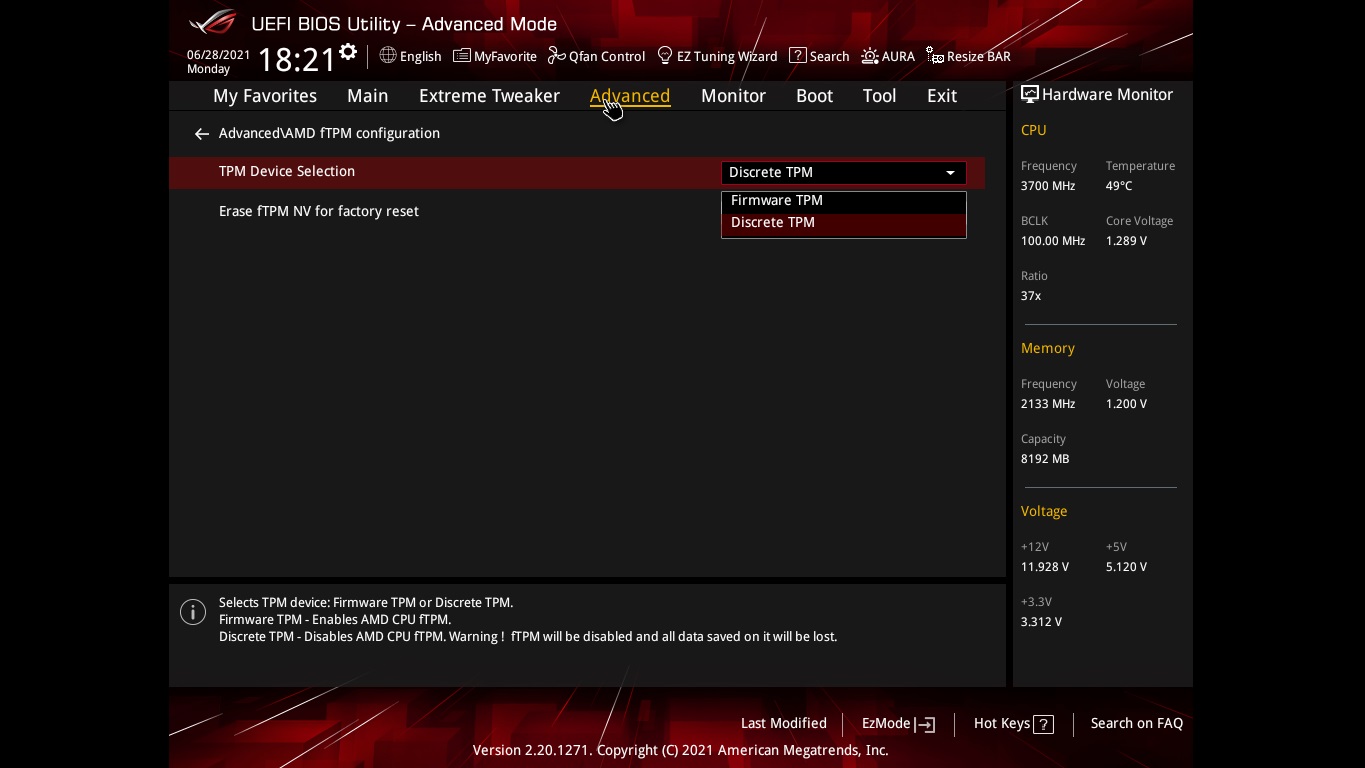
If you want to install Windows 11 on your PC, you must enable TPM in your BIOS. TPM stands for Trusted Platform Module, which is a mandatory requirement when installing Windows 11. Most modern AMD and Intel CPUs have TPM built into them, so you only need to go to your BIOS and enable it. Once enabled, you can proceed through the Windows 11 setup normally.
7) Secure Boot Settings
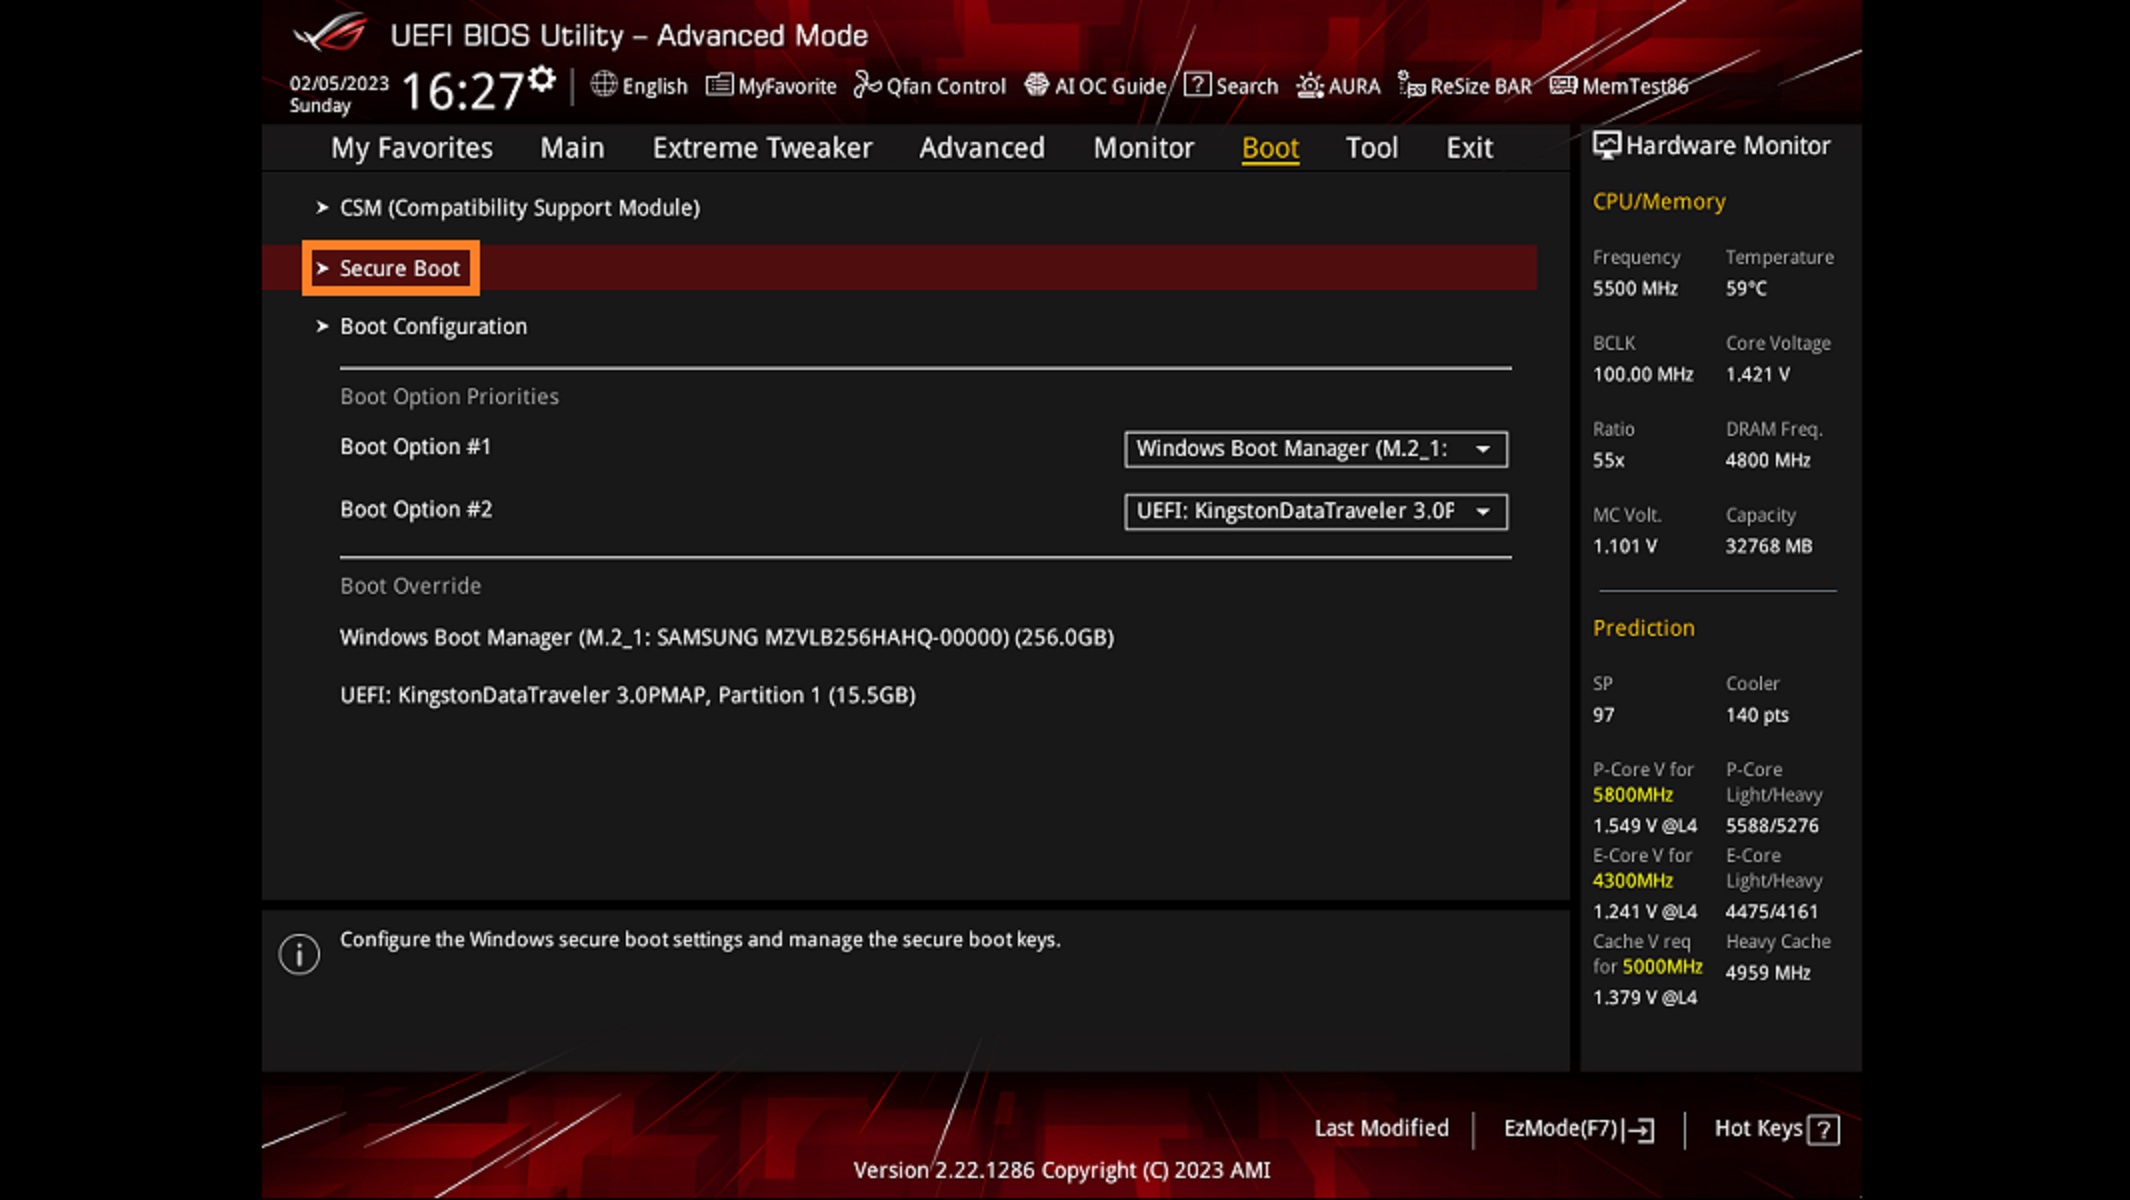
Secure Boot is a security feature that allows the system to verify the boot process and the integrity of the OS to ensure there is no malicious code or exploit running before the Windows OS boots. It is also another requirement for installing Windows 11, so go to your BIOS and enable it.
8) M.2 PCIe Lane Setting on Your NVMe SSD
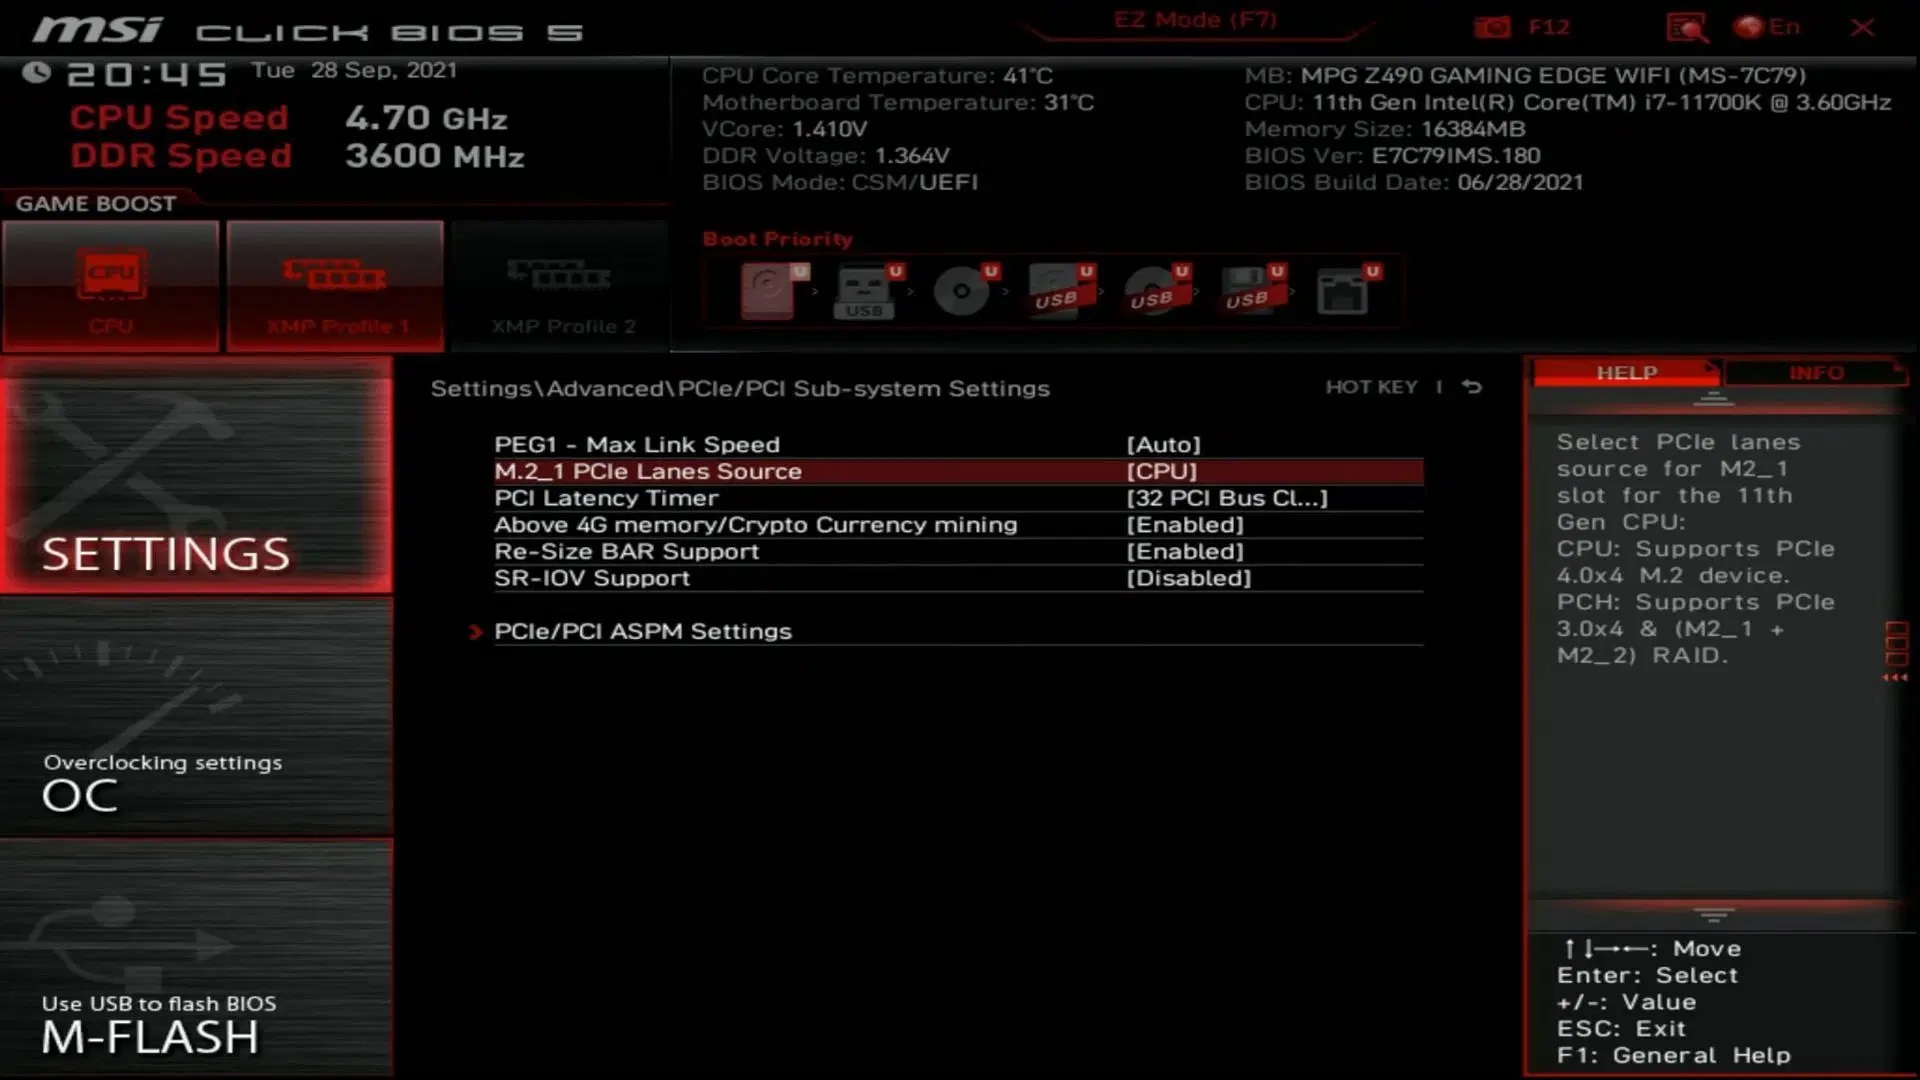
If you have a high-speed NVMe PCIe Gen 4 SSD, you must connect it directly to the CPU for the best performance. By default, the SSD may be set to the chipset, which could hamper the performance and increase latency. Set the M.2 PCIe Lane setting to CPU for the best result.
9) RAM XMP/EXPO Configs
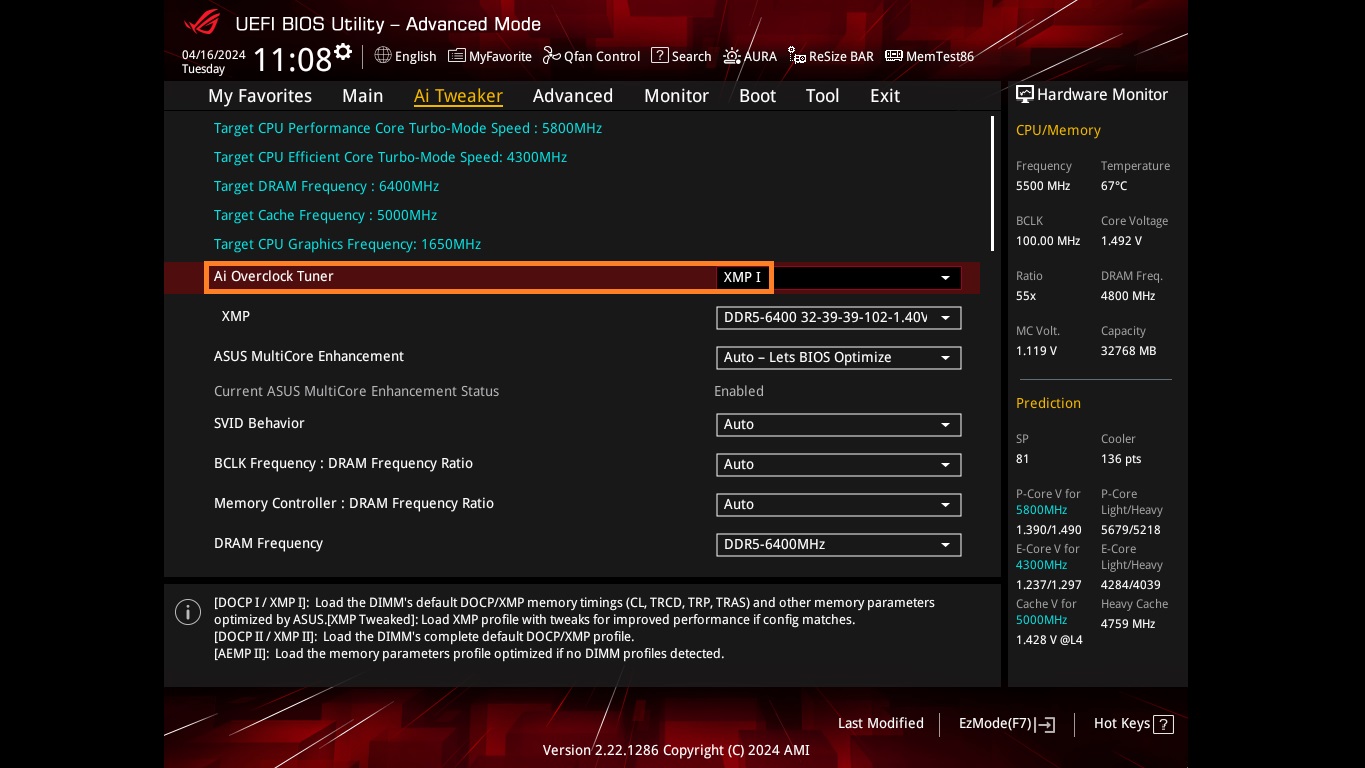
When you first configure your PC, your motherboard will be set to the default RAM speeds, which should be 2133 MT/s for DDR4 or 4800 MT/s for DDR5. These speeds are too low and could significantly hurt your PC’s gaming performance. You need to enable XMP or EXPO configs to reach 3200 MT/s for DDR4 or 6000 MT/s for DDR5. You might be able to reach even higher speeds, depending on your motherboard and the RAM kit you bought.
10) USB Power on Standby
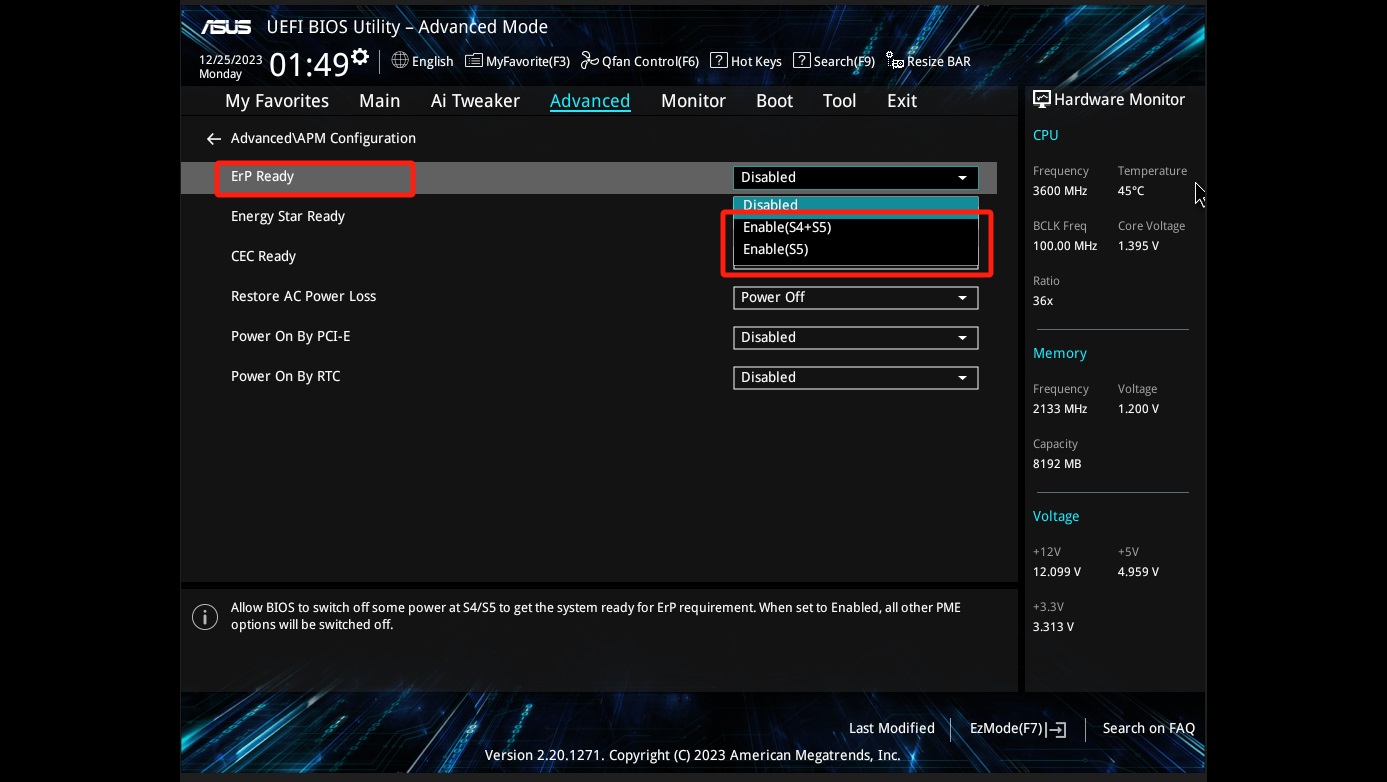
Do you want to charge your phone, gamepad, or wireless earbuds through your PC, even when it’s turned off or in sleep mode? Then you must enable USB Power on Standby in the BIOS. This allows the motherboard to send power via the USB to charge any device, including your smartphone.
This concludes the list of the 10 BIOS settings you must change after buying or building a new PC. The exact location of each of these settings in the BIOS will depend on the motherboard you bought. Try using the search functionality to find these settings easily. Also, make sure to take a picture with your phone before you change any settings. Therefore, you can change the settings back to their original values if you mess anything up.
We provide the latest news and “How To’s” for Tech content. Meanwhile, you can check out the following articles related to PC GPUs, CPU and GPU comparisons, mobile phones, and more:
- 5 Best Air Coolers for CPUs in 2025
- ASUS TUF Gaming F16 Release Date, Specifications, Price, and More
- iPhone 16e vs iPhone SE (3rd Gen): Which One To Buy in 2025?
- Powerbeats Pro 2 vs AirPods Pro 2: Which One To Get in 2025
- RTX 5070 Ti vs. RTX 4070 Super: Specs, Price and More Compared
- Windows 11: How To Disable Lock Screen Widgets