Facebook
 Reddit
 Email
Email
Learn in quick and easy steps how to format and set up your SSD for gaming on Windows, Mac OS, or Consoles.

Storage can be a significant issue in 2025. Consider game sizes now reaching over 100 Gigabytes. It’s easy to run out. But buying one for expansion is always an option. Out of the box, just plugging and playing won’t work if your storage drive is internal.
If it’s an external drive, still formatting is necessary, but it will work out of the box. According to your budget, if you have purchased an SSD, internal or external, you can follow this guide to get it up and running on your Windows or Mac-powered device, or any console.
1. Format SSDs for Windows and Mac OS
On Windows and macOS, some external drives can be used from scratch. But internal drives don’t share the same. For both, the formatting procedure is the same.
On Windows:
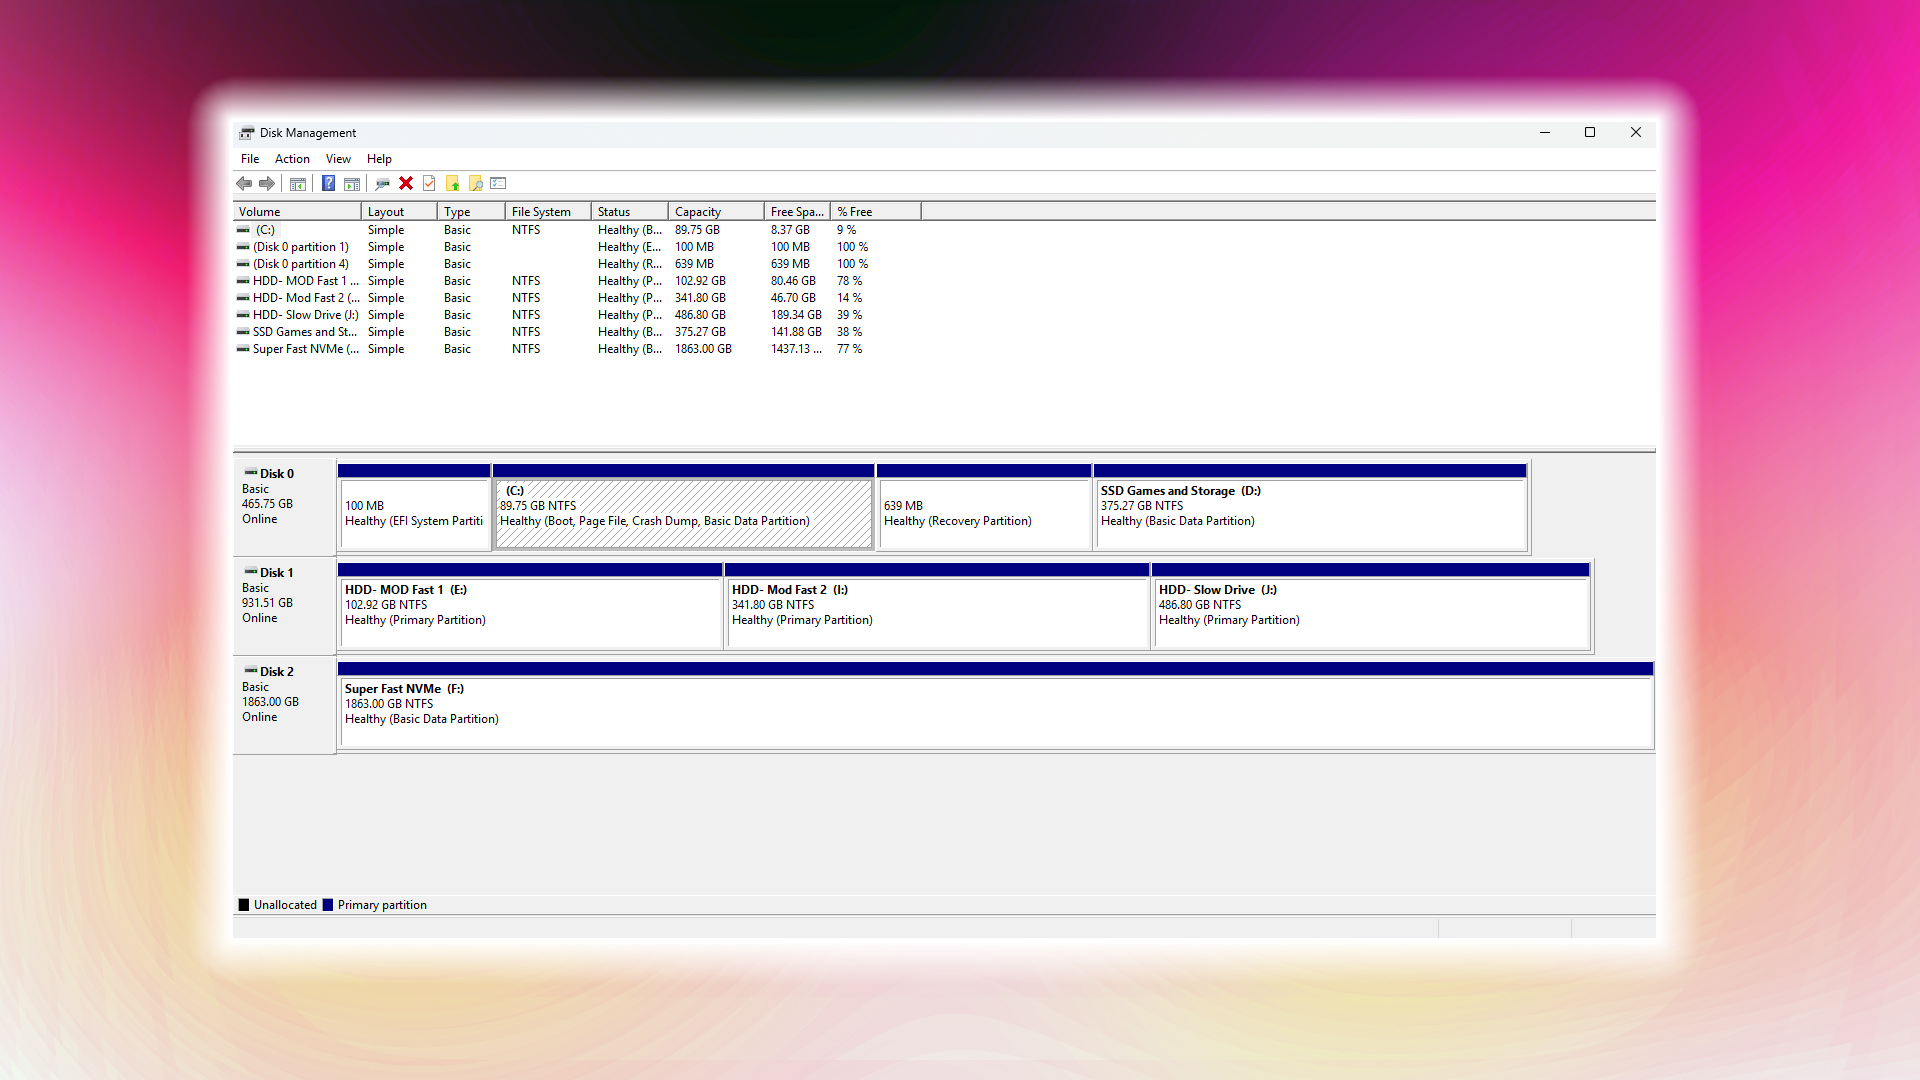
- Press the Windows key + X and select Disk Management to open it.
- Right-click the SSD volume (which will appear as an unallocated volume) and select ‘Format.’
- Select NTFS, set the allocation unit size to 4096 bytes, enable Quick Format, and click OK. You can also uncheck Quick Format, then the process becomes very lengthy.
- In the case of an external drive, you can right-click on it directly from File Explorer and follow the same formatting process.
On macOS:
- Launch Disk Utility (Finder > Applications > Utilities).
- From View, select Show All Devices.
- Select the SSD device and click ‘Erase.’
- Set Scheme to GUID Partition Map and Format to APFS (or APFS (Encrypted) for security).
- Name the drive and click Erase.
2. Formatting SSDs for Gaming Consoles
If your newly plugged-in storage drive isn’t working out of the box, here’s what you can do.
For the PS5:
- Connect the SSD to a rear USB port.
- Go to Settings, then Storage, and finally, select USB Extended Storage.
- Select “Format as USB Extended Storage” and confirm. The formatted drive will be repartitioned to use the exFAT filesystem.
Xbox Series X/S
- Plug the SSD into a USB 3.0 port.
- When prompted, choose “Format storage device” on-screen.
- Go ahead and name the drive. After that, pick NTFS and confirm. Your drive should now be formatted and repartitioned to use the NTFS file system.
Verdict
Remember, formatting wipes all data. If needed, perform a backup before formatting. In the case of new internal drives, formatting is the only option to let Windows, Mac, or any other operating system mount and utilize the drive.
We provide the latest news and “How To’s” for Tech content. Meanwhile, you can check out the following articles related to PC GPUs, CPU and GPU comparisons, mobile phones, and more:
- 5 Best Air Coolers for CPUs in 2025
- ASUS TUF Gaming F16 Release Date, Specifications, Price, and More
- iPhone 16e vs iPhone SE (3rd Gen): Which One To Buy in 2025?
- Powerbeats Pro 2 vs AirPods Pro 2: Which One To Get in 2025
- RTX 5070 Ti vs. RTX 4070 Super: Specs, Price and More Compared
- Windows 11: How To Disable Lock Screen Widgets