Facebook
 Reddit
 Email
Email
Here is the complete walkthrough of DOOM The Dark Ages Chapter 12 Sentinel Command Station, explaining the events at the Command Station.

While the DOOM Slayer locates Ahzrak’s castle and fights the demons inside the Fortress of Hell, Thira opens a portal for him. She also instructs him to head to the Command Station, as Kreed arrives at the location for a meeting with the Sentinels. Chapter 12 focuses on Sentinels preparing for Kreed’s arrival and the events that happened at Thira’s Command Station.
Follow along this DOOM The Dark Ages walkthrough to learn about Chapter 12 Sentinel Command Station and how to complete it.
Related: Doom The Dark Ages PC Optimization Guide
Sentinel Command Station Full Chapter Walkthrough in DOOM The Dark Ages
Getting to Serrat
As soon as you enter the area and get past the Sentinel armies, the security doors are locked. Press the buttons near the doors to trigger the access denied warning. Wait for a while until Commander Thira warns you that the Base is under attack. Escape through the newly opened pathway leading to a tunnel. Follow along the tunnel to drop down into a Point of No Return.
Then, Thira orders the Sentinel forces to move Kreed to the Command Deck. Defeat the enemies and make your way to Serrat. Continuing along the objective marker takes you to another Point of No Return. Jump down to regroup with the Sentinel forces.
You will also learn that a portal is opening above the Command Deck. Thira then commands her forces to prepare the Slayer’s dragon. Upon reaching the Serrat, drop down to reach another Point of No Return.
Defeating the Demonic Leader
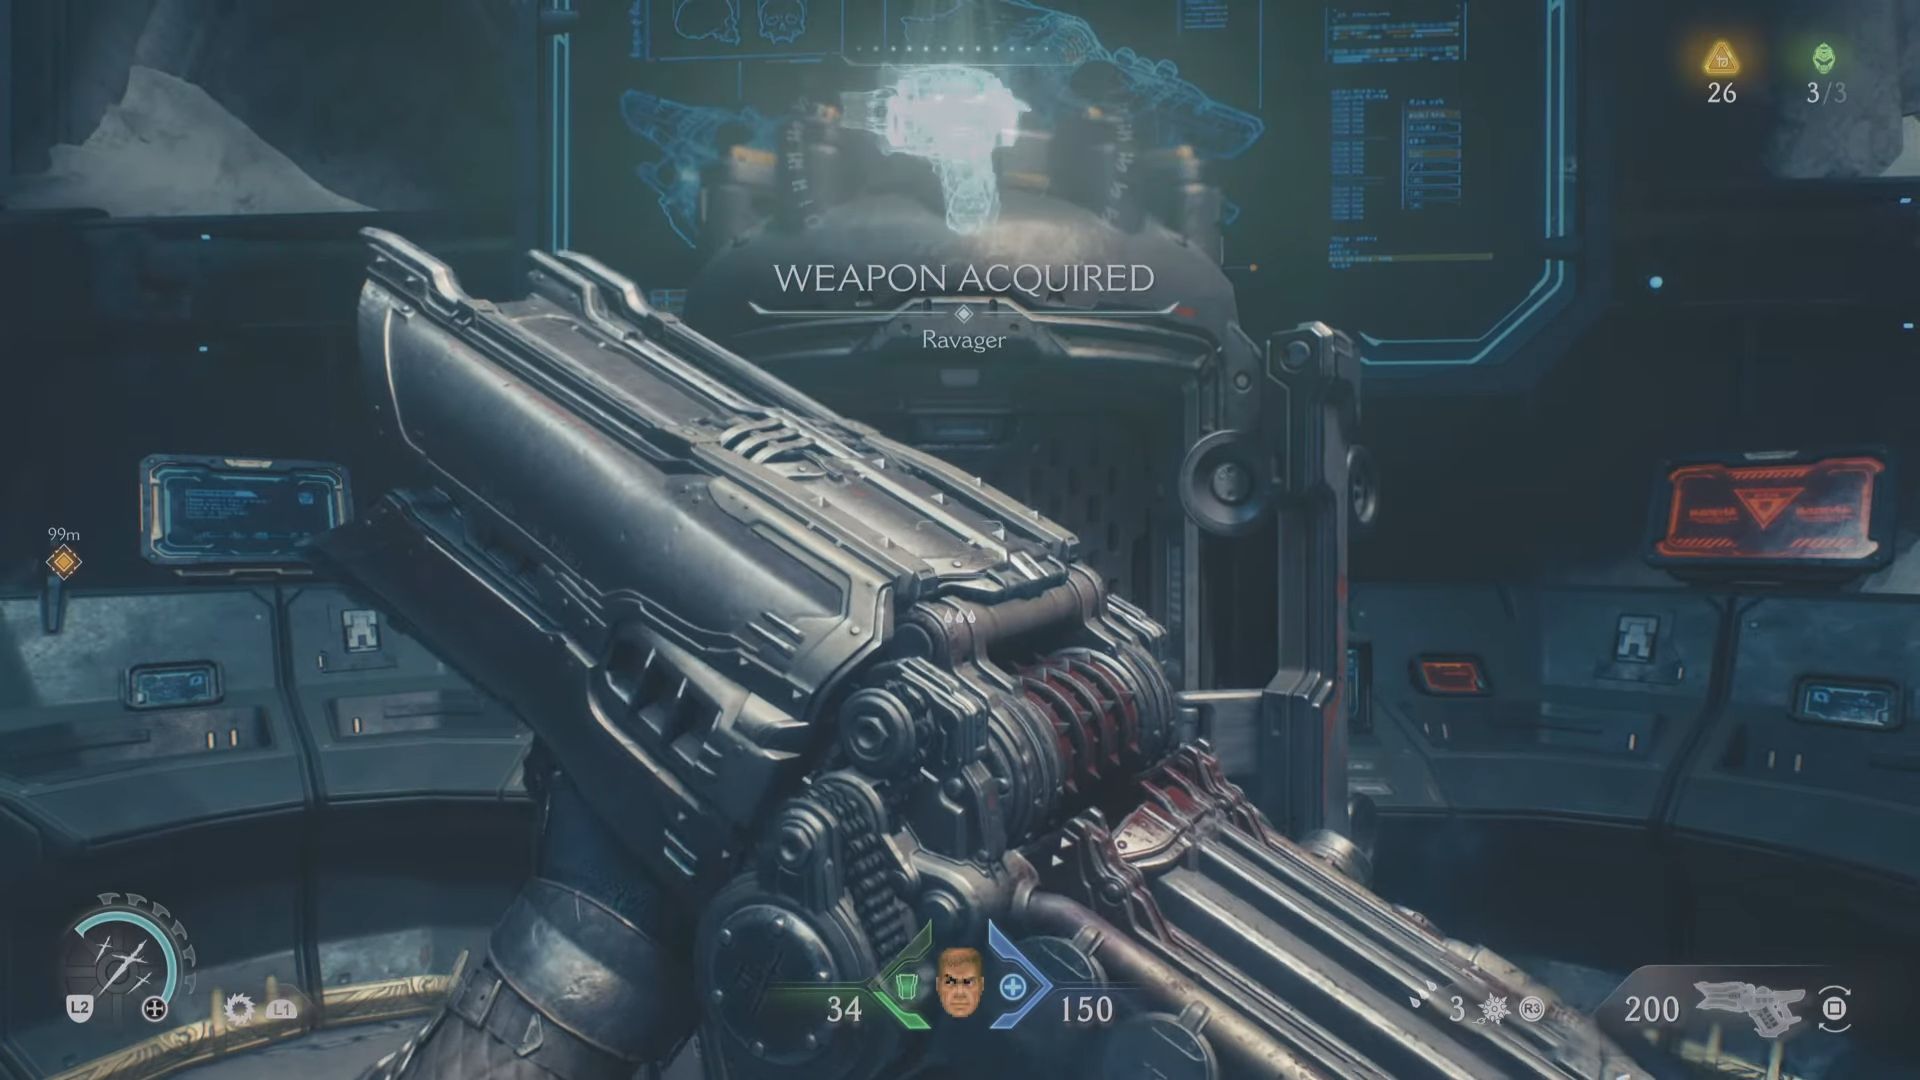
Follow the objective marker and pull the lever to open a door. Defeat the enemies and enter the door to find a Sentinel Shrine and another lever. Pull the lever to progress further. Head back to the main area and climb through the scramble wall. Get past the fireballs by blocking your way all through the vent and dropping down. There, you will find a weapon pod containing a new weapon, Skullcrusher Ravager.
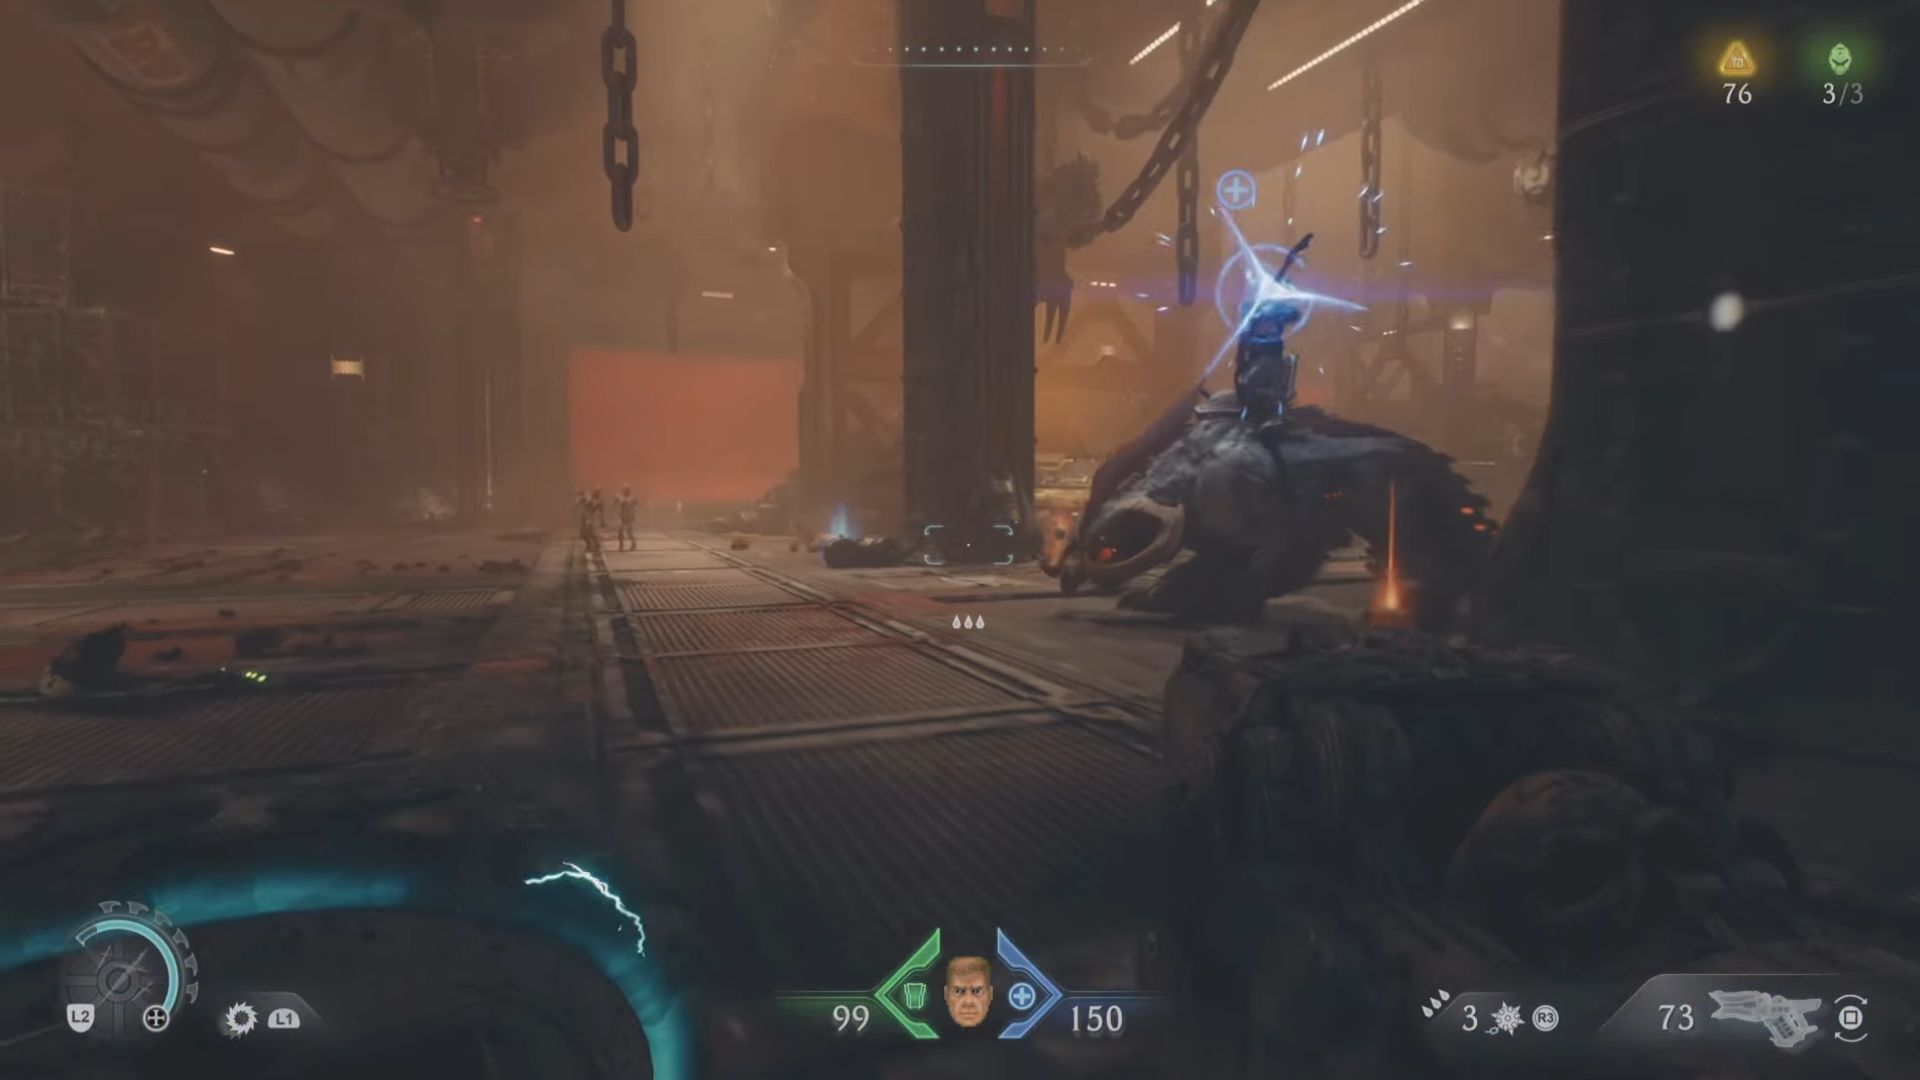
After defeating most of the enemies in the next room, the Demonic Leader appears. Defeating the leader rewards a Demonic Essence and increases your maximum health.
Finding the Keycard and Unlocking the Hangar
Press the button near the Sentinel forces to open the gate. Continue along the way and use the elevator. Climb the scramble walls and use the Shield Recal Jump to cross to the other side. You will find the Hangar Keycard inside a room near the cultists. Pick up the Yellow Keycard and open the door.
Upon falling into the pit, you will find a new Shield Rune called Auto Turret by interacting with the glowing green structure. After clearing the large demonic forces, continue the path to unlock the Hangar and reach the End of the Chapter objective, marking its end. You will find a total of 177 Gold, 1 Ruby, 1 Wraithstone, 1 Demonic Essence, 9 Secrets, 1 Codex, 1 Toy, and 1 Skin throughout the chapter.
Looking For More?
Thank you for reading the article. We provide the latest news and guides for DOOM: The Dark Ages. Also, visit our YouTube channel!