Facebook
 Reddit
 Email
Email
Discover how to defeat all bosses at Taedal’s Tower, a secret tower hidden in a painting with 20 floors for Throne and Liberty MMORPG.
Throne and Liberty is a new MMORPG released globally in the fall of 2024 by NCSOFT and Amazon Games, and it has a variety of activities that provide ways for players to advance their character and gear. Much of the core of the end-game revolves around guilds, large-scale player-vs-player events, and challenging group dungeons. However, the game also has an ongoing solo challenge called Taedal’s Tower. You can first access this secret space fairly early on in the game, but you likely won’t be able to get far until you’ve leveled up your stats and found better weapons and armor.
In the following guide, we’ll cover everything you need to know about how to find Taedal’s Tower in Throne and Liberty, the unique bosses on each floor, strategies to defeat them, and the rewards you can earn!
- 1F Charging Gatekeeper – Chief Orc Gatekeeper
- 2F Rushing Queen Spider – Venomous Queen Spider
- 3F Screams and a Healing Song – Starving Giant Zombie
- 4F Whirling Goblins – Incomplete Giant Goblin
- 5F Warrior’s Cry – Rusted Armor Warrior
- 6F Finding the Piton in the Flames – Mad Red Pyromancer
- 7F The Bound – Bound Shadowmancer and Despair Dark Enforcer
- 8F Poisons, Explosions, and Detox Herbs – Giant Ant Commander
- 9F Dance of the Flashing Sword – Dancing Giant Butcher
- 10F Commander’s Shadow Strike – Oblivion Skeleton Commander
- 11F Maze of Death – Roaring Avolos Umbramancer
- 12F Answers in the Sand – Scorpos
- 13F Fall, Shock, Destroy – Lighting Jump Attacker
- 14F Out of Sight – Old Wizard’s Eye
- 15F Takers and Retrievers – Stealer of Light Dren
- 16F Precise Moment – Immortal Guardian
- 17F Unbreakable Shield of Cooperation – Chaos Archwizard
- 18F Swirling Firestorm – Exploding Flame Desert Wizard
- 19F Reaching Higher – Nightmare Conductor
- 20F Revenge and Resurrection – Revenger Skeleton Commander
How to find the Taedal’s Tower in Throne and Liberty?
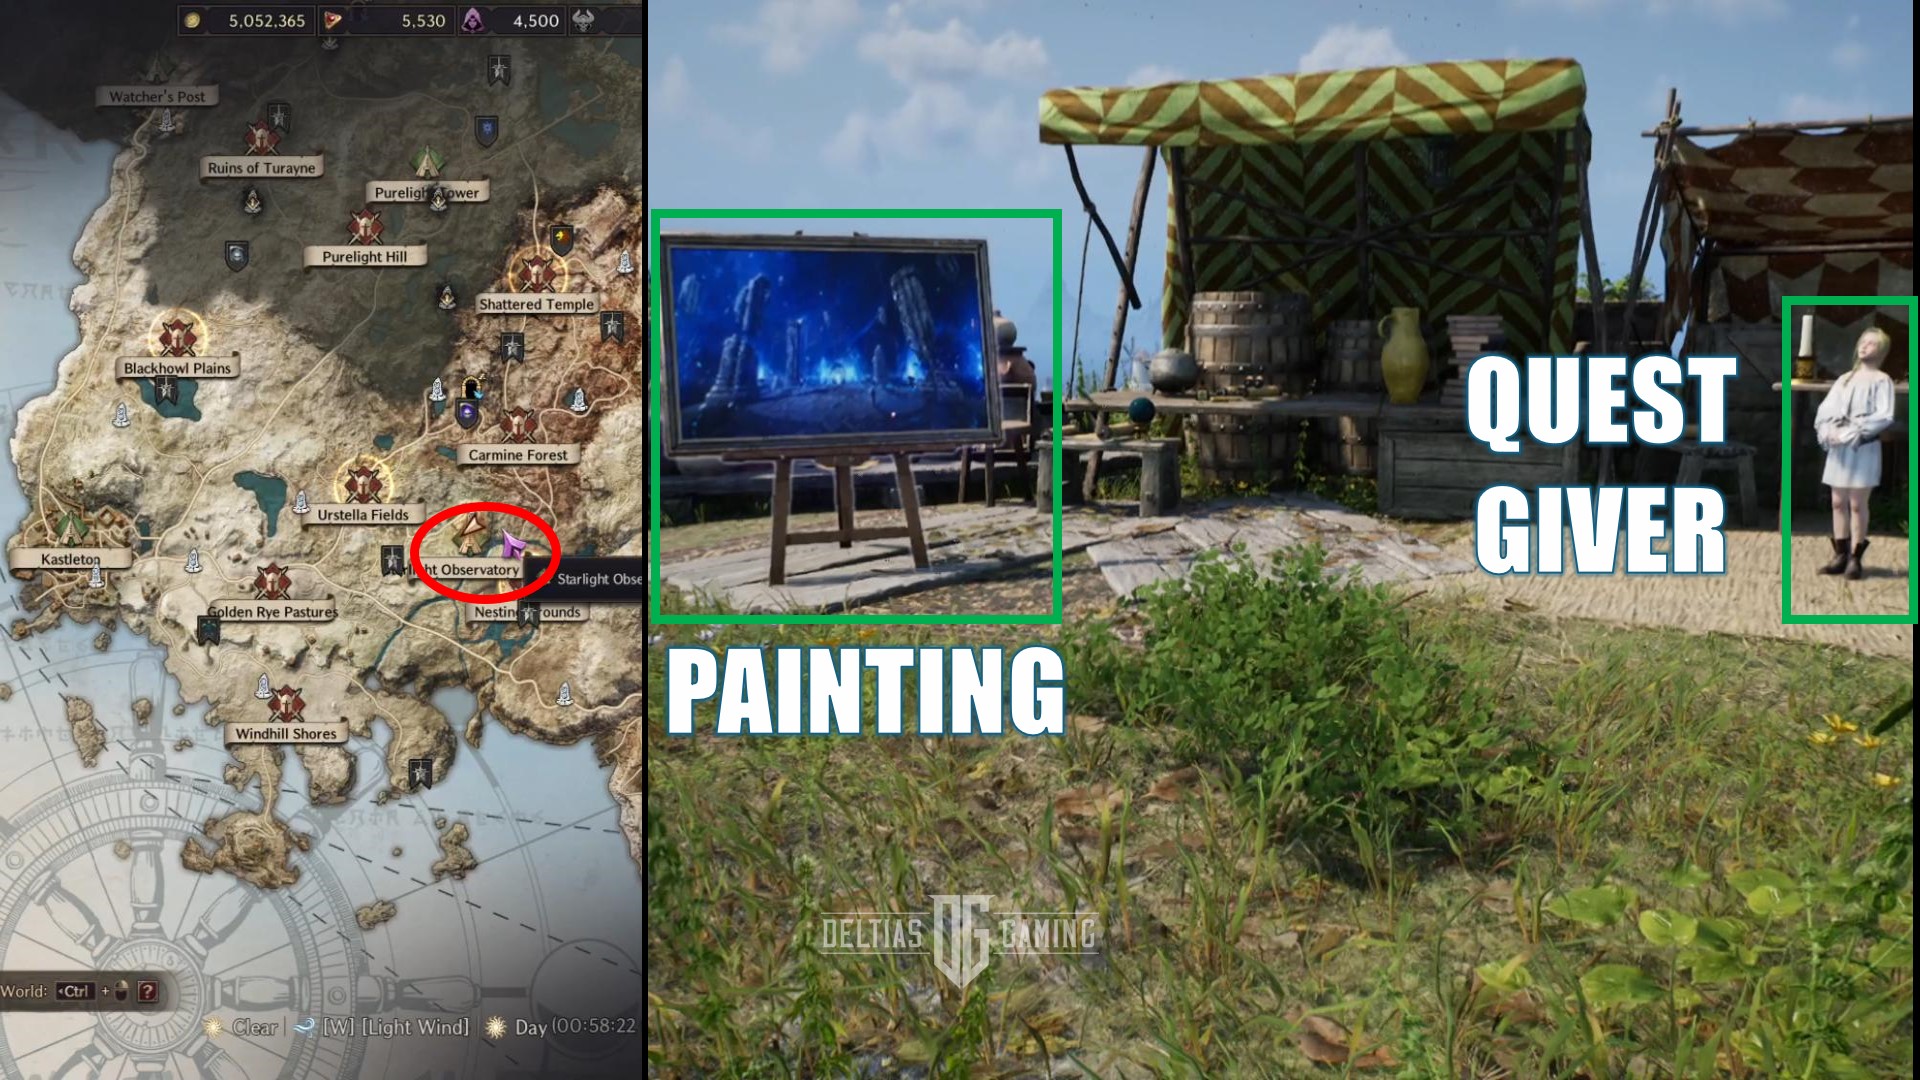
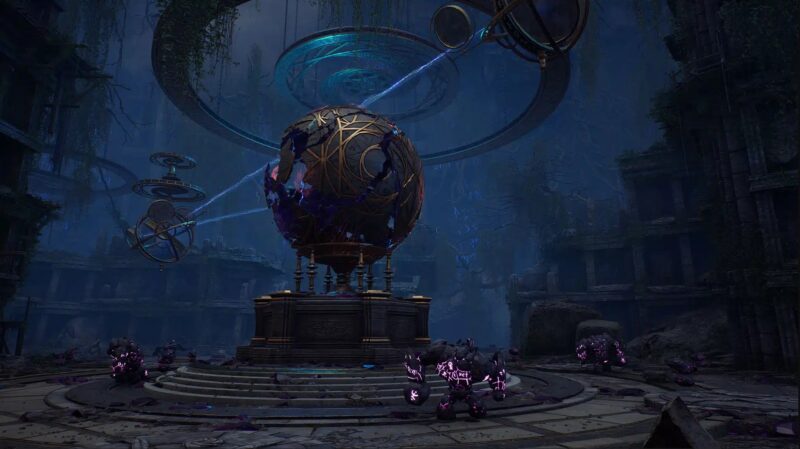
You can find Taedal’s Tower early on in Throne and Liberty by playing through the main story quests until you reach the Starlight Observatory Ruins and interact with Ashien’s Strange Painting in Chapter 3. The painting itself serves as a magical portal into Taedal’s Tower, and this is how you will first unlock it while playing the game.
Furthermore, once you have unlocked the Tower through the quest you can always return to it by using the same painting at the Starlight Observatory Ruins, or by going into your Main Menu and selecting Secret Dungeons. Additionally, even if you never complete this quest for some reason, Taedal’s Tower will eventually become available to you through the Secret Dungeons menu after you reach Level 30.
All Bosses in Taedal’s Tower Listed
Taedal’s Tower is a PvE solo dungeon, where you ‘climb’ the tower by defeating a new unique boss on each floor. There are currently 20 floors in Taedal’s Tower, and each new boss is more challenging than the last. You will be able to see the full list of all floors and bosses, but you cannot jump ahead and must defeat each boss in order.
Additionally, while there isn’t a time limit on these fights you cannot be too slow. If you have not defeated the boss within five minutes, it will enter an enraged state and become even stronger.
In this Throne and Liberty How to defeat all bosses in Taedal’s Tower guide, you can find an outline of what to expect, mechanics, tips, suggested builds, and more below!
List of All Bosses in Taedal’s Tower:
- Charging Gatekeeper
- Rushing Queen Spider
- Screams and a Healing Song
- Whirling Goblins
- Warrior’s Cry
- Finding the Piton in the Flames
- The Bound
- Poisons, Explosions, and Detox Herbs
- Dance of the Flashing Sword
- Commander’s Shadow Strike
- Maze of Death
- Answers in the Sand
- Fall, Shock, Destroy
- Out of Sight
- Takers and Retrievers
- Precise Moment
- Unbreakable Shield of Cooperation
- Swirling Firestorm
- Reaching Higher
- Revenge and Resurrection
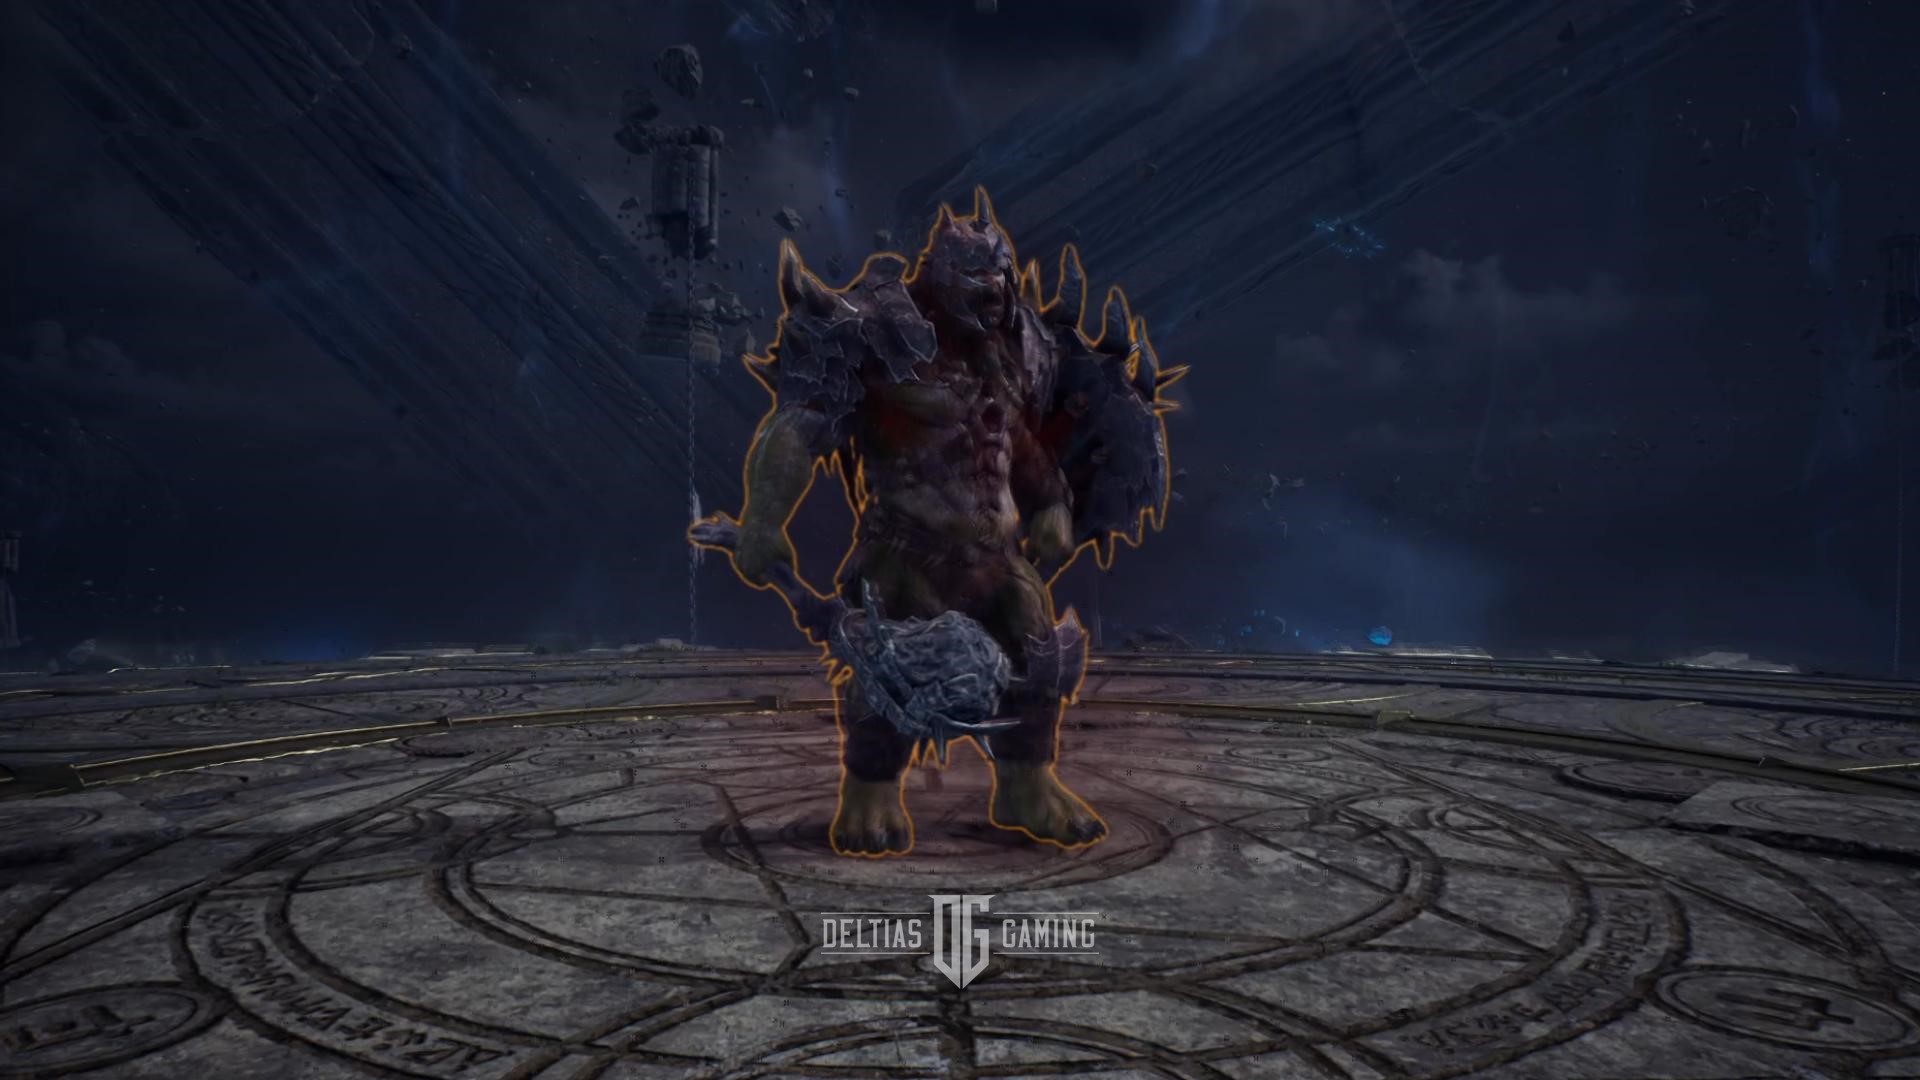
1F Charging Gatekeeper – Chief Orc Gatekeeper
All Floor 1 of Taedal’s Tower features in Throne and Liberty:
- Floor: Charging Gatekeeper
- Boss: Chief Orc Gatekeeper
- Unlocks at Level: 15
- Rewards: 1x Quality Weapon Growthstone, 2x Quality Armor Growthstone, 1x Quality Accessory Growthstone, 5x Recovery Crystal
- Recommended Build: Ranged weapons like Longbow, Crossbow, or Staff
To beat the Chief Orc Gatekeeper boss on Floor 1F, you should constantly strafe to the side and avoid his charging attacks. Moreover, this boss is slow and does not utilize any ranged attacks against you. Additionally, the telegraph animations on his attacks are easy to read. Consequently, this boss isn’t a difficult enemy, but is good practice for getting used to reading attacks and practicing mechanics.
First, the Chief Orc has a Slam ability where he puts his mace behind his hip and then up in the air. After this short animation, a rock will spew out in front, causing damage. Avoid it by side-stepping.
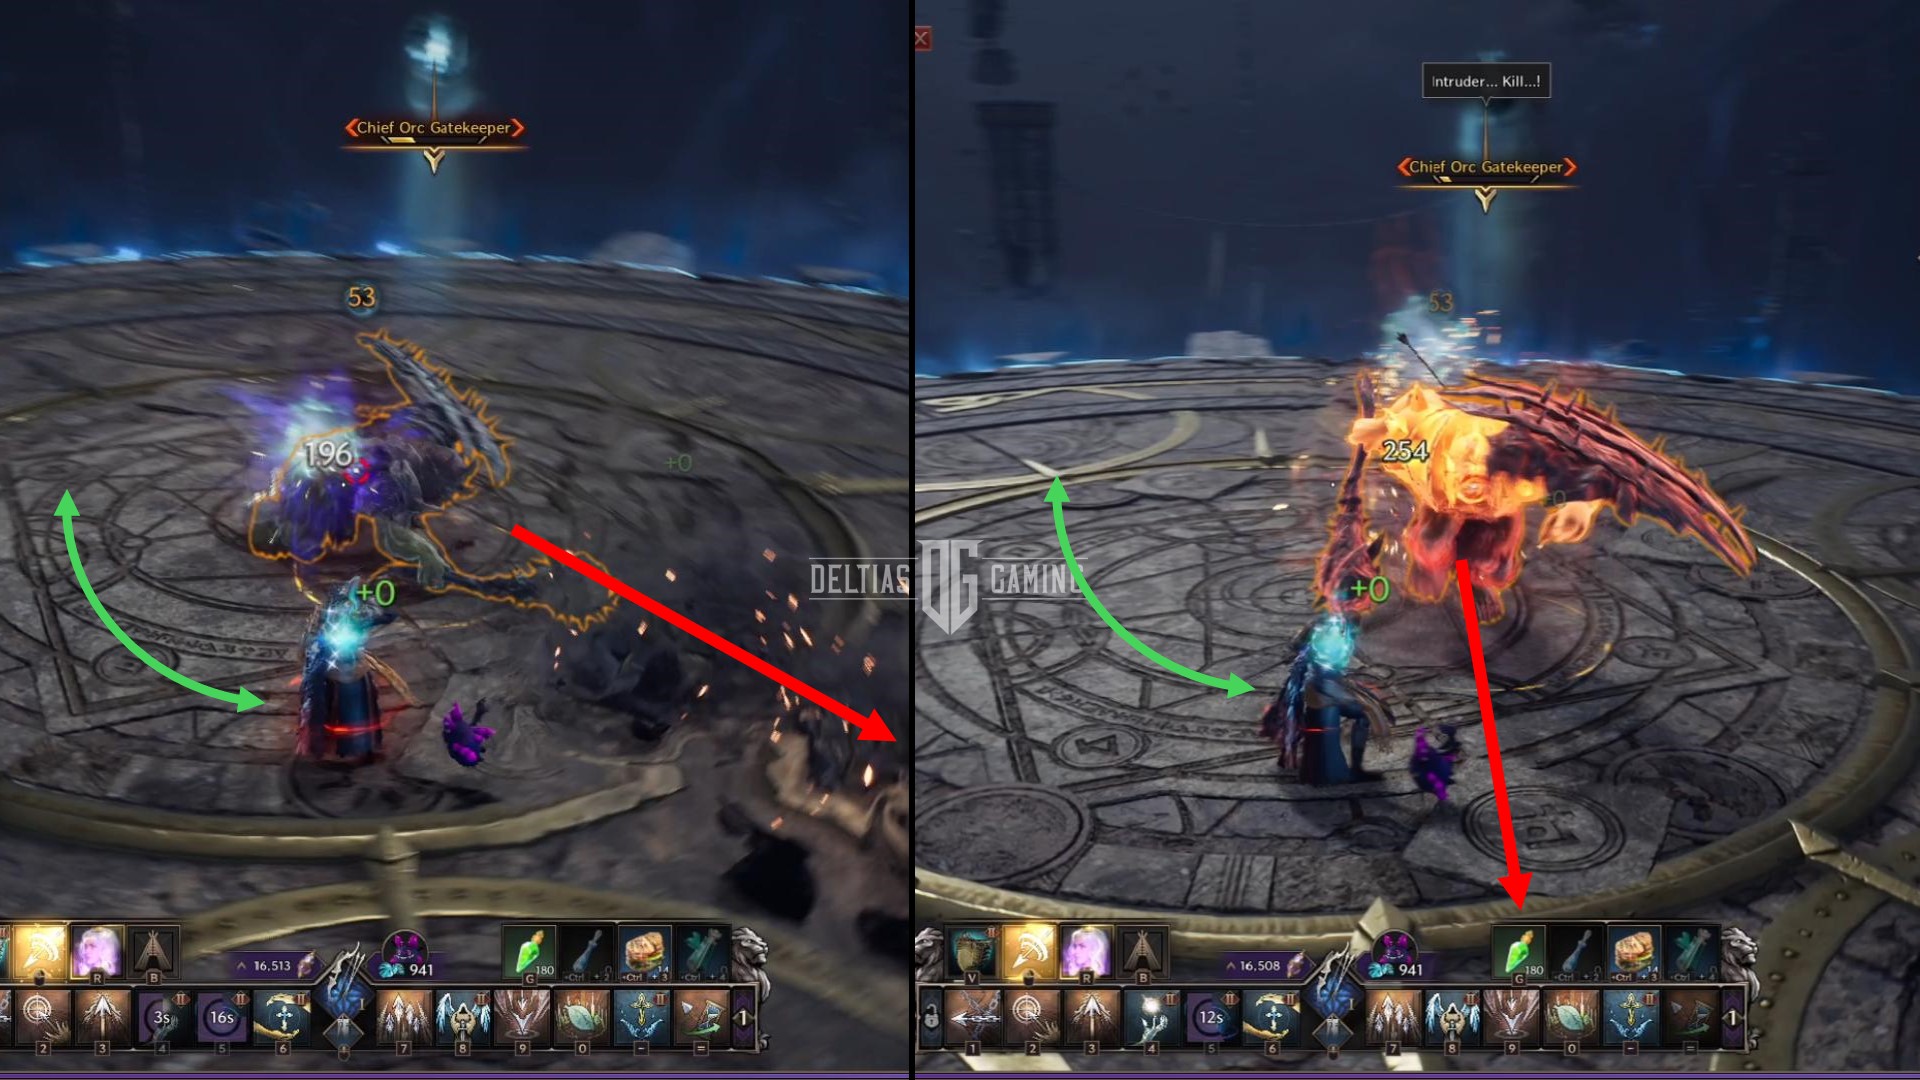
In the second animation attack, the boss will turn red and appear enraged, getting ready for a Charge. At lower health, this will happen, so you need to sidestep and expect a rush attack. After the initial rush attack, the Chief Orc Gatekeeper will repeat this process. However, you can defend with a Fury Attack (purple circle time defensive skill).
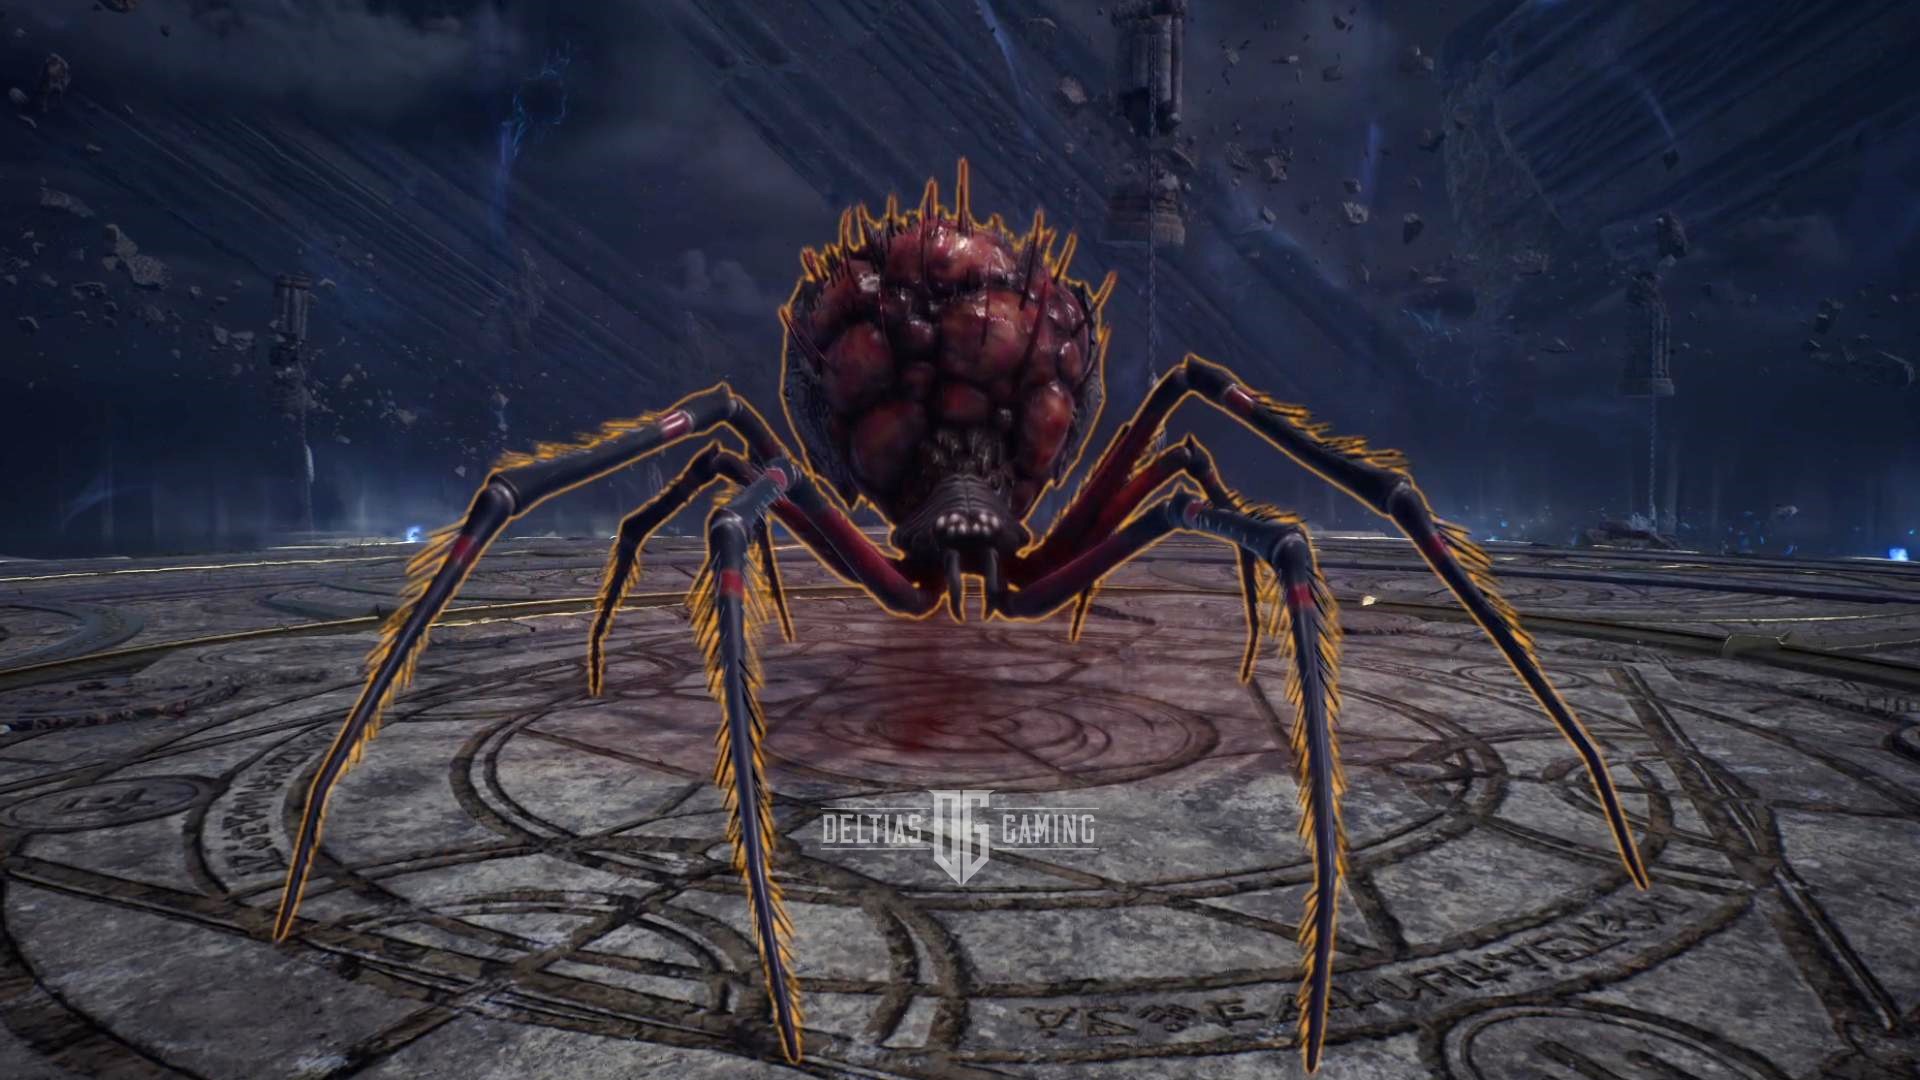
2F Rushing Queen Spider – Venomous Queen Spider
All Floor 2 of Taedal’s Tower features in Throne and Liberty:
- Floor: Rushing Queen Spider
- Boss: Venomous Queen Spider
- Unlocks at Level: 17
- Rewards: 1x Quality Weapon Growthstone, 2x Quality Armor Growthstone, 1x Quality Accessory Growthstone, 5x Recovery Crystal
- Recommended Build: Ranged weapons like Longbow, Crossbow, or Staff
To beat the Venomous Queen Spider on Floor 2F, use your defense skill to avoid her Jump attack, which not only deals hit damage, but also follows with a poison damage-over-time. Furthermore, the boss also has a Spray attack that will shoot webbing at your feet to hold you in the poison.
Additionally, if you play at range, the boss will attempt to close the distance with a Rush that can stun you and disable your character. Consequently, this is a fight that will test your mobility and you’ll need to be agile to dodge her attacks.
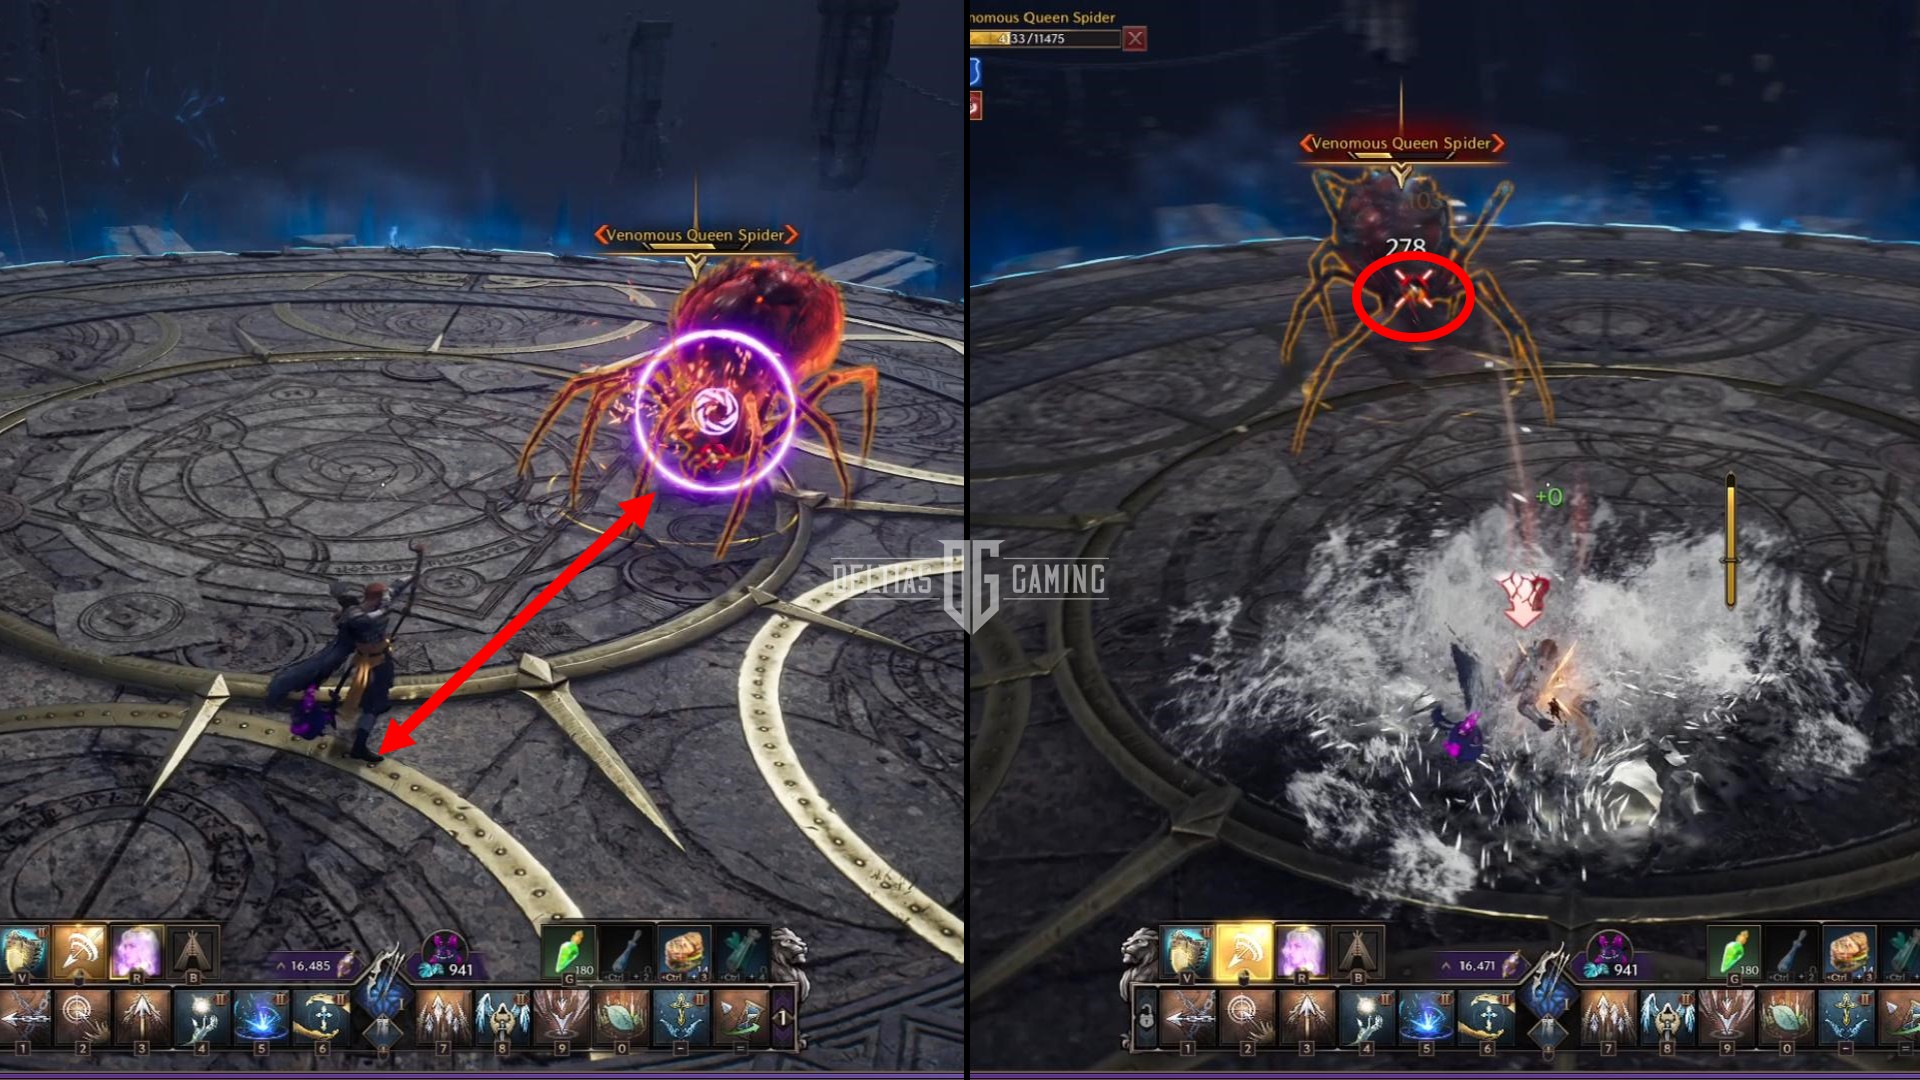
Expect two back-to-back attacks, which can be avoided with a timed Fury Attack as the purple circle closes on the center. Moreover, the Venomous Queen Spider will raise back her head and shoot a web, followed immediately by a jump attack. Thus, if possible, the best way to deal with this boss is to play at range and conserve your stamina for two separate fury attacks.
3F Screams and a Healing Song – Starving Giant Zombie
All Floor 3 of Taedal’s Tower features in Throne and Liberty:
- Floor: Screams and a Healing Song
- Boss: Starving Giant Zombie
- Unlocks at Level: 19
- Rewards: 2x Quality Weapon Growthstone, 4x Quality Armor Growthstone, 3x Quality Accessory Growthstone, 5x Recovery Crystal
- Recommended Build: Ranged weapons like Longbow, Crossbow, or Staff
To beat the Starving Giant Zombie on Floor 3F, you must destroy the incoming Starving zombies and protect the Lost Adventurer NPC who joins you for this fight. Your first priority should be keeping the Lost Adventurer from taking any damage because she will heal you during the fight.
First, you’ll need to kill four Starving zombies, which you should do with a ranged weapon because they explode if you get too close. Next, the Starving Giant Zombie boss will appear after the smaller zombies are dead. This boss uses ranged attacks only. Additionally, he doesn’t move from where he spawns. Therefore, you can either use ranged weapons against him, which will make dodging his attacks easier. Or, you can switch to a melee weapon to easily attack him head-on.
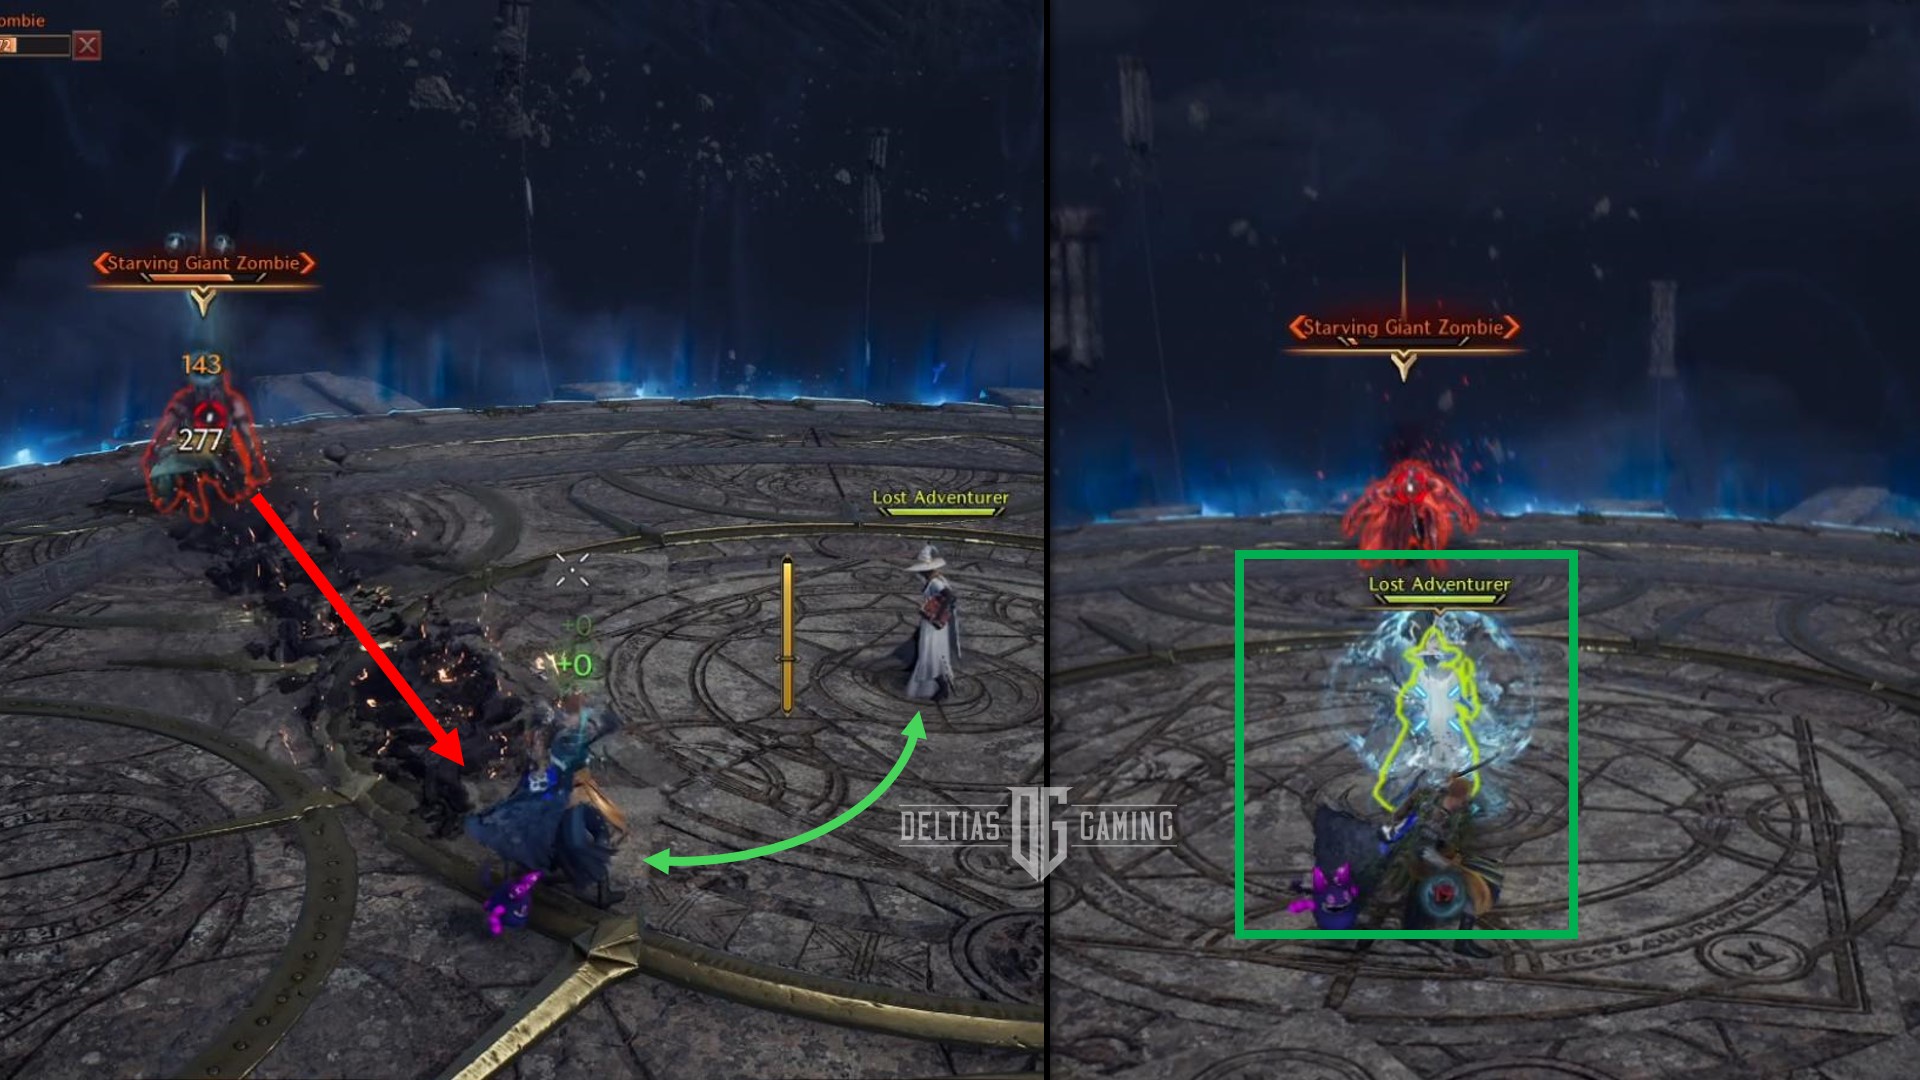
The Starving Giant Zombie has a Fury Attack range mechanic, which can be avoided. Furthermore, the boss will also stretch back before shooting rocks at you, which can be avoided by strafing side to side.
Furthermore, the Lost Adventure is a friendly NPC that will heal and protect you from constant bombardment at range. Thus, position yourself directly behind her, which will reflect the ranged incoming damage. Make sure to pan from side to side for incoming zombies and stay within the 10-meter range of the Lost Adventure for free healing.
4F Whirling Goblins – Incomplete Giant Goblin

All Floor 4 of Taedal’s Tower features in Throne and Liberty:
- Floor: Whirling Goblins
- Boss: Incomplete Giant Goblin
- Unlocks at Level: 20
- Rewards: 2x Quality Weapon Growthstone, 4x Quality Armor Growthstone, 3x Quality Accessory Growthstone, 5x Recovery Crystal
- Recommended Build: Ranged weapons like Longbow, Crossbow, or Staff
To beat the Incomplete Giant Whirling Goblin on Floor 4F, avoid his jump, chain, and spinning attacks. Moreover, he will attempt to jump towards you and belly flop, knocking you down and stunning you. You can avoid this with a Fury Attack defense or strafing to the side and keeping a safe distance. Avoid this attack at all costs, because the stun and follow-up damage the boss will deal can end the fight.

If you move out from the boss beyond 9 meters, he will chain-pull you back in forcefully. Thus, if you’re a range player, pay attention to the distance indicator on the upper left of your UI.
Lastly, the Whirling Goblin boss will turn red and spin, causing damage within a 3-meter range. Strafe to the side or sprint and run out of the way. This mechanic will fade and likely lead into a Fury Attack, so keep enough stamina to defend.
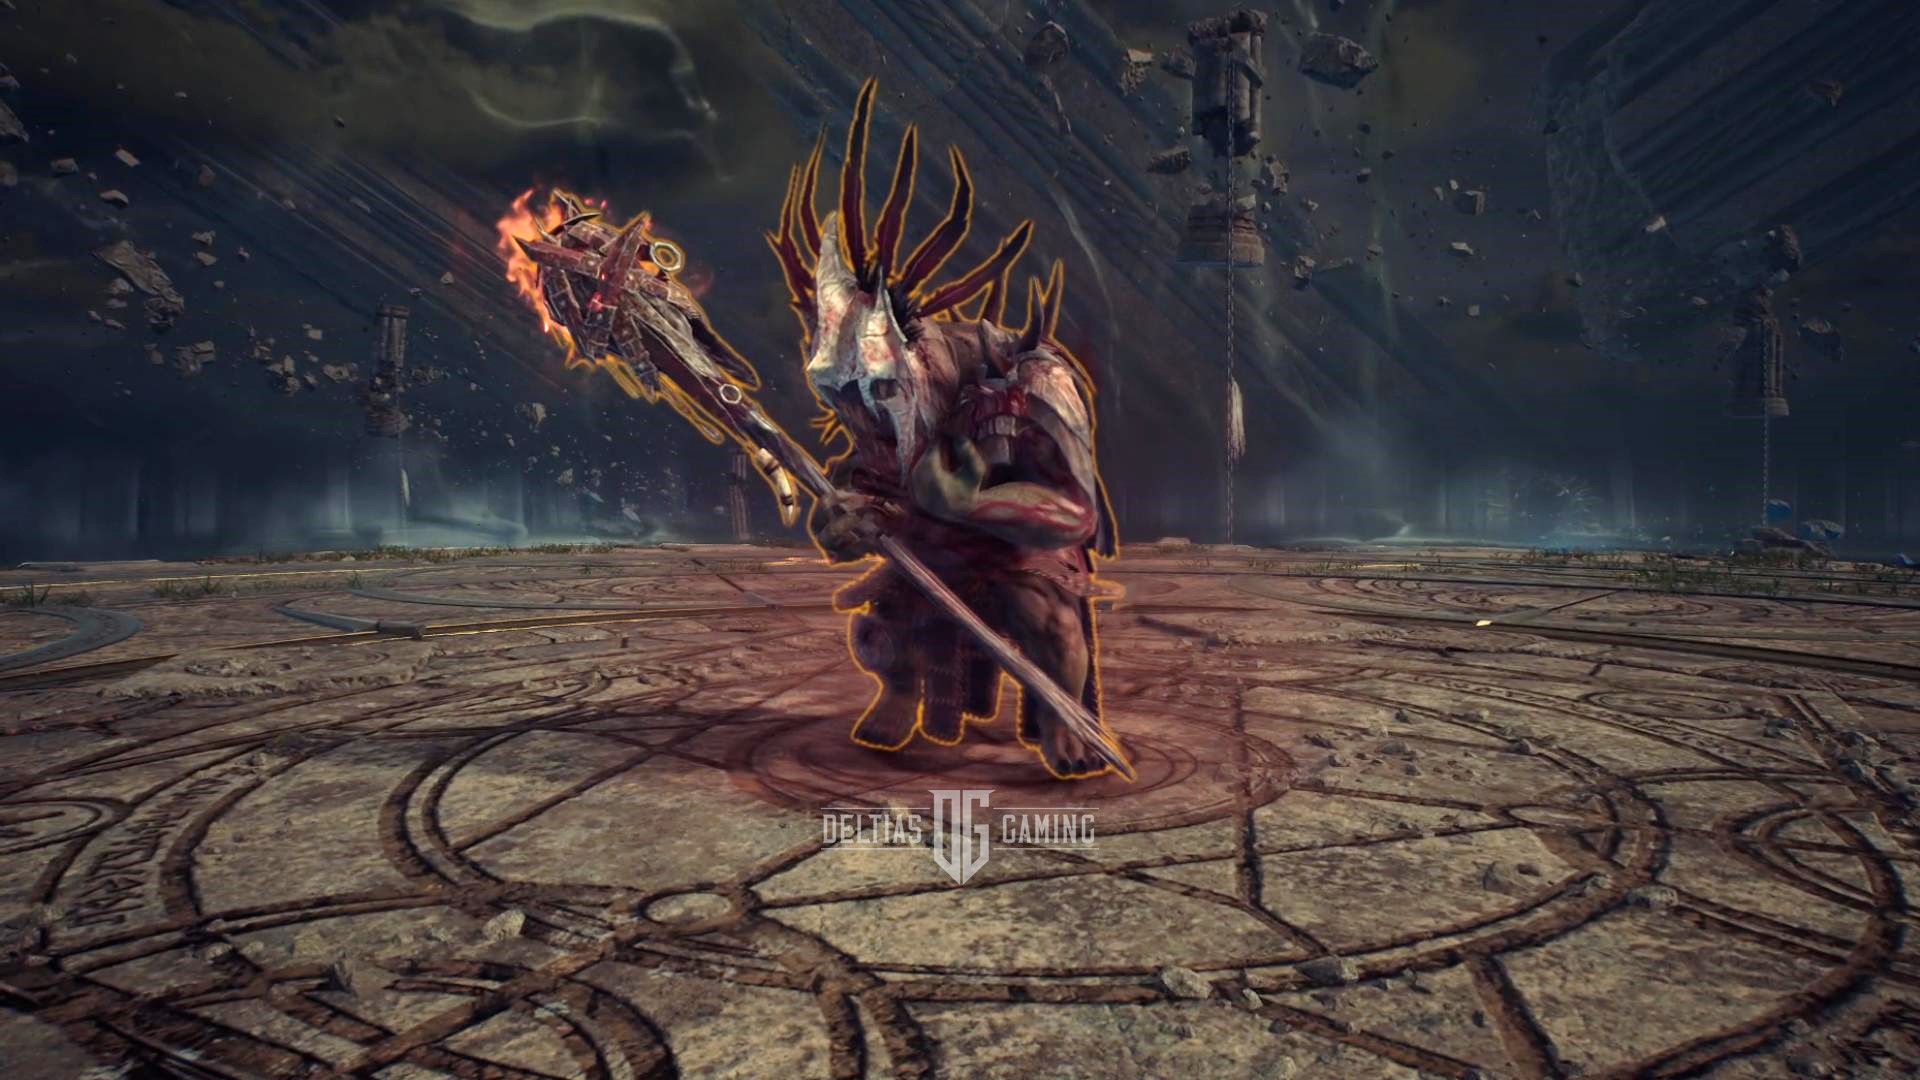
5F Warrior’s Cry – Rusted Armor Warrior
All Floor 5 of Taedal’s Tower features in Throne and Liberty:
- Floor: Warrior’s Cry
- Boss: Rusted Armor Warrior
- Unlocks at Level: 22
- Rewards: 1x Crafty Joker Amitoi, 2x Quality Weapon Growthstone, 4x Quality Armor Growthstone, 3x Quality Accessory Growthstone, 5x Recovery Crystal
- Recommended Build: Ranged weapons like Longbow, Crossbow, or Staff
To beat the Rusted Armor Warrior on Floor 5F, keep to an 8-meter range on shorter, and avoid melee attacks and stuns by strafing. The boss is very mobile and will chase you around the arena attacking only in melee.
Additionally, the boss will jump to targets beyond 8 meters and stun you unless you use mobility skills and follow up with one or two Fury Attacks that are near impossible to avoid. Therefore, the best way to detect when the boss is about to jump or use a mechanic is dialogue above its head.
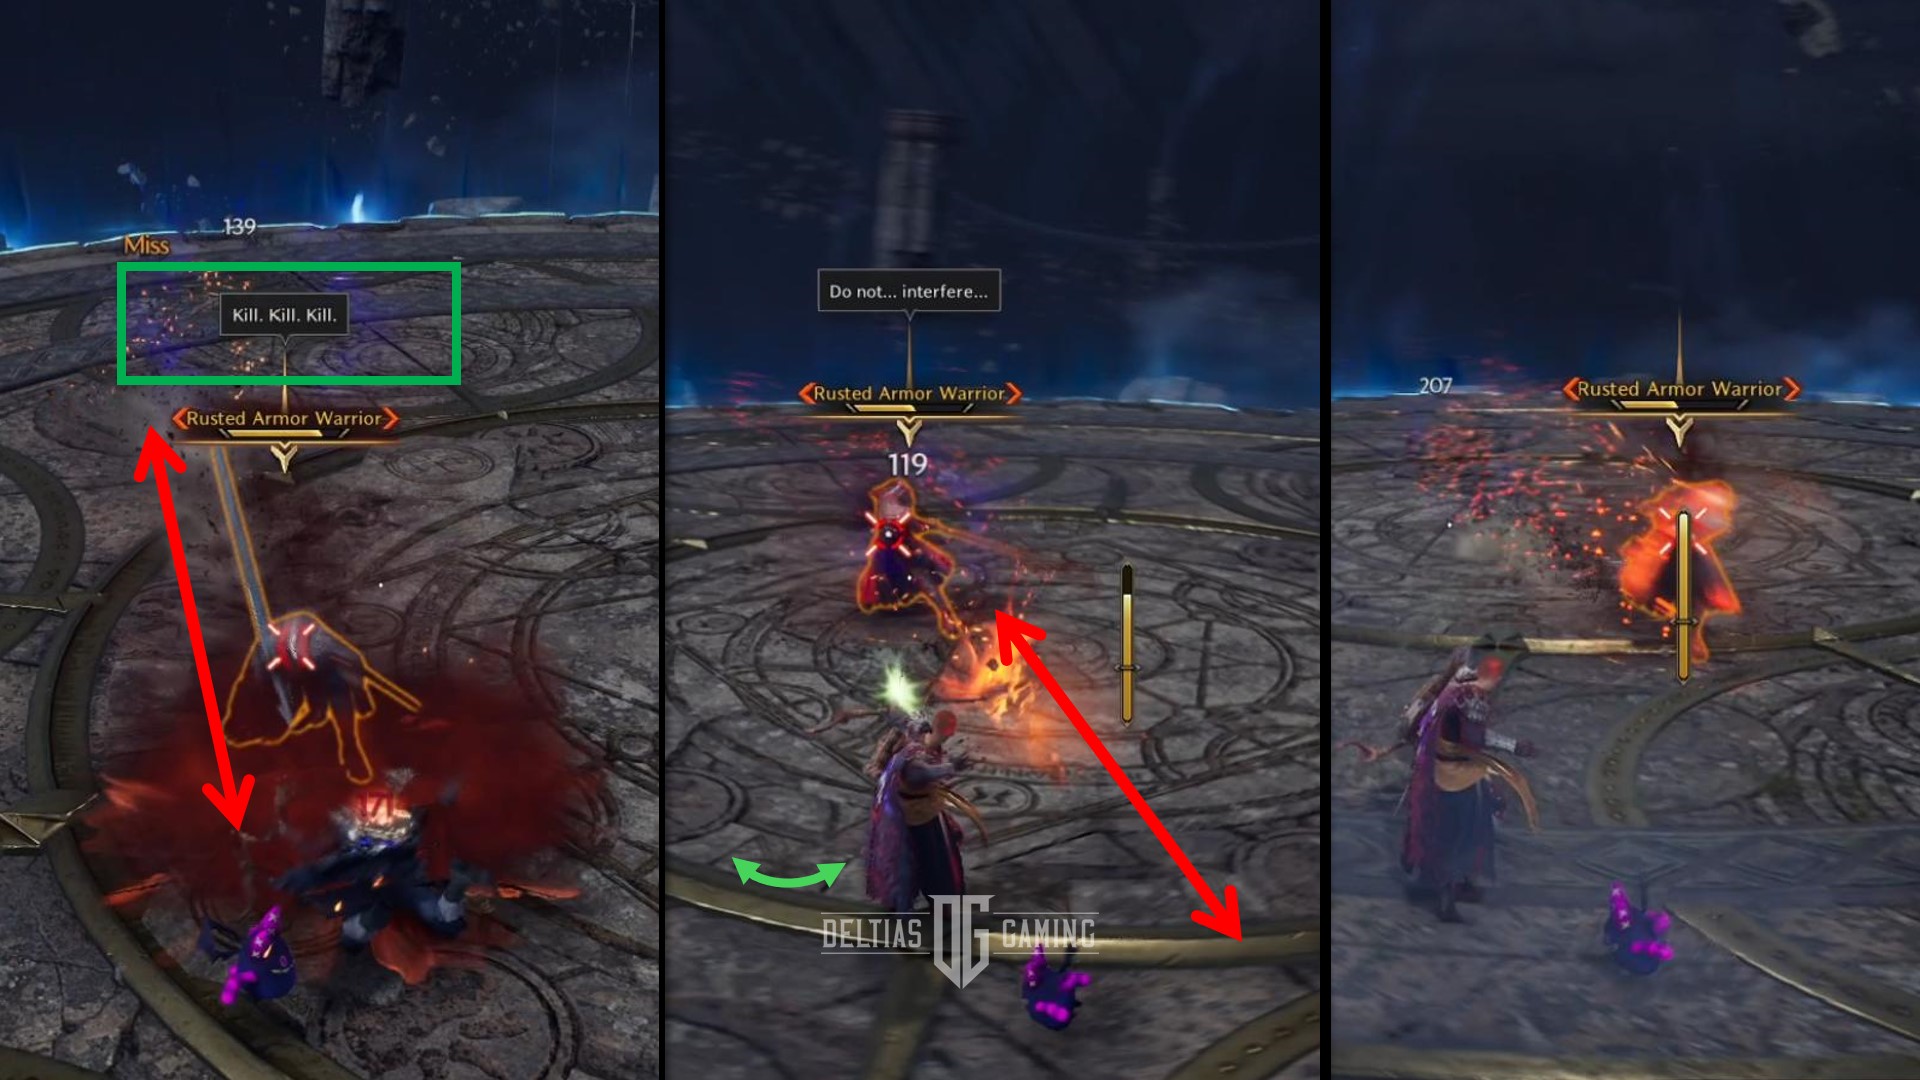
Next, the Rusted Armor Warrior will glow red and start using close-range melee attacks, including a spin. Do your best to flank or create some distance to avoid being stunned. Moreover, expect the boss to draw his Sword back above his head and shoot three consecutive fireballs. These can stagger you and are avoidable via mobility skills or strafing. After the three fireballs, the boss will charge to your position and likely stun you.
The best melee or range build strategy is to stay ranged, but stay within 8 meters, rotating constantly to avoid melee damage. If he uses the spinning attack, fall back and engage after the mechanic is over in three or four seconds.
6F Finding the Piton in the Flames – Mad Red Pyromancer
All Floor 6 of Taedal’s Tower features in Throne and Liberty:
- Floor: Finding the Piton in the Flames
- Boss: Mad Red Pyromancer
- Unlocks at Level: 24
- Rewards: 4x Quality Weapon Growthstone, 8x Quality Armor Growthstone, 5x Quality Accessory Growthstone, 10x Recovery Crystal
- Recommended Build: Melee (Greatsword) and Ranged (Longbow)
To beat the Mad Red Pyromancer on Floor 6F, you must prioritize getting on top of the pillars to avoid the powerful burning DoT the boss will place down on the entire arena floor. While fighting him, always be on the lookout for the four pillars that will rise from the floor and use your grapple hook to easily reach the top. The pyromancer will then set the arena on fire and you will have to wait for the effect to dissipate before jumping back down. Therefore, even if you are primarily a melee player you should equip a ranged weapon to your off-hand so that you can continue attack him from the pillars.
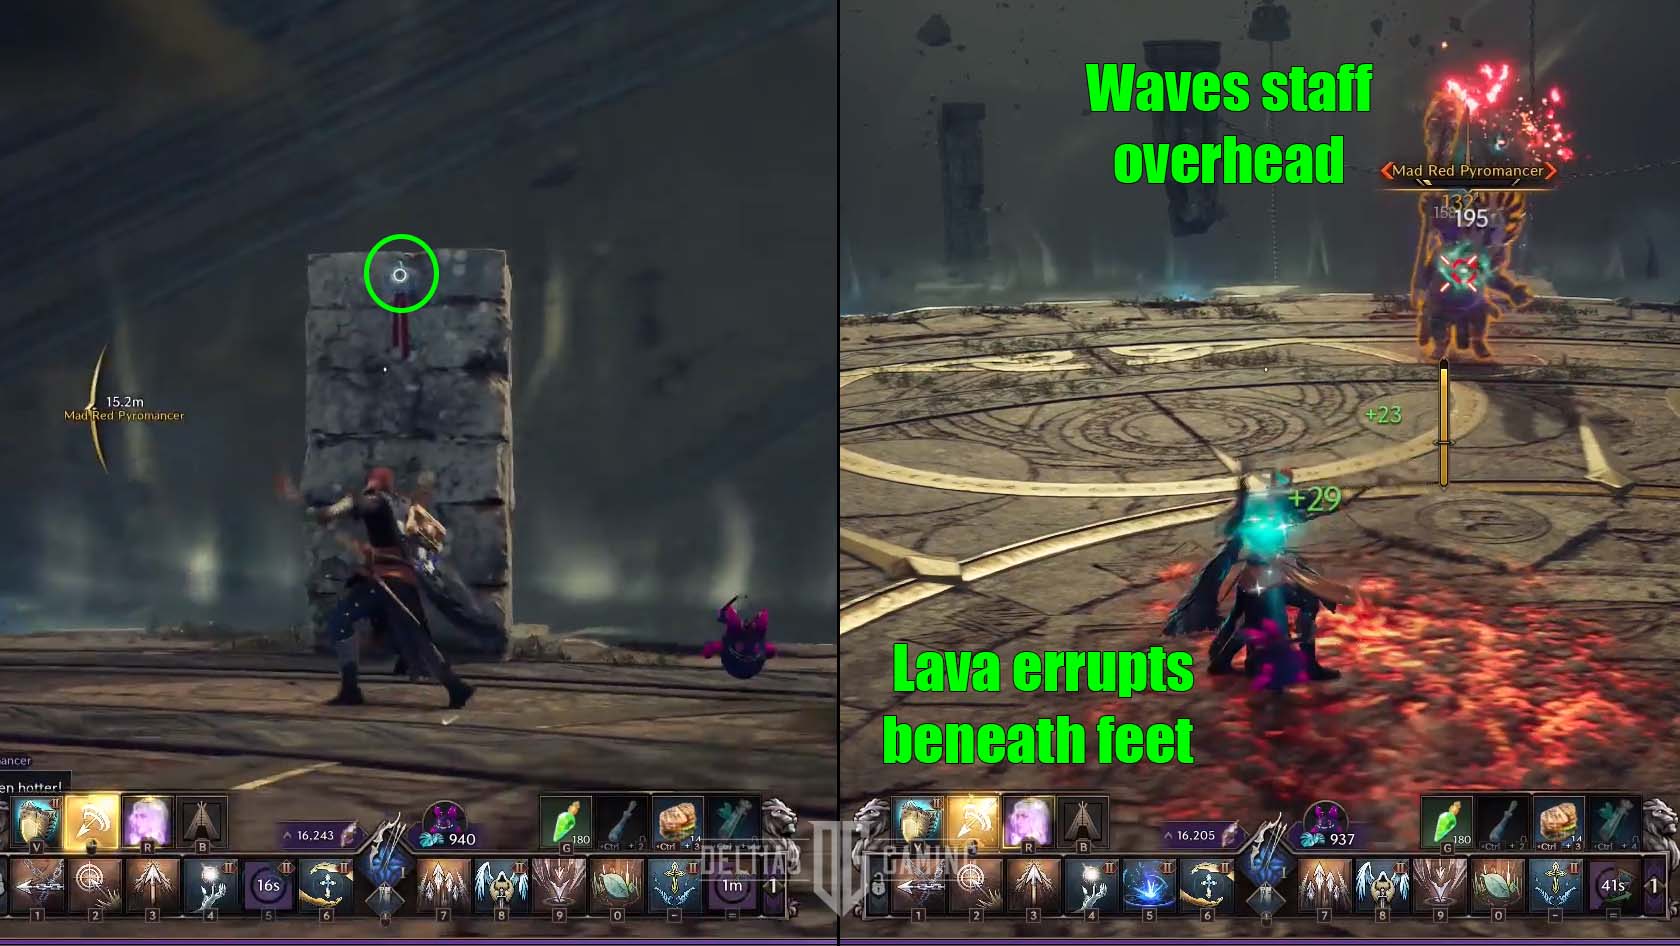
Furthermore, the Mad Red Pyromancer is fairly stationary during the fight, but he does have a teleport skill. If you’re attacking with a melee weapon, then this means you will occasionally have to chase him down. Another ability is a clearly telegraphed skill where the pyromancer will start to wave his staff in circles overhead. Shortly after, lava will appear beneath your feet and cause DoT fire damage. When it does this strafe to the side and keep moving because it will continue to try and follow you.
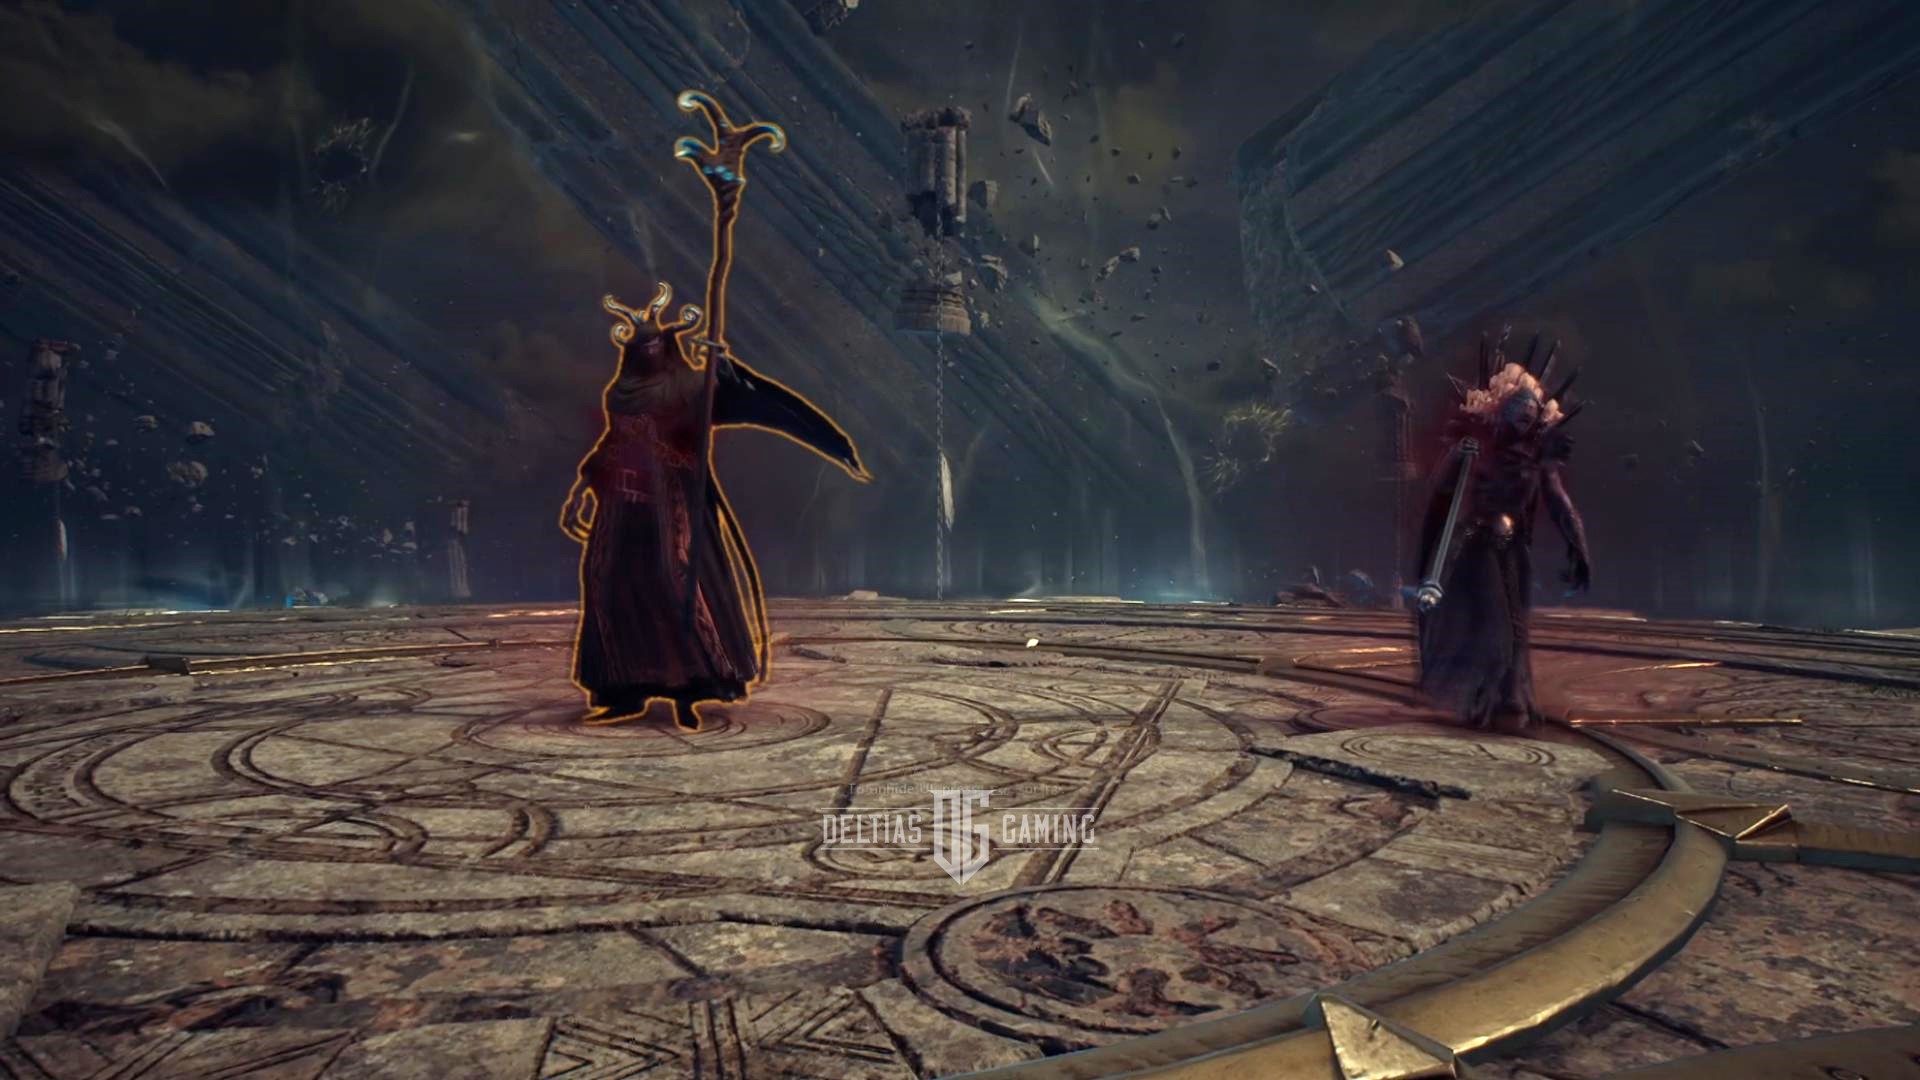
7F The Bound – Bound Shadowmancer and Despair Dark Enforcer
All Floor 7 of Taedal’s Tower features in Throne and Liberty:
- Floor: The Bound
- Boss: Bound Shadowmancer and Despair Dark Enforcer
- Unlocks at Level: 26
- Rewards: 4x Quality Weapon Growthstone, 8x Quality Armor Growthstone, 5x Quality Accessory Growthstone, 10x Recovery Crystal
- Recommended Build: Ranged weapons like Longbow, Crossbow, or Staff
To beat the Bound Shadowmancer and Despair Dark Enforcer on Floor 7F, you only need to defeat one of them. The Shadowmancer is a ranged boss who will attack you with spells, while the Enforcer is a melee boss that constantly follows and attacks you. We recommend using a ranged weapon and focusing on the Shadowmacer boss for the easiest strategy to win.
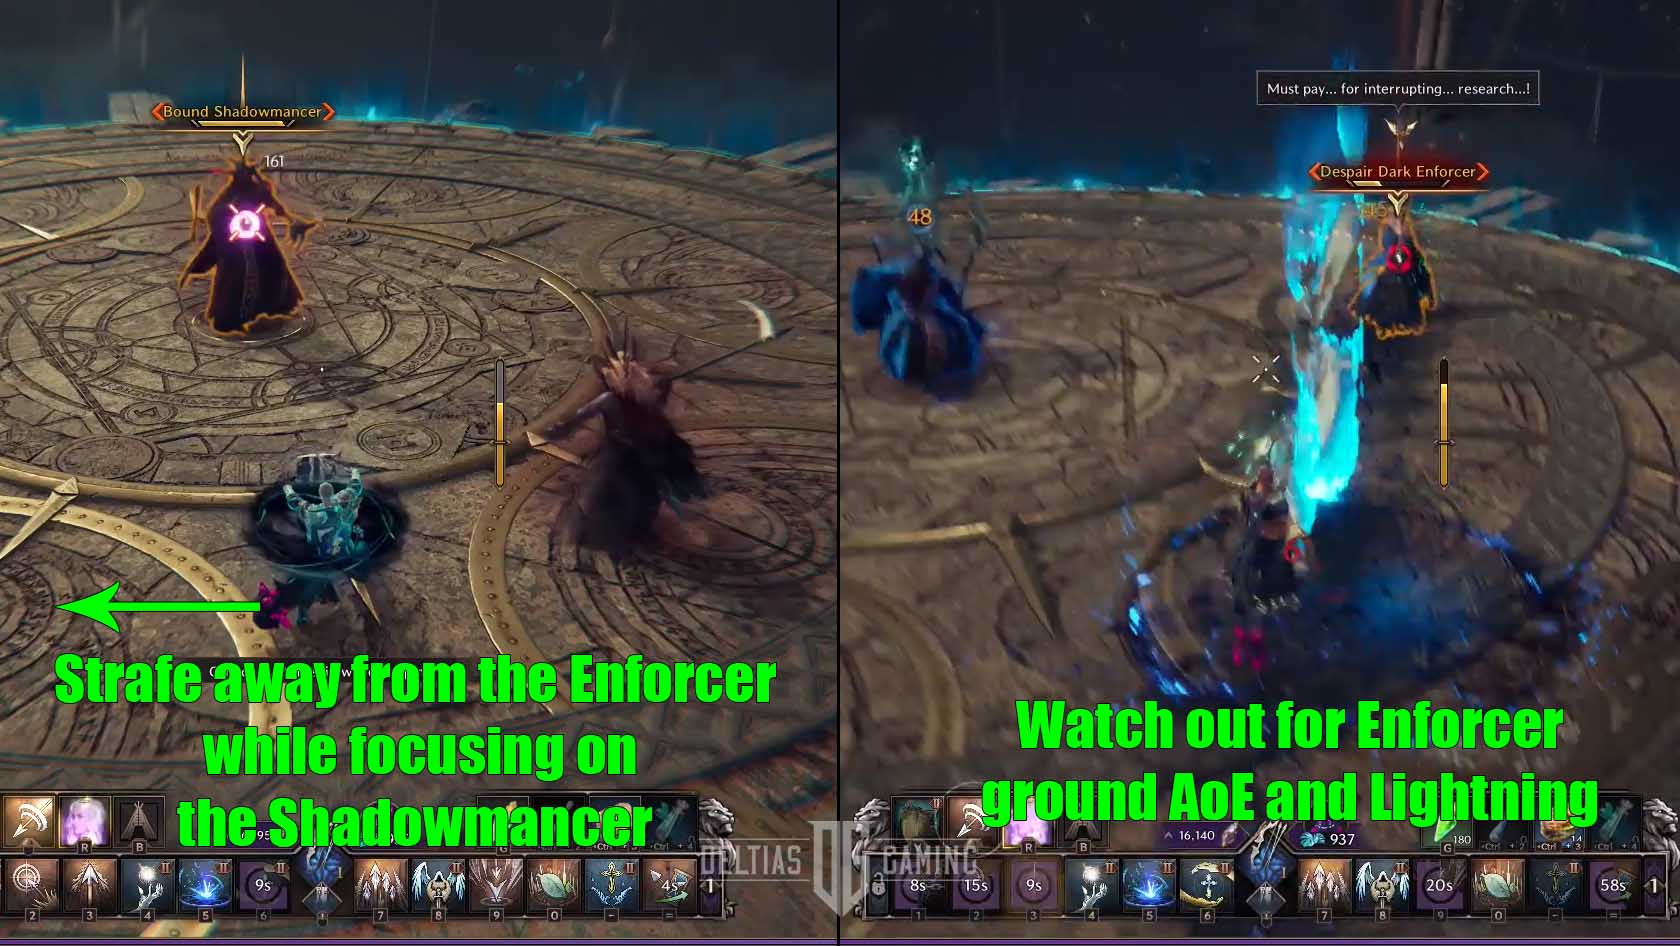
Additionally, it will be very important that you have a wide field of view so that you can see both bosses through out the entire fight. With a ranged weapon equipped, you can strafe around the arena avoiding the Enforcer’s melee attacks. Additionally, this movement will also help you avoid the Shadowmancer’s ranged casts. The Shadowmancer will largely stay in the center of the arena, so you can keep moving around him in a circle in either direction. However, he can teleport, so if he moves back off quickly and start the circle again.
8F Poisons, Explosions, and Detox Herbs – Giant Ant Commander

All Floor 8 of Taedal’s Tower features in Throne and Liberty:
- Floor: Poisons, Explosions, and Detox Herbs
- Boss: Giant Ant Commander
- Unlocks at Level: 28
- Rewards: 4x Quality Weapon Growthstone, 8x Quality Armor Growthstone, 5x Quality Accessory Growthstone, 10x Recovery Crystal
- Recommended Build: Melee (Greatsword) and Ranged (Longbow)
To beat the Giant Ant Commander on Floor 8F, you need to keep away from the Exploding Ants and make sure to use the Detox Herbs after the boss covers the arena in poison. Throughout the entire fight the boss will summon ant minions who will immediately chase after you and then stop to explode when they get in range. Consequently, you’ll always want to move away any time they get close because they will explode in a small circle of AoE you don’t want to be hit with.
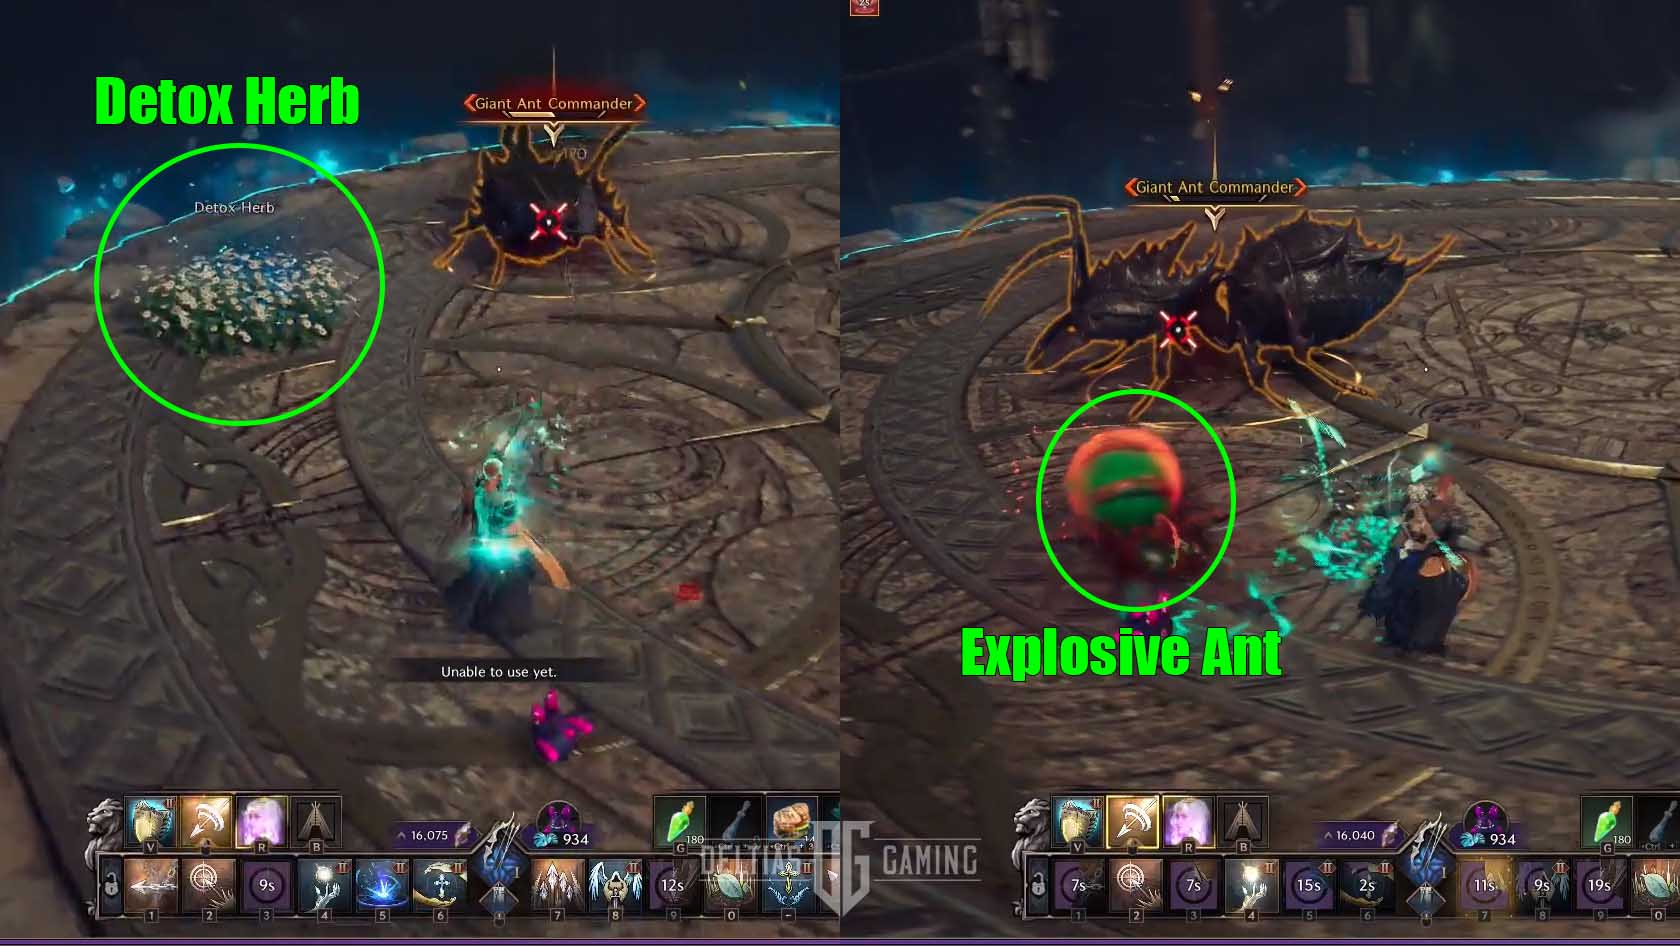
The Giant Ant Commander’s large-scale ability will cover the entire arena in poison. There is no way to avoid this and it will debuff you with three stacks of poison, dealing significant damage over time. However, shortly after the poison three bunches of white detox herbs will sprout around the area. All you need to do is run through each of these in order to remove one stack of the poison. Additionally, you’ll receive a bit of healing each time.
Therefore, while you’ll likely want to use a strong melee weapon for direct damage fighting, you’ll also want to have a ranged weapon in your off-hand. That way when you need to move around to the Detox Herbs you can still be attacking at range.
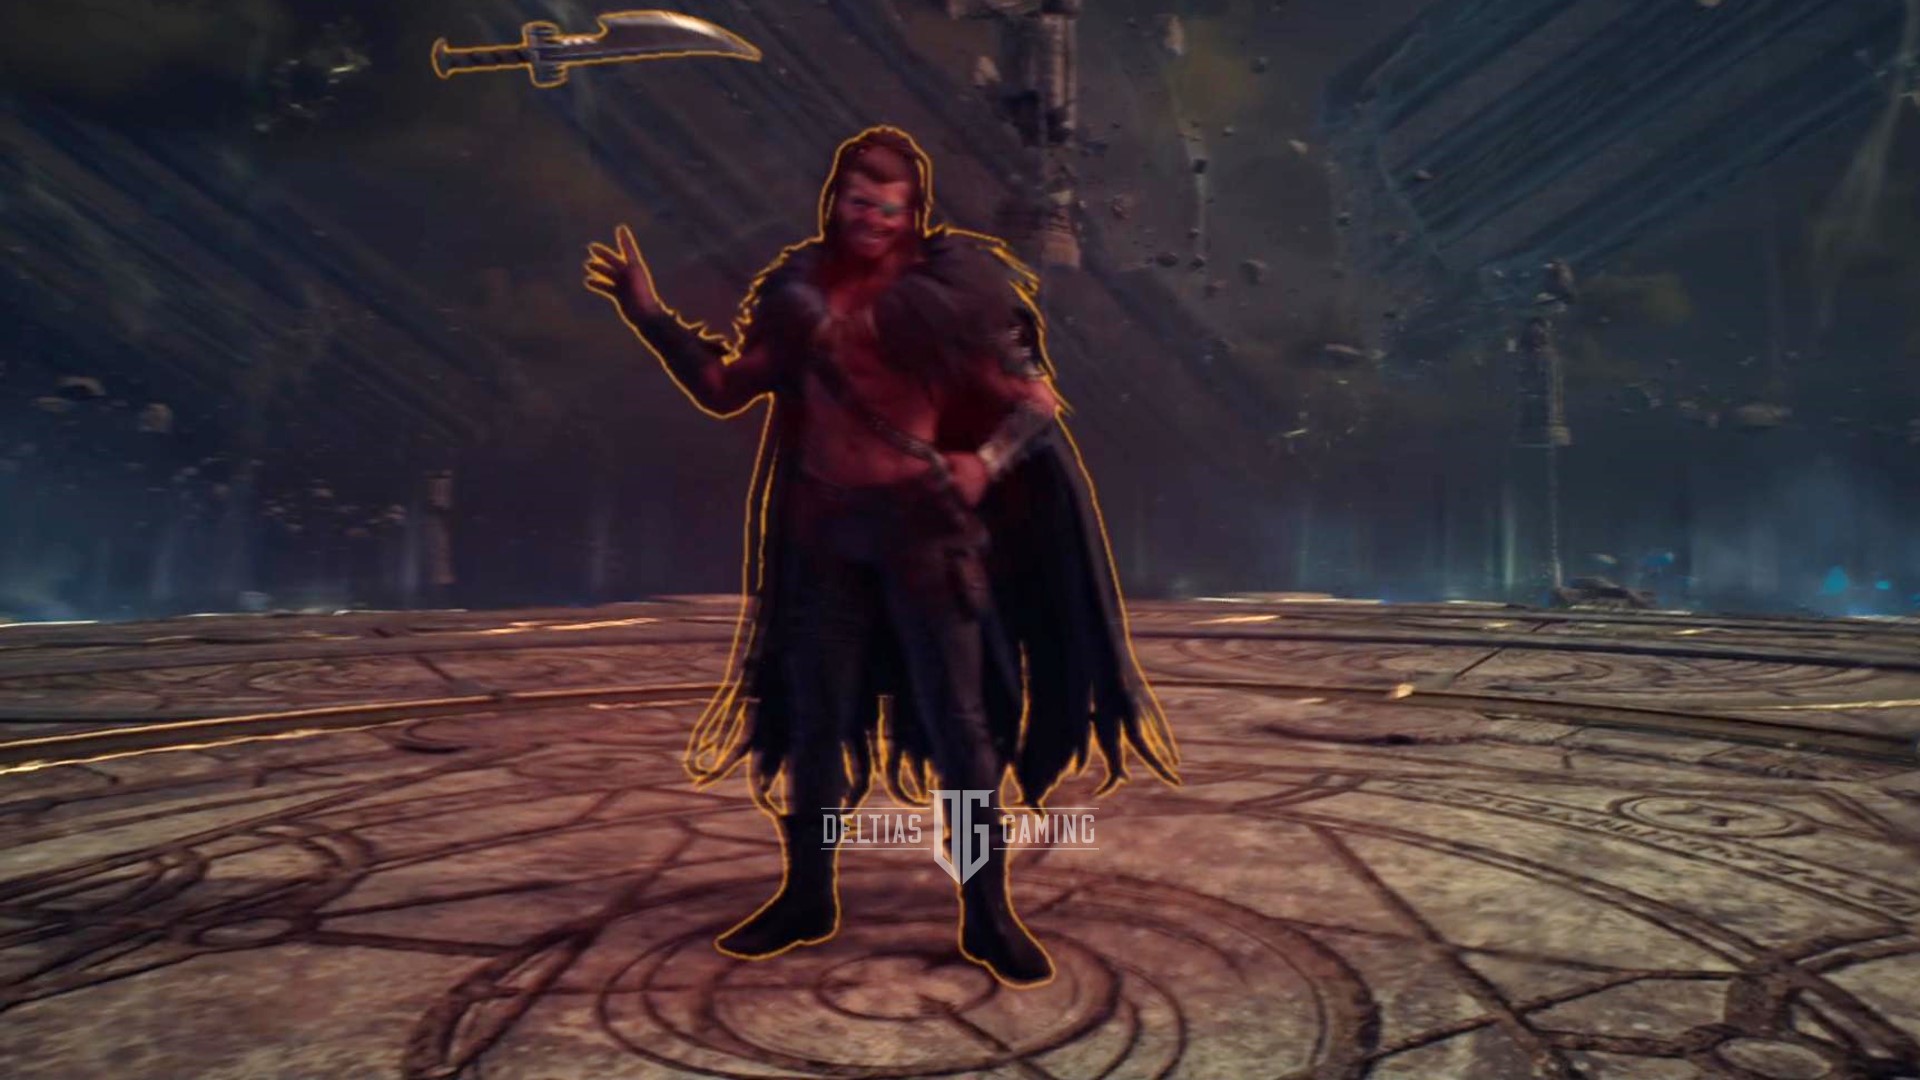
9F Dance of the Flashing Sword – Dancing Giant Butcher
All Floor 9 of Taedal’s Tower features in Throne and Liberty:
- Floor: Dance of the Flashing Sword
- Boss: Dancing Giant Butcher
- Unlocks at Level: 30
- Rewards: 1x Rare Weapon Growthstone, 2x Rare Armor Growthstone, 1x Rare Accessory Growthstone, 10x Recovery Crystal
- Recommended Build: Melee weapons like Greatsword and Sword and Shield
To beat the Dancing Giant Butcher on Floor 9F of Taedal’s Tower, you will need to be highly responsive to his attacks, executing perfect blocks and dodges to stay alive. This boss uses daggers as his weapon of choice, but he has a mix of melee attacks and ranged-throwing attacks. His first ability is a Dash or Gap Closer where he rushes at you and then follows up with a backstab. If you’re using a ranged weapon during this fight and already on the move this shouldn’t be too difficult to avoid. However, if you’re using a melee weapon there will be a chance to time a perfect block.
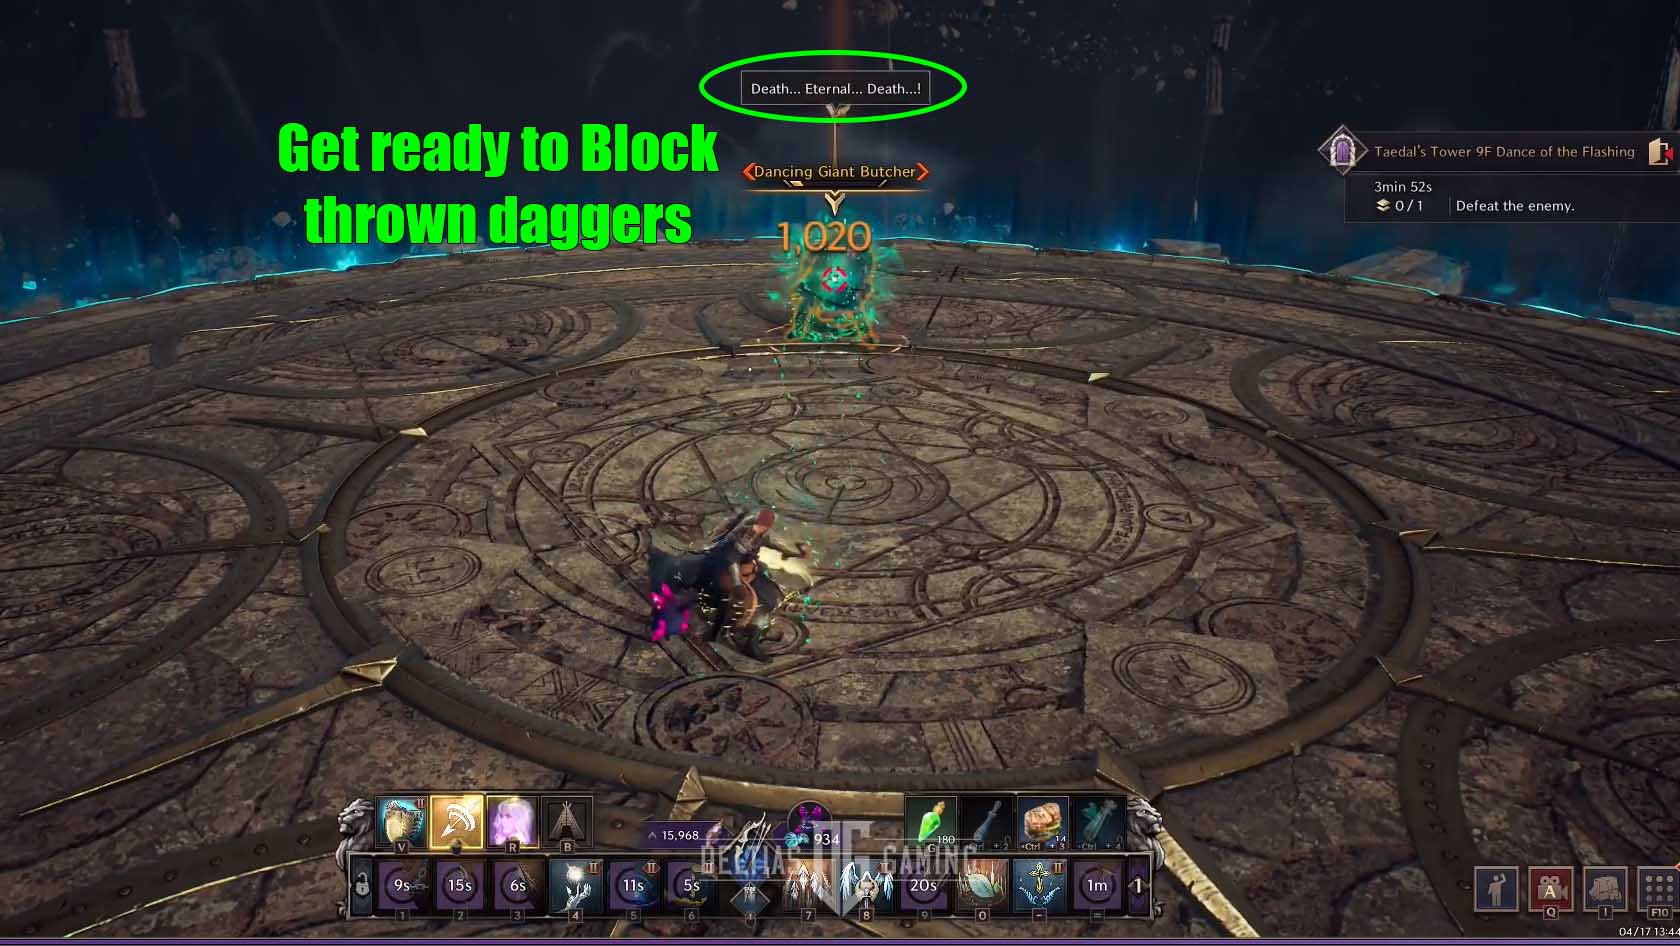
The Dancing Giant Butcher’s second attack is a throwing attack, and the telegraph for it is quite easy to spot. He will speak ‘Death…. Eternal…. Death…!’. Thus, when you hear that or see the text box above his head you’ll know he is preparing to throw. These can also be blocked to avoid damage.
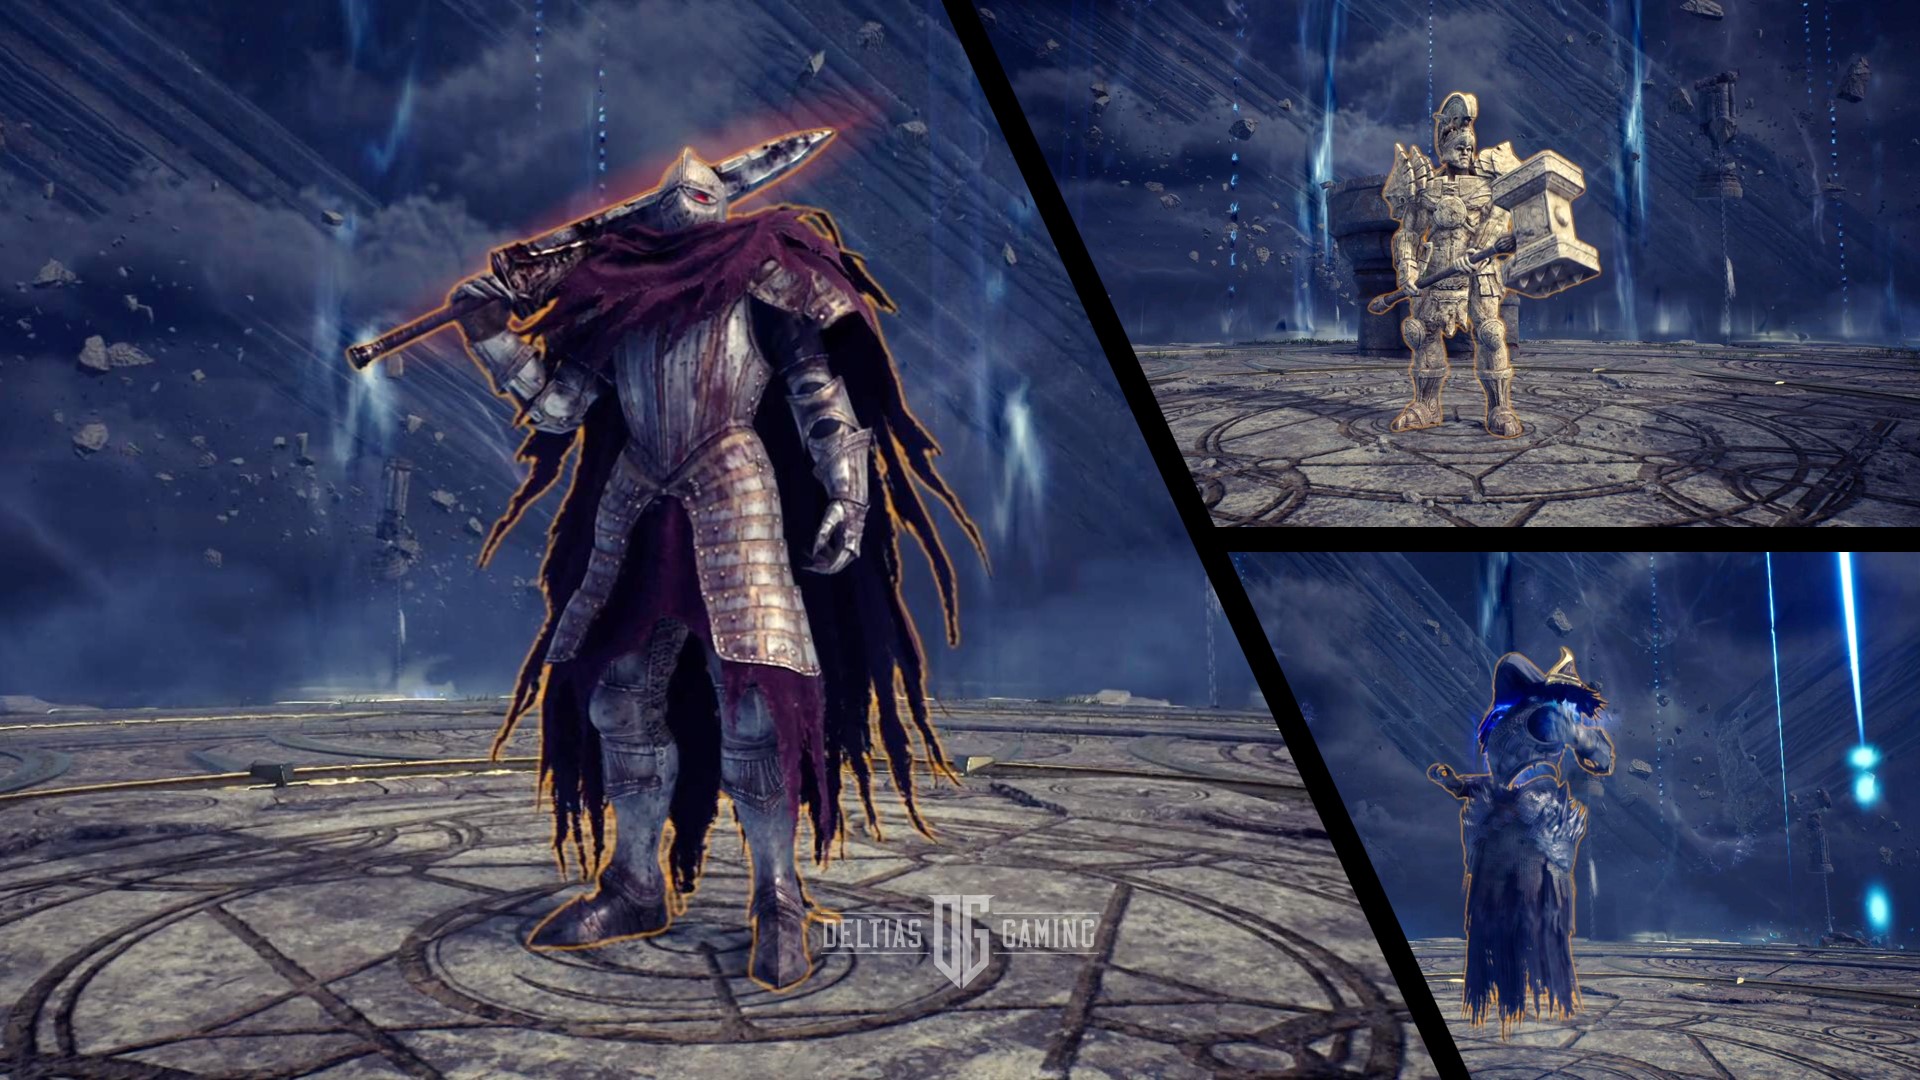
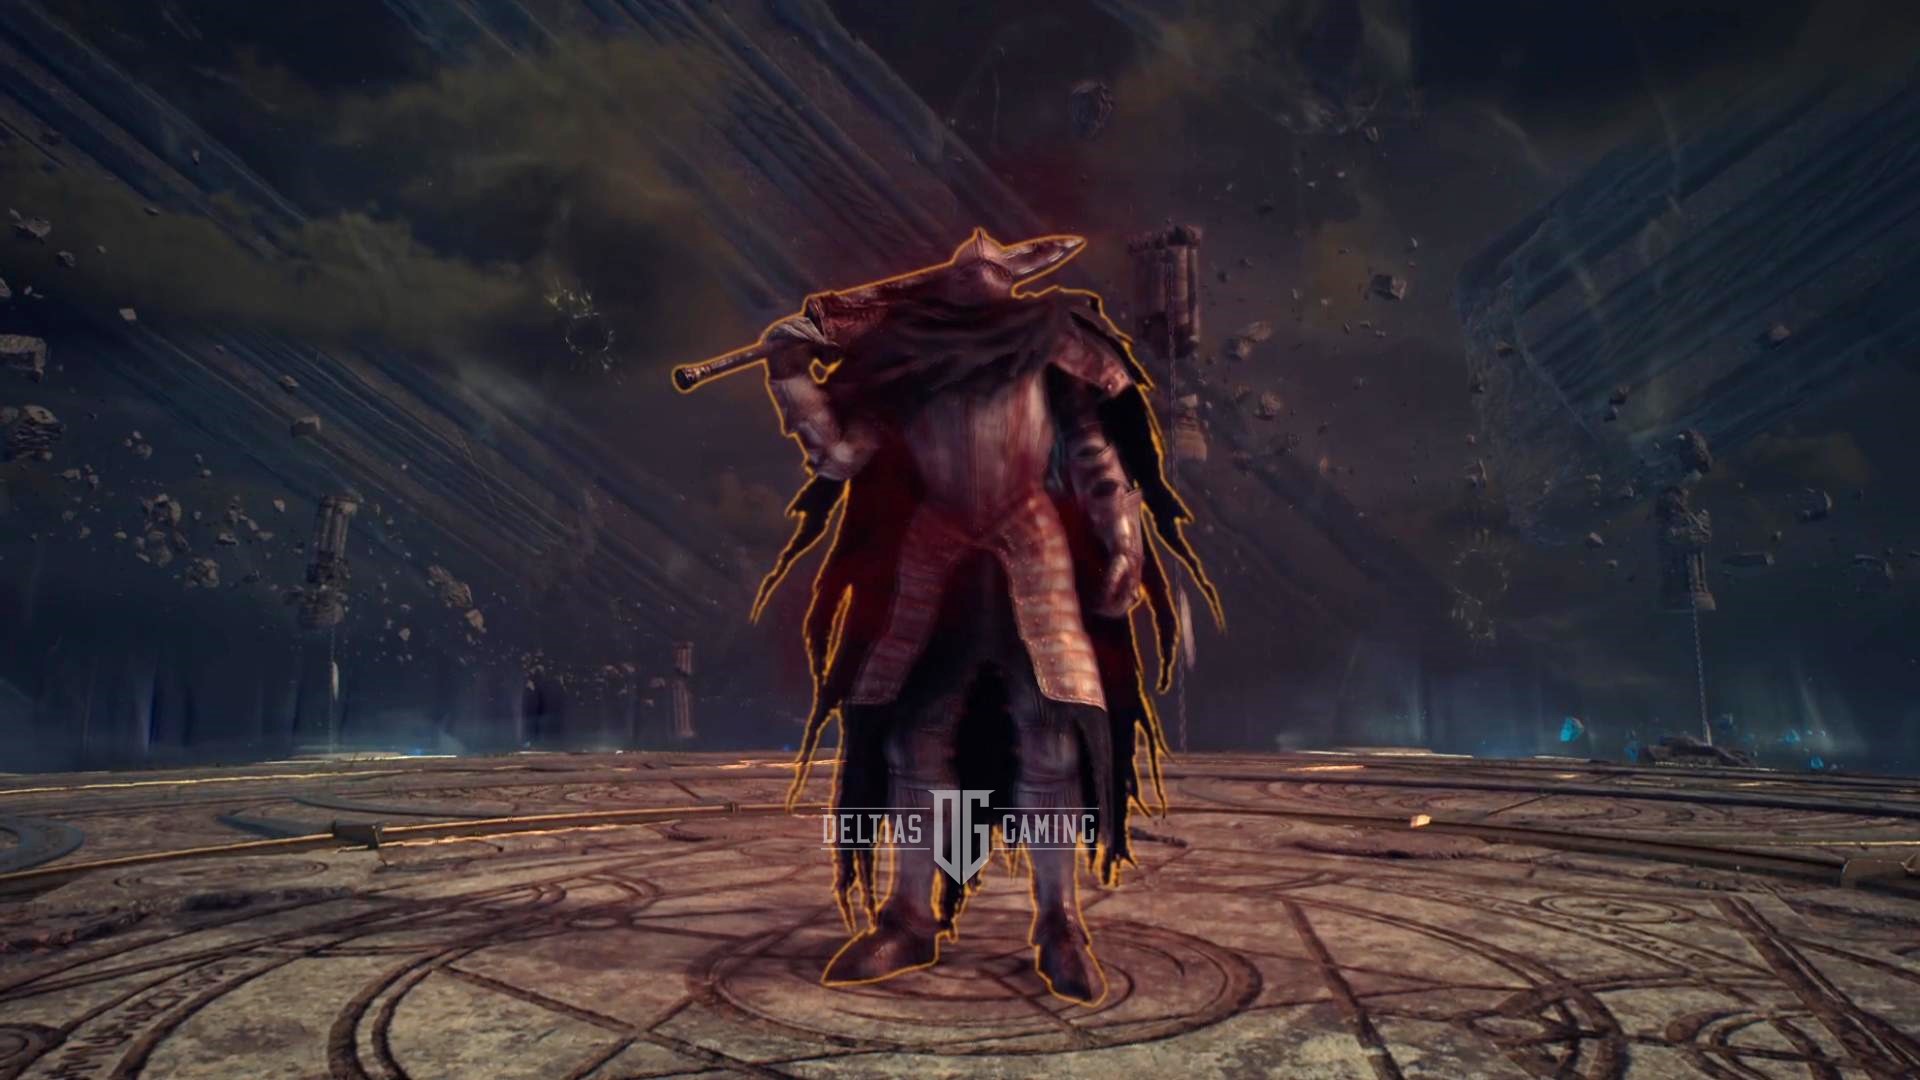
10F Commander’s Shadow Strike – Oblivion Skeleton Commander
All Floor 10 of Taedal’s Tower features in Throne and Liberty:
- Floor: Commander’s Shadow Strike
- Boss: Oblivion Skeleton Commander
- Unlocks at Level: 35
- Rewards: 1x Velvet Raven glide morph, 1x Rare Weapon Growthstone, 2x Rare Armor Growthstone, 1x Rare Accessory Growthstone, 20x Recovery Crystal
- Recommended Build: Melee weapons like Greatsword and Dagger
To beat the Oblivion Skeleton Commander on Floor 10F, you need to avoid his massive AoE jump attack and time your perfect blocks. Furthermore, this boss can easily catch you in a stun if you’re not careful, and he nearly always follows that up with a hard-hitting attack.
His jump attack is the one you really want to watch out for. When he hits the ground, it sends out an arena-wide AoE, and this will do massive damage to you if you get struck by it. The only way to avoid this is by timing your own jump. As he comes down, you jump up. The AoE will radiate out in a wave underneath you and by the time you land it should be safe.
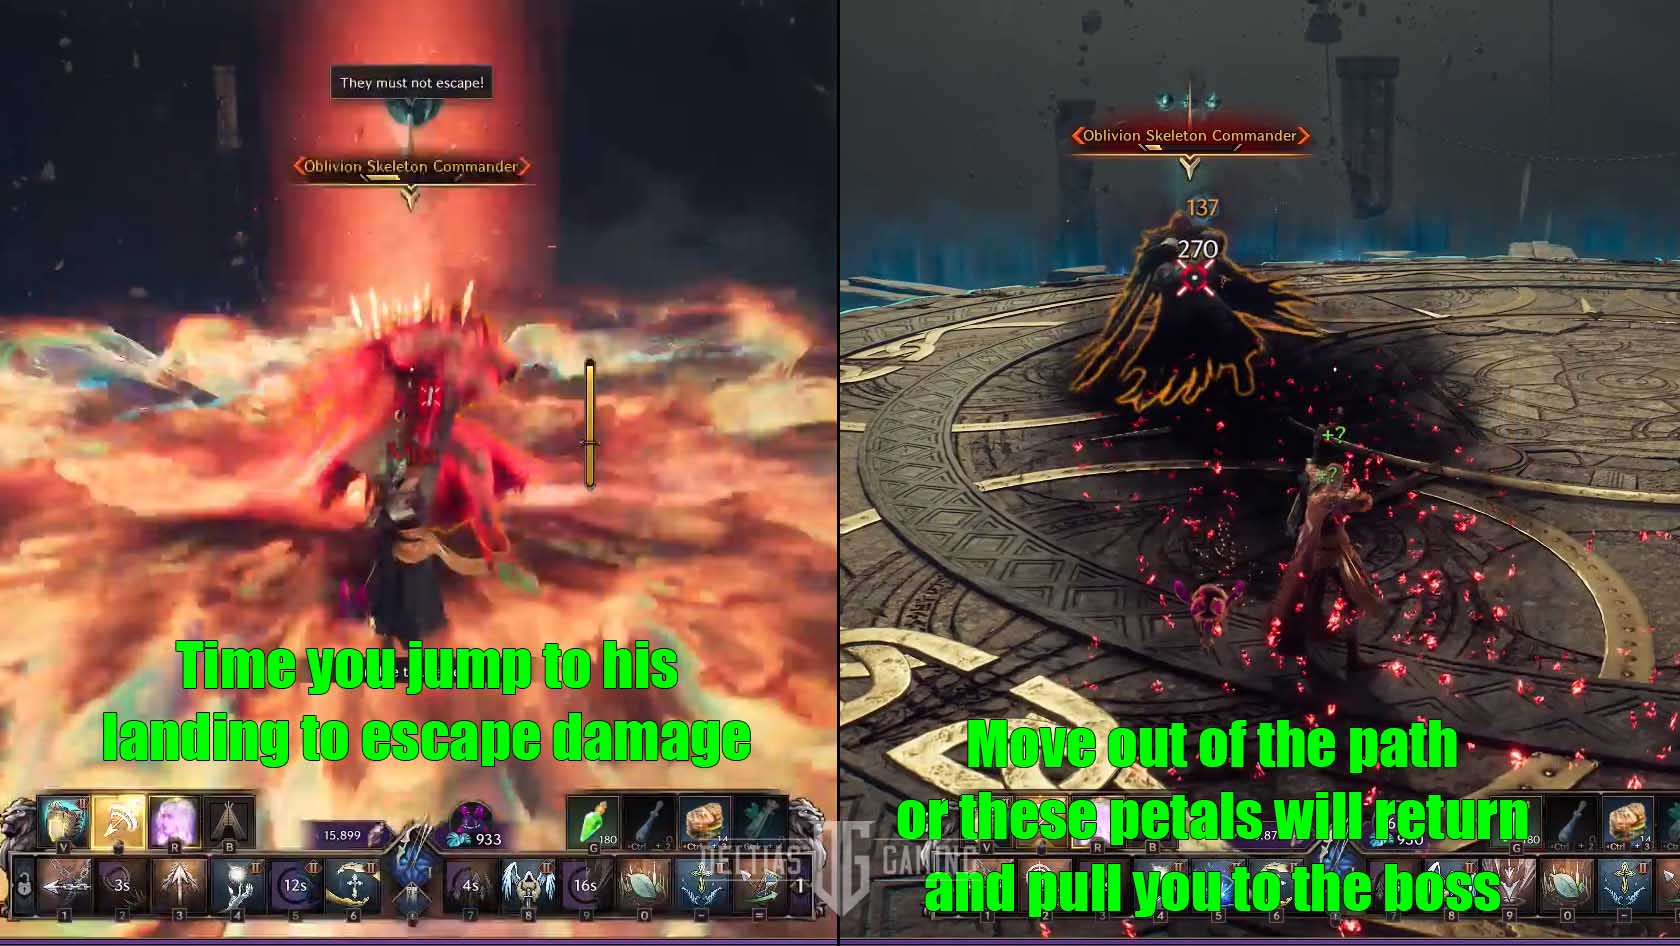
His second major attack to avoid is when he uses his sword to cast out three lines of dark and glowing red dagger lines at you. These won’t hurt much if you just stand there, but within a second or two they will come and hit you from behind. If you’re still standing in the path, they will pull you directly into the boss. Make sure you don’t stand still for too long in this fight, or be sure to strafe off to the side as soon as you see him cast this.
11F Maze of Death – Roaring Avolos Umbramancer

All Floor 11 of Taedal’s Tower features in Throne and Liberty:
- Floor: Maze of Death
- Boss: Roaring Avolos Umbramancer
- Unlocks at Level: 36
- Rewards: 2x Rare Weapon Growthstone, 4x Rare Armor Growthstone, 2x Rare Accessory Growthstone, 5x Quality Recovery Crystal
- Recommended Build: Melee (Greatsword) and Ranged (Longbow)
To beat the Roaring Avolos Umbramancer on Floor 11F, you have to avoid a massive AoE by navigating a maze before the blast hits you. Moreover, there are no shortcuts to solving this. You cannot climb or use your grapple hook to get over the walls, you must run the maze for real. Therefore, you are going to want to set your camera to the widest possible view when this happens. Sprint by changing into your dash morph, and make your way toward the outer wall of the maze. If you make it out safely, the walls will crumble down once the AoE reaches the edges.

Afterward, the rest of the Umbramancer’s attacks are fairly straightforward range magic spells. One attack will generate purple AoE circles all over the ground, so step away from them before the lightning comes down. Another very similar attack comes after the boss raises his staff to create three circles in a row. Again, make sure you are not standing inside. The last major attack he has is an energy beam he sends directly at you. This can be side-stepped if you are already strafing around the arena, or it can be blocked to avoid the damage.
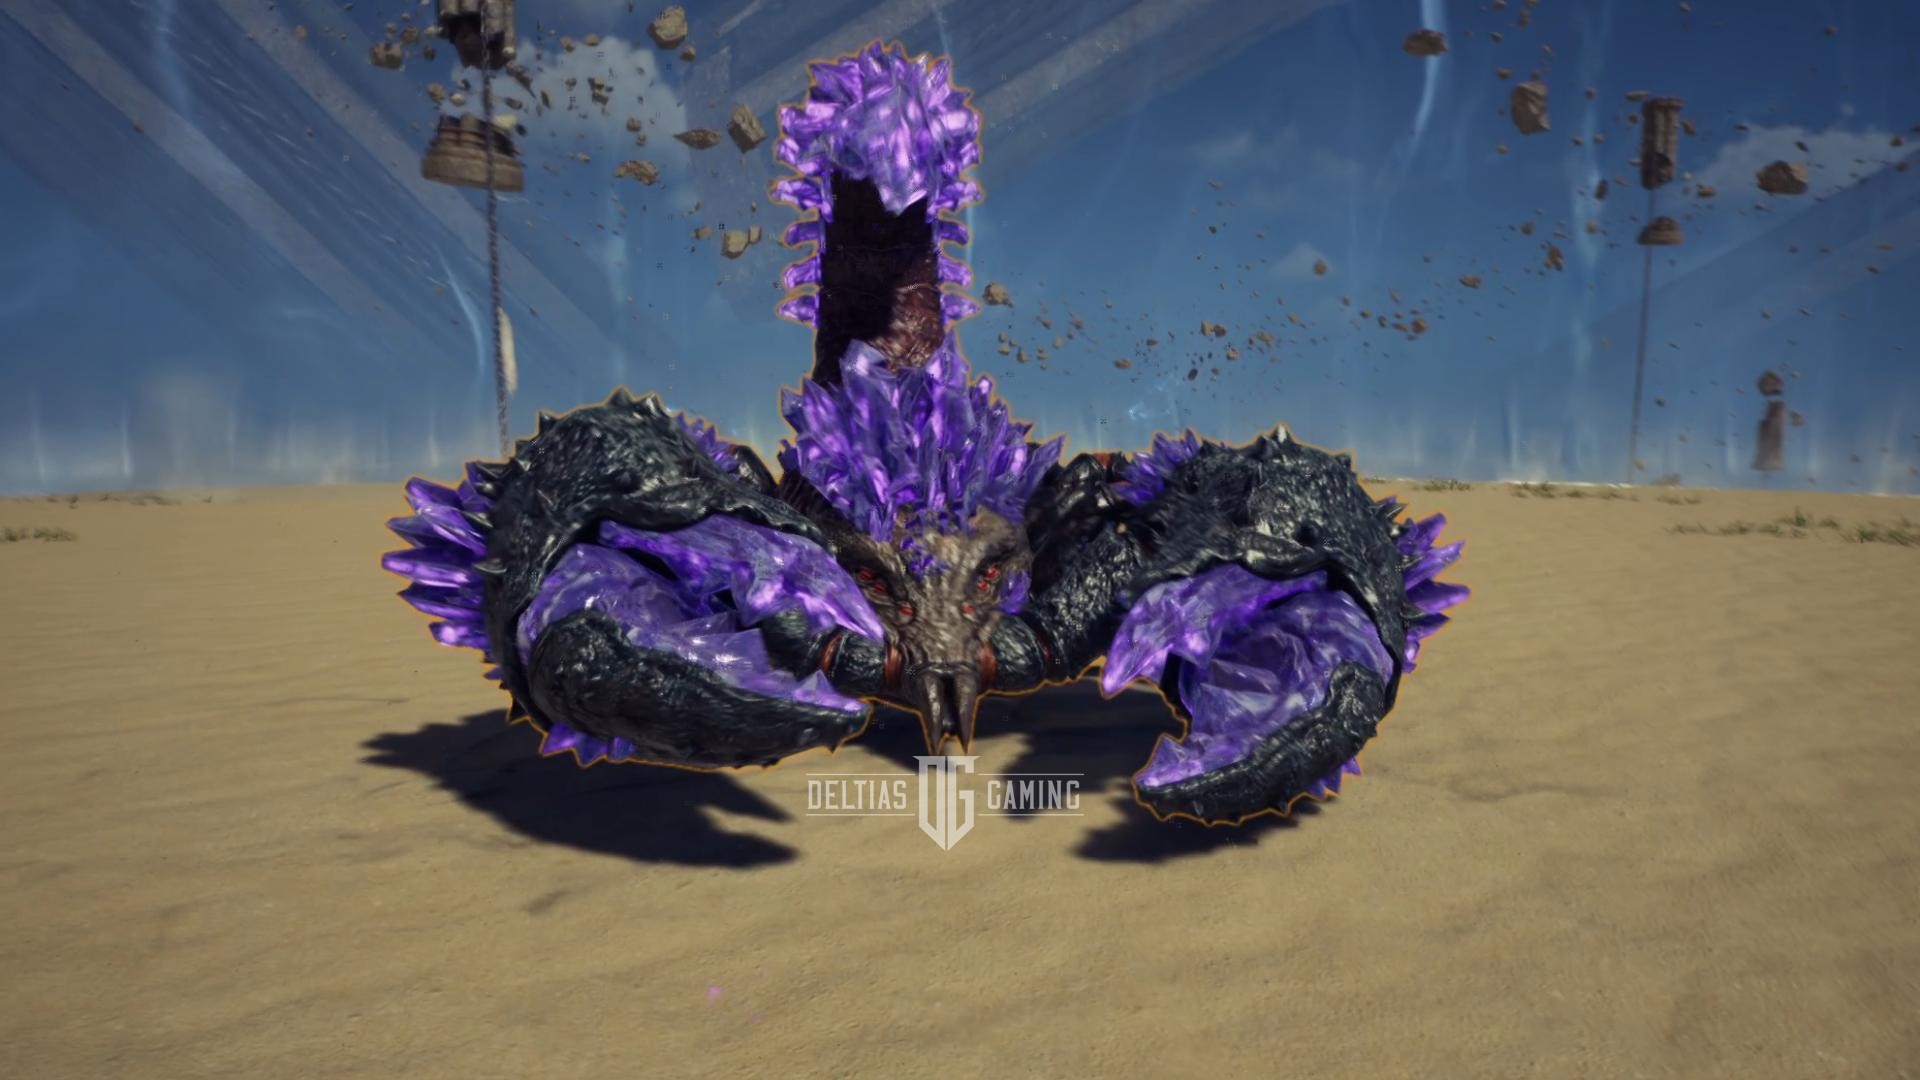
12F Answers in the Sand – Scorpos
All Floor 12 of Taedal’s Tower features in Throne and Liberty:
- Floor: Answers in the Sand
- Boss: Scorpos
- Unlocks at Level: 37
- Rewards: 2x Rare Weapon Growthstone, 4x Rare Armor Growthstone, 2x Rare Accessory Growthstone, 5x Quality Recovery Crystal
- Recommended Build: Ranged weapons like Longbow, Crossbow, or Wand and Tome
To beat Scorpos on Floor 12F, you will have to lure the main boss out of hiding by luring the smaller scorpions into the quicksand. This mechanic will repeat itself throughout the battle, and if executed correctly you can even stun the boss as it reappears.
When you first arrive Scorpos won’t be there yet. Instead, you need to strike the smaller Tower Explosive Scorpion with a basic attack. Then, lead it over to the quicksand circle in the center. This will cause Scorpos to spawn.
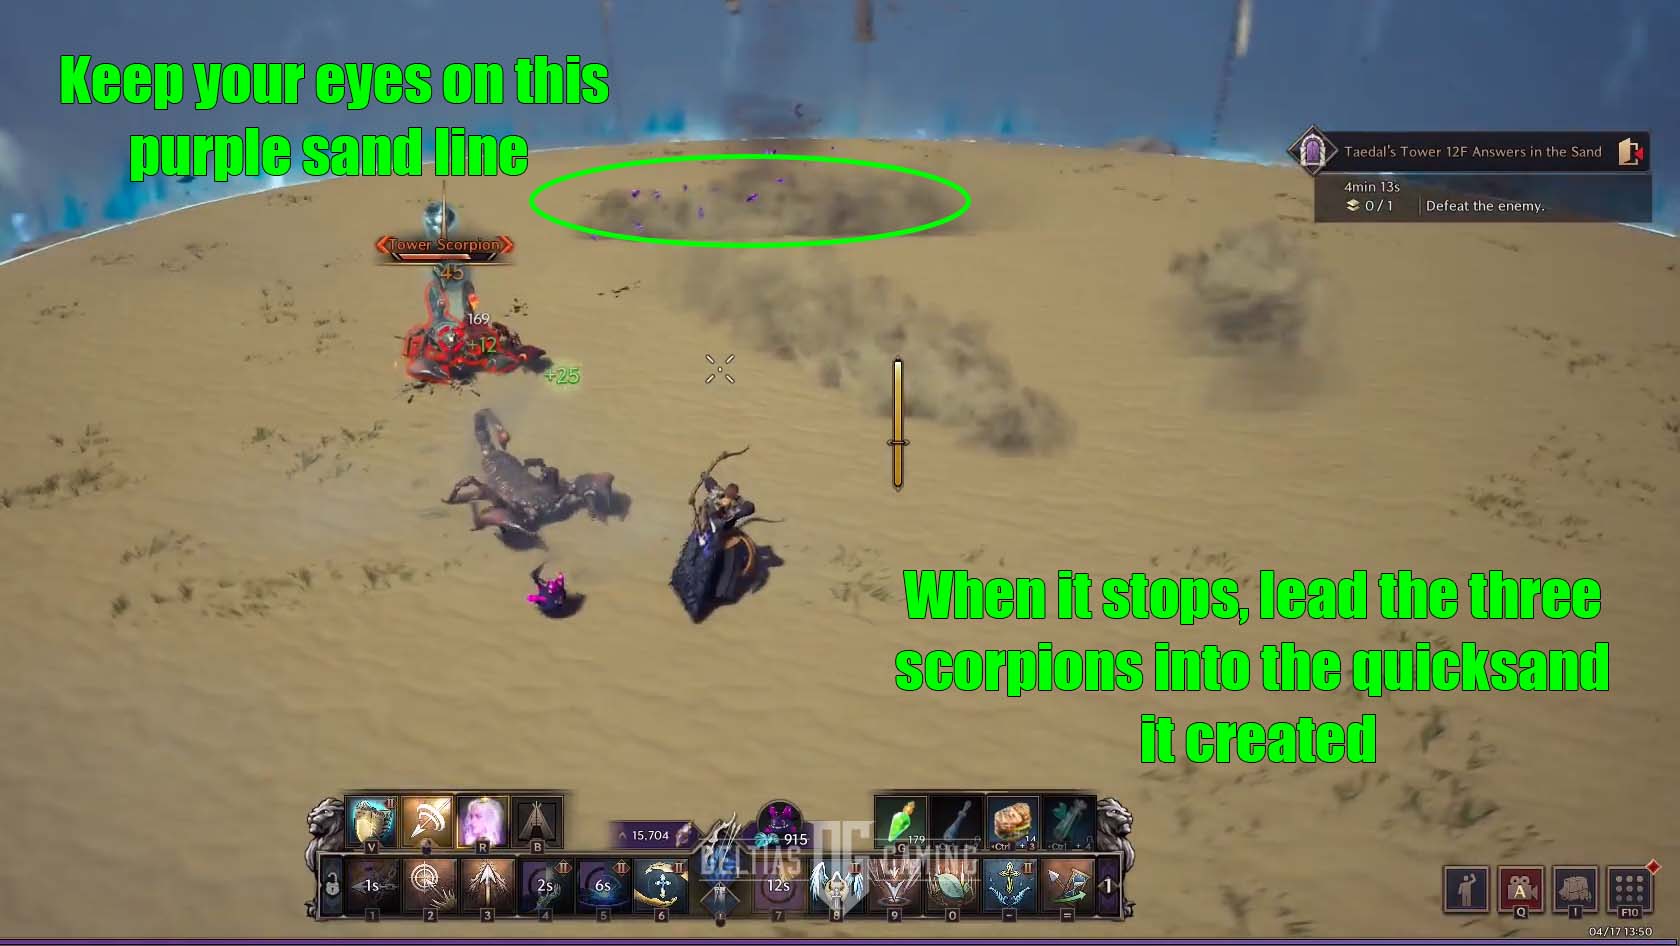
Furthermore, one of the main boss attacks will repeat this mechanic later on. Scorpos will burrow and three small scorpions will appear. Additionally, three scoring lines of sand will travel back and forth across the area. One of those lines will have purple crystals in it. Keep an eye on that one and lead the scorpions over to the quicksand hole it creates when it stops. Scorpos will reappear and be stunned! If you choose the wrong quicksand circle the stun will not happen.
Finally, the other attacks the boss uses are fairly standard. It will ‘teleport’ around the arena by burrowing down and then popping up underfoot. It will also shoot purple crystal projectiles at you from its tail. However, these can be blocked. It also has a spin attack that you will want to stay far away form and use a ranged weapon for attack.
13F Fall, Shock, Destroy – Lighting Jump Attacker
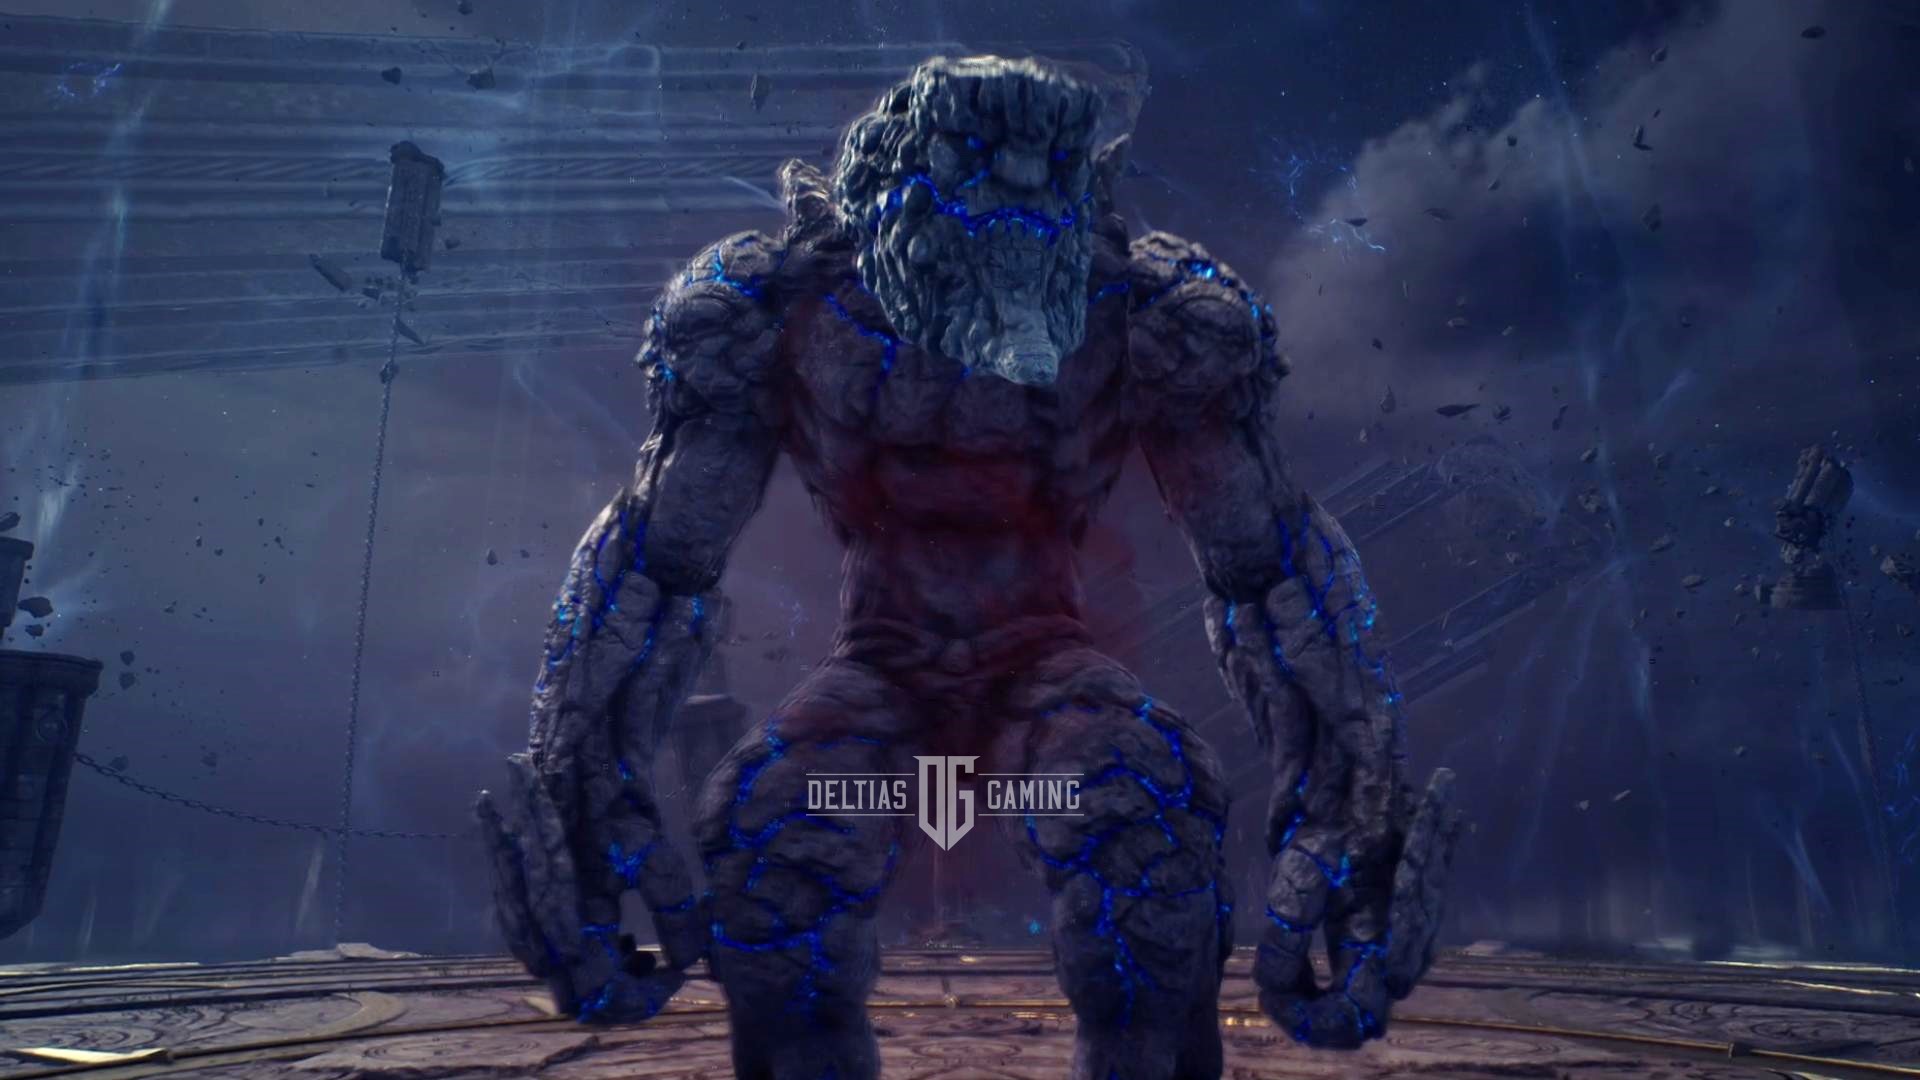
All Floor 13 of Taedal’s Tower features in Throne and Liberty:
- Floor: Fall, Shock, Destroy
- Boss: Lighting Jump Attacker
- Unlocks at Level: 38
- Rewards: 3x Rare Weapon Growthstone, 6x Rare Armor Growthstone, 4x Rare Accessory Growthstone, 5x Quality Recovery Crystal
- Recommended Build: Melee weapons like Greatsword and Sword and Shield
To beat the Lighting Jump Attacker on Floor 13F, you will have to learn the mechanics of the stone puzzle and avoid the incredibly deadly lightning punch. We highly recommend you stick mostly to melee weapons in this battle because ranged combat will trigger his lightning punch ability when you get too far away. This is where he will small the ground with a fist and cover the whole arena in lightning. This ability cannot be blocked and it will stun you. The best and easiest way to avoid it altogether is simply by staying close to him in melee combat.
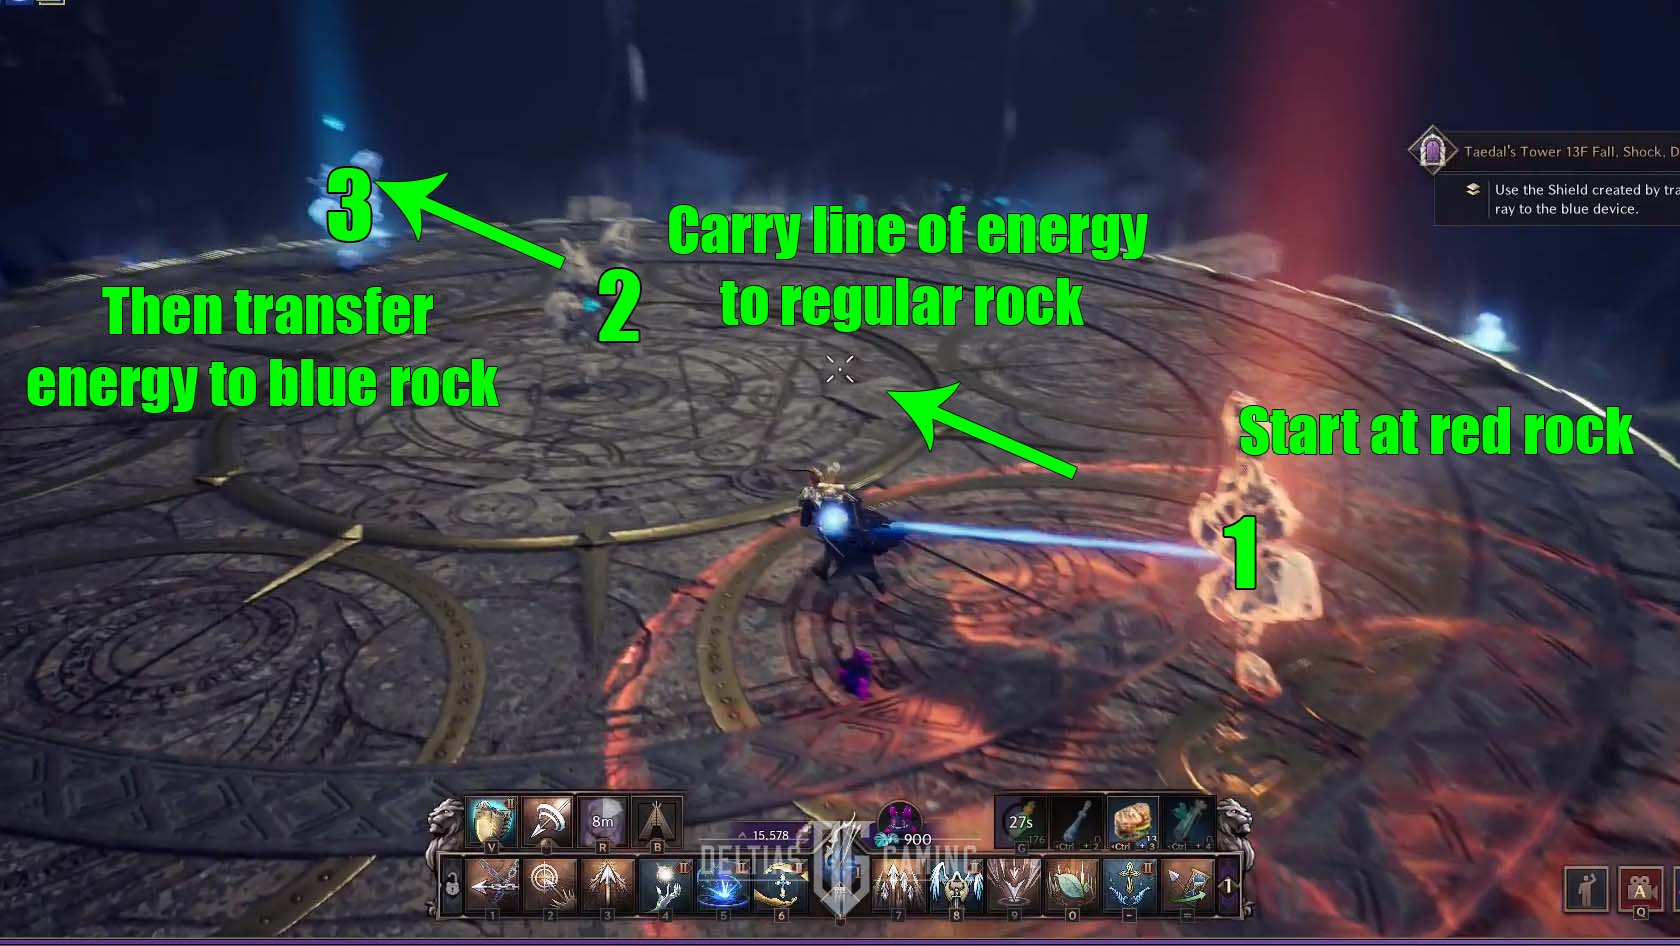
Additionally, when you start the fight you will have to solve another puzzle mechanic that will repeat throughout the fight. Three rocks will appear on the arena stage: Glowing Red, Basic Grey, and Glowing Blue. You must transfer the energy from the red rock to the blue rock. Go over to the red rock and when you get close enough an energy line will attach itself to you. Walk that line over to the grey rock in the center, then walk it over again to the glowing blue rock. This will summon the boss.
Moreover, this rock puzzle will repeat during the battle, when the boss will jump into the air and the rock reappear. You must immediately run to the red rock and start transferring the energy to the blue rock before the boss drops back out of the sky.
14F Out of Sight – Old Wizard’s Eye
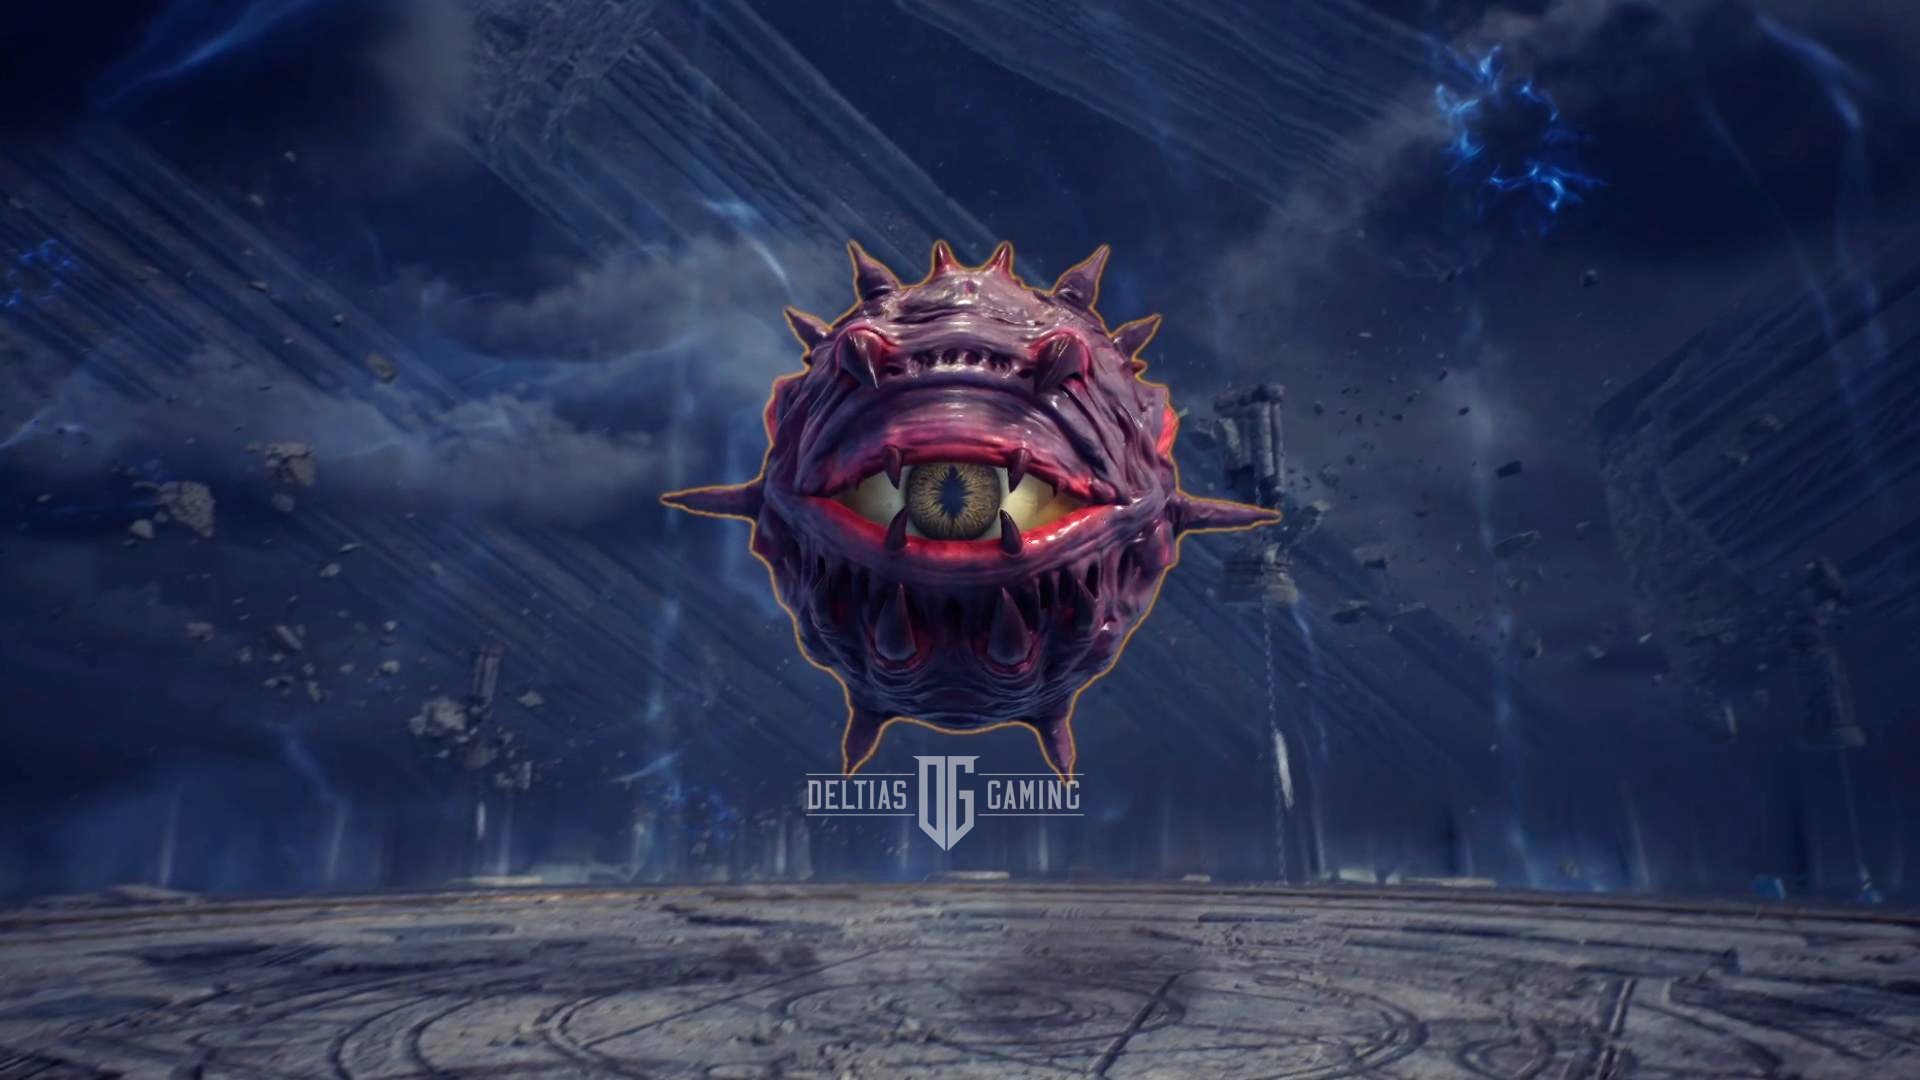
All Floor 14 of Taedal’s Tower features in Throne and Liberty:
- Floor: Out of Sight
- Boss: Old Wizard’s Eye
- Unlocks at Level: 39
- Rewards: 3x Rare Weapon Growthstone, 6x Rare Armor Growthstone, 4x Rare Accessory Growthstone, 5x Quality Recovery Crystal
- Recommended Build: Greatsword or Staff
To beat the Old Wizard’s Eye on Floor 14F, you must be familiar with and accurately respond to each of its attacks, especially the one-shot AoE ability that can end your fight suddenly. Additionally, many of these attacks will require you to perform a perfect block in order to avoid damage, so it may take you several tries to get the timing down correctly.
The first ability Old Wizard’s Eye has is a Spin Attack, where it will flare out tentacles and throw beams everywhere. Avoiding this will require a perfect block and you will be stunned if you miss. Secondly, the boss has the ability to create small red circles of AoE on the ground. Move, strafe, or dodge out of these immediately to avoid damage.
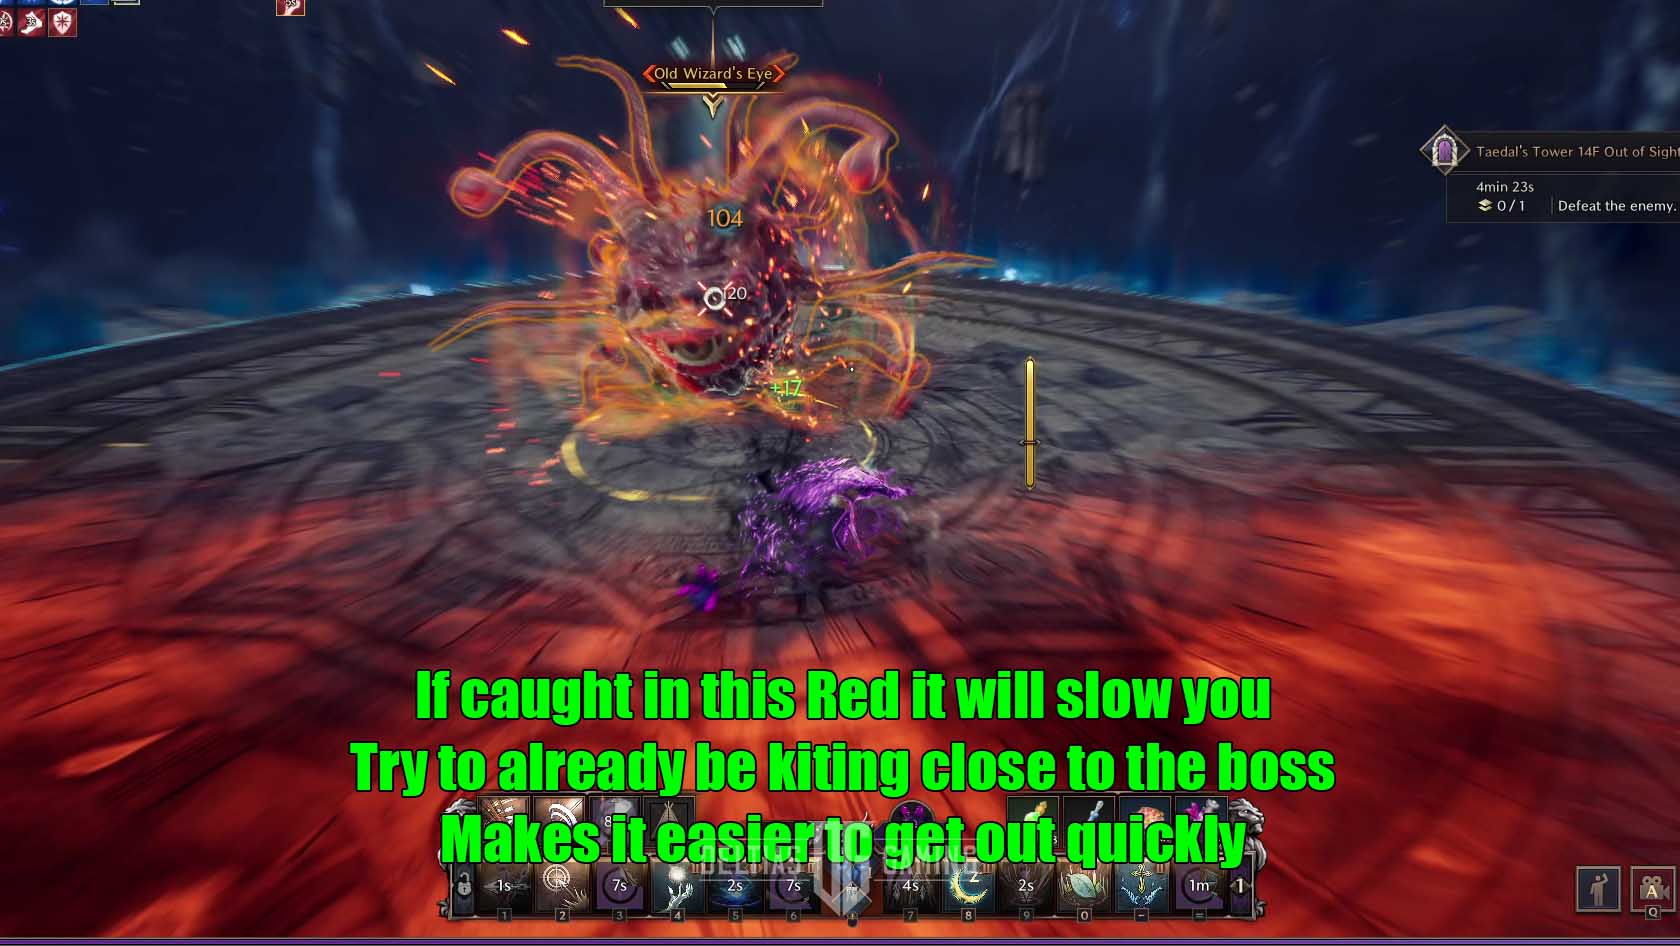
Next is a move where the boss smashes the ground three times, creating deadly AoE. The only way to avoid this damage is by timing your jumps. This can be tricky because to be successful you will have to make three jumps. However, if you are in the air when the boss hits the floor then you won’t take any damage.
The final major ability is a potential one-shot AoE. He’ll start by charging up his cast, and will cover half of the arena in front of him with a glowing red AoE warning. If you’re caught in this area your movement speed will be slowed. Moreover, you only have three seconds to get out of the red before a massive wave of damage can take you out.
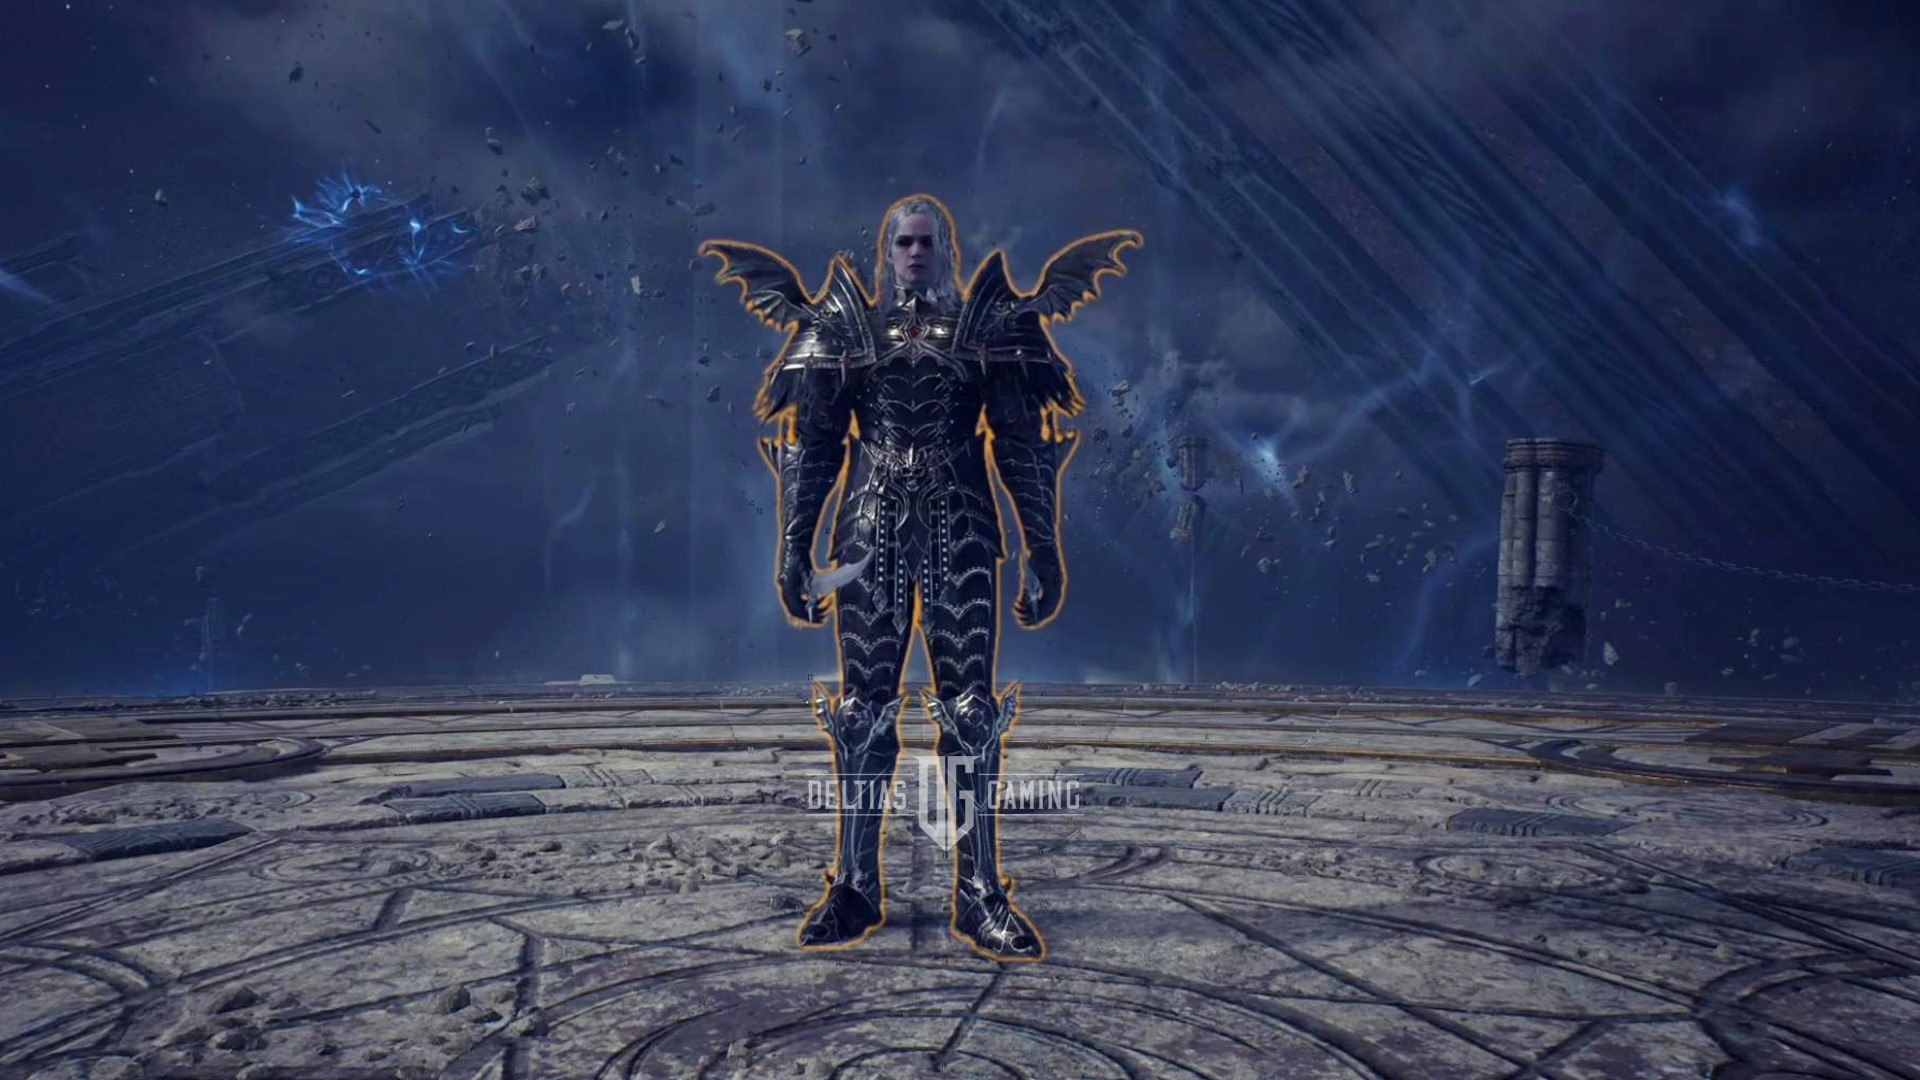
15F Takers and Retrievers – Stealer of Light Dren
All Floor 15 of Taedal’s Tower features in Throne and Liberty:
- Floor: Takers and Retrievers
- Boss: Stealer of Light Dren
- Unlocks at Level: 40
- Rewards: 1x Mischievous Joker Amitoi, 3x Rare Weapon Growthstone, 6x Rare Armor Growthstone, 4x Rare Accessory Growthstone, 5x Quality Recovery Crystal
- Recommended Build: Longbow or Wand and Tome
To beat the Stealer of Light Dren on Floor 15F, you will need to be highly mobile and reactive to the mechanics of this fight against a deadly dagger wielder. When you first drop in there will be a simple mechanic to summon the boss and it will repeat again in the fight. All you have to do is interact with the ball of light in the center to summon the boss.
However, later on during the battle the boss will disappear and teleport you to the outside edge. The arena will go dark, though you should be able to just see many shadowy forms roaming around the arena. You’ll see a bright ball of light on the other side of the arena, and you must cross to it without letting any of the shadows touch you. This is a timed event and if you are not successful within that time frame you will immediately die. When successful, the lights will come back and the boss will be revealed. Furthermore, he’ll be stunned and easy to attack.
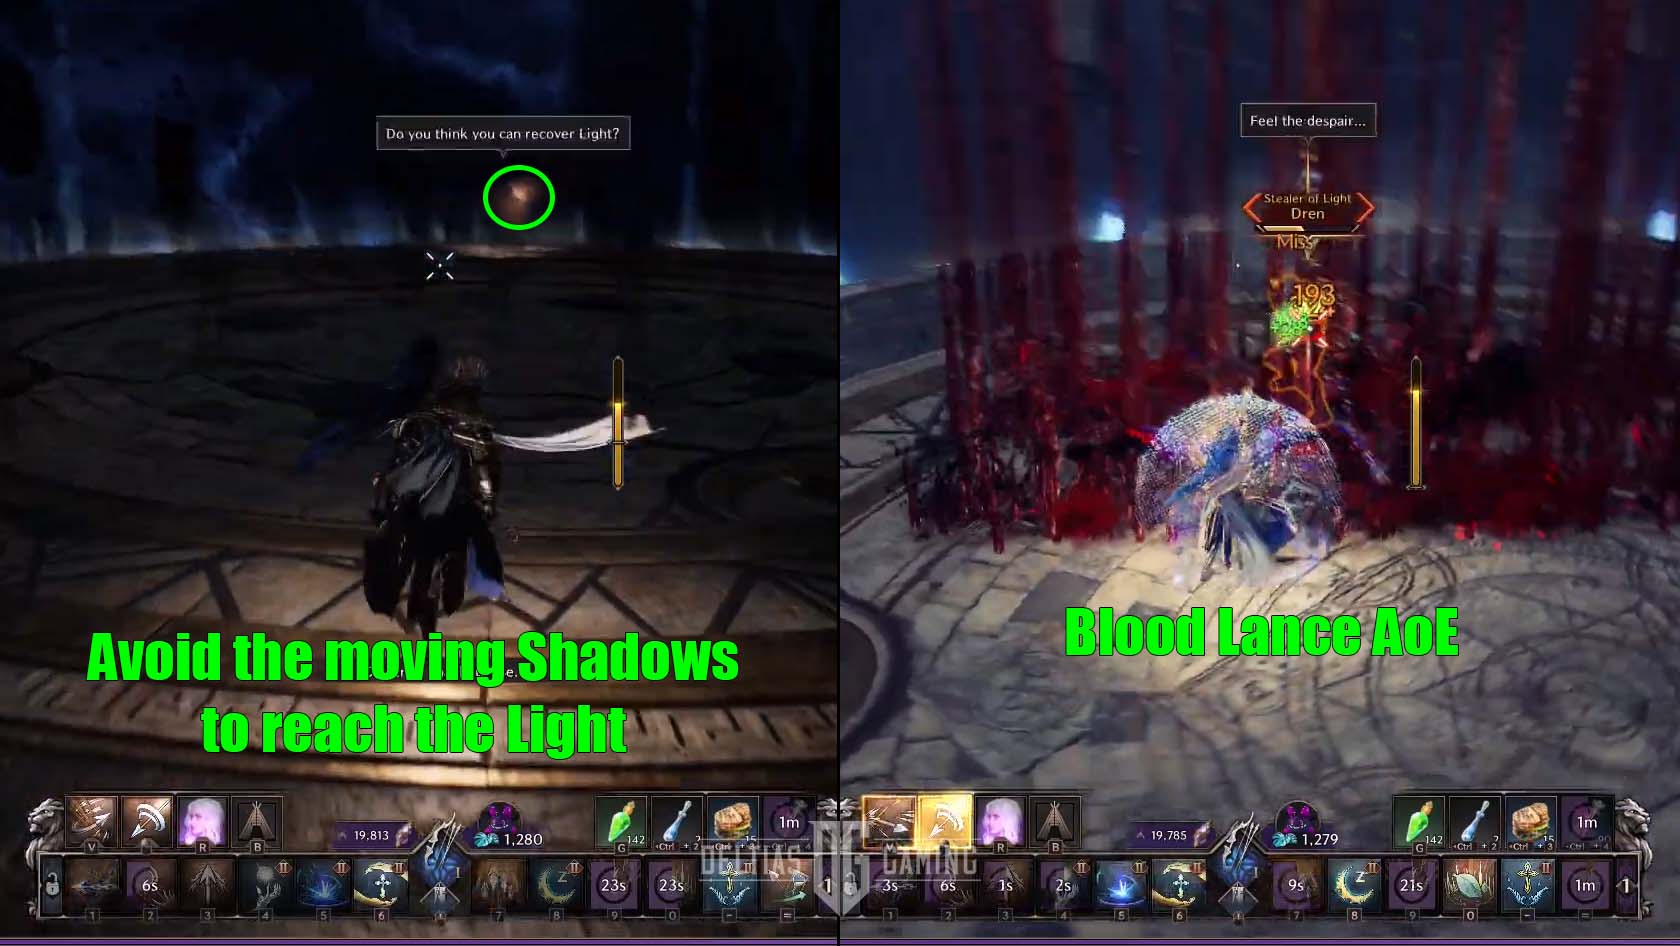
Other attacks include a ball of red blood that Dren will cast from range. You can avoid damage and a stun from it by executing a perfect parry. Another significant attack happens quickly, where he calls forth lances of blood that burst out of a rectangular AoE on the ground. The damage from this ability is strong, so be sure to move out of it as quickly as possible.
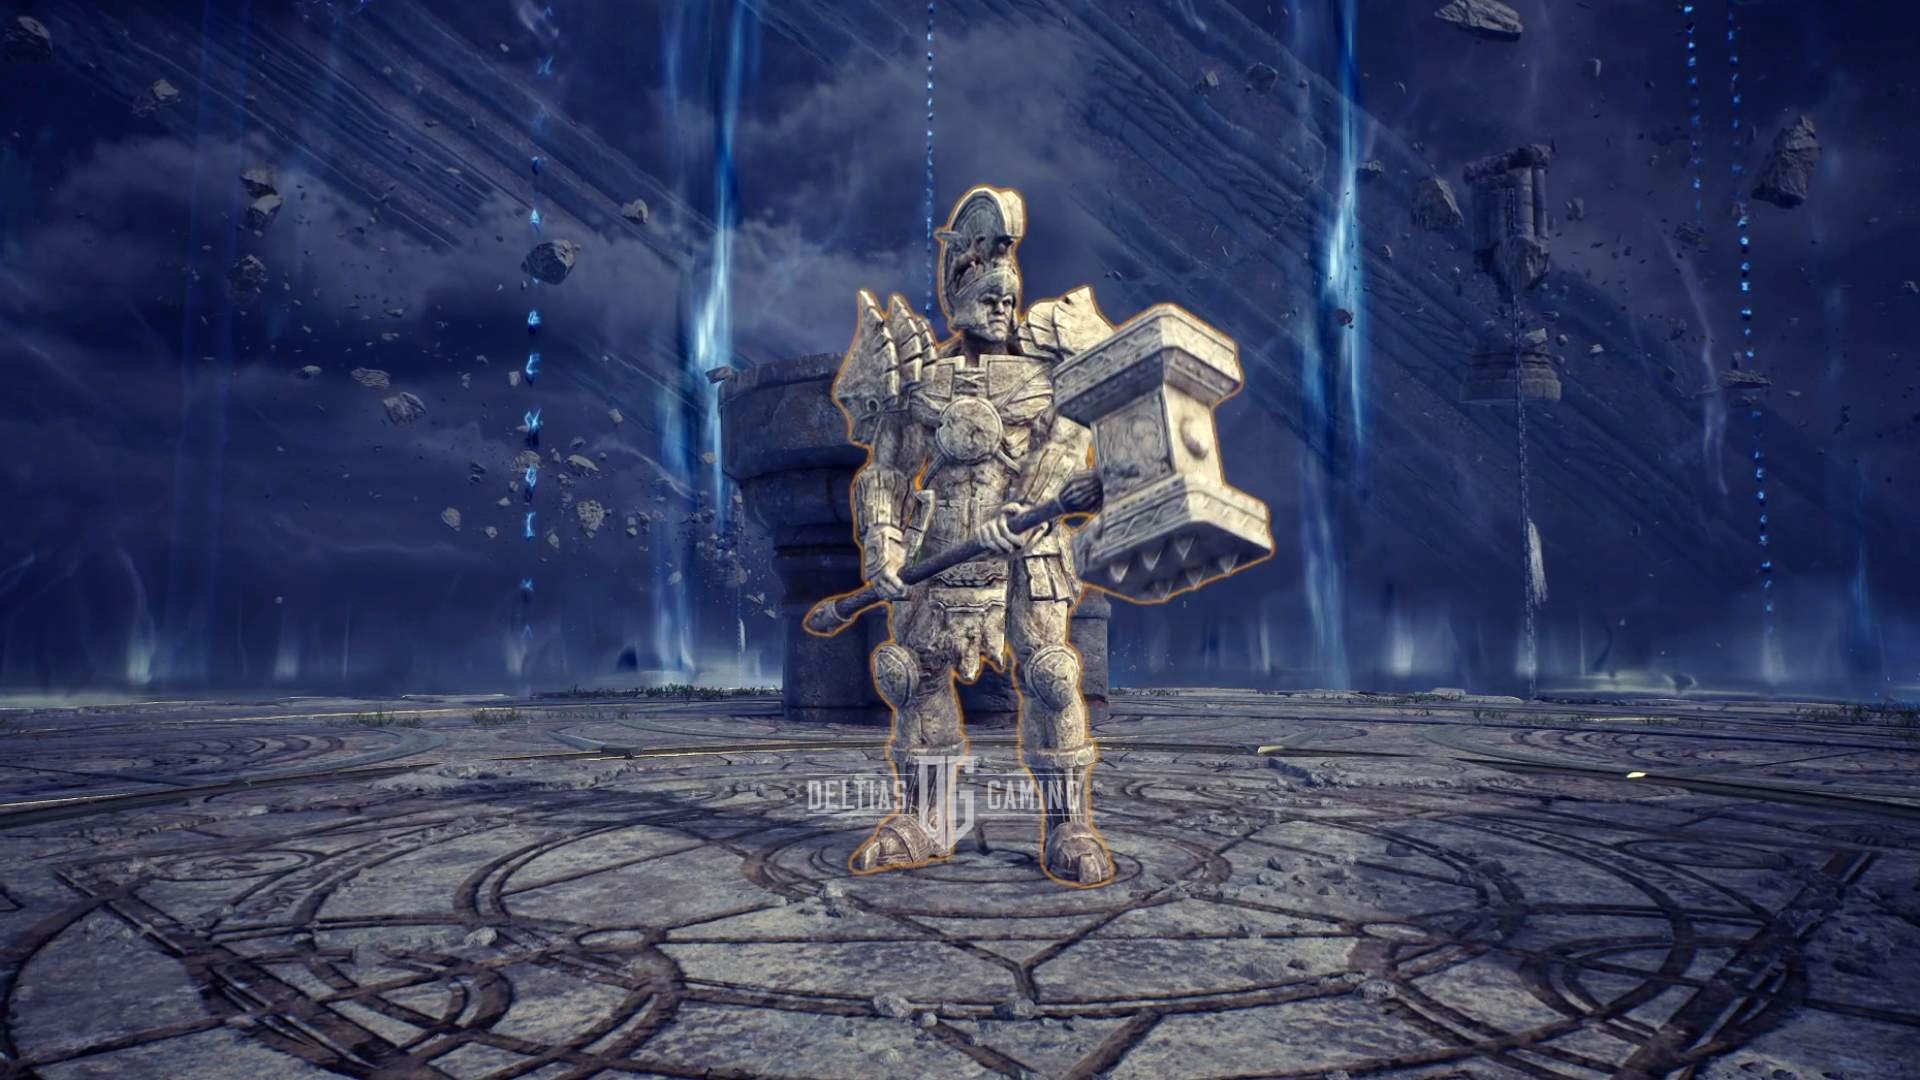
16F Precise Moment – Immortal Guardian
All Floor 16 of Taedal’s Tower features in Throne and Liberty:
- Floor: Precise Moment
- Boss: Immortal Guardian
- Unlocks at Level: 41
- Rewards: 3x Rare Weapon Growthstone, 6x Rare Armor Growthstone, 4x Rare Accessory Growthstone, 10x Quality Recovery Crystal
- Recommended Build: Sword and Shield or Greatsword
To beat the Immortal Guardian on Floor 16F, you’ll need to successfully manage your stamina resource as you fight this boss on pillars. Moreover, you’ll likely want to prioritize melee combat in this fight because you cannot stand on a different pillar and attack the boss at a distance. To do any damage to the Immortal Guardian you must be on the same pillar it is.
When you first arrive on the 16th floor of Taedal’s Tower, you will be on the ground with the boss in the center and three pillars around you. The fight will begin on the bottom, but partway through the battle the entire ground will glow red and the Guardian will jump to a pillar. If you do not follow, you will take a lot of damage. There will be grapple hooks on all of the pillars you can use to get up top.
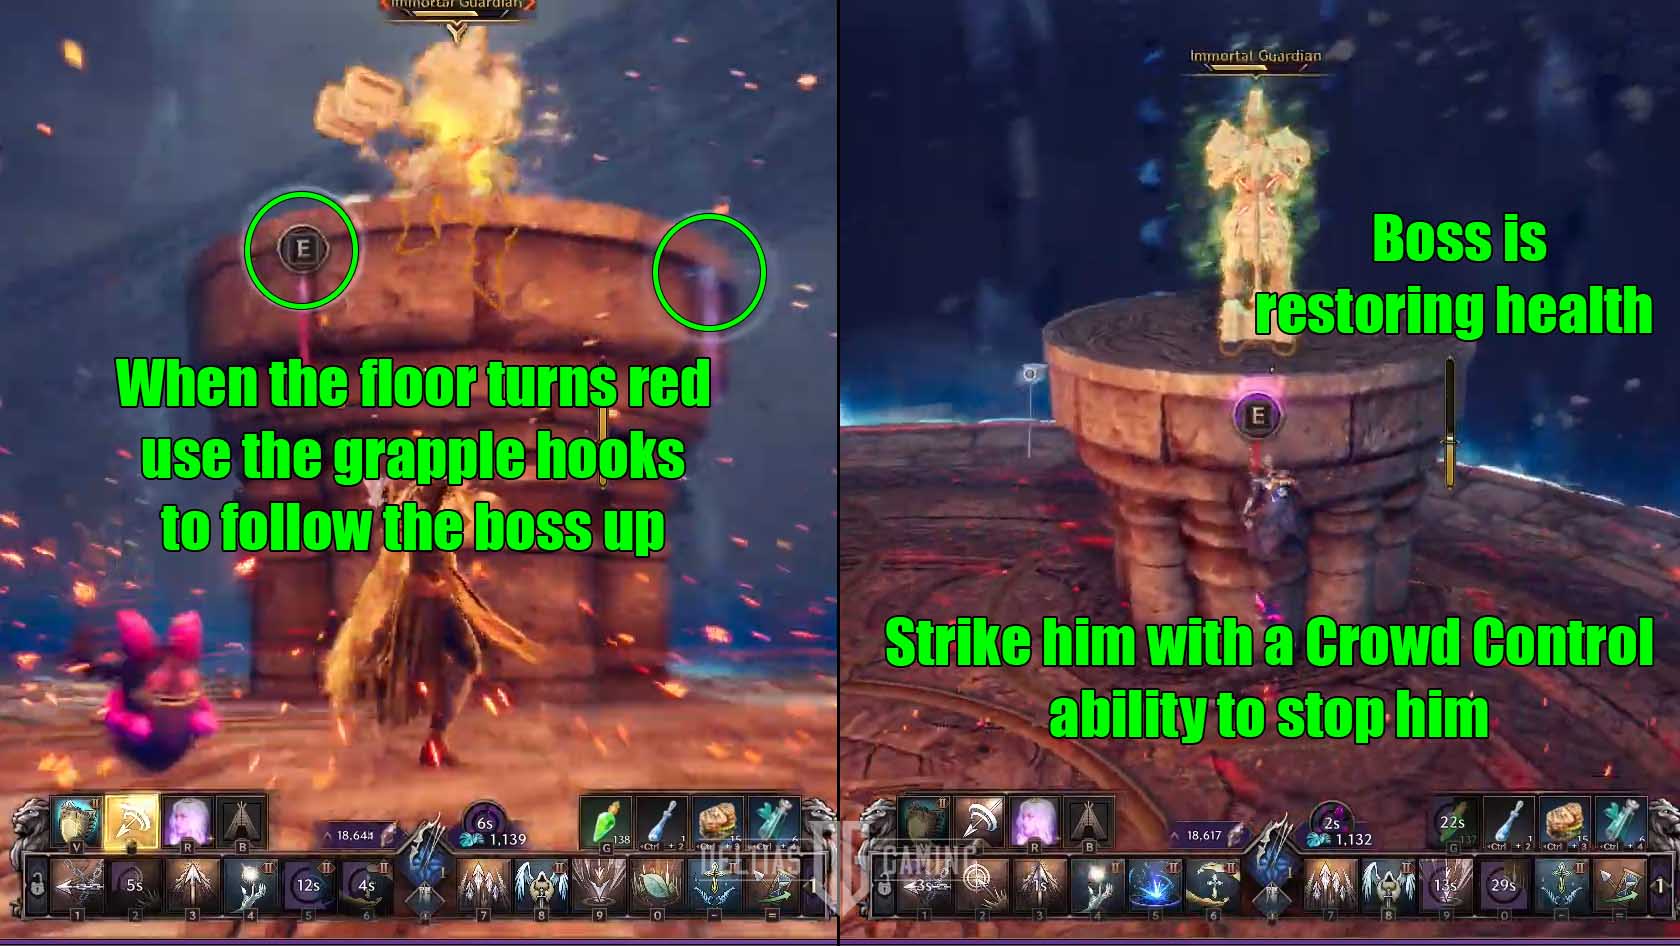
You have to face the Immortal Guardian directly on top of the pillar it is currently occupying. As you attack, be sure to be on the look out for the purple circle to execute perfect blocks and avoid attacks. Eventually, the Guardian will move to another pillar and you must follow. Moreover, as soon as it lands it will start to glow green and regenerate health. Use a crowd control or stun ability as soon as possible in order to stop this.
17F Unbreakable Shield of Cooperation – Chaos Archwizard
All Floor 17 of Taedal’s Tower features in Throne and Liberty:
- Floor: Unbreakable Shield of Cooperation
- Boss: Chaos Archwizard
- Unlocks at Level: 42
- Rewards: 4x Rare Weapon Growthstone, 8x Rare Armor Growthstone, 6x Rare Accessory Growthstone, 10x Quality Recovery Crystal
- Recommended Build: Longbow or Staff
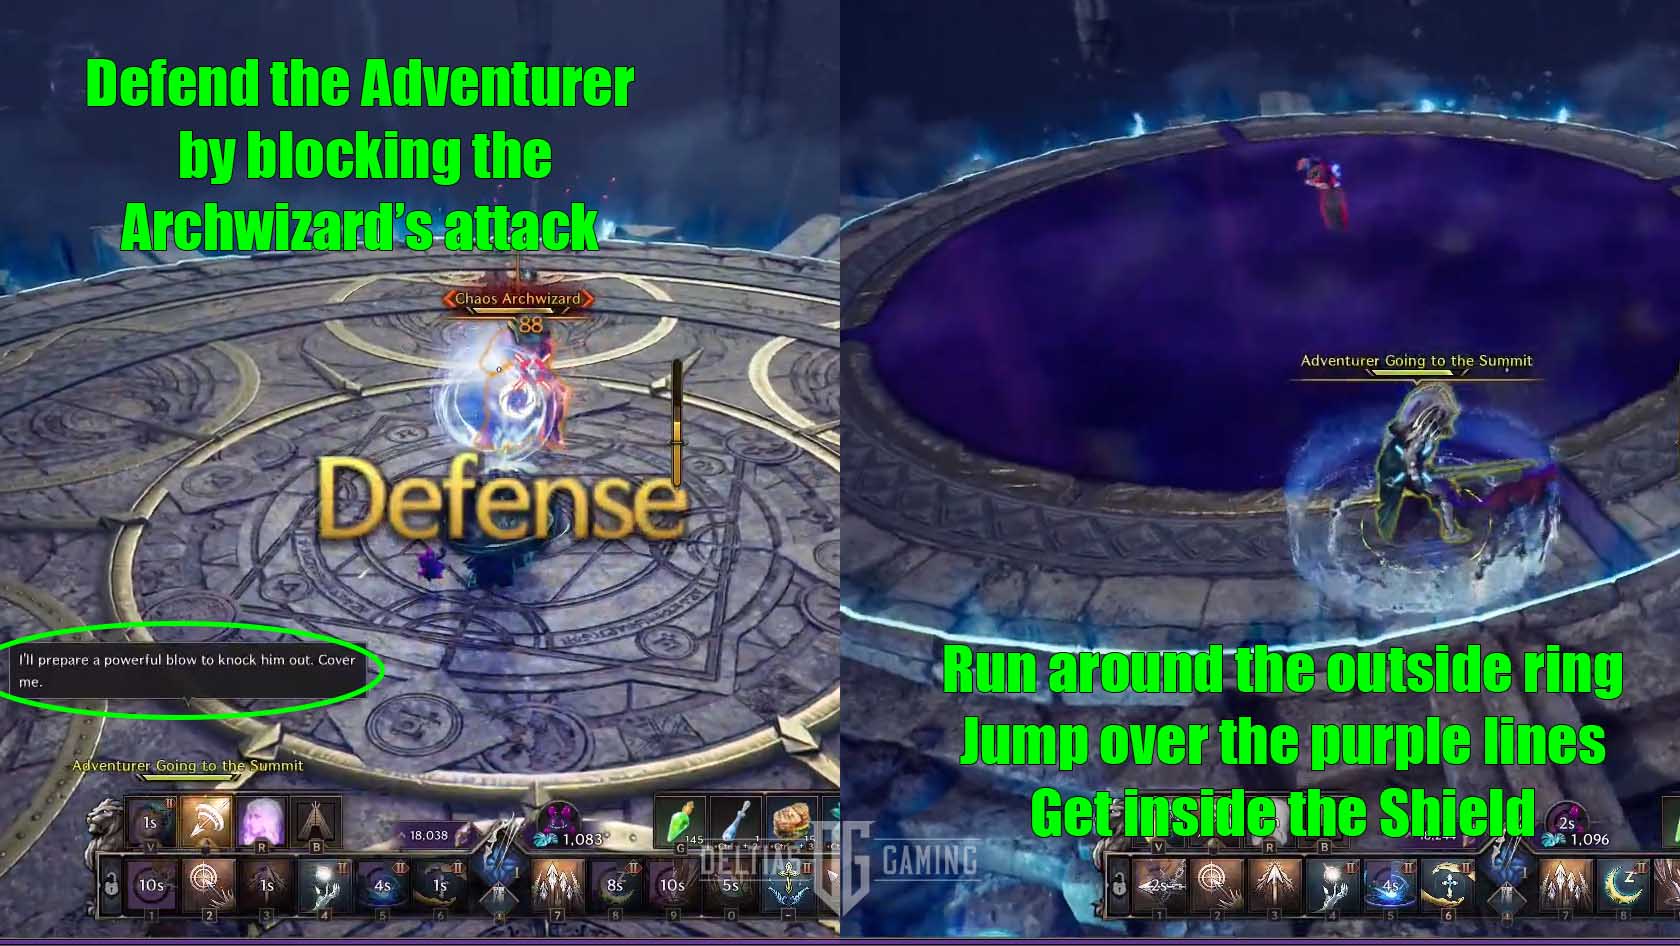
To beat the Chaos Archwizard on Floor 17F, you will need to protect the Adventurer NPC and keep him alive during the fight. As soon as you arrive, run to the Adventurer and stand inside his blue shield. This will protect you from damage as the boss crash lands.
The trick to this fight is that you need to stay mobile, but you also need to stay within a reasonable range of the Adventurer. At times the Archwizard will attack the NPC and you need to protect them. Keeping them alive is vital because without him you have no protection from the one-shot mechanic later.
During this fight, the boss will have a beam attack that you’ll have to strafe out of. Moreover, keep moving because the Archwizard will try to follow you with it. Secondly, he has an AoE ground explosion attack that you must execute a perfect block to avoid. Additionally, after this ground attack, the Archwizard will typically try to attack the Adventurer. Get in front of the NPC and perform another perfect block to keep him alive.
Finally, the major one-shot mechanic of this fight will have the Archwizard cover most of the arena ground in a purple AoE. Stay out of it and retreat to the edges. Make your way around the room as quickly as possible to the Adventurer, jumping over the little spindles of purple that stick out on the sides. Get under the blue shield provided by the Adventurer in time, or you will die.
18F Swirling Firestorm – Exploding Flame Desert Wizard

All Floor 18 of Taedal’s Tower features in Throne and Liberty:
- Floor: Swirling Firestorm
- Boss: Exploding Flame Desert Wizard
- Unlocks at Level: 43
- Rewards: 4x Rare Weapon Growthstone, 8x Rare Armor Growthstone, 6x Rare Accessory Growthstone, 10x Quality Recovery Crystal
- Recommended Build: Greatsword or Daggers
To beat the Exploding Flame Desert Wizard on Floor 18F, you will have to use the Fire Tornado to avoid the one-shot ability of this fire magic wielding wizard. Moreover, you’ll need to accurately time a lot of parry moves in order to avoid damage from the fireballs she like to throw in your direction.
For most of the fight, you’ll want to avoid touching the Fire Tornado because it will cause damage. However, you’ll always want to be aware of where it is in the arena. When the boss teleports into the center of the arena and summons ‘quicksand’ whirls on the ground, get ready. When the fire tornado touches a whirl it will get hotter and grow in size.
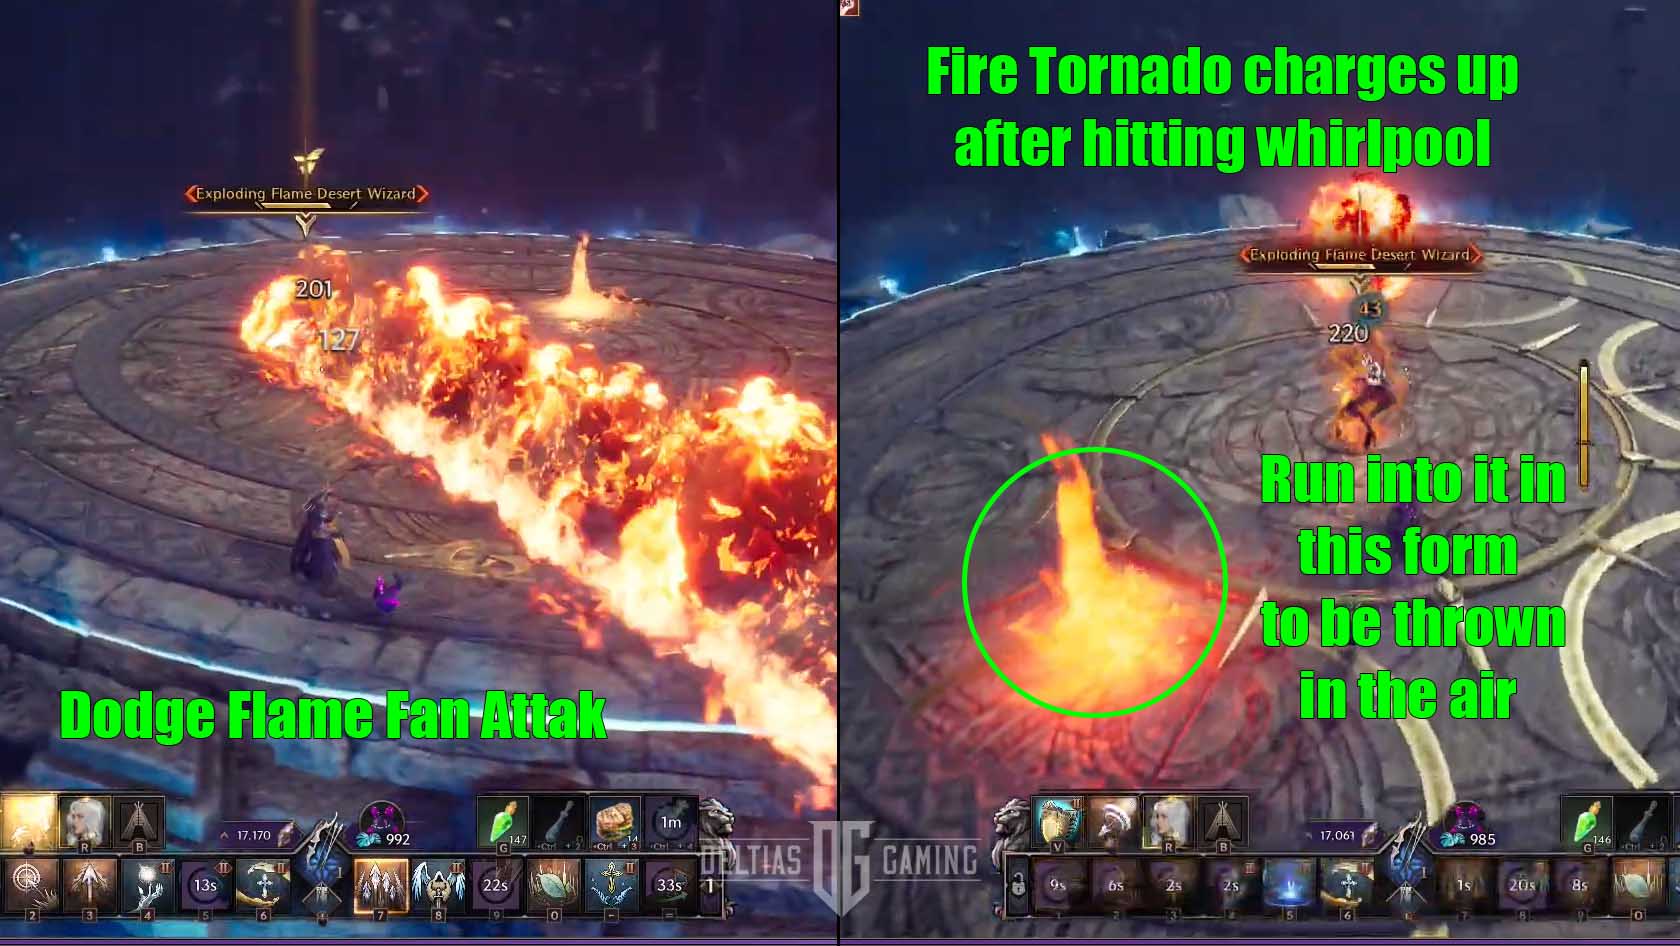
Now, you need to run over and into it, and the tornado will toss you high up in the air. Transform into your glide morph and look for the small safe area behind the boss where you can land out of the AoE.
Finally, the last major ability you need to look out for is when she casts three rows of flame damage on the ground, spread out in a fan shape in front of her. If you’re fighting her in close-quarters melee it should be relatively easy to strafe to the side and out of danger.
19F Reaching Higher – Nightmare Conductor
All Floor 19 of Taedal’s Tower features in Throne and Liberty:
- Floor: Reaching Higher
- Boss: Nightmare Conductor
- Unlocks at Level: 44
- Rewards: 4x Rare Weapon Growthstone, 8x Rare Armor Growthstone, 6x Rare Accessory Growthstone, 10x Quality Recovery Crystal
- Recommended Build: Ranged weapons like Longbow, Crossbow, or Staff
To beat the Nightmare Conductor on Floor 19F, you have to navigate floating, moving platforms while still managing deal damage and dodge or block attacks. Therefore, this fight will be much easier if you make use of ranged weapons because the platforms will sometimes keep you out of close melee range.
You cannot ignore the platform mechanics in this fight, either. You must make your way from the lowest platform to the highest within a limited time frame. If you cannot, then you will take heavy damage and can even die. Furthermore, this is complicated by the movement of some platforms, which will go up and down. You’ll have to carefully time your jumps to make it safely to the top.
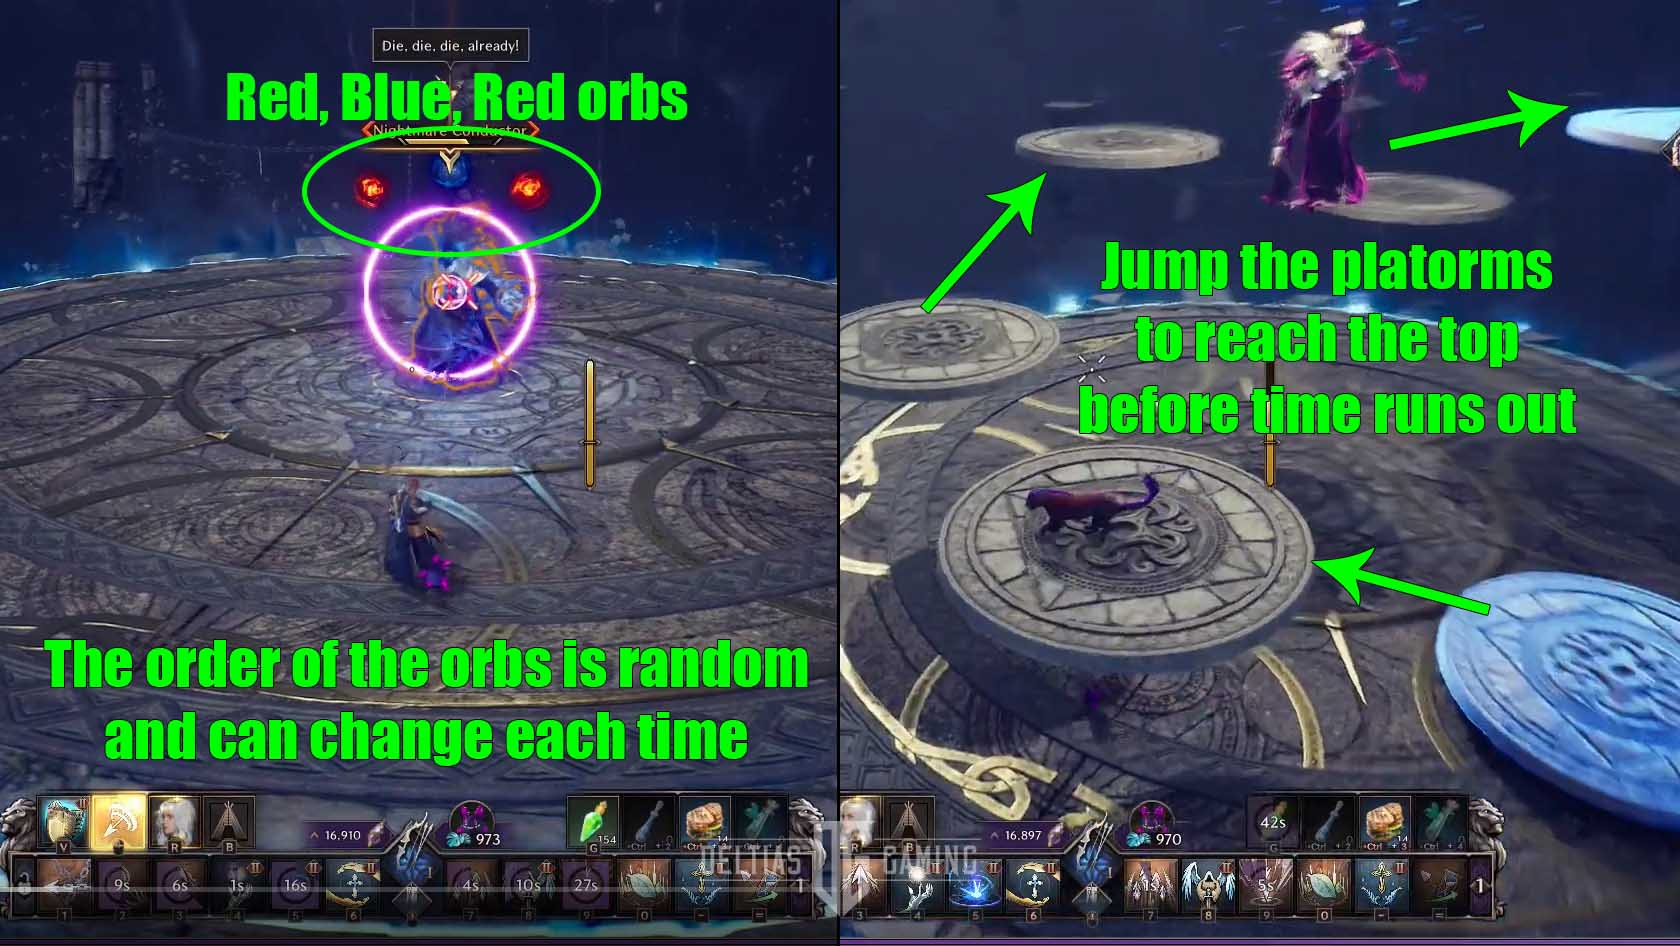
Secondly, the major boss ability you want to look out for is when he summons three orbs above his head. Two will be red and one blue. The red orbs will deal damage and create an AoE circle on impact. The blue orb will stun you and the only way to avoid it is to block. The best way to deal with this attack is to start kiting in a circle around him so that you can react to each orb as it comes and easily move out of any AoE.
The Nightmare Conductor’s other attacks are a beam attack and an AoE shockwave. Both can be negated by a perfect block, but you’ll have to time your movement precisely.
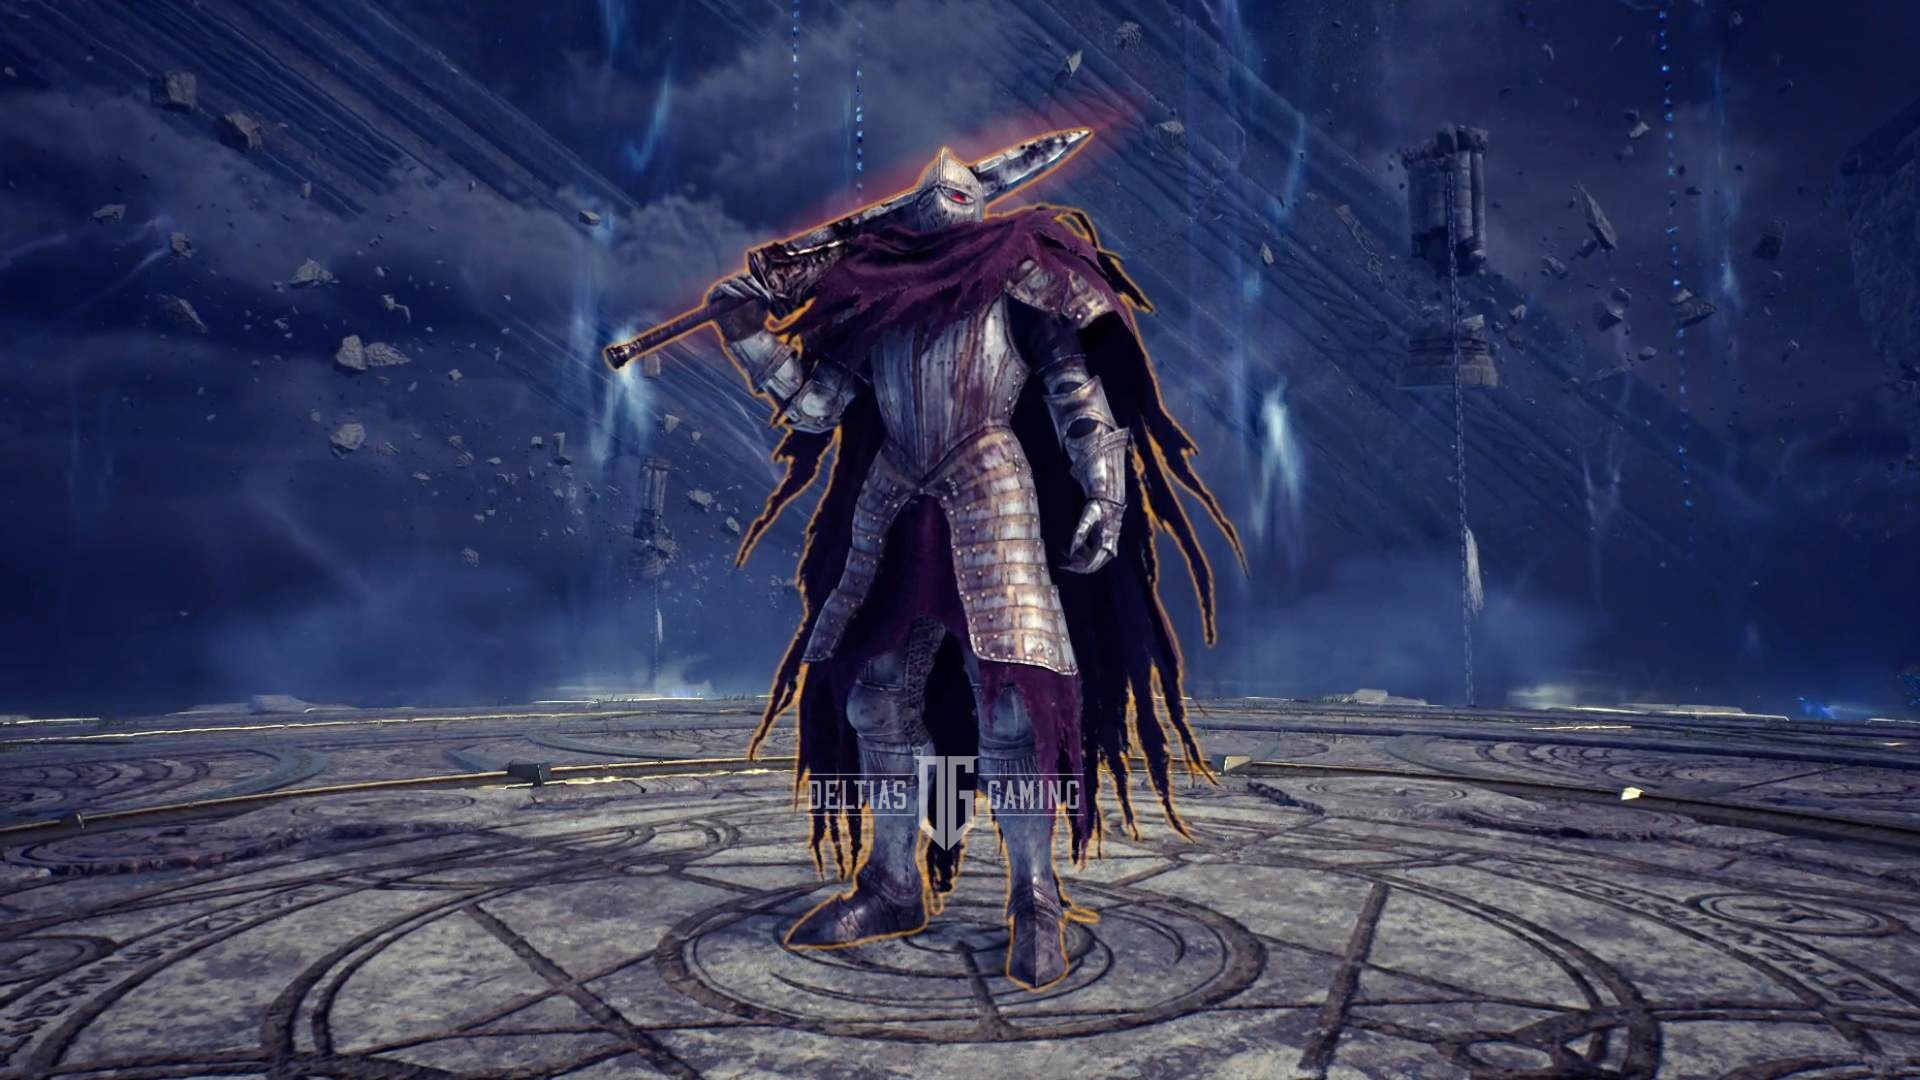
20F Revenge and Resurrection – Revenger Skeleton Commander
All Floor 20 of Taedal’s Tower features in Throne and Liberty:
- Floor: Revenge and Resurrection
- Boss: Revenger Skeleton Commander
- Unlocks at Level: 45
- Rewards: 1x Fierce Taion dash morph, 1x Precious Weapon Growthstone, 2x Precious Armor Growthstone, 1x Precious Accessory Growthstone, 20x Quality Recovery Crystal
- Recommended Build: Melee (Greatsword or Sword and Shield) and Ranged (Longbow or Staff)
To beat the Revenger Skeleton Commander on Floor 20F, you’ll need to fend off his relentless melee attacks, deal with his skeleton minions, and contend with a Phase 2 of this challenging boss fight. None of the mechanics of this fight are brand new, but there will be a lot of enemies and attacks going on at once.
The skeleton minions should be your priority in this fight because the Skeleton Commander will summon more of them over and over again. They are easy to kill, but if you ignore them their collective damage will add up quickly.

The Commander’s basic attacks should all be familiar to you. First is AoE circles of fire damage you should be sure to strafe and avoid. Secondly, he will charge up with energy and then blast it out in a shockwave around him. This can be blocked. Thirdly, the boss will jump in the air and you can avoid the AoE when he lands by jumping up just before he hits the ground.
Finally, after you get his HP all the way down he will come back for a Phase 2! All of the Commander’s health will regenerate and you will have to start over. The boss mechanics and abilities will be exactly the same. However, there will now be a ring of fire circling the entire arena. It will start to constrict, making the floor space smaller and smaller. You must beat the boss before it completely covers the arena or you will die.
Looking For More About Throne and Liberty?
Thank you for reading the Throne and Liberty How to defeat all bosses in Taedal’s Tower Guide. We provide the latest news and create guides for Throne and Liberty, Enshrouded, ESO, Baldur’s Gate 3, and More. Also, watch me play games on Twitch or visit my YouTube channel!