This guide focuses on the best Bard build in Baldur’s Gate 3, the College of Valour Build, and includes all the components to build a powerful character.

- Bard Class Guide
- Patch 8 Changes for BG3
- Features and Mechanics
- Spell Mechanics
- Subclasses
- Alternative Build
- Companions
- Gear
- Consumables and Items
- Build Summary Guide
- Q1. What is the best bard creation in BG3?
- Q2. What is the best subclass for a bard in BG3?
- Q3. What race makes the best Bard in Baldur’s Gate 3?
This build page has been updated for the Patch 8 version of Baldur’s Gate 3.
Bard Class Guide
Bards are versatile characters who are skilled in a variety of areas, including music, magic, and combat. They are known for their ability to inspire their allies, debuff their enemies, and play musical instruments. Out of combat, the Bard class has unique features and a fun playstyle. Inside of combat, their ability diminishes significantly and is weak compared to other classes.
This build will focus on primarily healing, buffs, and crowd control. The Bard does well with outside-of-combat role play and has some utility in combat. Don’t expect big damage with this build, but the crowd control is very nice especially later.
| Bard Class Pros | Bard Class Cons |
|---|---|
| Great Healing Abilities | Weak Damage |
| Buffs Party Damage | Concentration Heavy |
| Crowd Control Enemies | Low Damage in Early Game |
The Bard makes for a great character choice in Baldur’s Gate 3 if you want to focus on the story and play a support class. Consider this class weak in raw battlefield potential but unique and fun for storytelling and dialogue options.
Patch 8 Changes to College of Valour Bard Build for BG3
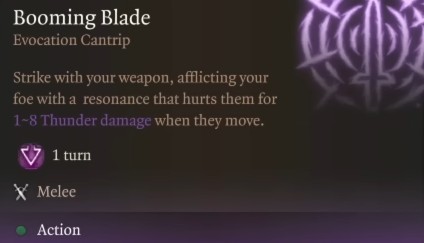
Patch 8 has brought exciting changes to the Bard class in Baldur’s Gate 3, most notably the addition of the College of Glamour subclass and the Booming Blade cantrip. The College of Glamour is perfect for players who want to build a support-focused Bard with strong crowd control abilities, along with a flair for dialogue and persuasion. It’s an ideal choice for those who want to control the flow of battle and engage socially with NPCs.
However, while Bards don’t naturally have access to Booming Blade, you can still unlock this powerful cantrip by multiclassing into Warlock. This opens up the potential for a hybrid playstyle, blending spellcasting and martial prowess. By adding Fighter levels later, you can create an incredibly effective melee character with a unique mix of magic and physical combat. In the Leveling Progression section below, we’ll outline a hybrid build that combines these classes for maximum effectiveness.
Bard Class Features and Mechanics
The following list presents all the essential Bard Mechanics in Baldur’s Gate 3
- Primary Ability: Charisma
- Saving Throws: Dexterity and Charisma
- Subclass: College of Valour
- Armor Proficiency: Light Armour
- Weapon Proficiency: Simple Weapons, Hand Crossbows, Rapiers, Longswords, Shortswords
- Combat Inspiration: add a +1d6 bonus to their next Attack Roll, Ability Check, or Saving Throw.
- Song of Rest: essentially a Bard spell providing a short rest for your group.
Bard Spell Mechanics
- Cantrips: are like spells, but you can cast them infinitely, and they don’t take your spell slots.
- Spell Slots: At each level, you gain access to more usage of spells and high-tier spells but only have a finite number of spells until a long rest.
- Learn Spells: Unlike Wizard, you get opportunities at leveling up to unlearn and learn new spells.
- Concentration: is a spell mechanic that requires you to maintain concentration otherwise, the spell effect ends.
For the list of the best spells for the Bard, look below in level progression.
Bard Class and Best Subclasses
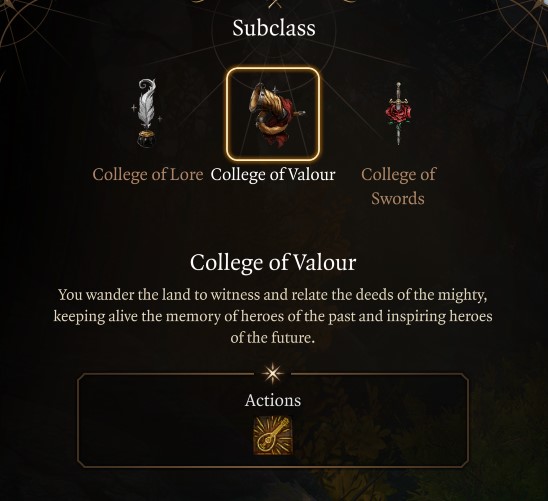
The College of Valour is the strongest Bard subclass because of its versatility, combat skills, spellcasting, and support. The bard can pick a subclass at level 3. The following are the Bard Subclasses for Baldur’s Gate 3:
- College of Valour: Martially focused, gaining proficiency in medium armor, shields, and martial weapons.
- College of Lore: Masters of many skills; able to debuff enemies and use non-Bard Spells from the Magical Secrets list.
- College of Swords: Combine Medium Armor Proficiency with Extra Attack and Bardic Inspiration to serve as versatile fighters.
- College of Glamour: Use Fey magic to support allies and Command enemies.
Ultimately, the best Bard subclass for you will depend on your playstyle and preferences. The most powerful and versatile spellcaster who can deal a lot of damage is the College of Valour subclass making it the best choice.
Baldur’s Gate 3 College of Valour Bard Features & Progression
The College of Valour subclass unlocks the following features and spells:
- Combat Inspiration: Your Bardic Inspiration receives an upgrade, allowing inspired allies to add bonus damage to their next weapon attack or a bonus to their Armour Class for one attack.
- Gain Proficiency: Medium Armour, Shields, Martial Weapons.
- Extra Attack: You can make an additional free attack after making an unarmed or weapon attack. If you gain the Extra Attack feature from more than one class, they don’t add together.
Character Creation for Bard College of Valour Build
| Category | Selection |
|---|---|
| Character | Origin – Custom character |
| Race | Asmodeus Tiefling |
| Class | Bard |
| Subclass | College of Valour |
| Cantrips | Vicious Mockery, Blade Ward |
| Spells | Healing Word, Cure Wounds, Tasha’s Hideous Laughter, Thunderwave |
| Background | Entertainer |
| Ability Score | STR: 8 DEX: 14 CON: 16 INT: 10 WIS: 10 CHA: 16 |
| Skill Proficiencies | Deception, Intimidation, and Persuasion |
Recommended Backgrounds

Entertainer is the best background for the College of Valour Bard build in Baldur’s Gate 3. This choice mainly influences roleplaying and dialogue options, allowing you to add a unique flavor to your character. Additional choices are:
- Entertainer: Proficiency in Acrobatics (dexterity) and Performance(charisma). You live to sway and subvert your audience, engaging common crowds and high society alike.
- Guild Artisan: Proficiency in Insight (wisdom) and Persuasion(charisma). Your skill in a particular craft has earned you membership in a mercantile guild, offering privileges and protection while engaging in your art.
- Soldier: Proficiency in Athletics (strength) and Intimidation (charisma). You are trained in battlefield tactics and combat, having served in a militia, mercenary company, or officer corps. Soldier companions in BG3 are Jaheira and Lae’zel.
Best Race Choice for Bard Build

Asmodeus Tiefling is the best Racial Choice for a College of Valour Bard because they are resistant to fire and have Hellish Rebuke, providing a source of counterattack damage. Drow is a secondary choice because they have extra spells, the Dancing Lights cantrip, and Superior Darkvision.
| Asmodeus Tiefling | Drow |
|---|---|
| Hellish Resistance | Superior Dark-vision 24m |
| Hellish Rebuke | Dancing Light Spell |
| Darkvision (12m) | Faerie Fire Spell |
| Darkness Spell | Fey Ancestry |
The ability score improvement will be determined by your class and not your race, freeing up choices. Each race offers unique advantages that can enhance your combat prowess, survivability, or utility. Additionally, consider the roleplaying opportunities and character concepts that resonate with you.
Recommended Skills for Bard College of Valour Build

Deception, Intimidation, and Persuasion are the best skills to invest in while creating a College of Valour Bard build in BG3 because they are all Charisma-based skills. Charisma is the primary ability score we focus on for the Bard, which enhances the selected skills, improving their impact during dialogue skill checks. Since you will be using the bard as party leader, they will be spearheading conversations with NPCs, ensuring that each one of these skills is put to good use. Skills can be edited during character creation or while rerolling a character through Withers.
Also Read: BG3 Interactive Map
Here are the skills for Bard in Baldur’s Gate 3:
- Intimidation: Charisma skill used to bully, threaten, and induce fear in dialogue situations.
- Deception: Charisma skill that makes you more likely to succeed Deception checks in conversation.
- Persuasion: Charisma Skill used entirely for dialogue Ability Checks.
Best Bard Ability Scores

Here’s the recommended ability point distribution for the build to maximize a College of Valour Bard’s potential in Baldur’s Gate 3:
| Ability | Points Goal |
|---|---|
| Strength | 8 |
| Dexterity | 16 |
| Constitution | 14 |
| Intelligence | 10 |
| Wisdom | 10 |
| Charisma | 16 |
The most important ability scores for a College of Valour bard are 16 Charisma for spellcasting, 16 Dexterity for weapon damage, and 14 Constitution for the health pool. After you choose the class, race, and background, the game will automatically distribute your abilities in the character creation abilities tab. You will need to reprioritize the stats for the chart to create a well-optimized BG3 Bard build. Simply use the plus-minus buttons in the character creator and make sure you have the suggested race, or the numbers will be off.
You can increase your ability score via a quest in each of Acts 1, 2, and 3. Make sure to check out our Permanent bonus guide on how you can boost your ability score through quests.
Bard Spell Slots
Here’s a chart that shows the levels and spell slots unlocked for the Bard class in Baldur’s Gate 3:
| Bard Level | 1st | 2nd | 3rd | 4th | 5th | 6th |
|---|---|---|---|---|---|---|
| Level 1 | 2 | 0 | 0 | 0 | 0 | 0 |
| Level 2 | 3 | 0 | 0 | 0 | 0 | 0 |
| Level 3 | 4 | 2 | 0 | 0 | 0 | 0 |
| Level 4 | 4 | 3 | 0 | 0 | 0 | 0 |
| Level 5 | 4 | 3 | 2 | 0 | 0 | 0 |
| Level 6 | 4 | 3 | 3 | 0 | 0 | 0 |
| Level 7 | 4 | 3 | 3 | 1 | 0 | 0 |
| Level 8 | 4 | 3 | 3 | 2 | 0 | 0 |
| Level 9 | 4 | 3 | 3 | 3 | 1 | 0 |
| Level 10 | 4 | 3 | 3 | 3 | 2 | 0 |
| Level 11 | 4 | 3 | 3 | 3 | 2 | 1 |
| Level 12 | 4 | 3 | 3 | 3 | 2 | 1 |
Bard Illithid Powers
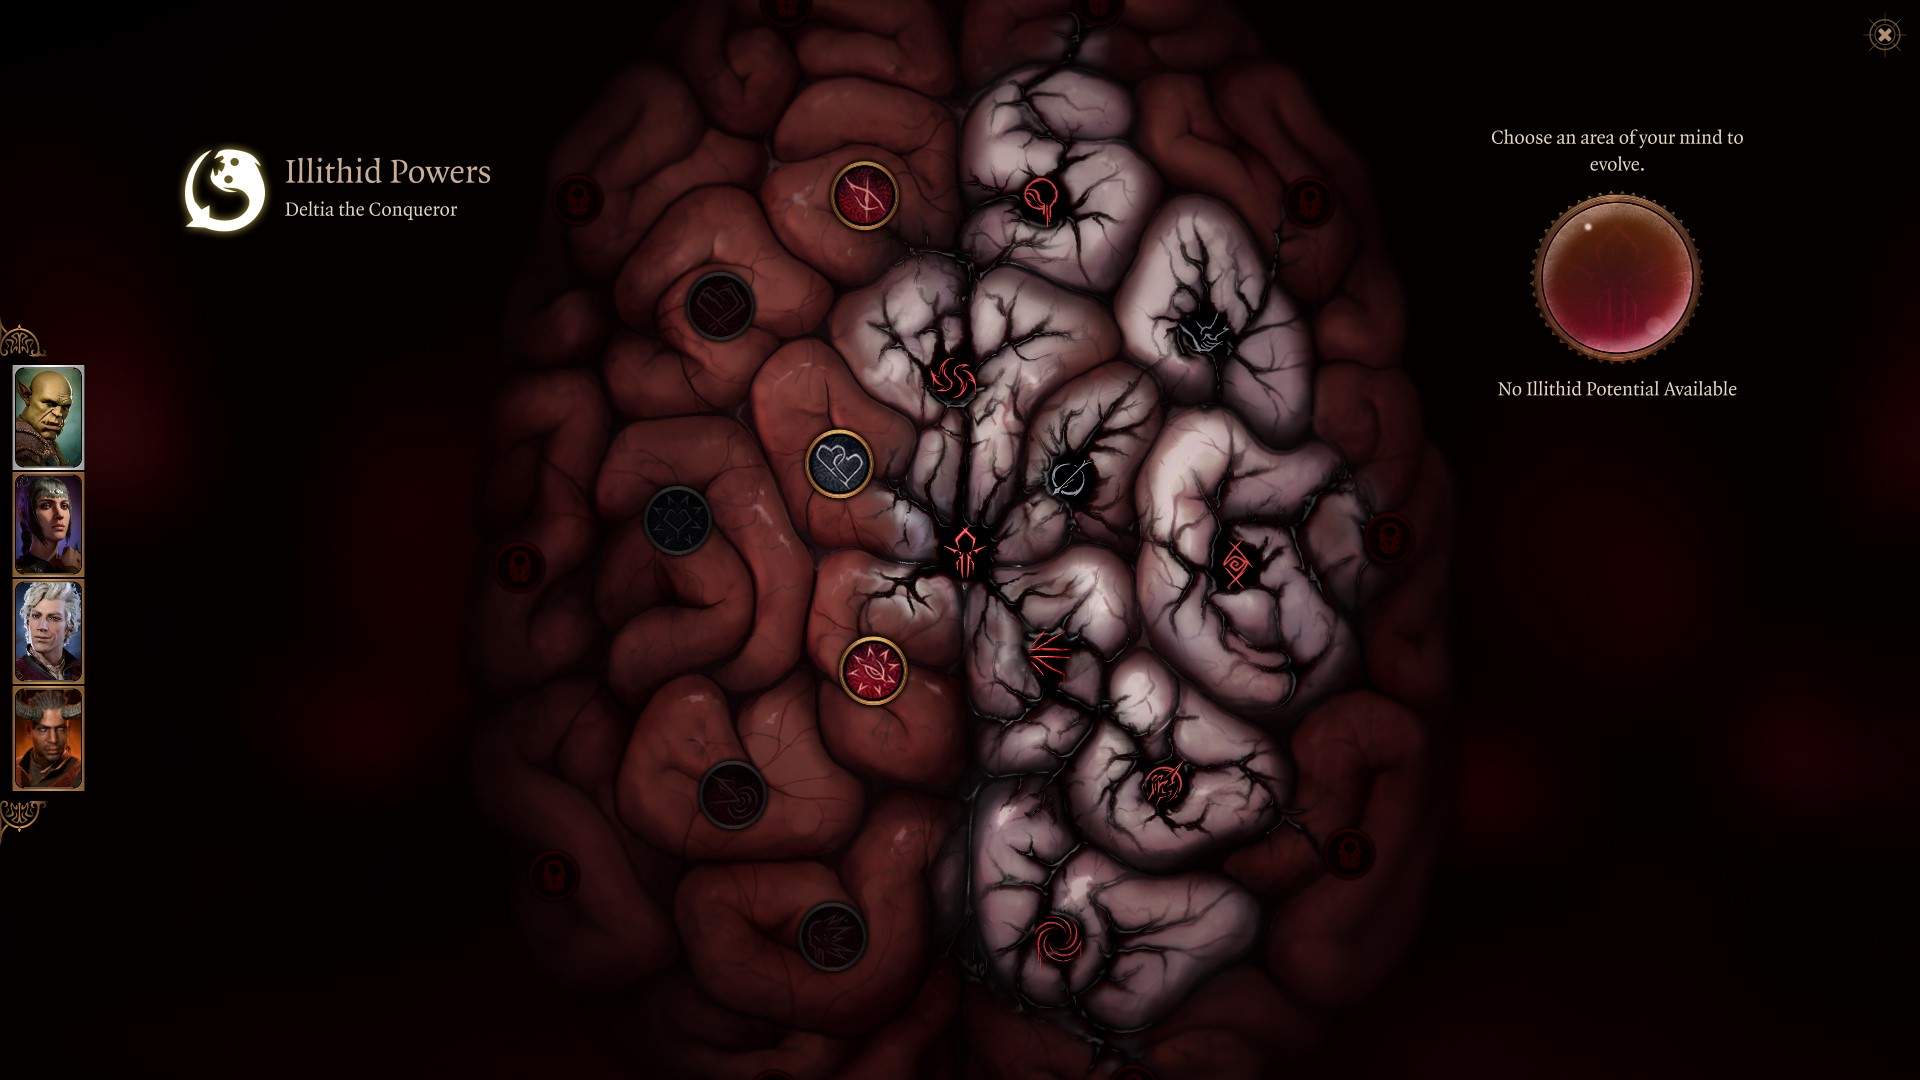
Illithid Powers are unlocked later in the game when you learn more about the Mind Flayers and tadpoles. You can gain jars of Mind Flayer Parasite Specimens, and consume them to gain one point. This is essentially another skill tree advancement with some very strong powers. If you decide to advance this skill line, the upgrades we recommend are listed in the table below.
Here are the best Illithid Powers you should invest in while building a College of Valour Bard in BG3:
| Illithid Powers | Description |
|---|---|
| Luck of the Far Realms | When you make a successful Attack Roll against a foe, you can change that hit into a Critical Hit. |
| Cull of the Weak | When you bring a creature down to fewer hit points than your number of evolved Illithid powers, it dies and all nearby creatures take 1-4 Psychic damage. |
| Psionic Backlash | When an enemy within 9m casts a spell, you can use your reaction to inflict 1d4 Psychic damage to the caster per the spell’s level. |
| Blackhole | Area-based suck-in that slows targets. |
| Repulsor | Massive area knockback that can hit friendlies. |
| Charm | A power that prevents an enemy from attacking you until their next turn. |
Bard Level Progression in BG3
| Level | Class | Selection |
|---|---|---|
| 1 | Bard | Bardic Inspiration,Vicious Mockery, Blade Ward, Healing Word, Cure Wounds, Tasha’s Hideous Laughter, Thunderwave |
| 2 | Bard | Song of Rest, Faerie Fire |
| 3 | Bard | Subclass: College of Valour, Heat Metal |
| 4 | Feat: Ability Improvement Charisma | |
| 5 | Bard | Glyph of Warding |
| 6 | Bard | Countercharm, Extra Attack, Stinking Cloud |
| 7 | Bard | Confusion |
| 8 | Bard | Feat: War Caster |
| 9 | Bard | Mass Cure Wounds |
| 10 | Bard | Minor Illusion, Seeming, Skill Expertise (Intimidation and Persuasion), Conjure Elemental, Blight |
| 11 | Fighter | Protection Fighting Style |
| 12 | Fighter | Action Surge |
Alternative College of Valour Bard Build
For this alternative Bard build, you’ll begin at Level 1 by choosing Warlock and the Hexblade subclass. This gives you access to Eldritch Blast and Booming Blade, two powerful cantrips that form the backbone of your ranged and melee combat abilities. At Level 2, take another level in Warlock to gain Hellish Rebuke, as well as a couple of Eldritch Invocations, which will enhance your versatility in both combat and survivability.
Once you reach Level 3, multiclass into Bard, and at Level 5 (Bard Level 3), select your subclass: College of Swords. This is the ideal choice for a melee-focused Bard, as it improves your combat effectiveness with weapon-based features. To round off the build, take levels in Fighter, choosing the Eldritch Knight subclass. This adds more spellcasting options and significantly increases your melee damage potential, creating a well-rounded character capable of holding its own in both magic and physical combat.
Read More – Top 10 builds for Baldur’s Gate 3
| Level | Class | Selection |
|---|---|---|
| 1 | Warlock | Subclass: Hexblade, Eldritch Blast, Booming Blade, Hex, Wrathful Smite |
| 2 | Warlock | Hellish Rebuke, Eldritch Invocations: Devil’s Sight and One with Shadows |
| 3 | Bard | Multiclass: Bard, Vicious Mockery, Friends, Longstrider, Speak with Animals, Tasha’s Hideous Laughter, Charm Person |
| 4 | Bard | Thunderwave Spell |
| 5 | Bard | College of Swords subclass, Duelling fight style, Invisibility spell |
| 6 | Bard | Mage Hand cantrip, Heat Metal spell, Feat: +2 Charisma |
| 7 | Bard | Glyph of Warding spell |
| 8 | Bard | Fear spell, replace Heat Metal with Hold Person |
| 9 | Fighter | Multiclass: Fighter, Defence Fighting Style |
| 10 | Fighter | Action Surge |
| 11 | Fighter | Subclass: Eldritch Knight, Chromatic Orb, Magic Missile spells, Bursting Sinew, Fire Bolt cantrips, Shield extended |
| 12 | Fighter | Feat: Alert, Protection from Good and Evil |
Level 1

At level 1, select our suggested background, race, skills, and ability score focusing on Charisma and Constitution. The level 1 Bard will be able to pick an instrument and have Bardic Inspiration, Cantrips, and Spells. Playing musical instruments can distract NPCs and even earn you a few tips. Bard doesn’t pick a subclass until level 3, so start off the game by wearing Light Armour and wielding miscellaneous weapons. Starting at level 3, you unlock a subclass, College of Valour, which gives you access to new weapon proficiencies.
Bard Cantrip and Spell Selections
Bardic Inspiration: 18m range consuming a bonus action ally can add a +1d6 bonus to their next Attack Roll, Ability Check, or Saving Throw. This can be used four times and recover charges by taking a long rest.
Cantrips
- Vicious Mockery: Do 1d4 Psychic damage and the target receives a Disadvantage on its next Attack Roll. A useful skill to do some ranged damage and debuff a target.
- Blade Ward: Gain Resistance to Bludgeoning, Piercing, and Slashing damage from weapon attacks. This is helpful when you need a non-spell slot defensive skill against melee aggressors.
Spells
- Healing Word: Heal a creature you can see up to 18m away using a bonus action. This is a useful heal because it’s ranged and consumes a bonus action, which can be paired with Cure Wounds a melee heal when in need.
- Cure Wounds: Touch a creature to heal it with 1d8. This is a melee-based heal that is more powerful than Heal Word and requires action so it can be used back-to-back if needed.
- Tasha’s Hideous Laughter: Inflict a creature with fits of laughter, leaving it Prone without the ability to get up for 10 turns and requires concentration. This is a great single-target crowd control ability and gives you some utility and defense.
- Thunderwave: Release a wave of thunderous force that pushes away enemies and deals damage. This is your knockback ability perfect to push aggressors back or knock enemies off ledges.
Level One Spell Loadout: Healing Word, Thunderwave, Cure Wounds, Tasha’s Hideous Laughter, Vicious Mockery, and Blade Ward.
Valour Bard Gameplay and Priorities
The gameplay at this level revolves around buff allies with Bardic Inspiration, Blade Ward, Crowd Control with Hideous Laughter, and healing with Healing Word and Cure wounds. You use Thunderwave to knock back enemies and Vicious Mockery for some damage and debuff. From here, the Bard gets more of the same as the levels progress. Mainly in the form of enemy crowd control effects and debuffs. You want your allies to provide most of the damage while you make life miserable for the enemy.
Read More – Baldur’s Gate 3 Shadow Magic Sorcerer Build
During the early phase of BG3, the Valour Bard build will be limited with equipment options until level 3. Once you reach level 3, equip a Quarterstaff and a Shield for a dramatic boost in AC. Moreover, look to use medium armour for protection rather than light. You can play this build as a melee damage dealer, however, other classes like the Fighter, Barbarian, and Paladin perform better. Thus, we will stick to buffing our party, controlling with stuns, and providing help during dialogue.
Your overall priority with the College of Valour Bard build is the following:
- Complete Prologue
- Recruit Companions
- Unlock Withers, respec companions to proper class/ability score
- Collect the Necromancy of Thay (important in Act 3)
- Reached Hollowed City/Druid Grove
- Sell, Stock up, complete quests
- Unlock summons, Scratch, Shovel
- Progress to level 5
- Reach Underdark and Grymforge
- Check all Permanent Bonuses in Act 1 and the best Gear
Following these steps ensures a strong foundation for her especially if you plan on playing solo or on Honour Mode difficulty.
Level 2
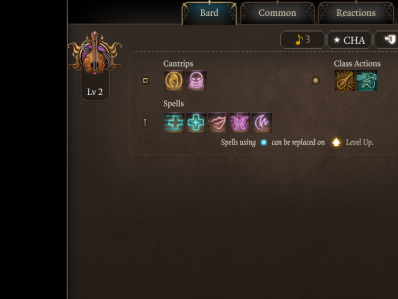
At level 2, Jack of All Trades is unlocked which adds half of your Proficiency Bonus (like persuasion) to Ability checks that you are not Proficient in. This essentially has little impact on performance but helps in story-telling and exploring situations.
Song of Rest will be unlocked at level two as well. This essentially provides an out-of-combat heal, like a short rest. Nothing that will aid you in a fight but can help you from heading back to camp repeatedly to heal up.
At level two, you will unlock more level 1 spell slots. You will also get the chance to unlearn any spells. This is useful if you picked the wrong spell loadout at character creator since you cannot prepare spells like a Wizard. We suggest taking Faerie Fire to this level.
- Faerie Fire: The targets turn visible, and Attack Rolls against the targets have an Advantage of 6m and require concentration. This is useful to help gain Advantage and very useful for Rogues who thrive off advantage attack roles.
The gameplay remains unchanged here, you just use Song of Rest to help outside of combat recovery.
Bard Level Two Spell Loadout: Healing Word, Thunderwave, Cure Wounds, Tasha’s Hideous Laughter, Vicious Mockery, Blade Ward, and Faerie Fire.
Level 3
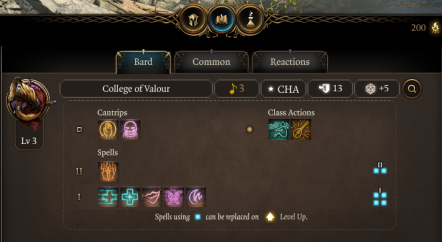

At level three you get to pick a subclass. The obvious choice is the College of Valour because it increases your survivability. You will gain proficiency in Medium Armour Shield, and Martial Weapon. The medium armor and shield help you as a sturdy battle-hardened support class.
You can pick two more skills that you are proficient in. This essentially makes dialogue ability checks highly likely to succeed. Lean into your character’s roleplay, and don’t expect any performance gain. Level three you also get access to level two spells. Take Heat Metal.
Heat Metal: the TLDR on this is a skill, if someone is wearing a metal weapon or armor, they can drop their armor and take damage. This requires concentration and has an 18m range. It’s essentially a must-have skill against hard-hitting Fighters and Barbarians and completely shuts them down and does damage.
College of Valour Unlocks
Subclass Features – College of Valour
Combat Inspiration: Inspire an ally to add a +ld6 bonus to their next Attack Roll, Ability Check. Saving Throw, weapon damage, or Armour Class. This uses a bonus action and lasts until a long rest so it doesn’t need to be recast and can be used just after a long rest on your primary target. Usually, this goes to the highest damage dealer in your party.
Weapon and Armor Proficiency: Shield, Medium Armour, and Martial Weapon which allows us to use medium armor and one hand and shield for more Armour Class (AC). AC helps with avoiding attacks and increases survival. This allows us to switch the build to Medium armor with a sword and shield.
Gameplay at this level is all about crowd control and dealing with the most threatening target. Heat Metal won’t always be used, but when you find that difficult fighter, pop it first turn.
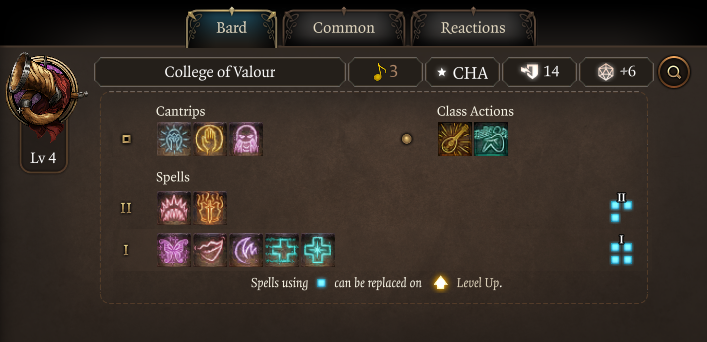
Level Three Spell Loadout: Healing Word, Thunderwave, Cure Wounds, Tasha’s Hideous Laughter, Vicious Mockery, Blade Ward, Faerie Fire, Shatter, and Heat Metal.
Level 4
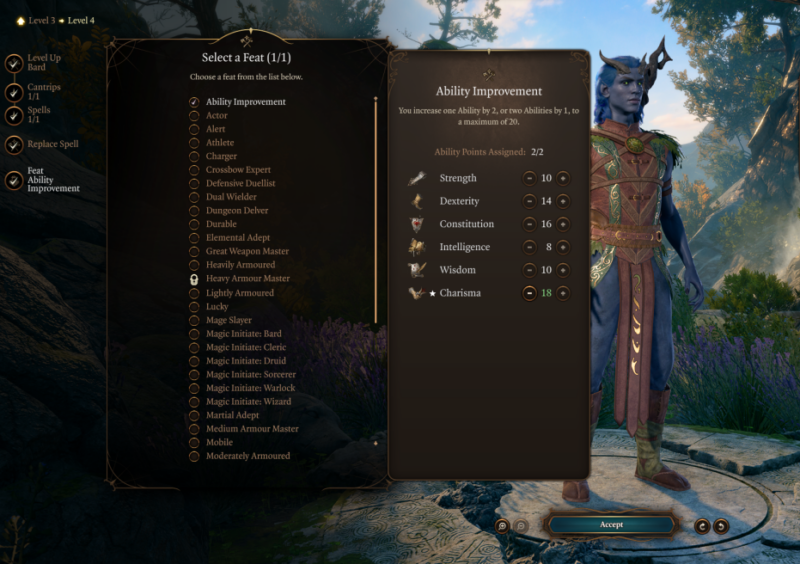
At level four, you can either take a feat or an ability improvement, one new spell and another Cantrip.
Feat: Ability Improvement should be taken, reaching 18 Charisma and increasing the effectiveness of your spells. An alternative route for a non-traditional Bard is taking the Feat Magic Initiate: Warlock. This unlocks Eldritch Blast and Hex, giving you a good, ranged damage combination. However, our build is focused on support and even such we have good damage.
Crown of Madness: Instill madness in a humanoid enemy, making them attack the creature closest to them (other than you), even if it’s allied. This spell is 18m and requires concentration useful for manipulating a powerful enemy.
The Bard Level Four Spell Loadout: Healing Word, Thunderwave, Cure Wounds, Tasha’s Hideous Laughter, Vicious Mockery, Blade Ward, Faerie Fire, Shatter, Heat Metal, Lesser Restoration, and Crown of Madness.
Level 5

At level five, Bardic Inspiration is enhanced going from a 1d6 to 1d8 benefit on attack rolls. You also gain all Bardic Inspiration on a short rest. Bards get access to level 3 spells at this point, and what you pick will depend on what your group composition needs.
You also get access to level 3 spells, and will pick up Glyph of Warding because up until this point, our Bard has very little area damage.
- Glyph of Warding inscribe a circle of arcane glyphs on the ground that triggers a magical effect when stepped on by an enemy 8m radius, does not require concentration. This grants an area-based effect of your choosing, like fire, thunder, or even sleep. You can set a trap or use it on top of enemies for the specific effect you want and big damage.
Depending on if you took a lot of control spells early, you can add more damage with Glyph.
Level Five Spell Loadout: Healing Word, Thunderwave, Cure Wounds, Tasha’s Hideous Laughter, Vicious Mockery, Blade Ward, Faerie Fire, Shatter, Heat Metal, Lesser Restoration, Crown of Madness, Glyph of Warding.
Level 6

At level 6 we gain Counter Charm, Extra Attack, and another spell. Here are the details at this level:
- Countercharm (class feature): You and any allies within 9m have Advantage on Saving Throws against being Charmed or Frightened.
- Extra Attack (subclass feature): Can make an additional free attack after making an unarmed or weapon attack. If you gain the Extra Attack feature from more than one class, they don’t add together.
- Stinking Cloud creates a cloud of gas that is so nauseating that it prevents creatures from taking action. This spell is in a massive 8m radius and creates a huge cloud that constantly makes Dex check to see if enemies cannot use actions. It essentially shuts down an entire area (friend or foe) from taking action.
At this level, the Bard has a lot of crowd control, some of which requires concentration. Pick the most important form of CC when needed.
Level Six Spell Loadout: Healing Word, Thunderwave, Cure Wounds, Tasha’s Hideous Laughter, Vicious Mockery, Blade Ward, Faerie Fire, Shatter, Heat Metal, Lesser Restoration, Crown of Madness, Glyph of Warding, Stinking Cloud.
Level 7
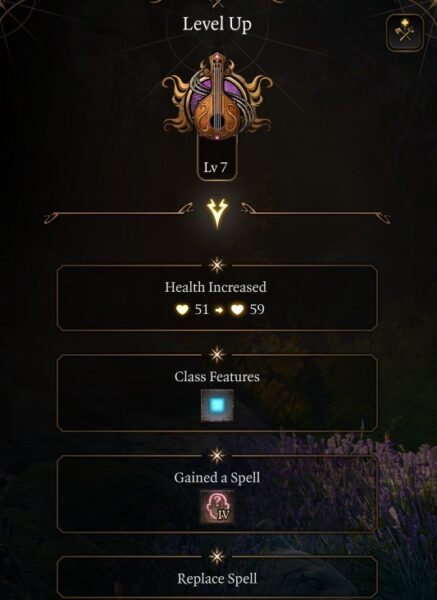
At level 7 we get access to level 4 spells. We recommend sticking with the theme of the build, control, and support, by taking Confusion.
Confusion: Befuddle a group of creatures, causing them to attack at random, wander around aimlessly, and occasionally skip turns in the stupor.
Confusion is one of the strongest areas of crowd control in the game. The best thing about it is the massive radius affecting multiple enemies, which often attack each other. This one also requires concentration, and you can swap out previously used control spells using the replace spell function if you have too many.
Bard Level 7 Spell Loadout: Healing Word, Thunderwave, Cure Wounds, Tasha’s Hideous Laughter, Vicious Mockery, Blade Ward, Faerie Fire, Shatter, Heat Metal, Lesser Restoration, Crown of Madness, Glyph of Warding, Stinking Cloud, Confusion.
Level 8
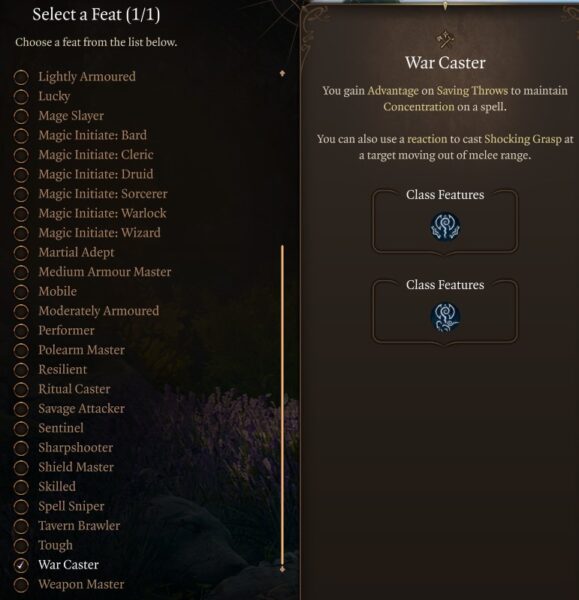
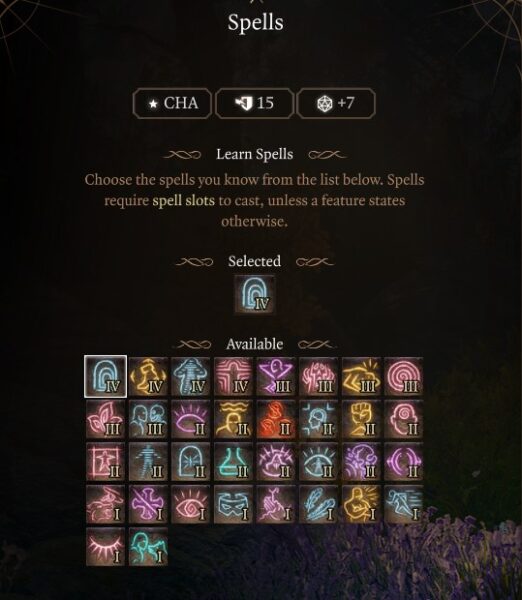
At level 8 we get access to another spell slot and a feat.
War Caster: You gain Advantage on Saving Throws to maintain Concentration on a spell. You can also use a reaction to cast Shocking Grasp at a target moving out of melee range. Reason: War Master helps dramatically maintain concentration which is almost always active for our build. We will use the level 12 feat to push our Charisma to 20, but after testing this was more helpful at level 8.
Dimension Door: Teleport yourself and up to 1 adjacent ally to a place you can see. The ally cannot be larger than medium. This spell is a rescue range spell for you and an ally. The nice thing is, this can be used out of combat as well to reach places jump normally wouldn’t work.
Bard Level 8 Spell Loadout: Healing Word, Thunderwave, Cure Wounds, Tasha’s Hideous Laughter, Vicious Mockery, Blade Ward, Faerie Fire, Shatter, Heat Metal, Lesser Restoration, Crown of Madness, Glyph of Warding, Stinking Cloud, Confusion, Dimension Door.
Level 9
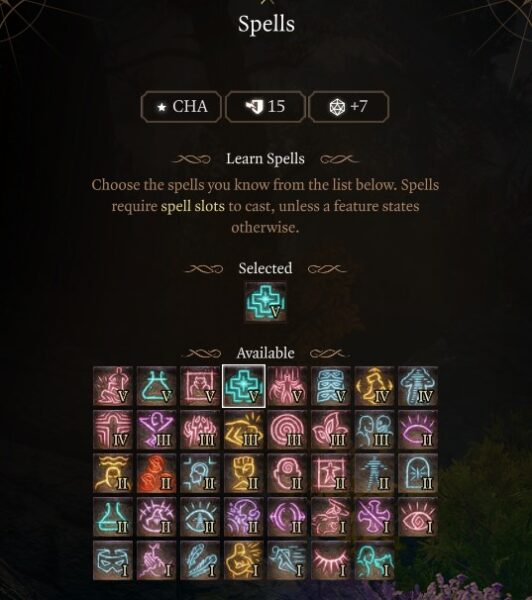
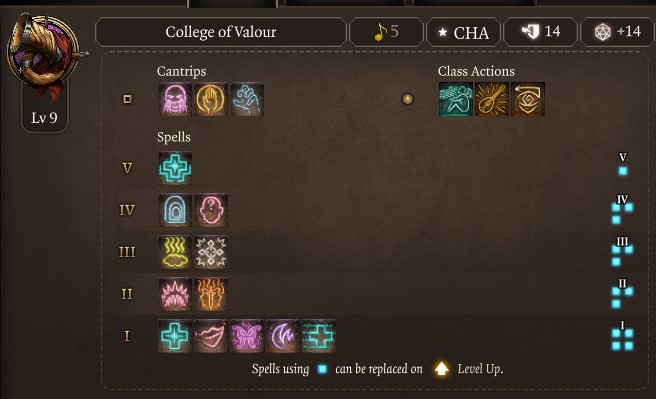
At level 9 the Bard gets access to level 5 spells. The obvious choice for a support build is Mass Cure Wounds.
Mass Cure Wounds: Up to 6 creatures regain 3d8+Spell Ability modifier. This spell acts as a massive group heal rather than single target. You can select up to 6 allies making it great when your entire team needs a big heal. The radius is generous and the healing is good. You can combine this with bonus action Healing Word and double the heal potential within one turn.
Bard Level 9 Spell Loadout: Healing Word, Thunderwave, Cure Wounds, Tasha’s Hideous Laughter, Vicious Mockery, Blade Ward, Faerie Fire, Shatter, Heat Metal, Lesser Restoration, Crown of Madness, Glyph of Warding, Stinking Cloud, Confusion, Dimension Door, Mass Cure Wounds.
Level 10

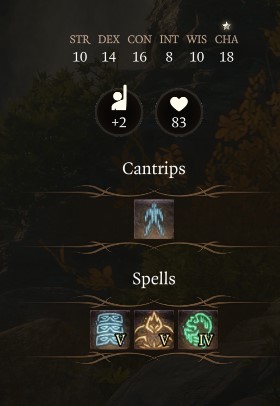
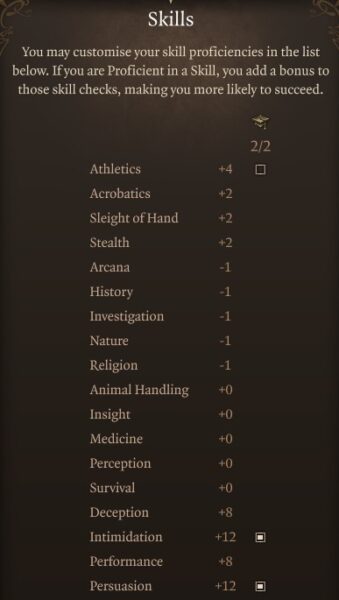
Level 10 you learn a cantrip, one spell, and two class features, along with improved skills.
Minor Illusion Cantrip: Create an illusion that compels nearby creatures to investigate. This is a useful outside-of-combat cantrip for sneaking and stealth.
Seeming: Disguise up to 4 members of your adventuring party. This is another useful non-combat-related spell that allows you to sneak around in areas you shouldn’t be in as a group.
Skill Expertise (class feature): pick two skills to increase even further. We select Intimidation and Persuasion both making them a mind-boggling +12!
Improved Bardic Inspiration (class feature): the bonus gained from Bardic Inspiration increase to +1d10.
Magic Secret Selections
Magical Secrets (class feature): Your versatile knack for the arcane lets you learn magic from every discipline. Choose some additional spells to add to your repertoire. We are going to take Conjure Elemental and Blight.
Conjure Elemental: Bend the barrier between the Planes until they disgorge an elemental ally to follow and fight for you. This will summon one of possibly four different Elemental creatures to fight for you. I prefer the Earth Elemental because it can stun opponents. Whatever you summon will follow you around and fight for you and not require concentration. The amount of damage and pressure these things can handle is staggering and I highly recommend using it. You can pre-cast this before combat after a long rest and keep the elemental the entire time.

Blight: 9m range, dealing 8d8 necrotic damage. This will help with single-target damage and a different elemental type if someone is susceptible to it. Moreover, they still take half damage on save, so consistent damage can spike a single target.
Bard Level 10 Spell Loadout: Healing Word, Thunderwave, Cure Wounds, Tasha’s Hideous Laughter, Vicious Mockery, Blade Ward, Faerie Fire, Shatter, Heat Metal, Lesser Restoration, Crown of Madness, Glyph of Warding, Stinking Cloud, Confusion, Dimension Door, Mass Cure Wounds, Seeming.
Level 11
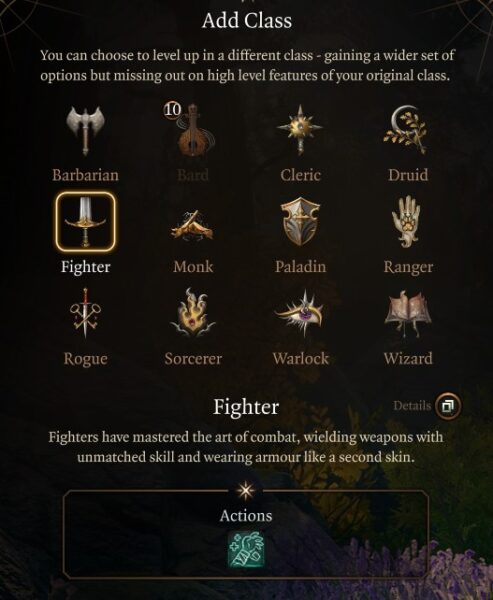
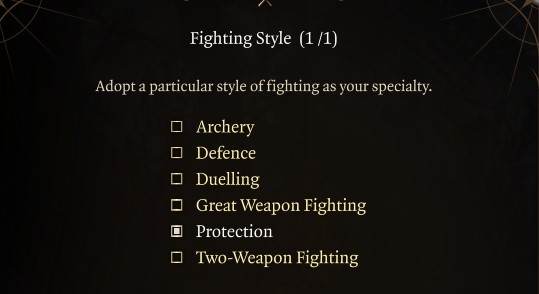
At levels 11 and 12, the Bard’s power significantly drops. At 11, you get access to the final tier level 6 spells. Unlike other classes, the selection is minimal and the options are very weak. Therefore I highly recommend multi-classing this for two levels of Fighter. The biggest reason for Fighter is getting Action Surge. This will give the Bard another action and recharge on short rest. One of Bard’s biggest weaknesses is the lack of multiple actions outside of extra attacks. However, Extra Attack is an odd class feature on a spell caster. Thus, this will get us much greater utility than a spell we are highly unlikely to use or be happy with.
Protection Fighting Style: When a creature you can see attacks a target other than you that is within 5 feet of you, you can use your reaction to impose disadvantage on the attack roll. You must be wielding a shield. This gives us more incentives and defense for using swords and shields with this build.
Level 12

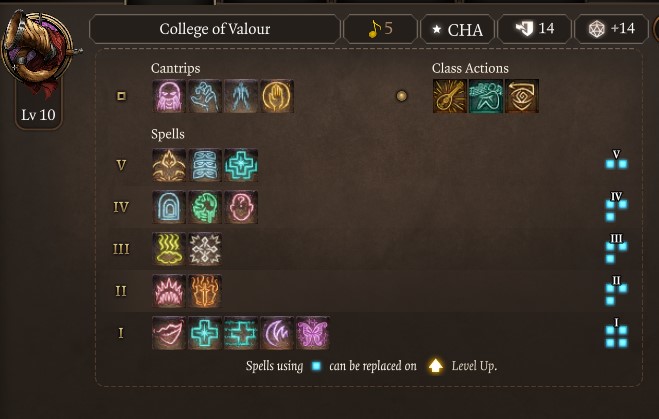
With two levels into Fighter, you get access to the awe-inspiring Action Surge. You get an extra action, but the biggest strength is, that it doesn’t require any resources to use it. Action Surge is a once-per-fight usage, but it allows you to cast another spell, attack, dash, etc. It gives you that extra oomph that most other classes have and the Bard doesn’t. If you disregarded my advice, you should be getting a feat at level 12 Bard. In that case, increase your Charisma by +2 to 20 overall.
If your spell book looks slightly different, realize that various racial features and passive can add or take away spells and cantrips. It should be very similar.
Best Companions for Bard Build
With a Bard build, you need more damage dealers and less support. Your goal is to create a team with one or more frontline fighters, a range build, and you as the main support.
Here’s are the best companions to complement your BG3 College of Valour Bard build:
- Lae’zeal (Fighter): Damage, crowd control, and in-your-face aggression, which takes the pressure off you.
- Gale (Wizard): Damage, crowd control, and elemental effects considered your range damage dealer.
- Astarion (Rogue): Stealth, lockpicking, critical damage, and an asset in and out of combat.
When putting your party together, consider companions for not only their combat prowess but also their outside abilities and skills that can influence storytelling, dialogue, and exploration. A balanced party will fit the traditional RPG ‘holy trinity’: Tank, Healer, and DPS. Ideally, in Baldur’s Gate 3 you are going to want one tank, one healer, one melee DPS, and one range DPS. Some classes/subclasses can cover both roles, so feel free to experiment and find out what works best for you.
Bard Equipment in BG3 (Best Gear for Bard Build)
Beginner: Act 1
Listed below is the best beginner gear to build the College of Valour Bard into a powerful supporter in BG3’s early game:
| Gear Slot | Best Gear Item | Effect |
|---|---|---|
| Head | Wapira’s Crown | Additional Healing |
| Cape | – | |
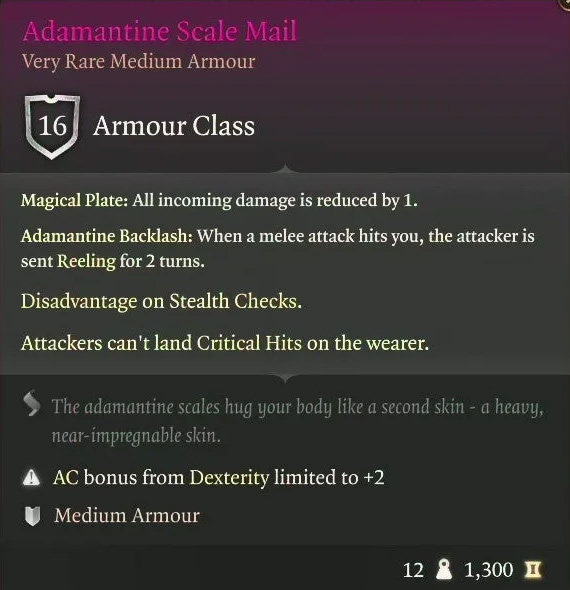
| Chest | Adamantine Scale Mail | 16 AC Medium |
| Gloves | Hellrider’s Pride | Heals give resistance |
| Boots | Boots of Aid and Comfort | Additional Temporary HP |
| Necklace | Amulet of Misty Step | Misty Step Spell |
| Ring | Ring of Absolute Force | Thunderwave Spell |
| Ring | The Whispering Promise | Healing gives Blessed |
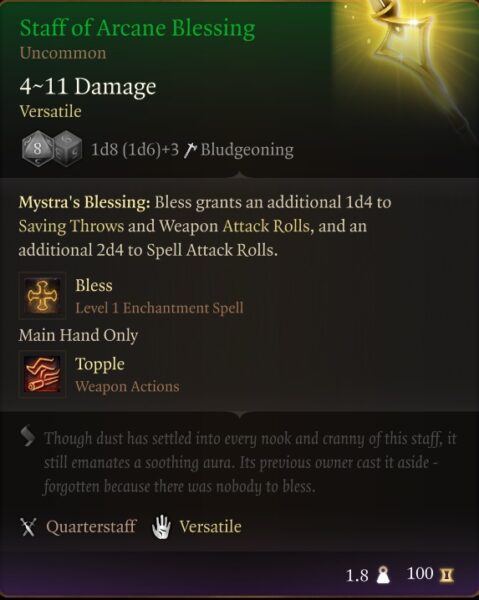
| Weapon 1 Main Hand | Staff of Arcane Blessing | Free Blessed Spell |
| Weapon 1 Off-Hand | Adamantine Shield | +2 AC, Shield Bash |
| Weapon 2 Ranged | Bow of Awareness | +1 Initiative |
Given below is a list of the best alternative gear, equipment, and weapons for the College of Valour Bard in Act 1:
- Wapira’s Crown: Reward from Zelvor for killing 3 leaders and the Goblin camp, accept gold (alternative Haste Helm, or Grymskull Helm).
- Adamantine Scale Mail: Complete Adamantine Forge Quest (X: -593 Y: 309) (alternative Luminous Armour, or Chain Mail +1)
- Hellrider’s Pride: Can be bought, stolen, or earned from Zevolr (alternative Gloves of Missile Snaring Vendors Act 1).
- Boots of Aid and Comfort: Sold by Grat The Trader at the Goblin Camp (alternative Disintegrating Night Walkers).
- Amulet of Misty Step: Found in a Gilded Chest (X386 Y8) in Defiled Temple (alternative Amulet of Silvanus, or Absolute’s Talisman).
- Ring of Absolute Force: Dropped by Sergeant Thrinn in Grymforge (alternative Crusher Ring).
- The Whispering Promise: From traders Zhentarim Hideout, Goblin Camp, Druid Grove, or Shattered Sanctum (alternative Ring of Colour Spray).
- Staff of Arcane Blessing: Obtained in Arcane Tower (alternative The Watcher’s Guide).
- Adamantine Shield Complete the Adamantine Forge Quest in Grymforge (Alternatives Glowing Shield, or Wood Woad Shield).
- Bow of Awareness: Sold by Vendor Roah Moonglow in the Shattered Sanctum. You can use it even without proficiency for extra initiative!
Advanced: Act 3 End Game
The following table presents the best end-game gear for the best College of Valour Bard build in Baldur’s Gate 3:
| Gear Slot | Best Gear Item | Effect |
|---|---|---|
| Head | Birthright | +2 Charisma |
| Cape | Mantle of the Holy Warrior | Free Crusader’s Mantle Spell |
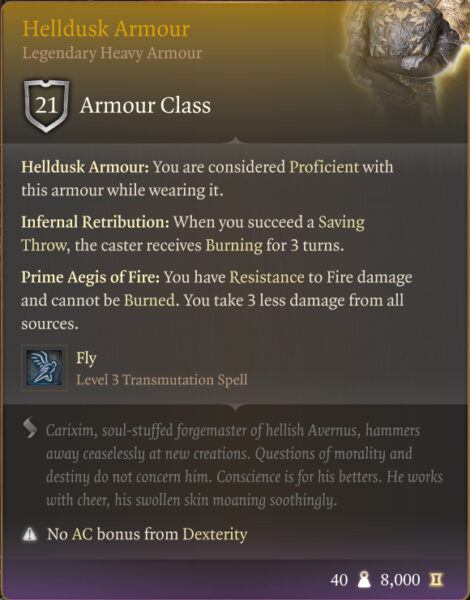
| Chest | Helldusk Armour | 21 AC, Fire Resistance |
| Gloves | The Reviving Hands | Healed Gain Blade Ward |
| Boots | Helldusk Boots | Cannot be Moved |
| Necklace | Amulet of Greater Health | 23 Constitution |
| Ring | Crypt Lord Ring | Free Create Undead |
| Ring | Till Death Do Us Part | Free Beacon of Hope |
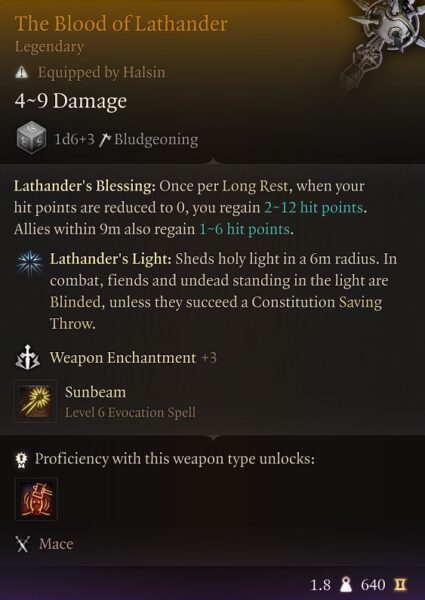
| Weapon 1 Main Hand | The Blood of Lathander | Sunbeam and Healing |
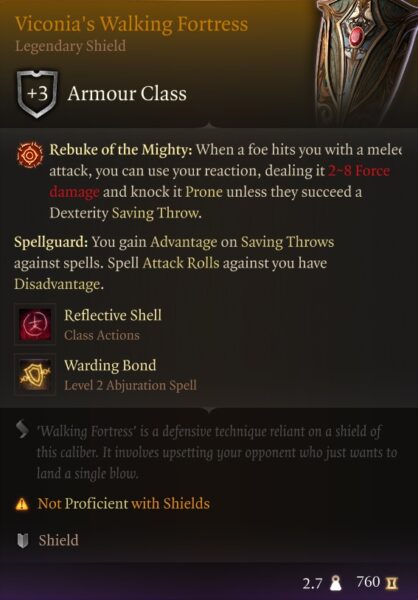
| Weapon 1 Off-Hand | Viconia’s Walking Fortress | 3 AC, Reflect Spell |
| Weapon 2 Ranged | Darkfire Shortbow | Free Haste Spell |
Below is a list of the best alternative College of Valour Bard gear, equipment, weapons, and armour for the end game:
- Birthright: This can be purchased at Sorcerous Sundries in Act 3 (Alternative Helm of Balduran, Helldusk Helmet, or Hood of the Weave).
- Mantle of the Holy Warrior: Sold by Vicar Humbletoes in Stormshore Tabernacle (Alternative Cloak of the Weave, or Cloak of Protection).
- Helldusk Armour: Looted from Raphael in the House of Hope in Act 3 (Alternative Adamantine Scale Mail, Flame Enamelled Armour).
- The Reviving Hands: Sold by Vicar Humbletoes in Stormshore Tabernacle (Alternative Jhannyl’s Gloves)
- Helldusk Boots: Chest on the top floor of Wyrm’s Rock Fortress (Alternative Disintegrating Night Walkers).
- Amulet of Greater Health: Archive in the House of Hope (Alternative Amulet of the Devout, or Spellcrux Amulet).
- Crypt Lord Ring: The Mystic Carrion’s Servant quest (Alternative Shifting Corpus Ring)
- Till Death Do Us Part: Looted from Lady Jannath in Act 3 (Alternative Ring of Free Action)
- The Blood of Lathander: The Blood of Lathander quest in Act 2 (Alternative Selûne’s Spear of Night, or Markoheshkir).
- Viconia’s Walking Fortress: Looted from Viconia DeVir during Shadowheart’s companion quest in Act 3 (Alternative Shield of Devotion)
- Darkfire Shortbow: Sold by Dammon Last Light Inn Act 2.
Best Bard Consumables, Potions, and Items
The following list represents the best individual use consumable items that complement our Baldur’s Gate 3 College of Valour Bard build:
- Potion of Greater Healing: 8d4 + 8 healing and removes burning.
- Potion of Invisibility: Become invisible for 1 minute. Attacking or casting spells ends the status.
- Potion of Flying: 10 turns of flying.
- Potion of Speed: 3 turns of an increased action via the Haste condition.
- Potion of Angelic Slumber: fall asleep for two turns, then restore all spell slots, hit points, and abilities.
- Elixir of Peerless Focus: gain advantage on concentration saves (ingredients Sublimate of Belladona, and any ashes).
- Elixir of Vigilance: gain +5 bonus initiative and you cannot be surprised (ingredients sublimate of bloodstained hook, any ashes).
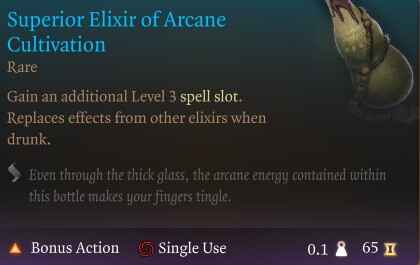
- Superior Elixir of Arcane Cultivation: gain a level 3 spell slot (ingredients Solution of Night Orchid, any Vitriol).
- Elixir of Viciousness: increase your critical hit chance (ingredients Vitriol of Shadowroot Sac, any Ashes).
- Elixir of Universal Resistance: gain resistance to all damage (ingredients Vitriol of Divine Miasma, any Sublimate).
Bard Gameplay Tips and Tricks in BG3
The following list includes 10 gameplay and combat tips to draw on the strengths of the College of Valour Bard build effectively in BG3:
- Inspire Allies: Constantly use Combat Inspiration during and before a fight to give them a massive advantage.
- Bonus Action: Always exhaust your bonus action with Combat Inspiration, potion, hide even shove can be beneficial.
- Environment Protection: Use line of sight, hide, and dash to avoid extra damage from melee aggressors as Bards are not equipped for frontline fighting.
- Knockback: Having a spell-like Thunderwave is essential to handling pressure from melee targets.
- Crowd Control: Bards should use single target and area-based control spells to reduce incoming damage.
- Rest Constantly: Constantly return to camp for a full rest so you enter with a full complement of spell slots.
- Use Consumables: Use the Potion of Speed in a tough fight to get an extra action per turn for a limited duration.
- Heal: The goal is to keep damage dealers from having to self-heal or use a bonus action potion, so constantly heal them to keep group damage high.
- Roleplay: Bards are god-tier RP characters and should mostly be doing dialogue options because of their huge built-in advantages.
- Use Skills: check your dice roll score by hovering over a dialogue check to see what gives you the best advantage.
Remember, this build guide serves as a foundation, and you can always adapt it to suit your preferences and the needs of your campaign. Enjoy playing as a formidable College of Valour Bard!
Baldur’s Gate 3 College of Valour Bard Build Summary Guide
Subclass: College of Valour
Armor: Medium
Weapons: One-Handed & Shield
- Strength 12
- Dexterity 14
- Constitution 16
- Intelligence 8
- Wisdom 10
- Charisma 16
Level Progression
- Level 1 – Bardic Inspiration
- Level 2 – Faerie Fire
- Level 3 – Combat Inspiration
- Level 4 – Feat +2 Charisma
- Level 5 – Glyph of Warding
- Level 6 – Extra Attack
- Level 7 – Confusion Spell
- Level 8 – War Caster Feat
- Level 9 – Mass Cure Wounds
- Level 10 – Skill Expertise
- Level 11 – Fighter Multi-Class
- Level 12 – Action Surge
FAQs
Q1. What is the best bard creation in BG3?
Ans. While the best Bard build in BG3 depends on your role and preferences, one of the most powerful picks is the College of Valour Bard.
Q2. What is the best subclass for a bard in BG3?
Ans. The College of Valour and College of Swords are the best bard subclasses in BG3.
Q3. What race makes the best Bard in Baldur’s Gate 3?
Ans. The Asmodeus Tiefling race is suitable for most bard builds because of their fire resistance and Hellish Rebuke ability. Drow is another viable alternative because of Superior Darkvision and weapon proficiencies.
Looking For More About Baldur’s Gate 3?
Thank you for reading Best Baldur’s Gate 3 Bard College of Valour Build Guide. We provide the latest news and create guides for Baldur’s Gate 3. Also, watch me play games on Twitch or visit my YouTube channel!
 Reddit
 Email
Email
