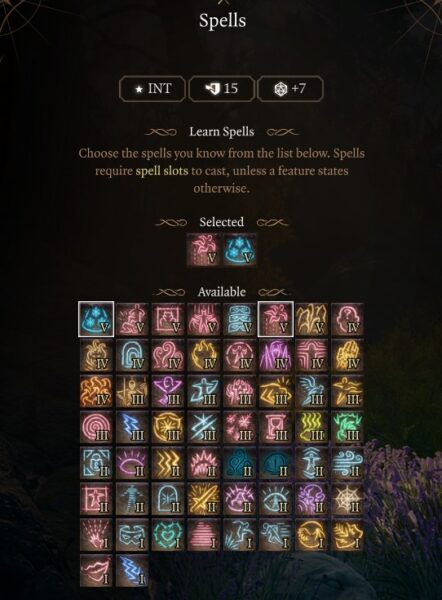
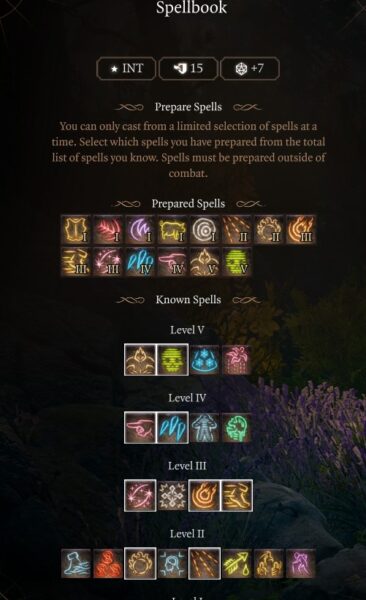
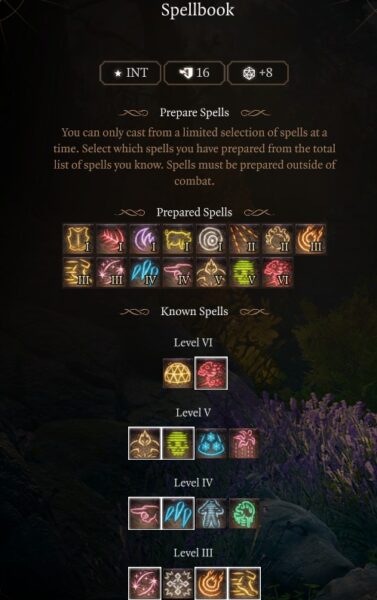
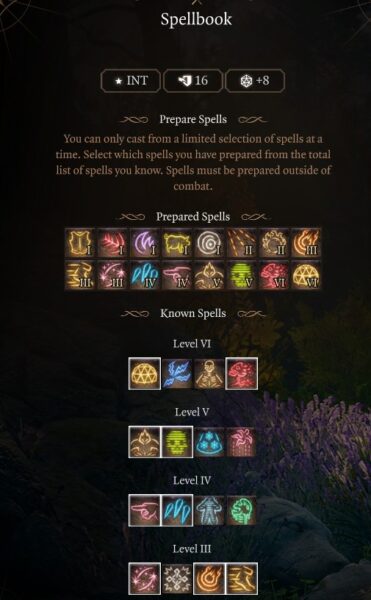
This guide focuses on the best Wizard build in Baldur’s Gate 3, the Evocation subclass, and includes all components to build a powerful character.

- Patch 8 Changes for BG3
- Class Mechanics and Features
- Spell Casting Explained
- Evocation Wizard Subclass
- Character Creation
- Level Progression
- Alternative Build
- Best Gear
- Best Consumables
- Permanent Bonuses
- Gameplay Tips and Tricks
- Changes in Patch 7 for BG3
- Build Summary Guide
- What does an Evocation Wizard do in BG3?
- What is the best Wizard class in BG3?
- Is Abjuration or Evocation better in BG3?
This build page has been updated for the Patch 8 version of Baldur’s Gate 3.
Everything About the Evocation Wizard in Baldur’s Gate 3
In Baldur’s Gate 3 the Evocation school is one of the best Wizard subclasses in the game because it allows you to cast massive area damage abilities without hitting allies. This is incredibly impactful the more powerful you become, and as you gain access to more powerful spells. Fireball is an especially useful, large area-of-effect spell that can do a huge amount of damage to a group of enemies. Being able to cast this without hurting your allies can make battle strategy much easier.
The Wizard class is renowned for their spellcasting prowess and unmatched versatility. They have access to the largest spell list in the game, enabling them to adapt to various situations. Wizards excel in area-of-effect spells, utility, and control, but they may require careful planning and preparation. Consider this build a great option for huge area damage that takes until level 5 to see the full potential.
| Wizard Class Pros | Wizard Class Cons |
|---|---|
| Spell Selection | Low Durability |
| Area Damage | Complex |
| Crowd Control | Lacks Metamagic |
Patch 8 Changes to Evocation Wizard Build for BG3
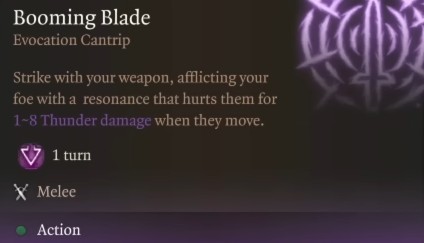
Patch 8 of Baldur’s Gate 3 redefines the Wizard class with the Bladesinging subclass and Booming Blade cantrip, allowing Wizards to thrive in melee combat. Bladesinging enhances AC and mobility, while Booming Blade offers reliable, scaling melee damage, though at the expense of some traditional spellcasting versatility.
To further boost early-game performance, a one-level dip into Hexblade Warlock adds weapon and armor proficiencies, plus access to Eldritch Blast. This increases both survivability and damage from the start. You’ll sacrifice a Level 12 feat, but the result is a flexible, engaging hybrid build that remains effective throughout the game.
Wizard Class Mechanics and Features

Here are the essential Baldur’s Gate 3 Evocation Wizard Build features and mechanics to focus on:
- Primary Ability: Intelligence
- Saving Throws: Intelligence and Wisdom
- Subclass: Evocation School
- Weapon Proficiency: Quarterstaves, Light Crossbows, Daggers
- Armour Proficiency: None
- Preferred Armor: Clothing
- Preferred Weapon: Quarterstaff
- Arcane Recovery: once per day out of combat, replenish expended spell slots.
- Learn Spells: Wizards who can learn spells from reading scrolls and paying gold.
Wizard Spell Casting Explained
- Cantrips: are like spells, but you can cast them infinitely, and they don’t take your spell slots.
- Spell Slots: At each level, you gain access to more usage of spells and high-tier spells but only have a finite number of spells until long rest.
- Concentration: is a spell mechanic that requires you to maintain concentration otherwise, the spell effect ends.
Evocation Wizard Subclass
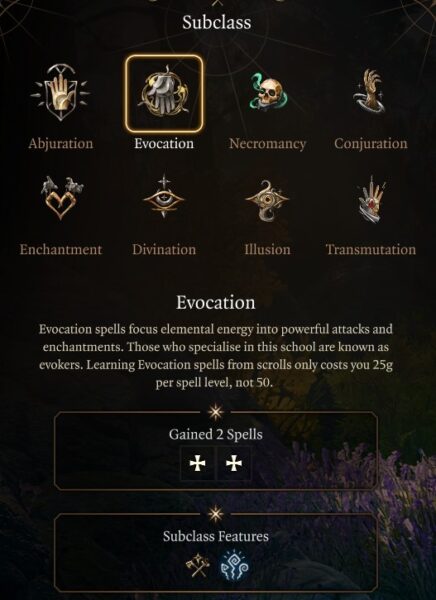
The best subclass for a Wizard build is Evocation because it delivers the most area-based damage in the game making it a perfect fit for a Wizard build. The Evocation Subclass comes with Evocation Savant and Sculpt Spells. Wizards will choose their subclass early on at Level 2.
Here are all Baldur’s Gate 3 Wizard Subclasses:
- Abjuration: They can create wards to protect themselves and their allies from harm, and they can also dispel the magic of their enemies.
- Conjuration: They can summon powerful allies to fight alongside them, and they can also create objects out of thin air.
- Divination: They can see the future, read minds, and even communicate with the dead.
- Enchantment: They can charm people, dominate them, or even make them forget their own names.
- Evocation: They can cast powerful spells that deal massive damage to their enemies.
- Necromancy: They can raise the dead, create undead minions, and even drain the life from their enemies.
- Illusion: They can create illusions that can fool the senses, and they can even alter the memories of others.
- Transmutation: They can change the size and shape of objects, and they can even transform living creatures into other creatures.
Baldur’s Gate 3 Evocation Wizard Features & Progression
The Evocation Wizard subclass unlocks the following features and spells:
- Evocation Savant (Level 2): Halves the cost of learning Evocation spells from Scrolls. Learning these spells will only cost
25gpper spell level. - Sculpt Spells (Level 2): Create pockets of safety within your Evocation spells. Allies automatically succeed their Saving Throws and take no damage from these spells.
- Potent Cantrip (Level 6): Your Cantrips become harder to evade entirely. When a creature succeeds its Saving Throw against one of your cantrips, it still takes half the cantrip’s damage, but suffers no additional effects.
- Empowered Evocation (Level 10): Your grasp of Evocation magic has tightened, and you can add your Intelligence Modifier to damage rolls with any Evocation spells.
Character Creation
| Category | Selection |
|---|---|
| Character | Origin – Custom character |
| Race | High Half-Elf |
| Racial Bonus | Darkvision, Shield Proficiency, Fey Ancestry |
| Class | Wizard |
| Subclass | Evocation |
| Cantrips | Ray of Frost, Acid Splash, Fire Bolt |
| Spells | Mage Armour, Magic Missile, Thunderwave, Grease, Chromatic Orb, Scorching Ray, Flaming Sphere, Fireball, Haste, Counterspell, Ice Storm, Banishment, Conjure Elemental, Cloudkill, Disintegrate |
| Background | Sage |
| Ability Score | STR: 8 DEX: 16 CON: 14 INT: 16 WIS: 10 CHA: 10 |
| Skill Proficiencies | Investigation and Religion |
Recommended Backgrounds for Evocation Wizard

Sage is the best background for the Evocation Wizard Build because you gain two intelligence-based skills. This choice mostly influences roleplaying and dialogue options aspects and allows you to create unique characters. Additional choices for the Best Baldur’s Gate 3 Evocation Wizard Build are:
- Sage: Proficiency in Arcana (intelligence) and History (intelligence). You are curious and well-read, with an unending thirst for knowledge. A companion who’s a Sage background is Gale.
- Acolyte: Proficiency in Insight (wisdom) and Religion (intelligence). You have spent your life serving a temple, learning sacred rites, and providing sacrifices to the god or gods you worship. Shadowheart is an Acolyte.
- Noble: Proficiency in History (intelligence) and Persuasion (charisma). You were raised in a family among the social elite, accustomed to power and privilege. A noble companion is Minthara.
Best Race Choice for Evocation Wizard

High Half-Elf is the best race choice for the Wizard Evocation in Baldur’s Gate 3 because you gain an extra Cantrip, Fey Ancestry, Darkvision, and Shield Proficiency. A secondary choice is the Human because you gain increased carrying capacity, skill proficiency, and shield proficiency as well.
When choosing a race for your Wizard, consider the racial traits that improve your ability score main stat. Each of these races offers unique advantages that can enhance your combat prowess, survivability, or utility. Additionally, consider the roleplaying opportunities and character concepts that resonate with you.
| High Half-Elf | Human |
|---|---|
| Darkvision | Shield Proficiency |
| Shield Proficiency | Carry Capacity |
| Fey Ancestry | Skill Proficiency |
The Wizard’s racial choice will not influence ability score, as race will get a +2 and +1 to spend regardless. This frees your race choice up to not completely hinder yourself based on ability score, but race features. Each of these races offers unique advantages that can enhance your combat prowess, survivability, or utility. Additionally, consider the roleplaying opportunities and character concepts that resonate with you.
Recommended Skills for Evocation Wizard Build

Investigation and Religion are the best skills for the Best Baldur’s Gate 3 Evocation Wizard Build because they complement your class abilities and enhance your effectiveness in various situations. In Baldur’s Gate 3, skills represent the abilities and proficiencies of your character that allow them to perform various actions and interact with the game world. Skills are associated with specific attributes and are used to determine the success or effectiveness of certain actions or abilities. They can be edited during character creation or with companions, during respec or reroll screen.
Here are the best skills for Wizard in Baldur’s Gate 3:
- Investigation: is an Intelligence skill used to analyze clues and solve mysteries.
- Religion: is an Intelligence skill that helps recognize deities and holy rites.
Best Evocation Wizard Ability Scores
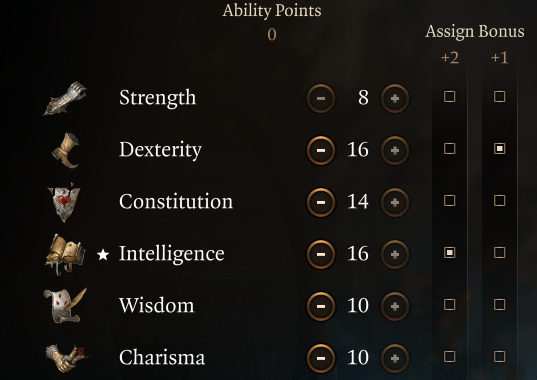
Below is the best ability score to unlock the full potential of the Best Baldur’s Gate 3 Evocation Wizard Build:
| Ability | Points Goal |
|---|---|
| Strength | 8 |
| Dexterity | 16 |
| Constitution | 14 |
| Intelligence | 16 |
| Wisdom | 10 |
| Charisma | 10 |
The best ability score for the Evocation Wizards is reaching 16 Intelligence because it increases the chance to land spells. Dexterity at 16 should be your second priority because we won’t be wearing armor, but rather clothing. High Dexterity allows the build to have higher AC even while only being proficient in clothing. Lastly, we will want to increase our Constitution to 14 to increase our health points (HP) increasing our chances of survival.
You can increase your ability score via a quest in Act 1, Act 2, and Act 3. Make sure to check out our Permanent bonus guide on how you can boost your ability score through quests.
Wizard Spell Slots
Here’s a chart that shows the levels and spell slots unlocked for the Wizard class in Baldur’s Gate 3:
| Wizard Level | 1st | 2nd | 3rd | 4th | 5th | 6th |
|---|---|---|---|---|---|---|
| Level 1 | 2 | 0 | 0 | 0 | 0 | 0 |
| Level 2 | 3 | 0 | 0 | 0 | 0 | 0 |
| Level 3 | 4 | 2 | 0 | 0 | 0 | 0 |
| Level 4 | 4 | 3 | 0 | 0 | 0 | 0 |
| Level 5 | 4 | 3 | 2 | 0 | 0 | 0 |
| Level 6 | 4 | 3 | 3 | 0 | 0 | 0 |
| Level 7 | 4 | 3 | 3 | 1 | 0 | 0 |
| Level 8 | 4 | 3 | 3 | 2 | 0 | 0 |
| Level 9 | 4 | 3 | 3 | 3 | 1 | 0 |
| Level 10 | 4 | 3 | 3 | 3 | 2 | 0 |
| Level 11 | 4 | 3 | 3 | 3 | 2 | 1 |
| Level 12 | 4 | 3 | 3 | 3 | 2 | 1 |
Best Companions for Evocation Wizard Build
The best companion for a Wizard Build in Baldur’s Gate 3 is Lae’zeal because she’s a melee-focused damage dealer. She will engage enemies and take the pressure off your ranged-focused build, allowing you to free-cast spells. Having a heavy focus on melee will keep you in the distance while applying pressure, snaring, and debuffing the opposition.
- Lae’zeal (Fighter): damage, high survivability, and in-your-face aggression.
- Shadowheart (Cleric): buffs, healing, and control.
- Astarion (Rogue): High Initiative, damage, lockpicking, and sneaking
When putting your party together, consider companions for not only their combat prowess but also their outside abilities and skills that can influence storytelling, dialogue, and exploration. A balanced party will fit the traditional RPG ‘holy trinity’: Tank, Healer, and DPS. Ideally, in Baldur’s Gate 3, you are going to want one tank, one healer, one melee DPS, and one range DPS. Some classes/subclasses can cover both roles, so feel free to experiment and find out what works best for you.
Evocation Wizard Illithid Powers

Illithid Powers are unlocked later in the game when you learn more about the Mind Flayers and Tadpoles. You can gain jars of Mind Flayer Parasite Specimens, and consume them to gain one point. This is essentially another skill tree advancement with some very strong powers. If you decide to advance this skill line, these are the choices we suggest for our Best Baldur’s Gate 3 Evocation Wizard Build.
Here are the best Illithid Powers for the Best Baldur’s Gate 3 Evocation Wizard Build:
| Illithid Powers | Description |
|---|---|
| Shield of Thralls | This can be a useful defensive shield when expecting or taking pressure. |
| Freecast | Utterly god-tier feature to pair with metamagic making your build obsencely strong because you can cast essentially three spells in one turn. Put together Quickened spell (2x) and Freecast with bonus action (3x). |
| Reflective Shell | A protective shell envelops you. It reflects any projectiles targeted at you to their point of origin. Does not affect creatures that don’t rely on sight or that can see through illusions. |
| Repulsor | Massive area knockback that can hit friendlies. |
| Charm | This is the priority power you want to obtain because you can force enemies to attack something else. |
Related:
Evocation Wizard Level Progression
| Level | Class | Selection |
|---|---|---|
| 1 | Wizard | Ray of Frost, Acid Splash, Firebolt, Mage Armour, Magic Missile, Thunderwave, Grease, Sleep, Chromatic Orb |
| 2 | Wizard | Subclass: Evocation, Find Familiar, Feather Fall |
| 3 | Wizard | Misty Step, Scorching Ray |
| 4 | Wizard | Feat: Ability Improvement Intelligence, Flaming Sphere, Mirror Image, Blade Ward |
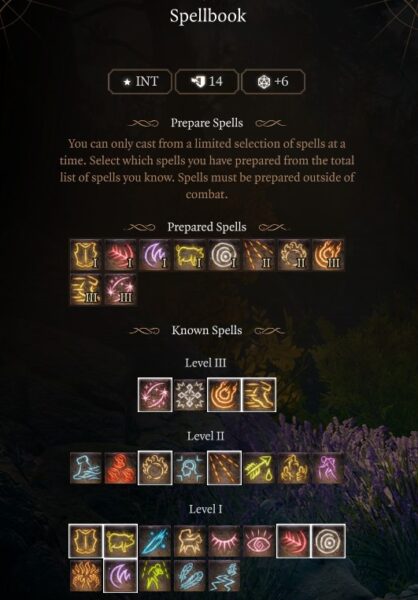
| 5 | Wizard | Fireball, Haste |
| 6 | Wizard | Counterspell, Glyph of Warding |
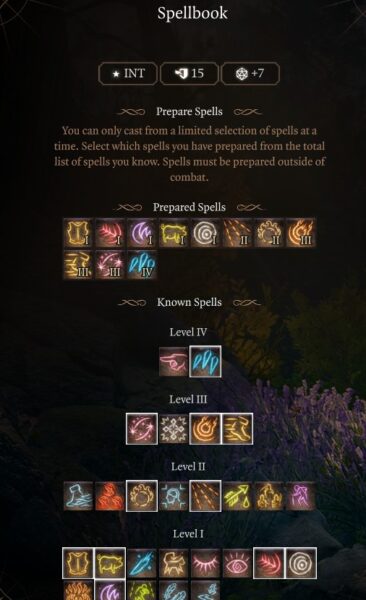
| 7 | Wizard | Ice Storm, Banishment |
| 8 | Wizard | Feat: Spell Sniper, Greater Invisibility, Blight, Eldritch Blast |
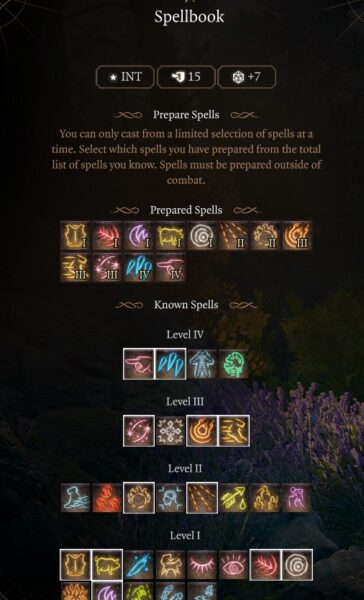
| 9 | Wizard | Cloudkill, Conjure Elemental |
| 10 | Wizard | Telekinesis, Cone of Cold, True Strike |
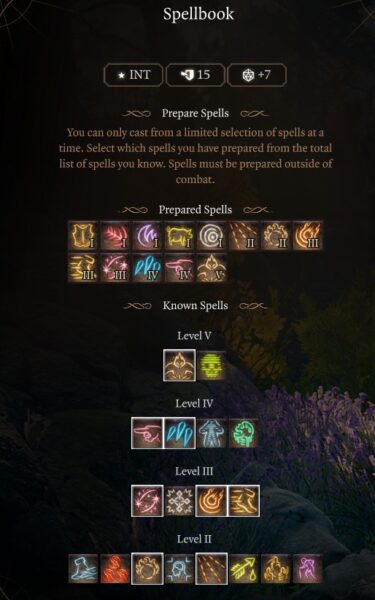
| 11 | Wizard | Disintegrate, Globe of Invulnerability |
| 12 | Wizard | Feat: Ability Improvement Intelligence, Chain Lighting, Create Undead |
Alternative Evocation Wizard Build
For our alternative Evocation Wizard build, begin at Level 1 with a dip into Hexblade Warlock. This gives you early access to two powerful cantrips such as Eldritch Blast for ranged attacks and Booming Blade for melee. Additionally, you’ll also get proficiencies in medium armor, shields, and martial weapons. These additions provide a significant boost to your early-game survivability and allow for a more aggressive frontline playstyle. If you prefer the classic Wizard aesthetic and clothing gear be sure to pick up Mage Armour at Wizard Level 3 to maintain solid defenses.
Although multiclassing means sacrificing a feat at Level 12, the trade-off is well worth it. The early access to impactful cantrips, combined with the added durability and versatility from Warlock, gives your Wizard a strong foundation that scales well into the late game. With Evocation’s enhanced AoE and offensive spell synergy, this hybrid build remains both powerful and reliable across all stages of the campaign.
| Level | Class | Selection |
|---|---|---|
| 1 | Warlock | Subclass: Hexblade, Eldritch Blast, Booming Blade, Hex, Shield |
| 2 | Wizard | Firebolt, Mage Hand, Friends, Chromatic Orb, Magic Missile, Longstrider, Shield, Thunderwave, Find Familiar |
| 3 | Wizard | Subclass: Evocation, Mage Armour, Protection from Good and Evil |
| 4 | Wizard | Misty Step, Scorching Ray |
| 5 | Wizard | Bursting Sinew, Mirror Image, Blur, Feat: +2 Intelligence |
| 6 | Wizard | Fireball, Counterspell |
| 7 | Wizard | Haste, Glyph of Warding |
| 8 | Wizard | Conjure Minor Elemental, Ice Storm |
| 9 | Wizard | Banishment, Blight, Shocking Grasp, Feat: Spell Sniper |
| 10 | Wizard | Conjure Elemental, Cone of Cold |
| 11 | Wizard | Toll of the Dead, Hold Monster, Confusion |
| 12 | Wizard | Disintegration, Globe of Invulnerability |
Level 1

At level 1, you should follow our Evocation Wizard Build character creation steps. Select the correct background, race, skills, and ability score focusing on Intelligence and Dexterity. You won’t be able to pick your subclass until level 3, so expect a slow start in terms of performance. At level 1, the Wizard will have access to three Cantrips, six spells, and four prepared spells. Here are our suggestions when using the Best Baldur’s Gate 3 Evocation Wizard Build:
Cantrip Selection
- Ray of Frost: Call forth a frigid beam of blue-white light and reduce the target’s Movement Speed by 3m. This is a decent attack to prevent a melee aggressor from closing the distance on you.
- Acid Splash: Hurl a bubble of acid that hurts each creature it hits. This is a decent area damage spell that can reduce armor.
- Fire Bolt: Hurls fireball dealing 1d10 fire damage 18m range. The highest damage cantrip Wizards have, plus it can ignite or set things on fire (especially useful in combination with the Grease spell).
Spell Selection
- Mage Armour: Surround an unarmoured creature with a protective magical force. Its Armour Class increases to 13 + its Dexterity modifier. This is an essential defensive skill because it sets AC to 13 + Dexterity Modifier landing you at 16 AC total when it’s active. Mage Armour stays on your character until you take a long rest, or down and can be cast out of combat. Usually, I cast this and use a Spell Recharge to be at full spells.
- Magic Missile: Create 3 darts of magical force, each dealing 1d4+1 Force to its target. The darts always hit their target. The strength of this ability is its 100% chance of landing. By far lower damage, but useful when you can target up to three separate enemies or finish someone off when you need a guaranteed hit.
- Thunderwave: Release a wave of thunderous force that pushes away all creatures and objects (2d8 Thunder). This spell acts as your knockback to melee characters and allows you to create distance and get away. It’s also great to knock enemies off ledges or high positions and keeps you having some defensive capabilities at the early level.
- Grease: Cover the ground in grease, slowing creatures within and possibly making them fall Prone. Having some type of crowd control early can help your group.
- Sleep: Put creatures into a magical slumber. Select targets up to a combined 24 hit points. Powerful area crowd control that’s very strong at lower levels.
- Chromatic Orb: Hurl a sphere that deals 3-24 elemental damage and possibly creates a surface on impact. A great spell because you can choose the element, and cold can do good damage and proc prone or crowd control a target.
Subclass Feature
- Arcane Recovery: you can recover two spell slots. The number allows you to either restore two level 1 spells or one level 2 spell. It’s a simple mechanic that you can use to prevent endless Resting in between fights. Expect a lot of rest at lower levels where your spell slots are limited.
Starting Gameplay
The most important aspect of playing an Evocation Wizard is using Mage Armour immediately following every long rest. This will boost your AC reaching 16 with a shield, giving you 18 AC. However, to equip a shield you need a race like Half-Elf or Human! Next, you want to focus on crowd control. This can be done with Sleep, Grease, and Fire Bolt combination. Additionally, you can use Thunderwave as a knockout, and Chromatic Orb for stuns. Chromatic Orb can be cast using Ice which can knock enemies prone, essentially skipping their turn. Wizards become much more powerful at level 5 but expect a slow start until you reach there. Your priorities early are:
- If human or Half-Elf, find and equip a shield
- Quarterstaff with a free spell like Crones or Melf’s
- Supplies for camps, alchemy material, and scrolls
- Consume scrolls that have useful spells to learn them
- Exchange spells and experiment to find the right combination for you.
In summary, you want to have a knockback, area damage, single target damage, and stuns. The default spell selection will give you this, but you can freely swap in and out spells as you learn what’s best for your party composition.
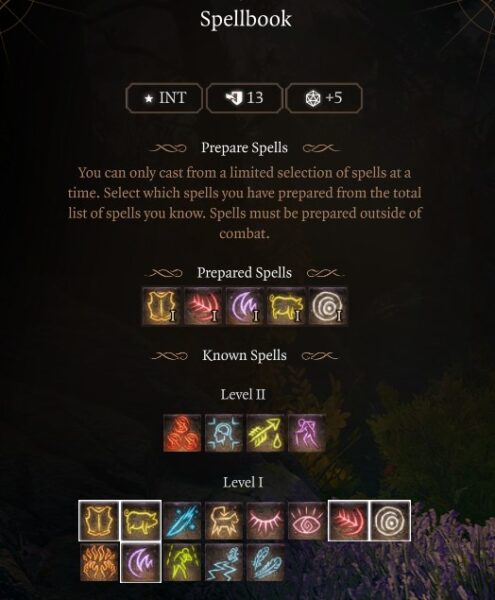
Level One Prepared Spells: Thunderwave, Magic Missile, Mage Armour, Sleep
Level 2
Take the Evocation Subclass at level two. Evocation school focuses on elemental spells and powerful damage. You get access to two features from this school.
Subclass Features
- Sculpt Spells: Create pockets of safety within your Evocation Spell. Allied creatures automatically succeed their saving throws and take no damage from them. Area-based spells will not give “friendly fire.” You can cast Fireball and not damage allies!
- Evocation Savant: Learning Evocation spells from scrolls costs half as much, becoming 25 gold pieces per spell level. This saves money when coming to a scroll to learn new spells.
Prepared Spells: at this level, you will get access to more spells. The Wizard’s strength is the variety and spells along with area damage, and that’s what you should lean into. Take both Chromatic Orb and Featherfall at this level.
- Find Familiar: Gain the service of a familiar, fey spirit that takes an animal from your choice. Summon a helpful critter to follow you around. You can also use them to sneak into smaller locations in overland exploring. Utility spell.
- Feather Fall: Slow the rate of descent of allied creatures. They become Immune to Falling damage. This is a great spell for general exploration. Specifically, it lets your character reach the Underdark without dying from fall damage.
At this level, use Fire Bolt for damage when you run out of spell slots. Save Thunderwave for a knockback when pressured. You can use Magic Missile for kill shots when you need 100% damage. Always activate your Mage Armour after a long rest. use Chromatic Orb with cold for crowd control or grease when you have a lot of melee in a choke point.
Level Two Prepare Spells: Mage Armour, Magic Missile, Thunderwave, Grease, Chromatic Orb
Level 3
At level three, what will happen is to increase your spell slots. You gain another level 1 and two level 2 spell slots. Now you can cast a couple of higher-level spells and lower-level spells per fight. Take Misty Step and Scorching Ray.
- Misty Step: Surrounded by silver mist, you teleport to an unoccupied space where you can see up to 18m range. One of the BEST defensive spells early in the game. It’s a teleport when you need it most. Moreover, this spell only requires a bonus action. You can use your action for a high-powered spell, and a bonus action to get away, assuming you have the spell slots.
- Scorching Ray: Hurl 3 rays of Fire, each dealing 2d6 Fire damage at 18m range. Think of this spell as an improved Magic Missile, that can miss, but also do a lot of damage when you need it. You can cast on the same target or up to three which is great for multi-kills without using are skill.
Gameplay: we only slot Scorching Ray at this level not Misty Step. The main reason, there’s a useful amulet that gives us this spell for free. If you find yourself dying a lot, swap out Grease for Misty Step and zip away until you get the Amulet. Also, you can learn Mirror Image which is a powerful defensive spell. Use Scorching Ray for single target or multiple single target shots.
Level 3 Wizard Prepared Spells: Mage Armour, Magic Missile, Thunderwave, Grease, Chromatic Orb, Scorching Ray
Level 4
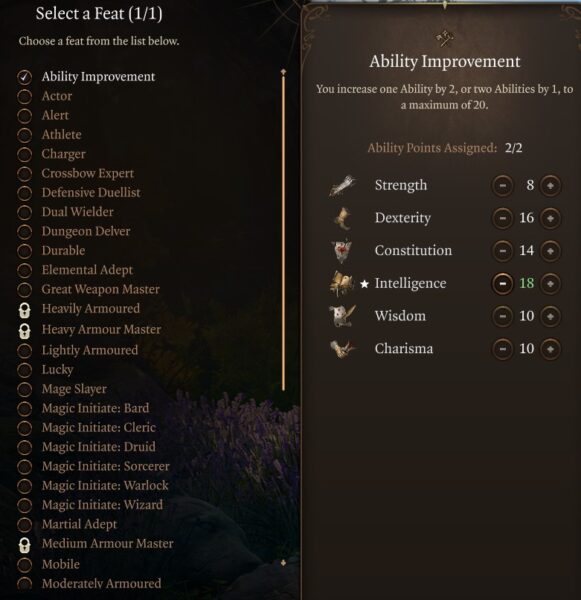
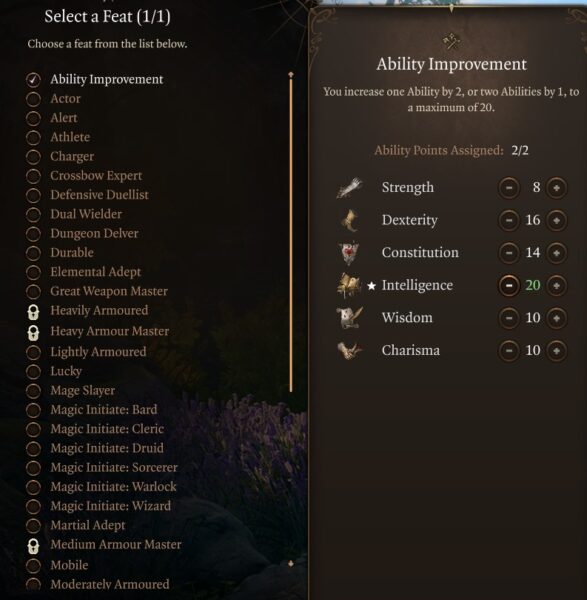
At level four you get access to another level 2 spell slot, another cantrip, and two more spells. You also get to either choose a feat or ability improvement. We suggest taking the Ability Improvement and boosting your Intelligence by two and increasing the power of your spells.
Spells Selection
- Flaming Sphere: this creates a fireball that acts as a companion and can do damage for you. It’s a great decoy along with easy-to-do damage skill. Moreover, it can be cast prior to combat and if you don’t use another concentration spell helps soak up and dish out damage at this level.
- Mirror Image: Create 3 illusory duplicates of yourself that distract attackers. Each duplicate increases your Armour Class by 3. Whenever you successfully evade an attack, one of the duplicates disappears. This is a god-tier defensive spell if you find yourself dying repeatedly to range or melee attacks. You don’t want your build to be too defensive, but Mage Armour and Mirror Image in combination can keep you alive in difficult fights.
Cantrip Selection
- Blade Ward: Take only half of the damage from Bludgeoning, Piercing, and Slashing attacks. This is a decent cantrip when expecting incoming melee damage.
Feat Selection
- Ability Improvement: +2 to Intelligence. We will take Spell Sniper at level 8 and another +2 at level 12 to reach 10 Intelligence at max level.
Gameplay: at this level, summing Flaming Sphere as a distraction in big melee brawls. Rely on Scorching Ray and Chromatic Orb as your main damage dealers. Use Fire Bolt to conserve spell slots.
Level Four Prepared Spells: Mage Armour, Magic Missile, Thunderwave, Grease, Chromatic Orb, Scorching Ray, Flaming Sphere
Level 5
At level 5, your Wizard starts to feel very powerful with access to Level 3 spells. Take Fireball and Haste at this level and here’s why:
- Fireball: Shoot a bright flame from your fingers that explode upon contact, torching everything in the vicinity 8d6 18m range 6m radius. This is the “mega” spell that everyone wants as a Wizard, and you start to feel very powerful. It does a massive amount of damage in a large radius. You need to make sure the area is clear or you target a spot on the ground that won’t impact your allies.
- Haste: Target yourself or an ally to become Hastened which allows an additional action for that character hastened. This spell requires concentration, and the target becomes lethargic when the condition ends after 10 turns. This gives whoever is targeted a huge advantage in combat at the expense of a level 3 spell. Typically, I don’t play my Wizard as a supporting character, but giving this ability to a Fighter that has Extra Attack and Great Weapon Master, means they can essentially attack five times in a turn!
Gameplay: at this level, your main focus is Fireball for damage, Haste for utility, and Scorching Ray for a single target. Use Flaming Sphere as a distraction and swap in Misty Step or Mirror Image if you struggle with survival.
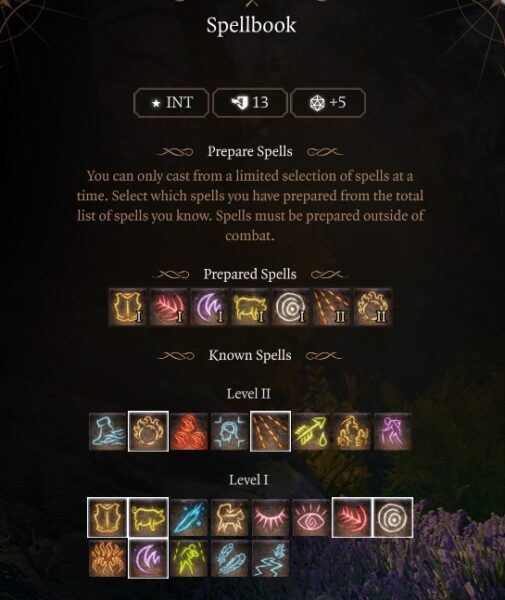
Level Five Prepared Spells: Mage Armour, Magic Missile, Thunderwave, Grease, Chromatic Orb, Scorching Ray, Flaming Sphere, Fireball, Haste
Level 6
At level six we get an additional spell and subclass feature Potent Cantrip. Below is what you should do at this level.
Subclass Feature
- Potent Cantrip: your cantrips become harder to evade entirely. If a creature succeeds in saving throw, they still take half its damage. This just makes Firebolt a bit more reliable which we won’t be using too often.
Spells Selection
- Counterspell: Nullify another creature’s spell as a reaction. The spell must be 3rd level or lower. If it is higher, you must succeed a Check to nullify it, the difficulty of which is based on the spell’s Level. An amazing spell because it’s a reaction, meaning it doesn’t cost an action. You can shut down a fellow spell caster, but be careful you don’t want to use all your spell slots.
- Glyph of Warding: this is a 3m radius glyph that procs elemental damage. The nice thing is you can pick the type of element and put it on the ground as a trap. It’s not as much damage as other area spells but has some utility because of the status effect component of different elements.
Ending Act 1 with an Evocation Wizard
When you reach Level 6 you should be close to transitioning out of Act 1. Make sure to check merchants and stock up on camp and alchemy supplies. Additionally, look over the best Act 1 items. There are also permanent bonuses you don’t want to miss in Act 1. Lastly, Grymforge has powerful armor and weapons (Adamantine) that can aid you well into Act 3. Consider taking the time to craft some items before transitioning to Act 2, where you won’t be able to return.
Wizard Level 6 Prepared Spells: Mage Armour, Magic Missile, Slow, Scorching Ray, Fireball, Glyph of Warding, Misty Step, Mirror Image, Flaming Sphere, Haste.
Level 7
At level 7 you gain access to level 4 spells and 1 more prepared spell. Here are our suggestions:
- Ice Storm: deals 2d8 bludgeoning damage and 4d6 cold damage in a massive 6m area. This spell is huge radius-like fireball doing two types of damage and using cold can proc status effects. Use it for area damage at the fourth level spell.
- Banishment: temporarily Banish your target to another plane of existence requires concentration. This is a very powerful single-target crowd control effect. This does require concentration so we will use it sparingly on bosses or something that deals a lot of damage. You won’t be able to damage the target, but they won’t threaten you. Use this and clear out additional enemies in two turns.
Flex Spells: Drop Chromatic Orb and Flaming Sphere for Misty Step and Mirror Image if survival is an issue.
Level 7 Wizard Prepared Spells: Mage Armour, Magic Missile, Thunderwave, Grease, Chromatic Orb, Scorching Ray, Flaming Sphere, Fireball, Haste, Counterspell, Ice Storm.
Level 8
At level 8 the Wizard gets access to two more spells and a feat. Take Greater Invisibility, Blight and Spell Sniper Feat.
Spells Selection
- Greater Invisibility: Turn a creature Invisible. Attack against it have Disadvantage. It attacks with Advantage. This is a helpful skill to give allies invisibility. You can use this in and outside of combat for utility.
- Blight: 9m range, dealing 8d8 necrotic damage. This will help with single target damage and a different elemental type if someone is susceptible to it. Moreover, they still take half damage on save, so consistent damage can spike a single target.
Feat Selection
- Spell Sniper: reduces critical chance dice roll by and you can select one cantrip. This is helpful because Eldritch Blast is the most powerful cantrip and we get a buff to Cantrip at level 6 with Potent Cantrip. Also, you are more likely to strike which is always helpful critically.
Cantrip Selection
- Eldritch Blast: Force damage The spell creates more than one beam when you reach higher levels: two beams at 5th level and three beams at 10th level. Each beam is rolled separately. Used when you are out of spell slots or just want force damage. This can also be useful to knock open holes in the walls outside of combat.
Gameplay: At level eight your wizard will have a lot of utility and with a better cantrip, you can not be terrified to run out of spell slots. Continue to focus on area damage as your primary goal, but adding Blight and Eldritch Blast gives us better single target focused.
Level 8 Wizard Prepared Spells: Mage Armour, Magic Missile, Thunderwave, Grease, Chromatic Orb, Scorching Ray, Flaming Sphere, Fireball, Haste, Counterspell, Ice Storm, Banishment.
Level 9
At level 9, the Best Baldur’s Gate 3 Evocation Wizard Build gets to pick two more spells to learn, one more prepared spell and access to level 5 spells.
Spell Selection
- Cloudkill: craft a large cloud that inflicts 5∼40 Poison damage per turn. Provides massive area damage and poison. You want to swap this into your prepared slots if you are fighting something resistant to other damages.
- Conjure Elemental: Bend the barrier between the Planes until they disgorge an elemental ally to follow and fight for you. I prefer the Earth Elemental because it can stun opponents. Whatever you summon, will follow you around and fight for you and not require concentration. The amount of damage and pressure these things can handle is staggering and I highly recommend using it.
Level 9 Wizard Prepared Spells: Mage Armour, Magic Missile, Thunderwave, Grease, Chromatic Orb, Scorching Ray, Flaming Sphere, Fireball, Haste, Counterspell, Ice Storm, Banishment, Conjure Elemental.
Level 10
At level 10, the Wizard can learn two spells, gets a new sublcass feature, and another prepared spell.
Subclass Feature
- Empowered Evocation: Your grasp of Evocation magic has tightened, and you can add your Intelligence modifier to damage rolls with any Evocation spells.
Spells Selection
- Telekinesis: Throw a creature or object up to 18m with a thought. Once per turn, you can use Telekinesis again without expending a spell slot. Heavier items deal more damage. A deceptively powerful spell which you can one-shot kill targets by throwing them off high ledges or into death environments.
- Cone of Cold: 8d8 cold damage Make a flurry of frost, crisp air, and condensed snow crystals erupt from your hands. Another amazing conal damage spell that is cold so it can proc status effects.
Cantrip Selection
- True Strike: Gain Advantage on your next Attack Roll. A mediocre cantrip at this point but advantage can be helpful if you need to land big damage.
Level 10 Wizard Prepared Spells: Mage Armour, Magic Missile, Thunderwave, Grease, Chromatic Orb, Scorching Ray, Flaming Sphere, Fireball, Haste, Counterspell, Ice Storm, Banishment, Conjure Elemental, Cloudkill.
Level 11
At level 11 the Wizard accesses the final level of spells, level 6. Our recommendation is Disintegration and Globe of Invulnerability.
Spell Selection
- Disintegrate: Shoot a thin green ray from your finger. If the 50-100 Force damage reduces the target to 0 hit points, it disintegrates into crumbly ash. My favorite spell in the entirety of Baldur’s Gate 3. It’s a powerful single-target damage spell that can outright disintegrate targets. While this build is focused on AOE, it’s a must-have in any aresnal for single target pressure.
- Globe of Invulnerability: Creates a barrier that makes creatures and objects inside it Immune to all damage 3m and requires concentration. Essentially, you cannot die while in this barrier. It can be helpful when taking heavy pressure and you need to turtle up, you and or your team.
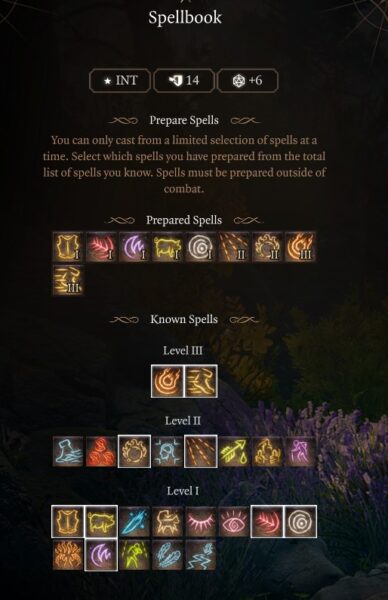
Level 11 Wizard Prepared Spells: Mage Armour, Magic Missile, Thunderwave, Grease, Chromatic Orb, Scorching Ray, Flaming Sphere, Fireball, Haste, Counterspell, Ice Storm, Banishment, Conjure Elemental, Cloudkill, Disintegrate.
Level 12
We’ve reached max level of 12 in Baldur’s Gate 3 with our Wizard. At this level you can learn two more spells, prepare one additional and select a feat.
Spells Selection
- Chain Lighting: deals 10-80 lighting damage Strike an enemy with lightning. Three more bolts will leap from the target, electrifying as many as three other enemies within 18m. Another amazing damage skill that has some area or multitarget potential. What holds the spell back from Disintegrate, is the lowest it can strike is 10, so there’s a wide range of outcomes but has better multi-kill potential. Swap them in and out and test your preference.
- Create Undead: Raise a corpse as a heinous mummy that fights by your side. The target must be a Medium or small corpse. The highest level undead corpse we can summon and this will have a ton of health and do good damage.
Feat Selection
- Ability Improvement: +2 to Intelligence.
At this stage, you should feel like an utter god. Unlike other classes, you can swap in spells and out. As a Wizard you can also learn more spells than what we have listed.
- Survival: Mage Armour, Mirror Image, Misty Step, Globe of Invulnerability, Invisibility Spell or Potion.
- Area Damage: Fireball, Chromatic Orb, Ice Storm, and Cloudkill.
- Single target: Scorching Ray, Disintegrate, Eldritch Blast, or Fireball.
Thanks for reading this section, if you have questions or comments scroll to the bottom of the page and hit “contact.” Below is recommended gear and items for the Best Baldur’s Gate 3 Evocation Wizard Build.
Level 12 Wizard Prepared Spells: Mage Armour, Magic Missile, Thunderwave, Grease, Chromatic Orb, Scorching Ray, Flaming Sphere, Fireball, Haste, Counterspell, Ice Storm, Banishment, Conjure Elemental, Cloudkill, Disintegrate, Globe of Invulnerability.
Best Gear for Evocation Wizard Build
In Games like Baldur’s Gate 3, you’ll explore the world, loot chests and your enemies’ dead bodies, and complete quests and all those activities can reward you with useful items, potions, armor, weapons, scrolls, and much more. Progression and finding new gear are part of the game, and you will organically get more powerful weapons during your journeys.
Beginner: Starting the Game
This gear is meant for Act 1 gear, and the meta chart is something for you to progress to by the end of the game, Act 3. Here’s the best beginner gear for Best Baldur’s Gate 3 Evocation Wizard Build:
| Gear Slot | Best Gear Item | Effect |
|---|---|---|
| Head | Circlet of Blasting | Free Scorching Ray |
| Cape | – | |
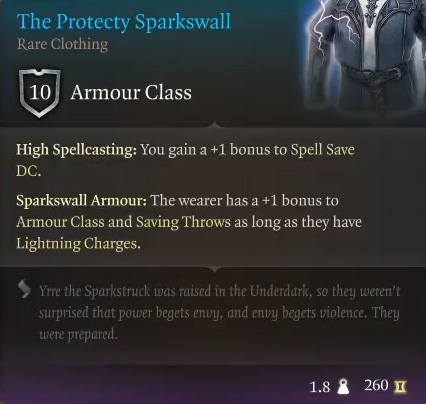
| Chest | The Protecty Sparkswall | +1 Spell Saves |
| Gloves | Bracers of Defence | +2 AC without Shield |
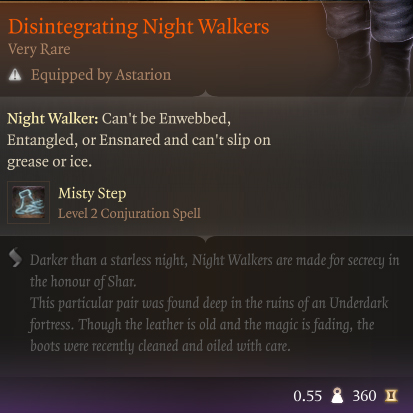
| Boots | Disintegrating Night Walkers | Mobility & Misty Step |
| Necklace | Amulet of Misty Step | Free Misty Step |
| Ring | Ring of Absolute Force | Free Thunderwave |
| Ring | The Sparkswall | Lighting Resistance |
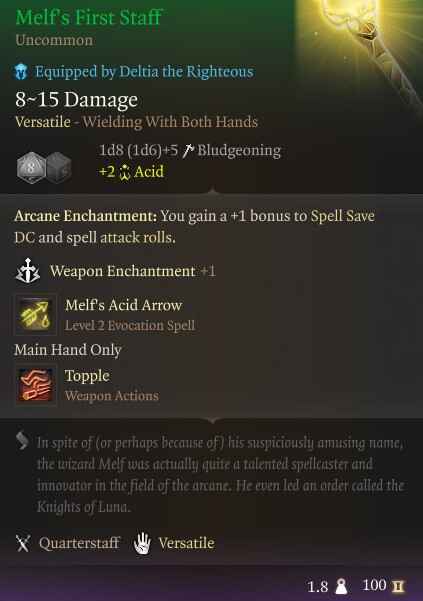
| Weapon 1 Main Hand | Melf’s First Staff | Free Acid Arrow |
| Weapon 2 Ranged | Hunting Shortbow | Free Hunter’s Mark |
Below is the best Act 1 Armor, Weapons, and Equipment for Evocation Wizard in BG3:
- Circlet of Blasting: Sold by Blurg in the Myconid Colony (Alternative Haste Helm).
- The Protecty Sparkswall: Looted in Gilded Chest in Grymforge X: -645 Y: 360 (Alternative Poisoner’s Robe).
- Bracers of Defence: Obtained in Necromancers cellar in Blighted Village (Alternative Gloves of Missile Snaring, or Gloves of Hail of Thorns, swap if using a shield).
- Disintegrating Night Walkers: Found in Underdark from Ne’re NPC (Alternative Cinder Shoes).
- Amulet of Misty Step: Found in a Gilded Chest (X386 Y8) in Defiled Temple (Alternative Moondrop Pendant).
- Ring of Absolute Force: Dropped by Sergeant Thrinn in Grymforge (Alternative Ring of Colour Spray).
- The Sparkswall: Found in the Arcane Tower, Act 1, Underdark (Alternative Sunwalker’s Gift if human race).
- Melf’s First Staff: Sold by Blurg in the Myconid Colony (Alternative Spellsparkler, or Staff of Crones).
- Shield – Adamantine Shield (optional if Half-Elf or Human Race – drop Bracers of Defence): crafted in Gyrmforge.
- Hunting Shortbow: Sold by Dammon in the Druid Grove.
Advanced: End-Game
The following table presents the best advanced and end-game gear for the Best Baldur’s Gate 3 Evocation Wizard Build:
| Gear Slot | Best Gear Item | Effect |
|---|---|---|
| Head | Hood of the Weave | +2 Spell Save & Roll |
| Cape | Cloak of the Weave | +1 Spell Save & Roll |
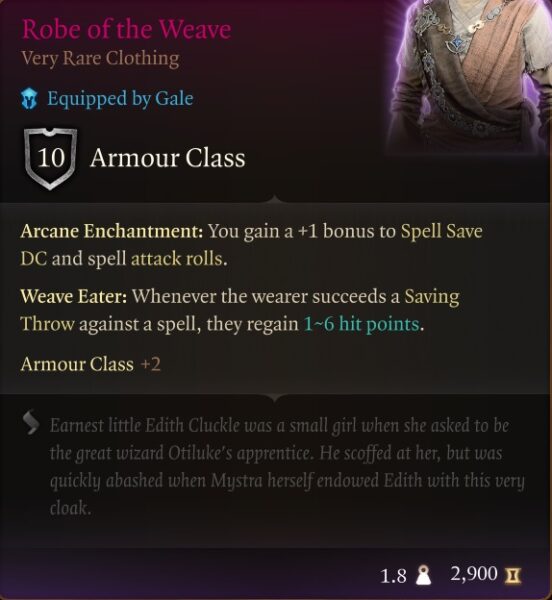
| Chest | Robe of the Weave | +2 AC & +1 Roll |
| Gloves | Quickspell Gloves | Cantrips Bonus Action |
| Boots | Helldusk Boots | Cannot be Moved |
| Necklace | Amulet of Greater Health | 23 Constitution |
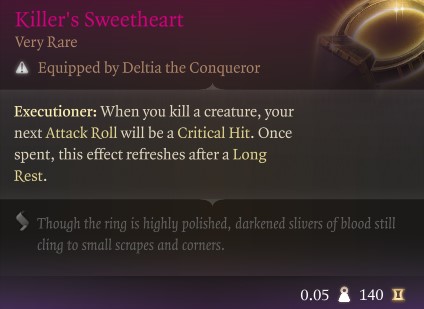
| Ring | Killer’s Sweetheart | Auto Critical |
| Ring | Crypt Lord Ring | Free Create Undead |
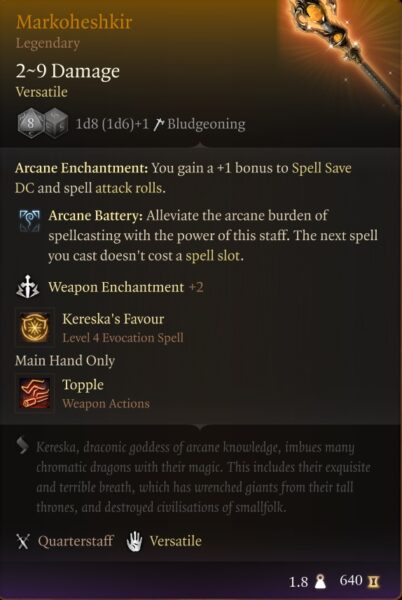
| Weapon 1 Main Hand | Markoheshkir | Free Spells, +1 Roll |
| Weapon 1 Off-Hand | Viconia’s Walking Fortress | If Human/Half-Elf |
| Weapon 2 Ranged | Darkfire Shortbow | Free Haste Spell |
Below is the best Act 3 Armor, Weapons, and Equipment for Evocation Wizard in BG3:
- Hood of the Weave: Sold by Mystic Carrion in Philgrave’s Mansion during Act 3 (Alternative Helldusk Helmet).
- Cloak of the Weave: Sold by Helsik at the Devil’s Fee (Alternative Cloak of Protection).
- Robe of the Weave: Ramazith’s Tower Act 3 (Alternative Helldusk Armour, Robe of Supreme Defences, or Potent Robe).
- Quickspell Gloves: Purchased at Lorroakan’s Projection at Sorcerors’s Sundries (Helldusk Gloves, or Gemini Gloves).
- Helldusk Boots: Gilded Chest on the top floor of Wyrm’s Rock Fortress (Alternative Disintegrating Night Walkers).
- Amulet of Greater Health: Archive in the House of Hope (Alternative Spellcrux Amulet).
- Killer’s Sweetheart: Found inside the Gauntlet of Shar ( X: -833 Y: -729)(Alternative Ring of Free Action).
- Crypt Lord Ring: The Mystic Carrion’s Servant quest (Alternative Shifting Corpus Ring).
- Markoheshkir: At Ramazith’s Tower (Alternative Staff of Cherished Necromancy, Staff of Spellpower, or Incandescent Staff).
- Viconia’s Walking Fortress: Looted from Viconia DeVir during Shadowheart’s companion quest in Act 3 (Alternative Shield of Devotion).
- Darkfire Shortbow: Sold by Dammon Last Light Inn Act 2.
Best Evocation Wizard Consumables, Potions, and Items
The following list represents the best individual use consumable items that will aid in our Wizard Build:
- Elixir of Bloodlust: Once per turn when you kill a foe, you gain HP 5 temporary hit points and an additional action.
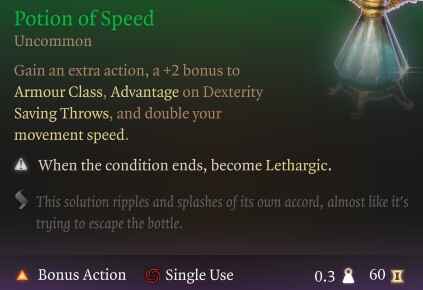
- Potion of Speed: 3 turns of an increased action via the Haste condition.
- Potion of Angelic Slumber: fall asleep for two turns, then restore all spell slots, hit points, and abilities.
- Potion of Invisibility: Become invisible for 1 minute. Attacking or casting spells ends the status.
- Potion of Flying: 10 turns of flying.
- Elixir of Peerless Focus: gain advantage on concentration saves (ingredients Sublimate of Belladona, and any ashes).
- Elixir of Vigilance: gain +5 bonus initiative and you cannot be surprised (ingredients sublimate of bloodstained hook, any ashes).
- Superior Elixir of Arcane Cultivation: gain a level 3 spell slot (ingredients Solution of Night Orchid, any Vitriol).
- Elixir of Viciousness: increase your critical hit chance (ingredients Vitriol of Shadowroot Sac, any Ashes).
- Elixir of Universal Resistance: gain resistance to all damage (ingredients Vitriol of Divine Miasma, any Sublimate).
Permanent Bonuses

Throughout Baldur’s Gate 3, you will have the ability to gain permanent bonuses to your character. These can grant additional spells, ability scores, and other bonuses. Permanent Bonuses are not displayed throughout the campaign but are vital to increase overall combat performance. We have all permanent bonuses here in a guide, but the most important ones for you to collect are listed below.
| Act 1 | Act 2 | Act 3 |
|---|---|---|
| Auntie Ethel’s Hair: Gain +1 to an Ability Score. | Potion of Everlasting Vigour: Gain +2 Strength. | Mirror of Loss – +2 to an Ability Score of your choice. |
| Awakened: Use illithid powers as a Bonus Action. | Slayer Form: Ability to transform into the Slayer. | Partial Ceremorphosis: Access to tier 3 illithid Powers. |
| Scratch: Gain Find Familiar Scratch. | Summon Us: Allows you to summon Us. | Sweet Stone Features: Blessed permanent. |
| Cheeky Quasit: Gain Summon Quasit Shovel. | Statue of the Gods: +2 to Saving Throws | |
| Loviatar’s Love: 30% Hit Points or less, you gain a +2 bonus to Attack Rolls and Wisdom saving throws. | ||
| Necromancy Of Thay: access to powerful spells in Act 3. | ||
| Volo’s Ersatz Eye: See Invisibility |
Best Permanent Bonuses for Evocation Wizard in Baldur’s Gate 3
Evocation Wizard Gameplay Tips and Tricks
- Pre-Buff: Always cast Mage Armour following a long rest. This will keep you alive and oftentimes you will forget it falls off.
- Bonus Action: Don’t forget your bonus action – you can use a potion of healing or speed to increase your survivability.
- Environment: Remember you can create environmental damage. Combine Grease with a fire spell and coat the area with fire damage.
- Knockback: Having a spell-like Thunderwave is essential to handling pressure from enemies.
- Area Damage: Your priority should be creating big area damage. Think of ways to hit multiple targets directly or with environmental damage to inflict the most damage at once.
- Rest Constantly: Your spell slots will quickly run out in challenging fights. Resting and using resources is a small-time commitment, but it’s the difference between life and death when you enter combat.
- Positioning: Keeping your distance and casting spells is how you successfully do damage. When needed, look to move back or even use Hide to prevent incoming damage.
- Crowd Control: Wizards have great crowd control options. Focus on taking out the primary target with Sleep, Hold Person, or any other CC to limit potential damage.
- Big Nuke: Typically, you want to cast your big spells early to finish off targets before they can attack. But save at least one of your spell slots for a critical moment. Usually, I do this for Misty Step as it’s a ‘get-out’ card.
- Use Consumables: One of the best early consumables is the Potion of Speed. This gives you an extra action and essentially doubles your combat potential for a few turns.
Remember, this build guide serves as a foundation, and you can always adapt it to suit your preferences. Enjoy playing using our formidable Best Baldur’s Gate 3 Evocation Wizard Build!
Evocation Wizard Changes in Patch 7 for BG3

The release of Patch 7 for Baldur’s Gate 3 did not bring with it any balance, combat, or gameplay changes to the game. Overall, Larian Studios’ main focus in this patch is mods and some new cinematic scenes focusing on evil endings.
Therefore, the game now features a modding toolkit and an in-game mod manager, allowing players to create and install mods directly within the game. This update is intended to hand over creative control to the community, enabling players to produce unique content and continue the story in new ways. Consequently, this best Evocation Wizard Build Guide remains mostly unchanged with Baldur’s Gate 3 Patch 7.
Baldur’s Gate 3 Evocation Wizard Build Summary Guide
Subclass: Evocation School
Armor: Cloth
Weapons: Quarterstaff and Shield
Background – Sage
- Strength 8
- Dexterity 16
- Constitution 14
- Intelligence 16
- Wisdom 10
- Charisma 10
Level Progression
- Level 1 – Chromatic Orb Spell
- Level 2 – Find Familiar Spell
- Level 3 – Misty Step Spell
- Level 4 – Feat +2 Intelligence
- Level 5 – Fireball and Haste Spells
- Level 6 – Counterspell
- Level 7 – Ice Storm Spell
- Level 8 – Spell Sniper Feat
- Level 9 – Conjure Elemental Spell
- Level 10 – Cone of Cold Spell
- Level 11 – Disintegrate Spell
- Level 12 – Feat +2 Intelligence
Frequently Asked Questions
What does an Evocation Wizard do in BG3?
The Evocation Wizard in BG3 can help you blow up enemies thanks to its impressive spells like Fireball, Lightning bolt, and Cone of Cold.
What is the best Wizard class in BG3?
Apart from Evocation Wizard class, the next best Wizard class in BG3 is Divination Wizard. Here is our build guide for that.
Is Abjuration or Evocation better in BG3?
The choice between these two depends on your personal playstyle. While Evocation Wizard is best for damage and simplicity, Abjuration is a better option for survivability and soloing.
Looking For More About Baldur’s Gate 3?
Thank you for reading Best Baldur’s Gate 3 Evocation Wizard Build guide. We provide the latest news and create guides for Baldur’s Gate 3. Also, watch me play games on Twitch or visit my YouTube channel!
 Reddit
 Email
Email
