Facebook
 Reddit
 Email
Email
In Baldur’s Gate 3, the Staff of Crones is a great quarterstaff you can get in Act 1 – This guide will explain everything you need to know about the Staff of Crones in BG3.

The Staff of Crones is a powerful and intriguing item in Baldur’s Gate 3, offering a mix of mysticism and unique abilities that can benefit both spellcasters and those looking for a more immersive experience in the world of Faerûn. This rare staff is tied to dark, eldritch powers, making it a coveted artifact among players who wish to harness its potent magic. In this guide, we’ll explore the Staff of Crones, how to acquire it, and tips for using it effectively in Baldur’s Gate 3.
What is the Staff of Crones in BG3?
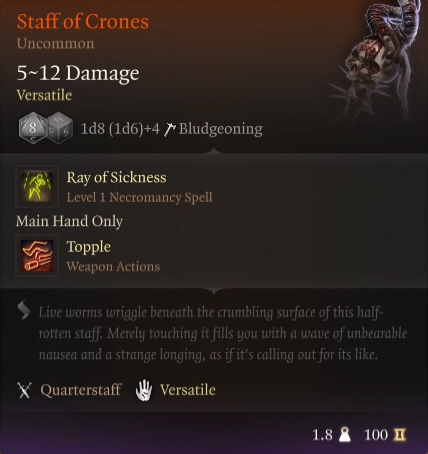
In Baldur’s Gate 3 the Staff of Crones is a great early game staff for Gale or any of your spellcasters to use. The main bonus from this staff is the ability to cast the Necromancy spell Ray of Sickness once per Short Rest. Ray of Sickness Deals 1d8 poison damage and also possibly poisons the target. This later condition is what you really want to proc. The Poisoned status effect enemy suffers a Disadvantage on Attack Rolls and Ability Checks. When a target has Disadvantage this means that when they attack, the game will roll two dice and take the lower result.
Related:
Staff of Crones Abilities and Effects
Below are all the features, abilities, and effects of the Staff of Crones in Baldur’s Gate 3:
- Weapon Type: Quarterstaff
- Damage: 1d8 (1d6)+1 Bludgeoning
- Requirements: Simple Weapons Proficiency
- Rarity: Uncommon
- Location: Looted from the Acrid Workshop in the Hag’s Lair, Act 1
- Weight: 1.8 kg
- Value: 430
- Bonuses:
- Cast Ray of Sickness once per Song Rest
- Classes with Simple Weapons Proficiency: Druids, Sorcerers, Wizards
- Companions Who Can Use This Weapon: Gale, Halsin, Jaheira
Note: The following explanation will include spoilers for Act 1.
Where to Find Staff of Crones in Baldur’s Gate 3
The Staff of Crones can be found in the Acrid Workshop at the very bottom of the Hag’s Lair in Act 1 of Baldur’s Gate 3. Getting to it will require you to visit Auntie Ethel’s Teahouse in the Sunlit Wetlands and finding the secret entrance behind the fireplace. As soon as you enter the basement, Auntie Ethel will turn hostile and you will have to fight her at the very bottom before you can get the Staff of Crones.
How to Get the Staff of Crones in BG3? Explained
To get the Staff of Crones in Baldur’s Gate 3 you’ll need to find Auntie Ethel’s Teahouse in the Putrid Bog/Sunlit Wetlands, discover the old woman’s secret, and find your way down past enemies and traps into the Acrid Workshop treasure room. It is highly recommended that you wait to tackle this portion of the game until your party is at least at Level 4. On higher difficulties you may want to wait until you’re level 5. A melee class with Extra Attack and a caster with the Fireball spell (both gained at Level 5) would be extra helpful.
The Sunlit Wetlands make up the southwest potion of the Act 1 map. To get there you need to travel west from the Emerald Grove Environs waypoint, across the large bridge heading into the Blighted Village. Instead of going into the Village, though, turn left right before the entrance and follow the path down around the south of the town. On the southwest bend, you find a path that stars to head more south – and you should begin to hear voices talking. Head over to find two men arguing with an older woman.

The men are looking for their sister Mayrina and accuse the old woman of taking her. During the conversation, you can side with either party. If you defend Ethel, she’ll invite you back to her house. But even if you don’t, you can still find and visit her home on your own.
Find Auntie Ethel’s Teahouse in Baldur’s Gate 3
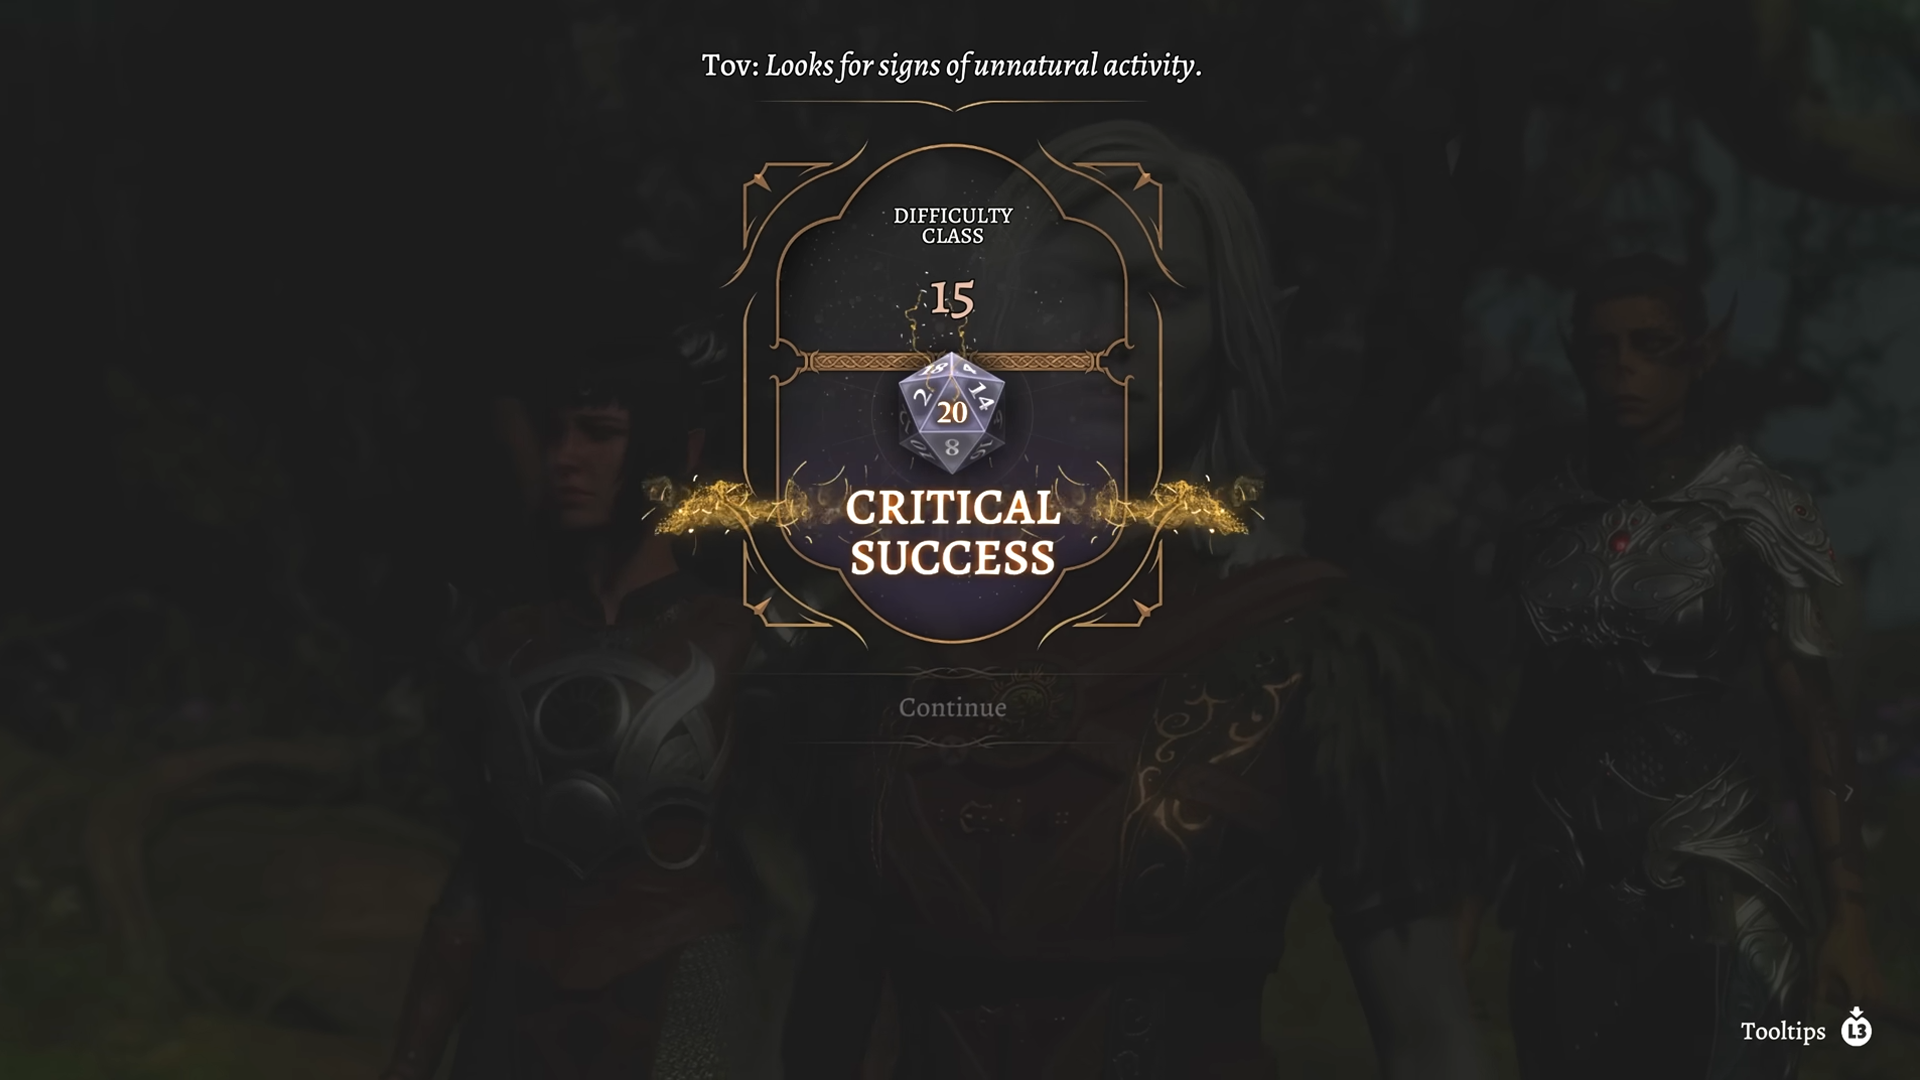
After the dialogue is over, continue south into the Sunlit Wetlands. You’ll trigger a cut scene where your character senses something. There will be a very high 20DC Investigation check you’ll have to pass in order to break the spell over the Wetlands. If you don’t manage it, don’t worry about it too much. You’re about to encounter a certain fight which will break the spell automatically.
Auntie Ethel’s house is on the far western portion of the map. It’s not recommended to drink from the well you find out front. While it can give your party members a +10 HP buff, during the upcoming confrontation with Ethel it will turn into a debuff and you don’t want that going into this fight.
Inside the house you’ll be greeted by Ethel and meet Myrina, too. Ethel will recognize you’re carrying a tadpole and offers to remove it for you. In trade, she wants to take one of your eyes, kiss it, and put it back. Letting Auntie Ethel take your eye will change its appearance and inflict you with the Paid the Price Condition. That condition gives you a +1 to Intimidation checks, but also gives you Disadvantage on Perception checks. Ethel can’t successfully remove the tadpole, so the decision about whether the condition is worth it is up to you.
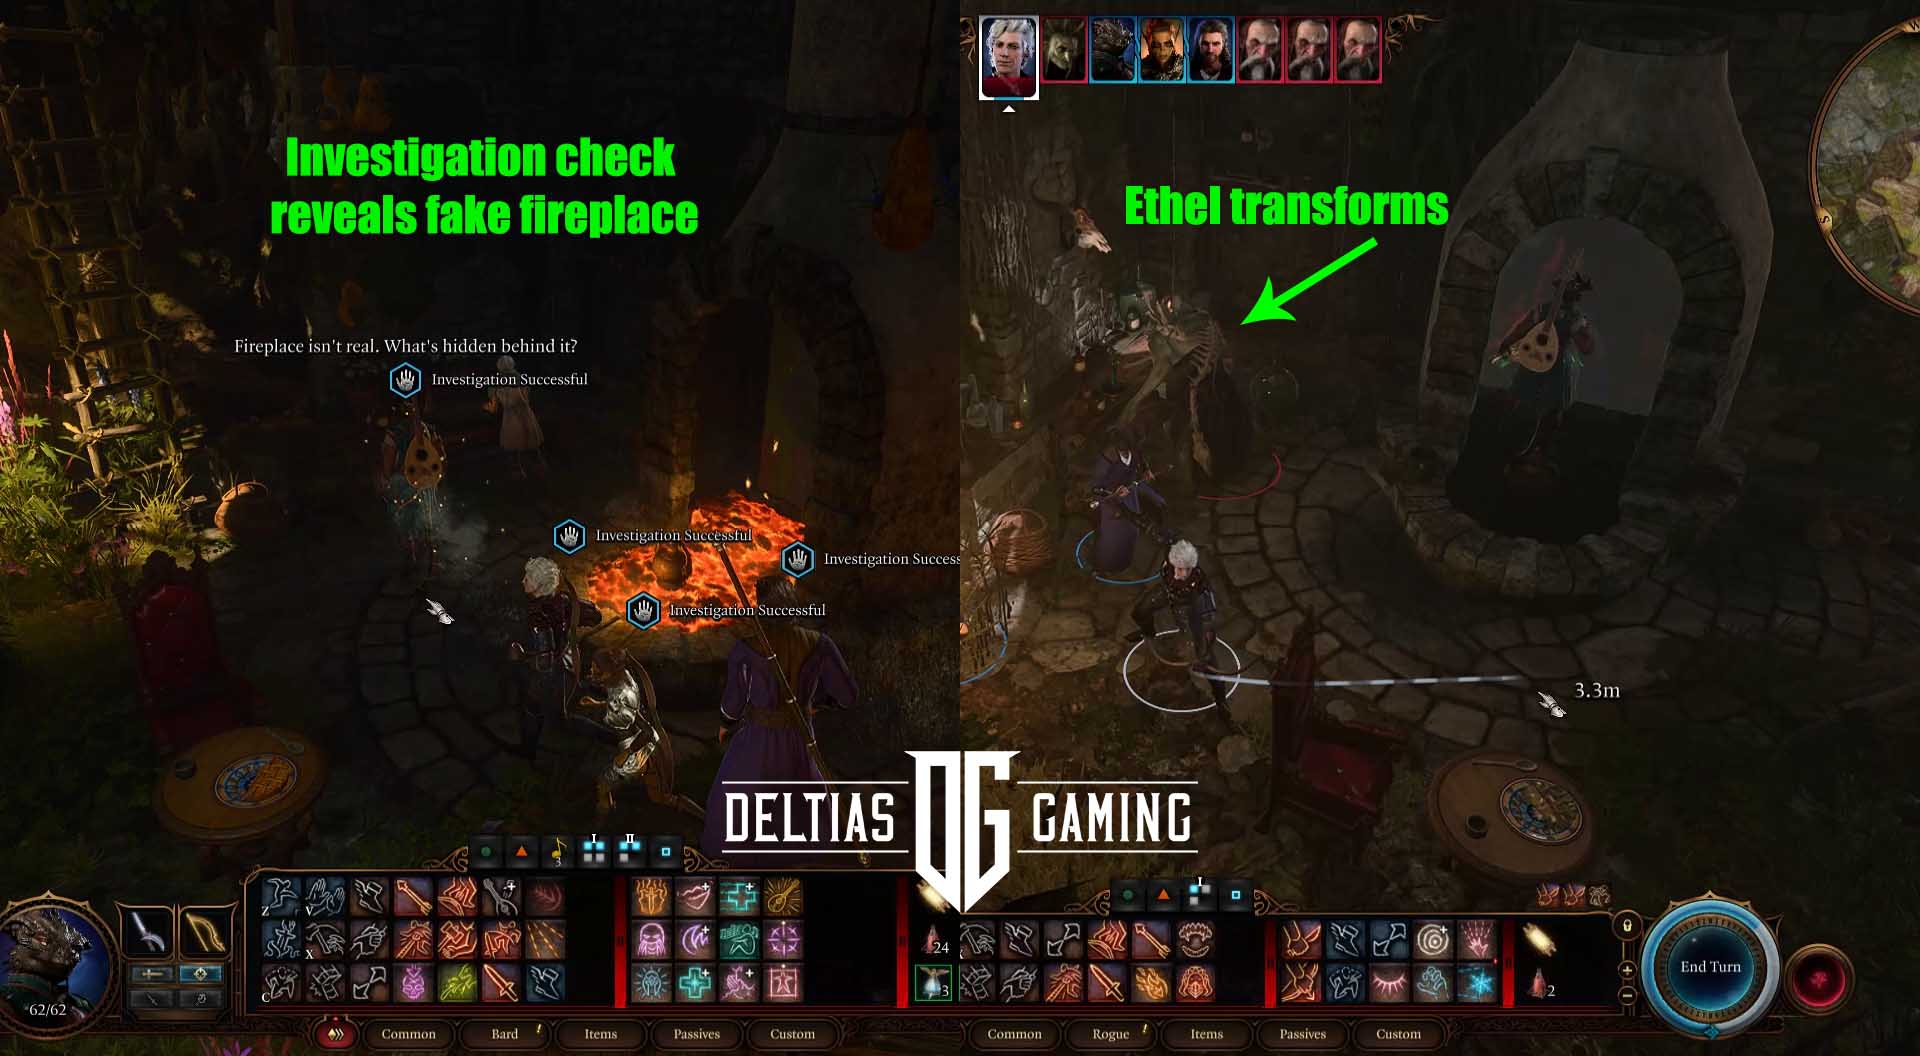
Once you’re out of the dialogue scene you’re free to move around the interior. As you walk past the fireplace a successful Investigation check lets you know that it isn’t real. Click on the fireplace to cool it. At this point, double check that your party is healed up. Interacting with the panel at the back of the fireplace will trigger a fight with Auntie Ethel, who will now reveal herself as a hag.
First Encounter with the Hag in Baldur’s Gate 3
Touching the back panel of the fireplace immediately triggers a fight. Ethel turns into a Hag and Redcaps coming running in to help. The goal here isn’t necessarily to straight up kill Ethel/the hag. If you’re planning on killing her outright anyway, then go for it. But if you let her escape to her basement lair and confront her again, she’ll offer you another bargain after a second fight. This second bargain is much better than the first and will give you an item which will add a permanent +1 bonus to any ability score you choose. If you kill her here you don’t get a chance at this.
The Hag uses Invisibility a lot and is actually looking to escape, so likely you’ll just end up fighting the four Redcaps that come to her aid. Once you’ve defeated them, you should probably make a jump to camp and take a Long Rest. You want to be full up on spell slots and HP before going any further. When ready, you can head through the back of the fireplace and down into the secret lair. You won’t fight the Hag again right away. This first space is like a gruesome kind of ‘trophy room’ and you can find out what happened to some of her previous victims.
Getting Through the Hag’s Basement Lair
How to Get Past the Gnarled Door in Baldur’s Gate 3
Circle around the cauldron until you come to a Gnarled Door. Click to initiate a conversation with the soul trapped inside. There will be an Intimidation or Persuasion option in the dialogue to get it to open. Both are 10 DC. There are masks on a table to the right, as well. If you wear it, the door will let you pass. However, the Hag can also control you while you’re wearing it. So avoid having to do this at all costs.

Assuming you’ve convinced or scared the door into letting you pass, you can simply walk right through. In the space beyond you’ll find four other individuals, all wearing one of the masks you just passed up. A fight will automatically trigger. There is some difficult/muddy terrain here which can make it slow to move around. But this fight shouldn’t be anymore difficult than the Redcaps from earlier. Conserve spell slots if you can.
Getting Through the Room with Noxious Gas
When this fight is over, head over to the waterfall over on the west side of the room. You can jump through it. Don’t move too far forward, though, as this next space will have noxious gas and traps about. It’s best to separate your group here so that you can move each party member individually. Misty Step can be a huge help here, but honestly it’s better to save it for the upcoming fight with the Hag. You can jump your characters down instead. If you don’t have a Feather Fall spell or scroll it can cost a bit of HP, but nothing healing potions or a Short Rest can’t cure.

As you head down, best to first take Astarion or any party member who is best at disarming traps. They can help clear the way for others. The first jump past the initial cloud of gas is easy (see image above). Walk forward to the second cloud of gas and this jump will be farther. You can choose to take the jump or to walk through the gas and climb down the ladder. The second option probably loses less HP, but either way you’ll just need a couple of basic healing potions.
Once you are past the last cloud of gas, don’t move to far ahead! Bring all your party members down first, group them back together. Make sure everybody is healed up and then head into the second confrontation with the Hag!
Baldur’s Gate 3 Act 1 Hag Fight
Strategies for the Baldur’s Gate 3 Act 1 Hag Fight:
- At least one Wizard or Sorcerer is almost a must for this fight.
- Use Misty Step to reach the Control Orb quickly.
- Use Magic Missile to target all Hag enemies and destroy duplicates.
- If she goes Invisible, use Fireball or Grease/Fire Bolt combo in the general area to snuff her out.
- Which Mayrina is real? Right click and ‘Examine’. The real one is visibly pregnant, the fake one is not.
The Hag fight in Act 1 can be difficult because she will create false duplicates of herself, which you have to hit to discover they’re not the real thing. A party member or two with Magic Missile can be very helpful when this happens. Additionally, as mentioned before, Misty Step is very helpful for saving Mayrina.
Full Hag Fight Walkthrough
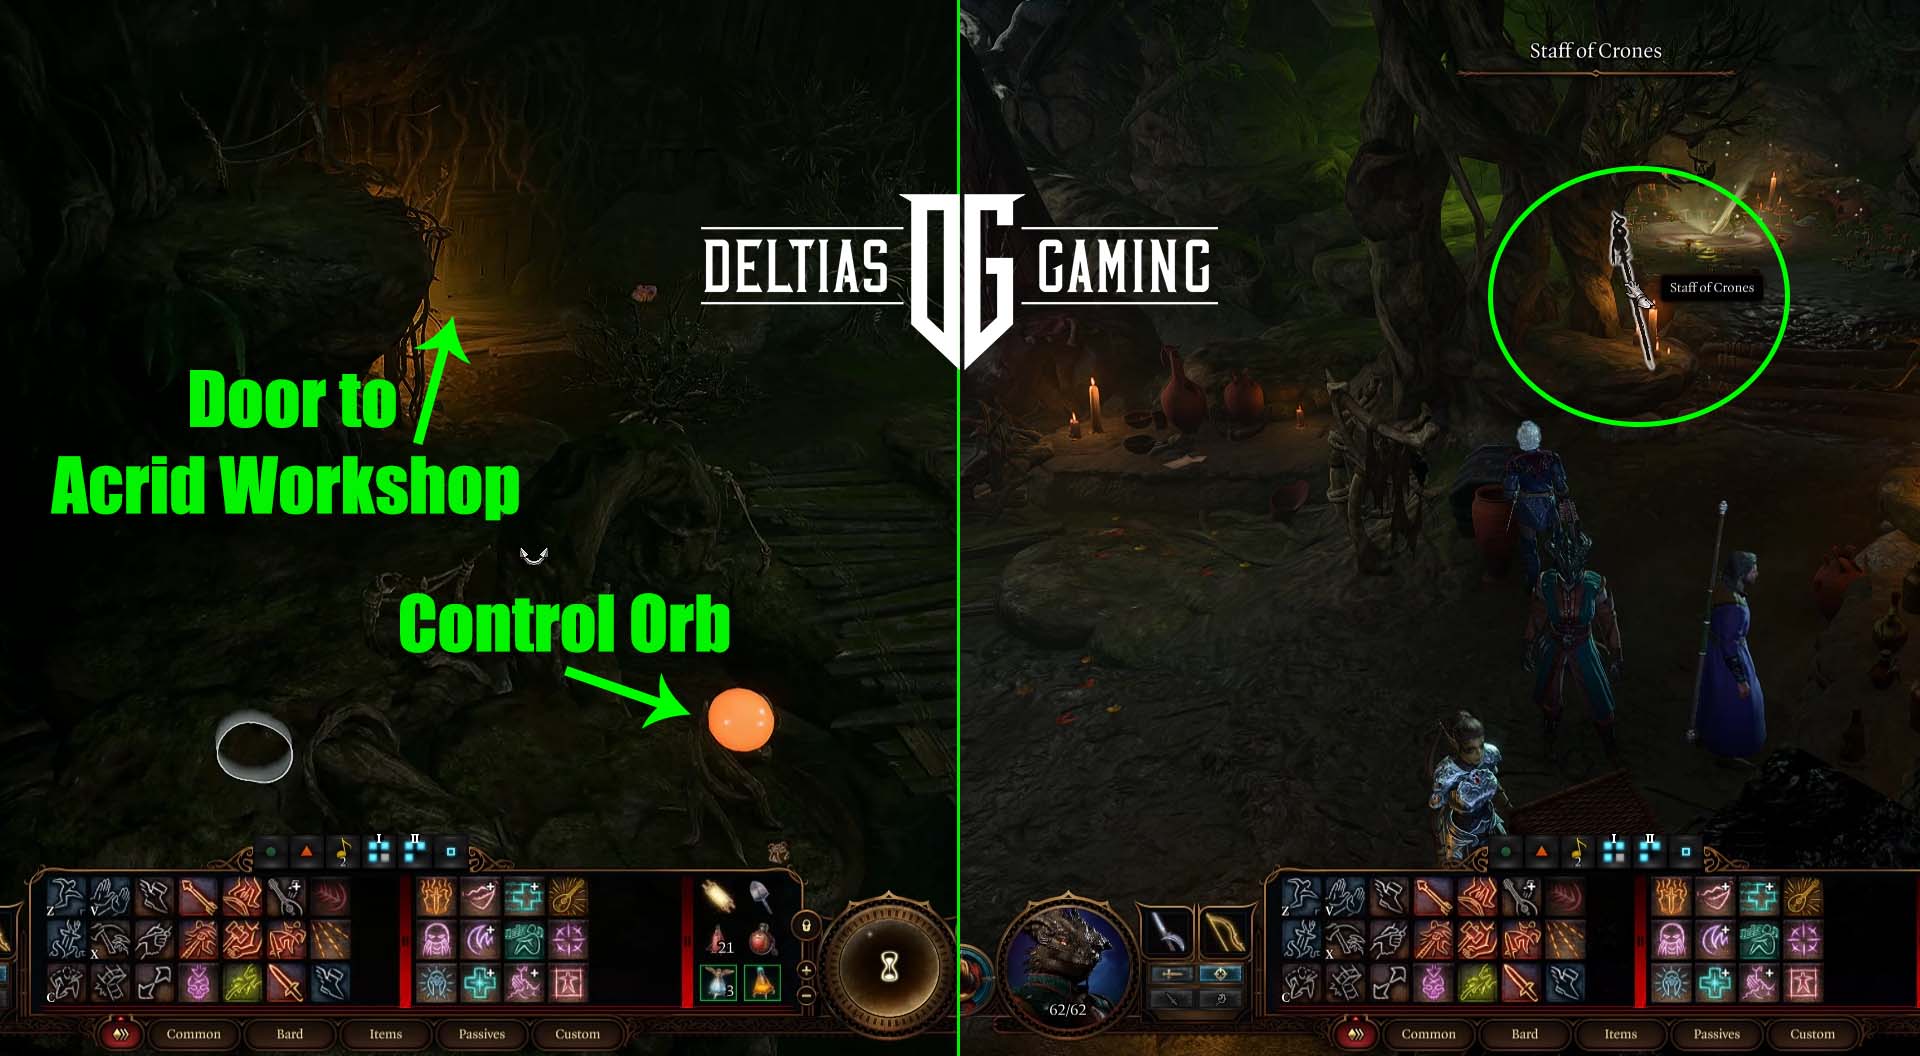
Mayrina has been locked in a cage suspended above a gaping chasm. The Hag will set the cage on fire and you’ll need to reach the control orb on the other side of the space in order to bring it down and let Mayrina out. Use Gale or whichever character has the Misty Step spell for this. He should be able to reach it (barely) in one turn. Run him forward as far as he can go, then Misty Step right next to the control orb. Interact with the Orb. It will go dark.

You can now keep your focus on the Hag. If she goes Invisible an area of effect spell like Fireball can be very helpful. If you don’t have access to that spell, one character casting Grease/throwing a Grease bottle and then another casting the Fire Bolt cantrip will have a similar effect. When she creates two duplicates of herself, use Magic Missile to hit all three and destroy the duplicates. Other than that, just keep hitting her and bringing her health down.
At a certain point, instead of duplicates the Hag will grab Mayrina. The Hag will change herself to look like Mayrina and you have to figure out which of the two is real and which is the Hag. Do this by right clicking on both Mayrina’s and choosing ‘Examine’. The real Mayrina will appear visibly pregnant, while the fake Mayrina does not. Attack the fake Mayrina.

When you finally get the Hag’s HP down low enough she’ll stop the fight and offer you a bargain in exchange for not killing her.
Get a Permanent Bonus From the Hag in Baldur’s Gate 3
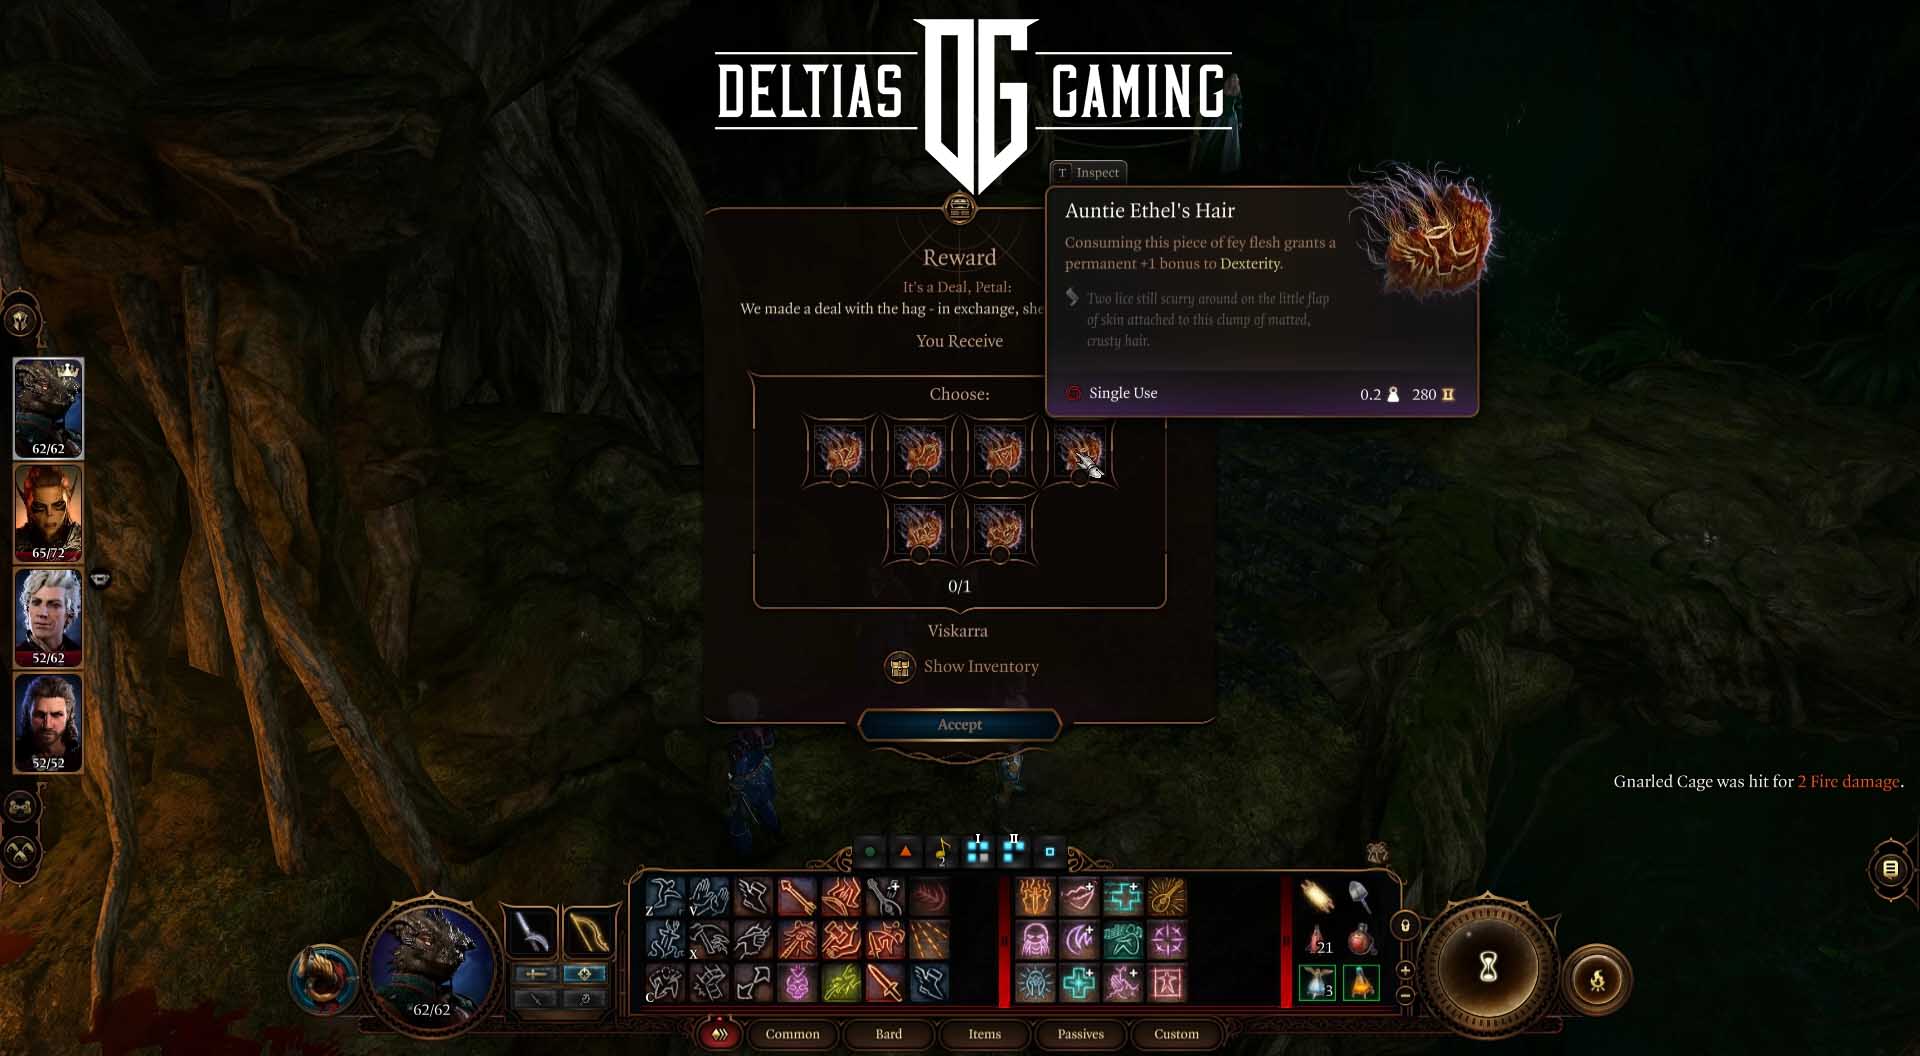
When her health is down to 20% or below, the Hag will stop the fight and offer you a permanent +1 to any ability in exchange for letting her go and taking Mayrina with her. You can agree to this exchange or refuse and continue the fight to kill the Hag. A third choice is to try and use the Deception or Intimidation dialogue options which will give you a chance to get the bonus and save Mayrina. Either option requires you to pass a 15 difficulty check.
If you don’t mind your character doing something morally grey, it’s highly recommended that you take the deal for the ability boost. Those kind of bonuses are few and far between in Baldur’s Gate 3.
If you choose to refuse this offer, you will immediately return to the fight. Everyone will be in their original positions, and you’ll simply pick up where you left off. Keep up the attack and the Hag will fall.
Find the Staff of Crones in the Acrid Workshop
Now that the Hag has been dealt with, you can finally get your hands on the Staff of Crones. Head over to where the Control Orb is and then follow the path farther down towards a wooden door. Inside you will find quite the workshop, with lots of interesting items and things to investigate and loot. The most important of all these objects is the Staff of Crones. You’ll find it leaning up against a tree as you move towards the glowing ring of mushrooms at the back. (You can use those mushrooms to port out of the basement, too.) Take the Staff of Crones before you go – you’ve earned it!
The Staff of Crones is a great early game staff for spellcasters, especially for Necromany Wizards. Moreover, the entire sequence of meeting Auntie Ethel, revealing her secret, and saving (or not) Mayrina is a great story block in Act 1 that you don’t want to miss. No matter what choices you make here, both or one of these characters will return again in Act 3 for more fun.
How to Use the Staff of Crones in BG3?
The best way to use the Staff of Crones in Baldur’s Gate 3 is by equipping it to a Necromancy Wizard build for a free cast of the Ray of Sickness spell. This spell deals poison damage and you can cast it once per short rest.
Additionally, you can combine the Staff of Crones with the Poisoner’s Robe for an additional benefit. With Poisoner’s Robe, when the wearer casts a spell that deals Poison damage, it deals an additional 1d4 Poison Damage. Combine the Poisoner’s Robe and the Staff of Crones weapon for a big boost in power early in Act 1!
Tips and Tricks for the Staff of Crones in BG3
These are the best tips and tricks for finding and using the Staff of Crones in Baldur’s Gate 3:
- Fighting Auntie Ethel is the only way to get the Staff of Crones. You cannot enter the Acrid Workshop from the mushroom circle exit.
- Right click and ‘Examine’ Mayrina to discover which one is real or not by looking to see which is pregnant.
- Defeat the Phase Spider Matriarch in the Whispering Depths to get the Poisoner’s Robe for a nice boost to poison damage.
Related:
FAQs About the Staff of Crones in BG3
Q1: Can you get Staff of Crones without fighting?
Answer: No, you cannot get the Staff of Crones without fighting the Hag. The only way to get inside the Acrid Workshop is to enter the Hag’s Lair, and finding the secret entrance in the Teahouse will automatically make the Hag hostile to your party.
Q2: Who should use the Staff of Crones in BG3?
Answer: Any spellcaster can make good use of the Staff of Crones in the early game of Baldur’s Gate 3. Wizards, especially the Necromancy subclass, will get good mileage out of this staff until better ones are found later in the game.
Looking For More About Baldur’s Gate 3?
Thank you for reading How to Get Staff of Crones in Baldur’s Gate 3 Guide. We provide the latest news and create guides for Baldur’s Gate 3. Also, watch me play games on Twitch or visit my YouTube channel!