Facebook
 Reddit
 Email
Email
Discover the 10 best beginner tips for 33 Immortals that will help you in this new co-op Roguelike adventure, and get you through the initial Worlds.
33 Immortals is a new Co-op Roguelike video game where players traverse into the Beyond to fight the monsters and Gods. It is very similar to other popular games like Hades, but it is cooperative, allowing players to party up with the other 32 players to complete various stages. However, starting as a new player in 33 Immortals might require you to get a grasp on some mechanics. Some of the crucial ones are what the characters offer in the player hub, how to level up the character, how to gain relics, and much more. In this guide, we will be telling you the 10 best beginner tips for 33 Immortals that will help you understand the major goal and fight your way to complete the Worlds.
Brief Overview of 33 Immortals
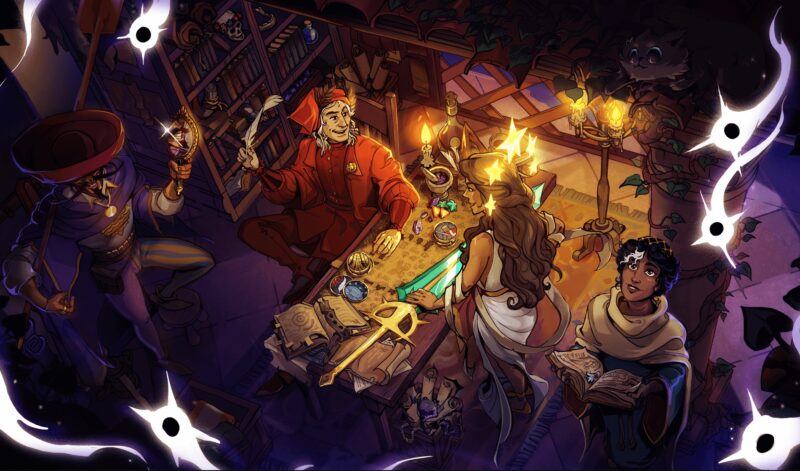
As players begin the game, they will get to complete a brief tutorial, giving them an intro to the Beyond, basic combat mechanics, and Torture Chambers. Upon completing the tutorial, players will return to the Dark Woods, the player hub. Here, players will see other players in the respective server and meet up with various characters. Knowing these characters is crucial, as each character offers a unique service that will help you strengthen your character.
Dante and Beatrice are the top two characters that you shall speak and interact with as soon as possible. Dante will offer you perks in exchange for the Perk Points and Beatrice will level up your Feat. Furthermore, you will be able to select your preferred weapon in the Dark Woods. It is best to choose a weapon that you are most comfortable with. Once you are ready, pass through the Eternal Gate and select one of the Worlds/Maps to begin the journey.
Best 10 Beginner Tips in 33 Immortals
Here are the best 10 beginner tips in 33 Immortals that we recommend you keep in mind.
- Select the Best Weapon for the Run: Choosing a weapon you are most comfortable with allows you to comfortably face the monsters.
- Look for Chests Early On: As you spawn in the World, start looking for the chests to gather resources.
- Follow the Question Marks on the Screen: Following the question marks on the screen will help you find Chests, Altars, and Breakables.
- Level Up at the Altars: Spend the resources to level up your character for the run.
- Pick up the Pace After the Judgement: Judgement determines the second phase of the World and various Torture Chambers unlock around the map.
- Enter the Torture Chamber as Quickly as Possible: Each Torture Chamber allows 6 players, so you have to be quick to get in.
- Gather the Relics from the Torture Chamber: Loot the chests within the Torture Chambers to gain Relics.
- Acquire and Upgrade the Perks: As you return to the hub after the run, speak with Dante to get new perks or upgrade the ones you are using.
- Level Up Feat: Complete the Feat missions to Level Up Feat. It will unlock more features for your character.
- Complete all Daily Missions: Completing the daily missions will reward you with currencies that you can use to upgrade the perks and weapons.
1. Select the Best Weapon for the Run
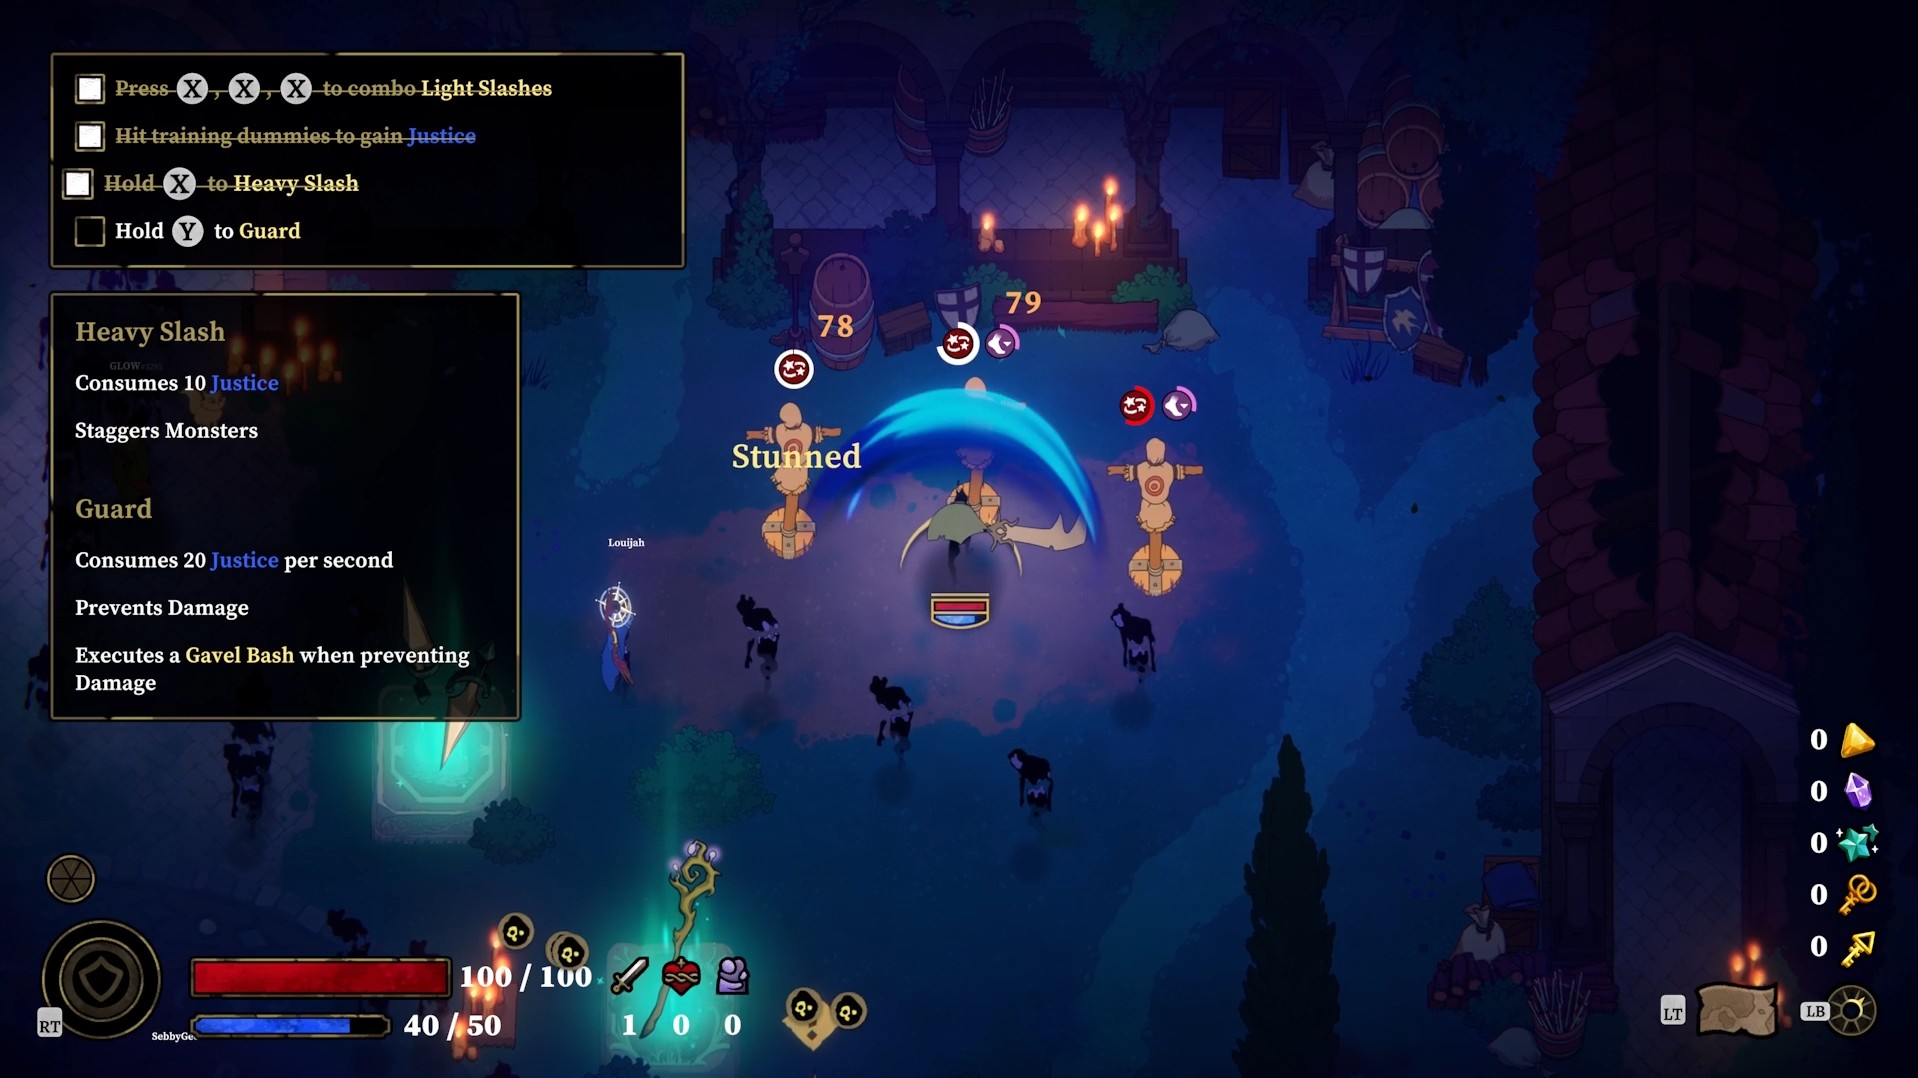
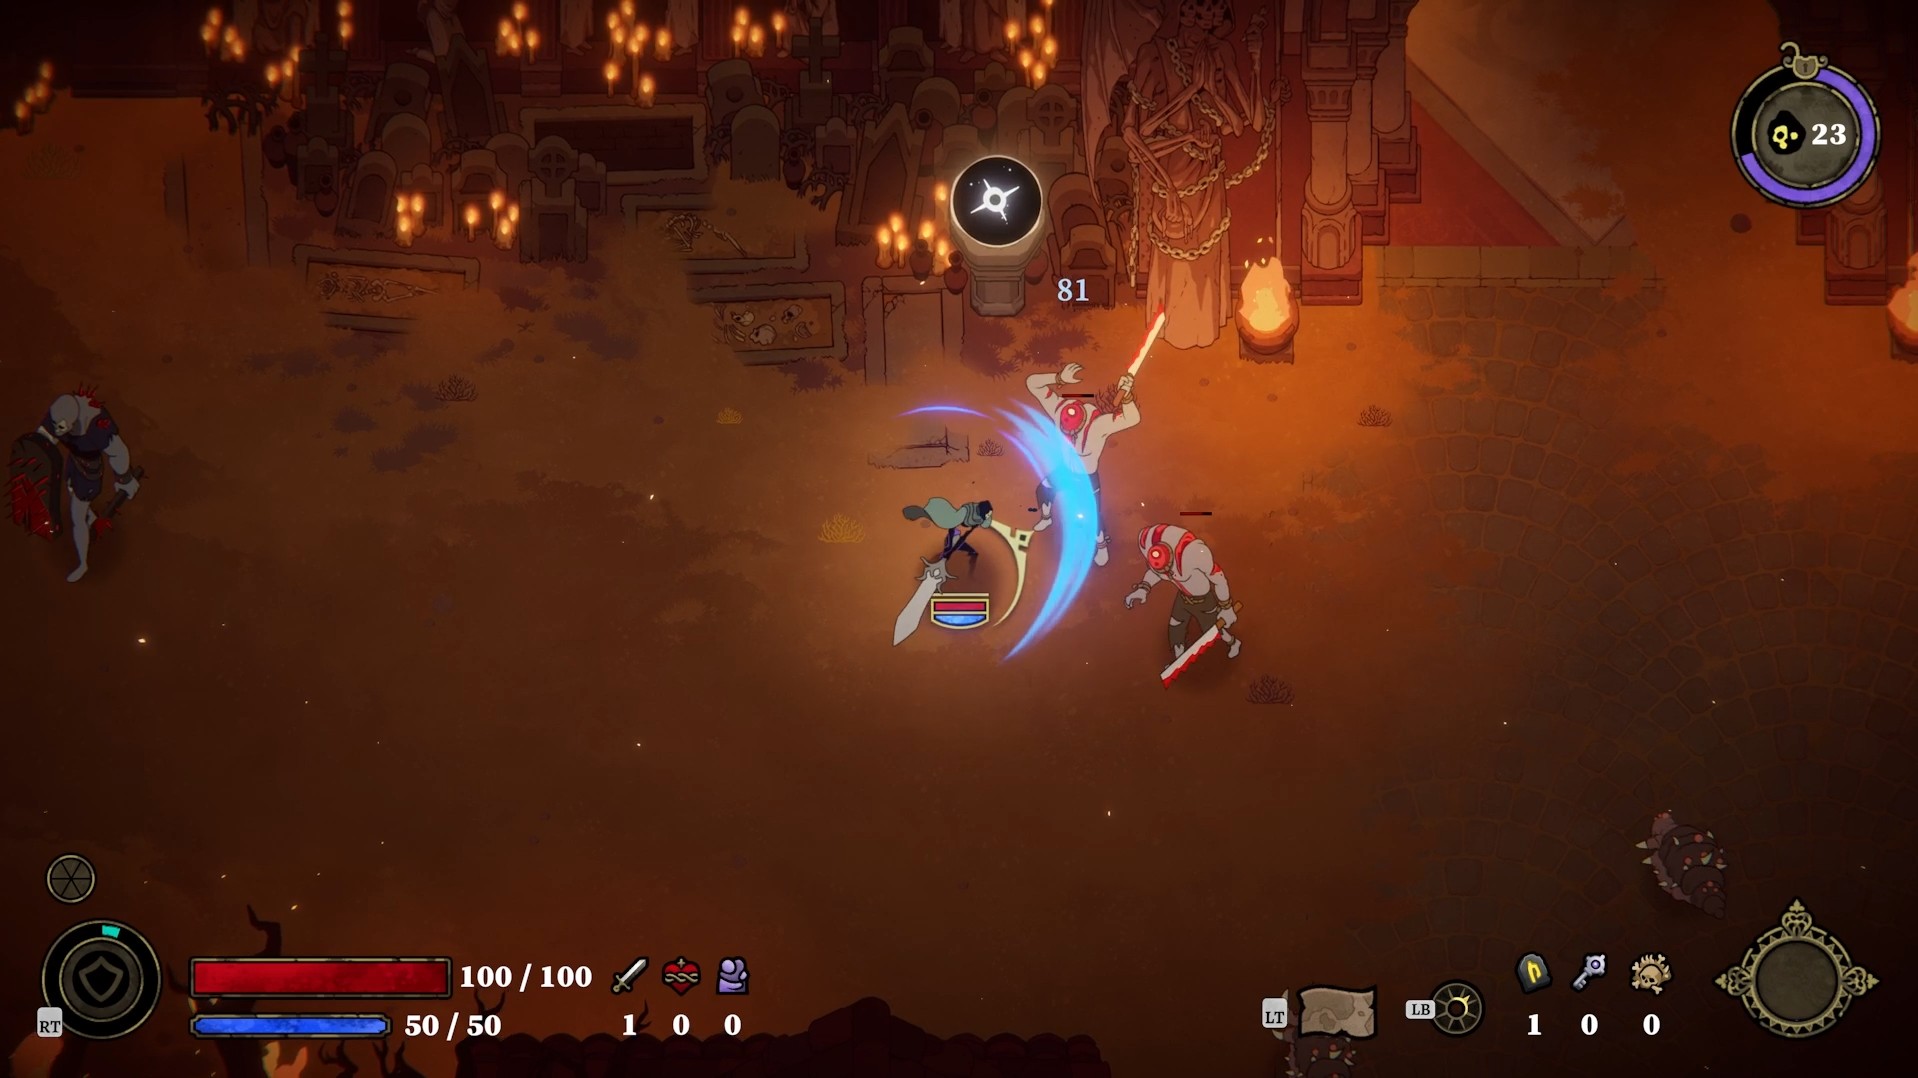
Before stepping into the Beyond to face the monsters and Elite enemies, it is essential to choose the right weapon for yourself. There are four weapons in 33 Immortals. It includes a Bow, a Staff, a Sword, and Daggers. Moreover, each weapon refers to a certain class, determining a unique playstyle. The Sword is mainly a Tank class, allowing players to deal massive damage and block incoming attacks. Equipping the Daggers will make your character a Fighter, allowing him to do quick slashes on enemies. The Bow is a Shooter class, that allows players to attack enemies from a safe distance. Lastly, the Staff is a Specialist class, allowing players to cast light and heavy orbs on enemies.
The best weapon that we recommend for new players is the Sword of Justice. It deals high damage with sword slash and has the special ability to block any incoming attack. As you attack with the sword, you generate Justice. Justice then can be used for heavy slashes and blocking. Overall, it is the perfect weapon for those who want to deal high damage and don’t want to dash every moment.
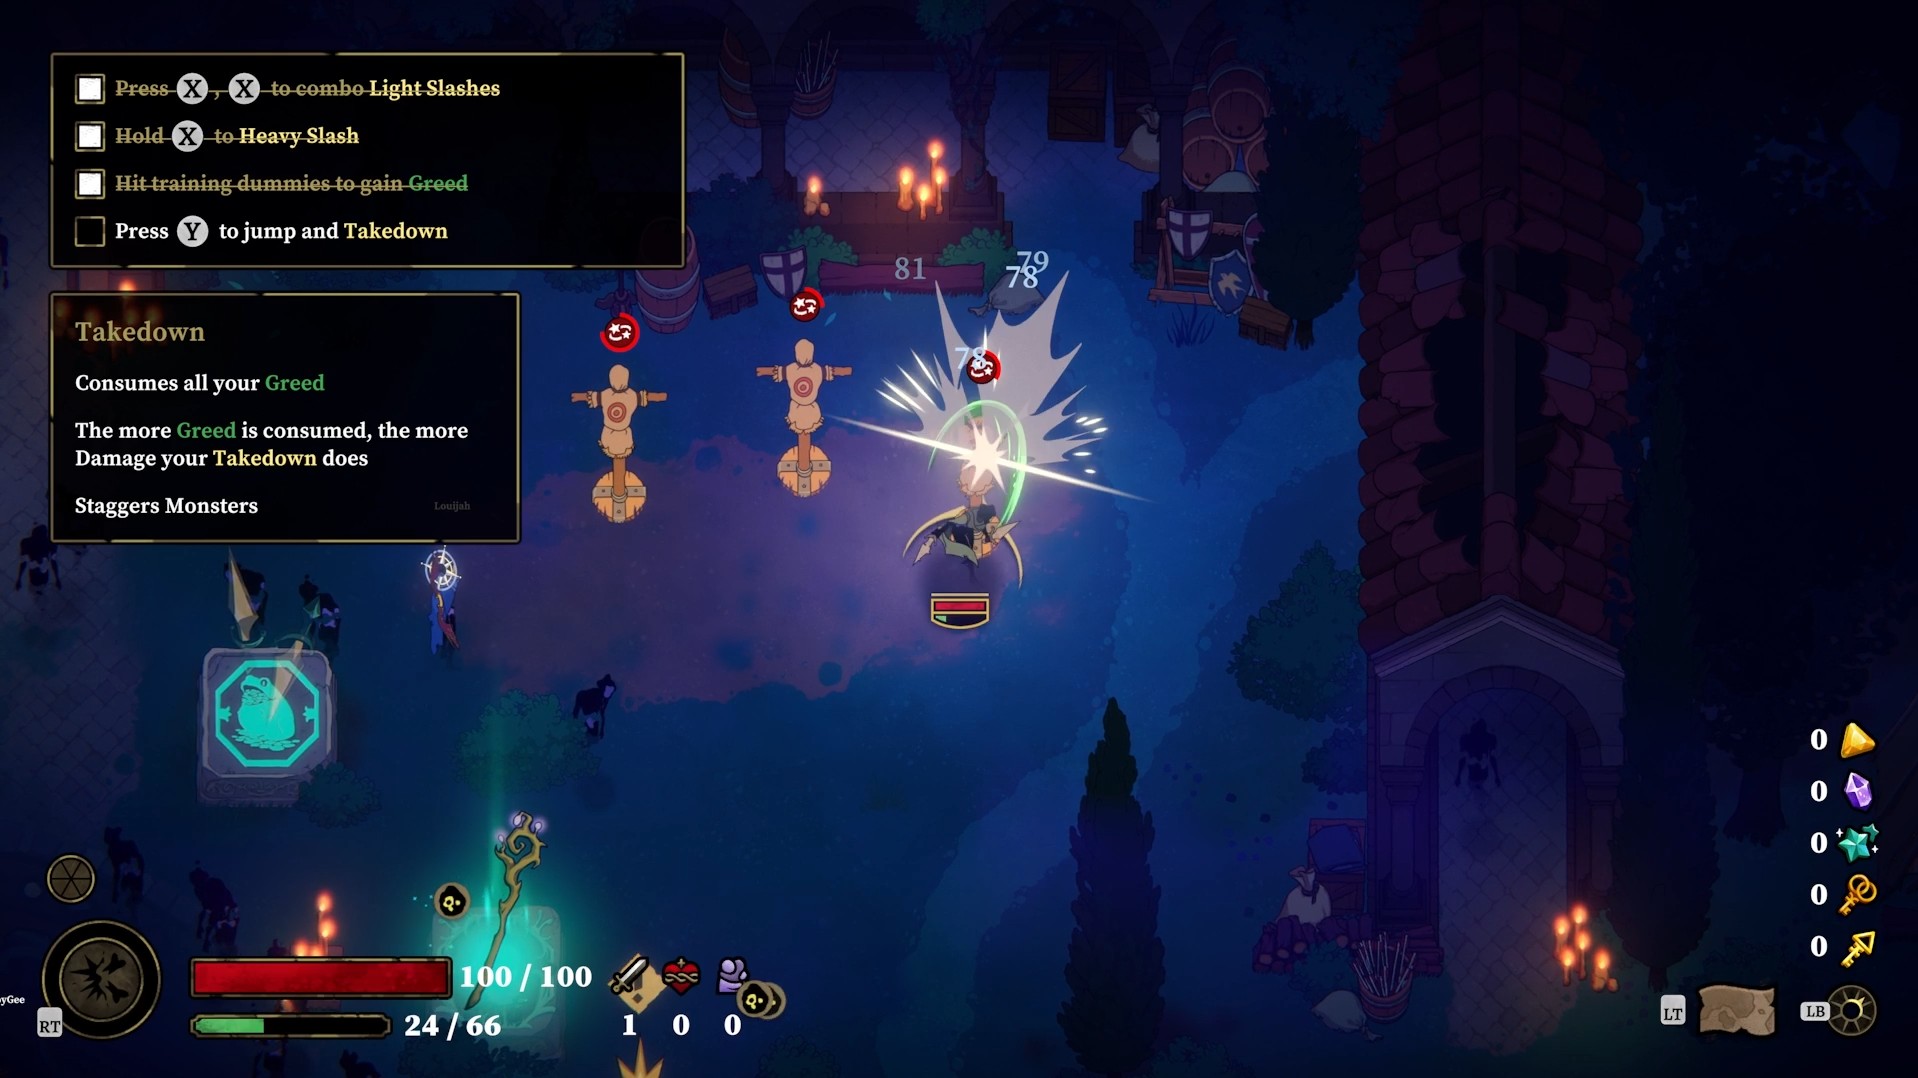
However, if you are someone who likes fast-paced combat, then the Daggers of Greed is the best weapon for you. You can perform a 5-hit combo in quick succession with the Daggers. Each time you hit the enemy, it generates Greed. After that, you can use Greed for the special Ability, Takedown. It allows you to perform the lunging slash that deals high damage and stun enemies. Moreover, it makes you invulnerable for the duration of a lunging slash attack.
So, before heading out to the Beyond, select your weapon carefully.
2. Look for Chests Early On
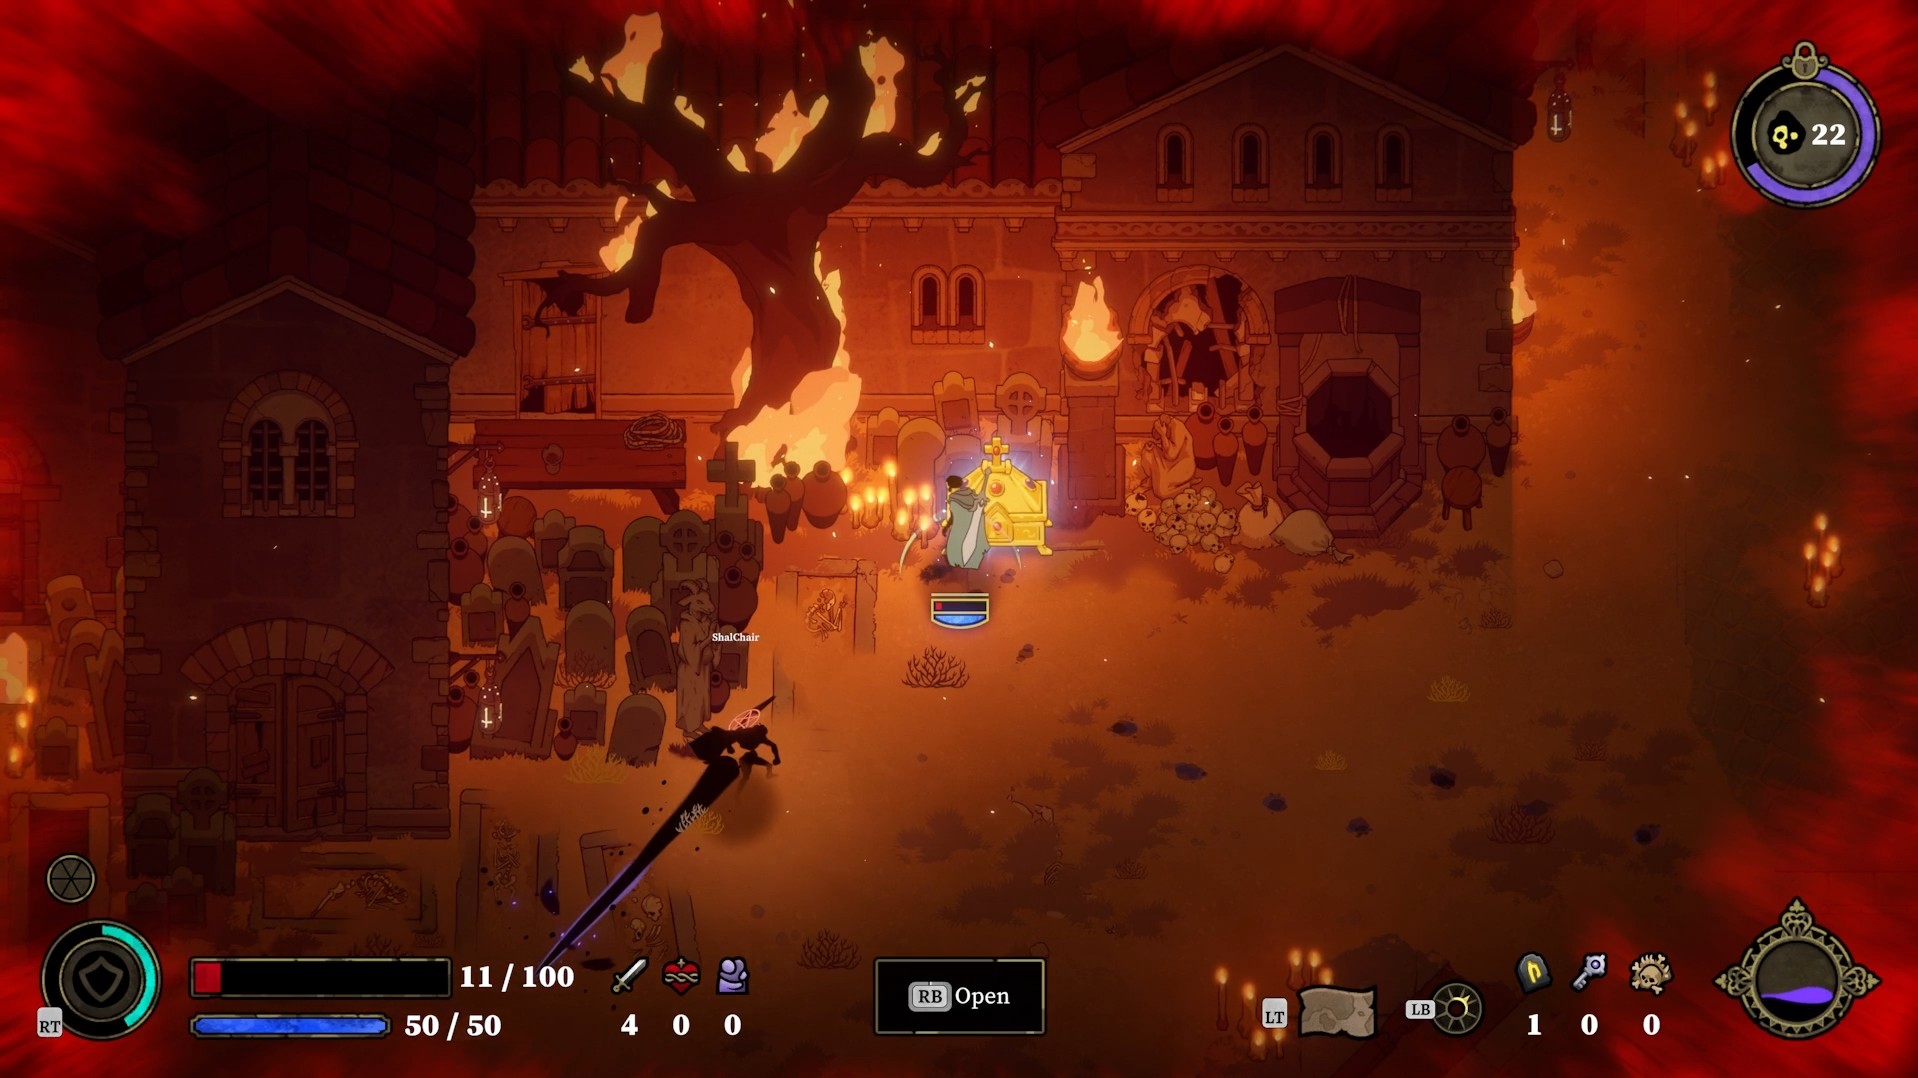
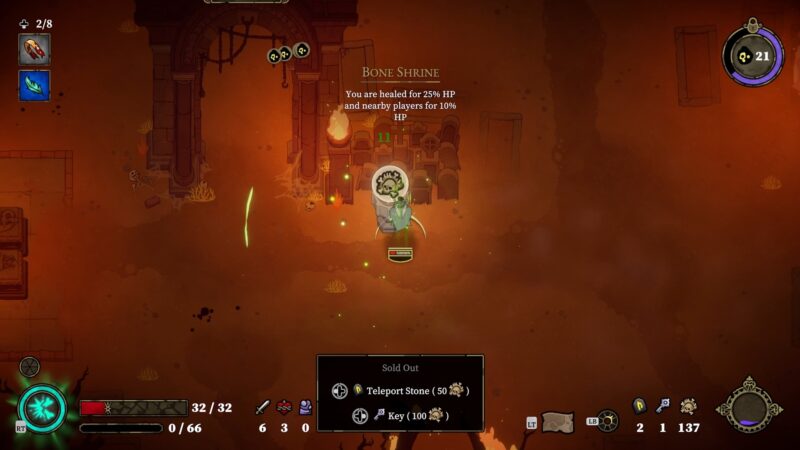
As you spawn in the Beyond, the first thing that you must do is to look for the Bones Chests. Two different types of Bone Chests spawn throughout the World. One is bigger and the other one is smaller. Opening each one will reward you with a certain amount of Bones. Usually, you will get 25 Bones from each Chest. Moreover, if you are lucky, you will also get a Key. The key is used to unlock a chest within the Torture Chambers.
The Bones is a crucial currency for the journey as you can use it at the Bone Altars. You can replenish your health by 25%, redeem a Teleport Stone, or a Key for the chest in the Torture Chamber. So, if you have enough Bones, you can redeem a Teleport Stone or get a Key. However, getting the key from the chests is recommended. You can then get the Teleport Stone from the Altar and fast travel to the Torture Chamber after the Judgement instantly before the players fill up.
3. Follow the Question Marks on the Screen
During your time in the Beyond, you will see various marks on the screen. The best ones to follow early on are the question marks. Following these marks can reveal Breakables, Altars, and Chests. The Breakables are the objects that you can attack to gather more Bones. There are different Altars in the Beyond, including Dust, Soul, and Bone Altars. All of these are essential as you can spend respective resources to level up the character or gain certain items. Lastly, finding more chests will help you get more Bones and Keys.
4. Level Up at the Altars
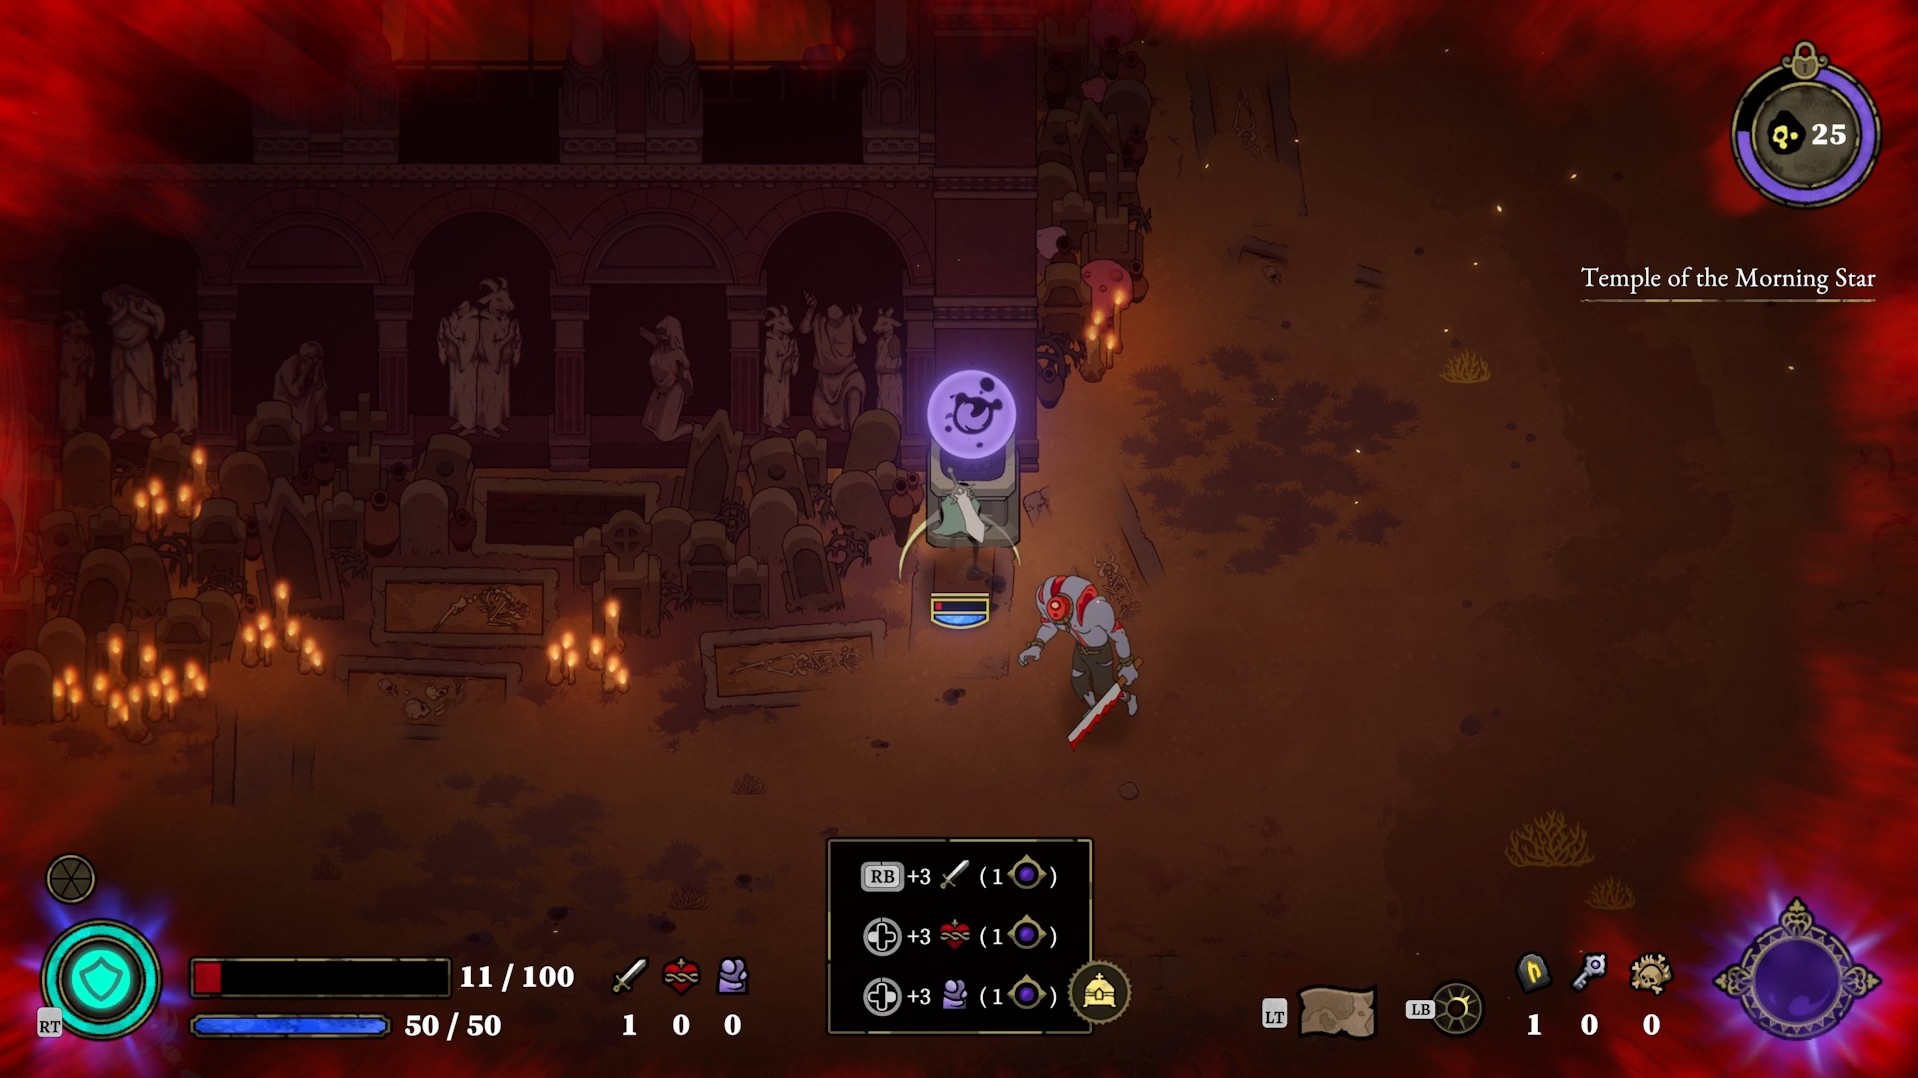
Before you head into any Torture Chamber or go for the Ascension Battles, you must Level Up the character. You can get three different types of level-ups for the character. It includes Attack, Vitality, and Empathy. All of these level-ups are offered at the Dust Altar/Shrine. For each different level-up, the Dust Altar will increase the respective stat by +3. For instance, if you want more attack power, it will increase it by +3. If you have 1 Attack Power before, you will have 4 after the upgrade.
Now, to upgrade at the Dust Altar/Shrine, you will need 1 full Dust Vial. You can see the Dust Vial in the bottom right corner of the screen of UI. Every enemy that you defeat in the Beyond will drop Dust. So, as you begin in the Beyond, clear out as many enemies as you can to fill up the Dust Vial.
NOTE: You can only get the upgrade once at a Dust Altar/Shrine. If you want to upgrade the Attack or any other stat further, you will have to find a new Dust Altar/Shrine.
There are around 5 Dust Altars/Shrines in every World. So, if you grind enough and explore the map, you will be able to get each upgrade five times. However, it does require a lot of grind. Getting two or three upgrades is enough for the run as other players will help you in Torture Chambers and Ascension Battles
5. Pick Up the Pace After the Judgement

Now, spending a bit of time at the Beyond, exploring around, unlocking chests, and upgrading the character, you will witness a Judgement. It is a large Circle that spawns around you and shoots a number of projectiles at you. It determines that a number of Torture Chambers are now available on the map. Upon successfully passing the Judgement, you need to hurry to any one of the available Torture Chambers.
If you have the Teleport Stone, you can easily teleport outside of the Torture Chamber on the map. You will be able to traverse into the Torture Chamber before it fills up with the players and closes.
NOTE: The Torture Chamber can only have 5 players at a time.
If you miss the Torture Chamber, you will have to wait for them to activate again.
6. Enter the Torture Chamber as Quickly as Possible
Similar to the previous tip, you must get to a Torture Chamber as quickly as possible. After passing the Judgement, either run to the closest Torture Chamber or teleport to one, if you have the Teleport Stone. Having the Teleport Stone will help you greatly in accessing the Torture Chamber quickly. As most of the players don’t have Teleport Stone at ready, they will run to the Torture Chamber. Once the Torture Chamber has 6 players, it will close for other players.
So, during the exploration phase, get 50 Bones as soon as possible and spend them at the Bone Altar to get a Teleport Stone. Keeping a couple of Stones will be enough for you to access a few Torture Chambers quickly. Moreover, you will be able to get to the Ascension Battles where you will have to clear a wave of enemies before you can fight the main boss of the stage.
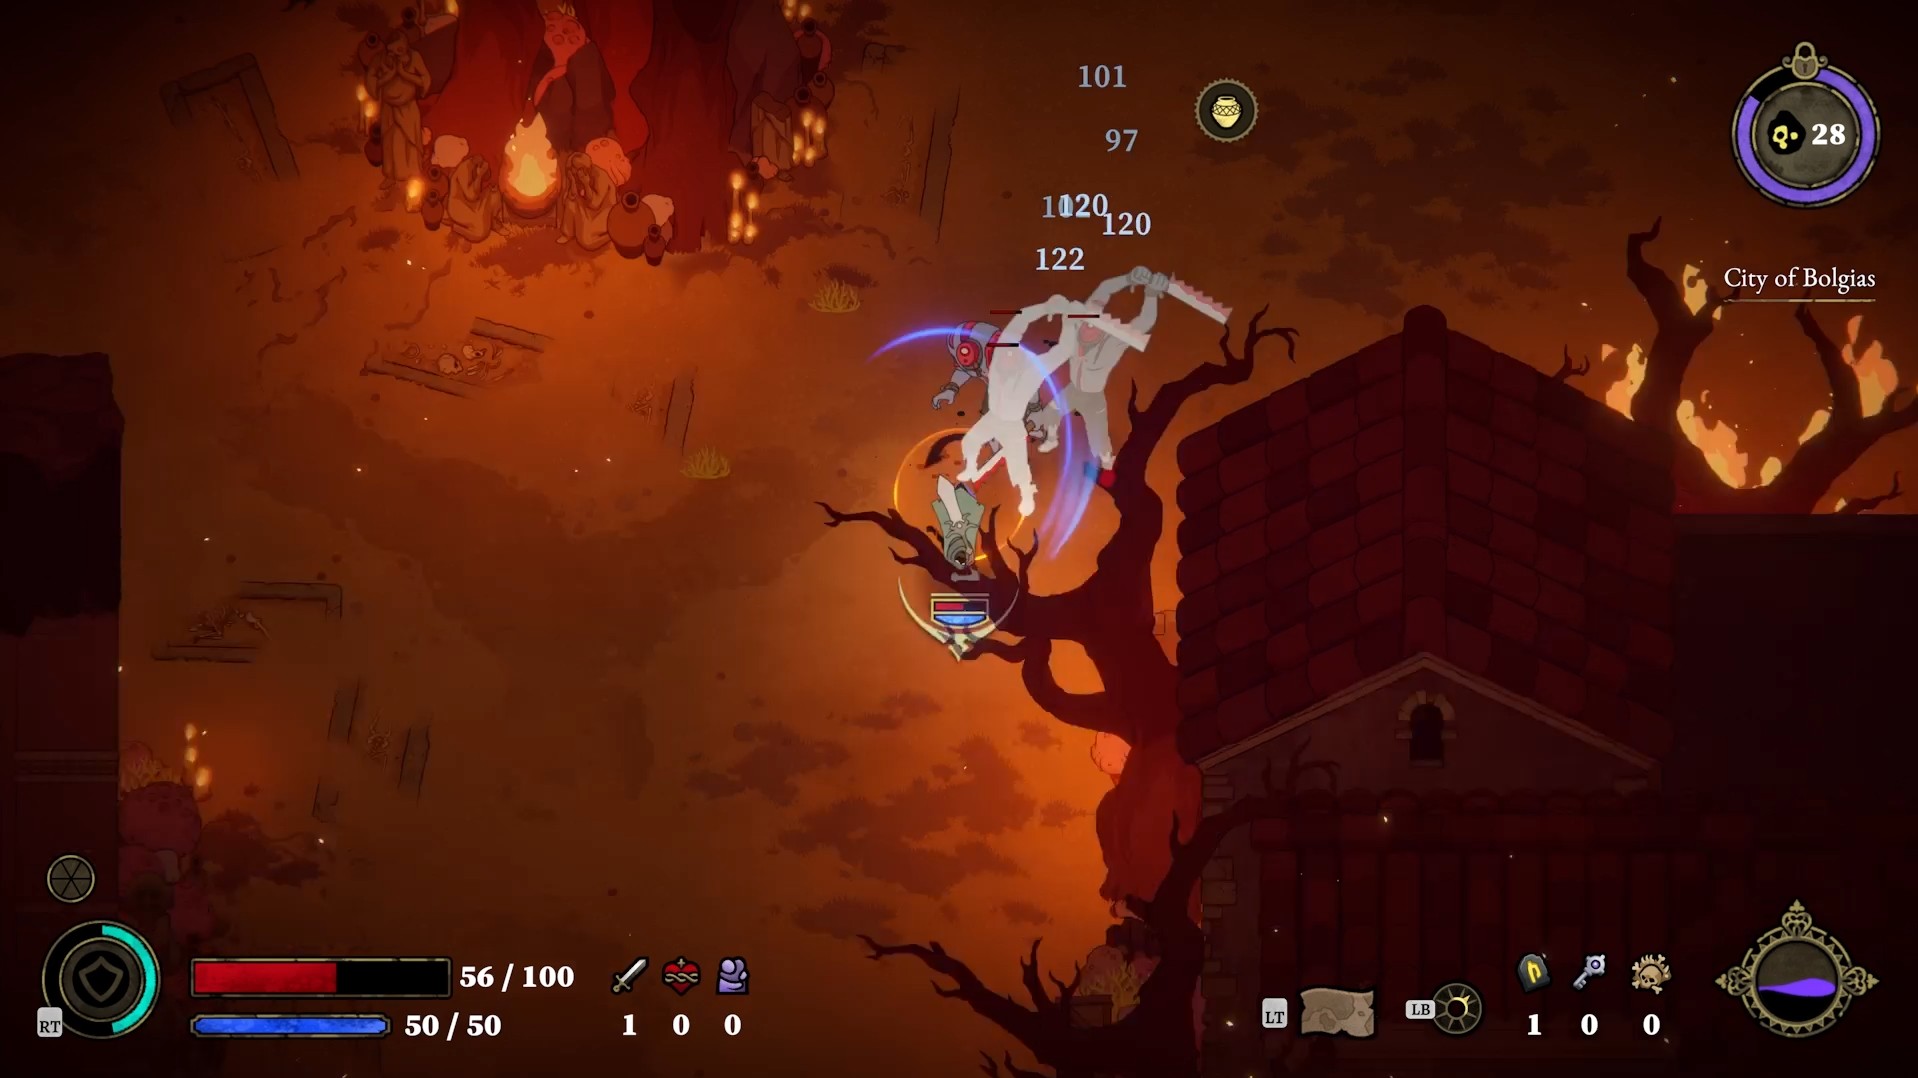
7. Gather the Relics from the Torture Chambers
Upon entering the Torture Chamber, you will face difficult enemies in high numbers. You must clear the chambers with all the monsters and gather any resources that they drop. The resources are crucial and they can contain various currencies and Tokens. After clearing the Torture Chambers, interact with the chests to get Relics. There will be two chests inside each Torture Chamber. You can open one chest freely and the other one will require a Key. The same key that you can get from the Bone Chests or buy it from the Bone Altars/Shrines. Equip the Relics to gain various passive buffs and enhance certain stats.
NOTE: The Relics are limited to the runs. You will have to gather Relics in each run for passive buffs.
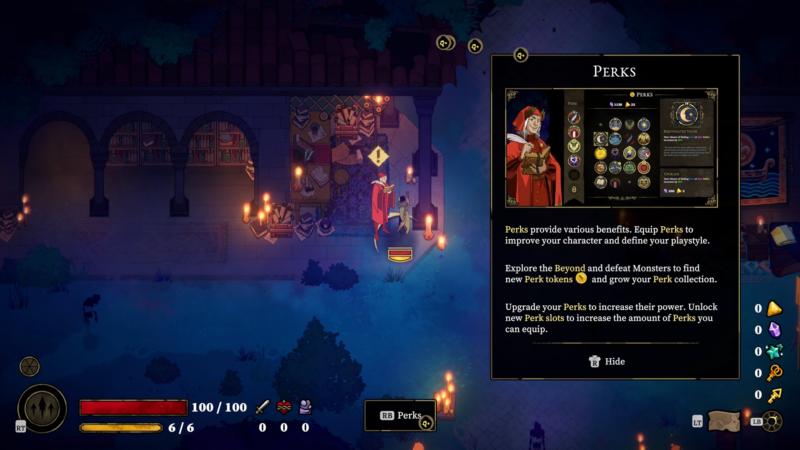
8. Acquire and Upgrade Perks
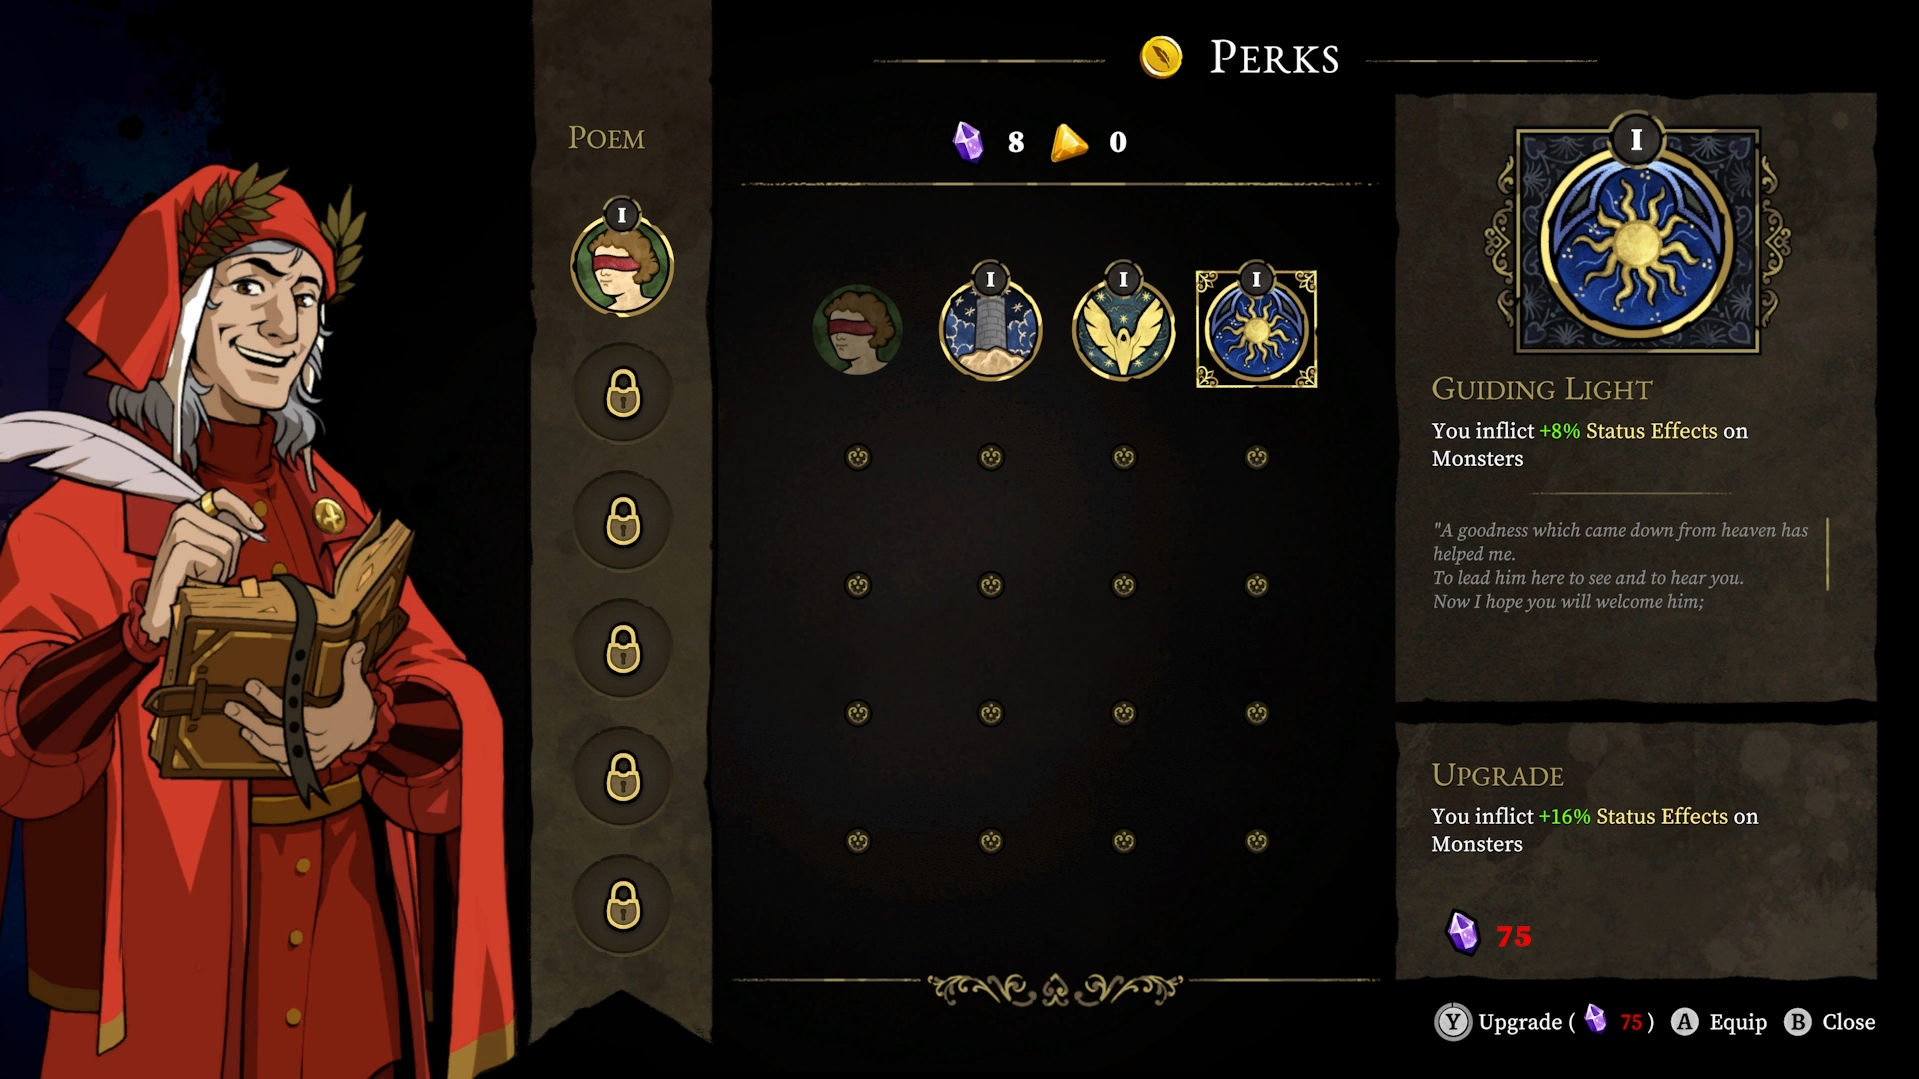
During your runs, you will come across Perk Points by defeating the monsters. Pick up the Perk Points as you can use them at Dante (character) to acquire new perks. Once your run has ended, go to Dante in the Dark Woods (the player hub) and interact with him. Here, you will be able to select the newly available perks in the Perk Slots. Moreover, you can upgrade the Perks using the Eternal Shards and Paragons.
Each perk can be upgraded up to 5 levels. The initial two upgrades of a perk will require only Eternal Shards, and the further two upgrades will require Eternal Shards and Paragons. Make sure that you collect the currencies in your runs and use them wisely. Because the upgrades are costly and you cannot reverse them.
9. Level Up Feat
Leveling up Feat is the crucial way to unlock new features and strengthen your character in 33 Immortals. Speak to Beatrice in the Dark Woods to see all the Feats available and their requirements. Each Feat will require the completion of a few tasks. The tasks are relatively simple for the early levels. As you complete each Feat, your character’s Feat level will increase.
Increasing the Feat Level will grant you further opportunities. One of the most crucial ones is upgrading weapons. You can only upgrade weapons at Feat Level 6. So, to permanently increase the damage and attacks of your favorite weapon, you must increase the Feat Level. Before heading out to Beyond, always check the Feats to see which tasks you can complete Solo and which require the assistance of other players.
10. Complete All Daily Missions
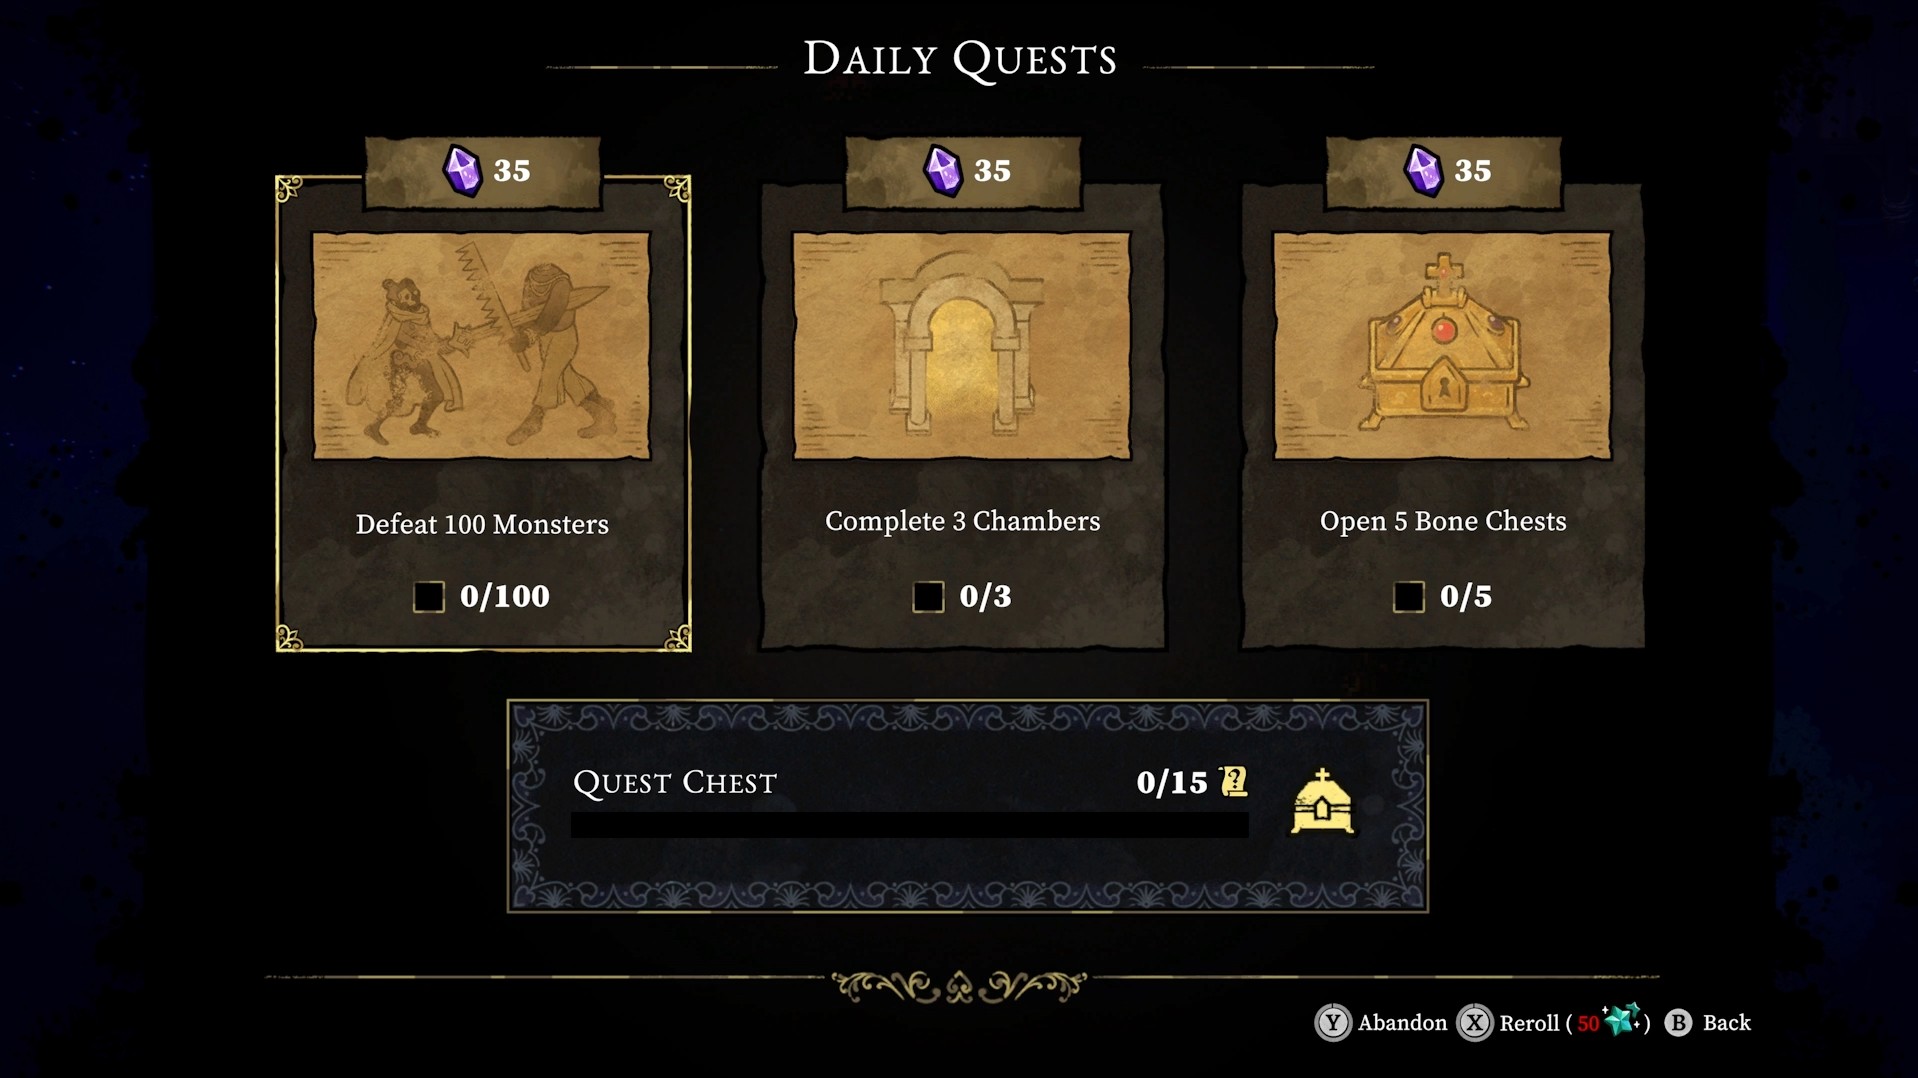
Completing the Daily Missions is a great way to earn Eternal Shards and Level up Feat. Similar to the Feats, the Daily Missions require straightforward and simple tasks. The Daily Missions reset every day and you can complete three daily missions in a day. Each mission rewards with a certain amount of Eternal Shards. You can find the Daily Quests at the Bulletin Board start of the Dark Woods. As Eternal Shards are necessary for unlocking more Perk Slots, upgrading Perks, and upgrading Weapons, it is essential that you pursue every way to get as many of them as you can.
Bonus Tips for Beginners in 33 Immortals
Here are a couple of bonus tips for new players in 33 Immortals.
- Do Training with All Weapons for Extra Eternal Shards: You can earn extra Eternal Shards by attacking the dummies in the Dark Woods. Equip each weapon and follow the objectives on the screen to earn Eternal Shards. There are four weapons, so complete the objectives for each one to have a decent amount of Eternal Shards. You will be able to upgrade a perk to Level 2 right from the beginning.
- Party Up with Other Players: Playing Solo might be difficult in the beginning. It is best to party up with other players on the server or your friends. It will help you greatly in exploration and overall progressing in each World. Moreover, several Feat tasks require other players’ assistance so you will be able to complete them easily.
FAQs for Beginners in 33 Immortals
What is the main Goal in 33 Immortals?
The main goal of 33 Immortals is to fight your way through Beyond to reach the Ascension Battles and defeat the God of the World. There are three Worlds available for now in 33 Immortals. Defeating each main boss of the World will grant you a key. You can then use the Key to access the next World.
How to Level Up the Character in 33 Immortals?
You must fill up the Dust Vial by defeating the enemies, and then use the Dust Vial at the Dust Altar/Shrine to get an upgrade. Every Dust Altar/Shrine offers the upgrade of Attack, Vitality, and Empathy. However, you can only level up an upgrade of a certain type once at a Dust Alatr. You will have to find another Dust Altar to get the second upgrade of the same type.
How to get Relics in 33 Immortals?
To get Relics, you will have to complete the Torture Chambers in Beyond. These appear randomly after the Judgment phase in the World. You must enter the Torture Chamber before all the players fill up and clear it from enemies. After that, you will be able to access the chests from which you can get Relics. However, one of the chests in the Torture Chamber will require a Key. You can get the Key from the Bone Chests in Beyond or purchase it from the Bone Altar for 50 Bones.
Looking For More?
Thank you for reading the 33 Immortals: 10 Best Beginner Tips Guide. We provide the latest news and create guides for Baldur’s Gate 3, Starfield, ARK Survival Ascended, and more. Also, watch Deltia play games on Twitch or visit his YouTube channel!