Facebook
 Reddit
 Email
Email
Enable syncing between your iPhone and iPad using iCloud with our easy guide. Follow step-by-step instructions to keep your data updated.
Syncing your iPhone and iPad can have a lot of upsides. It saves you a lot of time by sharing data between the two devices. At first glance, it may sound a bit like one of those complicated tech setups. Fortunately, Apple has made the process of enabling syncing between iPhone and iPad pretty straightforward.
The entire process works with the help of iCloud. In this post, we will guide you on how to enable syncing between iPhone and iPad. So, let’s get into it.
What You’ll Need?
Before we begin, make sure you have the following:
- An iPhone
- An iPad
- The same Apple Account is logged in on both devices
- A stable internet connection
Once you have all these things ready, you can start setting up syncing between iPhone and iPad.
Step 1: Sign Into Your Apple Account
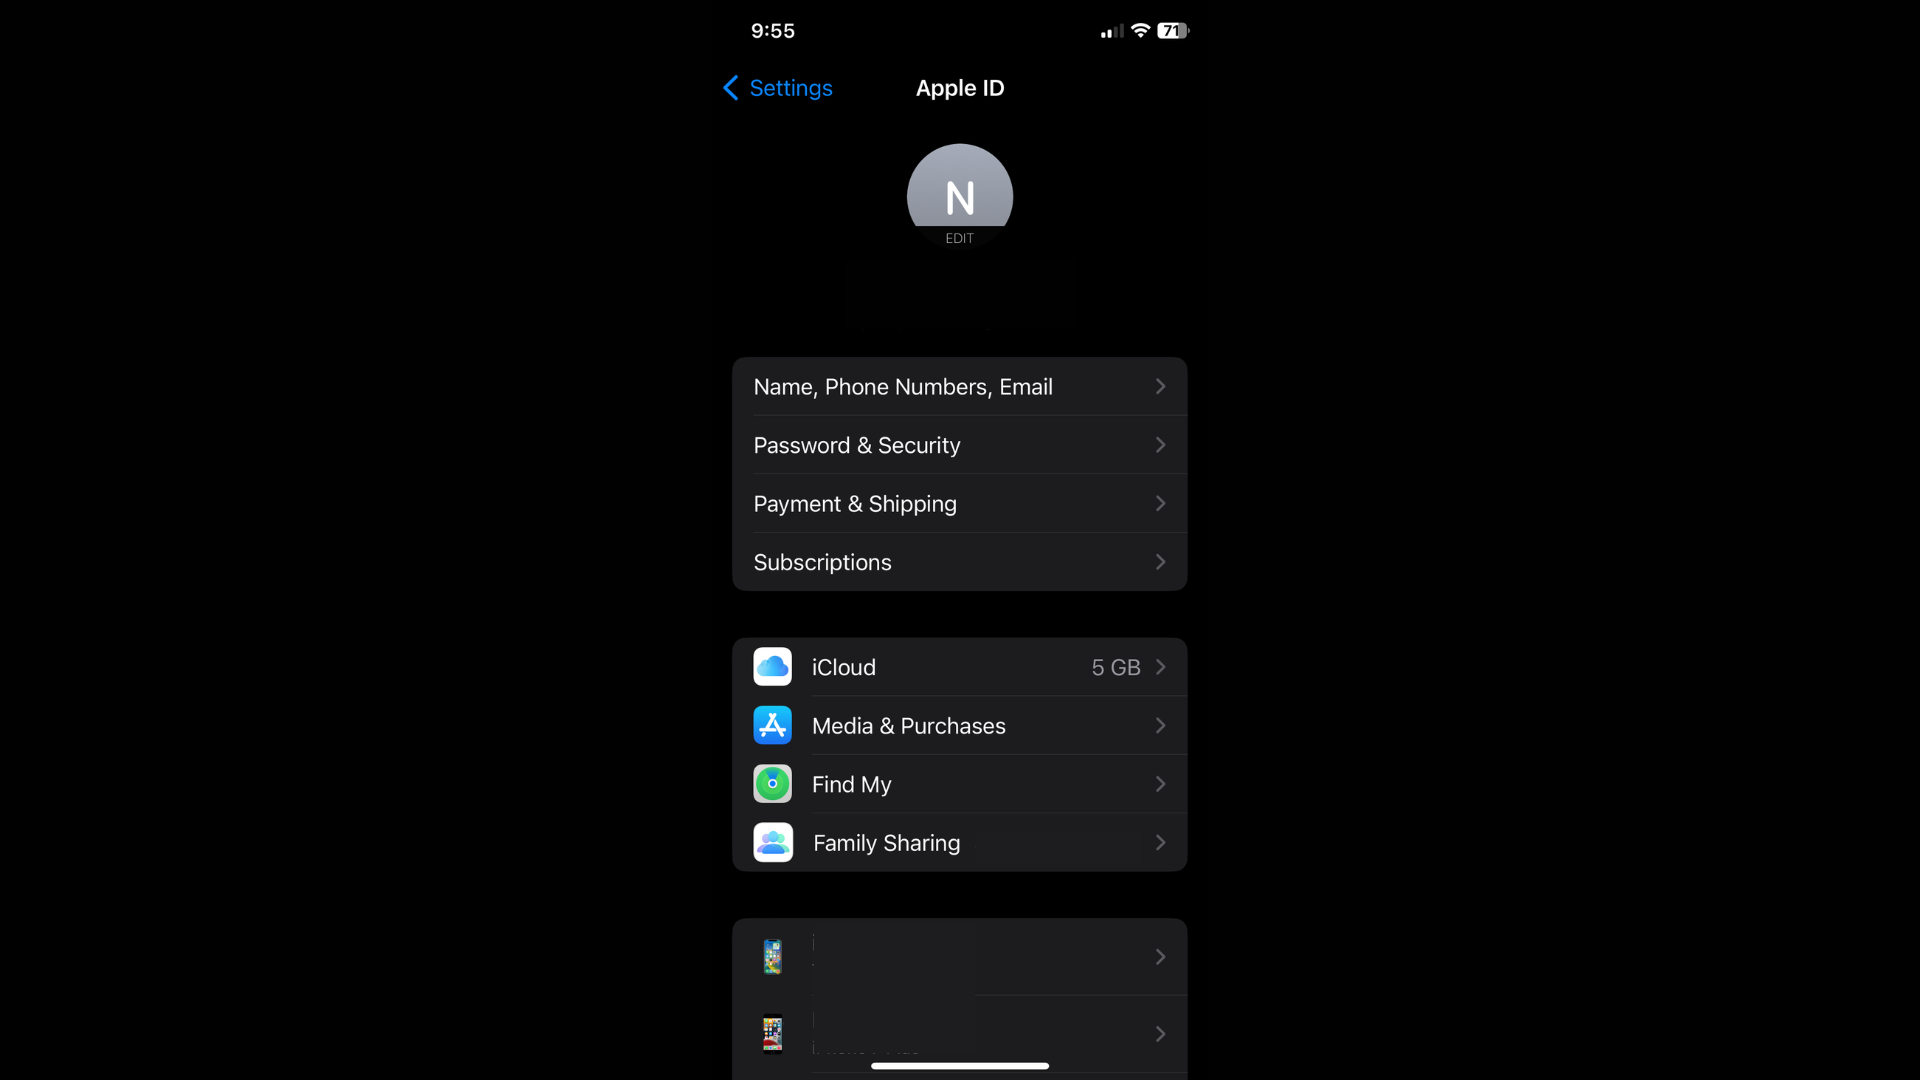
This entire process doesn’t work if you have signed in to different Apple IDs on the iPhone and iPad. You need to have a common Apple ID logged in to both of them. It allows iCloud to use your Apple account to determine which data should be shared.
On both devices:
- Navigate to the Settings app.
- Tap on your name at the top of the screen.
- Make sure that both devices have the same Apple ID in use.
Step 2: Access and Configure iCloud Settings
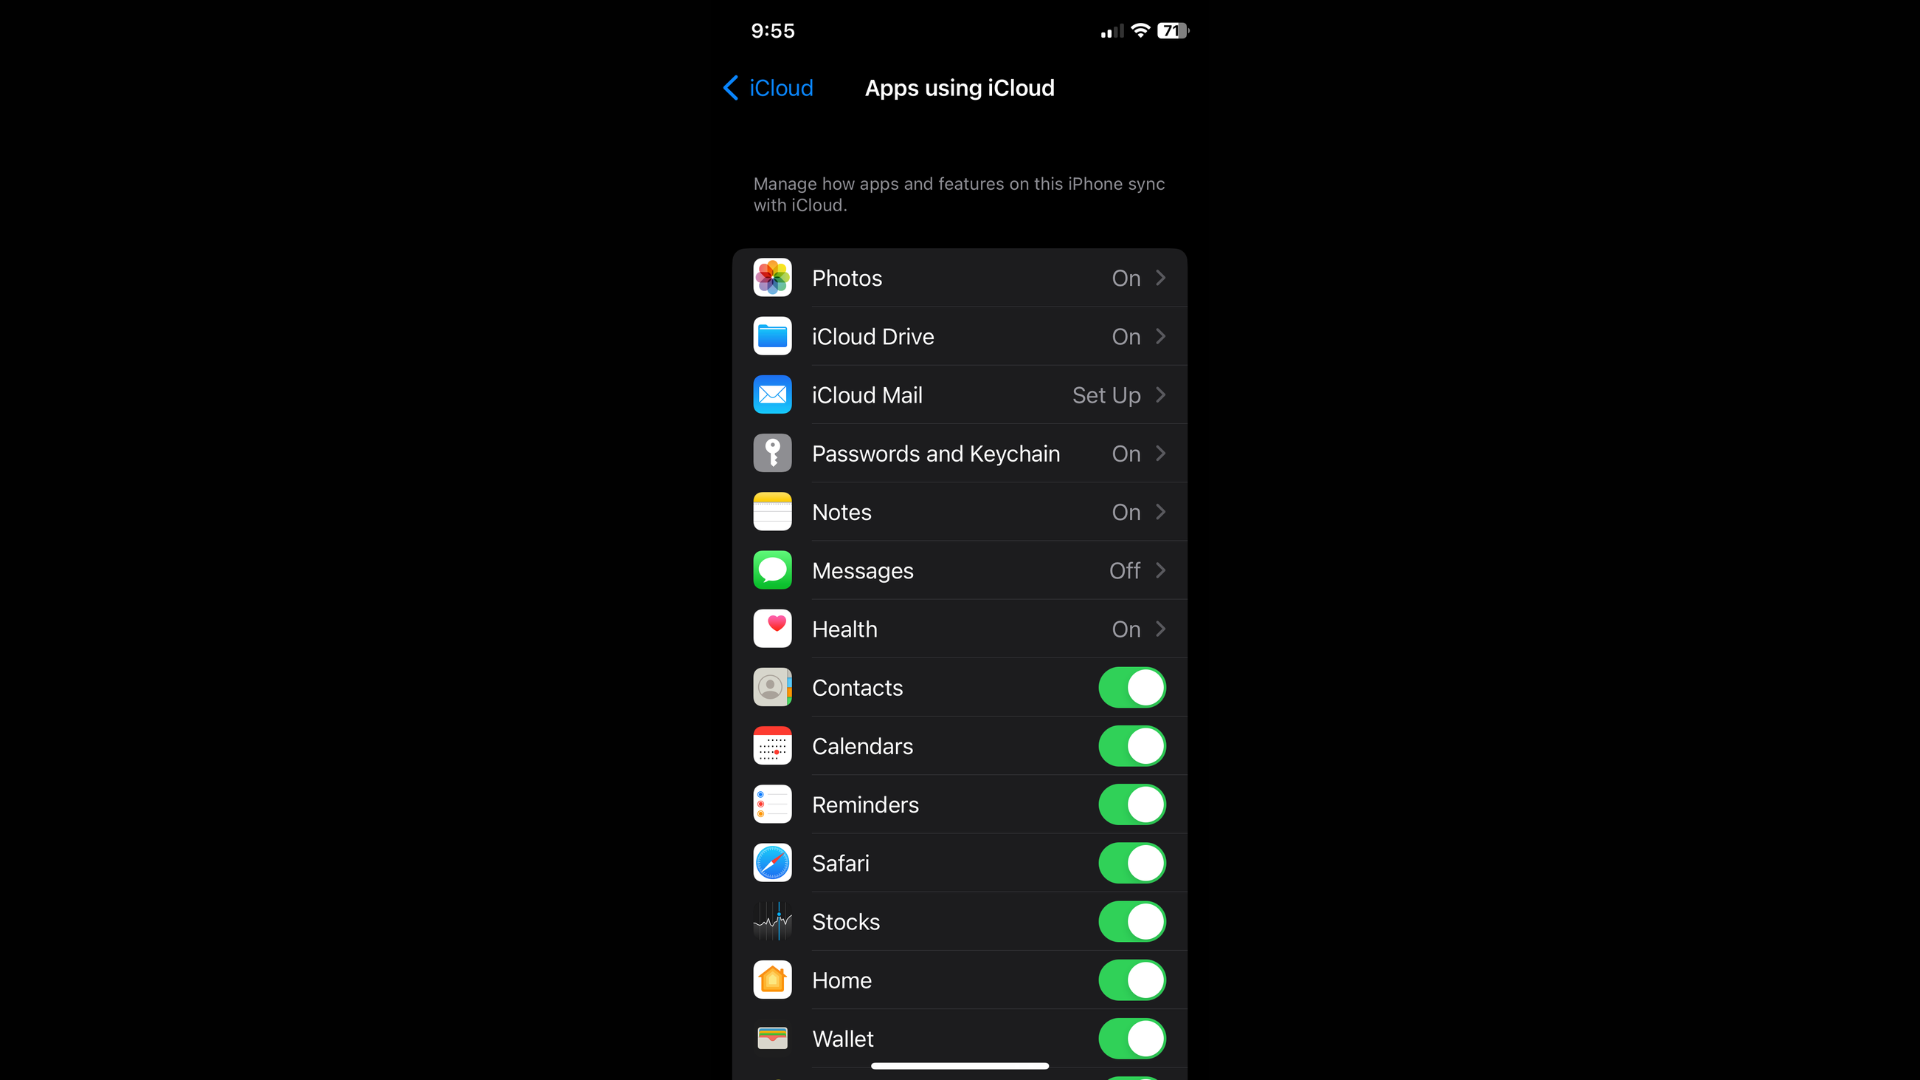
After making sure that the same Apple ID is logged into the iPhone and iPad, the next step involves fine-tuning the iCloud settings. This allows you to choose what data types are set to sync.
- Head over to the Settings app on either device.
- Tap on your Apple ID at the top.
- Tap on iCloud.
- A list of apps and services will appear.
- These apps, such as Photos, Contacts, Calendars, and Notes, can be synced via iCloud.
- Toggle on the switch next to the apps you want to sync between the iPhone and iPad.
- Similarly, toggle off any app you don’t want synced.
- Do the same on the other device.
Doing so allows iCloud to start sharing data across devices. Keep in mind that the free 5GB of cloud storage fills up before you know it, especially when you sync photos and videos. The only solution to this issue is to either disable sync for the Photos app or to consider paying for an iCloud+ subscription. The good thing is that the subscription plans are at least quite cheap.
Step 3: Verify That Syncing Is Working
After you are done with steps 1 and 2, we recommend double-checking if the feature is working properly. Here is how you can do it:
- Add a new contact on your iPhone and check whether it appears on your iPad.
- Create a calendar event and confirm that it popped up on both devices.
- If you have enabled syncing for the Photos app, take a photo on either device and verify that it shows on the other device as well.
Keep in mind that it may take a bit for your iPhone and iPad to start the sync process. If you don’t see the desired results, give it some time and check it again; it might work. In case the issue persists, the only course of action is to contact Apple Support for further troubleshooting.
Looking For More Related to Tech?
We provide the latest news and “How To’s” for Tech content. Meanwhile, you can check out the following articles related to PC GPUs, CPU and GPU comparisons, mobile phones, and more:
- 5 Best Air Coolers for CPUs in 2025
- ASUS TUF Gaming F16 Release Date, Specifications, Price, and More
- iPhone 16e vs iPhone SE (3rd Gen): Which One To Buy in 2025?
- Powerbeats Pro 2 vs AirPods Pro 2: Which One To Get in 2025
- RTX 5070 Ti vs. RTX 4070 Super: Specs, Price and More Compared
- Windows 11: How To Disable Lock Screen Widgets