Facebook
 Reddit
 Email
Email
Locate the hidden Banandiums in the area and complete the mission Crossing Through Crosshairs in Donkey Kong Bananza.

Banandiums in Donkey Kong Bananza are crystallized bananas that help you earn more skill points as well as get access to new upgrades. These are found scattered across the several layers in the game. The more you explore and branch out instead of following the main path straight on, the more you will discover these Banandiums. In the mission crossing through crosshairs, there are three Banandiums out of which one is hidden.
In this article, we will look at how to complete Crossing Through Crosshairs in Donkey Kong Bananza and the locations for all the Banandiums in this mission.
Crossing Through Crosshairs in Donkey Kong Bananza
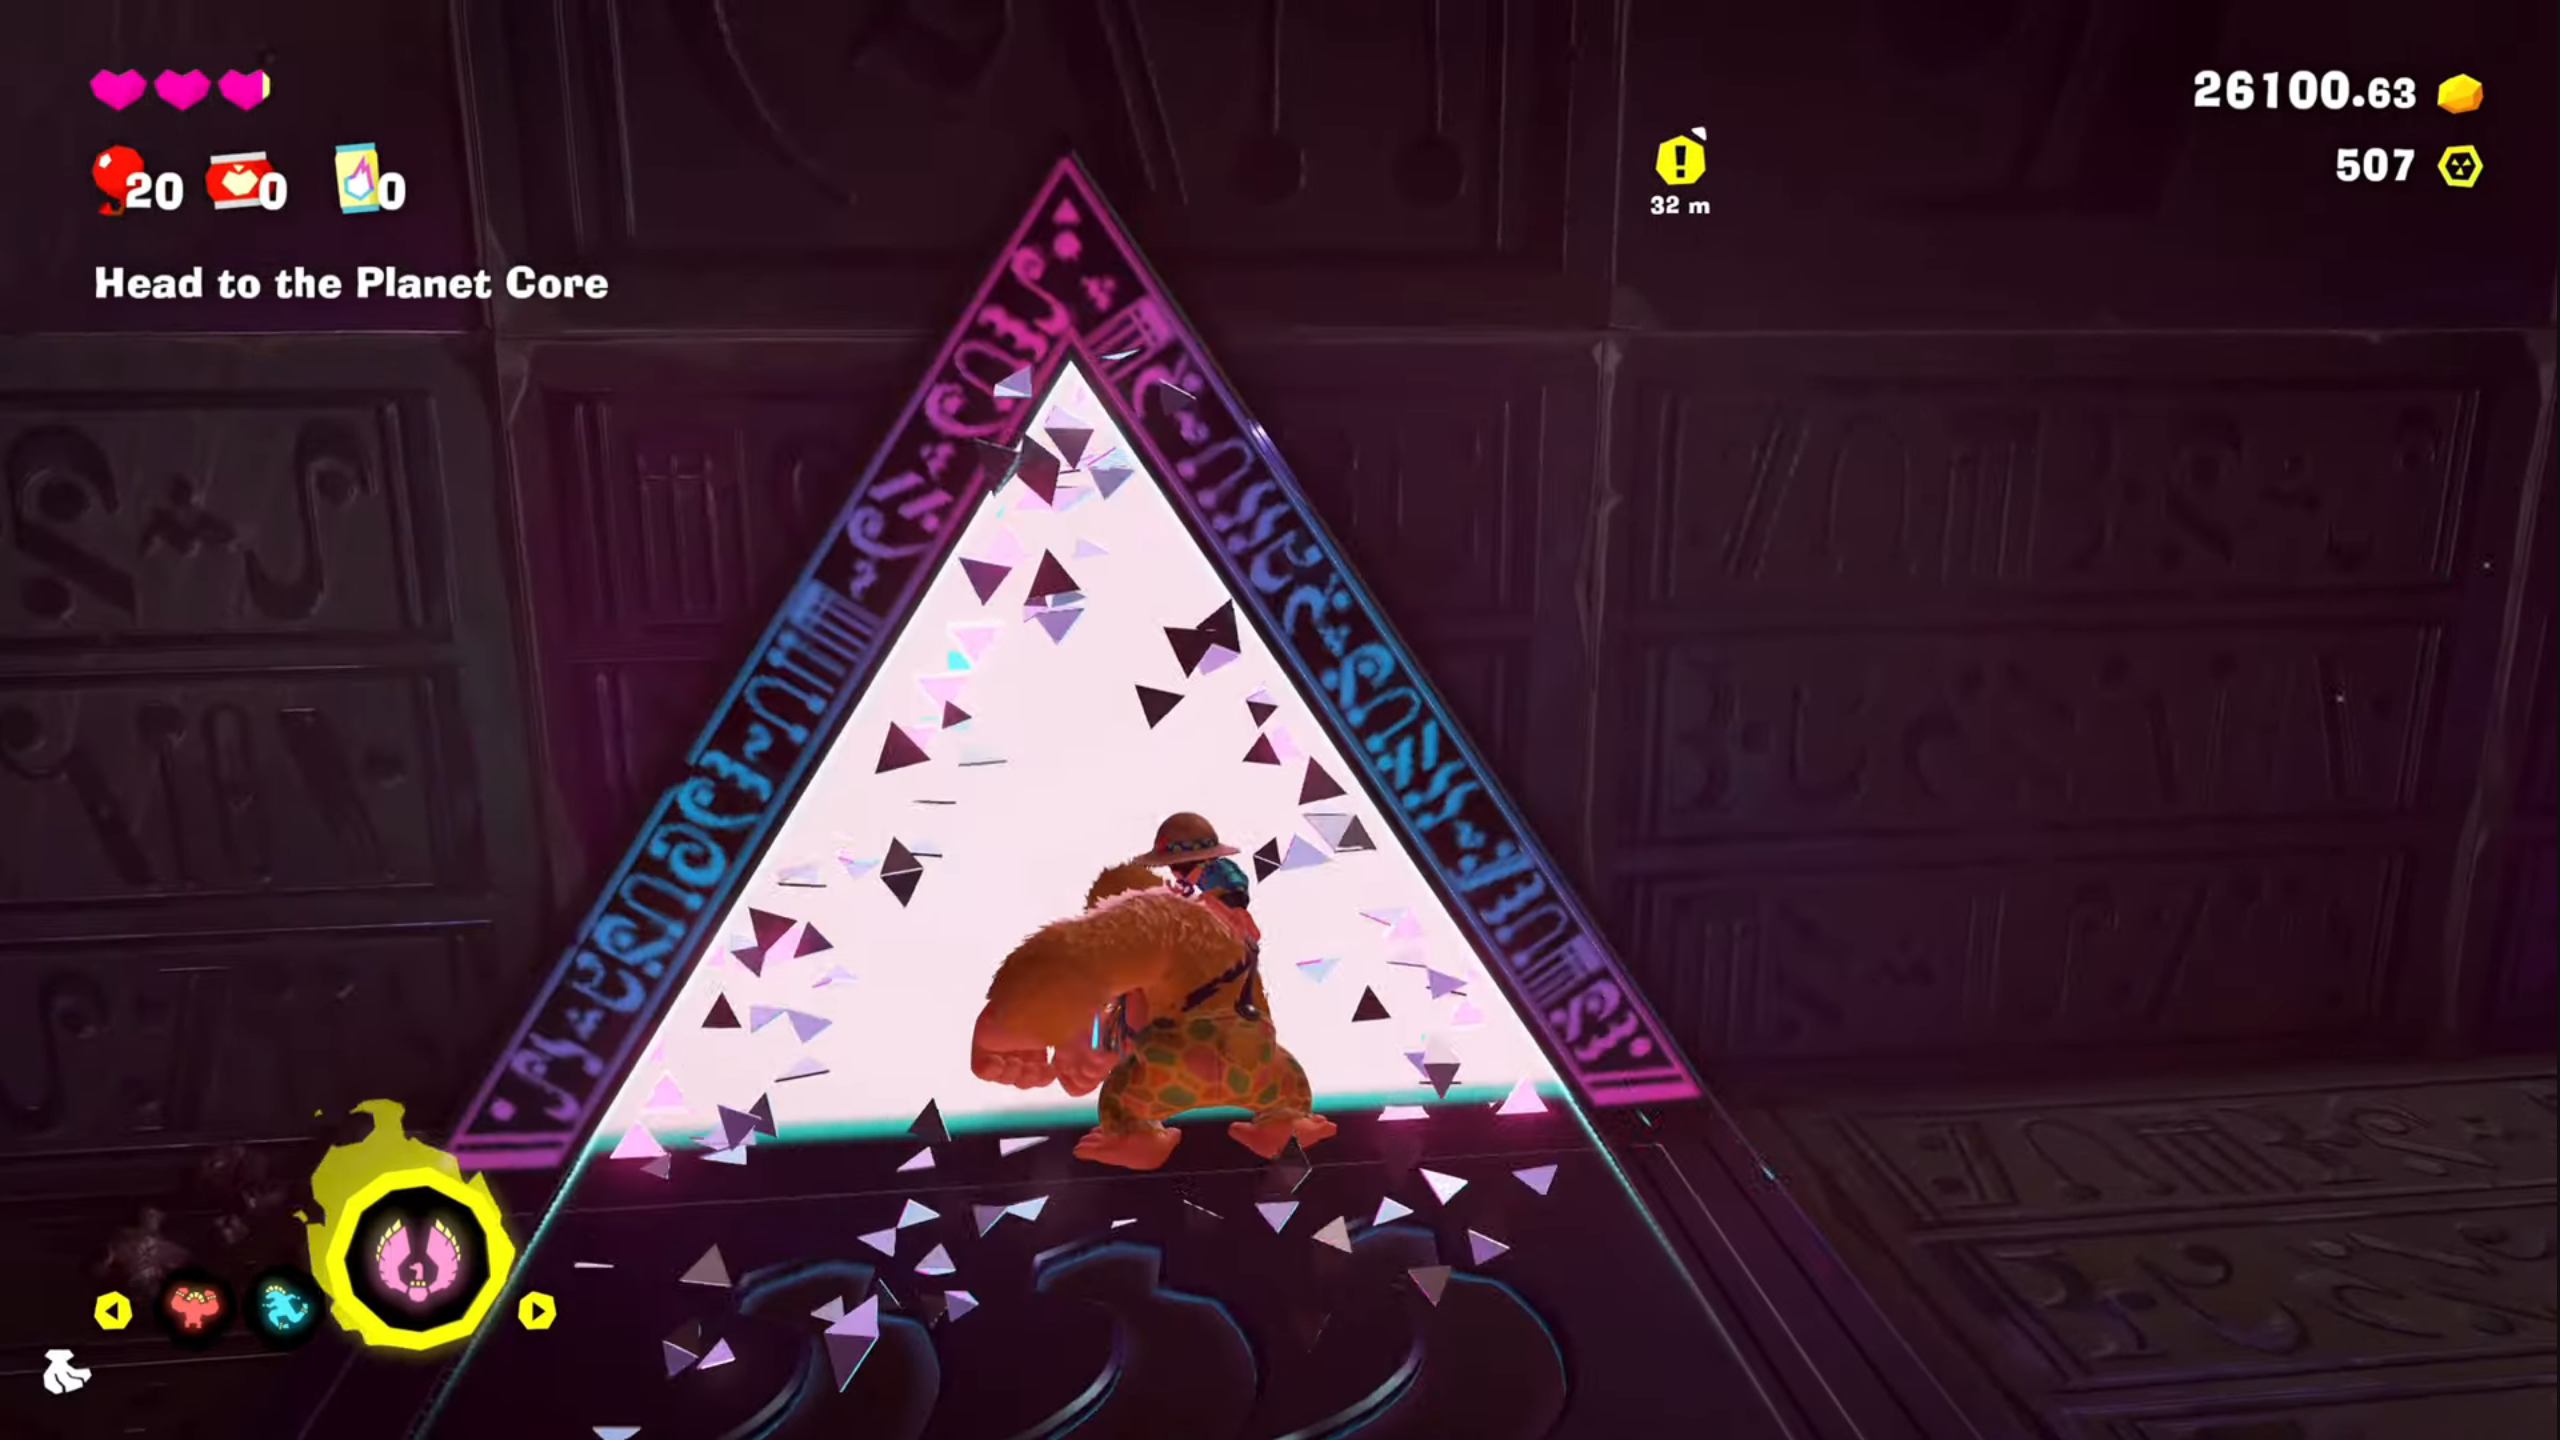
To play this mission, you will first need to interact with ‘Constructone’, who is capable of destroying bedrocks. This will cost you 9999 currency, but it will be slashed down to 1000 if you wish to accept this friendly gesture. After this, it will break the ruin, revealing a triangle portal which you will punch open to pass through.
Once in, there is a single path to move forward, which you can use the travelling platforms to move across. While progressing through this mission, you will be able to collect Banandiums, which are either in plain sight or may require you to explore a bit.
All Banandium Locations
Banandium 1 (Target on the Run)
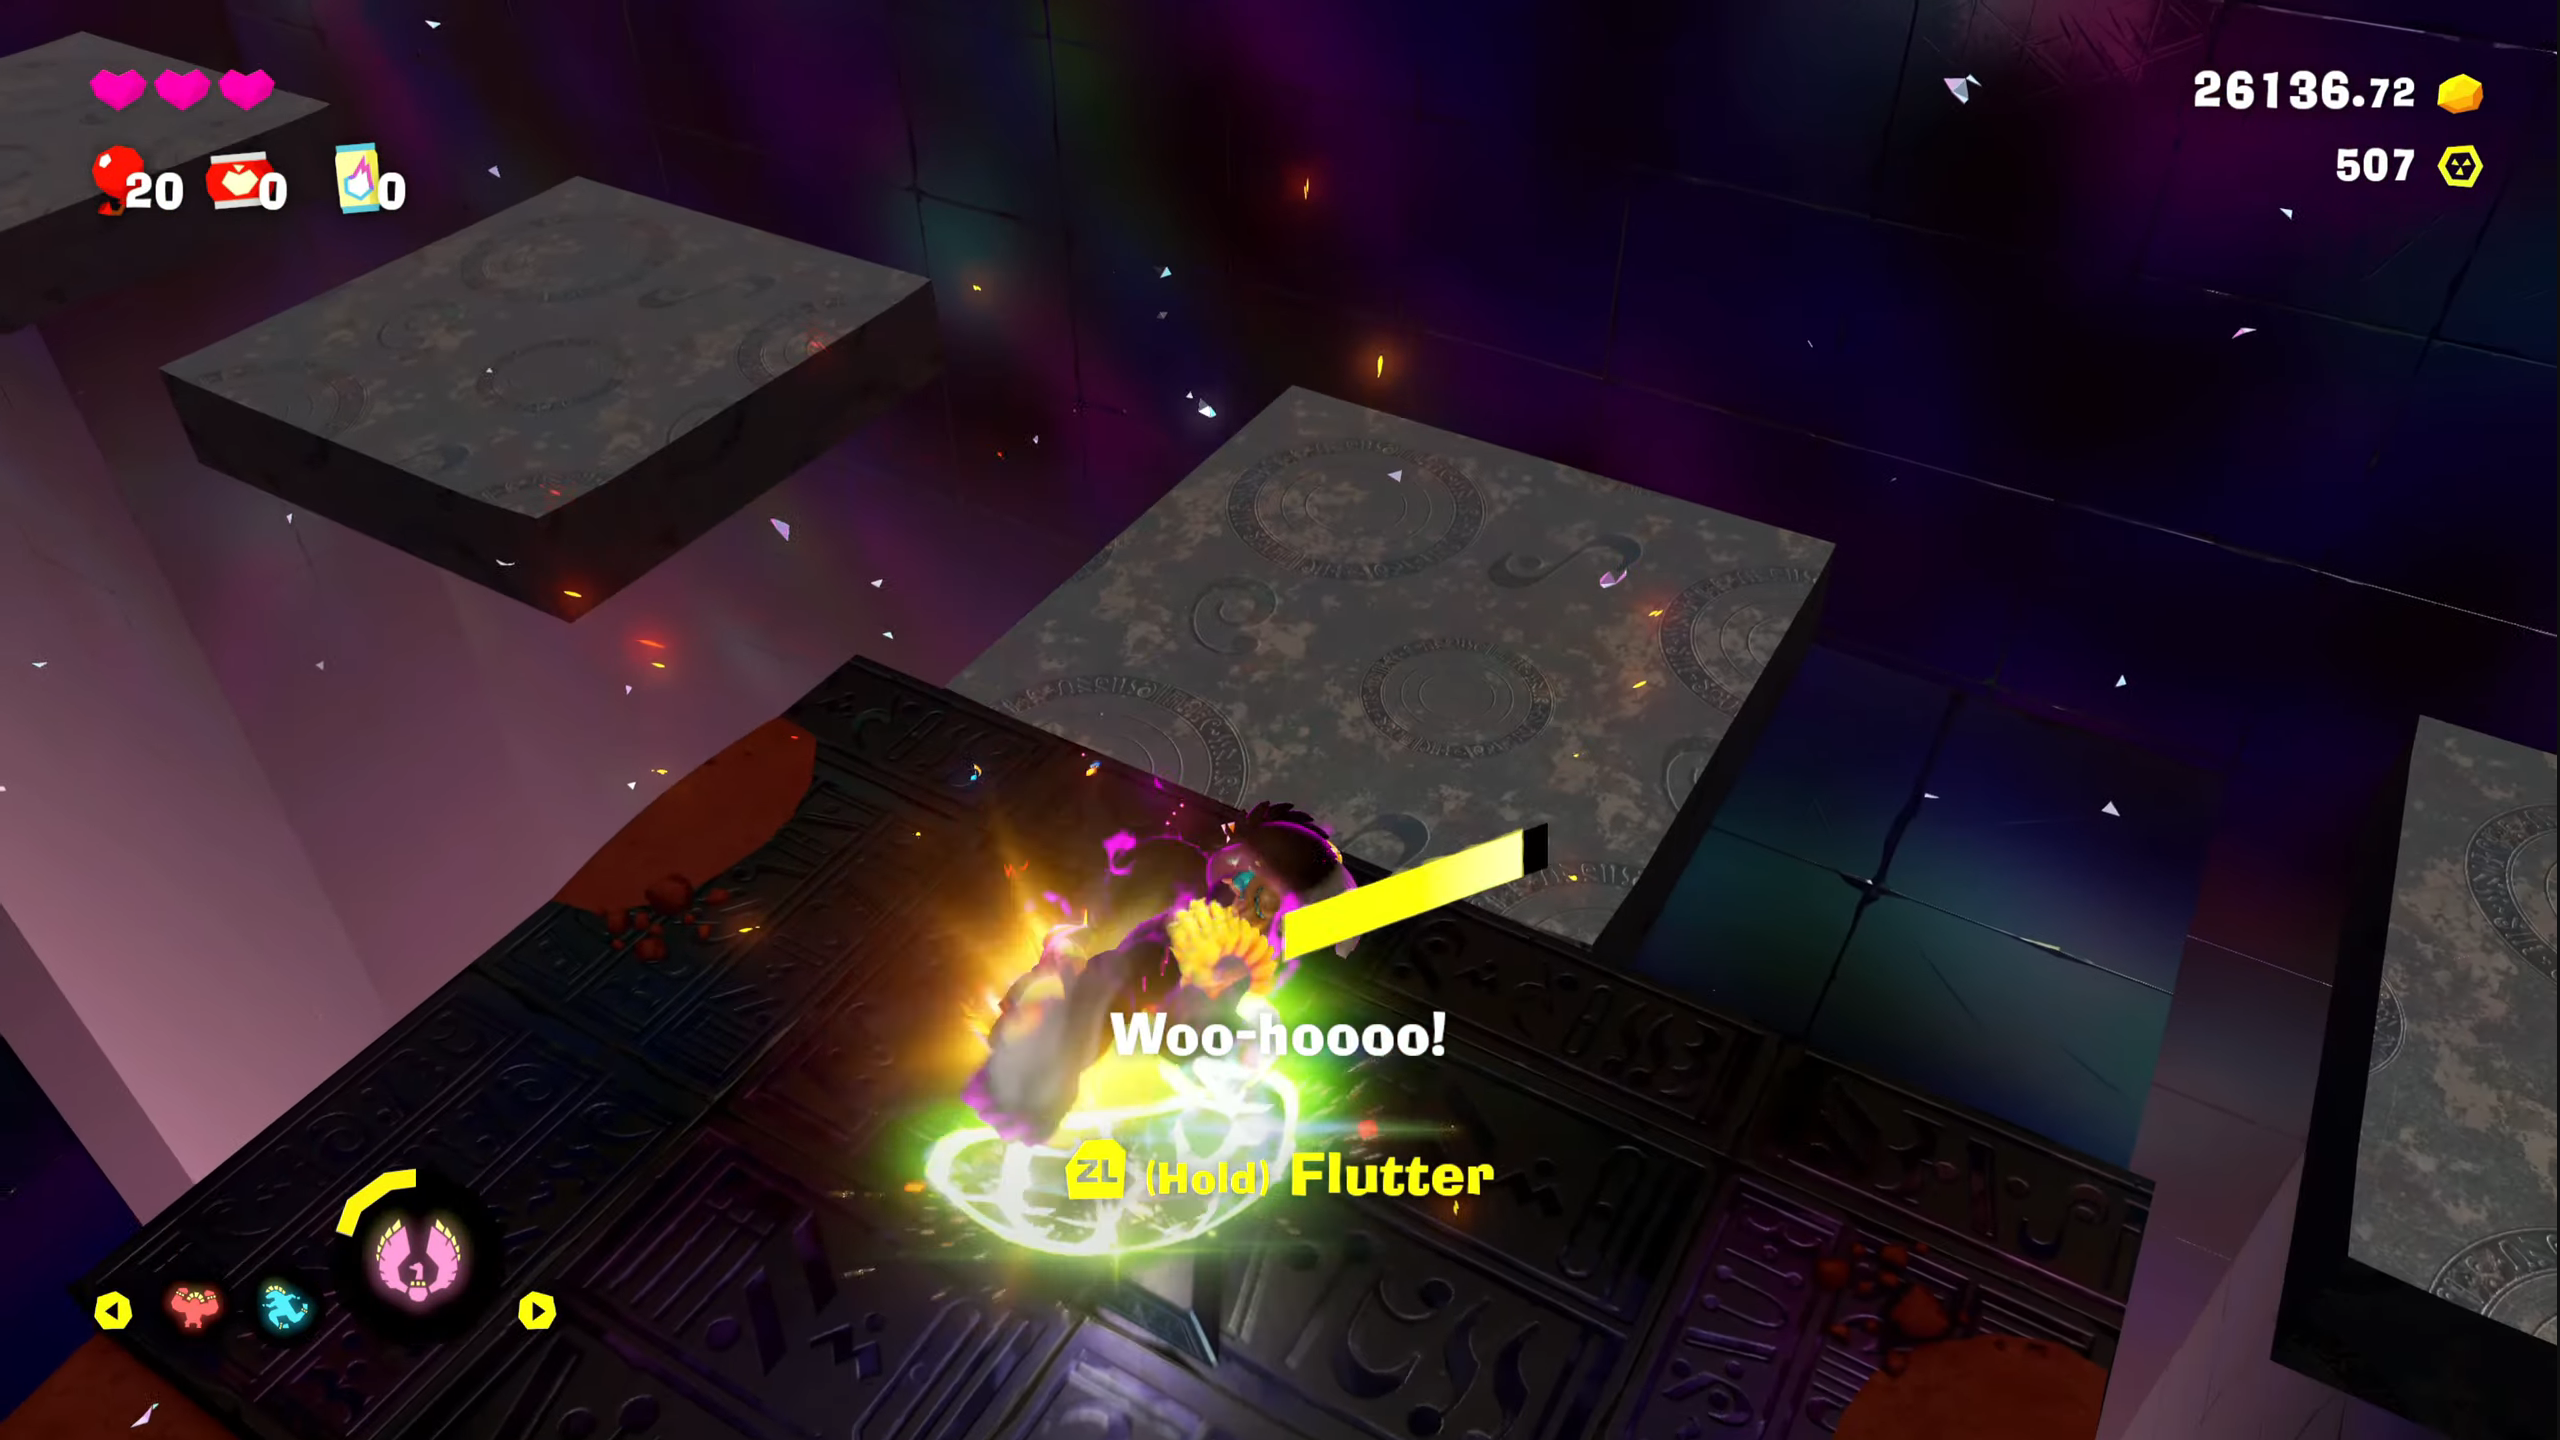
The first Banandium is the easiest one to grab as it is in your path and unmissable. Once you step on the moving platform, you will slowly make your way towards the traps set up. Once in their vicinity, they will shoot marking lasers at you. You have a brief period to move about before they attack you.
You have two options. Either you can wait for the platform to reach the end, or you can use your bird transformation and hold the prompted button to activate the ‘Flutter’ move. This will enable you to fly and quickly skip past the first laser stage. At the end of this lane, you will see the green Banandium. Break it and you will unlock a skill point.
Banandium 2 (Out-of-Range Perch)

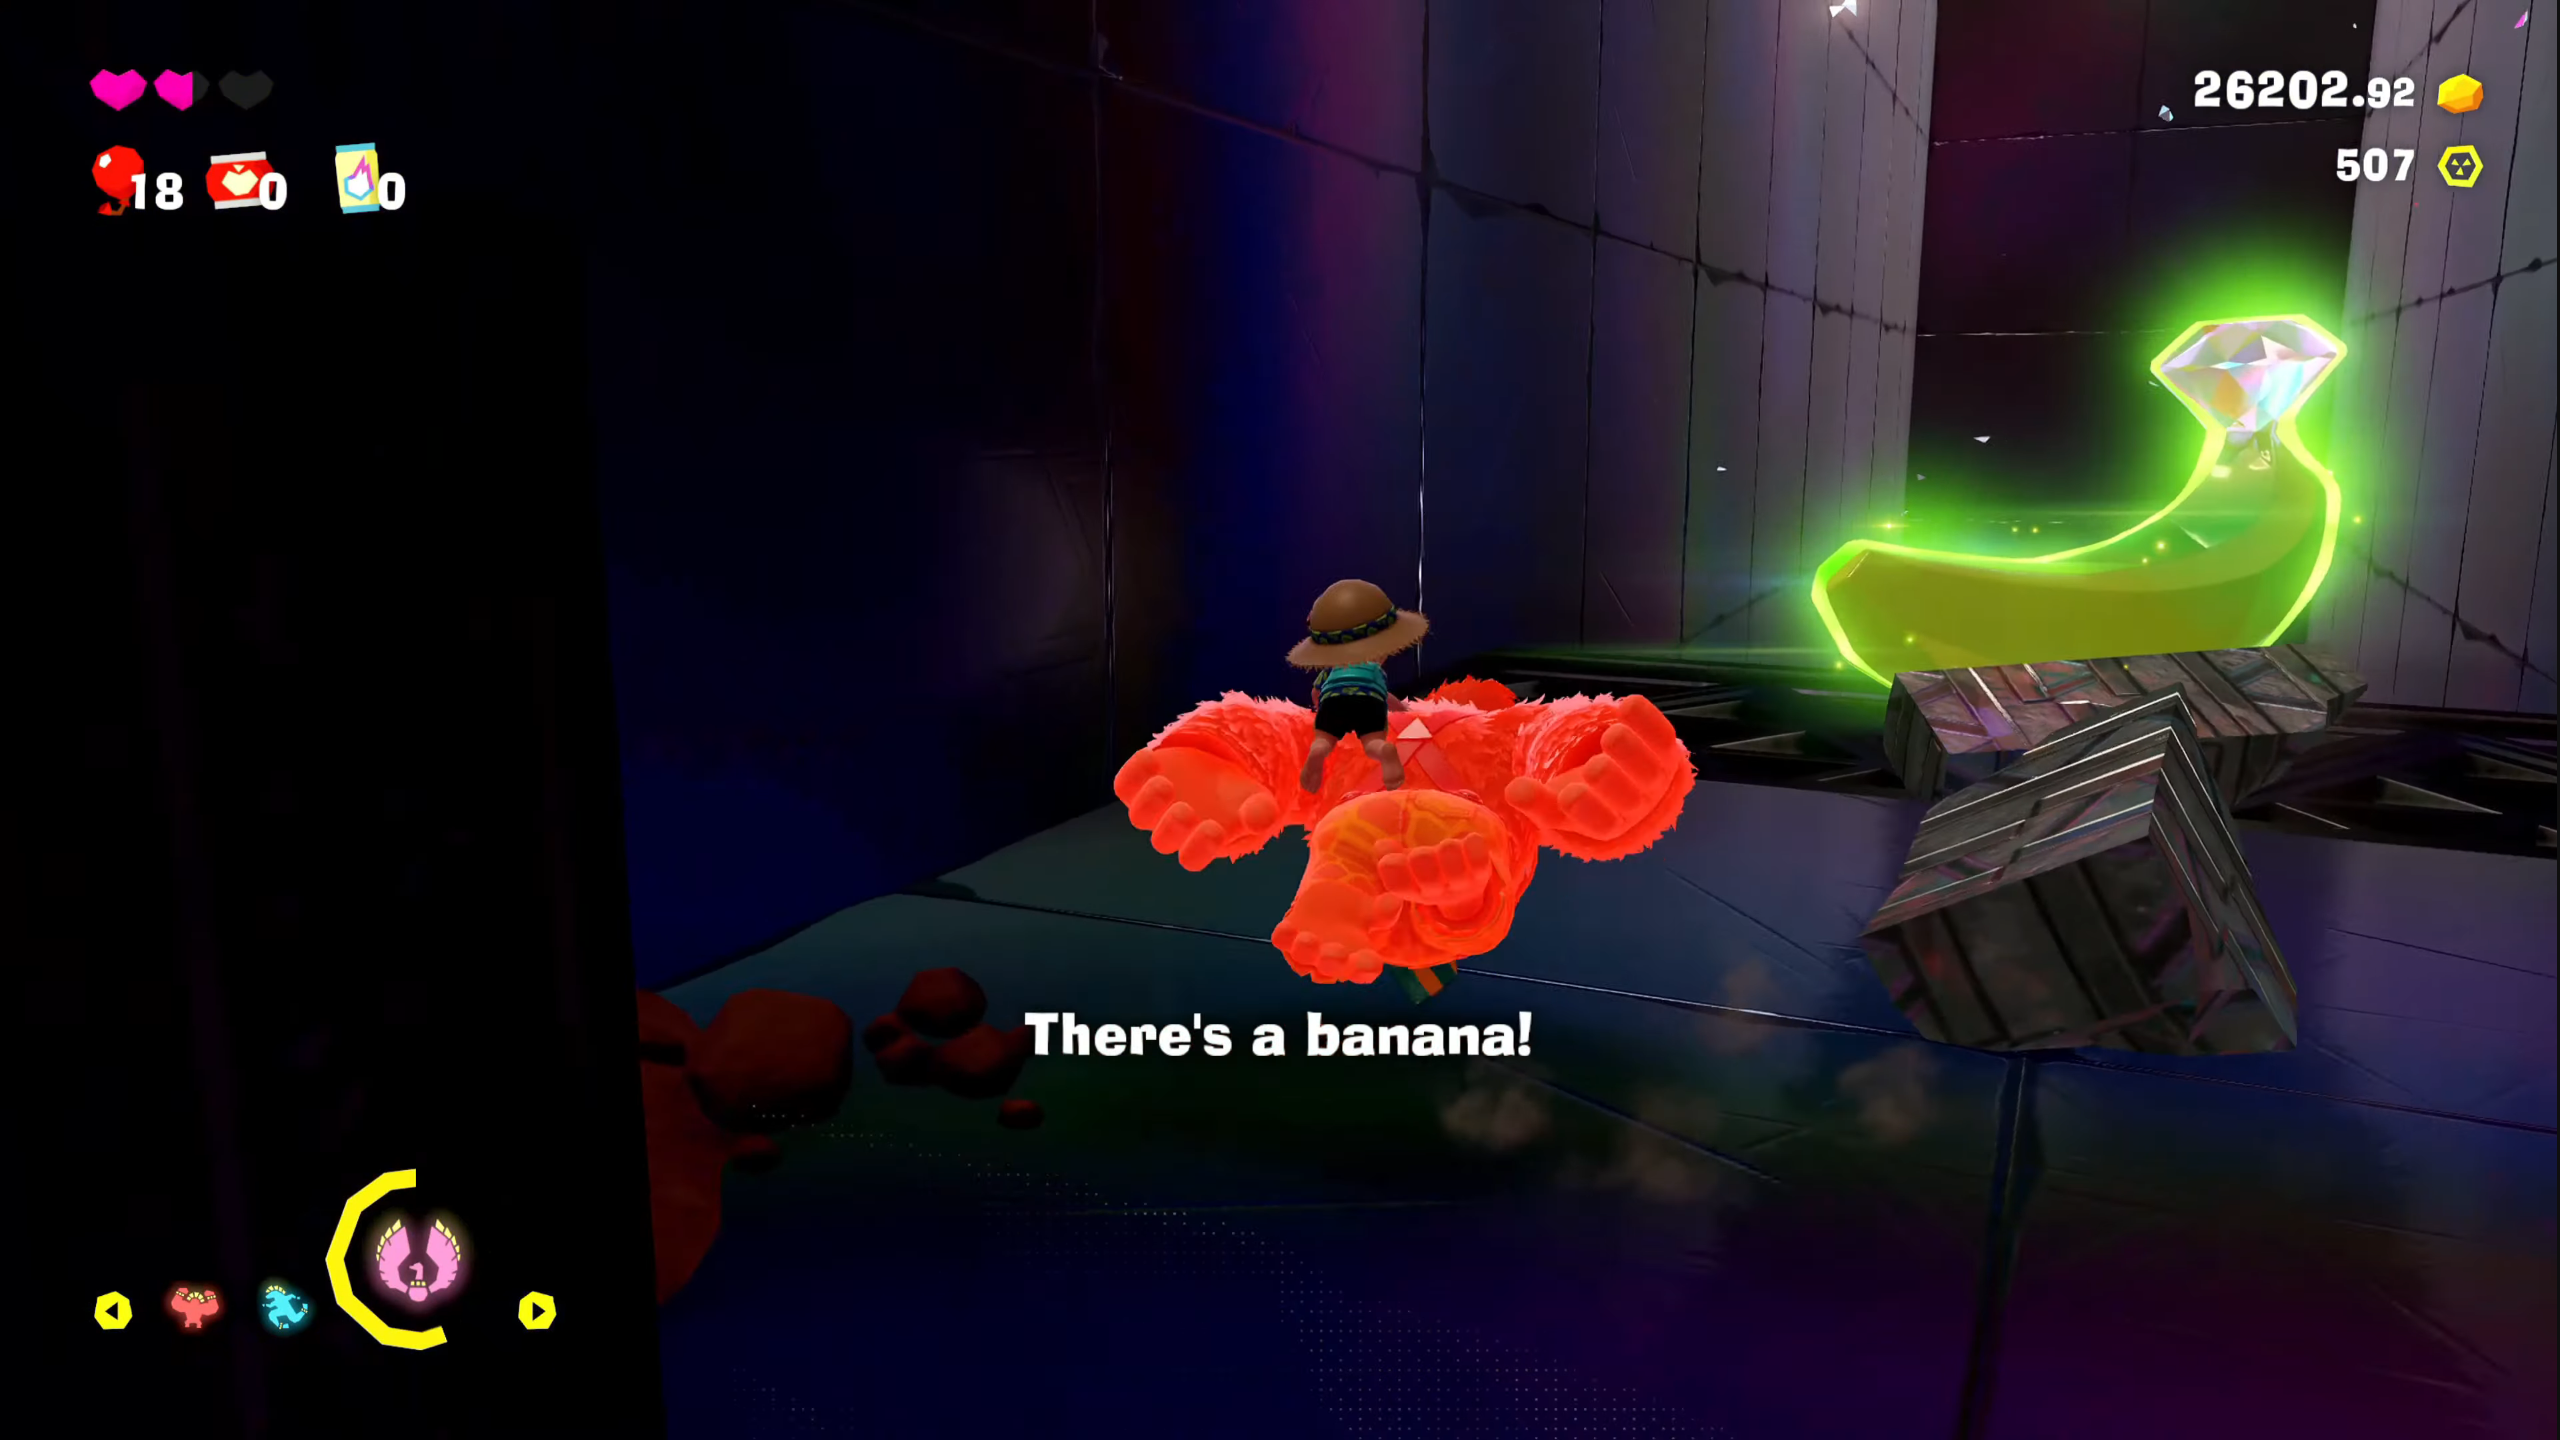
Post that, jump onto the next series of platforms moving to the left side. You can take your time and jump on a platform once you are ready. You can again choose either of the two options as before. Now, at the end of this lane, you will see a barrier in your path. Breaking this will push you to the next stage.
There is, however, a Banandium hiding right above this barrier, behind a second wall. Using your normal form, once you reach the wall, climb from the sides till the top, where you will see this second barrier. Over here, you can use the lasers to your advantage. Climb up and hang on the barrier. Once the lasers shoot at you, dodge, and they will, in turn, break the barrier for you. Now enter, and here you will see the second Banandium.
Banandium 3 (Target Escaped)
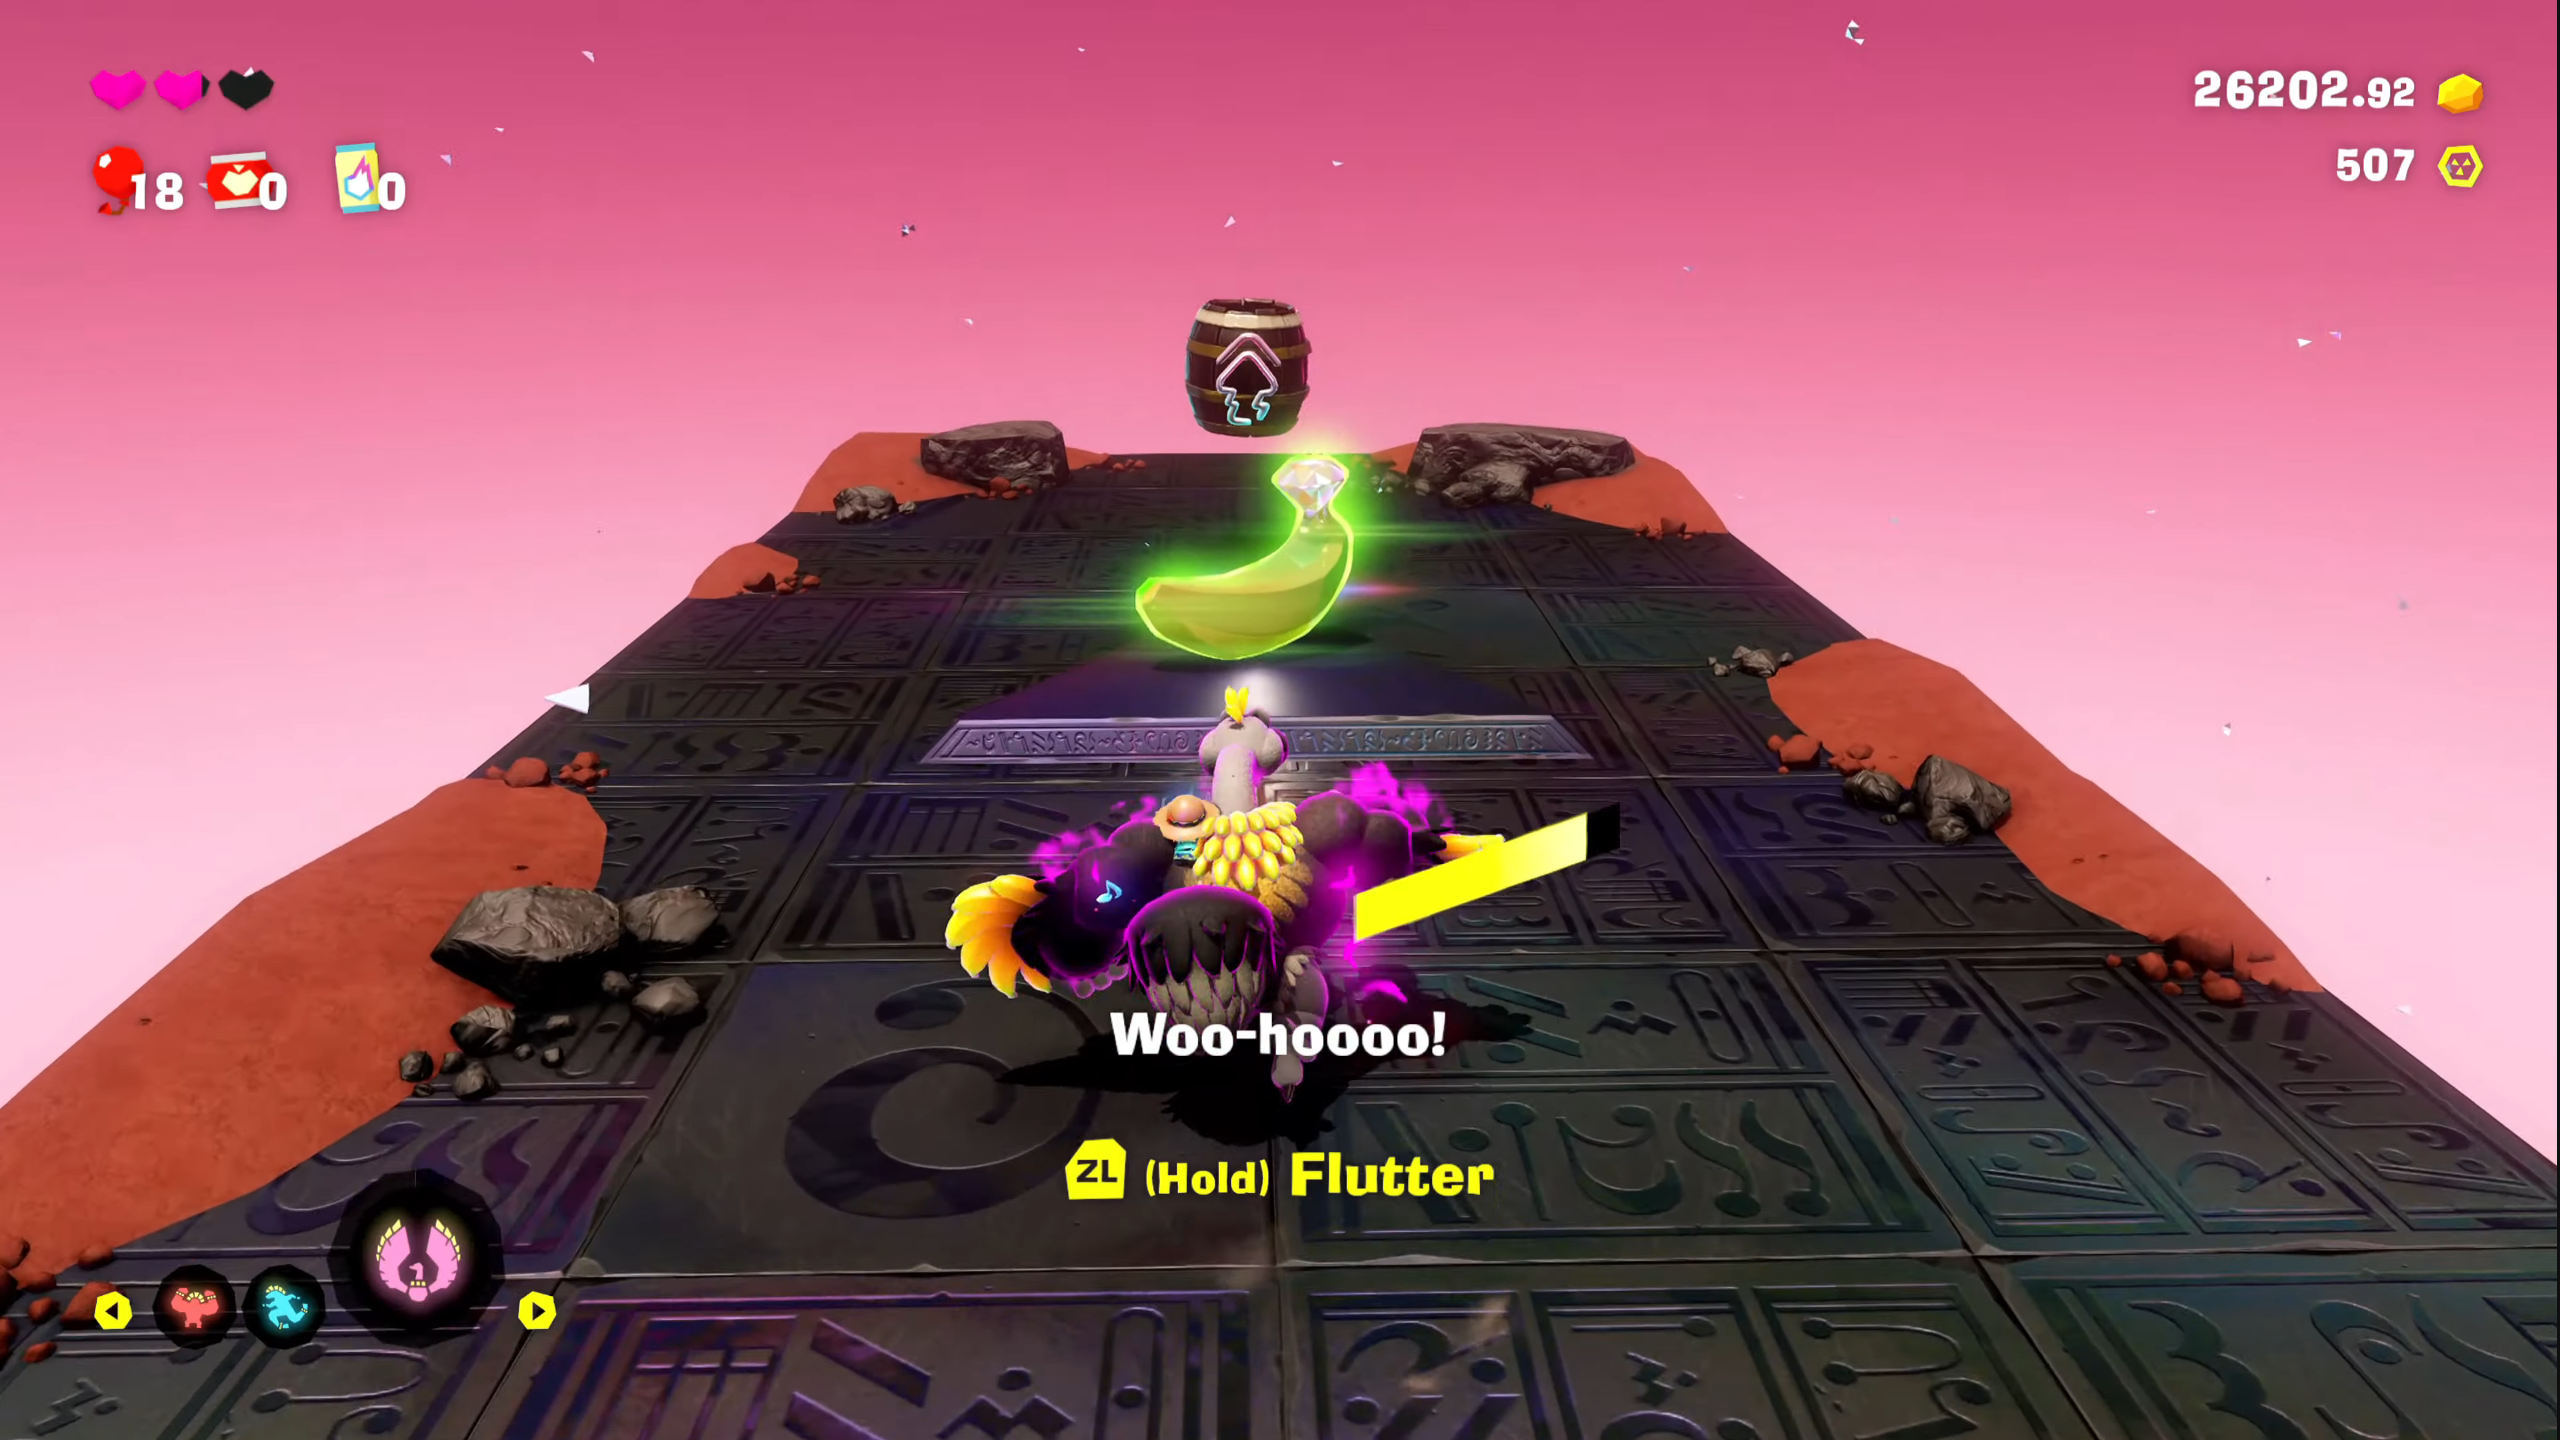
Once collected, jump down and land on any of the moving platforms. Beyond the final wall, you will see the last Banandium, glowing in all its glory. Break this Banandium as well, completing all the acquirable bananas as part of this mission. Now jump inside the barrel, which will then propel you outside this stage.
Also read: Donkey Kong Bananza: All Transformations And How To Unlock Them

We provide the latest news and create guides for Donkey Kong Bananza. Meanwhile, you can check out the following Donkey Kong Bananza articles or catch us playing games on YouTube: