Facebook
 Reddit
 Email
Email
Learn how to switch between integrated and dedicated GPUs for optimal performance & battery life in this brief Windows laptop guide.

On most Windows laptops, particularly gaming models with dual graphics, assigning graphics-intensive tasks to your dedicated GPU and light day-to-day tasks to the integrated GPU helps improve battery life and also increases performance within your games. Below are simple steps on how to manage your GPU usage on any Windows laptop with two GPUs.
Switch Between GPUs on Hybrid Laptops
There are several ways to do this, and the method depends on your laptop’s specifications, including the manufacturer and CPU type. GPU type, etc. Below are the techniques you can use to approach this.
1. Use Windows Graphics Settings
- Press Windows + I to open Settings.
- Go to System > Display > Graphics.
- Under Choose an app to set preferences for, select Desktop apps or Microsoft Store apps, click Browse to add your program, then click Options.
- Choose between High Performance (dedicated GPU) or Power Saving (integrated GPU), then click Save.
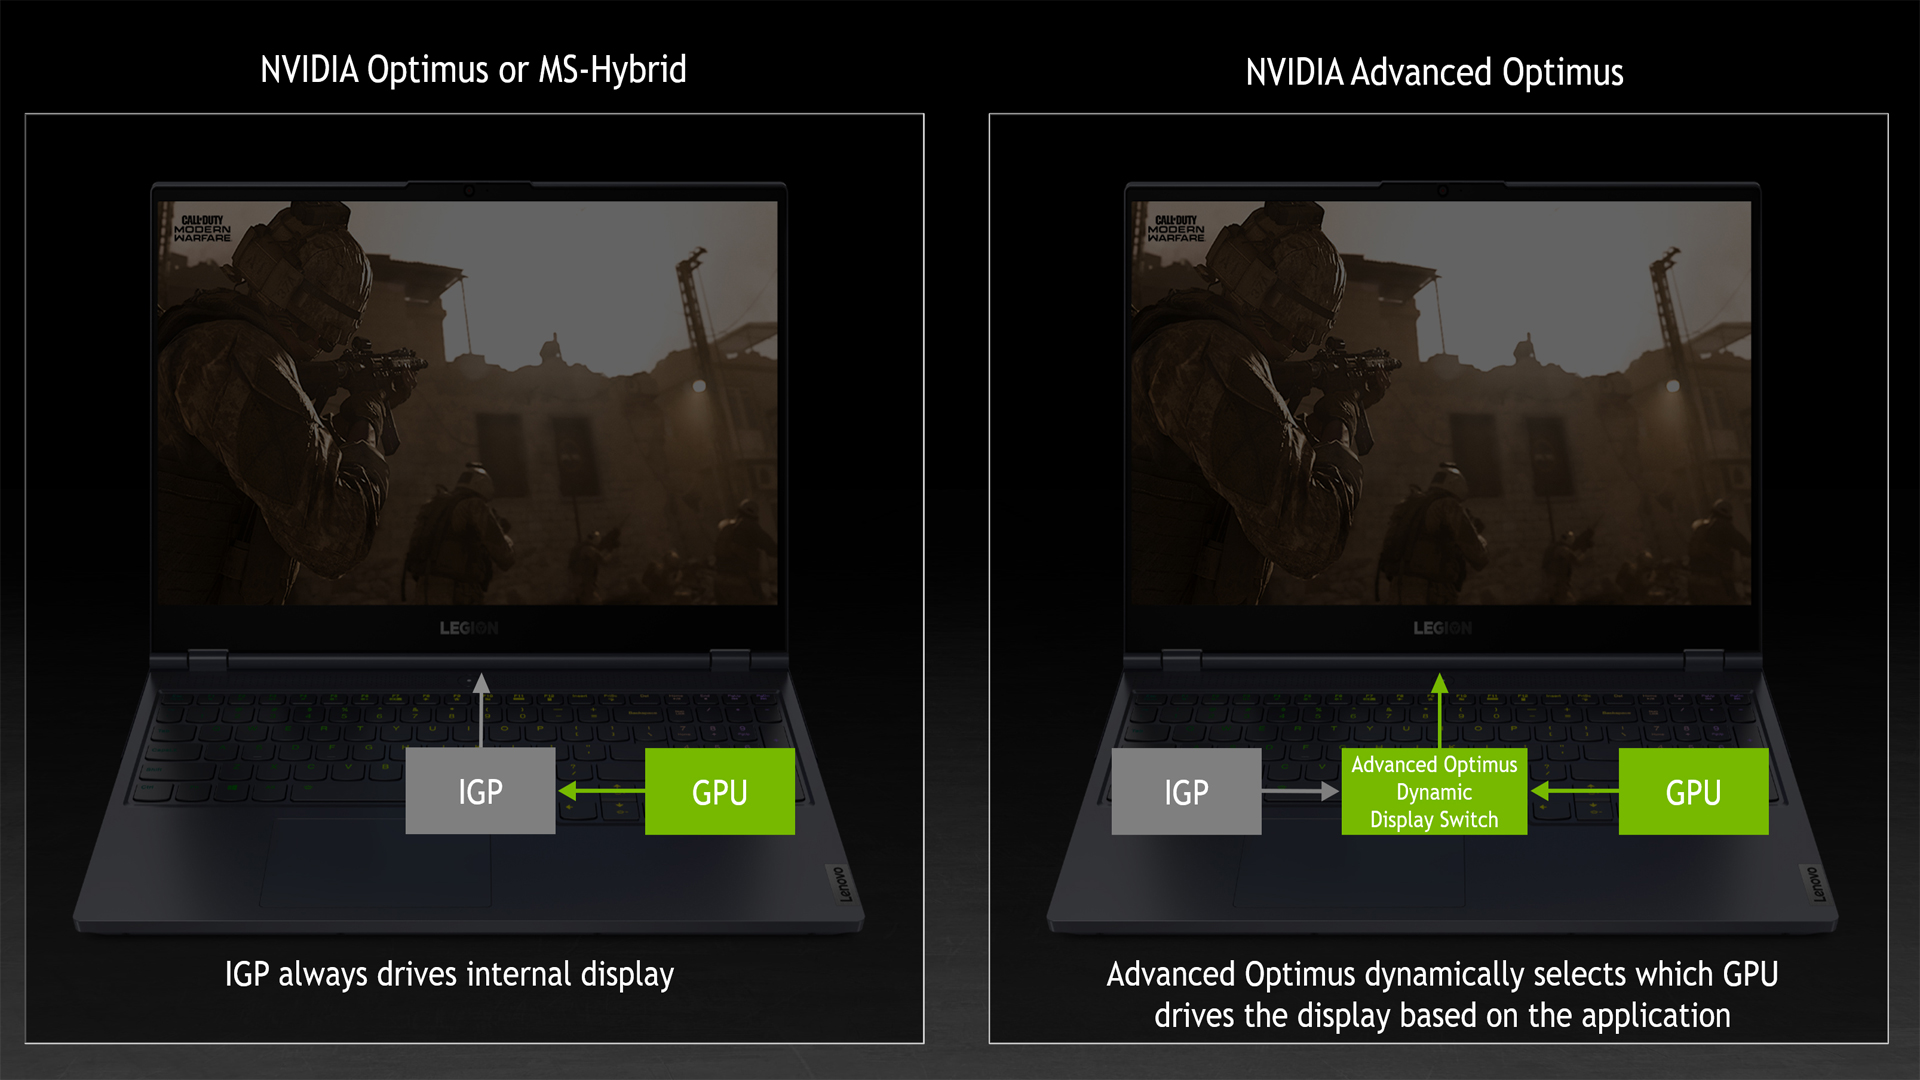
2. Nvidia Optimus Laptops
- Right-click the desktop and open NVIDIA Control Panel.
- Select Manage 3D Settings.
- In Global Settings, set Preferred graphics processor to:
- Auto-select for automatic switching,
- High-performance NVIDIA processor to force the GPU,
- Integrated graphics to save power.
- To configure per-app, switch to Program Settings, pick the app, then choose its GPU and click Apply.
Note: This can also be done via the Nvidia app, but the process is significantly more complicated than using the control panel. If your GPU is older than an RTX 20 series, such as the GTX 1070 Max-Q, then the control panel method is the most sensible option.
3. AMD Switchable Graphics Laptops
On AMD laptops, if you are using a newer model, such as those released in 2020 or later, Switchable graphics can be found already integrated into the Windows Display settings, rather than a standalone Radeon menu.
If you find the option missing in Radeon settings, use the Windows Graphics method mentioned in the beginning. Please note that some apps may be “locked” and default to an integrated GPU for power savings, requiring no changes to be made. That said, here are the steps:
- Right-click the desktop and open AMD Radeon Settings (or Catalyst Control Center in older versions).
- Go to System > Switchable Graphics.
- Under “Running Applications” or “Installed Profile Applications,” find your program or game in this use case.
- Assign High Performance (discrete GPU) or Power Saving (integrated GPU), or use a Setting Based on power source for dynamic switching.
4. BIOS or Physical Switch (If Available)
On a few laptops, a BIOS option or a hardware toggle is provided, specifically to execute this:
- Reboot and enter BIOS/UEFI.
- Look for Graphics, GPU Mode, or Switchable Graphics.
- Select Discrete, Integrated, or Dynamic mode as desired. (these options are just for reference, real-world values or parameters may change)
- Save and exit.
We provide the latest news and “How To’s” for Tech content. Meanwhile, you can check out the following articles related to PC GPUs, CPU and GPU comparisons, mobile phones, and more:
- 5 Best Air Coolers for CPUs in 2025
- ASUS TUF Gaming F16 Release Date, Specifications, Price, and More
- iPhone 16e vs iPhone SE (3rd Gen): Which One To Buy in 2025?
- Powerbeats Pro 2 vs AirPods Pro 2: Which One To Get in 2025
- RTX 5070 Ti vs. RTX 4070 Super: Specs, Price and More Compared
- Windows 11: How To Disable Lock Screen Widgets