 Facebook
 Reddit
 Email
Email
This guide focuses on the best explaining how to play an ESO Necromancer PvE Tank Build, including skills, gear, champion points, and more!
This build has been updated for the Updated 42, the Gold Road Chapter of the Elder Scrolls Online (ESO).
Why Should You Play ESO Necromancer PvE Tank Build?
TextThe ESO Necromancer PvE Tank Build has amazing self-healing, survivability, and one of the best group oriented ultimates in the game. The most important tank responsibility is to survive while enduring the enemy’s damage. Sometimes independently from a healer.
Second, a significant responsibility is to provide buffs and debuffs to your group. The ESO Templar PvE Tank Build has everything that you need to be successful in tanking. We will also give different gear options in case you lack the necessary gear whether beginner or hardcore tank in the Elder Scrolls Online.
ESO Necromancer PvE Tank Build Features and Mechanics
Below are some of the features found using the ESO Necromancer PvE Tank Build in the Elder Scrolls Online:
- Class – Necromancer
- Weapon One – Sword and Shield
- Weapon Two – Frost Staff
- Armor Types: 5 Heavy, 1 Medium, 1 Light
- Race: Nord
- Attributes: 64 Health
- Mundus Stone: Atronach
Related:
Skills
Skills Bar One: Sword and Shield
Two options in tanking:
- Sword and Shield (preferred front bar)
- Frost Staff (preferred back bar)
Silver Leash (Morph of Silver Bolts | Skill Line : Fighters Guild) – pulls mob in to quickly clear out trash. Downside it cost stamina and can be a burden to cast multiple times. Can be useful to have Void Bash two piece gear set instead.
Pierce Armor (Morph of Puncture | Skill Line : One Hand and Shield) – Single target taunt with massive armor debuff making DPS do more damage. Most mobs have 18,200 resistances, the lower, the more damage your group does. Use this on your priority target like a boss, mini boss or something you want to kill fast. If you’re using Master’s Sword and Shield this will heal you as well.
Necrotic Potency (Morph of Bitter Harvest | Skill Line : Bone Tyrant) – great healing and ultimate generation tool. If not using recommended gear sets, consider swaping for something else.
Hungry Scythe (Morph of Death Scythe | Skill Line : Bone Tyrant) – A very useful AoE damage and healing spammable that cost magicka. Make sure to block cast it if you need a massive burst heal on front bar.
Mortal Coil (Morph of Restoring Tether | Skill Line : Living Death) – Useful self/group heal and primarily used for resource sustain. Consider flexing to Heroic Slash from Sword and Shield.
Renewing Animation (Morph of Reanimate | Skill Line : Living Death) – AoE resurrection 3 players and incredible for survival.
Bar Two: Destruction staff – Ice staff
The Ice staff passives provide block mitigation and defence.
Balance (Morph of Equilibrium | Skill Line : Mages Guild) – infinite magicka sustain with an armor buff that last a very long duration.
Destructive Clench (Morph of Destructive Touch | Skill Line : Destruction Staff) – Range taunt that debuffs the enemy’s damage. Slot Inner Rage here in very long fights where you can’t reach the target.
Spirit Guardian (Morph of Spirit Mender | Skill Line : Living Death) – Great single target healing along with passive, corpse generation and oh yeah 10% damage reduction that stacks on major and minor protection.
Elemental Blockade (Morph of Wall of Elements | Skill Line : Destruction Staff) – use for AoE shield and immobilize and chance to proc brittle status effect adding damage to your team.
Echoing Vigor (Morph of Vigor | Skill Line : Assault) – strong heal over time that procs out 5 piece gear set and heals allies.
Glacial Colossus (Morph of Frozen Colossus | Skill Line : Grave Lord) – the best bursting ultimate in the game paired with our gear to absolutely melt healthbars. You’ll want to save 500 ultimate if using Saxheel champion for the most burst possible.
Scribing Skills & Grimoires – ESO PvE Tank Build
Ulfsild’s Contingency, Shield Throw, and Soul Burst are the best Grimoires (skills) for a PvE Tank build in ESO. Contingency grants damage reduction and damage shield, while Shield Throw can act as a pull or ranged taunt with major evasion. Soul burst is helpful for shield and ultimate generation. Below are our suggested Grimoires for Tanks:
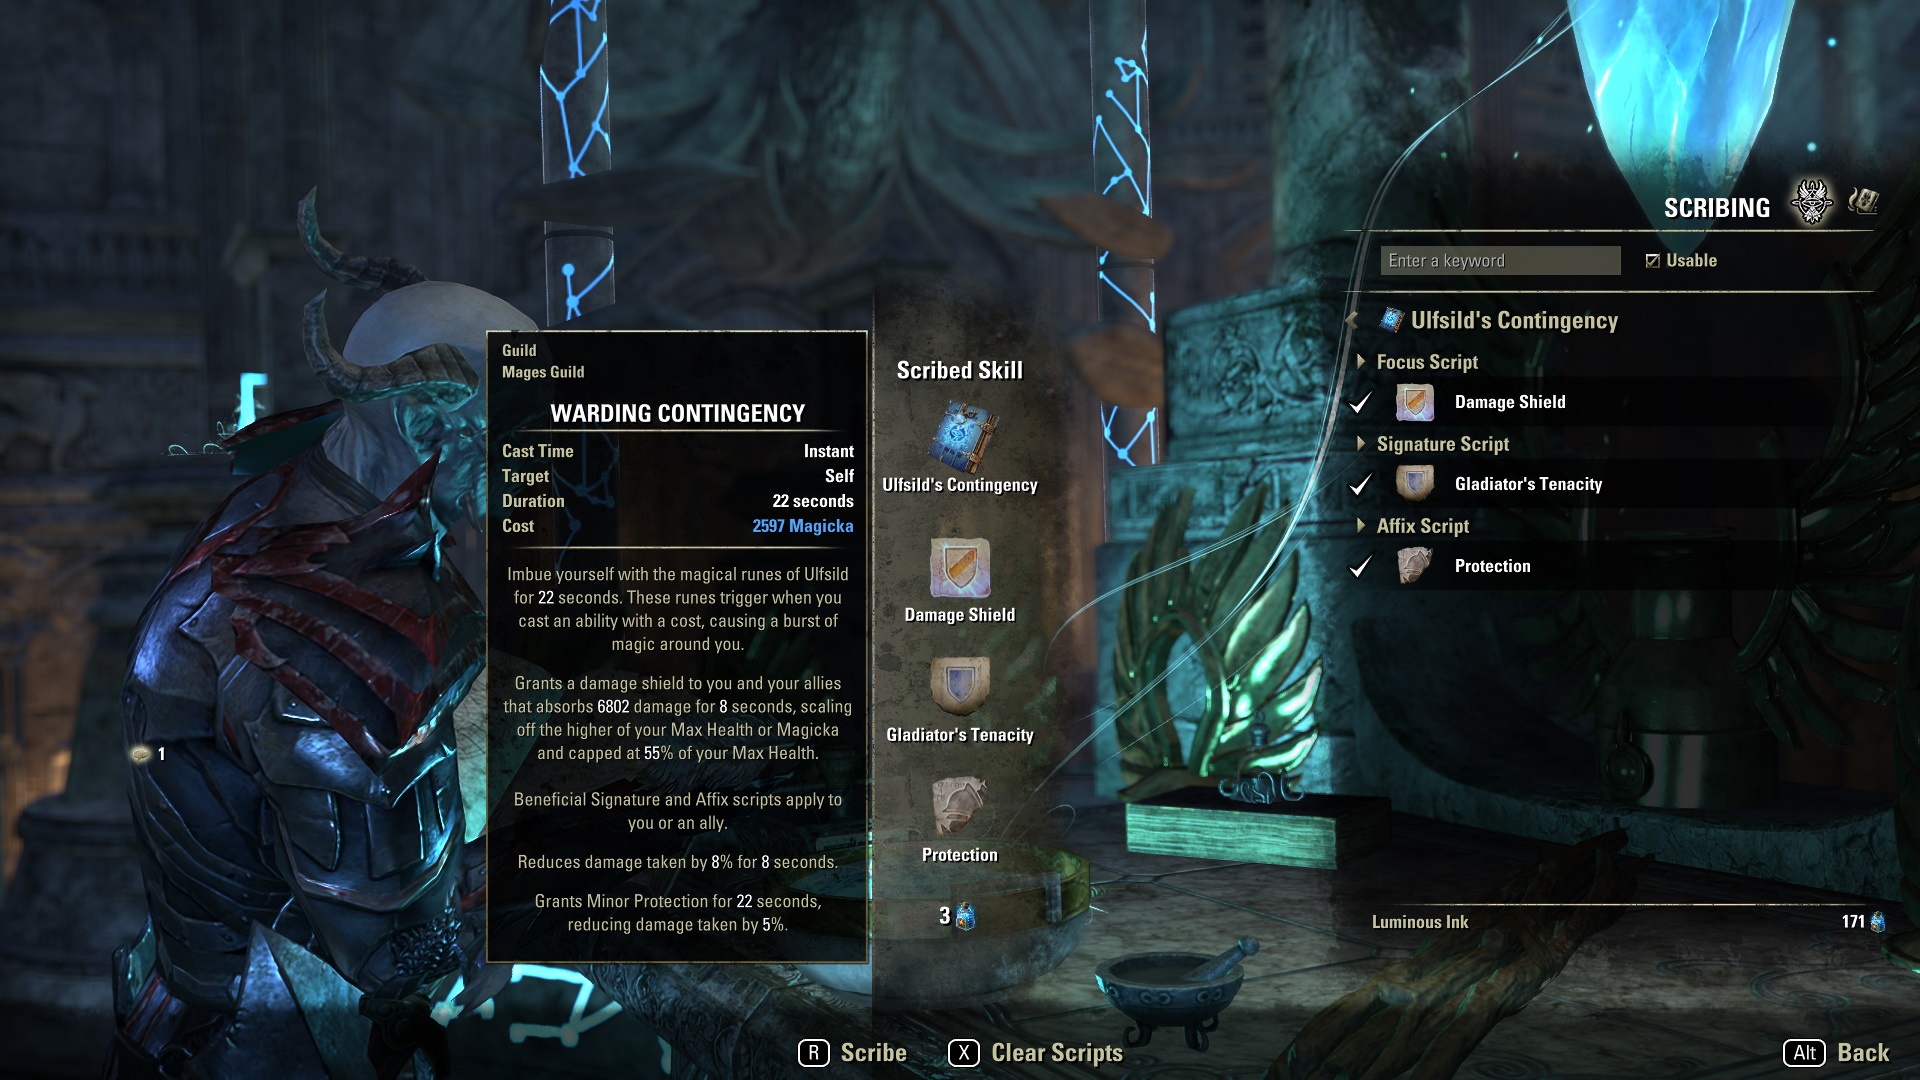
- Ulfsild’s Contingency (Mages Guild): Damage Shield (focus script), Gladiator’s Tenacity (signature script), and Protection (affixed script).
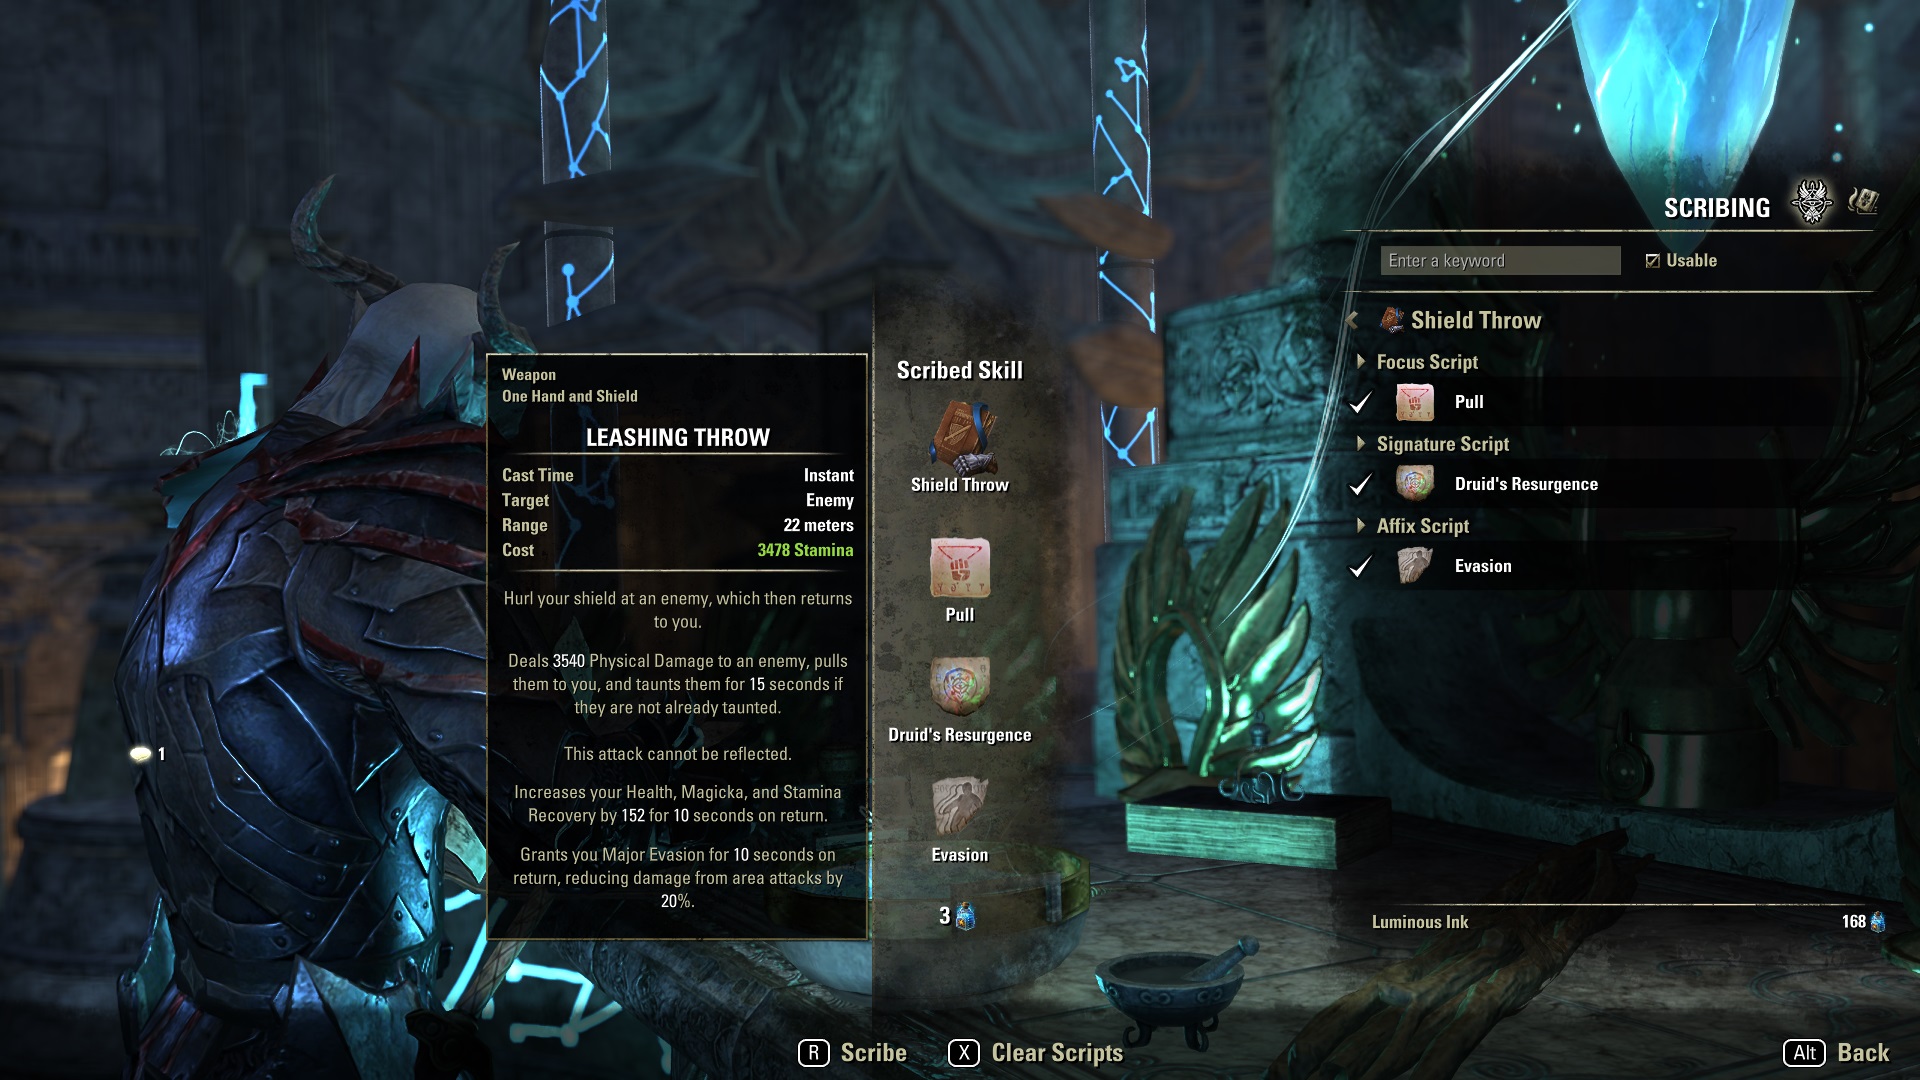
- Shield Throw (One-Hand and Shield): Pull or Taunt (focus script), Druid’s Resurgence (signature script), Major Evasion (affixed script).
- Soul Burst (Soul Magic): Damage Shield (focus script), Anchorite’s Potency (signature script, and Resolve (affixed script).
The Scribing System utilizes one of 11 new skills from the Gold Road Chapter called Grimoires. With Grimoires, you can customize spells via Scripts. The scribing feature requires the purchase of the Gold Road Chapter (sponsored link). To learn more about scribing, check out our full guide here.
Passives Skills
Consider taking all of the passives in the below skill trees to increase your builds performance without slotting any skills:
- Bone Tyrant (class skill line)
- Grave Lord (class skill line)
- Living Death (class skill line)
- Sword and Shield (weapon skill line)
- Destruction Staff (weapon skill line)
- Light Armor
- Medium Armor
- Heavy Armor
- Undaunted
- Mage’s Guild
- Fighters Guild
- Racial
- Alliance War Support
- Alliance War Assault
- Crafting, Alchemy Medicinal Use
Gear 1: Main Tank Trial Gear
| Slot | Type | Set | Trait | Glyph |
| Head | medium | Nazaray | Sturdy | Prismatic |
| Shoulders | light | Nazaray | Sturdy | Prismatic |
| Chest | heavy | Perfected Pearlescent Ward | Reinforced | Prismatic |
| Legs | heavy | Perfected Pearlescent Ward | Sturdy | Prismatic |
| Gloves | heavy | Perfected Pearlescent Ward | Sturdy | Prismatic |
| Boots | heavy | Perfected Pearlescent Ward | Sturdy | Prismatic |
| Belt | heavy | Perfected Pearlescent Ward | Sturdy | Prismatic |
| Weapon One | Sword | Perfected Puncturing Remedy | Decisive | Weakening |
| Secondary | Shield | Perfected Puncturing Remedy | Sturdy | Health |
| Weapon Two | Ice Staff | Crimson Oath’s Rive | Infused | Crusher |
| Necklace | Crimson Oath’s Rive | Infused | Magicka Recovery | |
| Ring 1 | Crimson Oath’s Rive | Triune | Magicka Recovery | |
| Ring 2 | Crimson Oath’s Rive | Triune | Magicka Recovery |
Monster Helm and Arena Set
Nazaray: obtained in Shipwright’s Regret DLC Ascending Tide. Considered best in slot due to extending all the important debuffs adding huge damage to your group.
FLEX OPTIONS
- Magma Incarnate 1pc + 1pc Spaulder of Ruin = incredible combo if you have another Nazaray tank
- Encratis’s Behemoth = great damage increase when running heavy magicka builds in group
- Sentinel of Rkugamz = decent healing and sustain for you and others
- Roksa the Warped = Update 37 monster helm that gives great resource sustain without Engine Guardian droid.
- Engine Guardian = incredible selfish base game (just you) sustain set
- Scourge Harvester = great self survivability monster
Perfected Puncturing Remedy: obtained in Veteran Dragonstar Arena in Craglorn though can do normal and get a lesser version. Perfect set to front bar, which adds a ton of resistance and amazing self-healing for something we are doing anyway: taunting!
FLEX OPTIONS
- Void Bash = great if you want to pull trash in easily
Gear Sets
Crimson Oath’s Rive: obtained in the Veteran Dread Cellar, Waking Flame DLC. Similar to Tremorscale, this set adds massive damage if you’re using heavily focused meta stamina builds.
- Drake’s Rush = great for dungeons
- Powerful Assault = great if you can manage casting echoing vigor on your back bar every 10 seconds.
- Saxhleel Champion = great option for necro tanks running barrier
- Aegis of Galenwe = great buff to great while blocking
- Leeching Plate = incredible self-survivability set
Perfected Pearlescent Ward: found in Dreadsail Reef trial, High Isle Chapter. A passive buff is useful to all players in the trial.
FLEX OPTIONS BACK BAR
- Perfected Claw of Yolnahkriin: useful for off tank or secondary set to increase groups damage via minor courage.
- Torug’s Pact = beginner set that can reduce armor for you
- Battalion Defender = incredible survivability and group utility set
Gear 2: Off Trials Tank
The below gear setup is intended for 12-player trials when you are the secondary tank ESO Necromancer PvE Tank Build:
| Slot | Type | Set | Trait | Glyph |
| Head | medium | Tremorscale | Sturdy | Prismatic |
| Shoulders | light | Tremorscale | Sturdy | Prismatic |
| Chest | heavy | Perfected Claw of Yolnahkriin | Reinforced | Prismatic |
| Legs | heavy | Perfected Claw of Yolnahkriin | Reinforced | Prismatic |
| Gloves | heavy | Perfected Claw of Yolnahkriin | Sturdy | Prismatic |
| Boots | heavy | Perfected Claw of Yolnahkriin | Sturdy | Prismatic |
| Belt | heavy | Perfected Claw of Yolnahkriin | Sturdy | Prismatic |
| Weapon One | Sword | Perfected Puncturing Remedy | Decisive | Weakening |
| Secondary | Shield | Perfected Puncturing Remedy | Sturdy | Health |
| Weapon Two | Ice Staff | Crimson Oath’s Rive | Infused | Crusher |
| Necklace | Crimson Oath’s Rive | Infused | Magicka Recovery | |
| Ring 1 | Crimson Oath’s Rive | Infused | Magicka Recovery | |
| Ring 2 | Crimson Oath’s Rive | Infused | Reduced Block Cost |
- Tremorscale: Used to debuff bosses. Obtained in Volenfell base game dungeon.
- Perfected Claw of Yolnahkriin: useful for off-tank or secondary set to increase group damage via minor courage.
- Perfected Puncturing Remedy: Heals you and grants resistance. Obtained in Dragonstar Arena base game 4-player arena.
- Crimson Oath’s Rive: Provides powerful armor debuff. Obtained in The Dread Cellar Waking Flame DLC.
Gear 3: Dungeons and Arenas
The below gear setup is designed for four-player arenas and dungeons including hard modes:
| Slot | Type | Set | Trait | Glyph |
| Head | medium | Magma Incarnate | Sturdy | Prismatic |
| Shoulders | light | Spaulder of Ruin | Sturdy | Health |
| Chest | heavy | Drake’s Rush | Reinforced | Prismatic |
| Legs | heavy | Drake’s Rush | Sturdy | Prismatic |
| Gloves | heavy | Drake’s Rush | Sturdy | Health |
| Boots | heavy | Drake’s Rush | Sturdy | Health |
| Belt | heavy | Drake’s Rush | Sturdy | Health |
| Weapon One | Sword | Perfected Puncturing Remedy | Decisive | Weakening |
| Secondary | Shield | Perfected Puncturing Remedy | Sturdy | Health |
| Weapon Two | Ice Staff | Powerful Assault | Infused | Crusher |
| Necklace | Powerful Assault | Triune | Magicka Recovery | |
| Ring 1 | Powerful Assault | Triune | Magicka Recovery | |
| Ring 2 | Powerful Assault | Triune | Magicka Recovery |
- Magma Incarnate: Provides resource sustain to you. Obtained in The Dread Cellar Waking Flame DLC.
- Spaulder of Ruin: Gives group power weapon and spell damage buff. Apart of Mythic system.
- Drake’s Rush: Used for ultimate generation. Obtained in Black Drake Villa, Flames of Ambition DLC.
- Perfected Puncturing Remedy: Heals you and grants resistance. Obtained in Dragonstar Arena base game 4-player arena.
- Powerful Assault: Adds group weapon and spell damage buff. Found in Imperial City Sewers, base game DLC.
Gear 4: Beginner
This setup is designed for someone who just started ESO or is sub 300 champion points and doesn’t have access to monster sets.
| Slot | Type | Set | Trait | Glyph |
| Head | heavy | Grace of Gloom | Sturdy | Health |
| Shoulders | heavy | Grace of Gloom | Sturdy | Health |
| Chest | heavy | Ebon Armory | Reinforced | Health |
| Legs | heavy | Ebon Armory | Sturdy | Health |
| Gloves | heavy | Ebon Armory | Sturdy | Health |
| Boots | heavy | Ebon Armory | Sturdy | Health |
| Belt | heavy | Ebon Armory | Sturdy | Health |
| Weapon One | Sword | Endurance | Decisive | Weakening |
| Secondary | Shield | Endurance | Sturdy | Health |
| Weapon Two | Ice Staff | Endurance | Infused | Crusher |
| Necklace | Grace of Gloom | Healthy | Reduce Bracing Cost | |
| Ring 1 | Grace of Gloom | Healthy | Magicka Recovery | |
| Ring 2 | Grace of Gloom | Healthy | Magicka Recovery |
- Grace of Gloom: Gives user reduce AOE damage and healing. Found in Summerset overland, Summerset DLC.
- Ebon Armory: Provides max health to you and others. Found in base game dungeon, Crypt of Hearts I, Crypt of Hearts II.
- Endurance: Simple health buff set. Found in Imperial City Sewers, base game DLC.
Race
The best race choices for the Necromancer PvE Tank:
- Nord: Great resistance passives for players who want more defensive gameplay and high stamina resource pool.
- Imperial: The best overall stat pool for tanking and skill cost reduction in cost makes it.
- Argonian: It’s a powerful defensive tank race all around.
Attributes
The best choice is 64 health, which increases your survivability.
Mundus Stone
The Atronach is the best Mundus Stone for PvE Healer Builds because it increases Magicka recovery.
Champion Points – ESO Necromancer PvE Tank Build
| Craft | Warfare | Fitness |
| Steed’s Blessing | Duelist’s Rebuff | Bracing Anchor |
| Rationer | Ironclad | Shield Master |
| Liquid Efficiency | Unassailable | Rejuvenation |
| Treasure Hunter | Enduring Resolve | Fortified |
Warfare Constellation Champion Points

Below is a step-by-step method for slotting your champion points in the Warfare tree (blue). We have used the minimum possible to reach 4 slottable selections all maxed out. If you have more CP, consider taking more in the passives for optimal performance.
Below are recommended Warfare Champion Point selections for the ESO Necromancer PvE Tank Build:
- Tireless discipline 10
- Staving death – sub con – Quick recovery 10
- Staving death – sub con – ironclad (slottable)– 50
- Duelist rebuff (slottable) – 50
- Enduring resolve (slottable) – 50
- Unassailable (slottable) – 50
This would be the bare minimum setup, spending 220 CP (660 total required). The next step is to max out passives, that do not require a slottable but increase performance.
- Precision 20
- Piercing 20
- Tireless discipline 10
- Eldritch insight 20
- Blessed 20
- Quick recovery 10
- Flawless ritual 40
- War mage 30
- Battle mastery 40
- Mighty 30
- Elemental aegis 20
- Hardy 20
- Preparation 20
This would max out the Warfare tree with all active and passive champion points at 520 spent 1,560 total spent.
Fitness Constellation Champion Points

Below are recommended Fitness Champion Point selections for the ESO Necromancer PvE Tank Build:
- Fortified (slottable) 50
- Rejuvenation (slottable) 50
- Sprinter 10
- Winder chaser – sub con – hasty 8
- Tireless guardian 10
- Walking Fortress – sub con – Nimble Protectors 3
- Walking fortress – sub con – Bracing anchor (slottable) 50
- Hero’s Vigor 10
- Shield master 10
- Bastion (slottable) 50
This would be the bare minimum setup, spending 251 CP (753 total required). The next step is to max out passives, that do not require a slottable but increase performance.
- Hero’s Vigor 10
- Tumbling 30
- Sprinter 10
- Defiance 20
- Hasty 8
- Tireless guardian 10
- Fortification 30
- Nimble 3
- Mystic tenacity 50
- Tempered soul 50
- Piercing gaze 30
- Savage defense 30
- Bashing brutality 20
This would max out the fitness tree with all active passive champion points at 552 cp spent and 1,656 total spent.
Craft Constellation Champion Points

Below are recommended Craft Champion Point selections for the ESO Necromancer PvE Tank Build:
- Steed’s blessing (slottable) – 50
- Breakfall 10
- Wanderer 15
- Steadfast 10
- Treasure hunter 50 (slottable)
- rationer (slottable) 30
- liquid efficiency (slottable) 75
This would be the bare minimum setup, spending 240CP (720 total required). The next step is to max out passives, that do not require a slottable but increase performance.
- Steadfast enchantment 40cp
- Breakfall 40 cp
- Wanderer 60
- Fortunes favor 50
- Friends in low places 25
- Out of sight 30
- Fleet of phantom 40
- Soul’s Reservoir 33
- Gilded fingers 50
- Fortunes favor 40
- Inspiration boost 45
- Infamous 30
This would max out the crafting tree with all active passive champion points at 723 cp spent 2,169 total spent.
Consumables
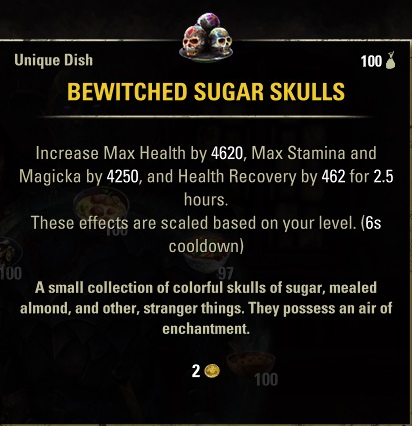
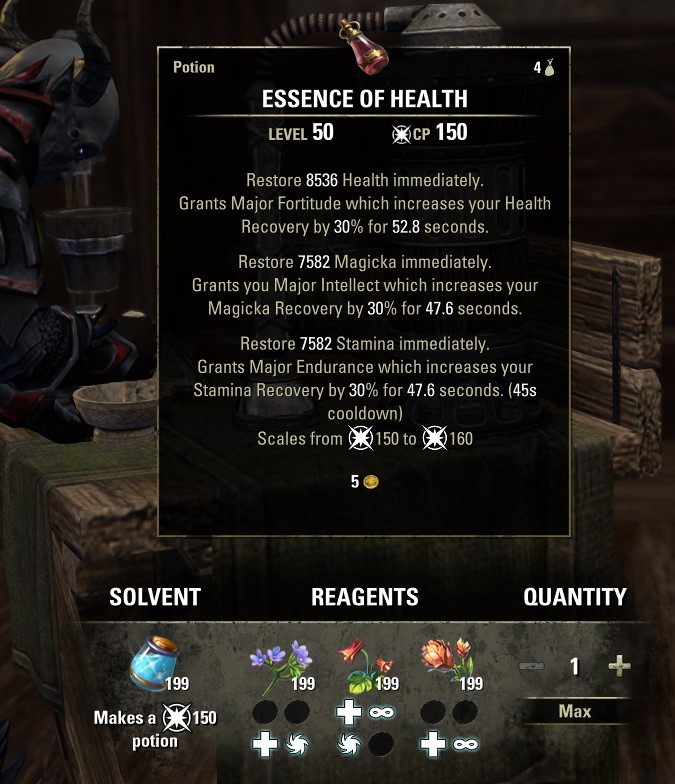
Bewitched Sugar Skulls food and Essence of Health (tri-stat) potions are the best consumables for a PvE Tank in the Elder Scrolls Online. Bewitched gives you all three useful resources and health recovery tools for a tank. Tri-stat potions give you health and a flood of both magicka and stamina for blocking and casting spells. Longfin Pasty with Melon Sauce is an alternative to Bewitched Sugar Skulls or rewards in the crown store with max stats.
- Bewitched Sugar Skulls: Increase Max Health by 4620, Max Stamina and Max Magicka by 4250, and Health Recovery by 462 for 2 hours. Ingredients: Scrib Jelly, Flour, Columbine, Bervez Juice, and Honey.
- Longfin Pasty with Melon Sauch: increase max health, magicka, and stamina. Crafted with provisions, including fish fruit, melon vegetable, greens, and Frost Mirriam.
- Tri-Pots – grants immediate health, stamina, and magicka, along with tri-recovery. Crafted with alchemy from ingredients such as Bugloss, Columbine, and Mountain Flower,
Build Summary – ESO Necromancer PvE Tank Build
Class: Necromancer
Race: Nord
Attributes: 64 Health
Mundus Stone: Atronach
Weapon One: Sword and Shield
Weapon Two: Frost Staff
Armor Set 1: Perfected Pearlescent Ward
Armor Set 2: Crimson Oath’s Rive
Monster Helm: Nazaray
Armor Weight: 5 Heavy, 1 Medium, 1 Light
Skill Bar 1
- Silver Leash
- Pierce Armor
- Necrotic Potency
- Hungry Scythe
- Mortal Coil
- Renewing Animation (Ultimate)
Skill Bar 2
- Balance
- Destructive Clench
- Spirit Guardian
- Elemental Blockade
- Echoing Vigor
- Glacial Colossus (Ultimate)
Scribing Grimoires and Scripts
- Ulfsild’s Contingency
- (Mages Guild): Damage Shield (focus script)
- Gladiator’s Tenacity (signature script)
- Protection (affixed script).
- Shield Throw (One-Hand and Shield)
- Pull or Taunt (focus script)
- Druid’s Resurgence (signature script)
- Major Evasion (affixed script).
Looking For More ESO Builds?
Thank you for reading the ESO Templar PvE Tank Build Guide. We provide the latest news and create guides for ESO. Also, watch me play games on Twitch or visit my YouTube channel!