 Facebook
 Reddit
 Email
Email
The guide gives gear, skills, champion points, and consumables for an ESO One Bar PvP Stamina Necromancer Build!
This build has been updated for the Updated 42, the Gold Road Chapter of the Elder Scrolls Online (ESO).
Why Should You Play ESO One Bar PvP Stamina Necromancer Build?
Stamina Necromancers also possess a unique burst potential along with high damage over time pressure. The downside is, they are very slow on the battlefield unless completely build for it. Stamina Necro with Blastbones builds for range and high damage.
ESO Stamina Necromancer PvP Build Features and Mechanics
Below are some of the features found using the ESO Stamina Necromancer PvP Build in the Elder Scrolls Online:
- Class – Necromancer
- Weapon One – Bow
- Armor Types: 3 Heavy, 3 Medium, 1 Light
- Mythic: Oakensoul
- Race: Imperial
- Attributes: 32 Stamina, 32 Health
- Infection: None
- Mundus Stone: Warrior
Related:
Skills
Skill Set 1 Front Bar
Blighted Blastbones (Morph of Blastbones | Skill Line : Grave Lord) – Insane single target and AoE damage ability that needs to be constantly recast.
Acid Spray (Morph of Arrow Spray | Skill Line : Bow) – Big aoe damage that gives a DoT and is getting buffed in Update 38 for even more damage. It’s a great spammable as well.
Magnum Shot (Morph of Scatter Shot | Skill Line : Bow) – This is your stunning tool to use right before blast bones lands.
Spirit Guardian (Morph of Spirit Mender | Skill Line : Living Death) – Keep it up at all time good healing over time and damage reduction.
Resistant Flesh (Morph of Render Flesh | Skill Line : Living Death) – Burst heal.
Ravenous Goliath (Morph of Bone Goliath Transformation | Skill Line : Bone Tyrant) – Great defence ult when you find yourself in trouble or overwhelmed.
Passives Skills
Consider taking all of the passives in the below skill trees to increase your builds performance without slotting any skills:
- Grave Lord (class skill line)
- Bone Tyrant (class skill line)
- Living Death (class skill line)
- Dual Wield (weapon skill line)
- Bow (weapon skill line)
- Light Armor
- Medium Armor
- Heavy Armor
- Undaunted
- Alchemy Medicinal
- Race
- Assault Alliance
- Alliance Support
- Vampire (optional stage 3)
Gear 1: With Mythic
This is for the highest damage loadout possible, flex options below if you don’t have this gear
| Slot | Type | Set | Trait | Glyph |
| Head | heavy | Daedric Trickery | Well-fitted | Prismatic |
| Shoulders | light | Magma Incarnate | Well-fitted | Stamina |
| Chest | heavy | Daedric Trickery | Reinforced | Prismatic |
| Legs | heavy | Daedric Trickery | Well-fitted | Prismatic |
| Gloves | medium | Tarnished Nightmare | Well-fitted | Stamina |
| Boots | medium | Tarnished Nightmare | Well-fitted | Stamina |
| Belt | medium | Tarnished Nightmare | Well-fitted | Stamina |
| Weapon One | Bow | Daedric Trickery | Sharpened | Weapon Damage |
| Necklace | Tarnished Nightmare | Swift | Weapon Damage | |
| Ring 1 | Tarnished Nightmare | Swift | Weapon Damage | |
| Ring 2 | Oakensoul Ring | Infused | Stamina Recovery |
Monster Helms and Mythic
Magma Incarnate: obtained from Vet Dread Cellar; requires Waking Flame DLC
- Why? Best all around 2pc monster helm for solo or small group.
FLEX OPTIONS for Monster Helm:
- Baron Thirsk = 1pc magicka and stamina recovery
- Chokethorn = 1pc magicka recovery
- Shadowrend = 1pc magicka recovery
Oakensoul: obtained through ESO Mythics/antiquities system. You need 5 items to be able to create the Mythic item. CLICK HERE FOR LEADS:
- Igneous Inlays Volcanic Vents in the High Isle and Amenos zone (High Isle)
- Larimar Gems Titanclaw boss at Mudcrab Beach (south-west) (Stormhaven)
- Petrified Oak Loop Murkmire Strongboxes (Murkmire zone)
- Sacred Resin Any Mob (Malabal Tor)
- Stone Shank Frame Blacksmithing nodes in Glenumbra (High Isle)
FLEX OPTIONS for Mythic
- Pale Order = best heals per second solo in the game
- Death Dealer’s Fete = high max stats and requires no effect but in combat
- Markyn Ring of Majesty = set and forget boost to spell damage and armor
Gear Sets
Tarnished Nightmare = obtainable from Bedlam Veil dungeon, Requires DLC Scions of Ithelia
- Why? High AoE damage and crit
FLEX OPTIONS
- Innate Axiom = buffs nearly everything for DK
- Burning Spellweave = great offensive set
- Rallying Cry = great group utility setup
Daedric Trickery: craftable, Vanderfell zone
- Why? generates incredible buffs that stack on top of each other, including Major Heroism which is the best for DK.
FLEX OPTIONS DEFENSIVE
- Mara’s Balm = This set still provides the best overall back bar survivability set.
- Wretched Vitality = great recovery/sustain
- Mark of the Pariah = good for armor keep on body all times
- Buffer of the Swift = awesome damage reduction
Gear 2: Without Mythic
Lack the Mythic bonuses, but more Survivable
| Slot | Type | Set | Trait | Glyph |
| Head | heavy | Roksa the Warped | Well-fitted | Prismatic |
| Shoulders | light | Roksa the Warped | Well-fitted | Stamina |
| Chest | heavy | Mark of Pariah | Reinforced | Prismatic |
| Legs | heavy | Mark of Pariah | Well-fitted | Prismatic |
| Gloves | medium | Daedric Trickery | Sturdy | Stamina |
| Boots | medium | Daedric Trickery | Sturdy | Stamina |
| Belt | medium | Daedric Trickery | Sturdy | Stamina |
| Weapon One | Bow | Daedric Trickery | Sharpened | Escapist’s Poison IX |
| Necklace | Mark of Pariah | Infused | Stamina Recovery | |
| Ring 1 | Mark of Pariah | Swift | Weapon Damage | |
| Ring 2 | Mark of Pariah | Swift | Weapon Damage |
Monster Helms and Mythics
Roksa the Warped: obtained from Vet Bal Sunnar; Scribes of Fate DLC
- Why? carries your survivability and resource sustain in a two piece set, without Engine Guardian droid.
FLEX OPTIONS
- Engine Guardian = incredible selfish base game (just you) sustain set
- Scourge Harvester = great self healing
- Chokethorn = great self healing
- Balorgh = burst damage
- Zoal = counter gank
- Magma Incarnate = best all around defensive and offensive 2pc
FLEX OPTIONS
- Pale Order = best heals per second solo in the game
- Death Dealer’s Fete = high max stats and requires no effect but in combat
- Markyn Ring of Majesty = set and forget boost to spell damage and armor
Gear Sets
Order’s Wrath = 3 trait craftable set in High Isle Zone, High Isle DLC or bought from traders.
- Why? high damage, healing and big crits
FLEX OPTIONS
- Innate Axiom = buffs nearly everything for DK
- Burning Spellweave = great offensive set
- Rallying Cry = great group utility setup
Daedric Trickery: craftable, Vanderfell zone
- Why? generates incredible buffs that stack on top of each other, including Major Heroism which is the best for DK.
FLEX OPTIONS DEFENSIVE
- Mara’s Balm = This set still provides the best overall back bar survivability set.
- Wretched Vitality = great recovery/sustain
- Mark of the Pariah = good for armor keep on body all times
- Buffer of the Swift = awesome damage reduction
Gear 3: No Proc PvP
This setup is made for Cyrodiil Campaigns or IC that doesn’t allow proc sets.
| Slot | Type | Set | Trait | Glyph |
| Head | heavy | Order’s Wrath | Well-fitted | Prismatic |
| Shoulders | light | Magma Incarnate | Well-fitted | Stamina |
| Chest | heavy | Order’s Wrath | Reinforced | Prismatic |
| Legs | heavy | Order’s Wrath | Well-fitted | Prismatic |
| Gloves | medium | Order’s Wrath | Well-fitted | Stamina |
| Boots | medium | Order’s Wrath | Well-fitted | Stamina |
| Belt | medium | Willow’s Path | Well-fitted | Stamina |
| Weapon One | Bow | Willow’s Path | Sharpened | Weapon Damage |
| Necklace | Willow’s Path | Swift | Weapon Damage | |
| Ring 1 | Oakensoul Ring | Infused | Stamina Recovery | |
| Ring 2 | Willow’s Path | Swift | Weapon Damage |
Monster Helms and Mythics
Magma Incarnate: helmet obtained in Veteran dungeon The Dread Cellar, Waking Flame DLC, shoulders bought from Urgarlag Chief-bane the Pledge Master
- Why? 1 piece gives stamina and magical recovery helps with sustain.
FLEX OPTIONS:
- Baron Thirsk = 1pc magicka and stamina recovery
- Chokethorn = 1pc magicka recovery
- Shadowrend = 1pc magicka recovery
Oakensoul: obtained through ESO Mythics/antiquities system. You need 5 objects(leads) to be able to create the Mythic item. Location of the 5 leads (click for details)
- Why? The best one bar item for a DPS
FLEX OPTIONS
- Torc of Tonal Constancy = Sustain
- Markyn Ring of Majesty: = good damage per one piece and it helps defensives as well.
- Pale Order = solo play survivability
- Wild Hunt = insane speed in an open world
Gear Sets
Willow’s Path: 6 trait craftable set (Bangkorai, Reaper’s March, The Rift Zones) or bought from traders.
- Why? Provides great recovery/sustain and insane with Orzorga’s Smoked Bear Haunch food
FLEX OPTIONS
- Mark of the Pariah = good for armor keep on the body all times
- Buffer of the Swift = awesome damage reduction
- Amber Plasm= recovery/sustain
Order’s Wrath = 3 trait craftable set in High Isle Zone, High Isle DLC or bought from traders.
- Why? none proc set that amps both our damage and healing if running high critical.
FLEX OPTIONS
- Deadly Strike = simple set and forget damage
- New Moon Acolyte = decent craftable option
- Spriggans = great pen for no proc/no cp
Skills: Melee Bomber
Blighted Blastbones (Morph of Blastbones | Skill Line : Grave Lord) – Main nuke before you launch in. If you can sustain, go with magicka based blast bones.
Razor Caltrops (Morph of Caltrops | Skill Line : Assault) – AoE that slows, damages and lowers enemy resistance. And can proc Dark Convergence
Ruinous Scythe (Morph of Death Scythe | Skill Line : Bone Tyrant) – A very useful AoE damage and healing spammable that costs stamina. Make sure to block cast it if you need a massive burst heal.
Elusive Mist (Morph of Mist Form | Skill Line : Vampire) – Mobility tool, you can use Race Against time instead of Vampire.
Resistant Flesh (Morph of Render Flesh | Skill Line : Living Death) – powerful burst heal for yourself and the group.
Pestilent Colossus (Morph of Frozen Colossus | Skill Line : Grave Lord) – AoE Nuke that pulls in enemies players as well.
Gear 4: Melee Bomber
This is for the highest damage loadout possible
| Slot | Type | Set | Trait | Glyph |
| Head | heavy | Magma Incarnate | Well-fitted | Prismatic |
| Shoulders | light | Dark Convergence | Well-fitted | Stamina |
| Chest | medium | Plaguebreak | Well-fitted | Prismatic |
| Legs | medium | Plaguebreak | Well-fitted | Prismatic |
| Gloves | medium | Plaguebreak | Well-fitted | Stamina |
| Boots | medium | Plaguebreak | Well-fitted | Stamina |
| Belt | medium | Plaguebreak | Well-fitted | Stamina |
| Weapon One | Two Handed Maul | Dark Convergence | Sharpened | Weapon Damage |
| Necklace | Dark Convergence | Swift | Spell Damage | |
| Ring 1 | Oakensoul Ring | Infused | Prismatic Recovery | |
| Ring 2 | Dark Convergence | Swift | Spell Damage |
Gear Sets
Magma Incarnate: helmet obtained in Veteran dungeon The Dread Cellar, Waking Flame DLC, shoulders bought from Urgarlag Chief-bane the Pledge Master
- Why? 1 piece gives stamina and magical recovery helps with sustain.
Plaguebreak: from Rewards of the Worthy and traders.
- Why? Incredible DoT pressure and damage.
Dark Convergence: obtained via rewards of the worthy from earning alliance points in Cyro or Battlegrounds.
- WHY? as of this writing, maybe the most overturned five piece gear set in ESO history. This can single handedly wipe massive groups especially with a necro. Flex Mechanical Acuity if it gets nerfed or War Maiden in no proc.
Oakensoul: obtained through ESO Mythics/antiquities system. You need 5 objects(leads) to be able to create the Mythic item. Location of the 5 leads (click for details)
- Why? The best one bar item for a DPS
Race
The best race choices for the One Bar PvP Stamina Necromancer:
- Imperial: Imperial is a sold PvP choice because it gives a bonus to stamina and health pools, and the skills cost reduction.
- Khajiit: Best for burst damage.
Attributes
Consider splitting your attributes into 32 health and 32 stamina. You want to reach at least 32,000 health inside your PvP context. Adjust if not reaching those numbers.
Mundus Stone
The Warrior is the best Mundus Stone for the One Bar PvP Stamina Necromancer because of the increase in weapon damage.
Champion Points – ESO One Bar PvP Stamina Necromancer Build
| Craft | Warfare | Fitness |
| Steed’s Blessing | Fighting Finesse | Fortified |
| War Mount | Focused Mending | Pain’s Refuge |
| Gifted Rider | Master-at-Arms | Celerity |
| Liquid Efficiency | Ironclad | Sustained by Suffering |
Warfare

Below is a step-by-step method for slotting your champion points in the Warfare tree (blue) for the ESO One Bar PvP Stamina Necromancer Build. We have used the minimum possible to reach 4 slottable selections all maxed out. If you have more CP, consider taking more in the passives for optimal performance.
- Precision 10
- Fighting Finesse (slottable) 50
- Extended might – sub constellation – piercing 10
- Master-at Arms (slottable) 50
- Mastered Curation – sub constellation – Blessed 10
- Focused Mending (slottable) 50
- Eldritch Insight – 10
- Staving Death sub-constellation – Quick Recovery 10
- Staving Death sub-constellation – Ironclad (slottable) 50
This would be the bare minimum setup, spending 250 CP (750 total required). The next step is to max out passives, that do not require a slottable but increase performance.
- Precision 10
- Tireless Discipline 20
- Eldritch Insight 10
- Blessed 10
- Quick Recovery 10
- Piercing 20
- Battle Mastery 40
- Mighty 30
- Flawless Ritual 40
- War Mage 30
- Hardy 20
- Elemental Aegis 20
- Preparation 20
This would max out the Warfare tree with all active and passive champion points at 470 spent 1,410 total spent.
Fitness

Below are recommended Fitness Tree Champion Point selections for the ESO One Bar PvP Stamina Necromancer Build:
- Fortified (slottable) 50
- Sprinter 10
- Wind Chase sub-constellation – Hasty 8
- Wind Chaser sub-constellation – Celerity 50 (slottable)
- Hero’s Vigor 10
- Survivor’s Spite sub-constellation – Mystic Tenacity 10
- Survivor’s Spite sub-constellation – Pain’s Refuge 50 (slottable)
- Survivor’s Spite sub-constellation – Sustain by Suffering (slottable) 50
This would be the bare minimum setup, spending 238 CP (714 total required). The next step is to max out passives, that do not require a slottable but increase performance.
- Sprinter 10
- Hero’s Vigor 10
- Tumbling 20
- Defiance 20
- Hasty 8
- Tireless Guardian 20
- Fortification 30
- Nimble Protector 6
- Tempered Soul 50
- Rousing Speed 50
- Savage Defense 30
- Bashing Brutality 20
This would max out the fitness tree with all active passive champion points at 512 cp spent 1,536 total spent
Craft

Below are recommended Craft Tree selections for the ESO One Bar PvP Stamina Necromancer Build:
- Steed’s Blessing (slottable) – 50
- Breakfall 10
- Wanderer 15
- Steadfast 10
- Rationer 10
- Liquid Efficiency (slottable) 75
- Treasure hunter 50
- Master gatherer 15
- Gifted rider (slottable) 100
- War mount (slottable) 120
This would be the bare minimum setup, spending 455CP (1365 total required). The next step is to max out passives, that do not require a slottable but increase performance.
- Steadfast enchantment 40cp
- Breakfall 40 cp
- Wanderer 60
- Fortunes favor 10
- Friends in low places 25
- Out of sight 30
- Fleet of Phatom 40
- Soul’s Reservoir 33
- Gilded fingers 50
- Fortunes favor 40
- Inspiration boost 45
- Infamous 30
This would max out the crafting tree with all active passive champion points at 898 cp spent 2,694 total spent
Consumables – ESO One Bar PvP Stamina Necromancer Build
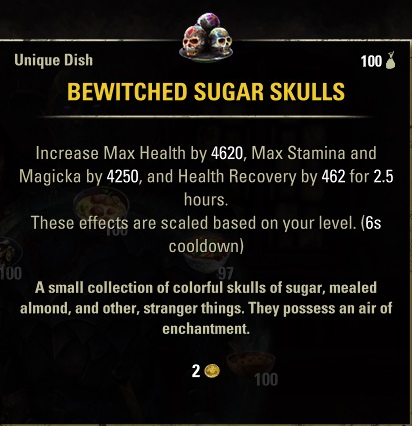

The best consumables for the ESO One Bar PvP Stamina Necromancer build are Bewitch Sugar Skulls food and Essence of Health tri-stat potions. Bewitched Sugar Skulls give a massive boost to overall stats but sacrifices recovery. If you struggle with recovery, use Orzorga’s Smoked Bear Haunch or cheaper Jewels of Misrule. The essence of health or Tri-static potions is the best to passively give you a flood of resources and tri-recovery with alchemy medicinal use. Immovability potions are also helpful. Below is our recommended food and potion choices:
- Bewitched Sugar Skulls: Increase Max Health by 4620, Max Stamina and Max Magicka by 4250, and Health Recovery by 462 for 2 hours. Ingredients: Scrib Jelly (2), Flour (5), Columbine (2), Bervez Juice (2), Honey (5).
- Orzorga’s Smoked Bear Haunch (recovery): Increase Max Health by 4312, Health Recovery by 406 and Stamina and Magicka Recovery by 369 (effects are scaled based on your level) Ingredients: Red Meat (1), Tomato (1), White Cap (1), Frost Mirriam (1), Perfect Roe (1).
- Jewels of Misrule (cheap): Increase Stamina and Magicka Recovery by 357 and Max Health by 3927 for 2 hours. (effects are scaled based on your level) Ingredients: Rose (1), Mint (1), Lotus(1), Columbine (1), Bervez Juice (1)
- Essence of Health (tri-stat): Restore 7329 Health, 6618 Magicka, and 6618 Stamina immediately. Grants Major Fortitude, Major Intellect, and Major Endurance, which increase your Health Recovery, Magicka Recovery, and Stamina Recovery by 20% for 31.7 seconds. (effects are scaled based on your level) Ingredients: Bugloss, Columbine, Mountain Flower.
- Essecene of Immovability: Restores health and stamina and is immune to knockback effects. Ingredients Namria’s Rot, Columbine, and Mountain Flower.
Build Summary – ESO One Bar PvP Stamina Necromancer Build
Class: Necromancer
Race: Imperial
Attributes: 32 Stamina, 32 Health
Mundus Stone: Warrior
Weapon One: Bow
Armor Set 1: Tarnished Nightmare
Armor Set 2: Daedric Trickery
Monster Helm: Magma Incarnate
Mythic: Oakensoul Ring
Armor Weight: 1 Light, 3 Medium, 3 Heavy
Infection: None
Skill Bar 1
- Blighted Blastbones
- Acid Spray
- Spirit Guardian
- Magnum Shot
- Resistant Flesh
- Ravenous Goliath(Ultimate)
Looking For More ESO Builds?
Thank you for reading the ESO One Bar PvP Stamina Necromancer Build Guide. We provide the latest news and create guides for ESO. Also, watch me play games on Twitch or visit my YouTube channel!