This guide explains how to use the best Elder Scrolls Online (ESO) Solo Necromancer Stamina PvE Build, skills, gear, champion points, and more!

This build has been updated for the Updated 42, the Gold Road Chapter of the Elder Scrolls Online (ESO).
Why Should You Play ESO Solo Necromancer Stamina Build for PvE?
In ESO, the Stamina Necromancer is perfect for everyone looking for a high survivability class with solid aoe damage and a complete set of tools for solo PvE gameplay. The Stamcro can reliably run Runecarver as well, which is a fun set after the set damage was reclassified in Update 41. Now, Runecarver properly deals direct damage, increasing your burning damage. Stamcro is stronger than the Magcro overall with the introduction of Scribing, and this is the build to run if you’re adamant about playing a Necro.
Necromancer Class Pros
- Unkillable: The Necromancer has always been very difficult to kill, and that’s still true.
- Incredible Sustain: With the proper buffs, you shouldn’t have any trouble sustaining resources.
- Great Skill Animations: While the damage is lacking, the Cro has some of the best animations in the game, and it feels cool to play.
Necromancer Class Cons
- Good Scribing Utilization: With the introduction of the Warrior’s Opportunity script, Scribed skills can be a required inclusion for this build.
- No Major damage buffs: The Necromancer can’t naturally source Major Brutality, Savagery, Prophecy, or Sorcery in their kit as other classes can. You need to run Inner Light until you unlock them through Scribing.
- Weaker Ultimate Options: The Necromancer’s ultimate abilities are great for utility but lose their usefulness in solo content.
ESO Solo Necromancer Stamina Build for PvE Playstyle
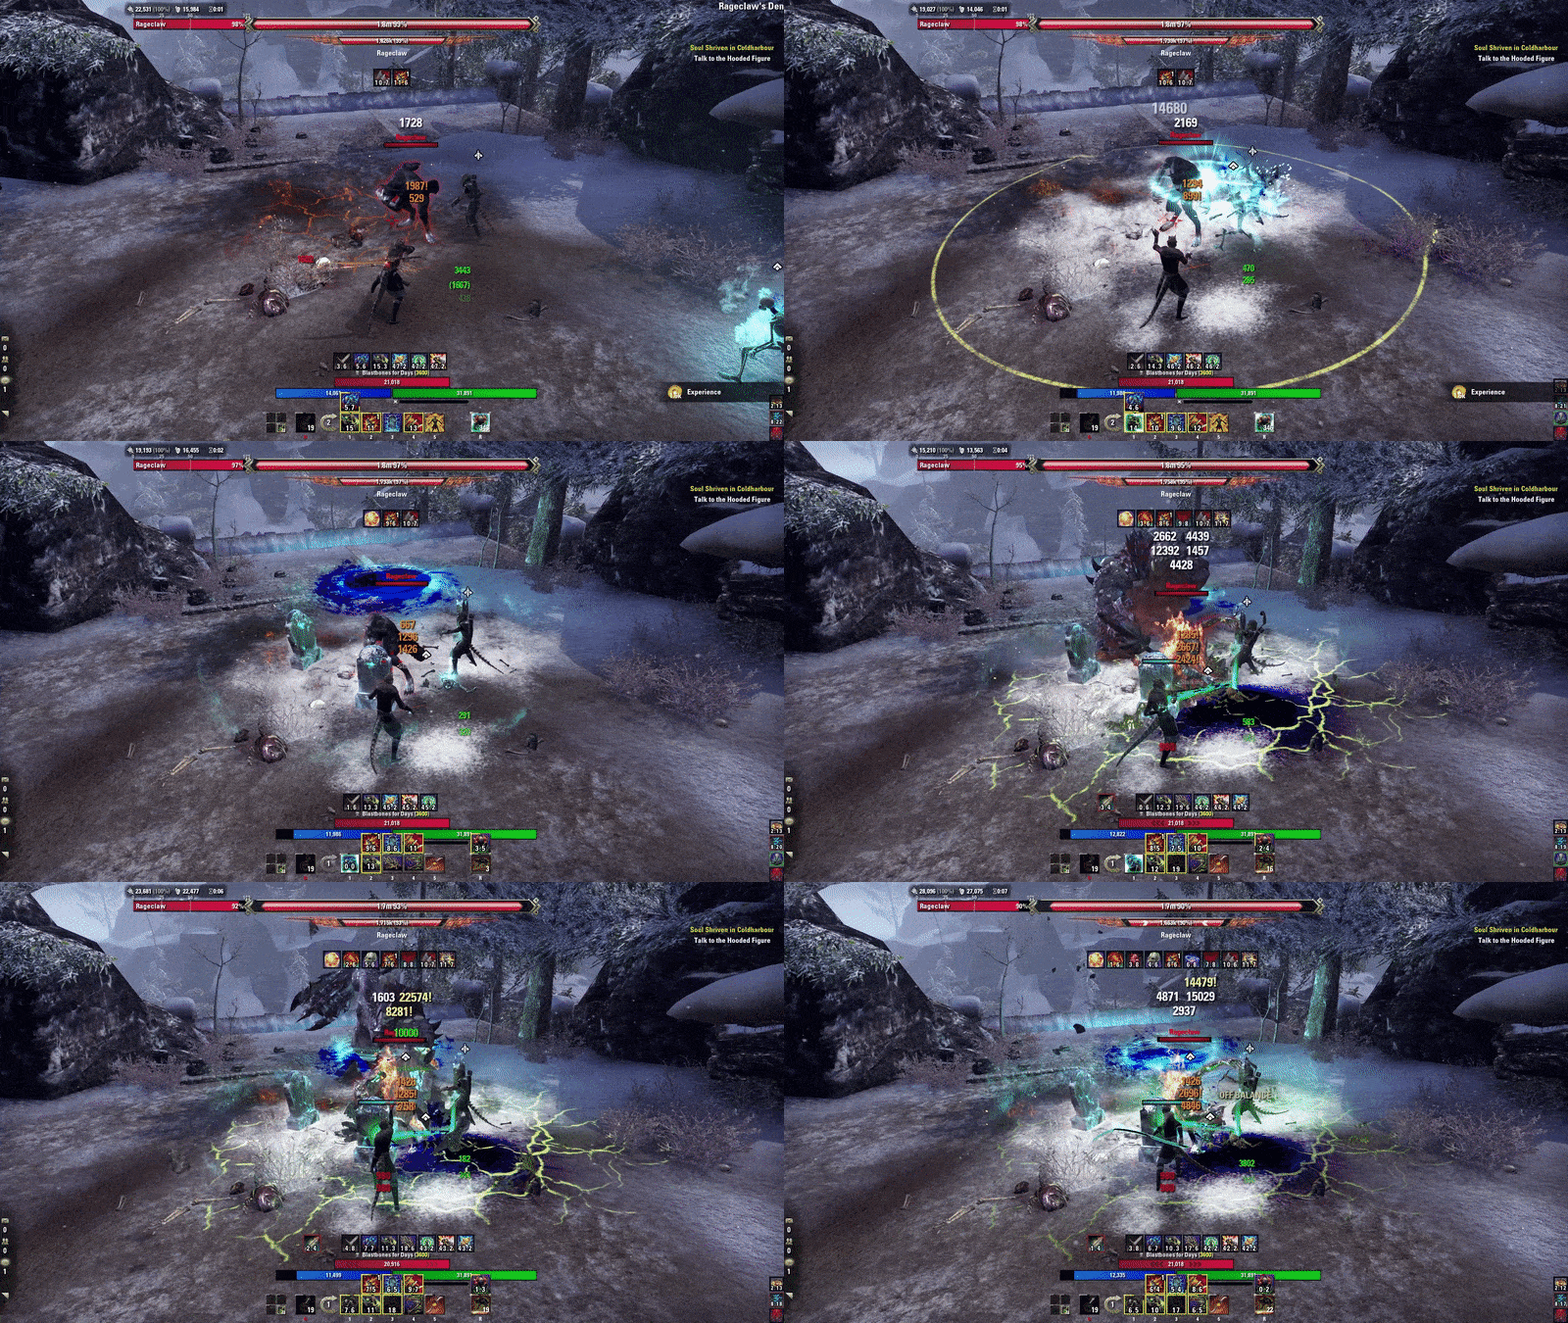
Stamina Necromancers got a solid damage boost once you have the Warrior’s Opportunity signature script on Traveling Knife. Once you get to that setup, your martial damage goes through the roof, and you have great aoe damage. The key to high damage on the necromancer is to cast your Blastbones every third skill, and get your Damage Over Time (DoT) abilities down as fast as possible to start proccing Runecarver. Once your Blastbones explodes, you can cast Detonating Siphon and begin using your spammable after your DoTs are on the ground.
Once you unlock the scribing skills, your main spammable is going to be Traveling Knife. You’ll cast Ruinous Scythe once to proc off balance on every enemy, then spam Traveling knife, remembering to cast Blastbones every third skill. The necro rotation does take some practice to get a feel for, but learning the rhythm through practicing on target dummies and in content will make it easy in no time.
Survival
Keeping Spirit Mender up is crucial for your survivability. The base version of this build doesn’t have Major Resolve, so you want the healing and extra damage mitigation for sure. Your scythe also heals you, which you can work into your rotation any time you start needing to heal. You can of course always use Ring of the Pale order for much more healing-intensive fights, but you shouldn’t need it for most content.
If you run out of resources, a heavy attack will restore stamina on either bar in this build.
ESO Solo Necromancer Stamina PvE Build Features and Mechanics
Below are some of the features found using the PvE Solo Necromancer Stamina in the Elder Scrolls Online:
- Class – Necromancer
- Weapon One – Daggers
- Weapon Two – Two-Handed
- Armor Types – 3 Medium, 4 Light
- Mythic – Velothi Ur-Mage’s Amulet
- Race – Dark Elf
- Attributes – 64 Stamina
- Mundus Stone – Thief
- Best Grimoires – Ulfsild’s Contingency, Traveling Knife
Related:
Skills
Front Bar – Daggers
Front Bar Weapon choice options:
- Destruction Staff
- Dual Wield
- Two Handed
- Bow
Blighted Blastbones (Morph of Blastbones | Skill Line : Grave Lord) – Summon a zombie skeleton that explodes on impact. You cast this ability every third ability.
Venom Skull (Morph of Flame Skull | Skill Line : Grave Lord) – A stamina ability where the skull bomb now does Poison damage. Moreover, every third cast increases damage and any Necro ability will count towards that third cast.
Ruinous Scythe (Morph of Death Scythe | Skill Line : Bone Tyrant) – AoE spammable
Detonating Siphon (Morph of Shocking Siphon | Skill Line : Grave Lord) – Uses a corpse for crazy AoE DoT.
Inner Light (Morph of Magelight | Skill Line : Mages Guild) – Reveals stealthed and invisible enemies around you for 5 seconds. Grants Major Savagery and Prophecy while slotted and increases maximum magicka by 5%.
Temporal Guard (Morph of Undo | Skill Line : Psijic Order) – Reset your Health, Magicka, Stamina, and position to what they were 4 seconds ago. Gain Minor Protection while slotted.
Back Bar – Two Handed
Back Bar Weapon choice options:
- Two-handed
- Dual Wield
- Bow
Stampede (Morph of Critical Charge | Skill Line : Two Handed) – Gap closer with hard hitting dot that is amplified by back bar weapon.
Carve (Morph of Cleave | Skill Line : Two Handed) – AoE hard hitting DoT which gives a decent shield making a great defensive and offensive option.
Avid Boneyard (Morph of Boneyard | Skill Line : Grave Lord) – AoE frost damage applies Major Breech to enemies. Consumes a corpse to deal 30% more damage. Can activate own syngergy.
Degeneration (Morph of Entropy | Skill Line : Mages Guild) – Single target DoT that gives you Major Brutality and Sorcery. Can Replace with Beckoning Armor if you need more defense, but you’ll want to run weapon power potions if you do.
Spirit Mender (Skill Line : Living Death) – Summoned spirit heals you or the lowest Health ally around you every 2 seconds, restoring 695 Health.
Pestilent Colossus (Morph of Frozen Colossus | Skill Line : Grave Lord) – Colossus summon deals Disease damage in three smashes, and stuns enemies for 4 seconds in final blow. Also applies Major Vulnerability to all enemies hit for 12 seconds.
Scribing Skills & Grimoires
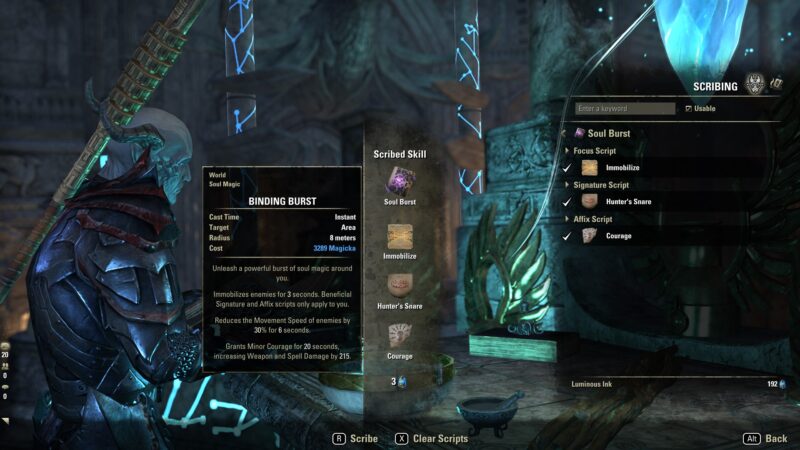
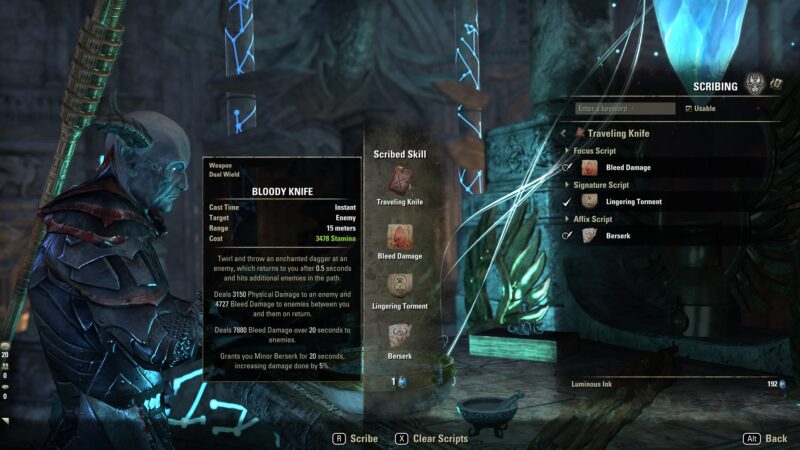
Ulfsild’s Contingency and Traveling Knife are the best Grimoires (skills) for a Stamina Necromancer PvE build. When you unlock scribing, you really want to begin incorporating these skills into the Necro’s build. The Stamina Necromancer has some of the best scribing utilization in the game, and it actually changes the build quite a lot. The first thing you’ll do is swap out Venom Skull for Traveling Knife. That then lets you drop Inner Light for Ulfsild’s Contingency.
- Ulfsild’s Contingency (Mage Guild) – Flame Damage (focus script), Lingering Torment (signature script), Vulnerability (Affix Script)
- Traveling Knife – Bleed (focus script), Warrior’s Opportunity (signature script), Major Savagery/Prophecy (Affix Script)
The Scribing System utilizes one of 11 new skills from the Gold Road Chapter called Grimoires. With Grimoires, you can customize spells via Scripts.
Passives Skills
Below are the passive skills lines that add power without requiring a skill slot while playing the ESO Solo Necromancer Stamina Build for PvE. Consider taking all the skill passives in the skill tree listed below:
- Bone Tyrant (class skill line)
- Grave Lord (class skill line)
- Living Death (class skill line)
- Destruction Staff (weapon skill line)
- Two-Handed (weapon skill line)
- Light Armor
- Medium Armor
- Undaunted
- Fighter’s Guild
- Mage’s Guild
- Racial
- Alliance War Support
- Alliance War Assault
- Crafting, Alchemy Medicinal Use
Gear – Best in Slot
The gear chart below represents the best gear for ESO Solo Necromancer Stamina Build for PvE:
| Slot | Type | Set | Trait | Glyph |
| Head | Medium | Perfected Sul-Xan’s Torment | Divines | Stamina |
| Shoulders | Light | Valkyn Skoria | Divines | Stamina |
| Chest | Medium | Perfected Sul-Xan’s Torment | Divines | Stamina |
| Legs | Medium | Perfected Sul-Xan’s Torment | Divines | Stamina |
| Gloves | Light | Runecarver’s Blaze | Divines | Stamina |
| Boots | Light | Runecarver’s Blaze | Divines | Stamina |
| Belt | Light | Runecarver’s Blaze | Divines | Stamina |
| Front Bar | Dagger | Perfected Sul-Xan’s Torment | Charged | Poison |
| Front Bar | Dagger | Perfected Sul-Xan’s Torment | Charged | Absorb Stamina |
| Back Bar | 2H Greatsword | Perfected Merciless Charge | Infused | Weapon Damage |
| Necklace | Mythic | Velothi Ur-Mage’s Amulet | Bloodthirsty | Weapon/Spell Damage |
| Ring 1 | Runecarver’s Blaze | Bloodthirsty | Weapon/Spell Damage | |
| Ring 2 | Runecarver’s Blaze | Bloodthirsty | Weapon/Spell Damage |
Monster Helms and Mythic
Valkyn Skoria: obtained in City of Ash II veteran. Gives a powerful one-piece bonus for penetration. Alternative: Slimecraw.
Velothi Ur-Mage’s Amulet: Mythic obtained by collecting five pieces. This gives great healing for doing damage and allows you to focus on pure damage.
FLEX OPTIONS (if you switch to monster setup, drop the ring and replace it with Vicious or flex piece)
- Stormfist – always works, easy to obtain and AoE DPS set.
- Balorgh = is incredible for boss burns in Veteran Maelstrom Arena saving up ultimate for 500 burns.
- Kra’gh – one piece is great for a pen, two-piece does good single-target damage
- Iceheart = is great for survivability.
- Perfected Merciless Charge = must change out Unstable Blockade for Stampede, good damage but requires melee skills.
- Perfected Thunderous Volley = good alternative to play at range with back bar. Swap out Unstable Blockade for Endless Hail bow skill.
- Agility = Base game set that gives you extra damage.
- Velothi Ur-Mage’s Amulet: new mythic that is incredible damage if you have good survivability and don’t require Pale Order.
- Mora’s Whisper = set and forget high critical mythic but requires a collection of Mages Guild books.
- Death Dealer’s Fete = high max stats and requires no effect but in combat.
Gear Sets
Perfected Sul-Xan’s Torment: Drops in Veteran Rockgrove trial, Blackwood chapter. Insane damage if you can reliably pick up the essence/soul (blue orb) left behind.
Runecarver’s Blaze: Dungeon set that drops in Scrivener’s Hall. Your damage over time abilities do additional Flame damage.
Perfected Merciless Charge: Obtained in Veteran Maelstrom Arena though you can do normal for a lesser version.
FLEX OPTIONS
- Pillar of Nirn: obtained in Falkreath Hold dungeon. One of the hardest hitting, easiest proc sets in the game.
- Ansuul’s Torment: great set and forget trial set.
- Order’s Wrath = Best overall crafting damage option
- Spriggan’s Thorns = Base game and decent penetration on front perfect for beginner offensive set
- Perfected Coral Riptide = god tier damage if you run low stamina (dodge roll a bit before pull)
- Order’s Wrath = Best overall crafting damage option
Gear – Beginner
This setup is for someone who just started and doesn’t have access to Monsters, Mythics, Trials Gear
| Slot | Type | Set | Trait | Glyph |
| Head | Medium | Briarheart | Divines | Stamina |
| Shoulders | Medium | Briarheart | Divines | Stamina |
| Chest | Medium | Spriggan’s Thorns | Divines | Stamina |
| Legs | Medium | Spriggan’s Thorns | Divines | Stamina |
| Gloves | Medium | Spriggan’s Thorns | Divines | Stamina |
| Boots | Medium | Spriggan’s Thorns | Divines | Stamina |
| Belt | Medium | Spriggan’s Thorns | Divines | Stamina |
| Weapon One | Dagger | Dagger | Precise | Flame |
| Secondary | Dagger | Dagger | Charged | Poison |
| Weapon Two | 2H Sword | Agility | Infused | Berserker |
| Necklace | Briarheart | Robust | Weapon Damage | |
| Ring 1 | Briarheart | Robust | Weapon Damage | |
| Ring 2 | Briarheart | Robust | Weapon Damage |
Race
The best racial choice for the Solo Stamina Necromancer is below:
- Dark Elf: Gain max magicka, stamina, and weapon and spell damage. The flame resistance is also helpful and considered the strongest overall PVE DPS race.
- Orc: Gain weapon damage and max stamina, though there is no magicka bonus.
- Khajiit: This race gets recovery, max stats, and critical damage and healing. Consider the Khajiit a great option if you aren’t over the critical cap of 125%.
Attributes
The best choice is 64 stamina, which increases damage, healing, and DoTs.
Mundus Stone
The Thief is the best Mundus Stone for PvE Builds because it Increases the Critical Strike rating.
Champion Points – ESO Solo Necromancer Stamina Build for PvE
| Craft | Warfare | Fitness |
| Steed’s Blessing | Fighting Finesse | Bloody Renewal |
| Rationer | Deadly Aim | Boundless Vitality |
| Treasure Hunter | Master-at-Arms | Rejuvenation |
| Liquid Efficiency | Wrathful Strikes | Fortified |
Warfare Constellation Champion Points

Below is a step-by-step method for slotting your champion points in the Warfare tree (blue). We have used the minimum possible to reach 4 slottable selections all maxed out. If you have more CP, consider taking more in the passives for optimal performance.
Below are recommended Warfare Champion Point selections for the ESO Solo Necromancer Stamina Build for PvE:
- Precision 10
- Wrathful Strikes (slottable) 50
- Fighting Finesse (slottable) 50
- Extended Might – sub constellation – piercing 10
- Biting Aura (slottable) 50
- Master – at- Arms (slottable) 50
This would be the bare minimum setup, spending 220 CP (660 total required). The next step is to max out passives, that do not require a slottable but increase performance.
- Precision 10
- Piercing 10
- Tireless discipline 20
- Eldritch insight 20
- Blessed 20
- Quick recovery 20
- Flawless ritual 40
- War mage 30
- Battle mastery 40
- Mighty 30
- Elemental aegis 20
- Hardy 20
- Preparation 20
This would max out the Warfare tree with all active and passive champion points at 520 spent 1,560 total spent.
Fitness Constellation Champion Points

Below are recommended Fitness Champion Point selections for the ESO Solo Necromancer Stamina Build for PvE:
- Fortified (slottable) 50
- Boundless vitality (slottable) 50
- Rejuvenation (slottable) 50
- Sprinter 10
- Winder chaser – sub con – hasty 8
- Hero’s Vigor 10
- Bloody Renewal (slottable) 50
This would be the bare minimum setup, spending 228 CP (684 total required). The next step is to max out passives, that do not require a slottable but increase performance.
- Hero’s Vigor 10
- Tumbling 30
- Sprinter 10
- Defiance 20
- Hasty 8
- Tireless guardian 20
- Fortification 30
- Nimble 6
- Mystic tenacity 50
- Tempered soul 50
- Piercing gaze 30
- Savage defense 30
- Bashing brutality 20
This would max out the fitness tree with all active passive champion points at 542 cp spent and 1,626 total spent.
Craft Constellation Champion Points

Below are recommended Craft Champion Point selections for the ESO Solo Necromancer Stamina Build for PvE:
- Steed’s blessing (slottable) – 50
- Breakfall 10
- Wanderer 15
- Steadfast 10
- Treasure hunter 50 (slottable)
- rationer (slottable) 30
- liquid effiency (slottable) 75
This would be the bare minimum setup, spending 240CP (720 total required). The next step is to max out passives, that do not require a slottable but increase performance.
- Steadfast enchantment 40cp
- Breakfall 40 cp
- Wanderer 60
- Fortunes favor 50
- Friends in low places 25
- Out of sight 30
- Fleet of phantom 40
- Soul’s reservoir 33
- Gilded fingers 50
- Fortunes favor 40
- Inspiration boost 45
- Infamous 30
This would max out the crafting tree with all active passive champion points at 723 cp spent 2,169 total spent.
Consumables
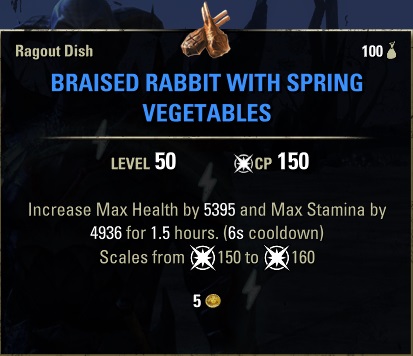
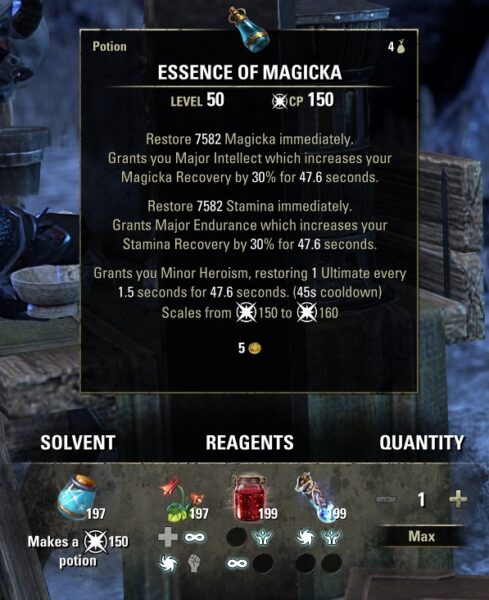
The best consumables for the solo Stamina Necromancer PvE build are Braised Rabbit with Spring Vegetables food and Heroism potions. Braised Rabbit with Spring Vegetables gives the most damage possible, though Artaeum Takeaway Broth is good for resource sustain if you struggle. A third balanced option for more hybrid resource pools is Bewitched Sugar Skulls. The best potion if you have weapon critical and weapon power buff is Heriosm (the essence of magicka). Another option is Weapon Power potions if you lack the buffs or tri-stat Essence of Health. Below are our recommended food and potion choices:
- Braised Rabbit with Spring Vegetables (best damage no sustain) – Increase health and stamina. Crafted with Provisioning ingredients Small Game, Greens, and Seasoning.
- Artaeum Takeaway Broth – increase max health, health recovery, max stamina, and stamina recovery. Crafted with provisioning from ingredients Fish, Melon, Torchbug Thorax, and Powdered Mother of Pearl.
- Dubious Camoran Throne (cheap sustain) – increases stamina recovery, max stamina, and max health. Crafted with provisioning from ingredients of White Meat, Beetle Scuttle, Insect Parts, and Guts.
- Bewitched Sugar Skulls (tri-max stats) – increases max health, stamina, magicka, and health recovery. Crafted with provisioning from ingredients of Scrib Jelly, Flour, Columbine, Bervez Juice, and Honey.
- Heroism Potion – Restores stamina and magicka and grants minor heroism for a time. Crafted with Alchemy from ingredients of Columbine, Dragon’s Blood, and Dragon Rheum.
- Essence of Weapon Power – grants major brutality, major savagery, and stamina recovery. Crafted with alchemy from ingredients such as Blessed Thistle, Stinkhorn, and Water Hyacinth (other combinations).
- Tri-Pots – grants immediate health, stamina and magicka, along with tri-recovery. Crafted with Alchemy from ingredients of Bugloss, Columbine, and Mountain Flower.
Build Summary – ESO Solo Necromancer Stamina PvE Build
Class: Necromancer
Race: Dark Elf
Attributes: 64 Stamina
Mundus Stone: Thief
Weapon One: Dual Wield
Weapon Two: Two-Handed
Armor Set 1: Perfected Sul-Xan’s Torment
Armor Set 2: Valkyn Skoria
Monster Helm: Runecarver’s Blaze
Mythic: Velothi Ur-Mage’s Amulet
Armor Weight: 3 Medium, 4 Light
Food: Braised Rabbit with Spring Vegetables
Potion: Essence of Magicka with Minor Heroism
Skill Bar 1
- Blighted Blastbones
- Traveling Knife (or Venom Skull)
- Ruinous Scythe
- Detonating Siphon
- Contingency (Inner Light without Traveling Knife)
- Temporal Guard (Ultimate)
Skill Bar 2
- Stampede
- Carve
- Avid Boneyard
- Degeneration
- Spirit Mender
- Glacial Colossus (Ultimate)
Scribing Grimoires and Scripts
- Ulfsild’s Contingency (Mage Guild)
- Flame Damage (focus script)
- Lingering Torment (signature script)
- Vulnerability (Affix Script)
- Traveling Knife (Dual Wield)
- Bleed (focus script)
- Warrior’s Opportunity (signature script)
- Major Savagery/Prophecy (Affix Script)
Looking For More ESO Builds?
Thank you for reading ESO Solo Necromancer Stamina Build for PvE Guide. We provide the latest news and create guides for ESO. Also, watch me play games on Twitch or visit my YouTube channel!
 Reddit
 Email
Email
