Facebook
 Reddit
 Email
Email
The guide delivers the complete walkthrough of the Destined Hereos quest that rewards you with a new Destiny 2 Exotic sword, the Ergo Sum.
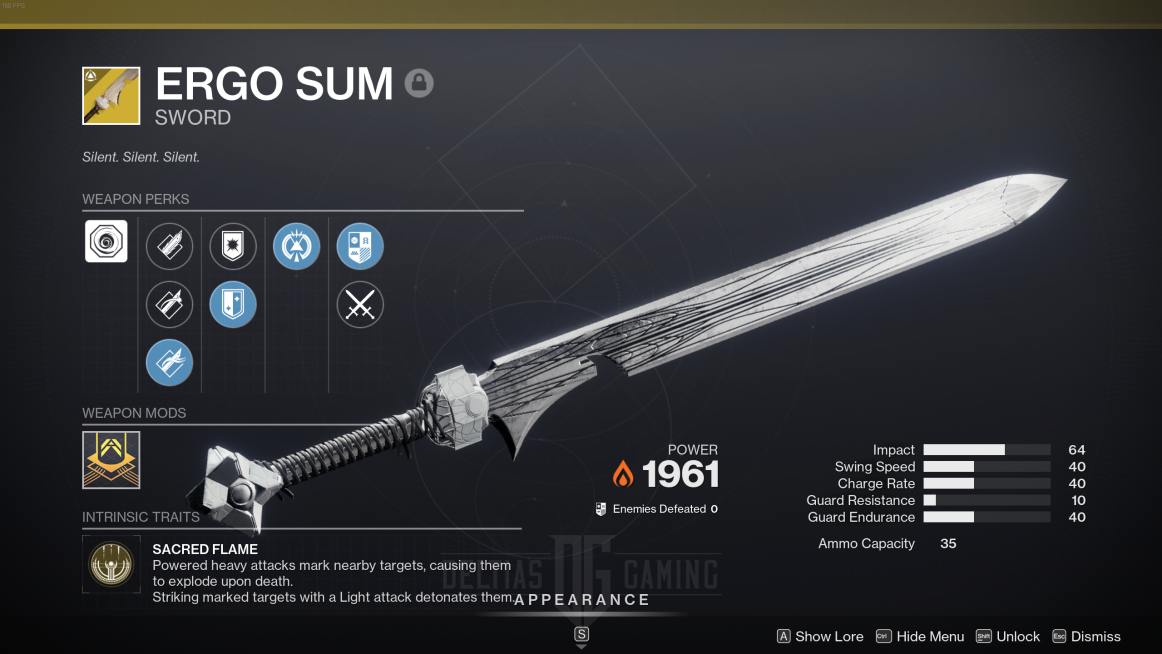
The Ergo Sum is an exotic sword that is randomly generated and was introduced after the completion of the Final Shape expansion. This sword is unique because it comes with random perks, frames, and elements. Its perks are similar to other exotic weapons, such as Wolfpack Rounds from Gjallarhorn or Arc Conductor from Riskrunner. It is available in multiple frames, including a new one called the Wave Sword Frame, which functions similarly to wave frame grenade launchers. Furthermore, the sword can have any of the three energy slot elements: Solar, Arc, or Void. Lastly, it is an energy slot sword, using special ammo instead of traditional heavy ammo.
Destiny 2: How to Get Ergo Sum (Destined Hereos)

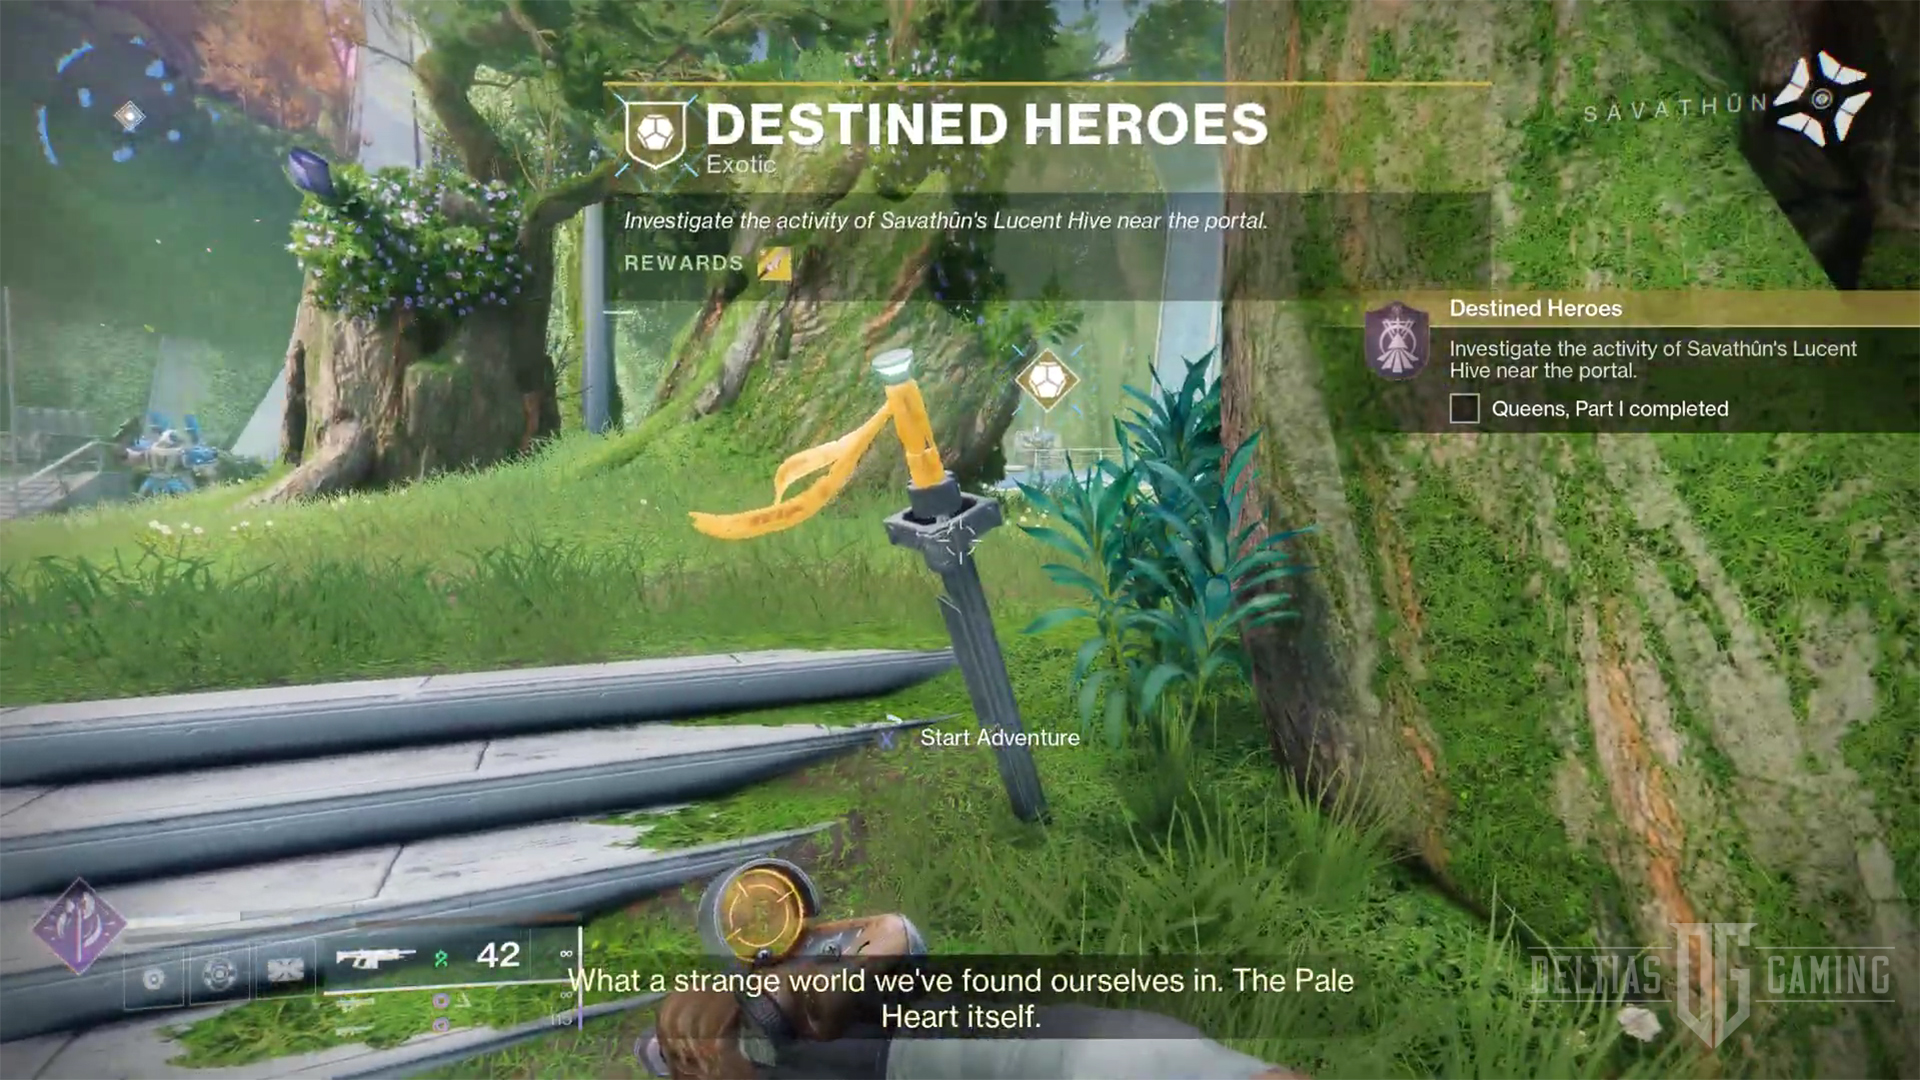
To get Ergo Sum in Destiny 2, you must complete the Destined Hereos legendary mission. However, you must first finish the Final Shape main campaign. Speak with your ghost, or open your season quest log and look for the Destined Hereos legendary mission. Head to the lost city, and next to the Old Tower, you will hear the weird transmission. Your task is to investigate.
The quest has many long steps and puzzle mechanics, as described below.
Completing Destined Hereos – Queens, Part 1
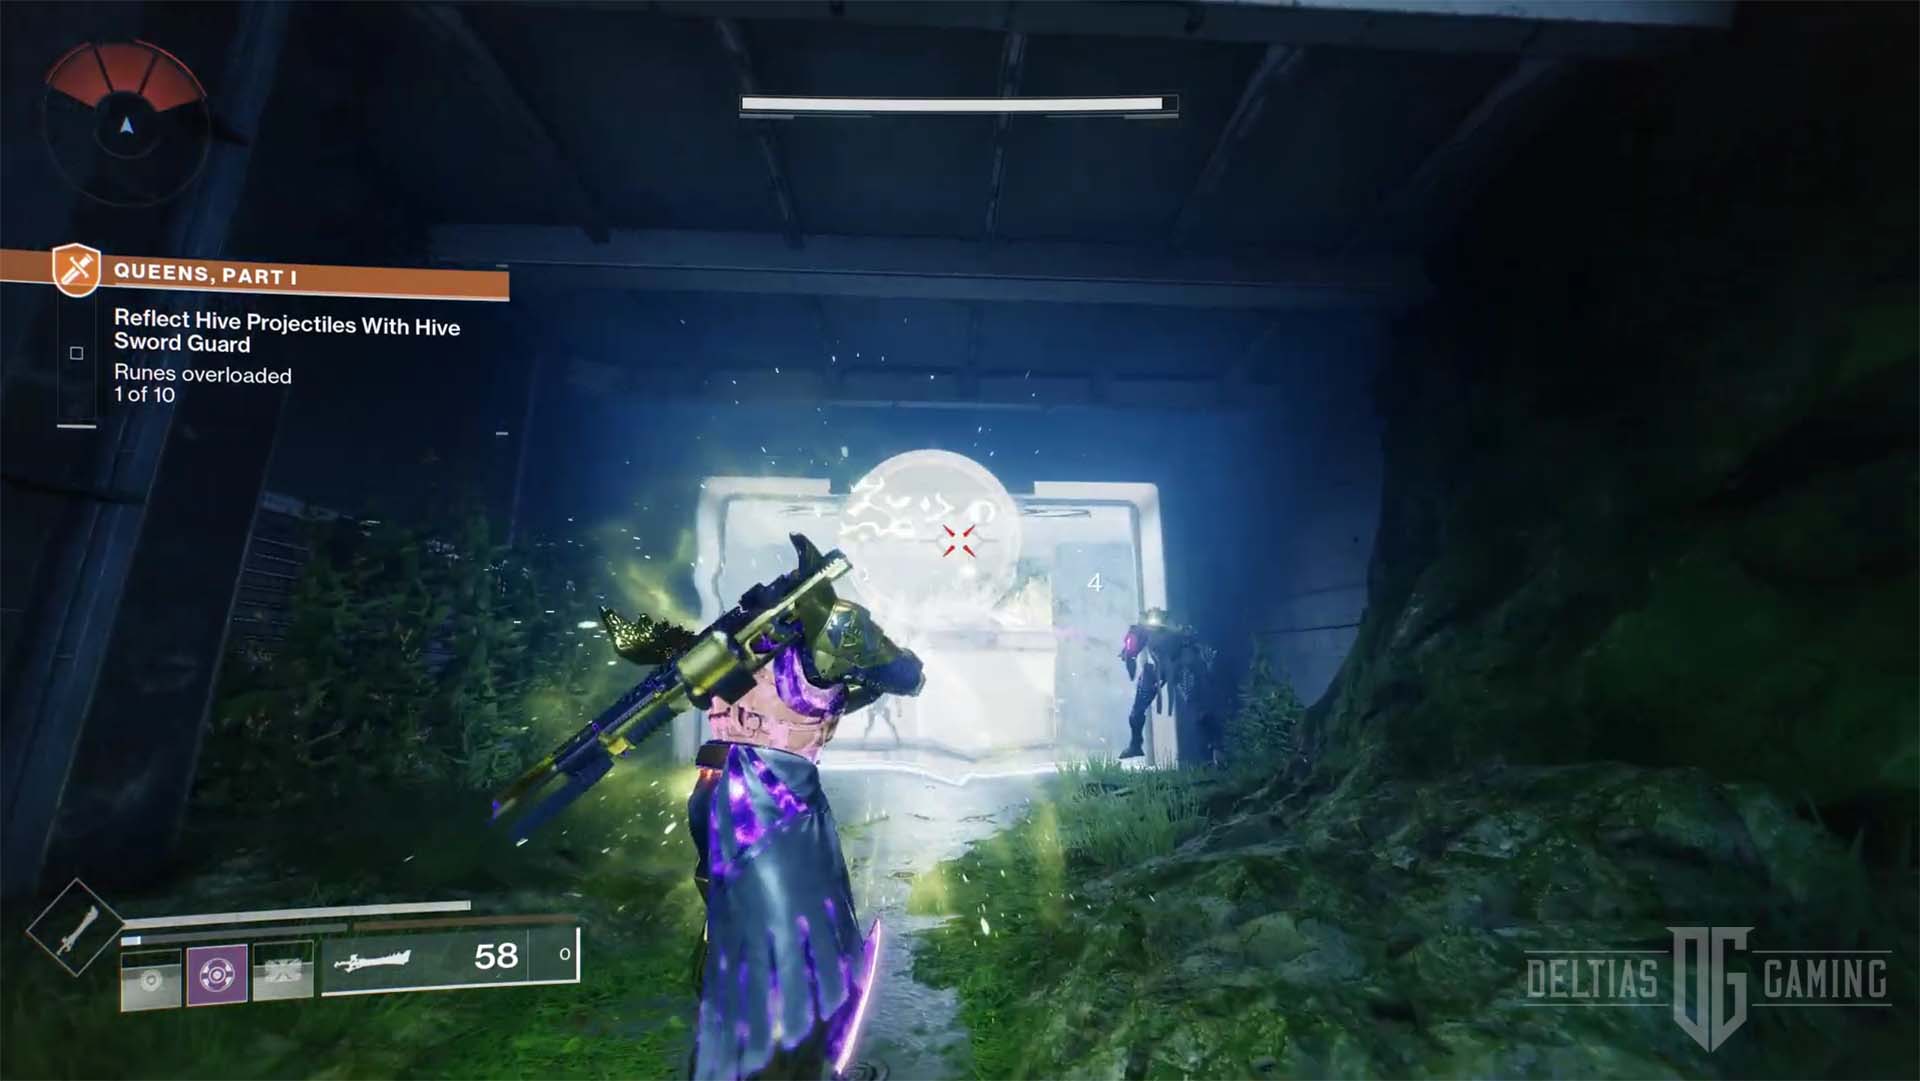
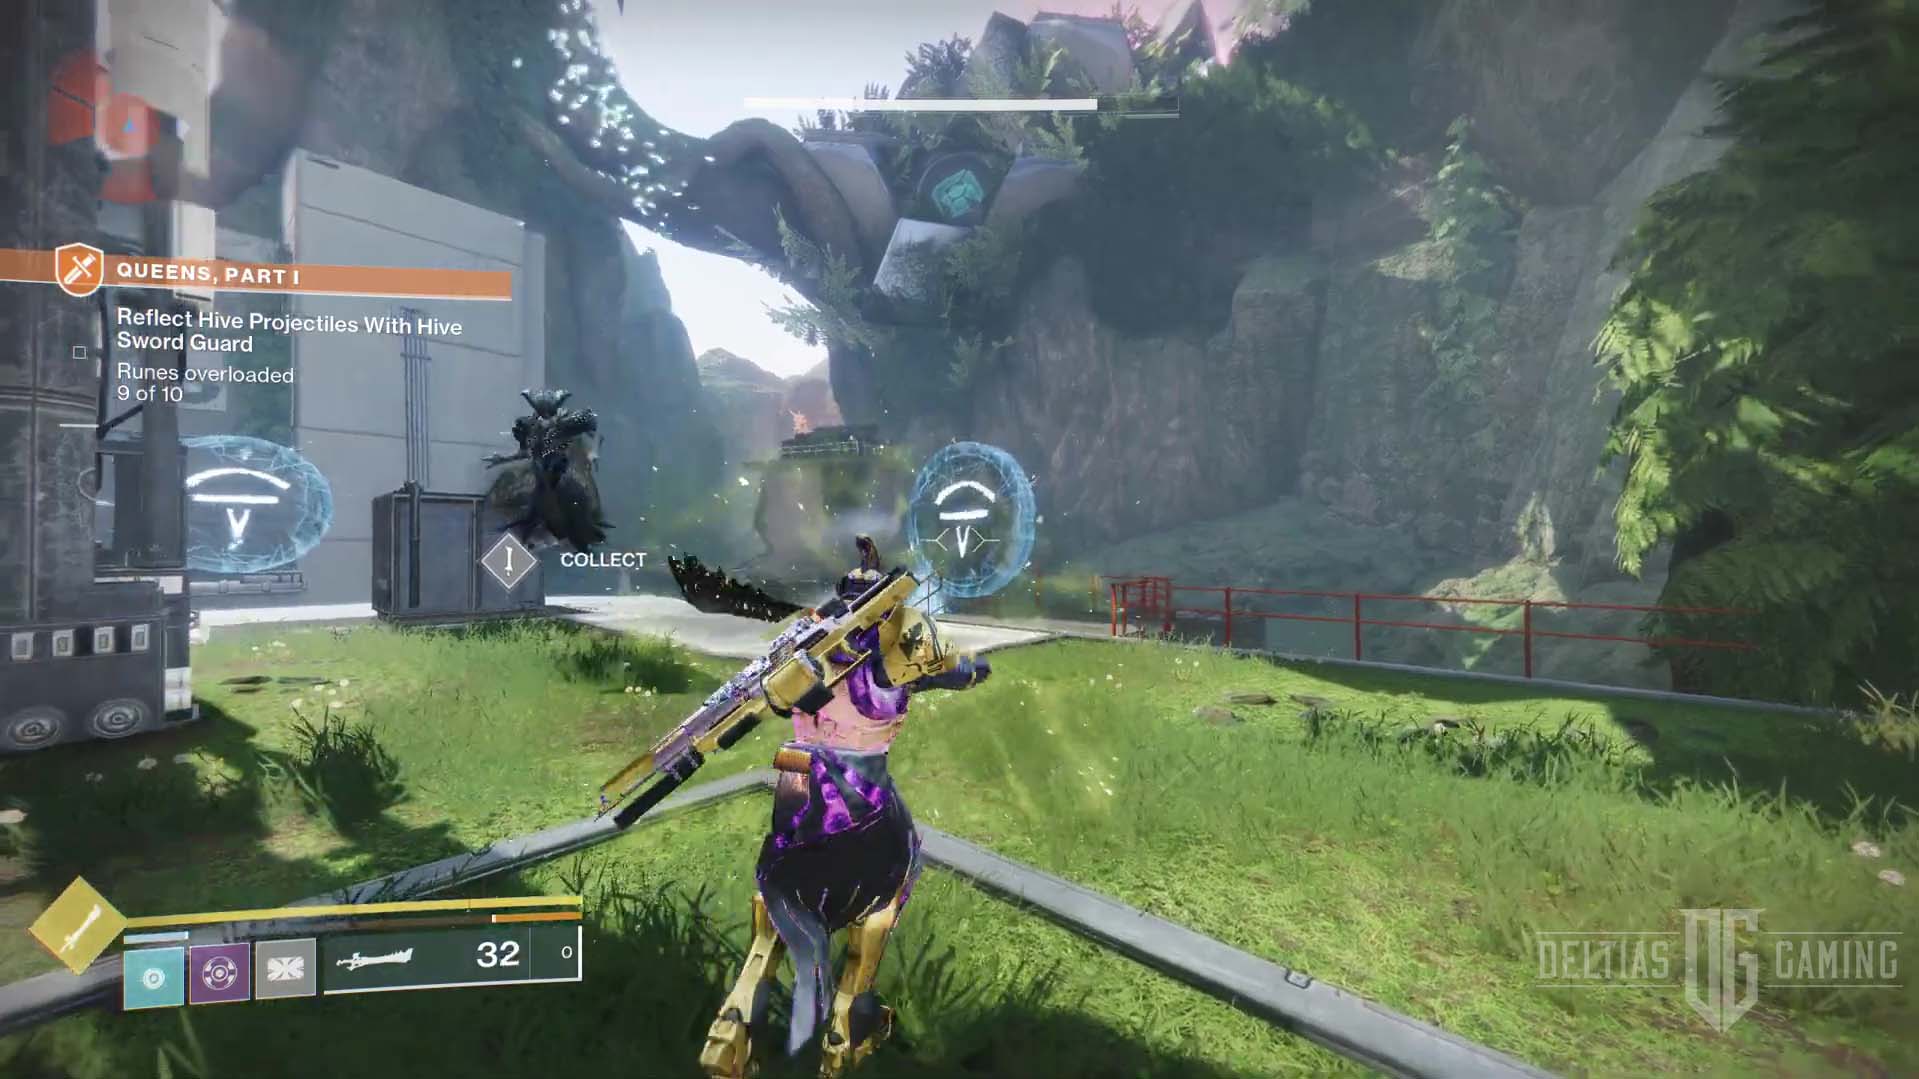
Follow the corridor into the mission to scout the area. Once you enter the building, jump down to the left, where you will meet the single Hive enemy guarding the door blocked by the energy field and the rune. You can’t pass unless you solve the puzzle. Do not kill this hive enemy. Instead, pick up the hive sword and block with it. They will try to shoot you, and when the projectile bounces off you while blocking, point the projectiles at the rune blocking the door. It will light up, and the electric field will disappear.
Don’t worry; if you kill the enemy, they will respawn. This mechanic will be the main feature throughout the quest. Defeat the rest of the enemies.
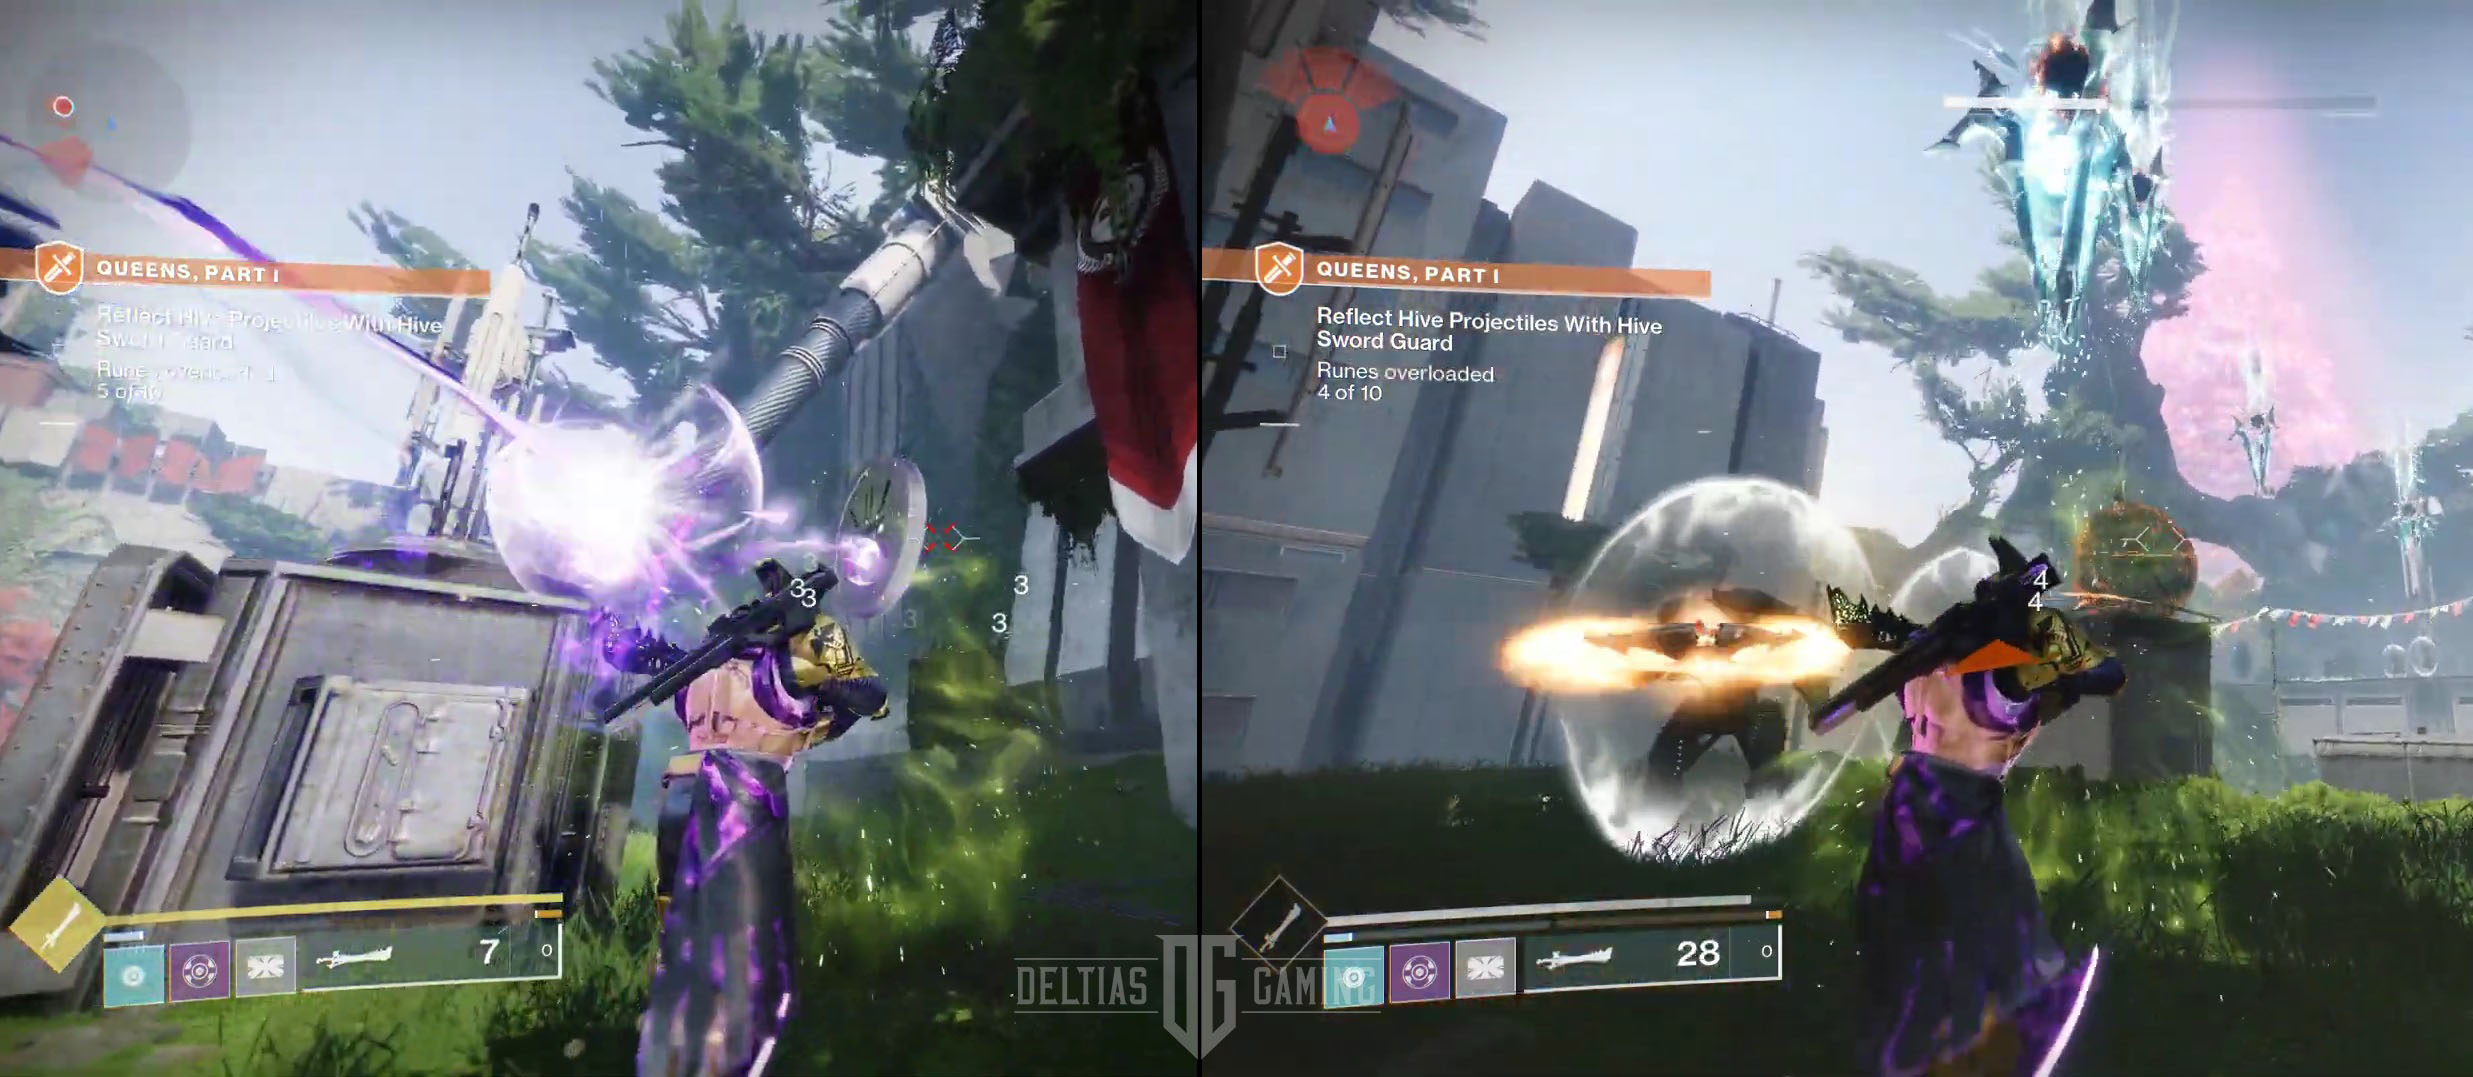
When you reach the courtyard, you will notice more runes. However, this time, few are surrounded by fire (on the left), and few by void(on the right). Hive enemies will shoot the fire projectiles. Again, pick up the sword, get closer to them, block, and send projectiles to the rune on the other side of the courtyard. Next, move to void Srinker and try to reflect its projectiles on the void runes.
Defeat all the enemies and jump to the other side of the chasm where few withes wait. Again, pick up the sword and activate all runes until they light up. Then, defeat the remaining enemies. Proceed through the city’s ruins until you reach another wave of enemies.
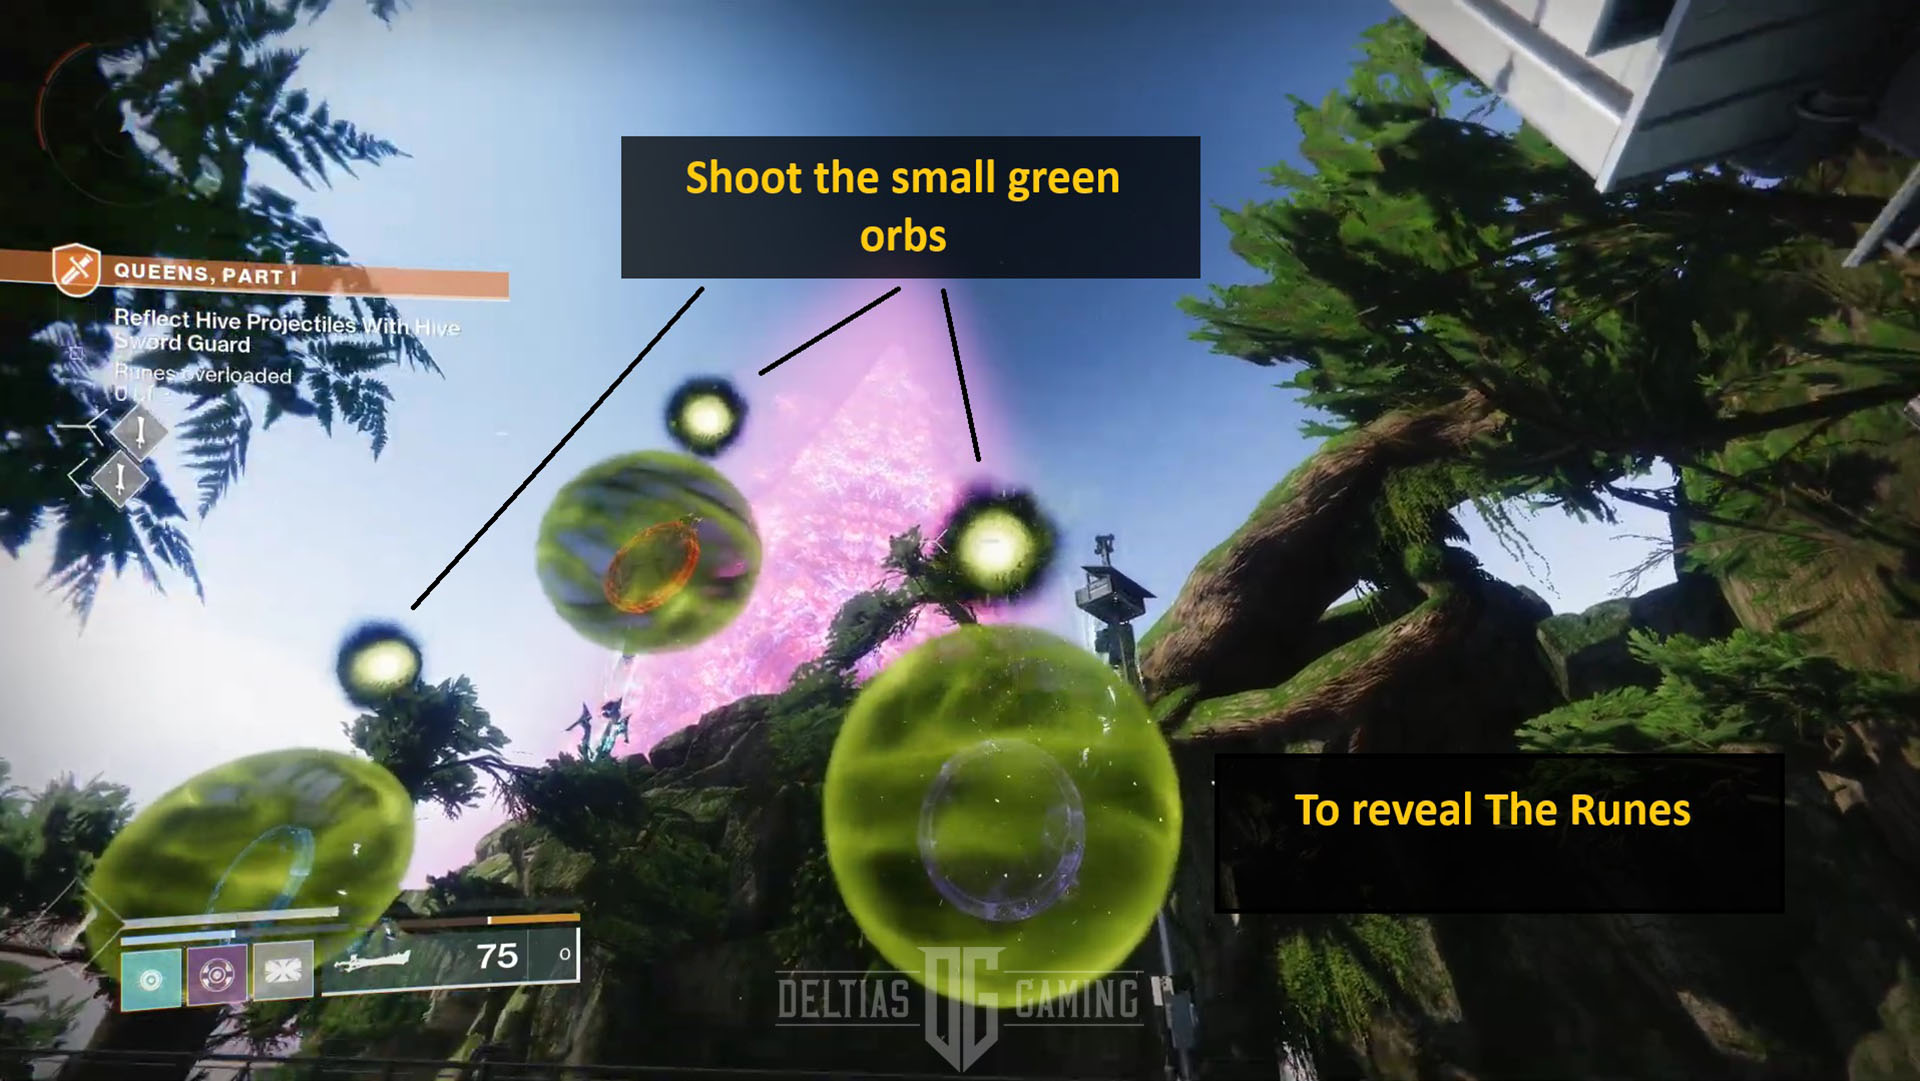
This time, you must attack with the sword and shoot the small green orbs above shield-protected runes to reveal them. Once you break all the green shields, you can activate the runes like before with matching damage type.
Start with the blue one first on the left. The witches that should already be there will help with that. Next, kill them to spawn the next enemy; this time, use the sword to send the projectiles to the purple rune first to the right. Kill the Shriker to spawn the last type of the enemy and activate the middle-red rune. Kill remaining Hive foes and proceed. Don’t forget to destroy the last enemy’s ghost.
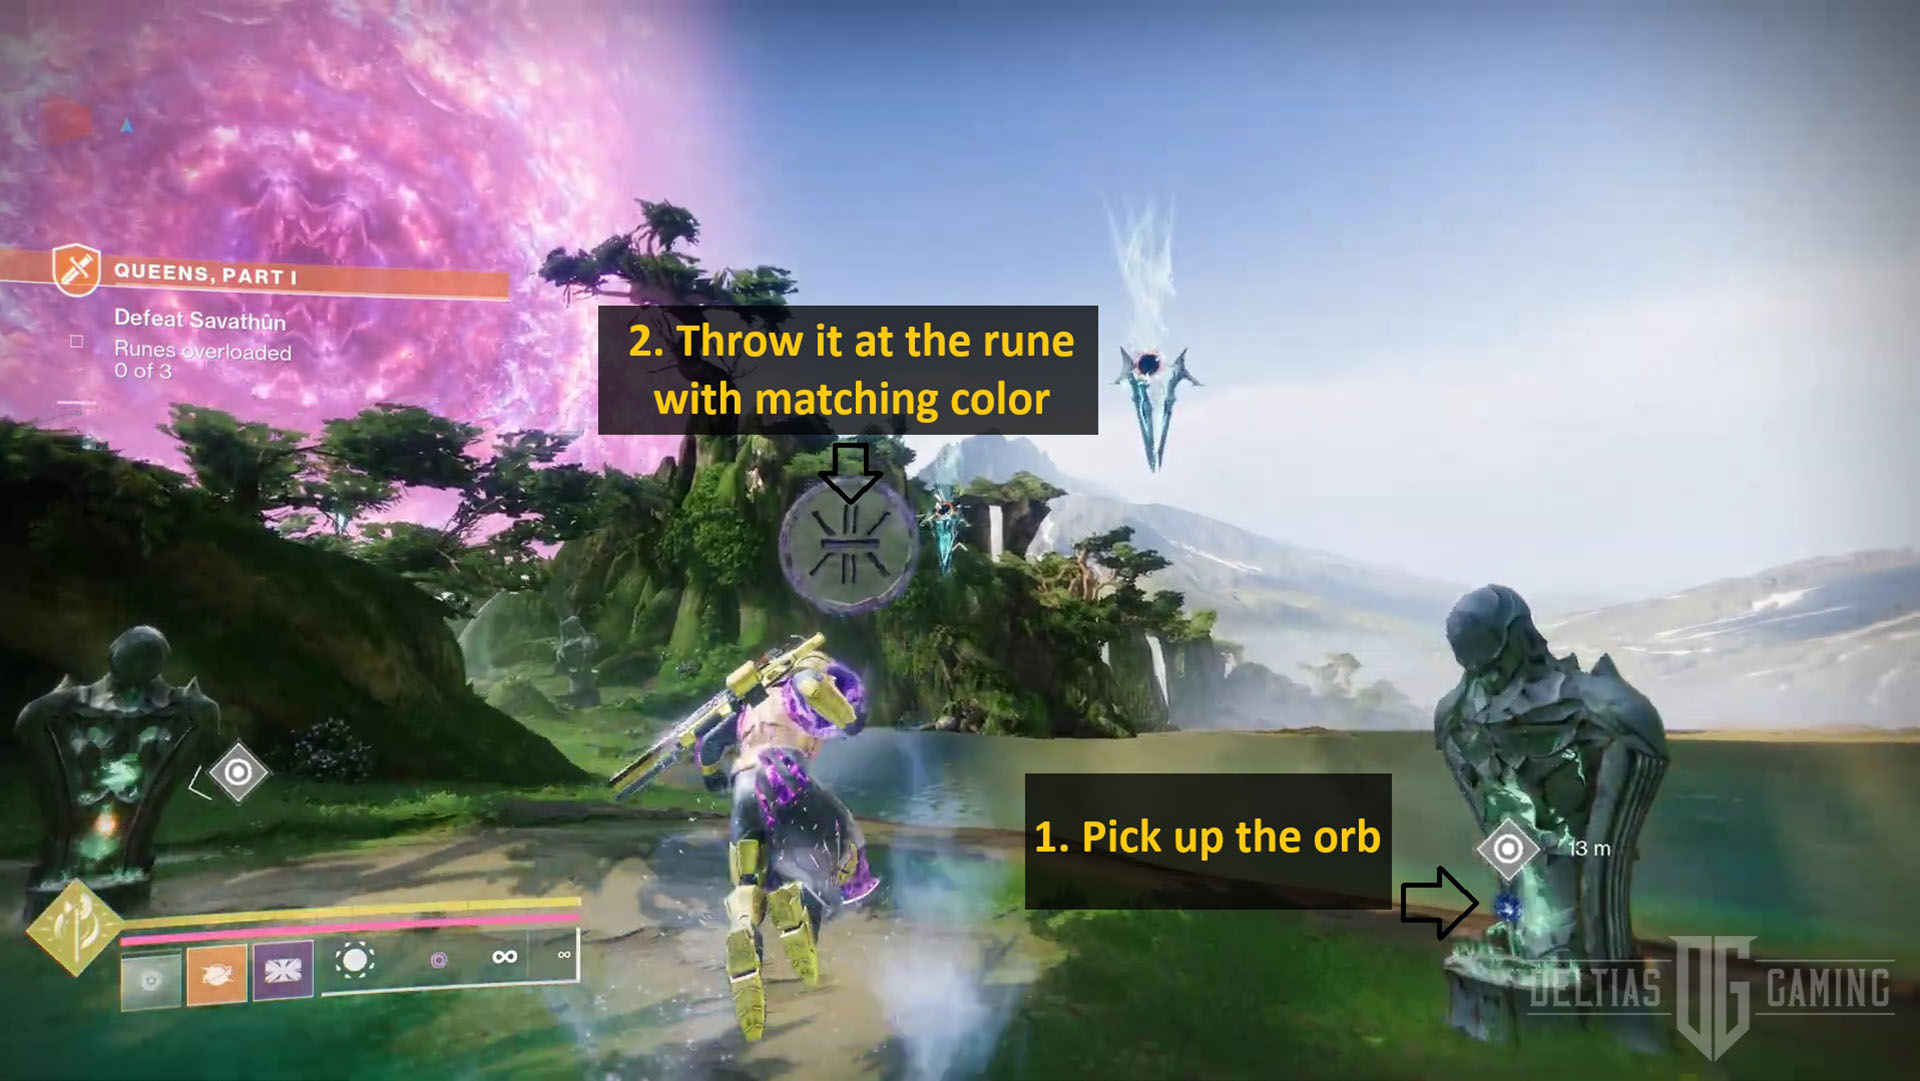
Eventually, you will come across Hive status with runes floating above them. Each statue has one of three element’s orbs near them that match the elements of three runes. Pick up the orb and throw it at the rune with matching color. Repeat three times to finish the puzzle. Defeat the enemies. Once the witch queen’s health drops to a certain percentage, you can move to the following location, where she will also travel.
Lastly, you need to repeat the same mechanics, but this time, it’s combined. Destroy green shields around the runes. Throw the orbs at the runes, and you can damage the queen again. However, she will teleport around 30% of her health again. That’s the end of the mission.
Speaking with Micah’s Conduit, Cayde-6, and your Ghost
Return to the tower in the Pale Heart to speak with Micah’s Conduit. He will give you the next Quest Convalescence: Rootbound. However, it’s a side quest from the Exotic Ergo Sum mission, the Destined Hereos, and you don’t need to do it to get the weapon.
Also, speak with Cayde-6 in Lost City to get the next exotic quest called Wild Card. If you complete it, you will get another fantastic exotic weapon, the Still Hunt. But it’s also not required for the Destined Hereos quest.
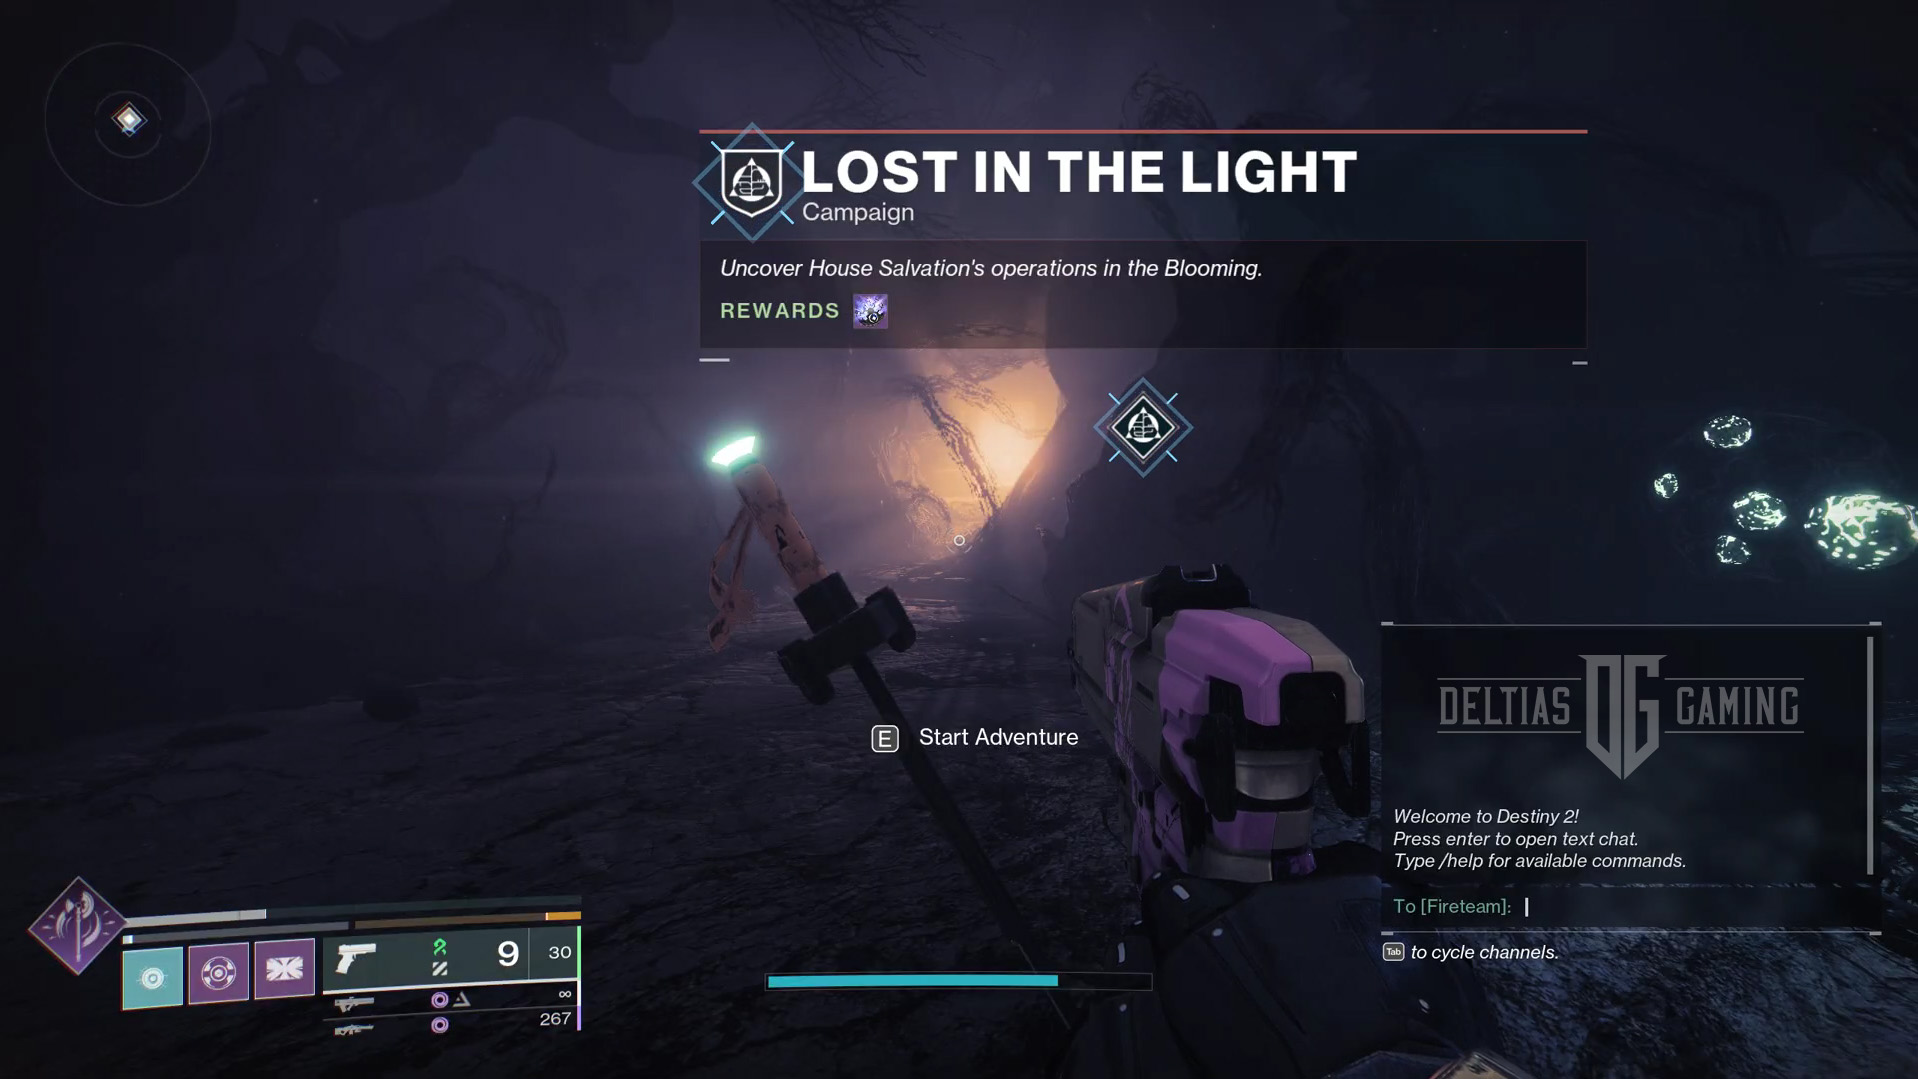
Instead, to proceed toward obtaining the Ergo Sum, speak with your ghost, who will give you two more minor quests: Lost in the Light and Bound in the Dark. You must finish them to get Ergo Sum. Luckily, both are simple and short.
Let’s start with the Lost in the Light mission. The quest also starts in the underground of the lost city. Don’t forget to grab a chest with the prismatic Granade skill.
Completing Lost in the Light – The Hollow Part 1
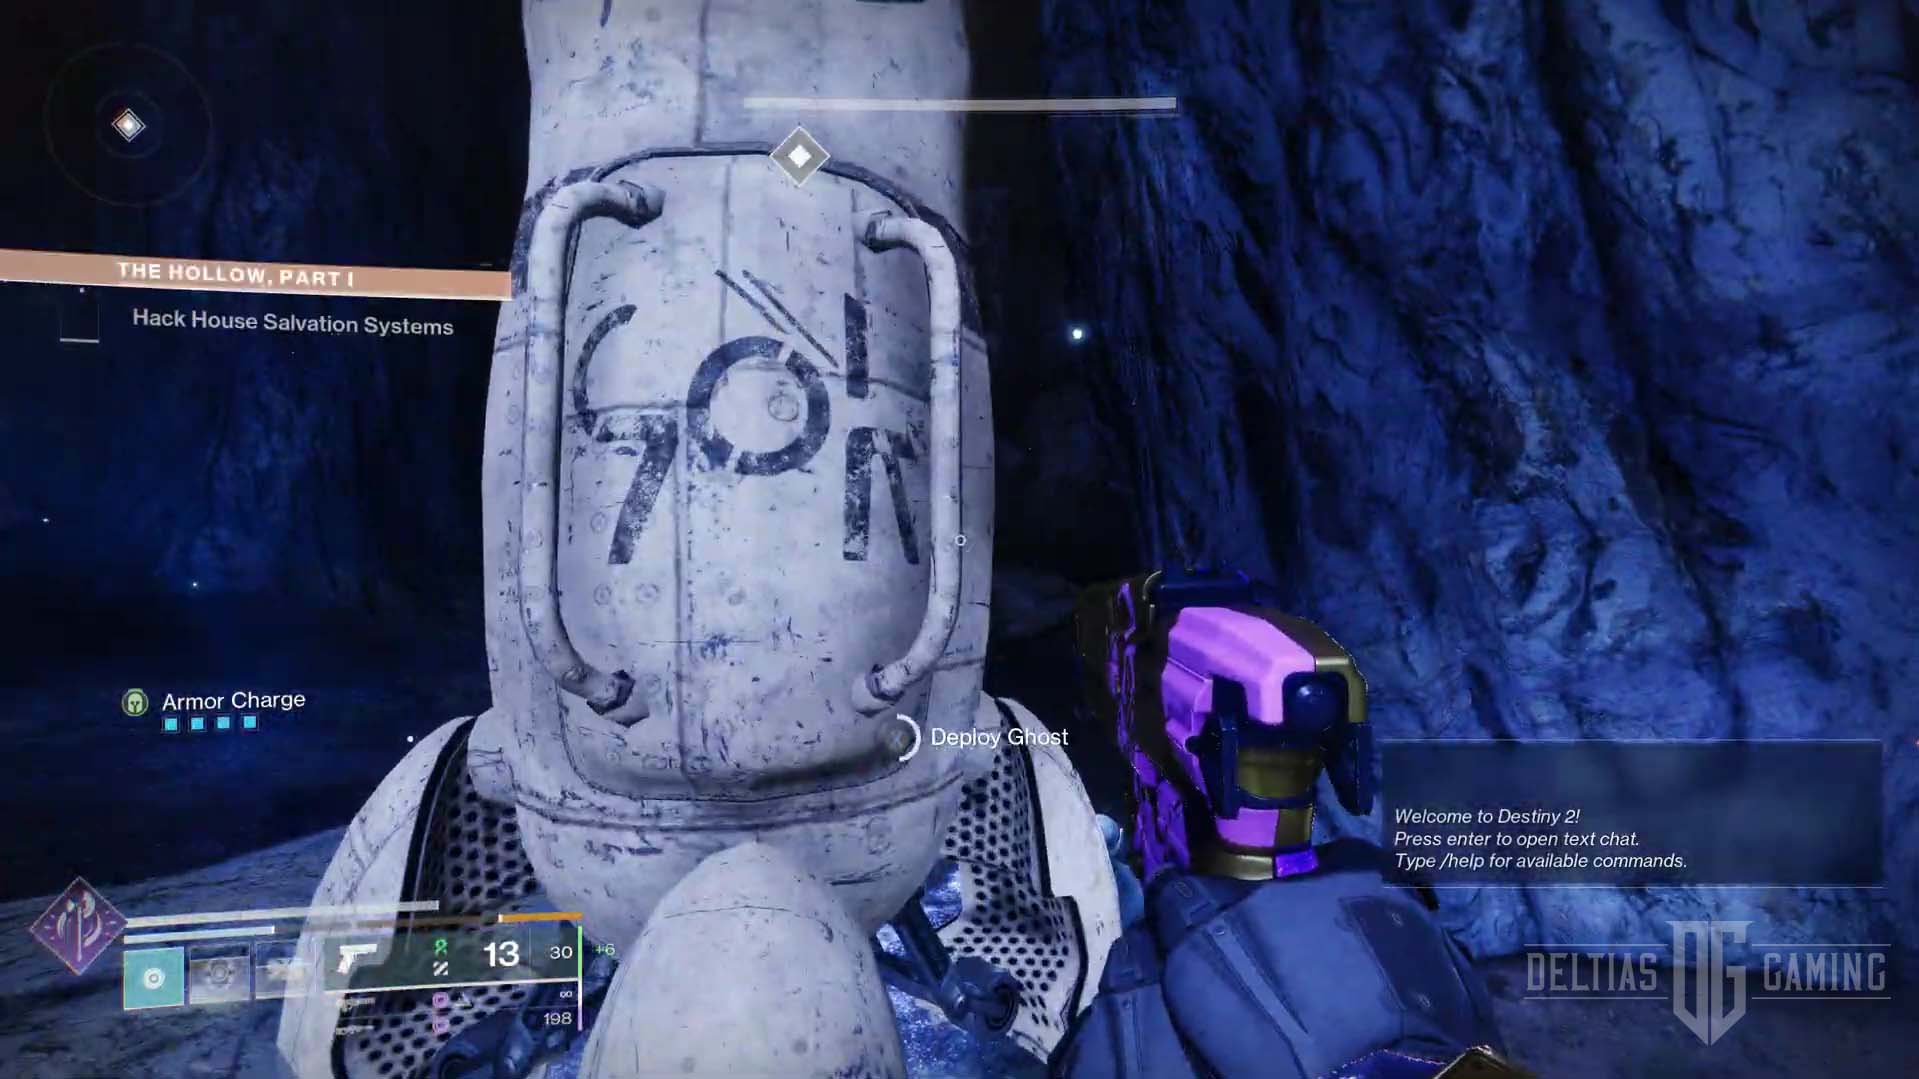
The patch is straightforward. There is some good lore there, as well. You must also hack into consoles to proceed, but no puzzles or special tasks are included. Consequently, you must protect your ghost from spawning enemies during the process and head to investigate the House of Salvation.
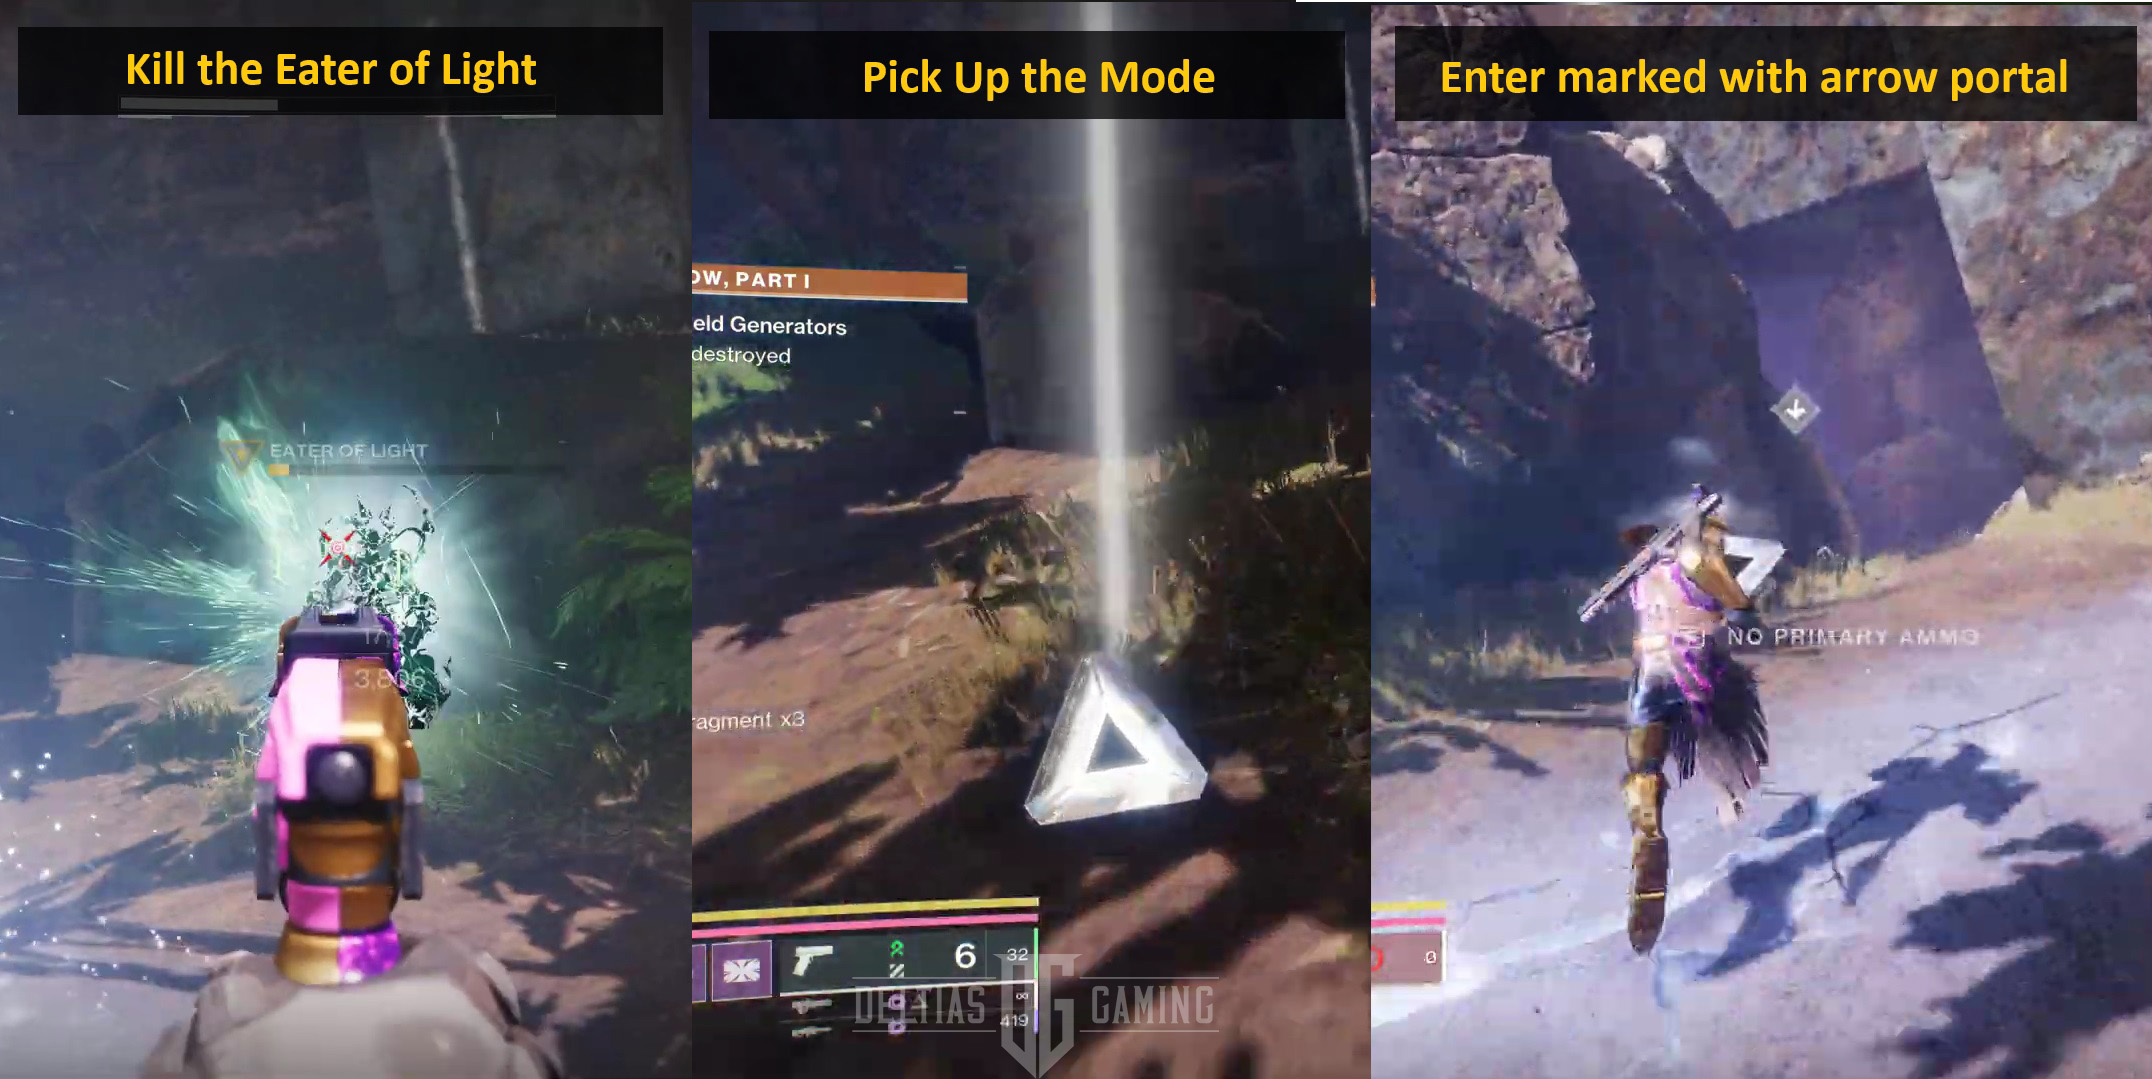
Proceed to leave the caves and find the shield that blocks your progress forward. You should see the markers pointing you down the open patch to destroy the shield generators. Next to those, you will find Eathers of Light, who drop light modes. Follow the arrow on the screen to enter the portal that will take you to the next cave area and drop the light mode on the platform.
Kill the eater of darkness to grab the dark modes and again enter the portal, return to the open area, and drop dark modes on the light platforms. As a result, the generators will deactivate, and you can pass through the now-deactivated shield that was blocking your path before.
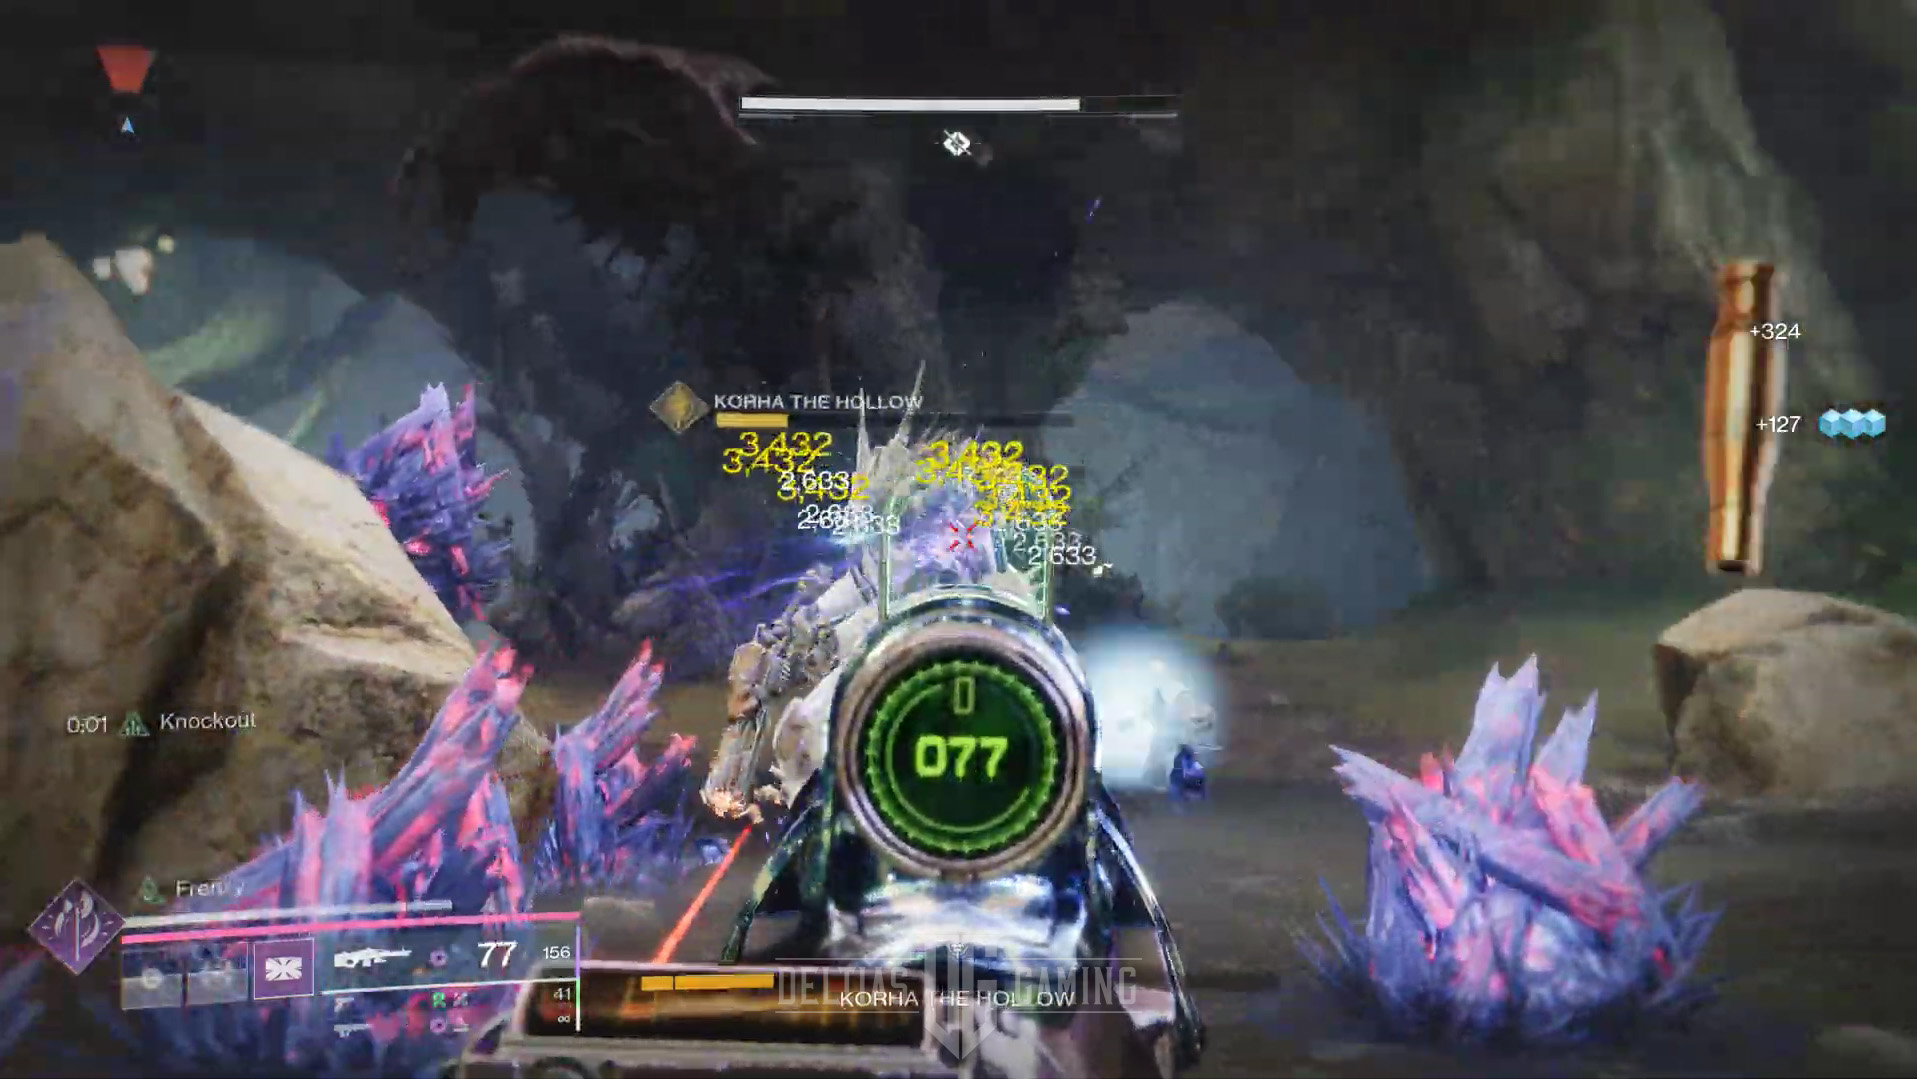
Lastly, the boss will spawn, the Korha the Hollow. It’s a challenging fight, and you can only damage the boss to a certain percentage, so you must repeat the mechanic, like with the eaters of light and dark before. Kill them, pick up the orb, and drop it on light and dark portals. Continue to damage the boss until around 10% of their health, and they will disappear. In short, that’s the end of the quest and another step towards getting Ergo Sum in Destiny 2 completed.
In the refraction, which is the next area, you will find the second chest with a new light fragment and the start of the second quest, The Hollow Part 2.
Completing The Hollow Part 2
The hollow part 2 will take you to Europa, where as you follow the marker, you will need to defeat the fallen along the way and enemies you encounter until you reach the closed door and a panel. Interacting with the panel will spawn a little robot, Resilient Homing Shank. Ensure it is as close to the door as possible, and shoot it to blow the robot up with the door blocking your path. This is a simple mechanic that you will need to repeat a few more times.
Secondly, you may need to kill the Weaver and other foes in the vast room. To drop the weaver’s shield, you must destroy the Servators, the little robots spread around the room that will drop arc charges. Deposit those charges to spawn yet another shank that, when exploded, can destroy the Weavers’ shields and make enemies easy to defeat.
As a result, the force field will open. You can proceed to the next area, where you need to spawn the shank and protect it from spawning foes until you reach another closed door, and you can blow up a little robot to open the path to the next red room with more Weavers, but the same mechanic as before. Destroy servitors, deposit charges, and spawn shanks to destroy weavers’ shields and kill them.
Lastly, you need to defeat the boss in the final room. When its health reaches around 60%, it will have the shield like Weavers before, so you must repeat the mechanic from before and take down boss shields with Shanks’s help.
In short, when the boss is defeated, you will return to retraction, finding another chest and completing the Hollow Part 2 quest, which will take you closer to obtaining Ergo Sum Exotic.
Completing Found in the Dark – The Home Part 1
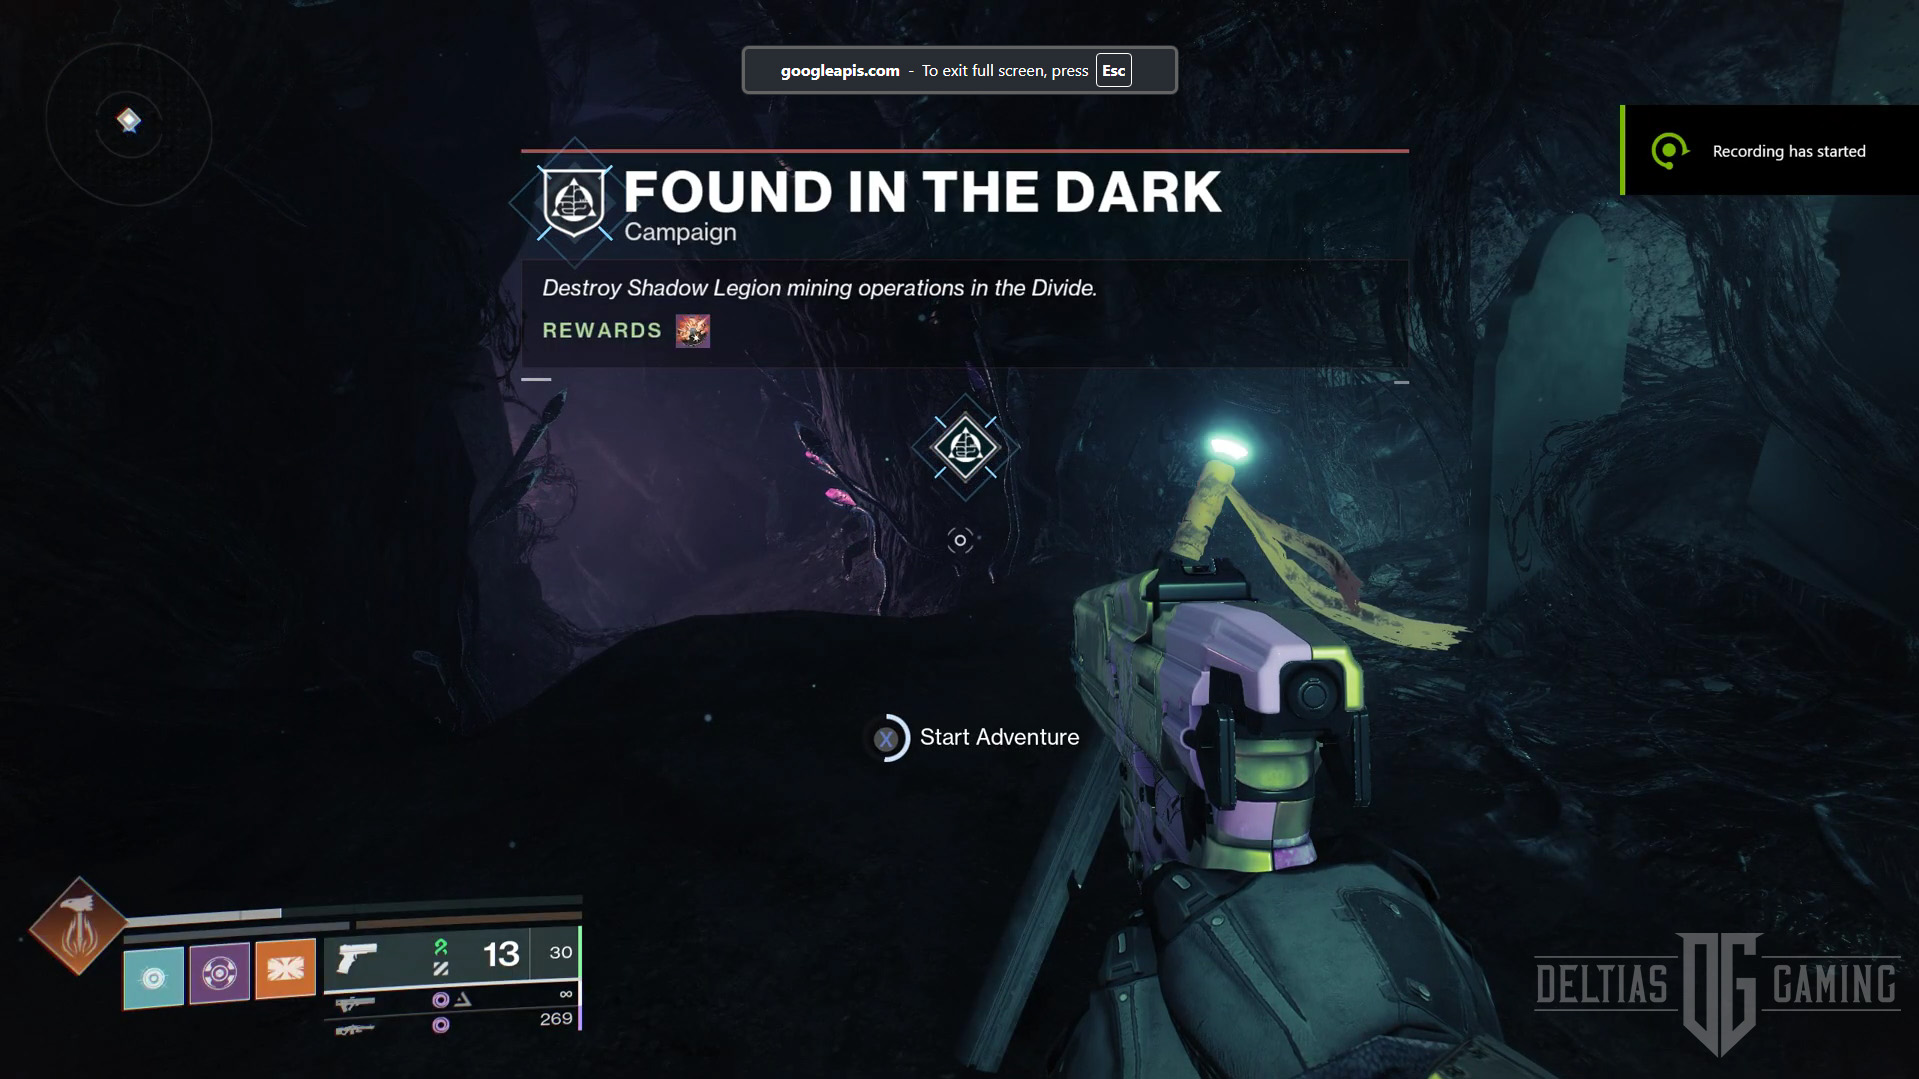
Return to Lost City to pick up the Found in the Dark quest marker. This time, you need to simply follow the marker to defeat Cabal you encounter and eventually destroy cabal generators.
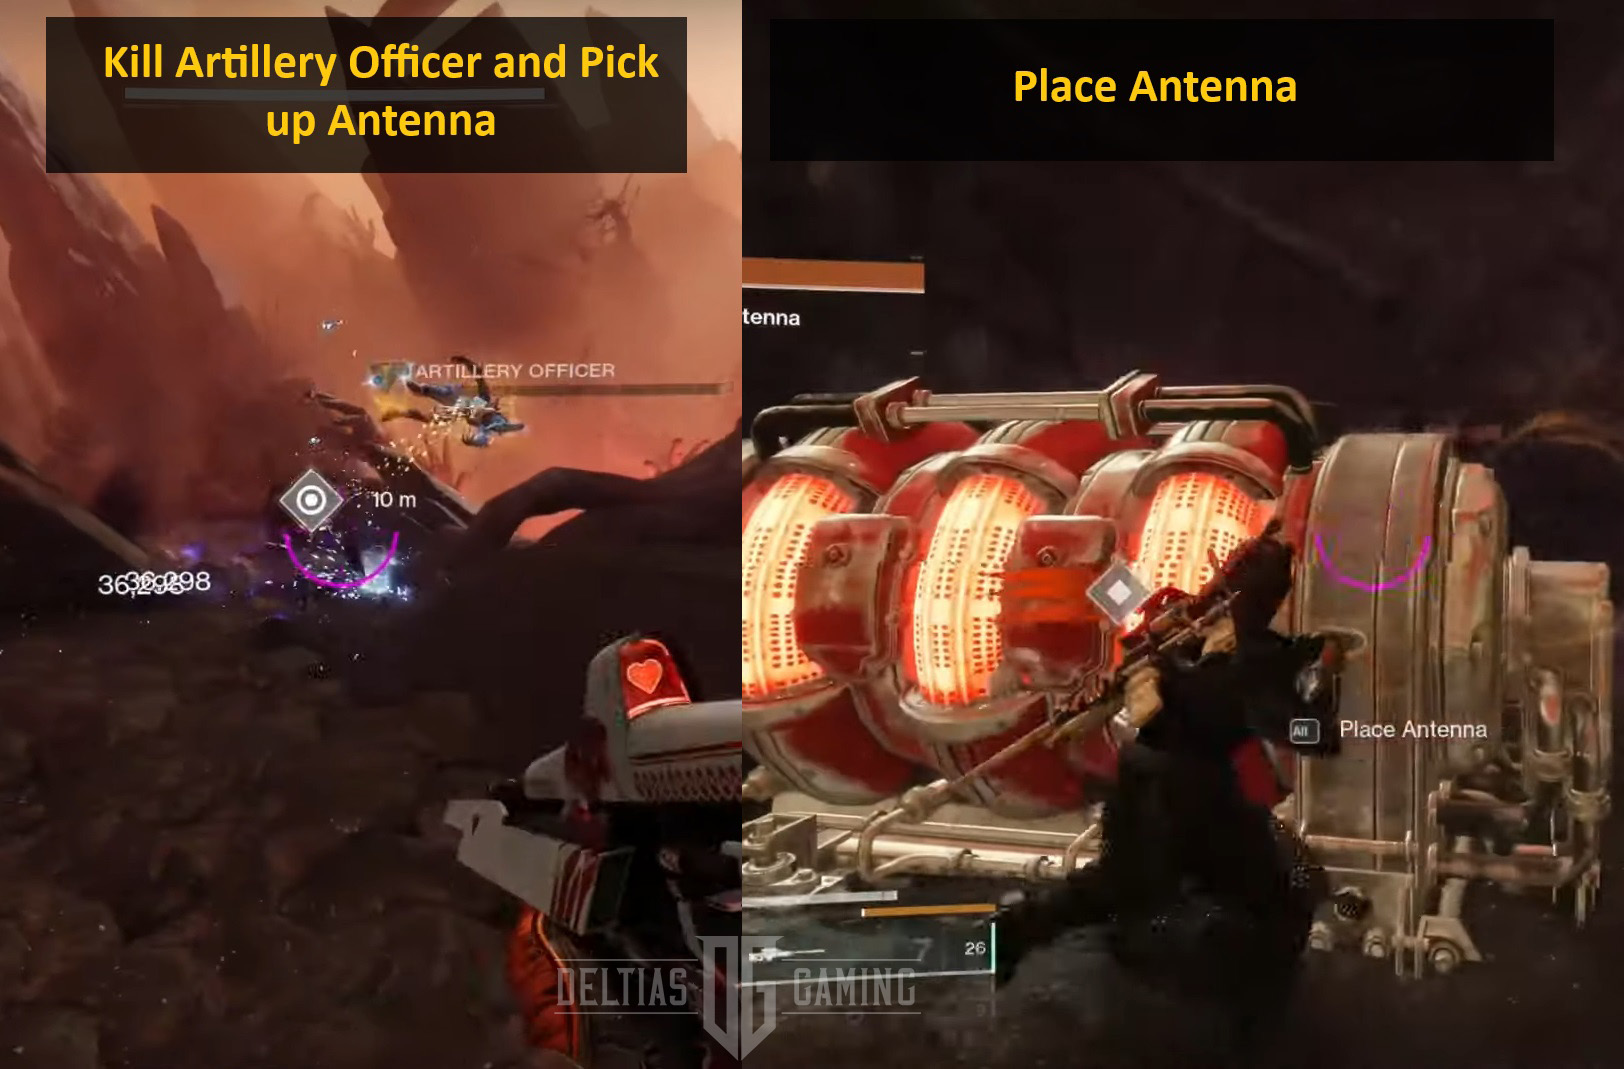
Next, during the fight with Artillery Officers, they will drop antennas. Similar to modes, you must pick up those antennas and bring them to the generators to proceed.
The same mechanic is when you start the next fight with platforms. However, the generators have shields. To lower them, shoot the Cannon Spheres. Also, kill Artillery Officers and place their antennas in the generator.
Lastly, there is a fight with the Caball boss. To damage some of the enemies, you will need the prismatic bar to be full. If you don’t have it filled, you can stand in the wells that spawn in the area to refill it. Consequently, the mission ends when the boss and all enemies are defeated.
Completing Found in the Dark – The Home Part 2
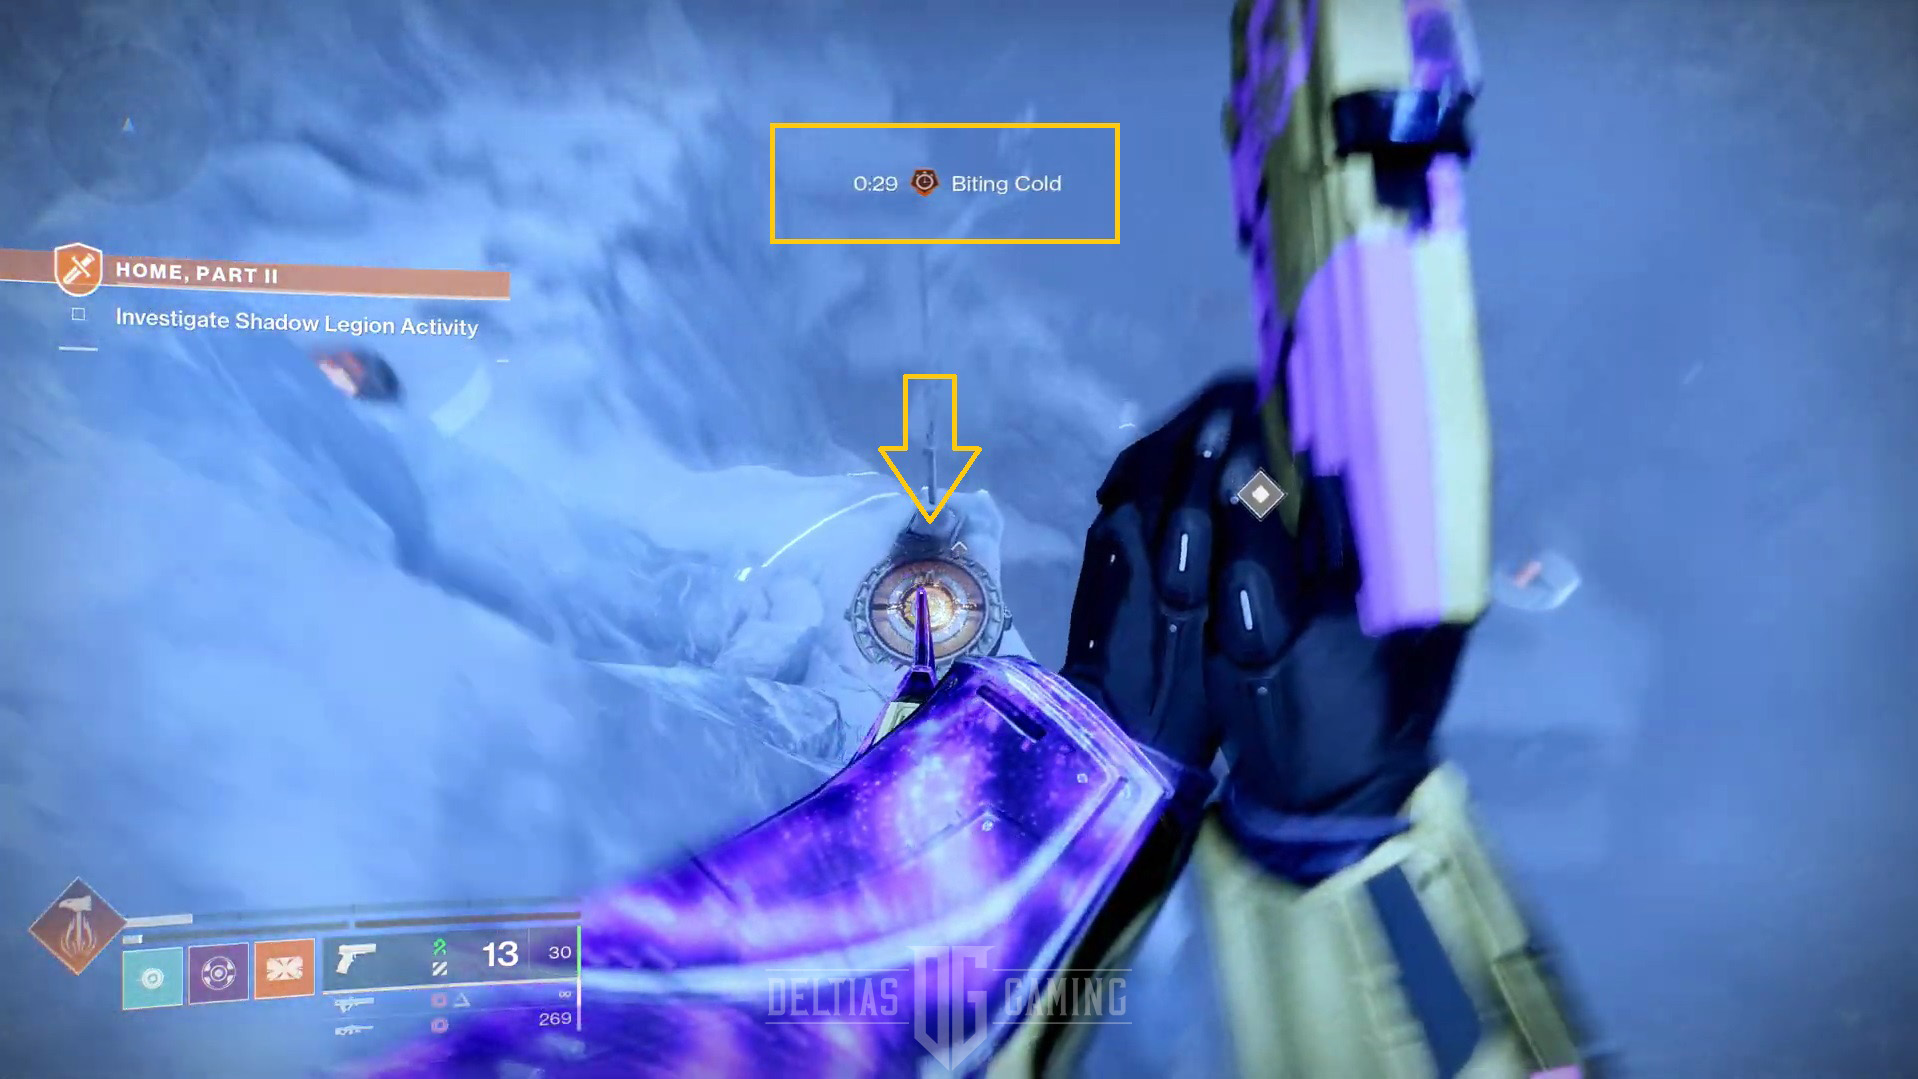
You are in the final steps of getting the Ergo Sum and completing the Destined Hereo quest. Now you must investigate Shadow Legion Activity in cold areas that constantly affect you with the Biting cold debuff. You can see it on your screen with the timer. Once the timer runs out, you die. Yet, the only method to refresh the timer is to stand on those orange platforms with fire.
Once you reach the bridge and cabal enemies. Similarly, like before, you need to disable generators. First, enter the Psions bubbles to defeat them and lower the generator’s shields. Then, kill Ascendant Guards, who drop the Unstable Power Units and place them in the generators to disable them. The next fight is the same with the same mechanic.
Lastly, before you can damage the final boss, Goliath Tank, in the following area, you need to kill the psions. The rest of the mechanics repeat. The mission is complete. Grab the chest and return to the Lost City to pick up a final mission for the Ergo Sum and Destined Hereos Quest in Destiny 2.
Completing Destined Hereos – Queens Part 2
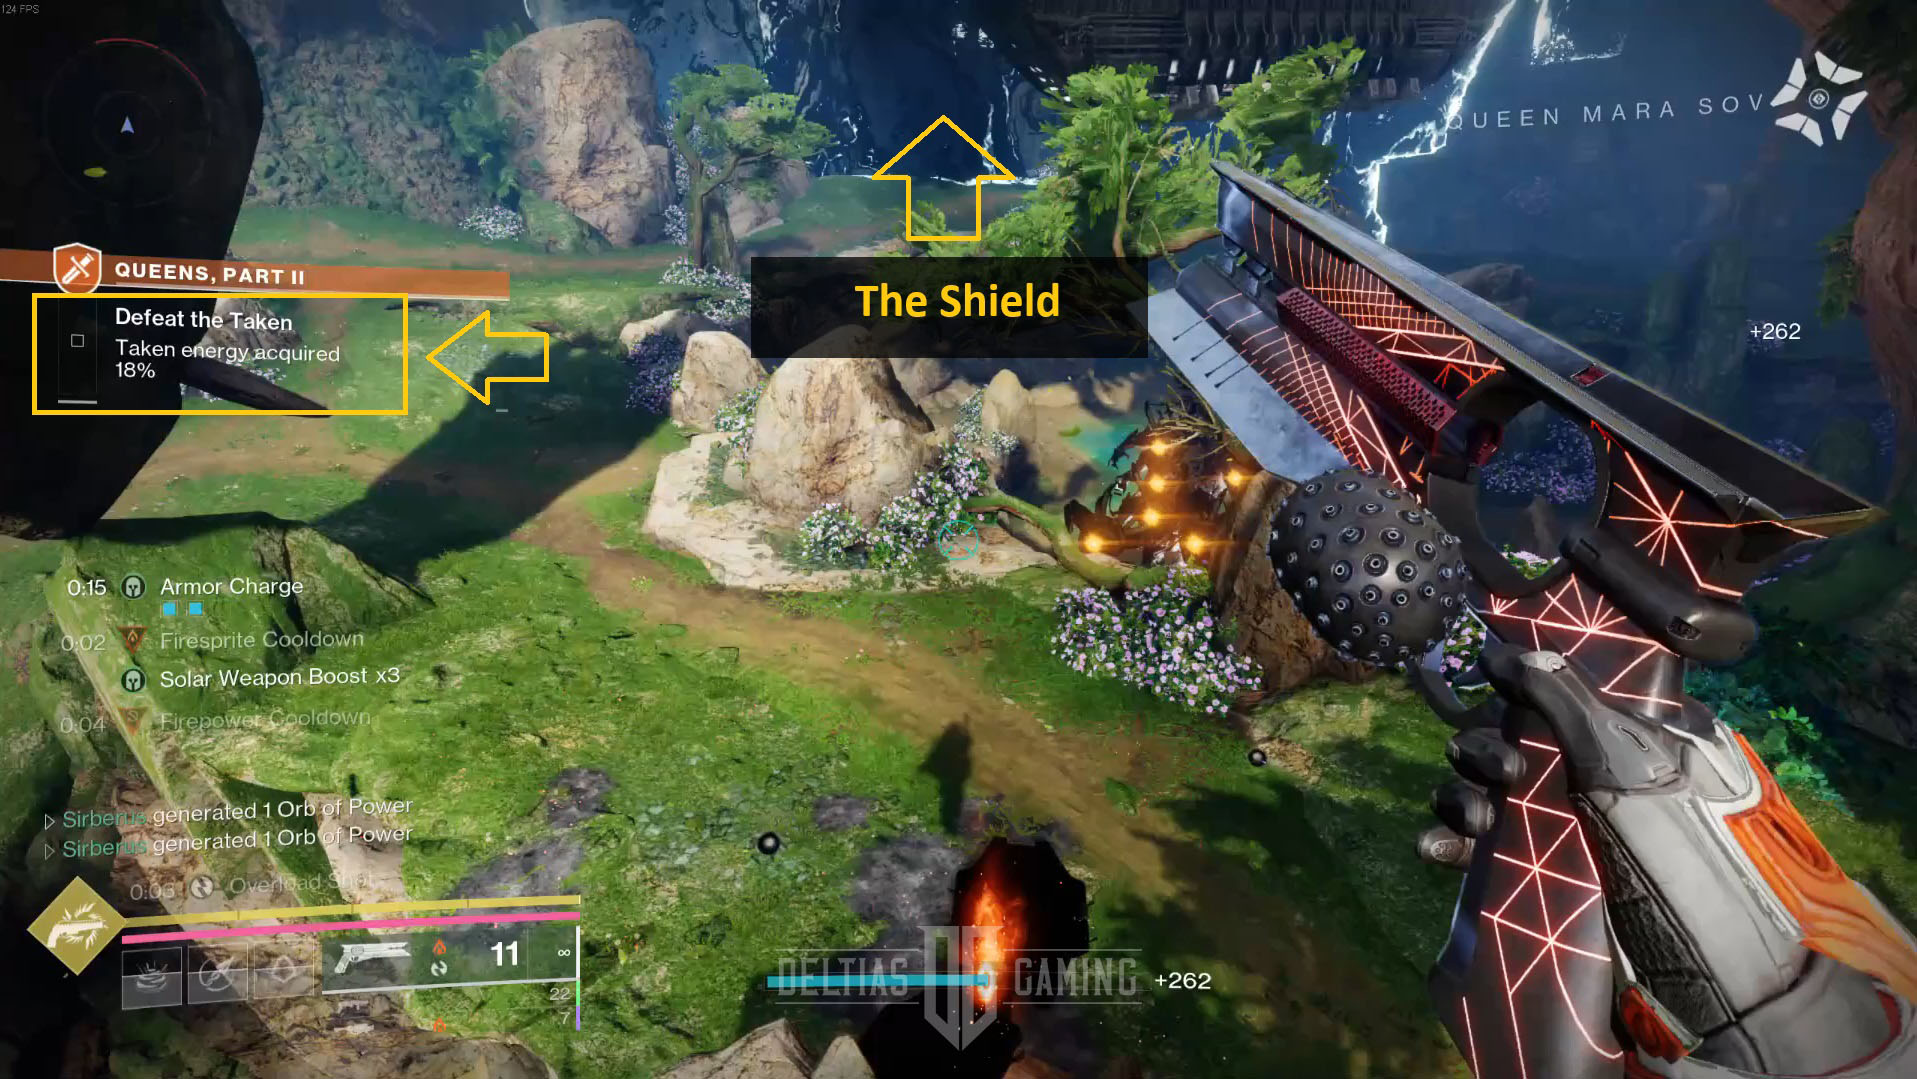
In the pale heart, the refraction you will need to defeat the Lucent hive enemies. This part is simple: follow the caves, kill all the enemies, listen to memory, and enjoy the fights. That is until you reach a green area with the taken. Your objective now is to take down the taken, and on the left side of the screen, you can see the percentage of how much taken energy you require to break the shield blocking your way. Kill them all to complete this step.
Consequently, you will become empowered, your screen will turn grey, and you will see additional platforms and objects. Reach the top rocky platform as the marker shows and continue to the next room, where you find the same required of taken energy to become empowered again. This time, it’s a restricted respawn area. This starts the final fight. It’s long and will take a little time, but when you stand victorious, you can return to the lost city for your final reward, Ergo Sum, a new exotic sword in Destiny 2.
Obtaining Ergo Sum in Destiny 2
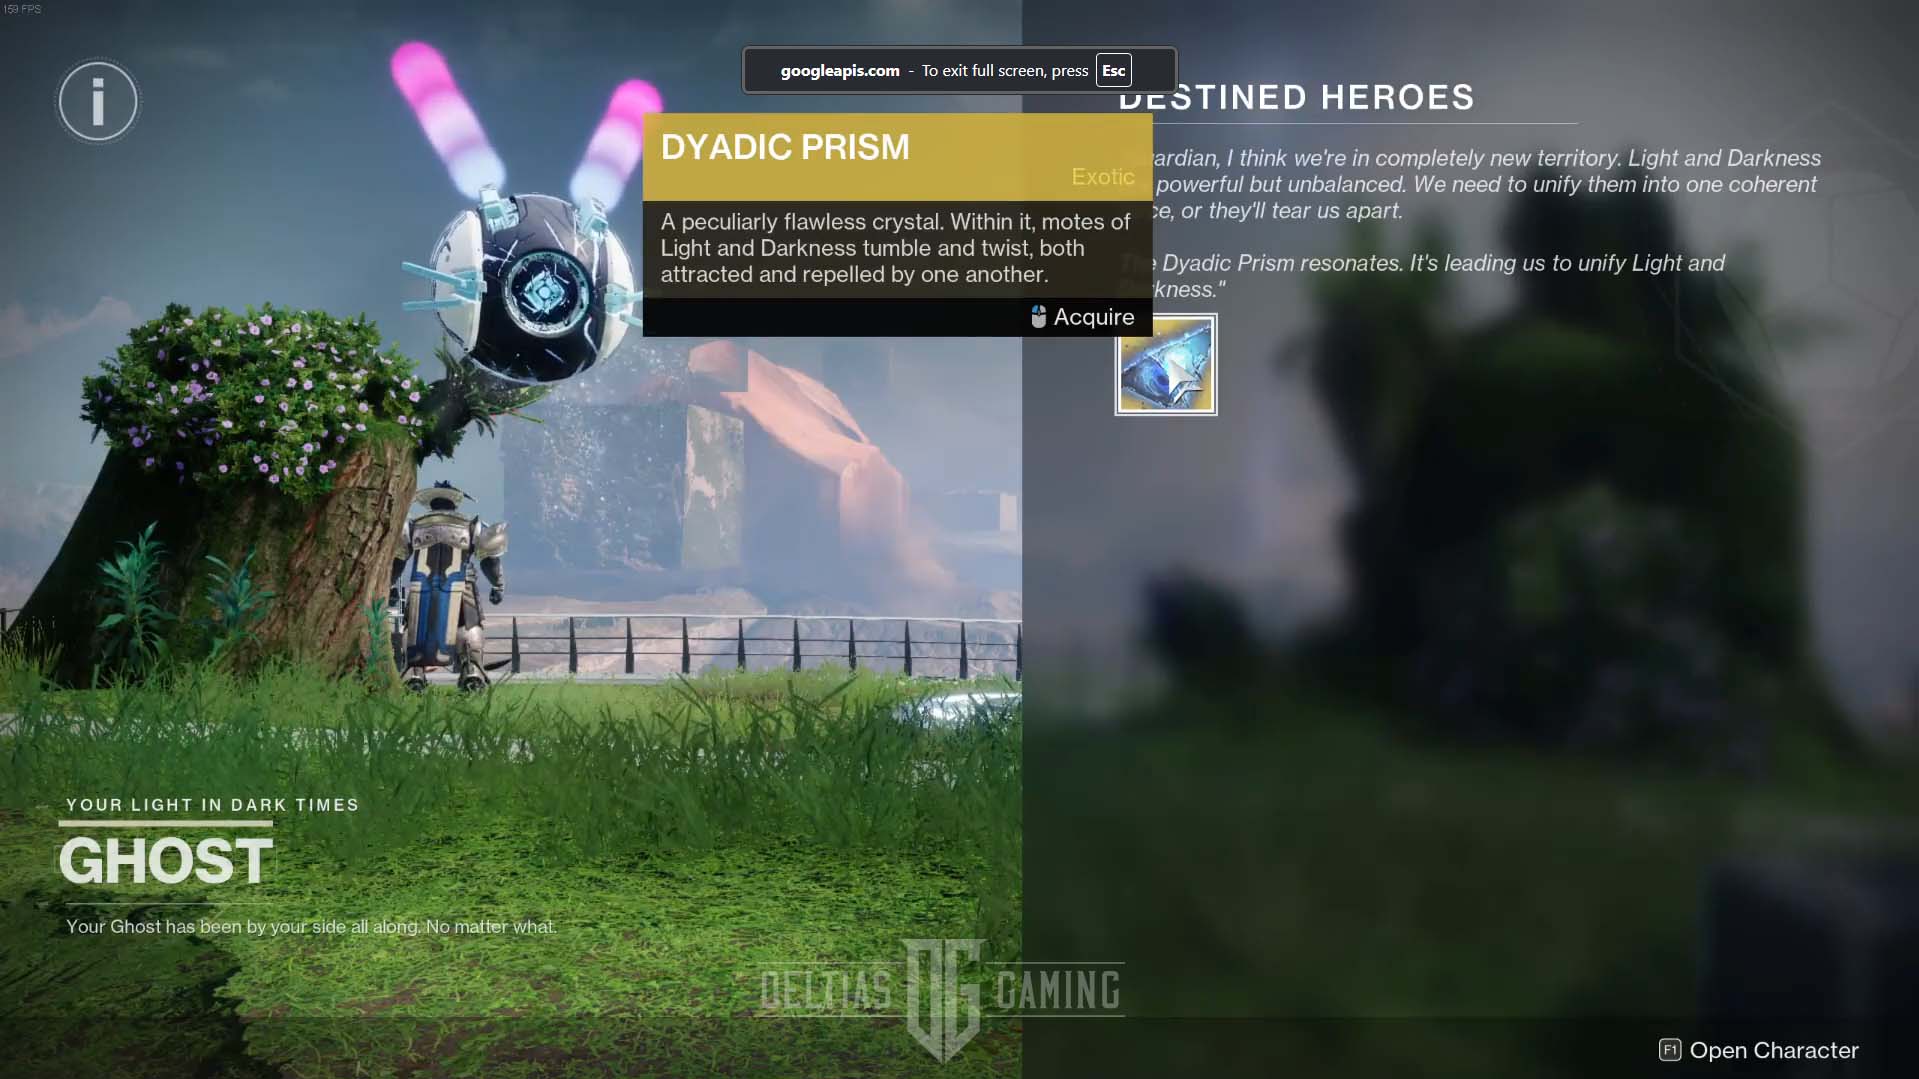
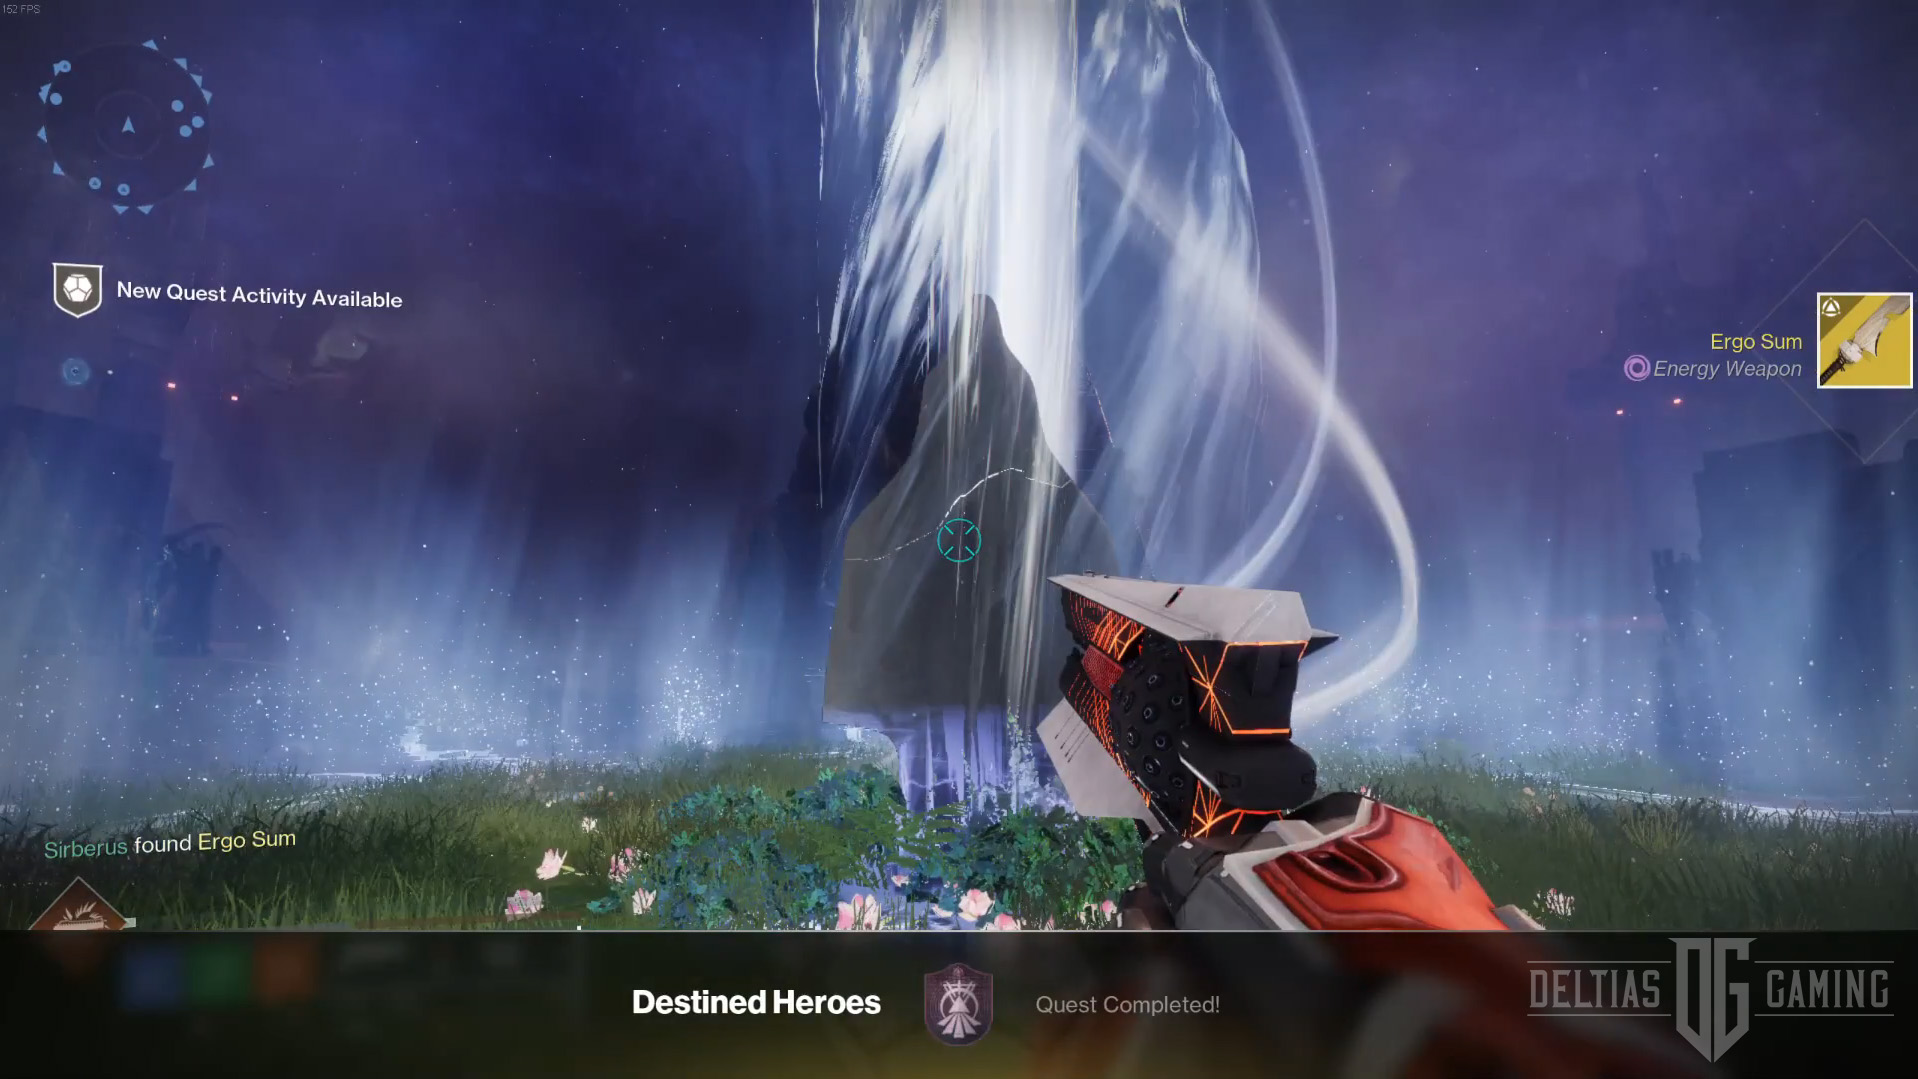
Once you return to Lost City to your ghost, you will get from him a Dyadic Prism Legendary item. Open your quest map and launch the last mission in the Sacrarion, the pale heart. Interact with the Destined Hereos quest marker that will take you to a new area with an impressive energy fountain in the middle, interact with it, and pick up your Ergo Sum exotic sword.
How to Farm Ergo Sum for God Roll
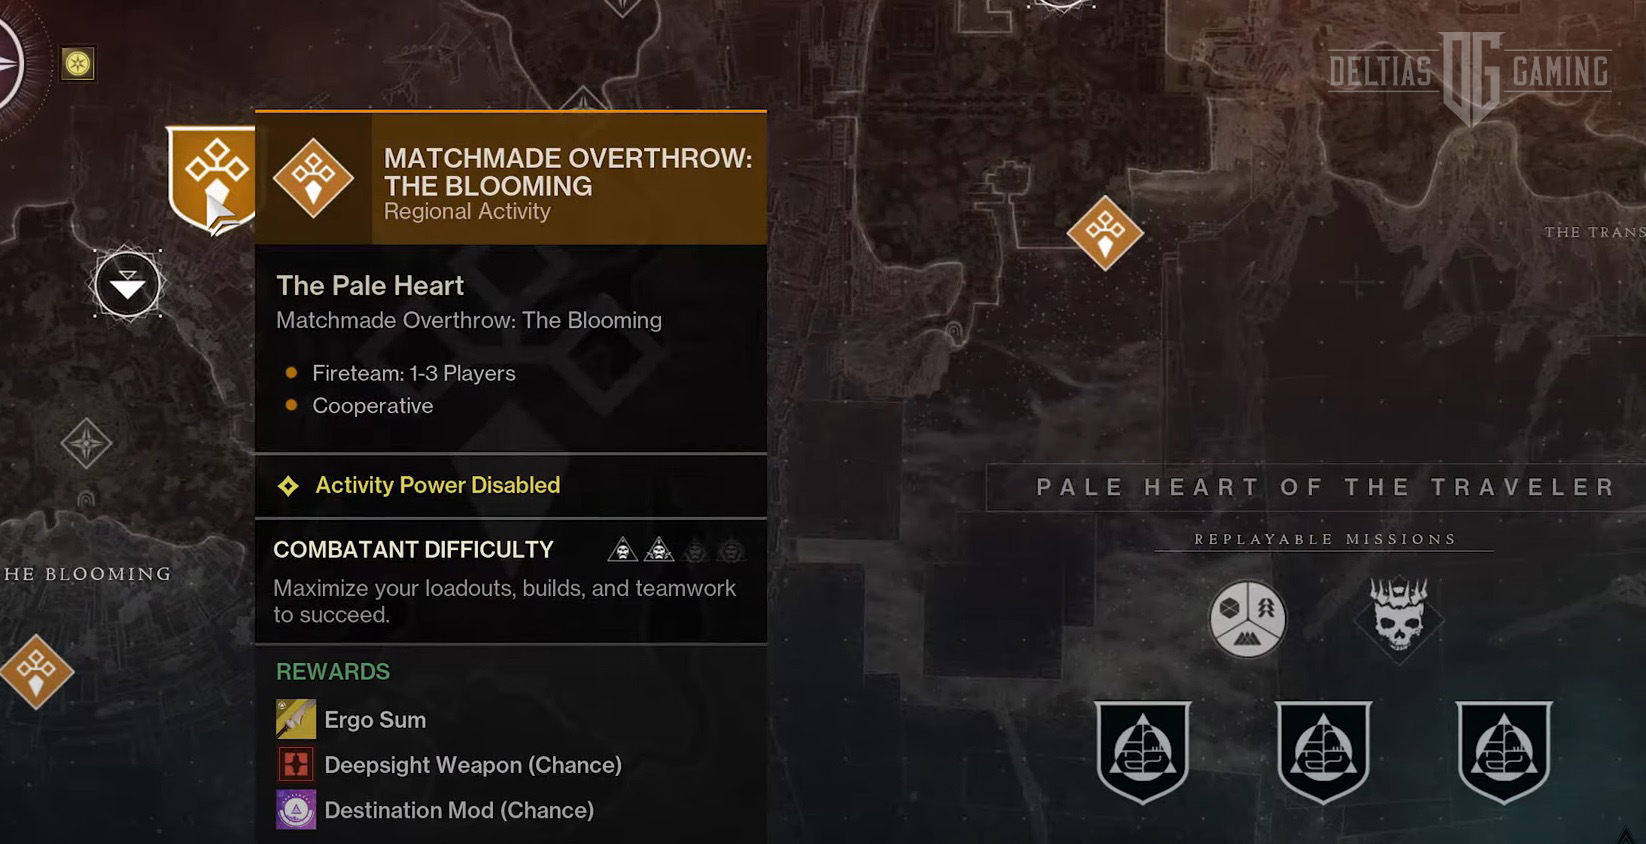
There are two main methods to farm Ergo Sum to get the perfect god roll. In Pale Heart of the Traveler, you can complete the Matchmade Overthrow regional activity, and you will see Ergo sum there as a reward. You can farm it after each weekly reset, so it may take some time before you get your roll. Secondly, you can get it through the Pathfinder. In the end, you will also be rewarded with the sword.
Looking For More About Destiny 2?
Thank you for reading Destiny 2: How to Get Ergo Sum (Destined Hereos) Guide. We provide the latest news and create guides for Destiny 2. Also, watch me play games on Twitch or visit my YouTube channel!