Facebook
 Reddit
 Email
Email
Here is a guide on how you can complete the boss encounter and defeat Kerrev the Erased in the Destiny 2 Sundered Doctrine dungeon.

As you progress through the Destiny 2 Sundered Doctrine dungeon, you will eventually encounter and have to defeat a boss named Kerrev the Erased. Defeating this formidable foe marks the dungeon’s climactic moment. However, considering he is the final boss of the dungeon, taking him down won’t be an easy task.
Similar to other parts of the campaign, you need to be familiar with the Pyramid symbols and use this knowledge to solve the puzzle. This article will guide you on how to complete the boss encounter and defeat Kerrev the Erased in Destiny 2 Sundered Doctrine.
How To Defeat Kerrev the Erased in Destiny 2 Sundered Doctrine Dungeon
Be Familiar With the Disciple Symbols
Just like the First Encounter and the Zoetic Lockset encounter, you will need to be familiar with the Disciple symbols. Check the image below for a refresher before you start the final boss encounter and defeat Kerrev the Erased:
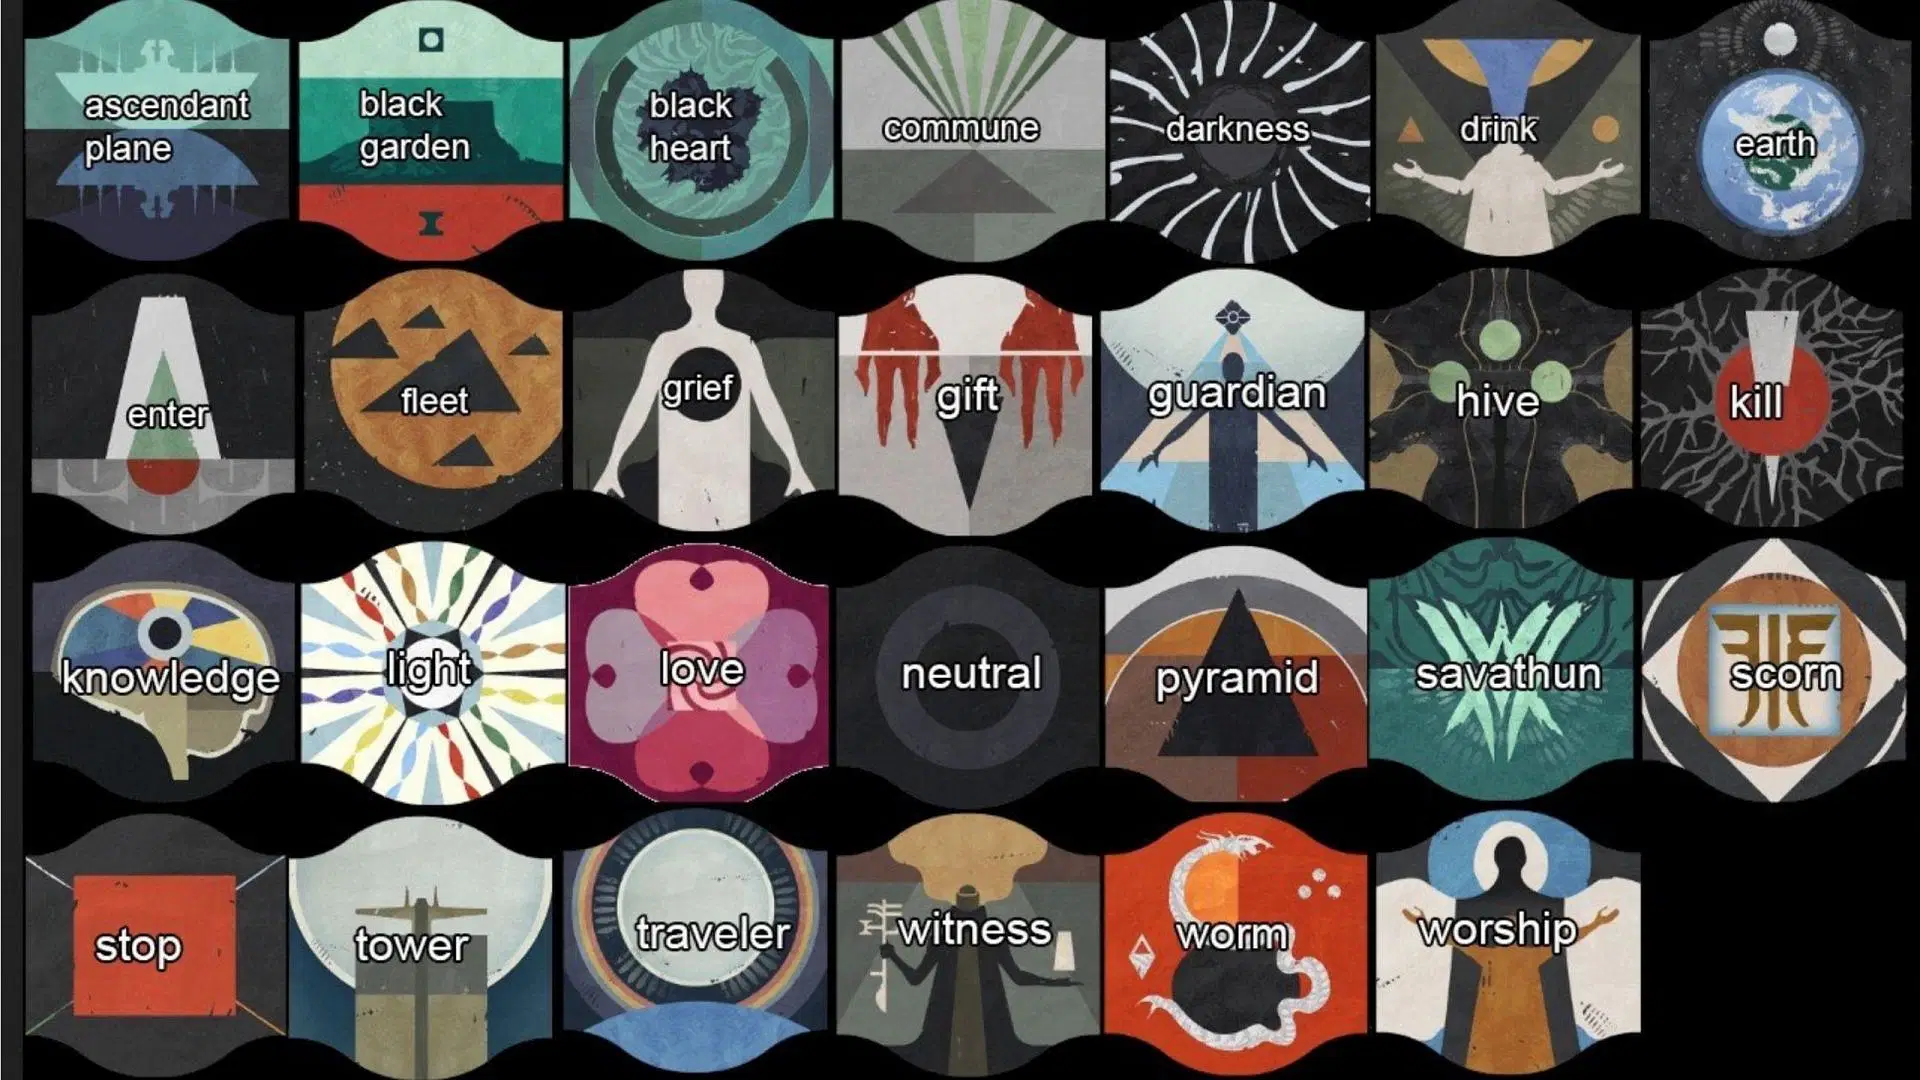
If you finished the two encounters already, you should be well-equipped to face the boss as most of the boss mechanics remain the same with a few new challenges added.
Check the Symbols on the Walls of Each Room
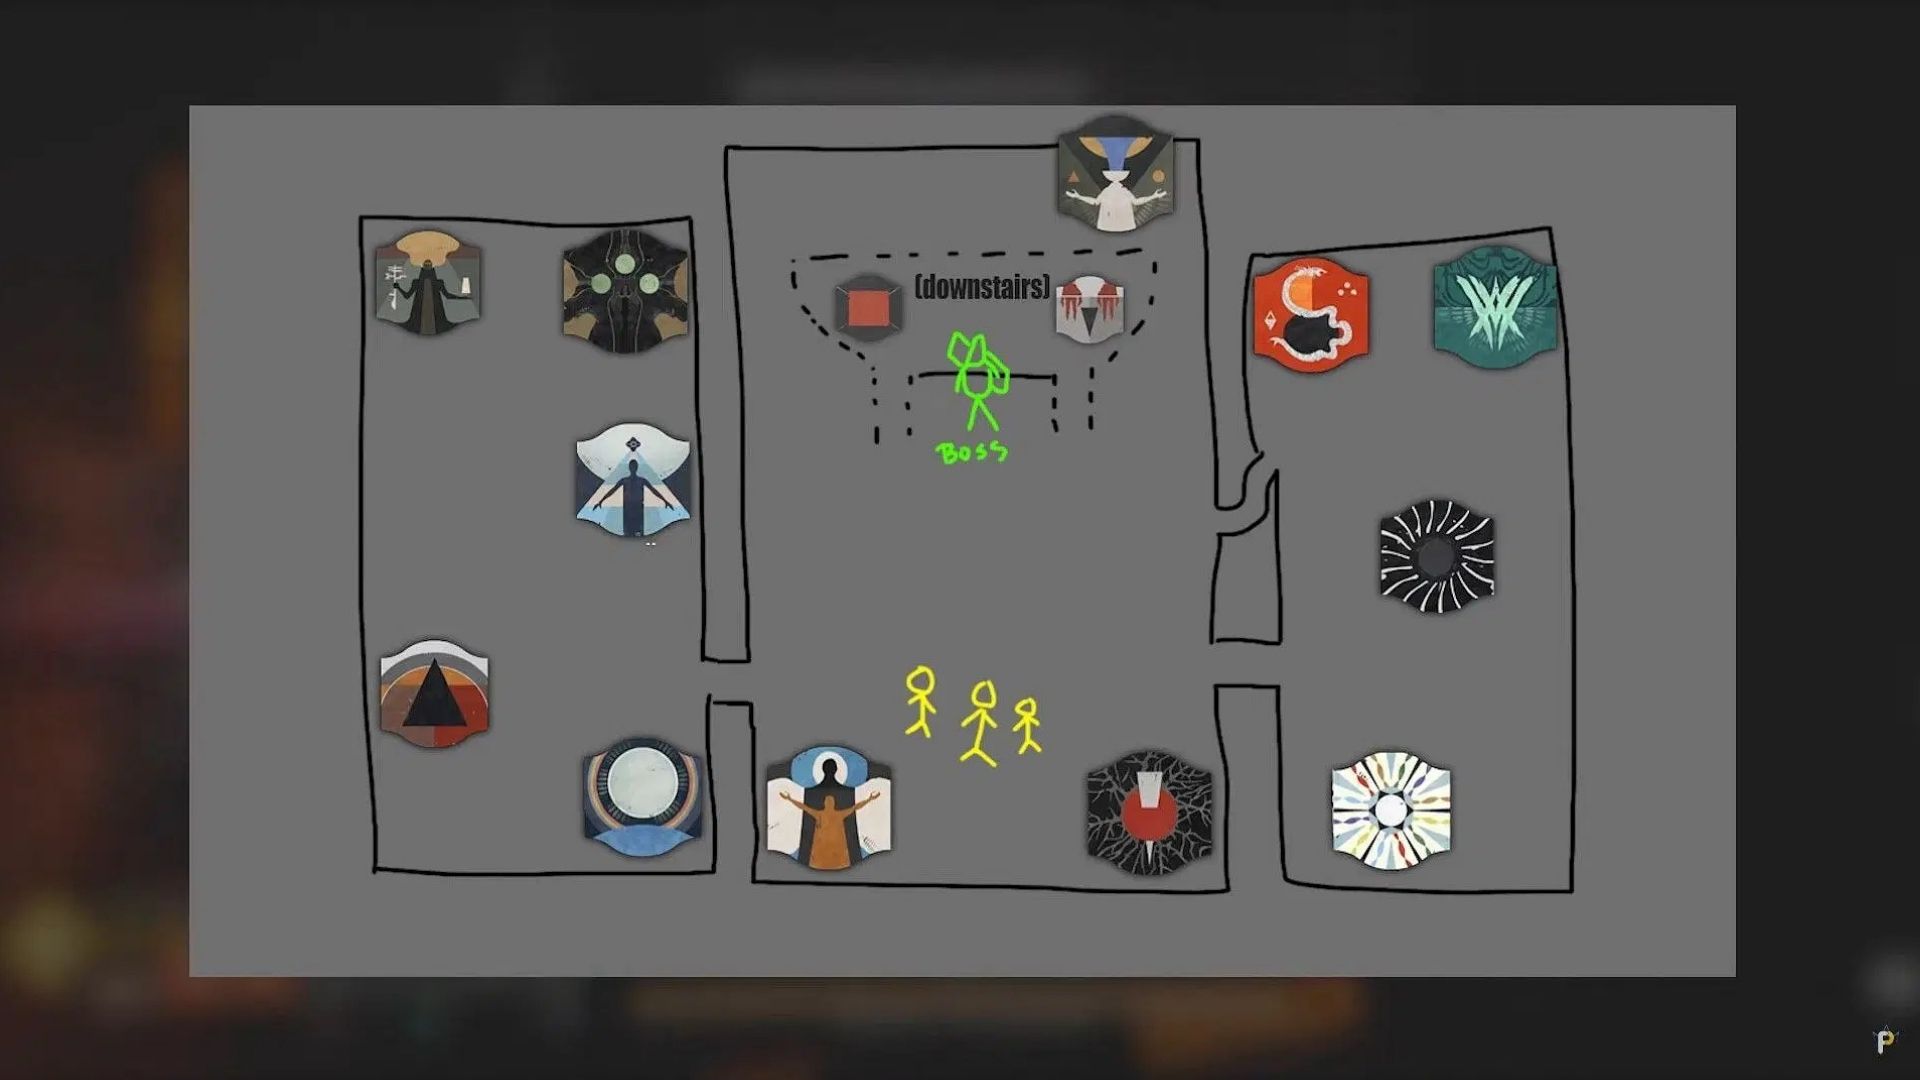
The boss area is divided into three sections. You can find the symbols on the walls of each section:
- Central Room: This is where Kerrev resides, protected by an invulnerable shield. At the back of this room, there’s a symbol wheel displaying six symbols—three on the left and three on the right.
- Left Room: Accessible by shooting a specific door until it glows orange and opens slightly. Quickly pass through before it closes. Don’t stop shooting if you are in the middle of the opening walls. When it closes on you, you die.
- Right Room: Entry is gained by standing on a protruding structure that lowers to reveal a passage. Exit this room through a small tunnel connecting back to the central area.
Analyze the Symbol Wheel
- Begin by examining the symbol wheel in the central room. Note the symbols on both the left and right sides.
Locate the Truthspeaker
- Search both the left and right rooms to find and defeat the Truthspeaker. This enemy reveals a symbol upon defeat.
Determine Truth and Falsehood
- The symbol dropped by the Truthspeaker indicates the “true” side of the wheel. For instance, if the symbol appears on the right side of the wheel, that side represents truth.
Adjust the Symbols
- Illuminate the symbols on the side opposite the truth (the false side) and ensure the symbols on the true side remain unlit.
- To do this, locate the corresponding symbols in the three rooms and use nearby lenses to direct light beams appropriately.
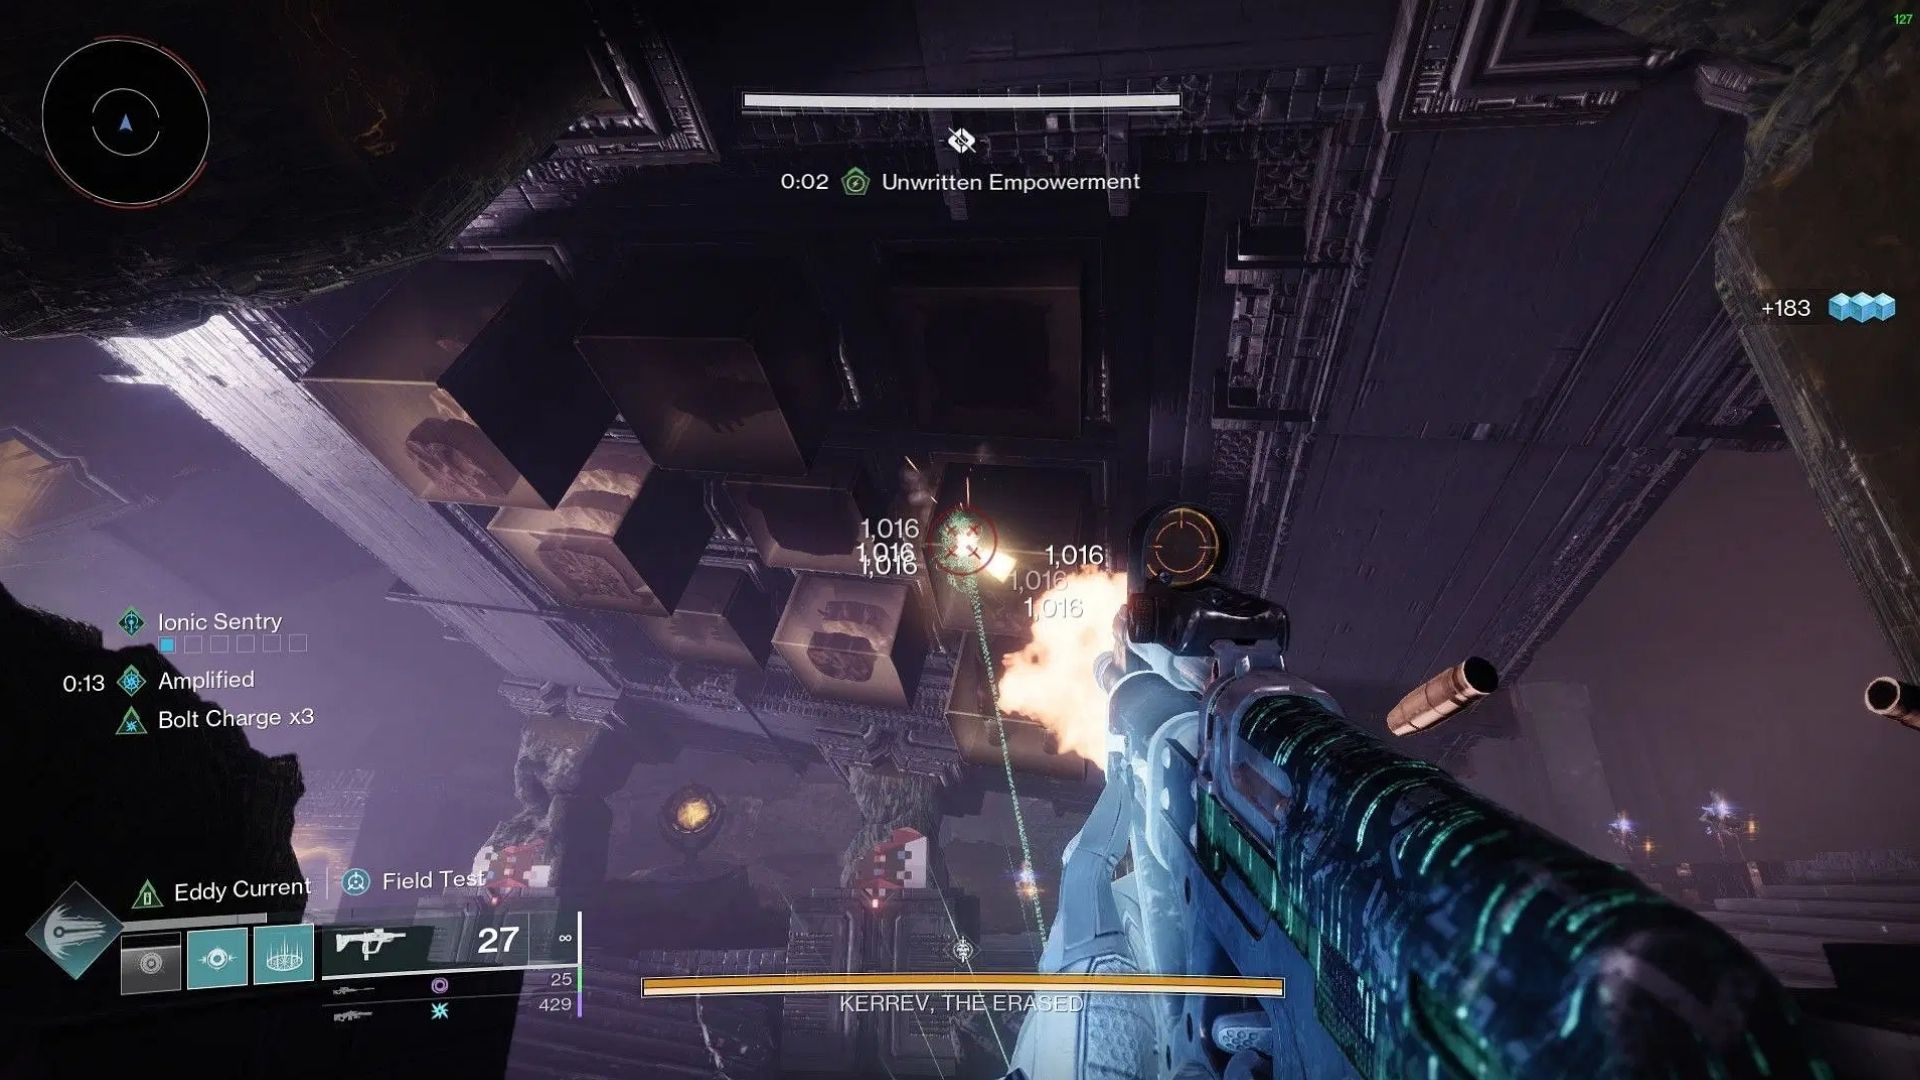
- Some lenses may be locked with Strand energy. Defeat Unwritten Attendants to gain the Unwritten Empowerment buff, allowing you to destroy these locks.
Initiate the Damage Phase
- Once the correct symbols are illuminated, interact with the main symbol wheel in the central room.
- Immediately seek cover, as this action triggers a burning effect that can be lethal if you’re exposed.
- After the burning subsides, Kerrev’s shield will be down, making him vulnerable to attacks.
Attack Kerrev While Shield is Down
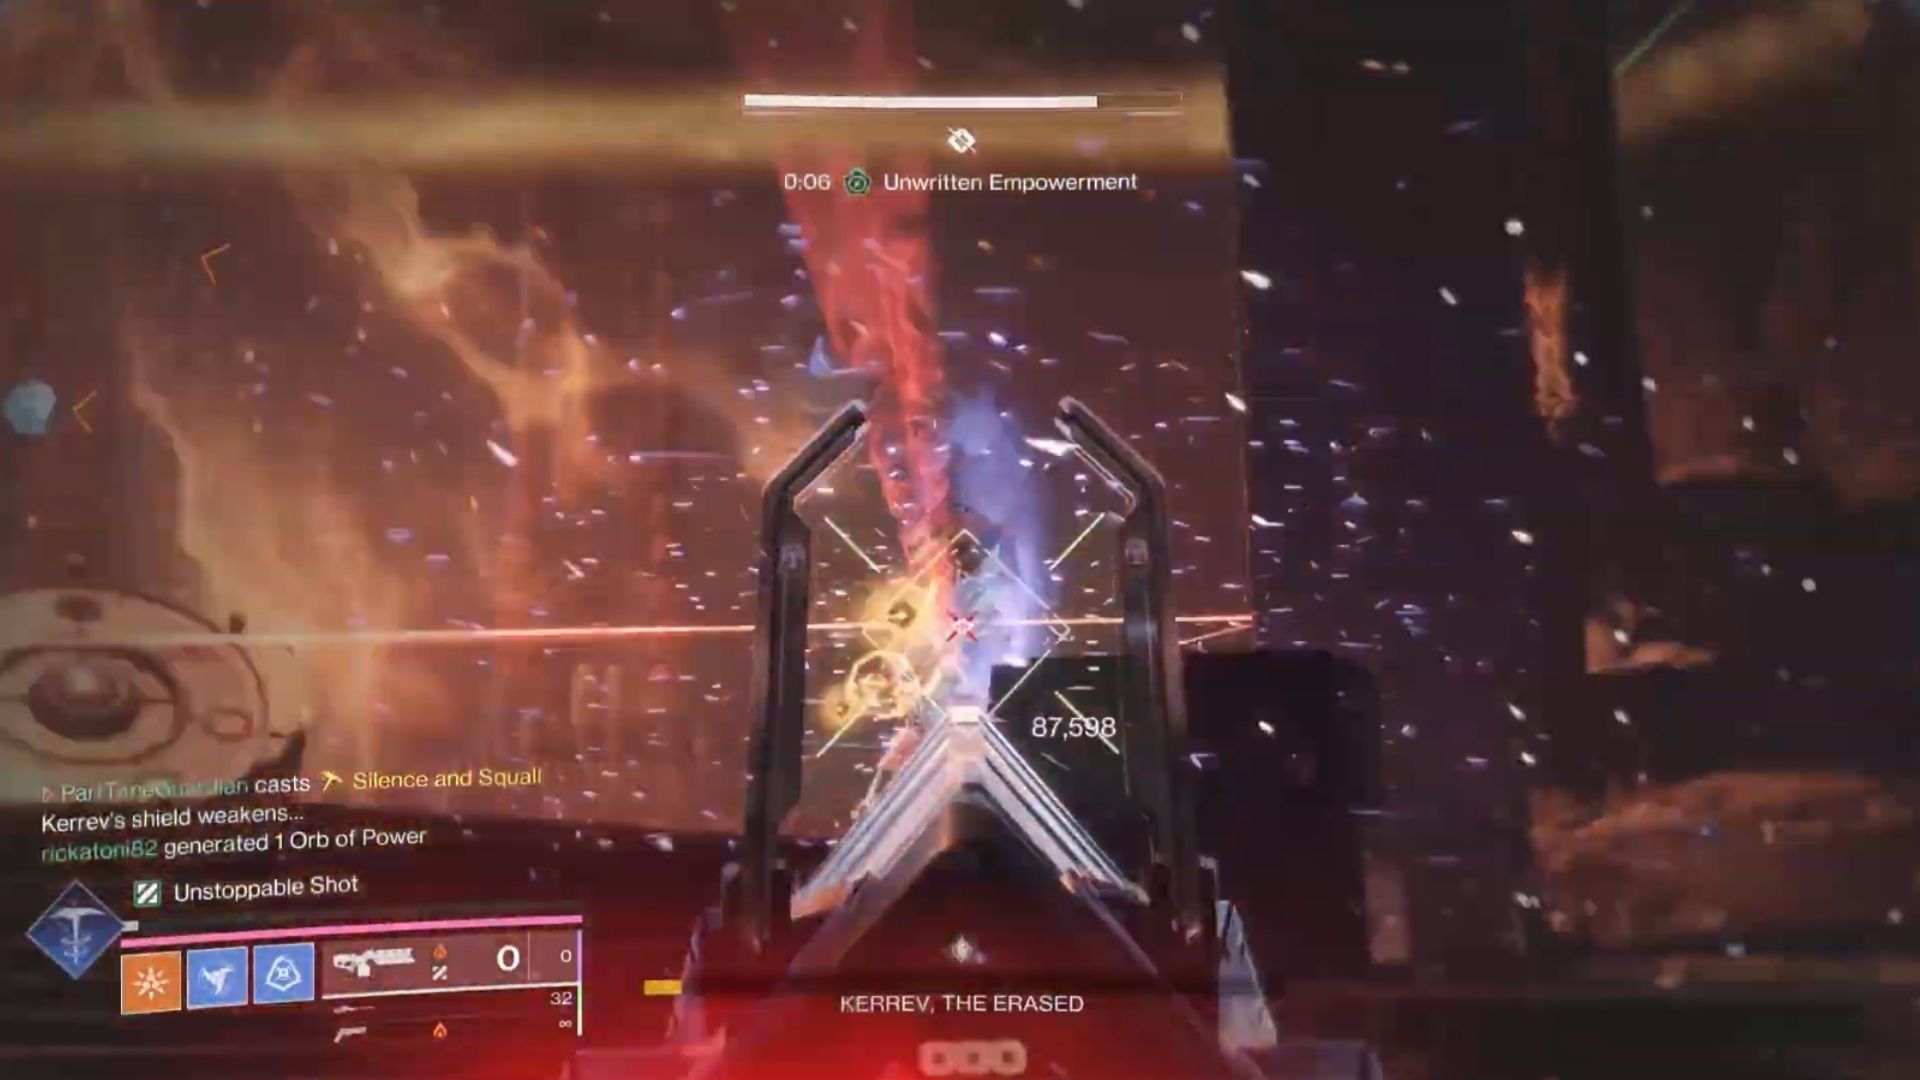
- Focus your firepower on Kerrev, utilizing high-damage weapons and abilities.
- He will try to move around the map. Make sure you use attacks that can suspend or pull you.
Rinse and Repeat
- Kerrev’s shield will regenerate after a short period. Repeat the above steps until he is defeated.
- Patience is key in this boss fight. Make sure you don’t mess up the puzzle to avoid extending the run.
Also Read: Destiny 2 The Nether: All Ravenous Wormspawn Locations (Collectible Guide)
Tips and Tricks for Destiny 2 Sundered Doctrine Kerrev the Erased Boss Fight
Here are a few recommendations for loadouts and team compositions that you can consider when facing Kerrev the Erased in Destiny 2 Sundered Doctrine:
- Weaponry: Utilize Rocket Launchers and Linear Fusion Rifles for effective damage. The Divinity Trace Rifle can also be a good option to maximize critical hits.
- Team Composition: Use abilities that provide healing and damage buffs, such as the Warlock’s Well of Radiance or the Titan’s Ward of Dawn.
- Survivability: Equip mods that offer resistance to Strand damage, as Kerrev’s attacks often inflict this type of debuff.
Keep in mind that these are only recommendations. You don’t have to follow them if you already have a preferred loadout and strategy.
Looking For More About Destiny 2?
Thank you for reading “” Guide. We provide the latest news and create guides for Destiny 2. Also, watch me play games on Twitch or visit my YouTube channel!