• Skip to main content
  • Skip to primary sidebar
  • Skip to footer

Deltia's Gaming

The best games, the best guides!

  • HOT 🔥Latest
    • Root of Nightmares: Loot Table Raid
    • One Bar Sorcerer Build
    • Destiny 2 Void Hunter PvE Build
    • Destiny 2 Void Warlock PvE Build
    • ESO Stamina Dragonknight PvP Build
    • Best ESO Classes: PvP Tier List
    • Best One Bar Build for ESO: PvE Tier List
  • Redfall
    • The Best Redfall Builds
    • Release Date
    • All Redfall Weapons and Gear
    • Abilities Attributes and Heroes Customisation
    • What Are The Best Heroes – Strengths & Backgrounds Guide
    • Classes
    • Redfall Overview
    • Redfall Gameplay and Trailers
    • Redfall Crossplay
    • Redfall Bite Back Edition
    • Redfall Game Pass
    • Redfall Pictures & Art
  • Guides
    • Destiny 2 Guides
      • Lightfall & Season 20
        • All Lightfall Legendary Weapons
        • All Lightfall Exotic Weapons & How to Get Them
        • All Strand Weapons & How to Get Them
        • Season 20 Weapons & How to Get Them
        • How to Get the Terminal Overload Keys
        • The Best War Table Upgrades
        • How to Complete Destiny 2 From Zero – Quest Guide
        • How to get The Revision Zero Catalyst
        • The Revision Zero how to get and unlock the weapon
        • How to Unlock Season 20 Artifact
        • New Origin Traits Season 20
        • Season Pass Rewards Season 20
        • New Seasonal Vendor Season 20
        • New Destiny 2 Lightfall Mods
        • Strand Warlock: Abilities, Aspects & Fragments
        • Strand Hunter: Abilities, Aspects & Fragments
        • Strand Titan: Abilities, Aspects & Fragments
        • All Destiny 2 Lightfall Editions Explained
        • "How to get Exotic Gear" Guides
          • Final Warning how to get and unlock the weapon
          • Winterbite how to get and unlock the weapon
          • Deterministic Chaos how to get and unlock the weapon
          • How to Get the Quicksilver Storm Exotic Catalyst
          • Cyrtarachne’s Facade how to get and unlock the Armor
          • Abeyant Leap how to get and unlock the Armor
          • Swarmers how to get and unlock the Armor
      • Destiny 2 Root of Nightmares: Loot Table – Full list
      • How to Get Vexcalibur Exotic Glaive
      • How to Unlock Strand Subclass
      • God Roll Weapons
      • Xur Locations Guide
      • Xur Guide
      • Beginner Guide
        • Gear & Weapon Mods
        • Weapon Crafting Guide
        • Legacy Exotics Guide
        • Armor Guide
        • Lost Sector Guide
        • Recommended Weapon Rolls
      • Iron Banner Guide
      • Returning Player Guide
      • How to Get ALL New IKELOS Weapons
      • How to Link Twitch and Bungie accounts
    • Hogwarts Legacy Guides
      • Which House should you choose
      • Hogwarts Legacy Houses
        • Hufflepuff
        • Slytherin
        • Ravenclaw
        • Gryffindor
      • Important Professors
        • Headmaster Phineas Nigellus Black
        • Professor Matilda Weasley
        • Professor Eleazar Fig
        • Professor Aesop Sharp
        • Professor Mirabel Garlick
        • Professor Dianah Hecat
        • Professor Abraham Ronen
      • Hogwarts Legacy Classes Guide
        • Classes – Beasts
        • Classes – Potions
        • Classes – Herbology
        • Classes – Charms
        • Classes – Defence Against the Dark Arts
        • Classes – Broomstick Flying
      • Can you be an evil Dark Wizard? Guide
      • How to Unlock and Enter Dark Arts Battle Arena
      • Max level & Talents Cap
      • Talents Guide
      • Quest Guides & Walkthrough
      • Merlin’s Trials & How to Increase Inventory Slots
      • Wand Guide and Customisation
      • How to unlock all Mounts
      • Fantastic Beasts Guide
      • Character Creation and Cosmetics Guide
      • How to Identify Gear Items Guide
      • Spells Guide
      • Plants Guide
      • How to change the Time of The Day?
      • Time Period
      • Combat Guide
      • How to Solve Puzzle Door?
    • ESO Guides
      • Jester’s Festival Guide
      • Character & Leveling
        • Complete Beginners Guide
        • Character Creation
        • Race Guide
        • Class Guides
          • Dragonknight
          • Nightblade
          • Templar
          • Sorcerer
        • Power Leveling & Grinding Guide
        • Skill Points Guide
        • Attribute Points Guide
        • Psijic Order Leveling Guide
        • Champion Points System
        • Champion Point Grinding Tips
      • Combat & Solo
        • How to Light Attack Weave
        • 5 Tips for Increasing Your DPS
        • What Tanks Should Know
        • Magicka DPS Gear Guide
        • SOLO Stamina Class Guide
        • SOLO Magicka Class Guide
      • PvP Guides
        • How to unlock Alliance War Skills
        • PvP Beginner Guide
        • PvP Campaigns, what to choose, CP or no-CP?
        • How to farm Alliance Points (AP)
        • How to farm Tel Var Stones
        • Cyrodiil guide for Beginners
        • Imperial City Guide for Beginners
        • Battlegrounds for Beginners
        • Battlegrounds objectives and strategies
        • Siege Guide
        • PvP Survival Tips
        • PvP Tips, Tricks and Hints
          • The best PvP Tips, Tricks and Hints
          • Best PvP Ultimates
          • How to “Stop a Ganker"
      • Crafting
        • Alchemy Potions & Recipes
        • Crafting Writs Guide
        • Master Crafting Writs
        • Fishing Guide
        • Crafting Trait Research Guide
      • ESO Tools
        • ESO Server Status
        • ESO Daily Endeavors Tool
        • ESO Golden Vendor
      • Tales of Tribute
        • Tales of Tribute Guide
        • Tales of Tribute Decks Guide
        • Tales of Tribute Strategies
        • Tales of Tribute Tutorial
      • Daily Routine Guides
        • Daily Priorities Guide
        • Daily Dungeon Guide
        • Undaunted Daily Pledges
        • Daily Job Brokers Guide
        • Daily Guild Quests Guide
        • Mount Training & Increase Speed
        • Daily Login Rewards
        • Endeavors Guide
      • Companions Guides
        • Full Companions Guide
        • Isobel Velois guide.
      • Addons, UI, and Keybinds
      • How to Link ESO Account to Twitch
      • How to Use the Public Test Server
  • ESO Builds
    • Beginner & Leveling PvE
      • Dragonknight
        • Magicka
        • Stamina
      • Nightblade
        • Magicka
        • Stamina
      • Sorcerer
        • Magicka
        • Stamina
      • Templar
        • Magicka
        • Stamina
      • Warden
        • Magicka
        • Stamina
      • Necromancer
        • Magicka
        • Stamina
    • Solo PvE
      • Dragonknight
        • Magicka
        • Stamina
      • Necromancer
        • Magicka
        • Stamina
      • Nightblade
        • Magicka
        • Stamina
      • Sorcerer
        • Magicka
        • Stamina
      • Templar
        • Magicka
        • Stamina
      • Warden
        • Magicka
        • Stamina
    • Group PvE
      • Dragonknight
        • Magicka DPS
        • Stamina DPS
        • Healer
        • Tank
      • Necromancer
        • Magicka DPS
        • Stamina DPS
        • Healer
        • Tank
      • Nightblade
        • Magicka DPS
        • Stamina DPS
        • Healer
        • Tank
      • Sorcerer
        • Magicka DPS
        • Stamina DPS
        • Healer
        • Tank
      • Templar
        • Magicka DPS
        • Stamina DPS
        • Healer
        • Tank
      • Warden
        • Magicka DPS
        • Stamina DPS
        • Healer
        • Tank
    • PvP
      • Dragonknight
        • Magicka
        • Stamina
        • Healer
      • Necromancer
        • Magicka
        • Stamina
        • Healer
      • Nightblade
        • Magicka
        • Stamina
        • Healer
      • Sorcerer
        • Stamina
        • Magicka
        • Healer
      • Templar
        • Magicka
        • Stamina
        • Healer
      • Warden
        • Magicka
        • Stamina
        • Healer
    • One Bar PvE
      • Dragonknight
        • DPS
        • Healer
        • Tank
      • Nightblade
        • DPS
        • Healer
        • Tank
      • Sorcerer
        • DPS
        • Healer
        • Tank
      • Templar
        • DPS
        • Healer
        • Tank
      • Warden
        • DPS
        • Healer
        • Tank
      • Necromancer
        • DPS
        • Healer
        • Tank
    • One Bar PvP
      • Dragonknight
        • Magica DPS
        • Stamina DPS
        • Healer
        • Tank
      • Nightblade
        • Magica DPS
        • Stamina DPS
        • Healer
        • Tank
      • Sorcerer
        • Magica DPS
        • Stamina DPS
        • Healer
        • Tank
      • Templar
        • Magica DPS
        • Stamina DPS
        • Healer
        • Tank
      • Warden
        • Magica DPS
        • Stamina DPS
        • Healer
        • Tank
      • Necromancer
        • Magica DPS
        • Stamina DPS
        • Healer
        • Tank
    • Companion Builds
      • Azandar Al-Cybiades
        • Ranged DPS builds
        • Melee DPS builds
        • Healer build
        • Tank build
      • Sharp-As-Night
        • Ranged DPS builds
        • Melee DPS builds
        • Healer build
        • Tank build
      • Ember
        • Ranged DPS builds
        • Melee DPS builds
        • Healer build
        • Tank build
      • Isobel Velois
        • Ranged DPS builds
        • Melee DPS builds
        • Healer build
        • Tank build
      • Mirri Elendis
        • Ranged DPS builds
        • Melee DPS builds
        • Healer build
        • Tank build
      • Bastian Hallix
        • Ranged DPS builds
        • Melee DPS builds
        • Healer build
        • Tank build
  • Destiny 2 Builds
    • Solo
      • Hunter
        • Arc Hunter
        • Solar Hunter
        • Stasis Hunter
        • Strand Hunter
        • Void Hunter
      • Titan
        • Arc Titan
        • Solar Titan
        • Stasis Titan
        • Strand Titan
        • Void Titan
      • Warlock
        • Arc Warlock
        • Solar Warlock
        • Stasis Warlock
        • Strand Warlock
        • Void Warlock
    • PvE
      • Hunter
        • Arc Hunter
        • Solar Hunter
        • Stasis Hunter
        • Strand Hunter
        • Void Hunter
      • Titan
        • Arc Titan
        • Solar Titan
        • Stasis Titan
        • Strand Titan
        • Void Titan
      • Warlock
        • Arc Warlock
        • Solar Warlock
        • Stasis Warlock
        • Strand Warlock
        • Void Warlock
    • PvP
      • Hunter
        • Arc Hunter
        • Solar Hunter
        • Stasis Hunter
        • Strand Hunter
        • Void Hunter
      • Titan
        • Arc Titan
        • Solar Titan
        • Stasis Titan
        • Strand Titan
        • Void Titan
      • Warlock
        • Arc Warlock
        • Solar Warlock
        • Stasis Warlock
        • Strand Warlock
        • Void Warlock
  • Hogwarts Legacy Builds
    • Plant & Cabbage Build
    • Dark Arts Build
    • Spell Build
    • Stealth Build
    • Protego Build
    • Ancient Magic Build
    • Fire Build
  • Contact
    • Support
    • Streaming Setup

Jan 20 2015

Dragonstar Arena Stage Four The Slave Pit Guide

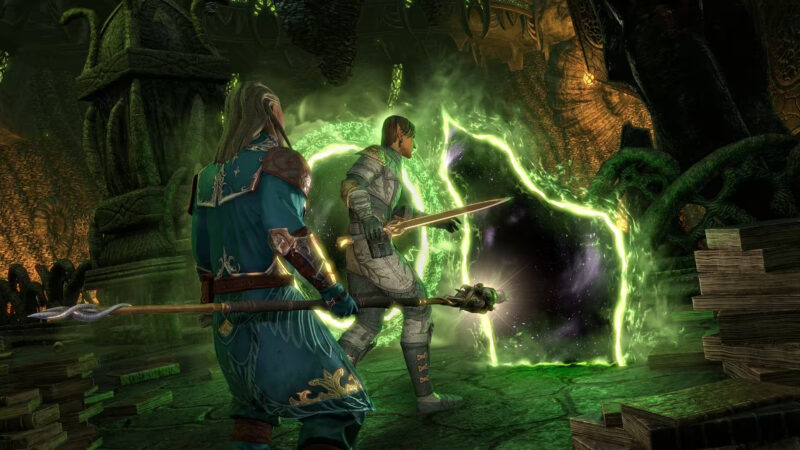
Welcome to Dragonstar Arena Stage Four The Slave Pit Guide.  This maybe one of the easier rounds in Vet DSA as long as you focus target, position within healing range and communicate.  Let’s get started with all you need to know about the Slave Pit!

Stage Four Video here


Enemies and Mechanics

Stage Four Dragonstar Arena Map Picture

Mechanics

This stage is pretty much a large open area similar to Stage Three.  The major mechanic added to Veteran mode is the Enslaver enemies tether a specific player and drop a Enslaver Shadow.  If you’re tethered, you will notice a white beam connecting you tot he Enslaver.  It will drain your resources and health for roughly six then place a semi permanent shadow at your feet.  The Shadow can be damaged, but disappears after a minute so no point in trying to kill it.  Make sure to avoid the red circle.

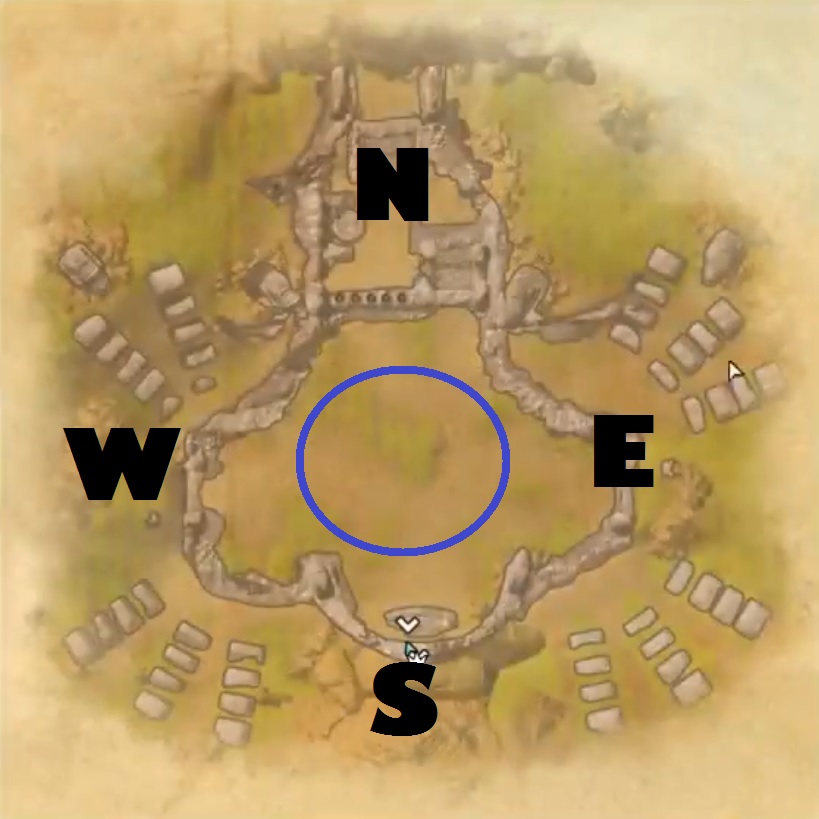
The picture above shows a blue circle where is which I like to drop the Shadow.  Meaning, each player that is tethered, go towards the outside part of the map until a Shadow Spawns.  This will leave room in the center to move around and avoid AoE cleave damage.  This is rough on the healer as you need to center yourself on the tank and DPS.  Make sure to communicate which direction you’re going and keep an eye on your healer.  If your group frame shows the healer (solwen heals in this video) as dark, you’re out of range.

In terms of individual roles, it’s pretty much the same as previous stages.  The tanks responsibility is to taunt melee targets and keep pressure off of teammates.  DPS role is prioritizing targets, casters > Enslavers > melee.  Healer has a tough job positioning the team so everyone can get healed while placing the Shadows on the outside edge of the arena.  The key to this battle is communication and prioritizing the right target.  Oh and red circles are bad 🙂

Enemies

Name of Mob – Amount of health (appearance) and type

  • Kwama Worker – 5,784 (small bug) melee
    • The Kwama Work is a low priority target which doesn’t do more than a couple of claw attacks.  Make sure to block these and you shouldn’t have a problem.  Remember that these along with almost every other enemy in the level can be Crowd Controlled (CC).  Stun, chain, push, do whatever you need to slow them down.
  • Kwama Warrior – 7,230 (large bug) melee
    • A medium priority bug which hits a little harder and does some Area of Effect (AoE) damage.  Your tank needs to pick up the Warrior quickly so the DPS can do damage without pressure.  If you’re not the tank and are being hit by the Warrior, just block cast until the tank can regain aggro.  Usually it’s best to run towards the tank with your target.  It’s frustrating for me when someone screams “I’m being attacked” and runs 60 meters away.
  • House Dres Templar – 17,797 (human) healer
    • A high priority healer which can be stunned.  Generally you want to rush towards this target or range stun via Venom Arrow (bow) or Crushing Shock (destruction staff).  The tank will be busy holding targets so it’s the DPS or healers job on interrupting.
  • House Dres Nightblade – 11,122 (human) dual wield
    • This is our Nightblade friend that likes to Ambush in and do a Steel Tornado AoE attack.  It’s another medium priority for the tank to pick up right away and block through it’s small damage.
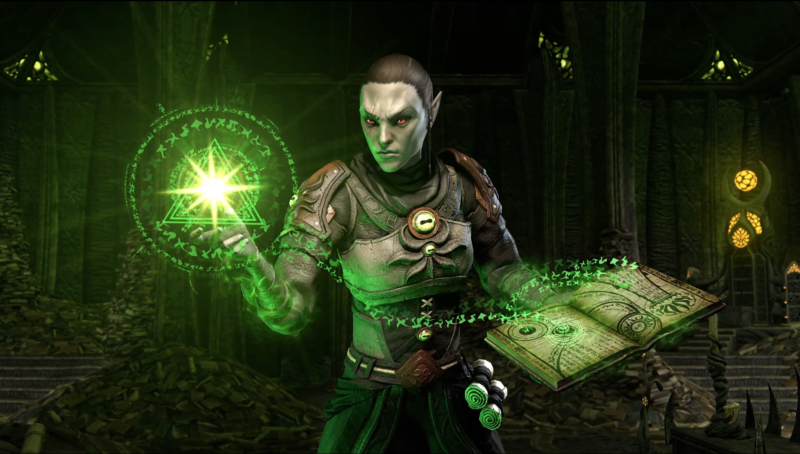
  • House Dres Illusionist – 8,342 (human) caster
    • The Illusionist can give your group trouble if you don’t destroy it early so make sure it’s high priority.  The Illusionist hits hard, cast some spells, and gives your tank trouble.  Range stun and interrupt quickly to limit effects on your group.
  • House Dres Sorcerer – 8,342 (human) caster
    • This little guy loves to do massive AoE damage and a teleport.  They are high priority targets and will likely teleport towards the person with the most aggro.  If the tank cannot range taunt, kite back in range of your tank and make sure you sprint or dodge roll out of the AoE.
  • Bull Netch – 17,797 (flying jelly fish) melee
    • Yay a massive flying jelly fish complete with AoE damage.  This is a medium priority melee target that can give DPS troubles.  It’s hard to miss this guy, but make sure you taunt as the tank immediately.
  • Nix Hound – 5,784 (small bug) melee
    • Our little Nix Hound is a low priority that doesn’t pose much of a problem.
  • House Dres Enslaver – 11,122 (Bannerman) melee
    • Enslavers pose the second most threat of the round making them high priority (Kill on Sight). These are the guys who place tethers on individual players and should be destroyed quickly.  After their tether mechanic they charge in so make sure to taunt them as well if you’re the tank.  Once they spawn a Shadow, completely disregard it while avoid the damage dealt by them.
  • Enslaved Shadow – (Bannerman) melee
    • These can be damage and have massive health.  You should avoid these and do not do damage unless you’re trying to build ultimate up.  These guys have a tendency of staying up for a long time (minute or more) and can overlap into another round.  That’s why it’s so important to travel a long the outer edge.
  • House Dres Cyromancer – 8,342 (human) caster
    • I consider Cyro’s the number one priority to kill as they cast a frost spell that can one shot most players.  They also spawn a frost shield at their feet which prevents them being chained or CC’d.  Make sure to target them early to prevent the frost shield and interrupt their cast otherwise someone will be hurting.
  • House Dres Battlemage – 17,797 (human) caster
    • This is another high priority target that can cast enemy Negate (cannot cast spells in area).  If you target early enough and stun, you can completely avoid the Negate.  If not, either CC break while in the negate to regain the ability to cast, or dodge roll out.
  • Kagouti – 17797 (Rhino) melee
    • This large crazy looking Rhino loves to charge and do heavy attacks.  It’s a medium priority target because it doesn’t have range.  Block and make sure to bring towards the tank so it can be controlled.
  • Earthen Heart Knight – 118,351 (Bannerman) melee
    • This gal is a cool Dragonknight boss with some fun mechanics.  At 80/40% health, she (I think) spawns additional mobs which need to be targeted.  Throughout the fight she cast Cinder Storms AoE which you’ll need to move her out of.  At around 35% health, she starts casting Fragmented Shield and you can see the bubble on the health bar.  Another annoying spell she’ll use against you is Fossilizes, which is a stun and regeneration debuff.  Lastly, at around 15% health she uses Magma Armor basically making her near impossible to kill for 10 seconds.  During this phase, you’ll see a massive red circle at her feet and the tank needs to sprint or dodge roll away.

Rounds

Round One – This round has only a couple of spawns with limited mobs.  The initial wave has four mobs while the second wave brings in another four with casters.  One Illusionist comes from the east and a few seconds later more spawn including a Sorcerer.  It’s good to chains all of these target in with the Dragonknight skill and nuke them down quickly.

Round Two – The second round has a lot of high priority targets to the east.  One Bannerman, a Cyromancer and a Battlemage.  The second spawn has some melee targets and doesn’t pose much of a threat.  I suggest in between rounds one and two, generate ultimate or save for the first wave.

Round Three – This round has a heavy spawn from the west including a Bull Netch and Enlsaver.  Have the tank pick up the Netch and nuke down the Enslaver before the second spawn.  The second spawn will be heavy casters from the west including more Enslavers and a Sorcerer.  Yet another spawn from the east with a healer and a quick spawn of more Enslavers and casters from the west.  This is generally the hardest round of the stage and has a lot of adds.  You need to either clump them up in the middle and AoE or move quickly from one side of the map to another.  You can have the tank and healer in middle while the DPS focus down casters.  I truthfully think it’s easier to chain all the mobs in the middle and just spam some AoE abilities.  Either way, good communication and movement are the key to surviving this one.

Boss Round – The only thing that changes in this round are the Enslavers.  The round ends when the boss is dead so you do not target the Enslavers rather the boss.  Focus the boss until it’s health reaches 80% which will spawn a phase of mobs.  You’ll have some a Cyromancer from the east that needs to be targeted immediately.  After those adds are cleaned up, get back on the boss and push to 40% health.  Another spawn will come with more Cyros and friends.  Finish them off and get ready for the boss to start using Fragmented Shield and Magma Armor.  Just make sure when you’re near the 20% mark you have stamina to dodge or spirit out of AoE and this shouldn’t be a problem.

I hope this helps and let’s move on to round five!

Written by Deltia · Categorized: Elder Scrolls Online Guides, PvE · Tagged: Dragonstar, Dragonstar Arena, DSA, DSA Stage Four, Elder Scrolls, Elder Scrolls Online, ESO, Slave Pit, Stage Four DSA, videogames

Reader Interactions

Leave a Reply Cancel reply

You must be logged in to post a comment.

Primary Sidebar

Youtube Channel

Deltia's Gaming

Deltiasgaming the player & coach simple writing guides for RPGs & MMOs. Our goal is to give you the information needed, to enjoy your favorite games, without having to spend countless hours. The best games, the best guides.

Deltia's Gaming
This list puts all of the classes and gives opinions and pros and cons on the best and worst PvP classes in ESO based on experience playing each class

Written Guide: https://deltiasgaming.com/best-eso-classes-pvp-tier-list/
Stam DK: https://deltiasgaming.com/builds/eso-stamina-dragonknight-pvp-build/ 
Mag Warden: https://deltiasgaming.com/builds/eso-magicka-warden-pvp-build/
Mag Nightblade: https://deltiasgaming.com/builds/eso-magicka-nightblade-pvp-build/
Stam Warden: https://deltiasgaming.com/builds/eso-stamina-warden-pvp-build/
Mag DK: https://deltiasgaming.com/builds/eso-magicka-dragonknight-pvp-build/
Stam Templar: https://deltiasgaming.com/builds/eso-magicka-templar-pvp-build/
Stam Sorc: https://deltiasgaming.com/builds/eso-stamina-sorcerer-pvp-build/
Mag Templar: https://deltiasgaming.com/builds/eso-magicka-templar-pvp-build/
Stam Nightblade: https://deltiasgaming.com/builds/eso-stamina-nightblade-pvp-build/
Stam Necro: https://deltiasgaming.com/builds/eso-stamina-necromancer-pvp-build/
Mag Sorc: https://deltiasgaming.com/builds/eso-magicka-sorcerer-pvp-build/ 
Mag Necro: https://deltiasgaming.com/builds/eso-magicka-necromancer-pvp-build/

💜 Twitch: https://www.twitch.tv/deltiasgaming
❤️ Patreon be in the ending credits: https://www.patreon.com/deltiasgaming
🔵 Follow me on Twitter https://twitter.com/Deltiasgaming1 
✔️ Check out our Website:  https://www.deltiasgaming.com/ 

Timestamps
0:00 Intro
0:31 Mag Necro
1:45 Mag Sorc
3:41 Stam Necro
5:11 Stam Nightblade
6:36 Mag Templar
8:07 Stam Sorc
9:31 Stam Templar
11:09 Mag DK
13:02 Stam Warden
14:29 Mag Nightblade
16:08 Mag Warden
17:48 Stam Dragonknight
19:55 Outro

🎥PRODUCT LINKS (Commission Earned)
My Streaming Setup https://deltiasgaming.com/deltias-gaming-streaming-setup 

Deltiasgaming the MMO and RPG player & coach writes guides for MMO, MMORPGs,  RPGs, focusing on walkthroughs, hints, tricks, builds, news and guides 

#eso  #elderscrollsonline #deltiasgaming  

Description Tags
Gaming,ESO,Elder Scrolls Online,TESO,ESO Builds,eso pvp,eso pvp build,eso,teso pvp,elder scrolls online,eso pvp tips,1vx,pvp,blackwood,outnumbered,player vs player,top 5,elder scrolls,dragonknight,sorcerer,templar,warden,nightblade,eso builds,cyrodiil,battlegrounds,ESO PvP,eso pvp gameplay,eso pvp guide,ESO pvp tips,TESO Pvp,tier list,eso tier list,eso pvp tier list,eso pvp tier list 2022,eso 2023,eso tier list pvp,eso tier list 2023,pvp tier list
Load More... Subscribe

Latest Post

Gates of Oblivion: DLC Bundle

ESO Builds Update 37 Scribes of Fate

Destiny-2-Briars-Contempt-Linear-Fusion-Rifle

Destiny 2 Briars Contempt God Roll and How to Get

Destiny-2-Mykels-Reverence-Sidearm

Destiny 2 Mykel’s Reverence God Roll and How to Get

UESP.net


We are proud to partner with the Unofficial Elder Scrolls Pages (UESP) for some of our content. Check out their ESO Build Editor or support them through Patreon.

Footer

Logo

Deltia’s Gaming is your home for the best games & the best guilds. builds, Guides and walthroughs for your favorite video games daily!

  • Address : Deltia's Gaming, LLC, PO Box 460721, Papillion, NE 68046
  • Email : info@deltiasgaming.com
Follow us

Privacy

Deltia's Gaming Privacy Policy.

WATCH LIVE

Copyright © 2023 · Deltias Gaming · Log in