Facebook
 Reddit
 Email
Email
Discover everything you need to know about the Gleaming Depths Raids guide in Fallout 76, including the steps required to complete it.

The Gleaming Depths Raid in Fallout 76 is a demanding and intense experience that requires the players to go through all five distinct phases without dying. Completing each encounter requires proper strategies and techniques as each has unique mechanics. Use explosives or energy weapons to deal sustained damage for the first part of the encounter. You also need to defend the tunnel boring drill while it operates.
Enemies will spawn in waves, and most of them will try to attack the drill directly. Communicating with your teammates is essential for winning all the encounters of this raid. Completing each raid will grant you useful rewards that will be distributed among each team member. Choosing the best build is also necessary as your ability to complete each phase depends on it. Commando Ghoul Build and Heavy Gunner builds are the best choices in this case. In this guide, we’ll discuss how to complete the Gleaming Depths Raid, along with some useful tips and tricks for it.
Gleaming Depths Raid Overview in Fallout 76
The Gleaming Depths is a challenging raid in Fallout 76 that is set in a former Enclave laboratory within the Ash Heap region. This raid is designed for high-level four players who will complete it by running through all the phases. The difficulty is high, as no respawns are allowed during encounters. There are five encounters in total during this raid. You get one life per encounter, as there will be no revive mechanic. Once you’re dead, you’re out until your team completes or fails the encounter. Encounters are checkpointed, so once you complete an encounter you do get a checkpoint. You also get a reward after each encounter. Completing this quest allows you to gain 4-Star Legendary mods, weapons, the Vulcan Power Armor, and other valuable items. Here are all the objectives you need to complete to accomplish this quest.
- Defeat the EN06 Guardian Bot by deactivating its shield and exploiting heating phases.
- Operate a drilling machine while defending against a cluster of enemies.
- You need to confront and eliminate the Epsilon Squad.
- Surviving waves of ultragenetically deadly creatures.
- Eliminate the Ultracite Terror, a massive cobra infused with ultracite.
Team coordination is required to complete this raid successfully. However, the rewards are distributed after each stage.
Where is the Gleaming Depths Raid

The Gleaming Depths Raid in Fallout 76 is located in the Ash Heap region of the map. You can find it near the site of the former Enclave laboratory. This is close to Stryker’s Row. This area requires you to move through a series of tunnels and dangerous environments to access the raid. You can find the entrance to a cave system beneath the region.
How to Beat Gleaming Depths Raid
Here are all the steps required to complete the Gleaming Depths Raid in Fallout 76.
How to Start the Raid
All you need to do is to head down to the Ash Heap to the Gleaming Depths location, located in the south of the Ash Heap. It’s not that hard to miss, as it will have the new Vault raid icon as its map icon. However, all you need to do is to enter the Gleaming Depths to begin the raid. It sounds simple, but for those who have seen or experienced The Raid already, that’s where the Simplicity ends and the fun begins. You need to understand a few things when it comes to this raid. This raid is designed to test your patience, your determination, and your skill level and requires you to work as a team throughout the majority of the phases. We experiment with different play styles and techniques. People will more than likely be able to complete this entire mode.
It’s best to join someone else’s team instead of leading one yourself. Keep in mind that your teammates will leave you and join another team if you die continuously. So, it’s best to participate as a party member rather than a team leader. You need to complete the five different phases to finish this quest successfully. Each stage has its difficulty level, as the part of the mission goes fail if you die during the raid segment. Make sure you have plenty of bullets along with the Stimpaks to complete a raid without facing much difficulty. Using the best weapon like Railway Rifle, Gauss Rifle, and Flamer are best to eliminate the enemies.
ENO6 Guardian Phase 1

The first phase of the raid will find you battling against the ENO6 Guardian, the first mini-boss of the raid. The way this encounter will work is that it will have you trying to defeat the guardian. There are specific ways to do this and also turns in your way to prevent you from defeating this. Firstly, to defeat the guardian, you will need to drain its ultra genetic Shield system. After that, you can inflict any damage to its primary health bar. Some of the best ways to do this, as the guardian’s damage output, is no laughing matter.
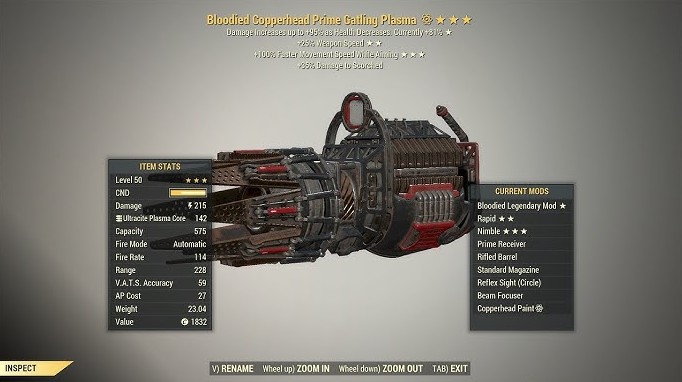
Depending on your build, it will inflict a lot of damage with the various weapons it has available. A good way to do this is to try and Target its Shield system while using Vats. Weapons such as the Gauss Minigun, Laser Rifles, and pepper shakers have all been noted by others in the community as some great weapons. They can be used to drain its Shield system a little bit quicker than other weapons. You can use weapons such as Fixers, Rail Rifles, and so on if you’re using the Commando build.
Overall, energy weapons seem to do the trick when it comes to its Shields. A good strategy, if you’re on a team, is to have two people on the opposite side targeting a shield system. The other two team members try to tank the incoming damage. They can even dodge and hide behind the concrete pillars while the guardian is focused on them. Once the guardian spins back around, rinse and repeat and alternate your roles.
Attack the shields while the others defend. Once you’ve drained its Shields, you’ll then have an opportunity to inflict as much damage as you can on its health bar. This is where you need to consider what your best primary weapon for damage is. Upon depleting a portion of its health bar, you’ll then be notified that the room is heating up. You also need to get to the Shelter, which will involve you having to run to one of the three safe rooms marked A, B, or C.
You’ll know exactly which room you’ll need to run to as there will be Sirens flashing above the room. The doors to the room will be open. Make sure to get to this room as fast as you can. If you’re locked outside, you will be instantly killed. Probably a good time to note that you only have one life per instance. Just run to safety and work together. Once the doors open back up it’s back to work by repeating the same steps as before. You need to drain the shields, inflict as much damage as you can, run to safety, and then go back to the Grind again until you finally deplete its health bar. This will complete the first phase of the raid.
Tips for First Encounter
Some important tips to note are that during this encounter, there will be other deterrents in place. Such as the blue electrical field on the floor around the guardian. This will pretty much instantly kill you if you stand on it. It’s probably best to avoid that and also an invisible wall of instant death around the Guardian. So, unfortunately, you won’t be able to and shouldn’t be able to melee the guardian. The melee builds might find it a little bit difficult during this phase.
Drilling Room Phase 2

The next phase of the raid will find you trying to drill your way into the Enclave research facility by fueling up the giant drill in the drilling room. It’s a big room with a giant drill in it. This encounter will require you to work as a team. This encounter will firstly require at least two to three team members playing a more Fetch and grab role. This is where you’ll need to acquire gas canisters for the mine and the hallways. It is located around the drilling room and fills it up via the gas canister deposit box located beside the drill. Some of the main faceoff during this encounter is the wave of mole Miners and mole rats who are trying to destroy the drill as you fill it up.
This is where it’s probably best to have at least one person holding back and defending the drill. The other three can head out and collect the gas canisters. However, for those who are collecting the canisters, it’s important to note that you can only pick up one canister at a time. You’ll need to deal with the ultra genetic mole Miner stalkers who come with a one-tap instant kill mechanic.
One hit from them, and you’re out. So, this phase, and from what you can tell already, will require communication and teamwork. It’s important to note, though, that as time goes on and as the timer increases and the more fuel that you deposit, the mole miner horde that’s trying to destroy the drill will become more hostile. Their damage output will also increase, making them even more powerful.
They’ll be dealing more damage on the drill, so it’s probably best for more people to run out to collect the fuel canisters as one other person defends. If you’re brave enough, have all members run and collect the canisters initially to help speed up the process. You can have one other person defend. However, depending on the size of your team you’ll need to figure out who stays back in to defend and who runs out and collects the fuel. Another important note is that the main drilling room is a safe room from the Ultra Genetic mole miner stalkers. They won’t follow you back into the room, so if you need to take a breather for a moment, you can. Once you have filled the drill, you’ll complete the second encounter and drill your way into the Enclave research facility.
Enclave Squad Epsilon Phase 3

The third phase of the raid will find you making your way into the Enclave research facility to defeat Enclave Squad Epsilon, Vulture, Lynx, and Blood Hound. This is probably one of the easiest encounters out of all of the phases of the raid if you work as a team. The way this encounter will work is that each Enclave member will be fully immune to the incoming damage due to the shields that surround them. However, to remove their Shields, you’ll need to destroy each of the shield generators assigned to Vulture, Lynx, and Blood Hound. This can be found behind each of the cryopods in the rooms marked A, B, and C.
Upon destroying the generators, there will be several repair bots that will emerge to try and repair the generators. It’s important to note that once they repair even a small amount of the generator’s health bar, the shields of the corresponding Enclave member will replenish. This is where the teamwork comes in. It’s best to have three team members defending each generator. And popping into and out of the room to provide damage support for the Enclave members. Move back to remove any repair burst from the room. This will be a rinse-and-repeat job. It’s important to note that both Vulture, Lynx, and Blood Hound come equipped with each of the new four-star legendary weapons that you can get your hands on. The cauterizer, the resolve breaker, and the flatliner are those weapons.
Each of these comes with unique legendary effects that can stagger you by freezing you. They can also instantly inflict a high amount of melee damage and also inflict a high amount of damage criticals. It’s probably best to avoid as many of their incoming damage attacks as you can. The radiation bug is back when you use the gamma gun on an enemy. When it comes to Enclave Squad Epsilon, it will inflict an unintended amount of damage on each enemy. You might remember that during the skyline Valley update, this bug was Notorious with the storm goliaths and could defeat each of them quite quickly. Once you’ve depleted each of the Enclave members’ health bar, that will complete the encounter. This allows you to move to the next phase of the raid.
Research Facility Phase 4

The next Encounter of the raid will find you making your way directly into the research facility. This will involve you attempting to defeat the Ultragenetic Horde. Defeat the Horde and move on. It’s not that simple, as the Horde will be completely immune to incoming damage from you and your weapons. That’s where all of these crystals scattered around the room come into play. This phase will require communication and understanding from each of your members to make sure that you complete this properly. Insert shock face can be completed solo.
The main objective is to defeat the entire horde by destroying each of the crystals as they get close to them. Upon destroying a crystal, it will emit a shock wave that will inflict damage upon the horde. There are two things to note here, Firstly, it’s best to group up as many of the enemies as you can, at least around one of the crystals. There is a limited amount of crystals that you can use to defeat the Horde.
So, if you run out of crystals to destroy them and they’re still enemies alive, you need to start again. Secondly, upon destroying a crystal it will also emit a pool of toxic and harmful gas that will damage you. This is where you will need to use strategy in a big way if you’re on a full team. So, make sure everyone is going to the same crystal. Running this solo can be a thing, and in some instances, it might work better if your team members aren’t properly communicating or working together.
You can simply hop around the room as the Horde will only be focused on you. The best way to approach this is to focus on defeating the ultra genetic mole Miner stalker first. Similar to the previous phase, this enemy will instantly kill you if he hits you. Defeating him will not only relieve a bit of stress but will also deplete a big chunk of the ultra genetic Horde health bar.
Another important thing to note is that the larger crystals will inflict a greater amount of damage compared to the smaller crystals scattered around the room. It’s probably best to bunch up as many enemies around the bigger crystals and then move on to the smaller crystals if you need to. However, over time, the Horde will grow in size and will increase your chances of inflicting damage. Try your best to balance out the number of crystals that you use over the number of enemies that you try to defeat. Once the health bar is depleted, it will complete the encounter, and you’ll move on to the final phase of the raid.
Ultracite Terror Phase 5

This encounter will involve you attempting to defeat the end of the dungeon boss, the Ultracite Terror. This is the giant serpent that everyone wants to banish out of Appalachia and also attempting to defeat. This phase is where all of those years of putting together your builds, hoarding those resources, and gathering as much ammo as you can come into play. The Ultracite Terror is a giant bullet sponge that will give you a giant headache if you don’t work together on this one. If you have a really solid build, you can probably defeat solo.
You’ll need to make your way onto the main island in the center of the cavern, where upon getting there the little walkway that you use to get there will be destroyed. Simon, the big stinky serpent, will emerge, and you’ll need to defeat him. Once the Ultracite Terror emerges, you’ll need to watch out for a few different things.
Firstly, you need to avoid the acid attacks it spits out at you. They inflict an enormous amount of damage on you and your team. Secondly, you need to avoid its staggering attacks, which involve the terror attempting to bite you or one of your team members. You also need to mitigate the Screech attacks it produces by running as fast as you can towards it. Failure to do so will result in the Ultracite Terror pushing you off the island and into the pool of instant-kill green lava.
Make sure you’ve managed to deplete its health bar by roughly 25% to 30%. It will then use its tail to not only try and attack you but it will also to destroy the island around you. Make sure to communicate to your team to focus all of your Collective fire on the tail to avoid it from destroying the ground around you. Failure to do so and once the terror uses a tail to destroy all of the island, well it’s time to get your swimming trunks on because you’re going for a nice hot swim to the instant death pool.
On top of that, there will also be pools of acid scattered around the island. You will need to avoid them and avoid any additional damage dealt to you or your team members. Once you’ve rinsed and repeated this process, attack the terror, defeat its big swinging tail, and once its bar is fully depleted that will bring the raid to a close. You will have sealed your name in the Hall of Champions who haven’t pulled their hair out. This is one of the most challenging forms of endgame content that Bethesda has released for Fallout 76.
Vault Raid Issues
Players are experiencing game crashes not only mid-raid but more frequently during the final Ultracite Terror encounter. I experienced a couple of crashes mid-raid and experienced several crashes during the Ultracite terror phase. If you know how Interiors works and especially if you’re on a team, it can cause an enormous headache for everyone involved, especially if you’re the team leader.
If you’re a team lead and if you crash out and try and re-enter the raid, it will put you in your instance Vault raid minus your team members. On top of that, you won’t be able to join your remaining members. Some workarounds to get back in on your team involve you leaving your team and then joining back in on them and so forth. Then you have to make your way back into the cavern and run through the entire Vault raid to get back down to where your team members are.
This is a bit of a frustrating one, and then after getting back to your team in one way, shape, or form, you sort of have to pray to the Todd gods that the remaining team members don’t crash either. Now, with any major update like this, a lot of us in the Community have grown accustomed to the bugs and issues upon release. This is nothing new, but it’s an important one to address because this mode is the flagship piece of content for this update.
Best Builds and Tips
The biggest question that people will probably ask when it comes to the Vault raid specifically is what kind of builds are viable. The majority of people have found that running a full health build is one of the best viable options for surviving the majority of the encounters. However, you can run through this with a low Health build. However, you will need to make sure that your build is good for damage mitigation if you intend to run through this while at low Health.
It’s important to note that two out of the five encounters don’t rely on you needing to have a fully optimized build. The drilling encounter is more of a fetch Quest, and the research facility is more of a game of chess. Just lure the enemies to the crystals and survive. For the ENO6 guardian, both heavy gunner builds and Commando Build can work here.
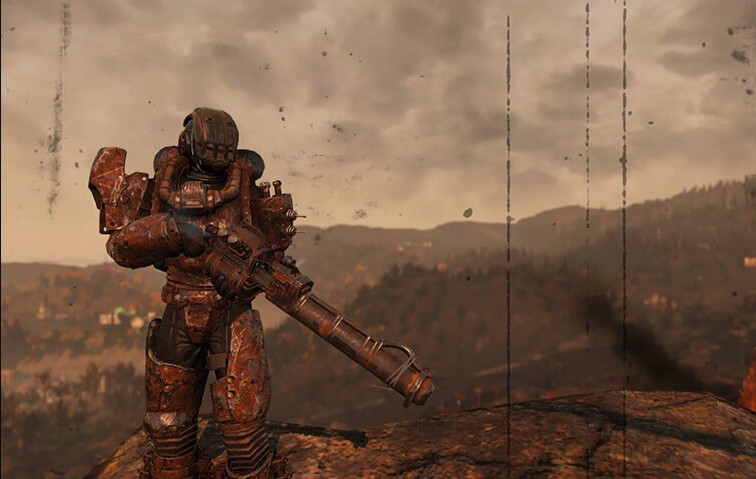
Heavy Gunner Ghoul Build
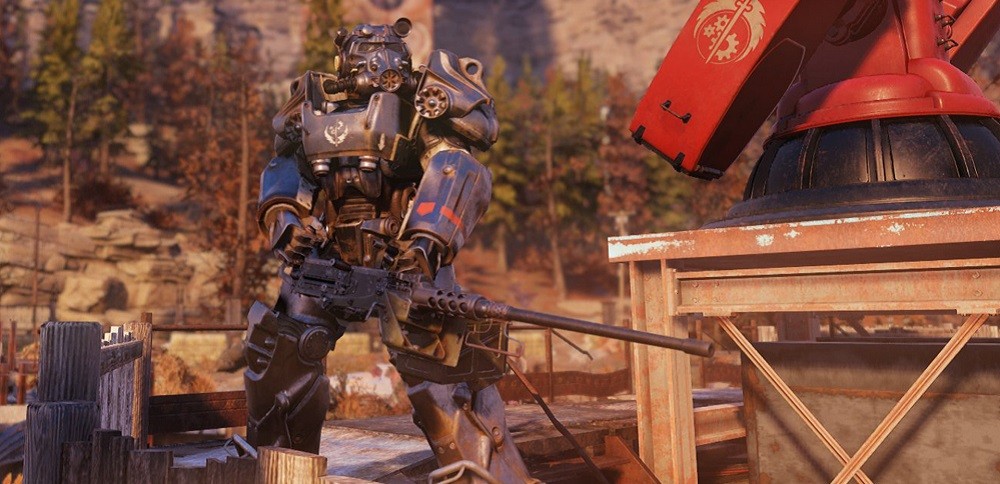
A Heavy Gunner Ghoul Build in Fallout 76 is a powerful setup that uses heavy weapons to eliminate enemies in tough combat. This build is perfect for players who enjoy dealing massive damage from a distance while tanking hits. Our Heavy Gunner Ghoul build includes weapons like Flamer, Gatling Plasma, and .50 Cal Machine Gun to deal massive damage. Use only those perk cards like Heavy Gunner and Ghoulish that increase your effectiveness and generate health. Fill our inventory with the Toxic Goo to deal high radiation damage in combat. However, using this build can mitigate your movement speed and stealth approach. We include the T-65 Power Armor to protect your character from incoming damage. Strength is the most important attribute of this build, as it boosts the effectiveness of heavy weapons.
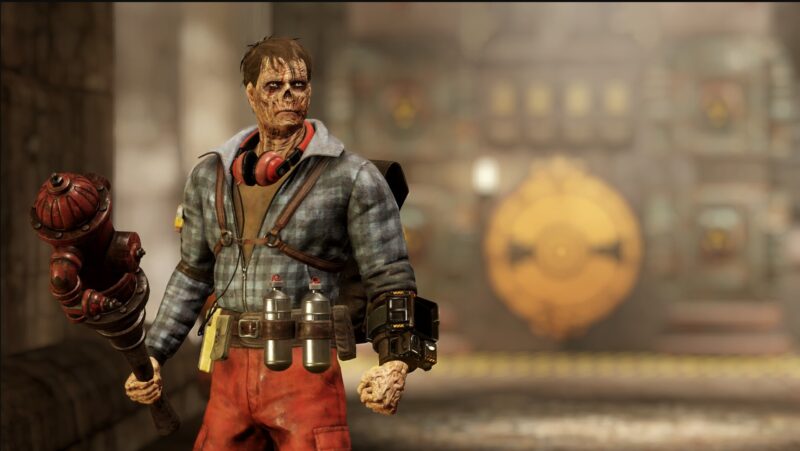
Commando Ghoul Build
The Commando Ghoul Build in Fallout 76 is a powerful combination of high damage output and survivability. This unique build focuses on maximizing the benefits of playing as a Ghoul and using automatic weapons. Our Commando Ghoul build includes weapons like The Fixer, Handmade, and Railway Rifle. These are the best-ranged weapons to use while running this build, as they can eliminate a group of enemies pretty easily. We include the Secret Service Armor in this build because it provides maximum protection in combat from several threats. Commando, Expert Commando, Master Commando, Adrenaline, Bloody Mess, Concentrated Fire, Incisor, and Ammo Savvy are the best perks to unlock for the Commando Ghoul build in Fallout 76. Fill our inventory with the Toxic Goo to deal high radiation damage in combat.
Best tips and tricks for Gleaming Depths Raid in Fallout 76
Here are the best tips and tricks for Gleaming Depths in Fallout 76.
- Make sure your gear is fully upgraded. Legendary armor, weapons, and mods are highly recommended.
- You must disable the shield by completing a sequence of actions and avoid overheating while dealing damage.
- Operate the drill while defending against enemies. Make sure the player manages the drill while others focus on enemy control.
- Make sure your team has a mix of roles: tank, DPS, and support/healers.
- Bring the Stimpaks, Ammunition, Healing Items, and Radaway because the raid can be long and demanding.
- You must learn the attack pattern of the Guardian Bot, Ultragenetic Horde, and Ultracite Terror.
- Communication with your team is essential to complete the Gleaming Depth Raid quest in Fallout 76.
- You can use the environment to take cover or funnel enemies in most areas during the raid.
FAQs about Gleaming Depths Raid Guide in Fallout 76
What is the Gleaming Depth Raid Quest in Fallout 76?
The Gleaming Depths is a challenging raid in Fallout 76 that is set in a former Enclave laboratory within the Ash Heap region. This raid is designed for high-level four players who will complete it by running through all the phases.
What are the five different phases of the Gleaming Depths Raid Quest in Fallout 76?
ENO6 Guardian, Drilling Room, Enclave Squad Epsilon, Research Facility, and Ultracite Terror are the five different encounters or phases of the Gleaming Depths Raid.
How to Start the Gleaming Depths Raid Quest in Fallout 76?
You need to head down to the Ash Heap to the Gleaming Depths location, located in the south of the Ash Heap.
Looking For More?
Thank you for reading the Fallout 76: Gleaming Depths Raid Guide. We provide the latest news and create guides for Baldur’s Gate 3, Starfield, ARK Survival Ascended, and more. Also, watch Deltia play games on Twitch or visit his YouTube channel!