• Skip to main content
  • Skip to primary sidebar
  • Skip to footer

Deltia's Gaming

The best games, the best guides!

  • HOT 🔥Latest
    • Root of Nightmares: Loot Table Raid
    • One Bar Sorcerer Build
    • Destiny 2 Void Hunter PvE Build
    • Destiny 2 Void Warlock PvE Build
    • ESO Stamina Dragonknight PvP Build
    • Best ESO Classes: PvP Tier List
    • Best One Bar Build for ESO: PvE Tier List
  • Redfall
    • The Best Redfall Builds
    • Release Date
    • All Redfall Weapons and Gear
    • Abilities Attributes and Heroes Customisation
    • What Are The Best Heroes – Strengths & Backgrounds Guide
    • Classes
    • Redfall Overview
    • Redfall Gameplay and Trailers
    • Redfall Crossplay
    • Redfall Bite Back Edition
    • Redfall Game Pass
    • Redfall Pictures & Art
  • Guides
    • Destiny 2 Guides
      • Lightfall & Season 20
        • All Lightfall Legendary Weapons
        • All Lightfall Exotic Weapons & How to Get Them
        • All Strand Weapons & How to Get Them
        • Season 20 Weapons & How to Get Them
        • How to Get the Terminal Overload Keys
        • The Best War Table Upgrades
        • How to Complete Destiny 2 From Zero – Quest Guide
        • How to get The Revision Zero Catalyst
        • The Revision Zero how to get and unlock the weapon
        • How to Unlock Season 20 Artifact
        • New Origin Traits Season 20
        • Season Pass Rewards Season 20
        • New Seasonal Vendor Season 20
        • New Destiny 2 Lightfall Mods
        • Strand Warlock: Abilities, Aspects & Fragments
        • Strand Hunter: Abilities, Aspects & Fragments
        • Strand Titan: Abilities, Aspects & Fragments
        • All Destiny 2 Lightfall Editions Explained
        • "How to get Exotic Gear" Guides
          • Final Warning how to get and unlock the weapon
          • Winterbite how to get and unlock the weapon
          • Deterministic Chaos how to get and unlock the weapon
          • How to Get the Quicksilver Storm Exotic Catalyst
          • Cyrtarachne’s Facade how to get and unlock the Armor
          • Abeyant Leap how to get and unlock the Armor
          • Swarmers how to get and unlock the Armor
      • Destiny 2 Root of Nightmares: Loot Table – Full list
      • How to Get Vexcalibur Exotic Glaive
      • How to Unlock Strand Subclass
      • God Roll Weapons
      • Xur Locations Guide
      • Xur Guide
      • Beginner Guide
        • Gear & Weapon Mods
        • Weapon Crafting Guide
        • Legacy Exotics Guide
        • Armor Guide
        • Lost Sector Guide
        • Recommended Weapon Rolls
      • Iron Banner Guide
      • Returning Player Guide
      • How to Get ALL New IKELOS Weapons
      • How to Link Twitch and Bungie accounts
    • Hogwarts Legacy Guides
      • Which House should you choose
      • Hogwarts Legacy Houses
        • Hufflepuff
        • Slytherin
        • Ravenclaw
        • Gryffindor
      • Important Professors
        • Headmaster Phineas Nigellus Black
        • Professor Matilda Weasley
        • Professor Eleazar Fig
        • Professor Aesop Sharp
        • Professor Mirabel Garlick
        • Professor Dianah Hecat
        • Professor Abraham Ronen
      • Hogwarts Legacy Classes Guide
        • Classes – Beasts
        • Classes – Potions
        • Classes – Herbology
        • Classes – Charms
        • Classes – Defence Against the Dark Arts
        • Classes – Broomstick Flying
      • Can you be an evil Dark Wizard? Guide
      • How to Unlock and Enter Dark Arts Battle Arena
      • Max level & Talents Cap
      • Talents Guide
      • Quest Guides & Walkthrough
      • Merlin’s Trials & How to Increase Inventory Slots
      • Wand Guide and Customisation
      • How to unlock all Mounts
      • Fantastic Beasts Guide
      • Character Creation and Cosmetics Guide
      • How to Identify Gear Items Guide
      • Spells Guide
      • Plants Guide
      • How to change the Time of The Day?
      • Time Period
      • Combat Guide
      • How to Solve Puzzle Door?
    • ESO Guides
      • Jester’s Festival Guide
      • Character & Leveling
        • Complete Beginners Guide
        • Character Creation
        • Race Guide
        • Class Guides
          • Dragonknight
          • Nightblade
          • Templar
          • Sorcerer
        • Power Leveling & Grinding Guide
        • Skill Points Guide
        • Attribute Points Guide
        • Psijic Order Leveling Guide
        • Champion Points System
        • Champion Point Grinding Tips
      • Combat & Solo
        • How to Light Attack Weave
        • 5 Tips for Increasing Your DPS
        • What Tanks Should Know
        • Magicka DPS Gear Guide
        • SOLO Stamina Class Guide
        • SOLO Magicka Class Guide
      • PvP Guides
        • How to unlock Alliance War Skills
        • PvP Beginner Guide
        • PvP Campaigns, what to choose, CP or no-CP?
        • How to farm Alliance Points (AP)
        • How to farm Tel Var Stones
        • Cyrodiil guide for Beginners
        • Imperial City Guide for Beginners
        • Battlegrounds for Beginners
        • Battlegrounds objectives and strategies
        • Siege Guide
        • PvP Survival Tips
        • PvP Tips, Tricks and Hints
          • The best PvP Tips, Tricks and Hints
          • Best PvP Ultimates
          • How to “Stop a Ganker"
      • Crafting
        • Alchemy Potions & Recipes
        • Crafting Writs Guide
        • Master Crafting Writs
        • Fishing Guide
        • Crafting Trait Research Guide
      • ESO Tools
        • ESO Server Status
        • ESO Daily Endeavors Tool
        • ESO Golden Vendor
      • Tales of Tribute
        • Tales of Tribute Guide
        • Tales of Tribute Decks Guide
        • Tales of Tribute Strategies
        • Tales of Tribute Tutorial
      • Daily Routine Guides
        • Daily Priorities Guide
        • Daily Dungeon Guide
        • Undaunted Daily Pledges
        • Daily Job Brokers Guide
        • Daily Guild Quests Guide
        • Mount Training & Increase Speed
        • Daily Login Rewards
        • Endeavors Guide
      • Companions Guides
        • Full Companions Guide
        • Isobel Velois guide.
      • Addons, UI, and Keybinds
      • How to Link ESO Account to Twitch
      • How to Use the Public Test Server
  • ESO Builds
    • Beginner & Leveling PvE
      • Dragonknight
        • Magicka
        • Stamina
      • Nightblade
        • Magicka
        • Stamina
      • Sorcerer
        • Magicka
        • Stamina
      • Templar
        • Magicka
        • Stamina
      • Warden
        • Magicka
        • Stamina
      • Necromancer
        • Magicka
        • Stamina
    • Solo PvE
      • Dragonknight
        • Magicka
        • Stamina
      • Necromancer
        • Magicka
        • Stamina
      • Nightblade
        • Magicka
        • Stamina
      • Sorcerer
        • Magicka
        • Stamina
      • Templar
        • Magicka
        • Stamina
      • Warden
        • Magicka
        • Stamina
    • Group PvE
      • Dragonknight
        • Magicka DPS
        • Stamina DPS
        • Healer
        • Tank
      • Necromancer
        • Magicka DPS
        • Stamina DPS
        • Healer
        • Tank
      • Nightblade
        • Magicka DPS
        • Stamina DPS
        • Healer
        • Tank
      • Sorcerer
        • Magicka DPS
        • Stamina DPS
        • Healer
        • Tank
      • Templar
        • Magicka DPS
        • Stamina DPS
        • Healer
        • Tank
      • Warden
        • Magicka DPS
        • Stamina DPS
        • Healer
        • Tank
    • PvP
      • Dragonknight
        • Magicka
        • Stamina
        • Healer
      • Necromancer
        • Magicka
        • Stamina
        • Healer
      • Nightblade
        • Magicka
        • Stamina
        • Healer
      • Sorcerer
        • Stamina
        • Magicka
        • Healer
      • Templar
        • Magicka
        • Stamina
        • Healer
      • Warden
        • Magicka
        • Stamina
        • Healer
    • One Bar PvE
      • Dragonknight
        • DPS
        • Healer
        • Tank
      • Nightblade
        • DPS
        • Healer
        • Tank
      • Sorcerer
        • DPS
        • Healer
        • Tank
      • Templar
        • DPS
        • Healer
        • Tank
      • Warden
        • DPS
        • Healer
        • Tank
      • Necromancer
        • DPS
        • Healer
        • Tank
    • One Bar PvP
      • Dragonknight
        • Magica DPS
        • Stamina DPS
        • Healer
        • Tank
      • Nightblade
        • Magica DPS
        • Stamina DPS
        • Healer
        • Tank
      • Sorcerer
        • Magica DPS
        • Stamina DPS
        • Healer
        • Tank
      • Templar
        • Magica DPS
        • Stamina DPS
        • Healer
        • Tank
      • Warden
        • Magica DPS
        • Stamina DPS
        • Healer
        • Tank
      • Necromancer
        • Magica DPS
        • Stamina DPS
        • Healer
        • Tank
    • Companion Builds
      • Azandar Al-Cybiades
        • Ranged DPS builds
        • Melee DPS builds
        • Healer build
        • Tank build
      • Sharp-As-Night
        • Ranged DPS builds
        • Melee DPS builds
        • Healer build
        • Tank build
      • Ember
        • Ranged DPS builds
        • Melee DPS builds
        • Healer build
        • Tank build
      • Isobel Velois
        • Ranged DPS builds
        • Melee DPS builds
        • Healer build
        • Tank build
      • Mirri Elendis
        • Ranged DPS builds
        • Melee DPS builds
        • Healer build
        • Tank build
      • Bastian Hallix
        • Ranged DPS builds
        • Melee DPS builds
        • Healer build
        • Tank build
  • Destiny 2 Builds
    • Solo
      • Hunter
        • Arc Hunter
        • Solar Hunter
        • Stasis Hunter
        • Strand Hunter
        • Void Hunter
      • Titan
        • Arc Titan
        • Solar Titan
        • Stasis Titan
        • Strand Titan
        • Void Titan
      • Warlock
        • Arc Warlock
        • Solar Warlock
        • Stasis Warlock
        • Strand Warlock
        • Void Warlock
    • PvE
      • Hunter
        • Arc Hunter
        • Solar Hunter
        • Stasis Hunter
        • Strand Hunter
        • Void Hunter
      • Titan
        • Arc Titan
        • Solar Titan
        • Stasis Titan
        • Strand Titan
        • Void Titan
      • Warlock
        • Arc Warlock
        • Solar Warlock
        • Stasis Warlock
        • Strand Warlock
        • Void Warlock
    • PvP
      • Hunter
        • Arc Hunter
        • Solar Hunter
        • Stasis Hunter
        • Strand Hunter
        • Void Hunter
      • Titan
        • Arc Titan
        • Solar Titan
        • Stasis Titan
        • Strand Titan
        • Void Titan
      • Warlock
        • Arc Warlock
        • Solar Warlock
        • Stasis Warlock
        • Strand Warlock
        • Void Warlock
  • Hogwarts Legacy Builds
    • Plant & Cabbage Build
    • Dark Arts Build
    • Spell Build
    • Stealth Build
    • Protego Build
    • Ancient Magic Build
    • Fire Build
  • Contact
    • Support
    • Streaming Setup

Feb 22 2023

Hogwarts Legacy – Charles Rookwood’s Trial Quest

Welcome to our guide for Hogwarts Legacy – Charles Rookwood’s Trial Quest! Hogwarts Legacy is a highly anticipated single player, action RPG with an endless amount of places to explore and magical spells to learn! Read on below to follow this Hogwarts Legacy quest!

Last updated February 22, 2023 – Clarified/simplified text instructions, added image

Table of Contents

  • Charles Rookwood’s Trial Quest
  • Charles Rookwood’s Trial Quest Walkthrough Hogwarts Legacy.
    • Rookwood Castle
      • Rookwood Castle Courtyard
    • Charles Rookwood’s Trial
      • First Portal Puzzle Room
      • Second Portal Puzzle Room
      • Trial Combat #1
      • Third Portal Puzzle Room
      • Trial Combat #2
      • Final Combat and Boss
    • Pensieve Memory
  • Top Hogwarts Legacy Articles:

Charles Rookwood’s Trial Quest

  • Charles Rookwood’s Trial Quest Walkthrough Hogwarts Legacy.

    Charles Rookwood’s Trial Quest Walkthrough Hogwarts Legacy.

Load more

Rookwood Castle

  • Meet Fig at Rookwood Castle
    • Use fast travel if you can, or use your broom/mount to get there
  • Speak with Professor Fig
  • Enter Rookwood Castle
    • You’ll need to find a way inside that isn’t through the front gate
    • As you follow the quest marker up to the castle you’ll find a camp with enemies to defeat
    • Continue on past the camp and around the castle, where more enemies will appear. Specifically one goblin enemy will appear on a standing platform.
    • Once the battle is over, look directly across the way from the standing platform. There is a stack of boxes up against the castle wall and one crate can be moved.
    • Pick it up with Wingardium Leviosa and move it just to the right – if you look up a bit you’ll see a ledge you could climb up to. Turn the box on it’s side so that it’s tall enough for you to reach the ledge above.
    • Once inside the castle, a cut scene will take a place
  • Rookwood Castle Courtyard
    • As you step into the courtyard, there will immediately be enemies to engage
    • After the fight, head down the courtyard left from the entrance and up the stairs
    • At the top of the stairs turn right, move down the battlements and turn right again
    • Inside, jump down on the wooden structure you see ahead and then down again to the interior floor below
    • In this interior room is a door sealed by ancient magic. In order to open it, you’ll need to hit three golden notes with Diffindo to unlock the seal. As you face the door, one node is to the left behind a wooden wall structure you’ll need to first blast away.
    • The other two nodes are to the right. One is immediately to the right of the door and a little ways up. The other is on the right directly across from where the node on the left was.
  • Find Charles Rookwood’s portrait
    • The path ahead is pretty straight forward. Follow it until you come to a room with the portrait above a cold fireplace. You likely can’t interact with it just yet – you’ll have to wait for Fig to catch up and stop speaking before you can speak to Rookwood
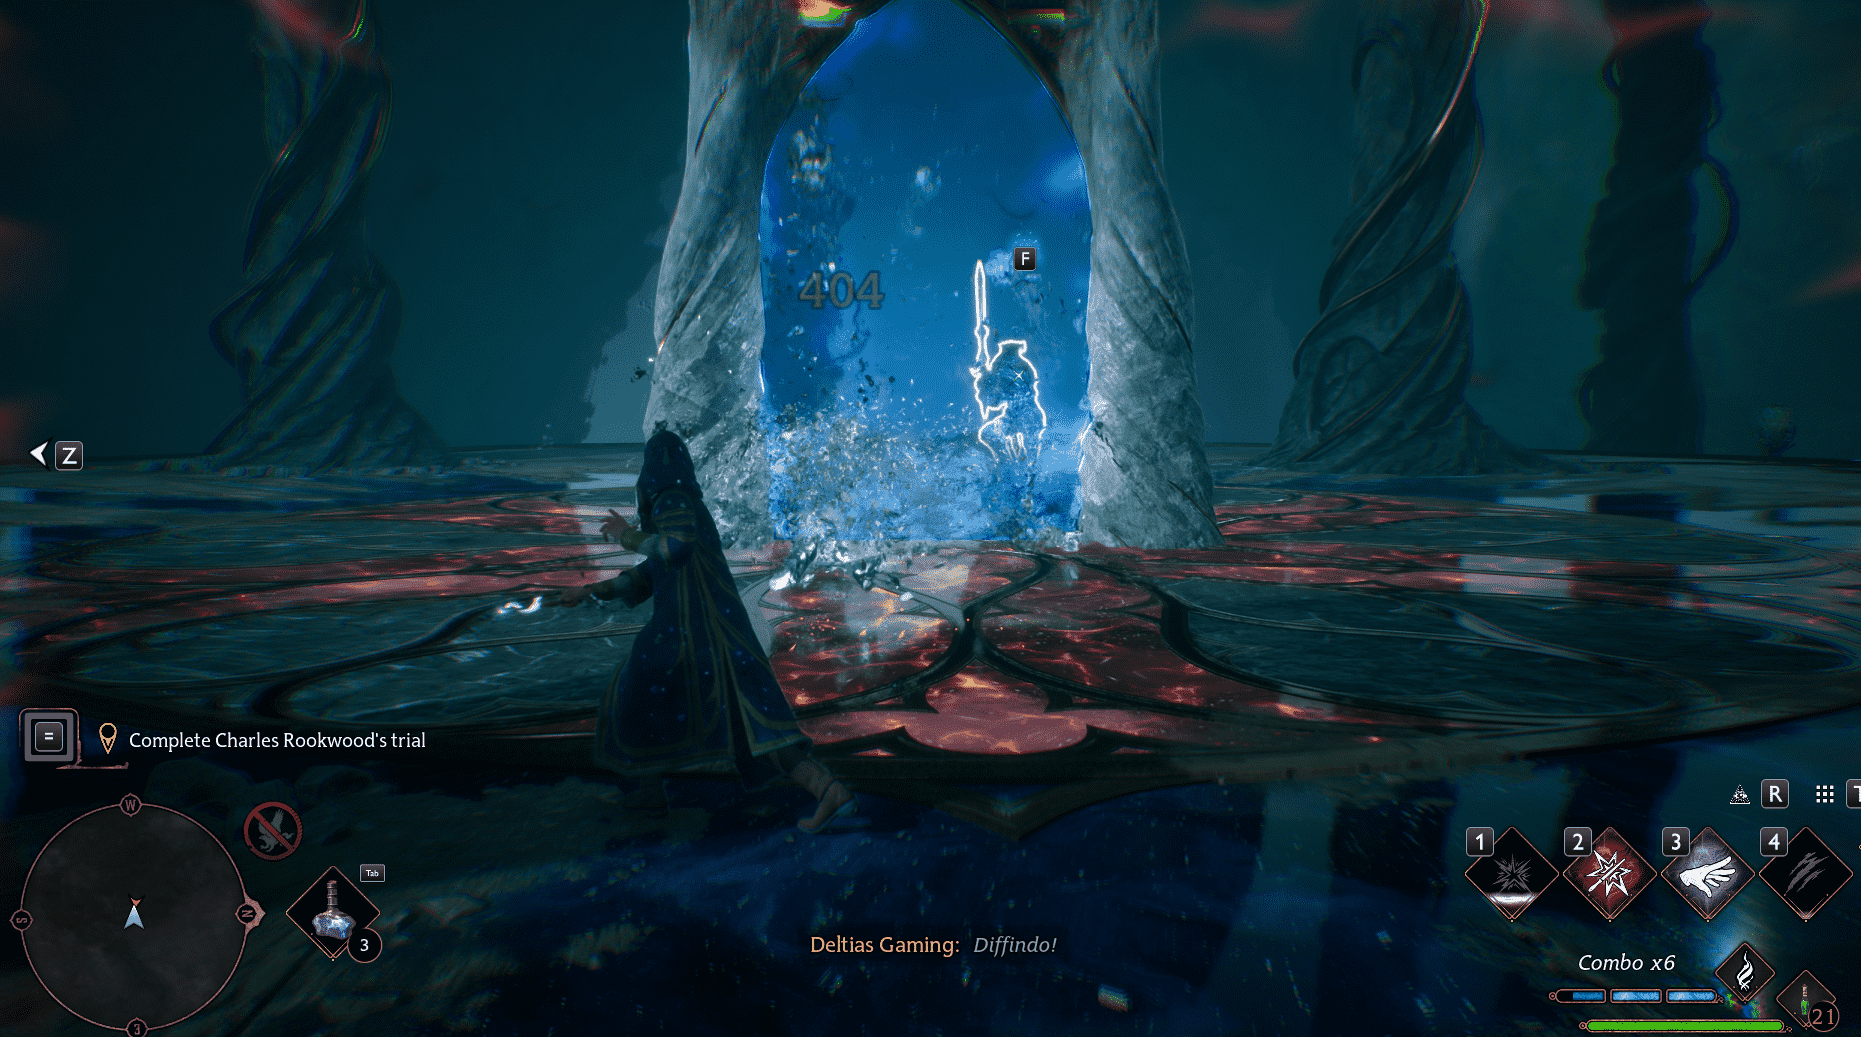
  • Connect with ancient magic
    • Follow the whisps of magic showing you the spot where ancient magic wells up. Interacting with it will open a door
    • Enter the Second Trial

Charles Rookwood’s Trial

  • First Portal Puzzle Room
    • Run forward into a room with stone pillars in the center, and turn to the right and go all the way up the stairs. At the very end will be another well of ancient magic to activate, which will create a familiar portal in between the stone pillars,
    • Go back down the stairs and through the portal from the blue side. Just to the right you will easily spot a short pillar. Cast Wingardium Leviosa on it and move it to the left, there is a ledge not too far away. Move the pillar up against it, then run back through the portal on the red side in order to make the pillar solid again
    • Climb up, and then you can grab onto a metal lattice to reach the top of the ledge.
  • Second Portal Puzzle Room
    • The pathway into this room is a straight shot ahead. Don’t be bothered with the pathway starts to move underneath you.
    • When you get to the area with the currently inert stone doorway a well of ancient magic will pop up just to your right. Interact with it to open the portal.
    • Walk through the pillar. Right in front will be a large pillar blocking your way. Look up and to the right. You will see a metal medallion hanging on the wall. Hit this with a basic attack. This introduces a new mechanic, which turns the whole portal doorway completely around
    • Come around to the front of the portal. Don’t walk through it, but you can look through and see the moveable crate inside the pillar now. Cast Wingardium Leviosa and pull it towards you through the portal.
  • Hogwarts Legacy - Charles Rookwoods Trial puzzle room 2
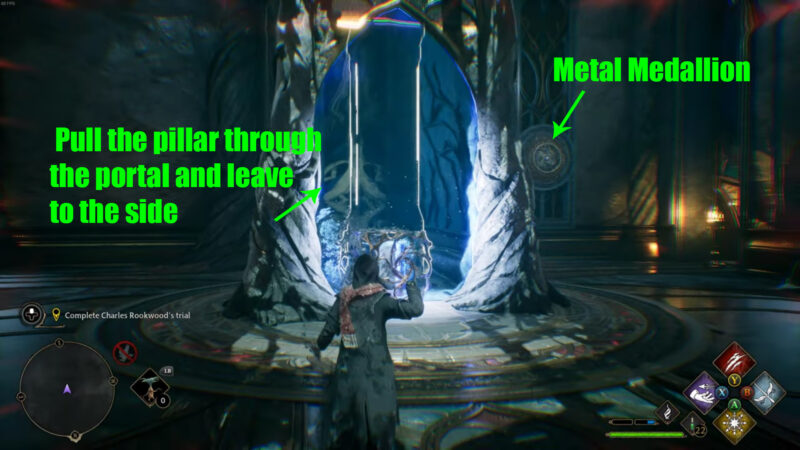
    • The way is now unblocked. But before you go through the portal, step around and hit the medallion with a basic attack to turn the portal back around.
    • Now you can step straight through the portal and move down the open path
  • Trial Combat #1
    • You’ll come to a platform with one single large pensieve guardian on it, but as you move forward to engage it four small enemies will also appear.
    • Defeat all these enemies and the path forward will appear
  • Third Portal Puzzle Room
    • You’ll run straight towards a dead portal doorway and right in front of it an ancient well of magic will appear which will turn the portal on
    • Looking straight through it you will see another metal medallion. Hit it with a basic attack and the doorway will turn to the right.
    • Go through the portal and turn around. Look back to see the same metal medallion on the wall back behind you on the right. Hit it with another basic attack and the portal doorway will return to it’s original position.
    • Now move straight across, ignoring the portal doorway which is now on your right.
    • You’ll go up a long staircase and come to another inert stone doorway. Again, a well of ancient magic will appear on your right and you can activate the portal. Notice that one of the short stone pillars also appears on the left.
    • Run around to the back side of the portal. Facing it, look to the left. On the wall will be a metal medallion, which you hit with a basic attack. The doorway will swing partway around.
    • From this blue side of the portal you can look through and see the crate part of the stone pillar. Cast Wingardium Leviosa and pull it through the portal towards you. Then bring it around the portal and set it back down where it was up on the raised platform.
    • Come back and go through the portal from the blue side. Then walk up the short stairs to the pillar, climb it, and then jump from the pillar to the ledge you see above the portal doorway.
    • There is another portal up here! But don’t go through it – instead look down to your right at the metal medallion from before. Hit it with a basic attack to move the whole structure back around.
    • This will bring you around to a ledge – jump on to it, you don’t need that upper portal at all.
  • Trial Combat #2
    • Run forward as the hallway moves around you, and then turn to your left. The middle statue in this room will remain lifeless as you run past but when you hit the blocked entrance beyond it, this will wake up two other smaller other statues in the room.
    • Defeat them and the seal around the doorway will disappear
    • Run down this hallway and up one side of the double staircase beyond.
    • There will then be two sets of double doors which will automatically open for you
  • Final Combat and Boss
Portal Fight Charles Rookwood's Trial Quest
Make them come through
    • This platform will contain both a portal doorway (which automatically activates) as well as statue enemies
    • Run straight through the blue side of the portal and engage the pensieve protector on the right.
    • Smaller statue enemies will also appear and need to be defeated.
    • When finished, go back through the portal on the red side and fight another large pensieve protector along with more smaller statues
    • After these enemies are defeated the portal disappears and a massive pensieve guardian appears.
Pensieve Guardian Hogwarts Legacy
Protego!
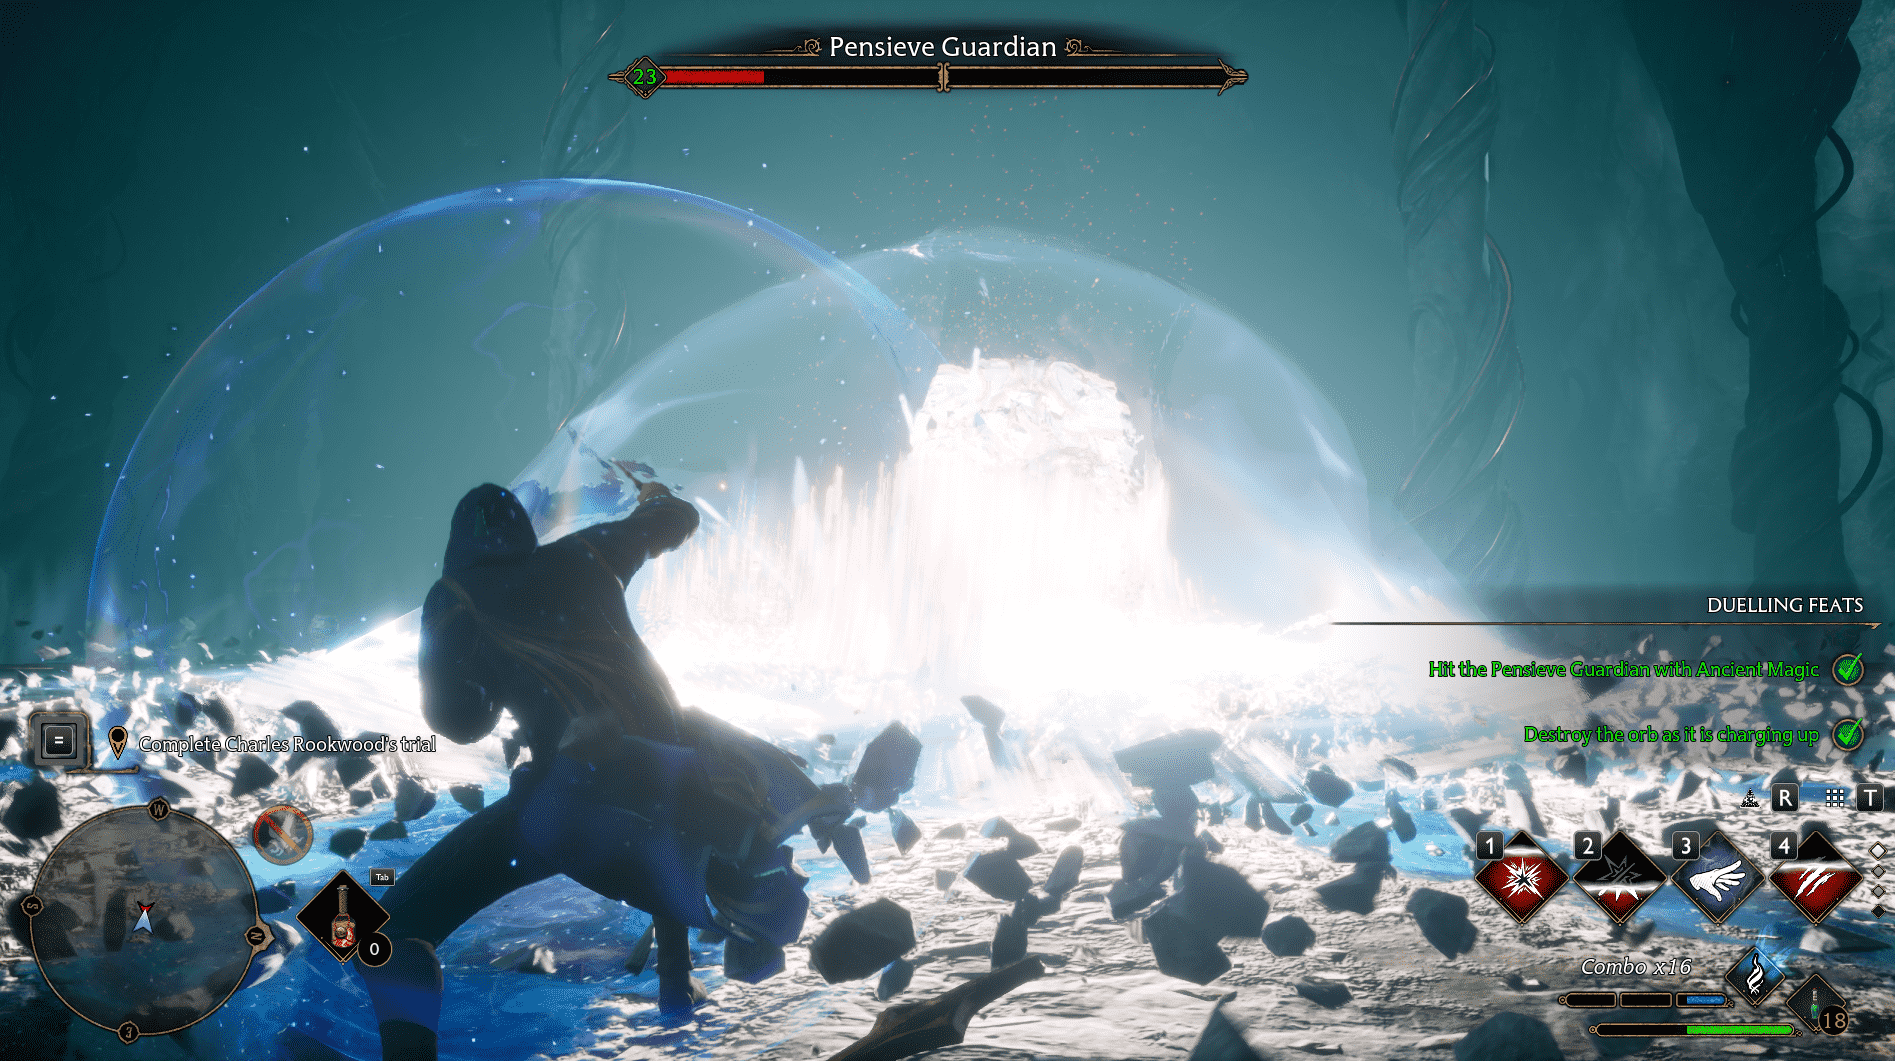
    • Your strategy here should be similar to how you fought the one in Rackham’s trial. When he spawns a yellow orb and you’ll want to cast Levioso. He will also spawn a purple orb and in that case you’ll want to use Accio. Expelliarmus and Confringo are good regular damage spells to round out your spell diamond slots.  Be prepared to use a lot of Protego here, especially when he uses a yellowish ball.  Additionally, make sure to use consumables and ancient magic as soon as it’s filled up.

Pensieve Memory

  • Continue exploring Rookwood’s trial
    • Upon defeating this final enemy, a clear pathway will open up for you. Follow it to the next quest marker and interact with the pensieve to discover about Rookwood’s memories
  • Exit Charles Rookwood’s trial
    • You can enter the Map Chamber through a nearby portal
  • Speak to Percival
  • Speak with Professor Fig

Next Quest – Fire and Vice

Previous Quest – Back on the Path


Thanks for following our guide for Hogwarts Legacy – Charles Rookwood’s Trial Quest! We’ll be posting walkthroughs, guides, combat builds and more for Hogwarts Legacy, so keep your eyes out for more! Deltia will also be streaming the game at launch – you can watch him at https://www.twitch.tv/deltiasgaming

Top Hogwarts Legacy Articles:

  • Hogwarts Legacy Builds
  • Hogwarts Legacy Quest Walkthroughs
  • All Spells in Hogwarts Legacy
  • Hogwarts Legacy Full Talent Guide
  • Unlock all the Mounts in Hogwarts Legacy

Written by Jeanstarwind · Categorized: Hogwarts Legacy, Hogwarts Legacy Quests Walkthrough, RPG Games, Single Player Games · Tagged: AvalancheSoftware studio, Deltia, Deltias Gaming, deltiasgaming, Harry Potter, Hogwarts, Hogwarts Legacy, Hogwarts Legacy AvalancheSoftware, hogwarts legacy channel, hogwarts legacy characters, Hogwarts Legacy Gameplay, hogwarts legacy gameplay showcase, Hogwarts Legacy Harry Potter, hogwarts legacy news, Hogwarts Legacy RPG, Nintendo Switch, pc, PS4, PS5, Rewards, RPG, Wand, Wand Ceremony, WB Games, Wizarding World, xbox one, xbox series x, Xbox Series X/S

Primary Sidebar

Youtube Channel

Deltia's Gaming

Deltiasgaming the player & coach simple writing guides for RPGs & MMOs. Our goal is to give you the information needed, to enjoy your favorite games, without having to spend countless hours. The best games, the best guides.

Deltia's Gaming
With 100k gold, I was able to complete trifecta Veteran Vateshran Hollow, the latest DLC dungeons and trials.  This guide walks you through the gear, skills, passives and more.  

Important Links
Written Build: https://deltiasgaming.com/builds/eso-solo-nightblade-magicka-build-for-pve/
Tamriel Trade Center: https://www.tamrieltradecentre.com/
Race Guide: https://deltiasgaming.com/eso-race-guide/
Complete Beginners Guide: https://youtu.be/lcbfj92Mdb8
ESO Builds: https://deltiasgaming.com/build_type/eso-beginner-build/
Champion Points Guide: https://deltiasgaming.com/eso-champion-point-system-guide/
UI and Addons Video: https://www.youtube.com/watch?v=btYXcWA3_Mw
Daily Priorities Guide: https://deltiasgaming.com/eso-daily-priorities-guide/
Addons, UI and Keybind changes: https://deltiasgaming.com/addons-ui-and-keybinds-guide-for-eso-2022/

💜 Twitch: https://www.twitch.tv/deltiasgaming
❤️ Patreon be in the ending credits: https://www.patreon.com/deltiasgaming
🔵 Follow me on Twitter https://twitter.com/Deltiasgaming1 
✔️ Check out our Website:  https://www.deltiasgaming.com/ 

Timestamps
0:00 Intro
0:40 Sets
3:00 TTC
4:27 Parse
10:48 Skills
19:35 Rotation
21:47 Champion Points
24:02 Gameplay
30:13 Outro

🎥PRODUCT LINKS (Commission Earned)
My Streaming Setup https://deltiasgaming.com/deltias-gaming-streaming-setup 

Deltiasgaming the MMO and RPG player & coach writes guides for MMO, MMORPGs,  RPGs, focusing on walkthroughs, hints, tricks, builds, news and guides 

#eso  #theelderscrollsonline #deltiasgaming 

Description Tags
ESO,Elder Scrolls Online,MMORPG,ESO Builds,elder scrolls online,eso,teso,eso gameplay,the elder scrolls online,eso builds,deltiasgaming,deltia,deltia's gaming,nightblade,necromancer,sorcerer,warden,eso pve,eso pve build,ESO PvE,elder scrolls,eso guide,teso trials,eso beginner,eso beginner tips,eso beginner guides,eso beginner guide,eso beginner tips and tricks,eso new player guide,eso nightblade,eso nightblade guide,eso class guide,nightblade eso
Load More... Subscribe

Latest Post

Gates of Oblivion: DLC Bundle

ESO Builds Update 37 Scribes of Fate

Destiny 2 Phyllotactic Spiral Pulse Rifle

Destiny 2 Phyllotactic Spiral God Roll

Destiny-2-Briars-Contempt-Linear-Fusion-Rifle

Destiny 2 Briars Contempt God Roll and How to Get

UESP.net


We are proud to partner with the Unofficial Elder Scrolls Pages (UESP) for some of our content. Check out their ESO Build Editor or support them through Patreon.

Footer

Logo

Deltia’s Gaming is your home for the best games & the best guilds. builds, Guides and walthroughs for your favorite video games daily!

  • Address : Deltia's Gaming, LLC, PO Box 460721, Papillion, NE 68046
  • Email : info@deltiasgaming.com
Follow us

Privacy

Deltia's Gaming Privacy Policy.

WATCH LIVE

Copyright © 2023 · Deltias Gaming · Log in