Facebook
 Reddit
 Email
Email
Check out our detailed guide on how to create multiple partitions on a Windows PC. Simple steps to make your PC more organized and secure.
If you have never done it before, creating multiple partitions on a Windows PC may seem like something meant to be done by IT experts. In reality, it is quite a simple process using Windows’ built-in features.
Creating multiple partitions on Windows has many uses. Whether you intend to dual-boot another OS or just want to set aside a dedicated partition for a category of files, partitions can be very helpful in keeping your system organized.
In this post, we will guide you on how to create multiple partitions on a Windows PC. Let’s get started.
Why Consider Creating Partitions on Windows?
Before we go over the how, let’s make sure we understand the why. Creating partitions on Windows involves dividing your storage space, HDD or SSD, into separate logical sections.
Generally speaking, your current system may already have at least two partitions by default. These partitions are the primary C: drive, meant for the operating system, and a smaller recovery partition. The purpose of this smaller partition is to provide space for system repairs.
By creating more partitions on Windows, you can:
- Organize Data: Neatly segregate the operating system, applications, and all sorts of files. In the event of reinstalling Windows, your personal data will remain untouched and vice versa.
- Enhance Security: If your system contains sensitive information, you can create a separate partition for those files. After that, you can encrypt the entire partition using Windows’ BitLocker.
- Dual-Boot Setups: If you intend to run two different OS versions or two different versions of Windows on the same PC, creating separate partitions makes the process manageable.
It is important to assign space to each partition wisely. You don’t want to create an imbalance between partition sizes.
Preparation Before You Create Partitions on Windows
To ensure a smooth process when creating partitions on Windows, we recommend preparing first by:
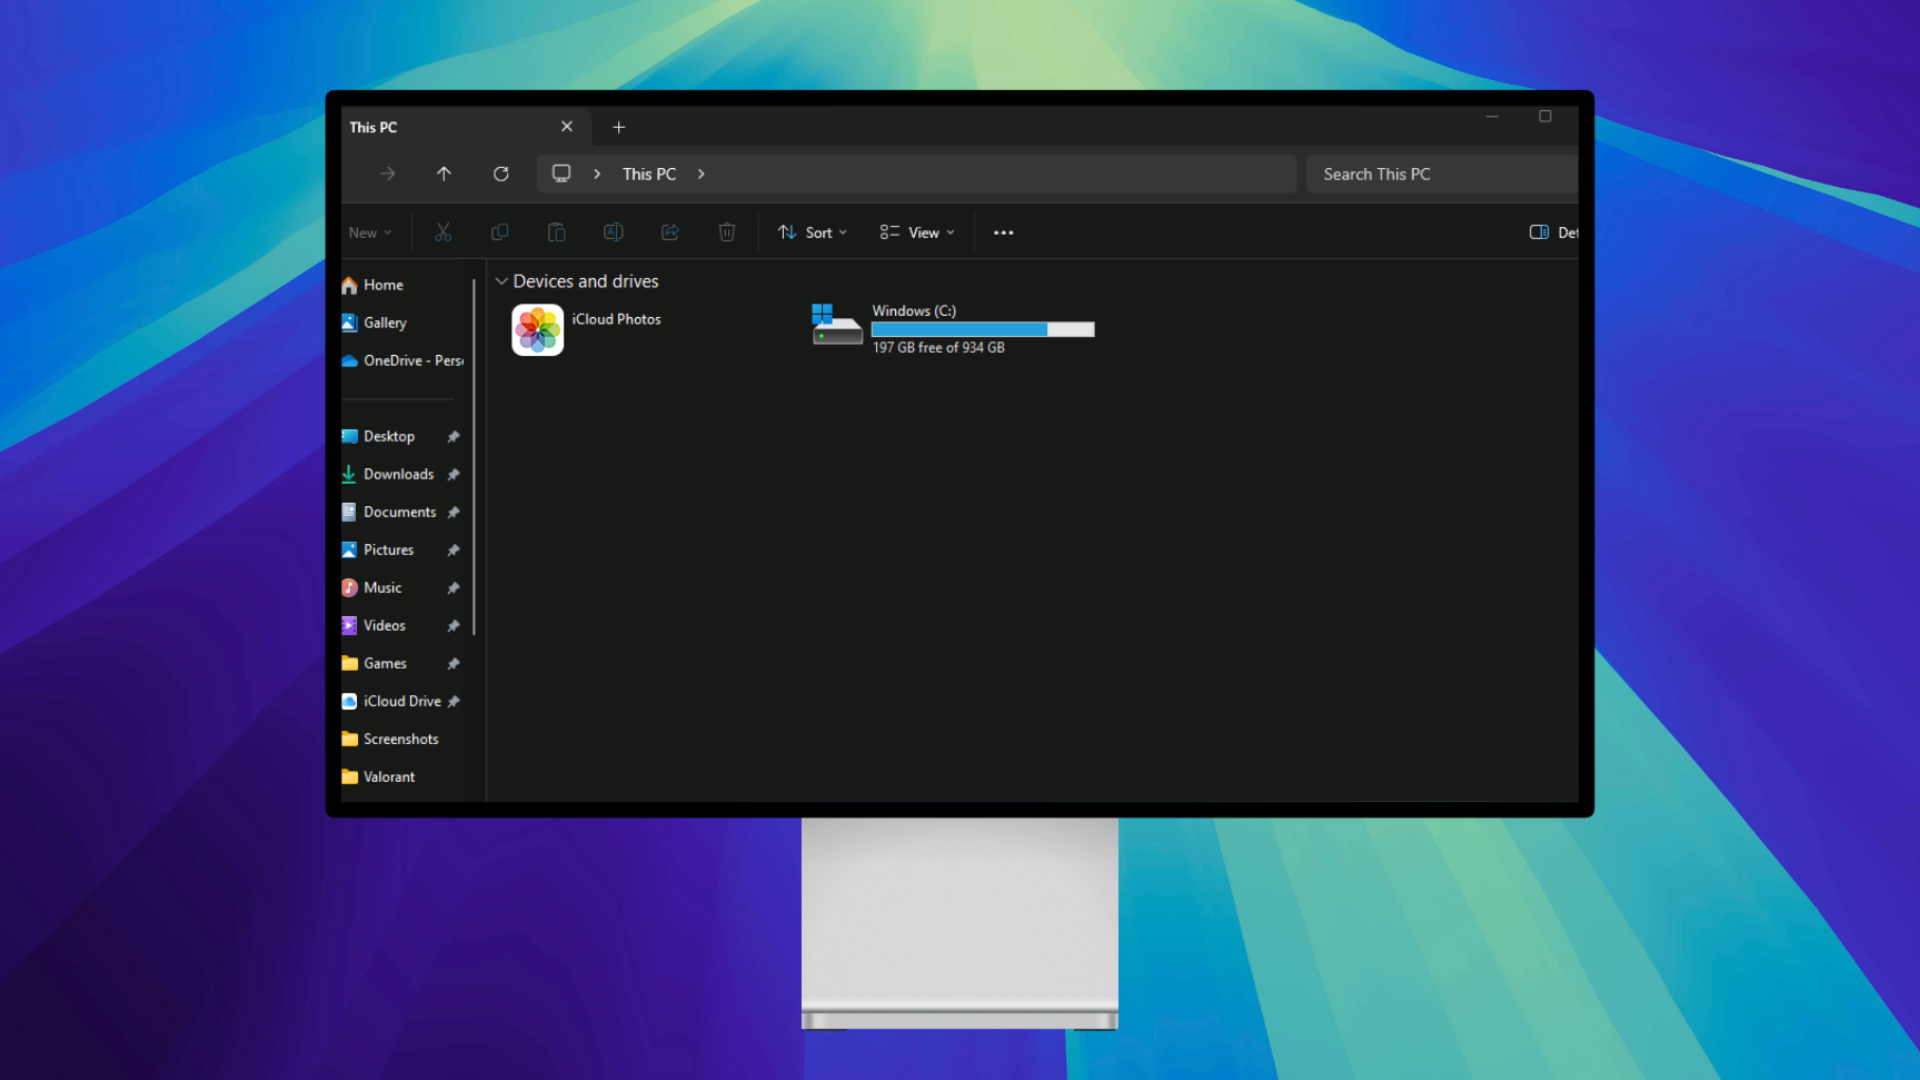
- Checking the Available Space: Ensure you have enough free storage before creating partitions. If you try to create them without sufficient space, your current drive partitions may be affected.
- Create Data Backup or Restore Point: As with any technological process, mistakes can lead to data loss. The same applies to hardware failures. Thus, it is important to be prepared. Creating full backups using Windows’ built-in features, such as a system image or recovery drive, can prevent the critical loss of personal data. Better safe than sorry.
How To Create Partitions on Your Windows PC
Now that you are familiar with the do’s and don’ts, it’s time to get started. There are two ways to create partitions: you can either do it manually using the Windows Disk Management tool or use third-party software to simplify the process.
Follow these steps to do it yourself:
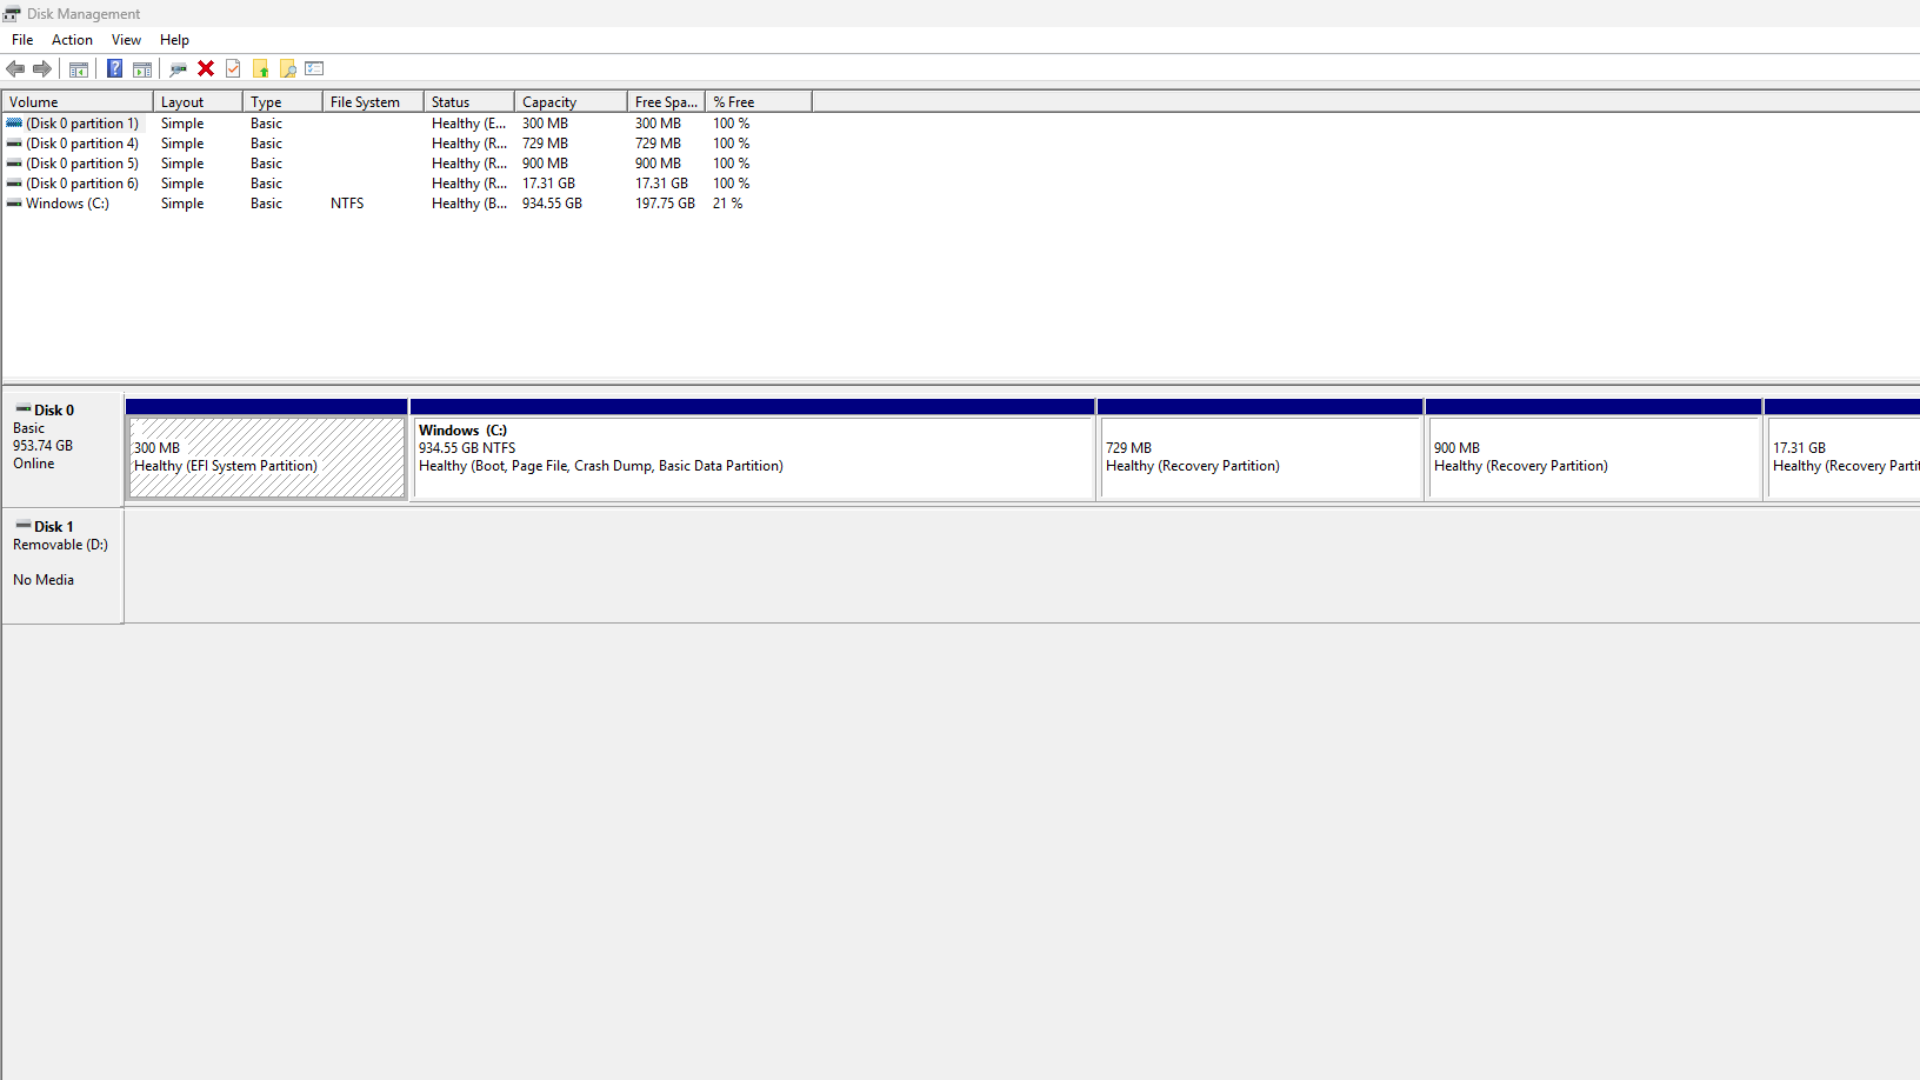
1. Open Disk Management
- Press the Windows key to open the Start menu.
- Type ‘Create and Format Hard Disk Partitions’ and click on the corresponding search result.
- This launches the Disk Management tool.
- Here, you can inspect a graphical layout of your current storage space, including the partitions.
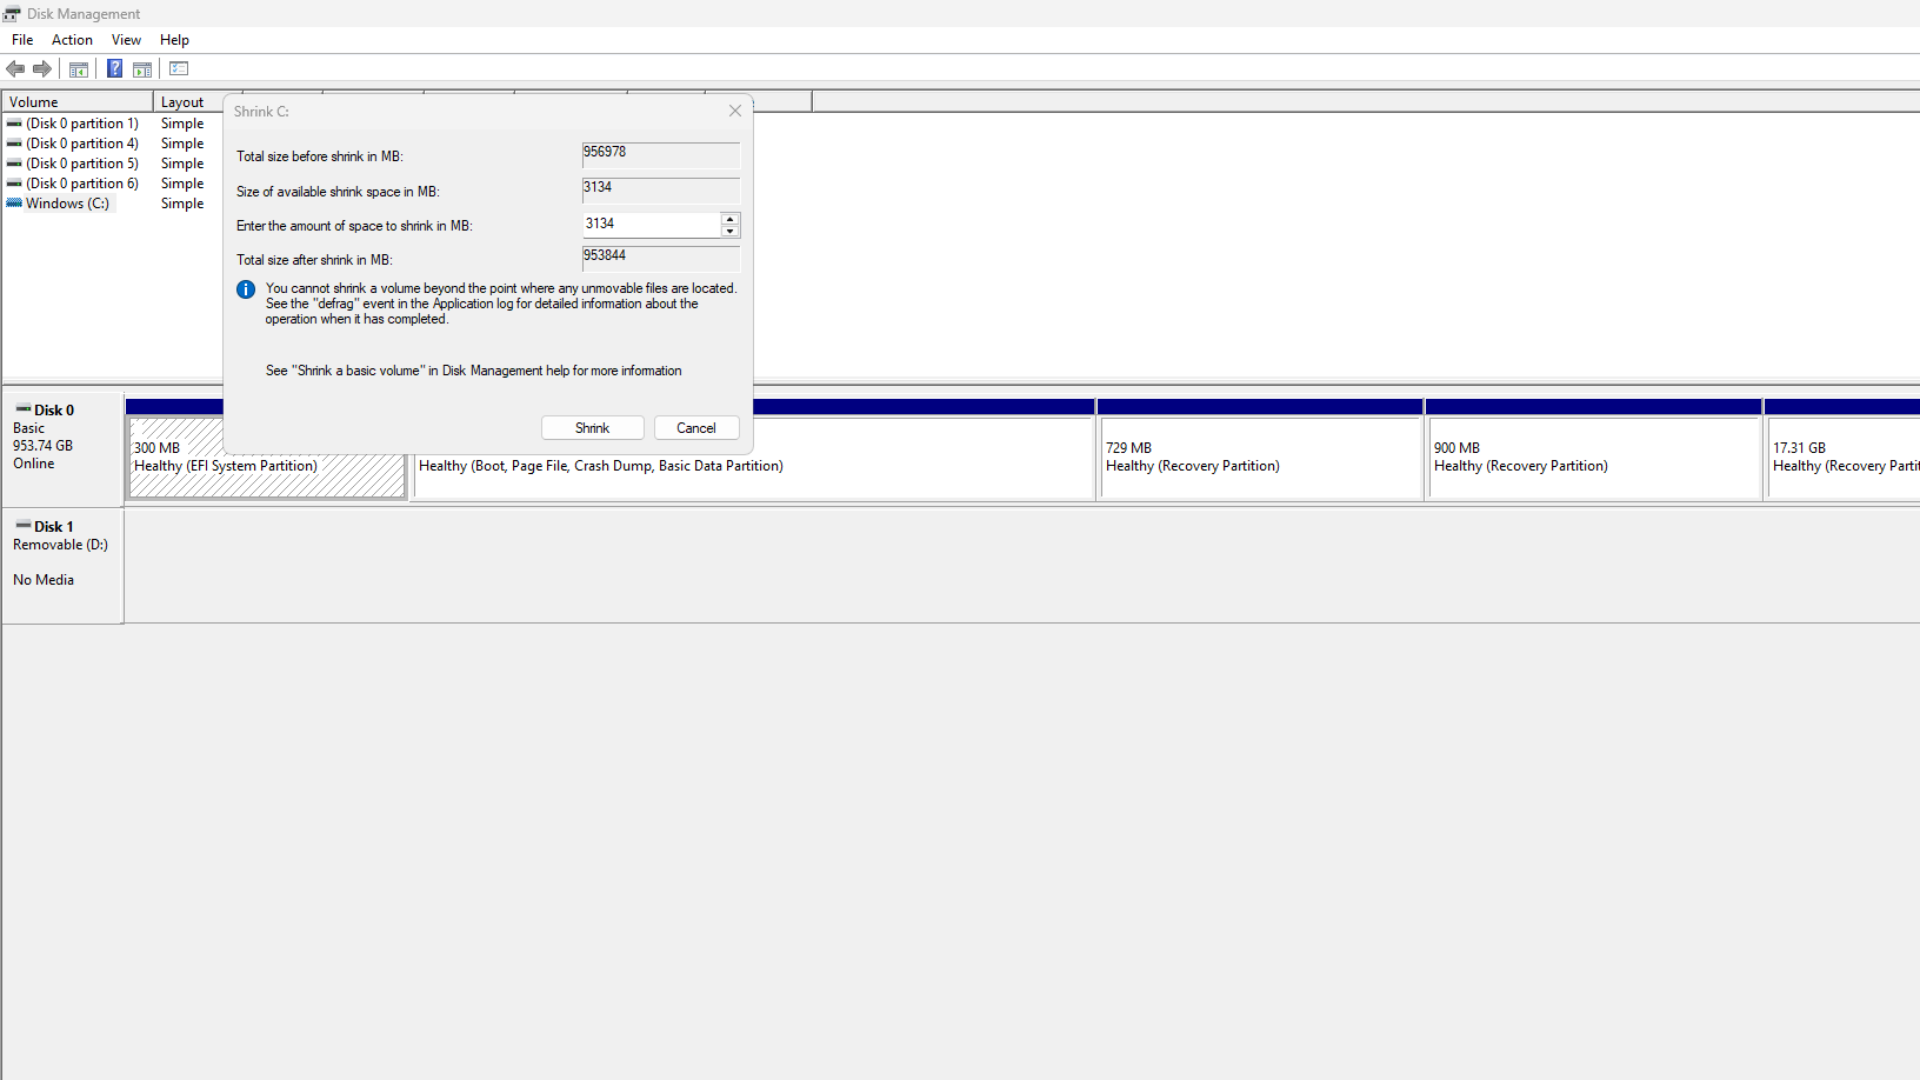
2. Shrink the C: Drive
- In the Disk Management tool window, right-click on the C: drive.
- Select the option ‘Shrink Volume.’
- A window will appear asking for the amount of space you want to free up.
- Keep in mind that 100,000 MB equates to approximately 100 GB.
- Enter the desired amount.
- This amount should provide enough room for a new partition without causing system performance issues.
- Select the ‘Shrink’ option.
3. Create a New Partition from Unallocated Space
- On shrinking the C: drive, you will notice a new block in the graph, labeled ‘Unallocated Space.’
- Right-click this space and choose ‘New Simple Volume.’
- Follow the partition wizard and assign a name and a letter to the new drive partition.
4. Format the New Partition
- You need to format the new partition to make it usable.
- When prompted, choose the file system.
- If you plan on only using Windows, NTFS is the most suitable option.
- The exFAT option is for when you plan to share files with other operating systems or devices.
- If you want to create a dual-boot setup, the installer will typically reformat the partition during setup. For starters, it is okay to go with the basic file system.
Third-Party Softwares
There can be a few annoying issues when trying to create partitions in Windows. These can range from unmovable files preventing you from shrinking the C: drive to multiple recovery partitions complicating the process.
Desperate times call for desperate measures. We recommend using third-party tools that often streamline the process. However, using these tools can be risky, as they may lead to data loss in rare cases. Ensure you have backed up all important data before proceeding. Here are some recommended third-party tools:
- MiniTool Partition Wizard
- AOMEI Partition Assistant SE
- Macrorit Partition Expert
- GParted
- EaseUS Partition Master
That is all you need to know to create partitions in your Windows PC. We hope to have helped you with this guide and prevented any storage-related issues.
Looking For More Related to Tech?
We provide the latest news and “How To’s” for Tech content. Meanwhile, you can check out the following articles related to PC GPUs, CPU and GPU comparisons, mobile phones, and more:
- 5 Best Air Coolers for CPUs in 2025
- ASUS TUF Gaming F16 Release Date, Specifications, Price, and More
- iPhone 16e vs iPhone SE (3rd Gen): Which One To Buy in 2025?
- Powerbeats Pro 2 vs AirPods Pro 2: Which One To Get in 2025
- RTX 5070 Ti vs. RTX 4070 Super: Specs, Price and More Compared
- Windows 11: How To Disable Lock Screen Widgets