Everything you need to know on how to enable, create, or join a Steam Family and share your game library on PC.

With the release of Steam Family Sharing, gaming on Steam has become more family-friendly. This feature introduces a game-sharing system that operates within Steam Families. To use the feature, you need to create or join a Steam Family to share games on PC with your family. By creating a virtual family with friends or family, you can establish a shared game library accessible to each member, allowing them to play any of the games included.
Before we dive into how to create a Steam Family and share games on PC, note two important points: First, you can only play games that are not currently being played by another member of the Steam Family. Second, not every game can be shared with family members—this depends on the game’s publisher, any bans on the account holding the game, or if the game requires a separate account or subscription to play. With that, let’s get into the details.
How To Set Up Steam Family Beta
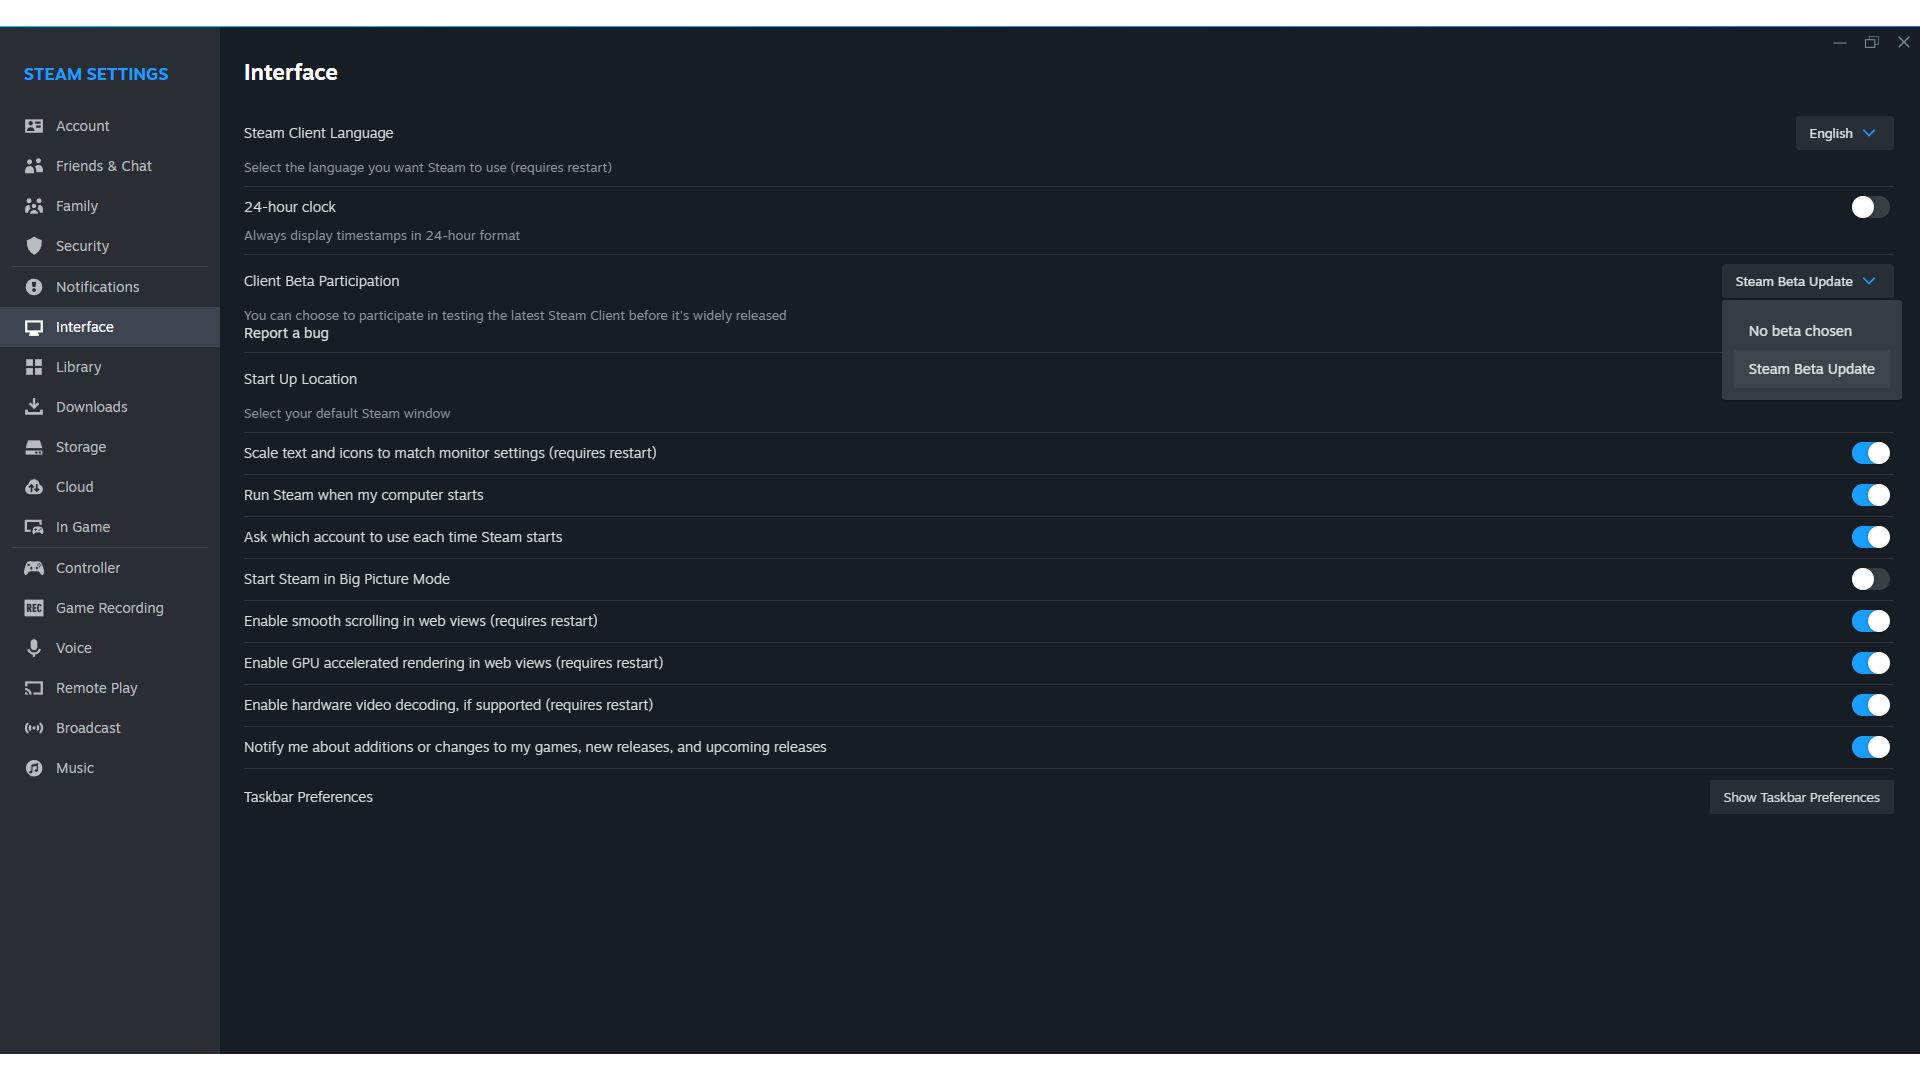
To start setting up Steam Family, you first need to enable Client Beta Participation. This allows you to access beta features like Steam Family. Follow these simple steps:
- Click on ‘Steam’ on the top-left of the main window after you launch Steam.
- Click on ‘Settings’.
- Under the ‘Interface’ tab, look for ‘Client Beta Participation’.
- Click on the drop-down arrow and choose ‘Steam Beta Update’.

After this, Steam will need to restart and update with the new beta features enabled. If you still cannot access these features, ensure that Steam Guard is enabled on your account. Here’s how:
- Click on ‘Steam’ on the top-left and open ‘Settings’.
- Select the ‘Security’ tab.
- From there, you can enable the Steam Guard.

How To Create or Join Steam Family
You can create a Steam Family or join one after enabling access to the Steam Family beta feature. Importantly, note that you can only create or join a Steam Family once per year. Therefore, if you leave or are removed from a family, you will need to wait a full year from the last time you joined or created a family before you can do so again. Now, follow these steps to set up the Steam Family:
- Click on ‘Steam’ on the top-left and open the ‘Settings’ menu.
- Under the ‘Family’ tab, click on ‘Create or Join a Steam Family’.
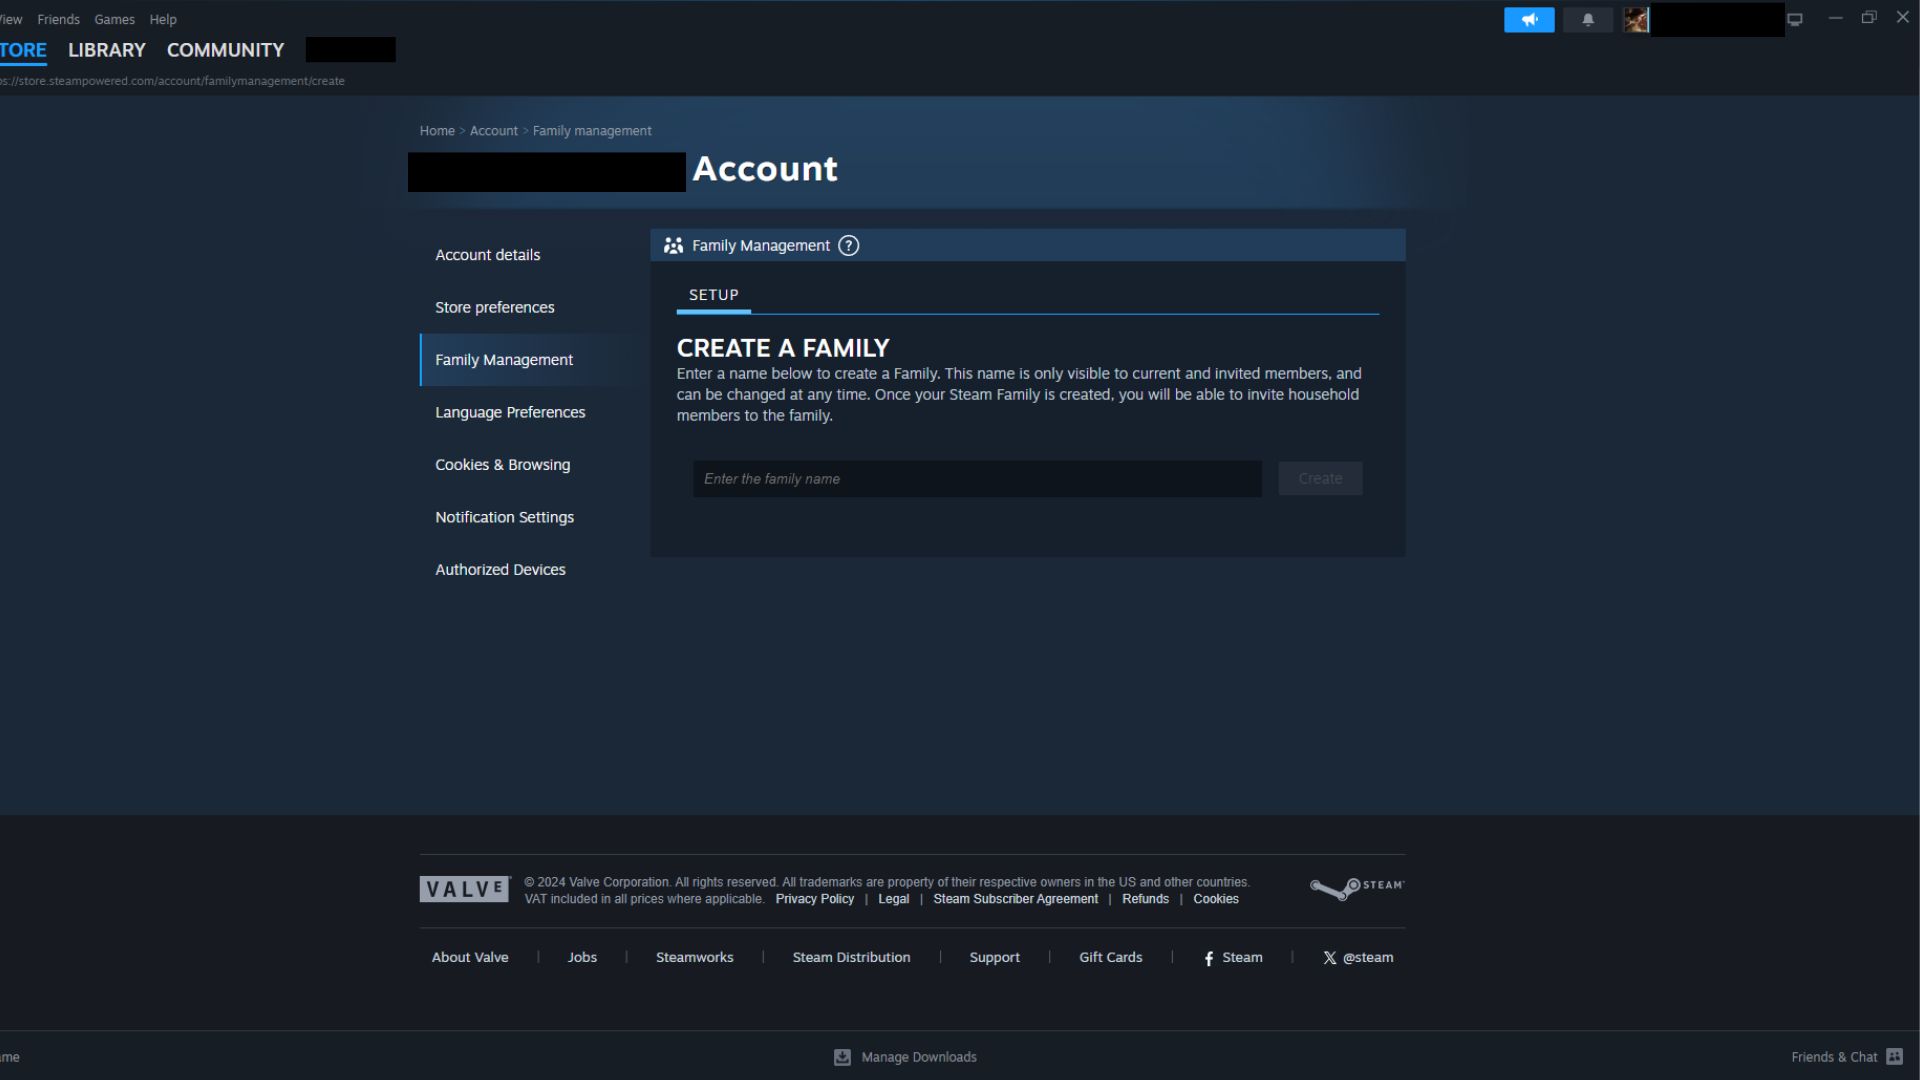
- You will be redirected to the menu where you can create or join a Steam Family.
- Select ‘Create a Family’.
- Choose a name for the Steam Family and enter it.
- Invite up to 5 other people to your Steam Family.
- Similarly, you can join a Steam friend’s family by accepting an invitation.
Also, be cautious when inviting people to your Steam Family. Because, you’ll be sharing personal information, playtime details, and your entire game library with them.
How To Share Games With Your Steam Family Members on PC
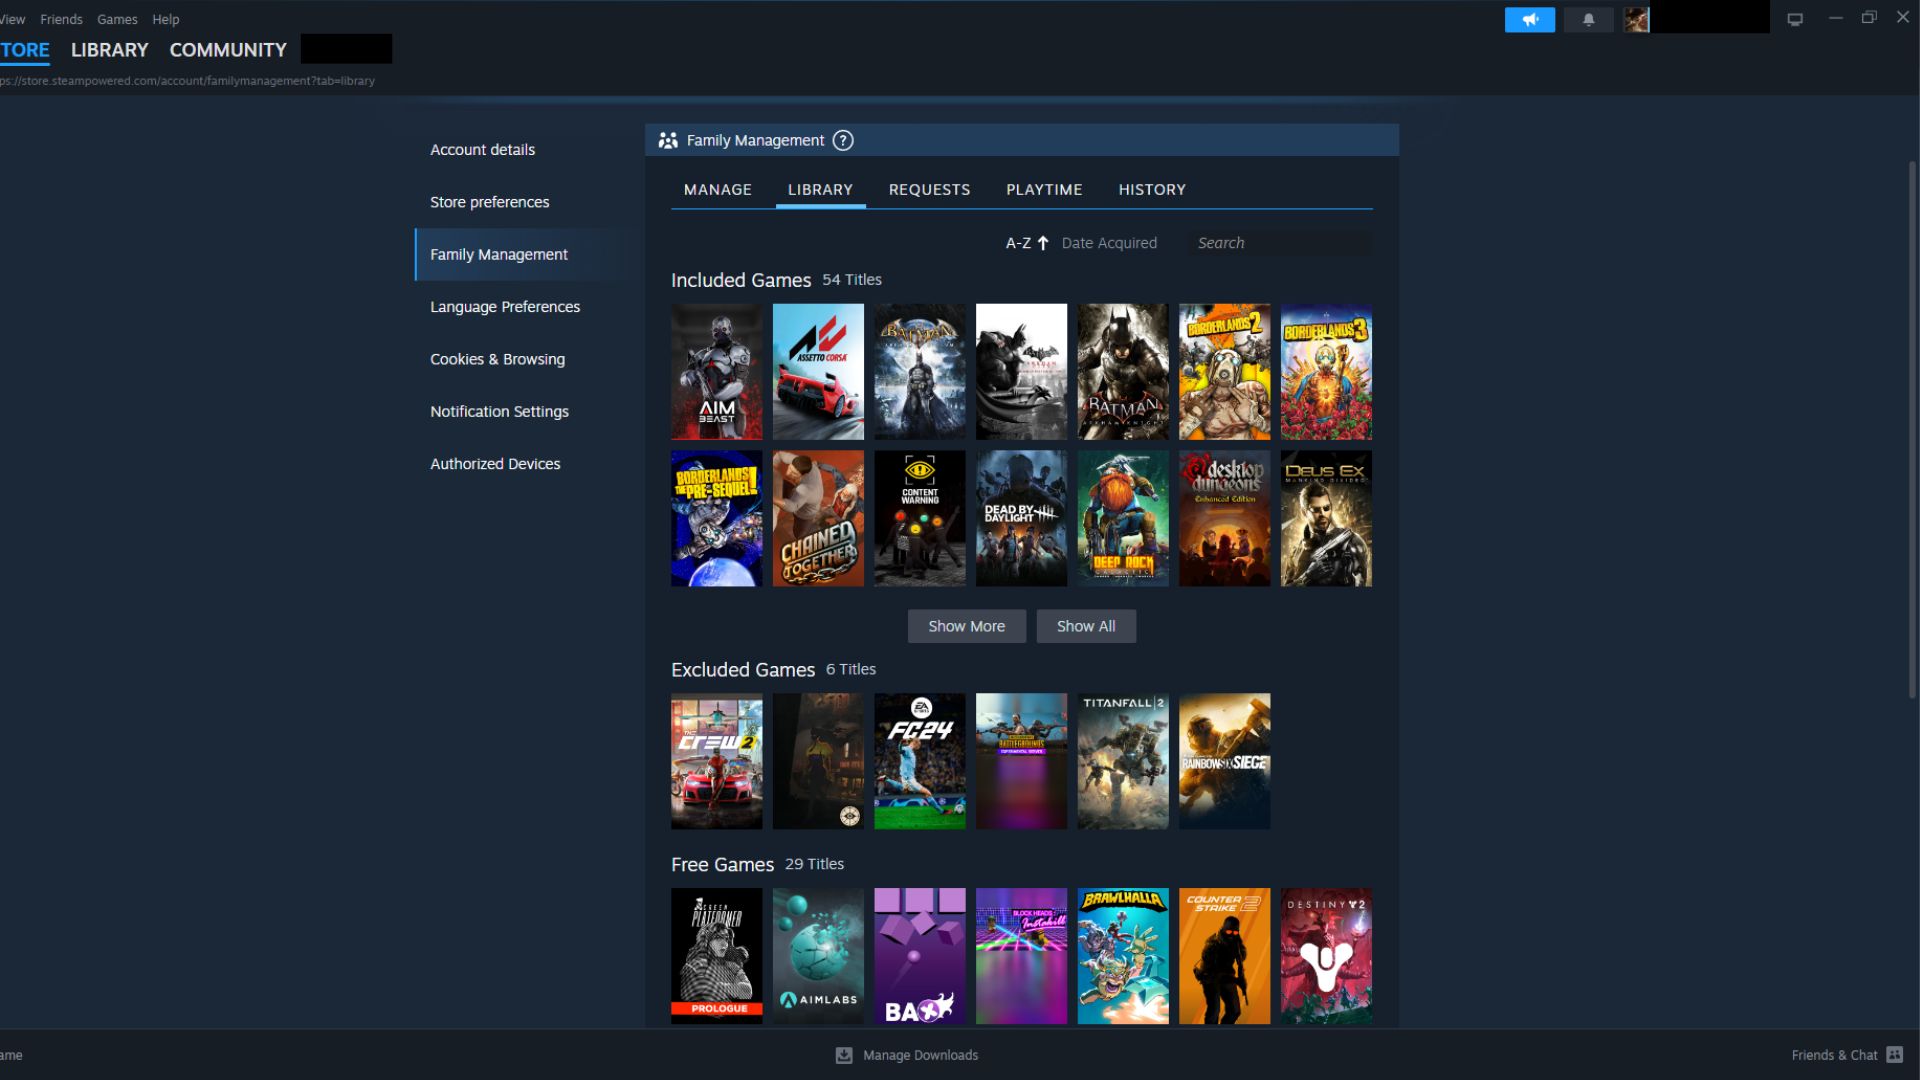
Once you’ve created or joined a family, you can start sharing games with your family members. Furthermore, when someone joins the Steam Family, their entire game library is automatically added to both the shared family library and your personal library. Next, navigate to the Family Management menu to choose which games to share. Additionally, you can check which games are available for sharing and which cannot be shared with family members.

If you or another member wants to play a game they own, but someone else is already playing it, Steam gives a 5-minute prompt to either purchase the game or quit. If there are children in the family, you can monitor their playtime information and set restrictions.
And that’s all you need to know about creating a Steam Family and sharing games on PC.
Looking For More?
Thank you for reading the article. We provide the latest news and create guides for Baldur’s Gate 3, Starfield, ARK Survival Ascended, and more. Also, watch Deltia play games on Twitch or visit his YouTube channel!
 Reddit
 Email
Email


