Facebook
 Reddit
 Email
Email
Step-by-step methods to disable the touchscreen in Windows 10/11 via PowerShell, Device Manager, or Registry Editor.
Nowadays, a large portion of Windows laptops feature a touchscreen to boost the input flexibility. While it is a feature for a lot of people, it can be an anti-feature for some. The reason for that can be the user experiencing erratic inputs when the laptop’s temperature goes past certain thresholds. On the other hand, some users just prefer using the familiar keyboard and mouse setups.
In this post, we will share three methods using which you can disable the touchscreen on Windows 10 and 11. Without further ado, let’s get started.
Method 1: Using PowerShell

People who want a quick and easy way to disable the touchscreen on Windows 10 and 11 can make use of Windows PowerShell. Follow these steps:
- Press the Windows key and type ‘PowerShell’ in the search bar.
- Right-click on Windows PowerShell and select ‘Run as administrator.’
- To disable the touchscreen feature, copy-paste the command mentioned below in the PowerShell window and press Enter.
Get-PnpDevice | Where-Object { $_.FriendlyName -like "*touch screen*" } | Disable-PnpDevice -Confirm:$false- If you want to enable the feature again, use the command below to do so.
Get-PnpDevice | Where-Object { $_.FriendlyName -like "*touch screen*" } | Enable-PnpDevice -Confirm:$falseThis method specializes in how fast it is. A perfect option for people who work with scripts or are in a hurry.
Method 2: Using Device Manager

Using the device manager is the pretty straightforward method to disable the touchscreen on Windows. The idea is to disable the drivers that control the touch functionality, making the touchscreen effectively unresponsive. Here is how you can do it:
- Press the Windows key + X to pop up the Quick Link menu.
- From the list, select Device Manager.
- Expand the ‘Human Interface Devices’ section.
- Keep an eye out for the listing names ‘HID-compliant touch screen.’
- Right-click on it and choose ‘Disable device.’
- Confirm the action if prompted.
This is a simple way to disable the touchscreen on Windows systems. However, some users have reported that the touchscreen may be re-enabled after your system reboots.
Method 3: Using Registry Editor
In case you are plagued by the issue of the touchscreen reactivating after a reboot or Windows update, do not worry. There is a permanent fix to this issue. This method involves using the Registry Editor to permanently disable the touchscreen. Here is what you need to do:
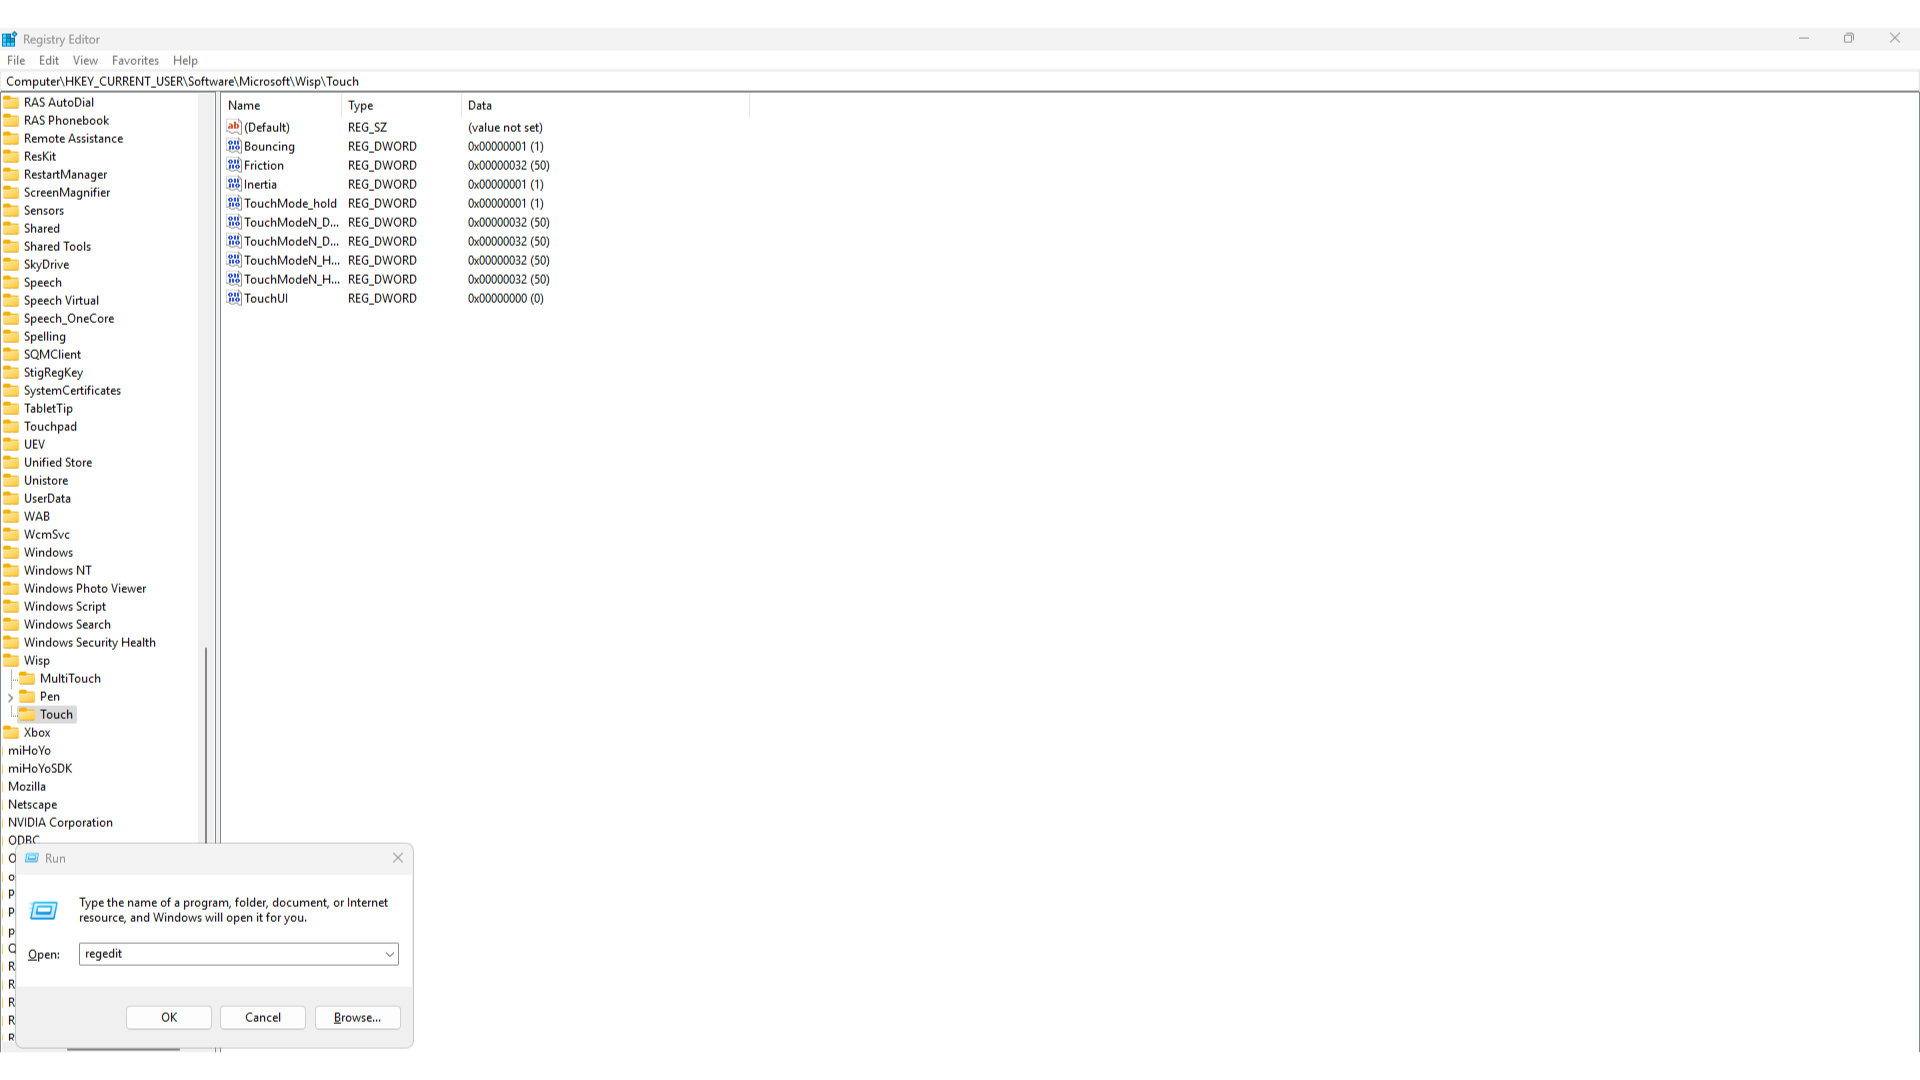
- Press the Windows key + R to launch the Run service.
- Type ‘regedit’ and hit Enter.
- The Registry Editor window will open on your screen.
- On that window, copy-paste the following path into the address bar and press Enter.
Computer\HKEY_Current_USER\Software\Microsoft\Wisp\Touch- On the right side of the window, look for the TouchGate entry.
- Double-click to modify it.
- Change the Value data to 0.
- Select OK to finalise the process.
Note: Using the Registry Editor can impact system behavior. Make sure to back up your registry settings before you make any changes to them.
That covers everything on how to disable the touchscreen on Windows 10 and 11. We hope this guide was able to make the process easier for you.
Looking For More Related to Tech?
We provide the latest news and “How To’s” for Tech content. Meanwhile, you can check out the following articles related to PC GPUs, CPU and GPU comparisons, mobile phones, and more:
- 5 Best Air Coolers for CPUs in 2025
- ASUS TUF Gaming F16 Release Date, Specifications, Price, and More
- iPhone 16e vs iPhone SE (3rd Gen): Which One To Buy in 2025?
- Powerbeats Pro 2 vs AirPods Pro 2: Which One To Get in 2025
- RTX 5070 Ti vs. RTX 4070 Super: Specs, Price and More Compared
- Windows 11: How To Disable Lock Screen Widgets