Facebook
 Reddit
 Email
Email
Did you know you can dual boot both Windows and SteamOS? Well, you can. We are here to make this process much simpler for you with this guide.
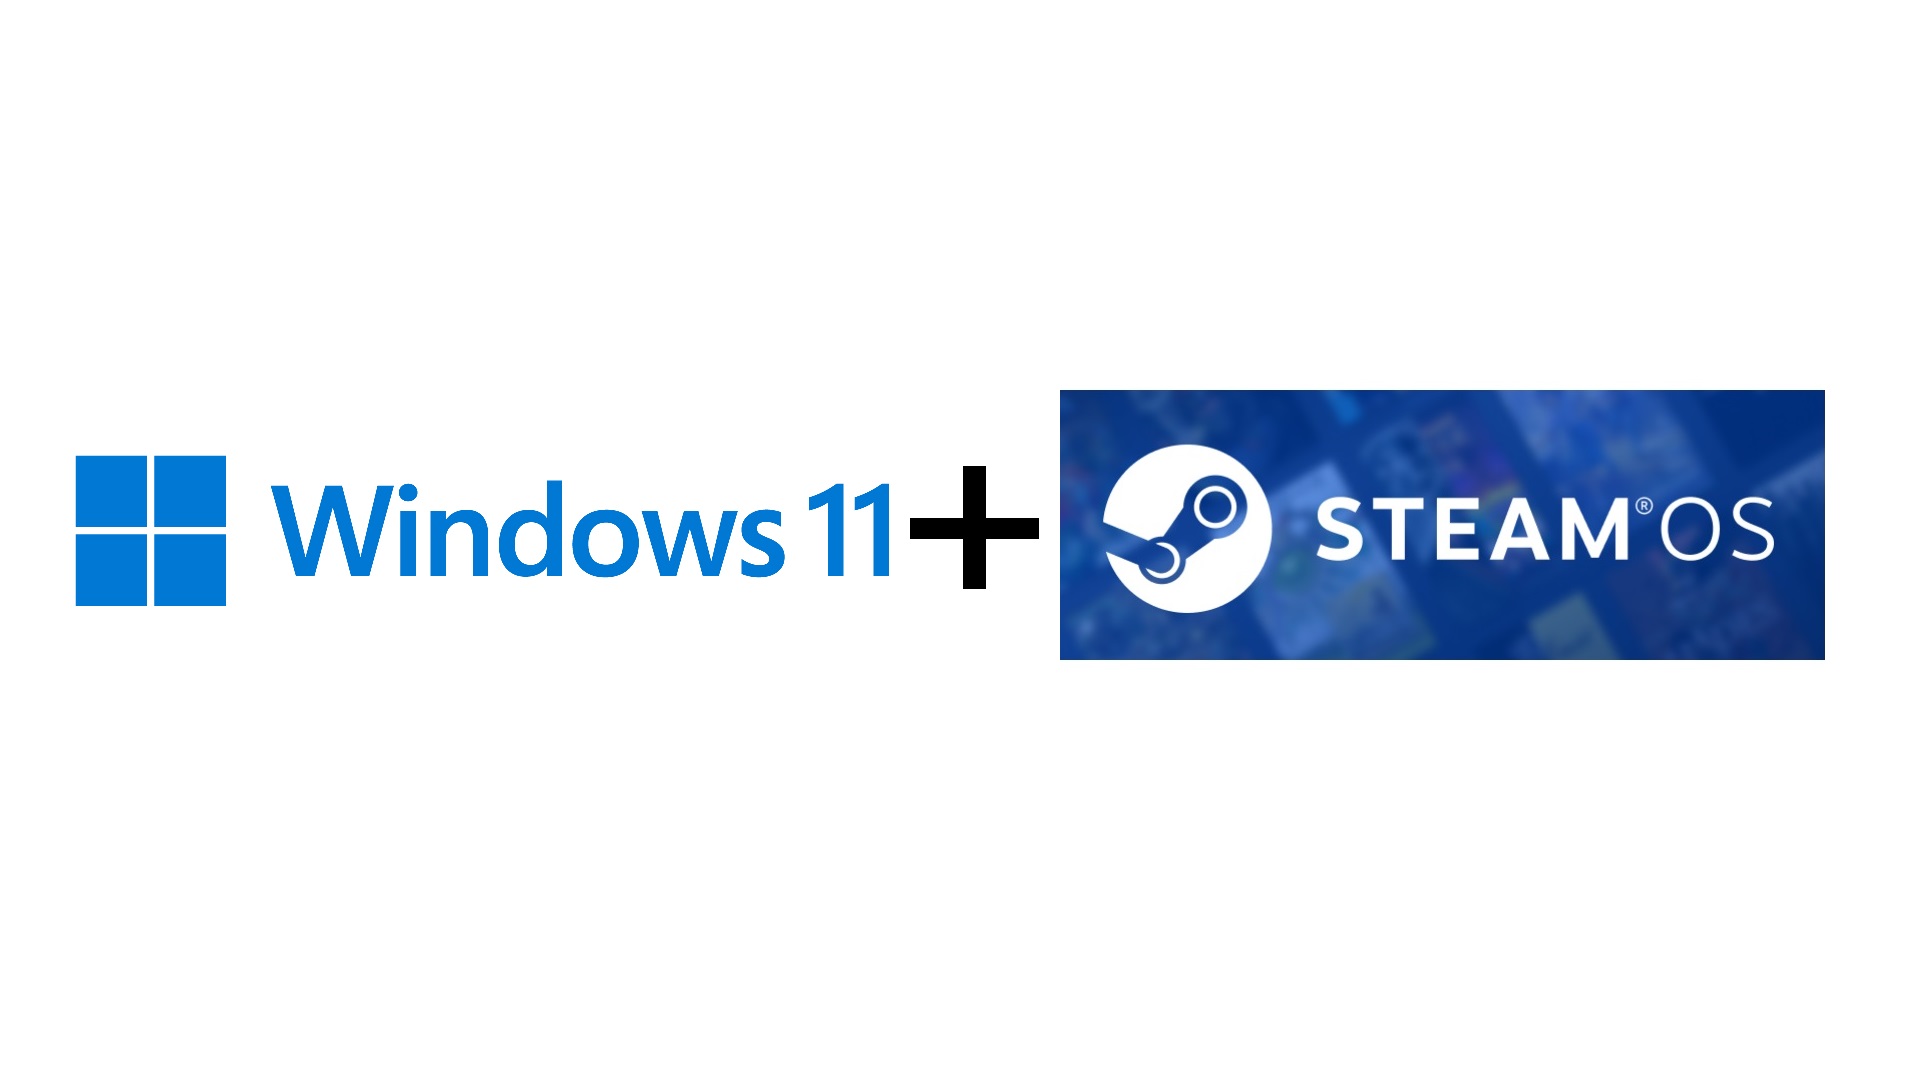
SteamOS is known for its simple and elegant UI for gaming handheld devices, such as the Steam Deck, but it has also been released for other devices. In fact, you can install it alongside Windows 11. Essentially, you will have SteamOS for gaming and Windows 11 for work, the best of both worlds.
However, dual booting both Windows 11 and SteamOS is a complicated process. That’s why we have prepared a detailed guide, from the beginning to the end, to help you achieve this dual boot system without any hassle. Read on to find the full guide below.
Note: Some aspects of this article are subjective and reflect the writer’s opinions. Attempting this dual booting process will wipe all your data, so back up your data.
Prerequisites for Dual Booting Windows and SteamOS
Dual booting with Windows and Linux is a complex process, so it’s better to keep some things ready before we get started. Here are a few prerequisites you will need to set up the dual boot process on your PC:
- You should back up all your files, documents, pictures, game saves, and any other data you need, as the dual boot setup process will delete everything.
- Download the latest Windows 11 ISO, SteamOS, and Rufus Utility program, and keep them ready.
- You should keep two USB flash drives ready with at least 8 GB of storage for each.
- You must have the Windows 11 key ready. If your PC came with Windows 11, the activation key is embedded in the hardware. It will activate automatically without requiring you to add the key.
- Visit your motherboard or laptop’s support webpage and download all the necessary drivers, such as networking, chipset, serial IO, and more. If you have a dedicated GPU, visit AMD, Nvidia, or Intel’s website to download the driver. Download and keep them all in a single folder called Drivers, so they are easy to find. We will need them during the preparation process.
How To Set Up Dual Boot With Windows and SteamOS
For dual booting, we need to install the two operating systems in a specific order. Here’s how we will dual boot: Install SteamOS > Shrink Drive Partition > Install Windows 11 > Configure the EFI Partition for dual boot menu, and that’s it. Let’s start with SteamOS first:
1) Preparing Boot Media for SteamOS and Windows
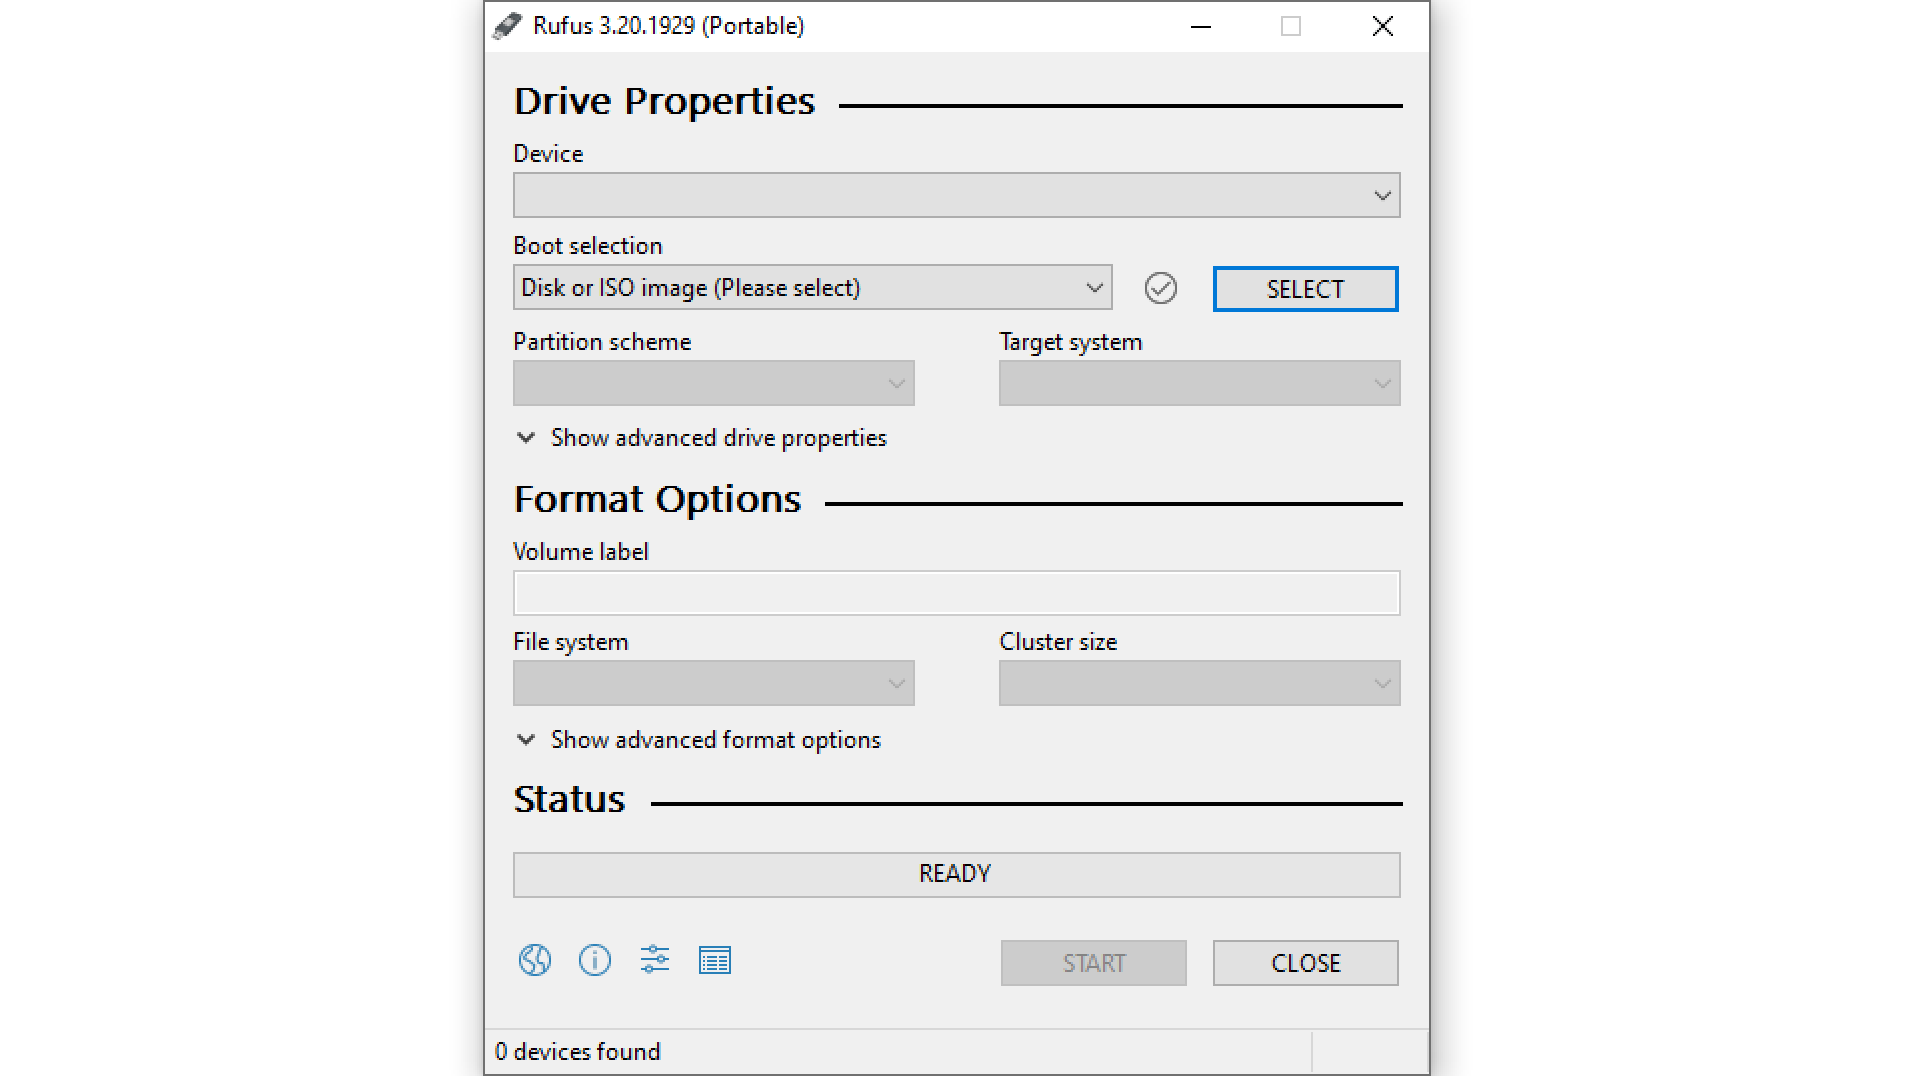
Here’s how to create the SteamOS boot media:
- Connect your 8GB or higher USB flash drive to your PC and launch the Rufus Utility program.
- In Rufus, select your USB flash drive as the device and select the SteamOS ISO you downloaded earlier in the Boot selection.
- Make sure the partition scheme and target system are set to GPT and UEFI.
- Next, click on the START button and follow the instructions to add the SteamOS installation files to the flash drive.
- After a few minutes, the SteamOS installation media will be ready.
- Next, connect your second USB flash drive and execute the same process, but with the Windows ISO file instead of SteamOS.
- Once the Windows flash drive is ready, copy the Drivers folder you created earlier and paste it directly inside the USB.
Therefore, one flash drive will have SteamOS and the other will include Windows.
2) Installing SteamOS as the First OS
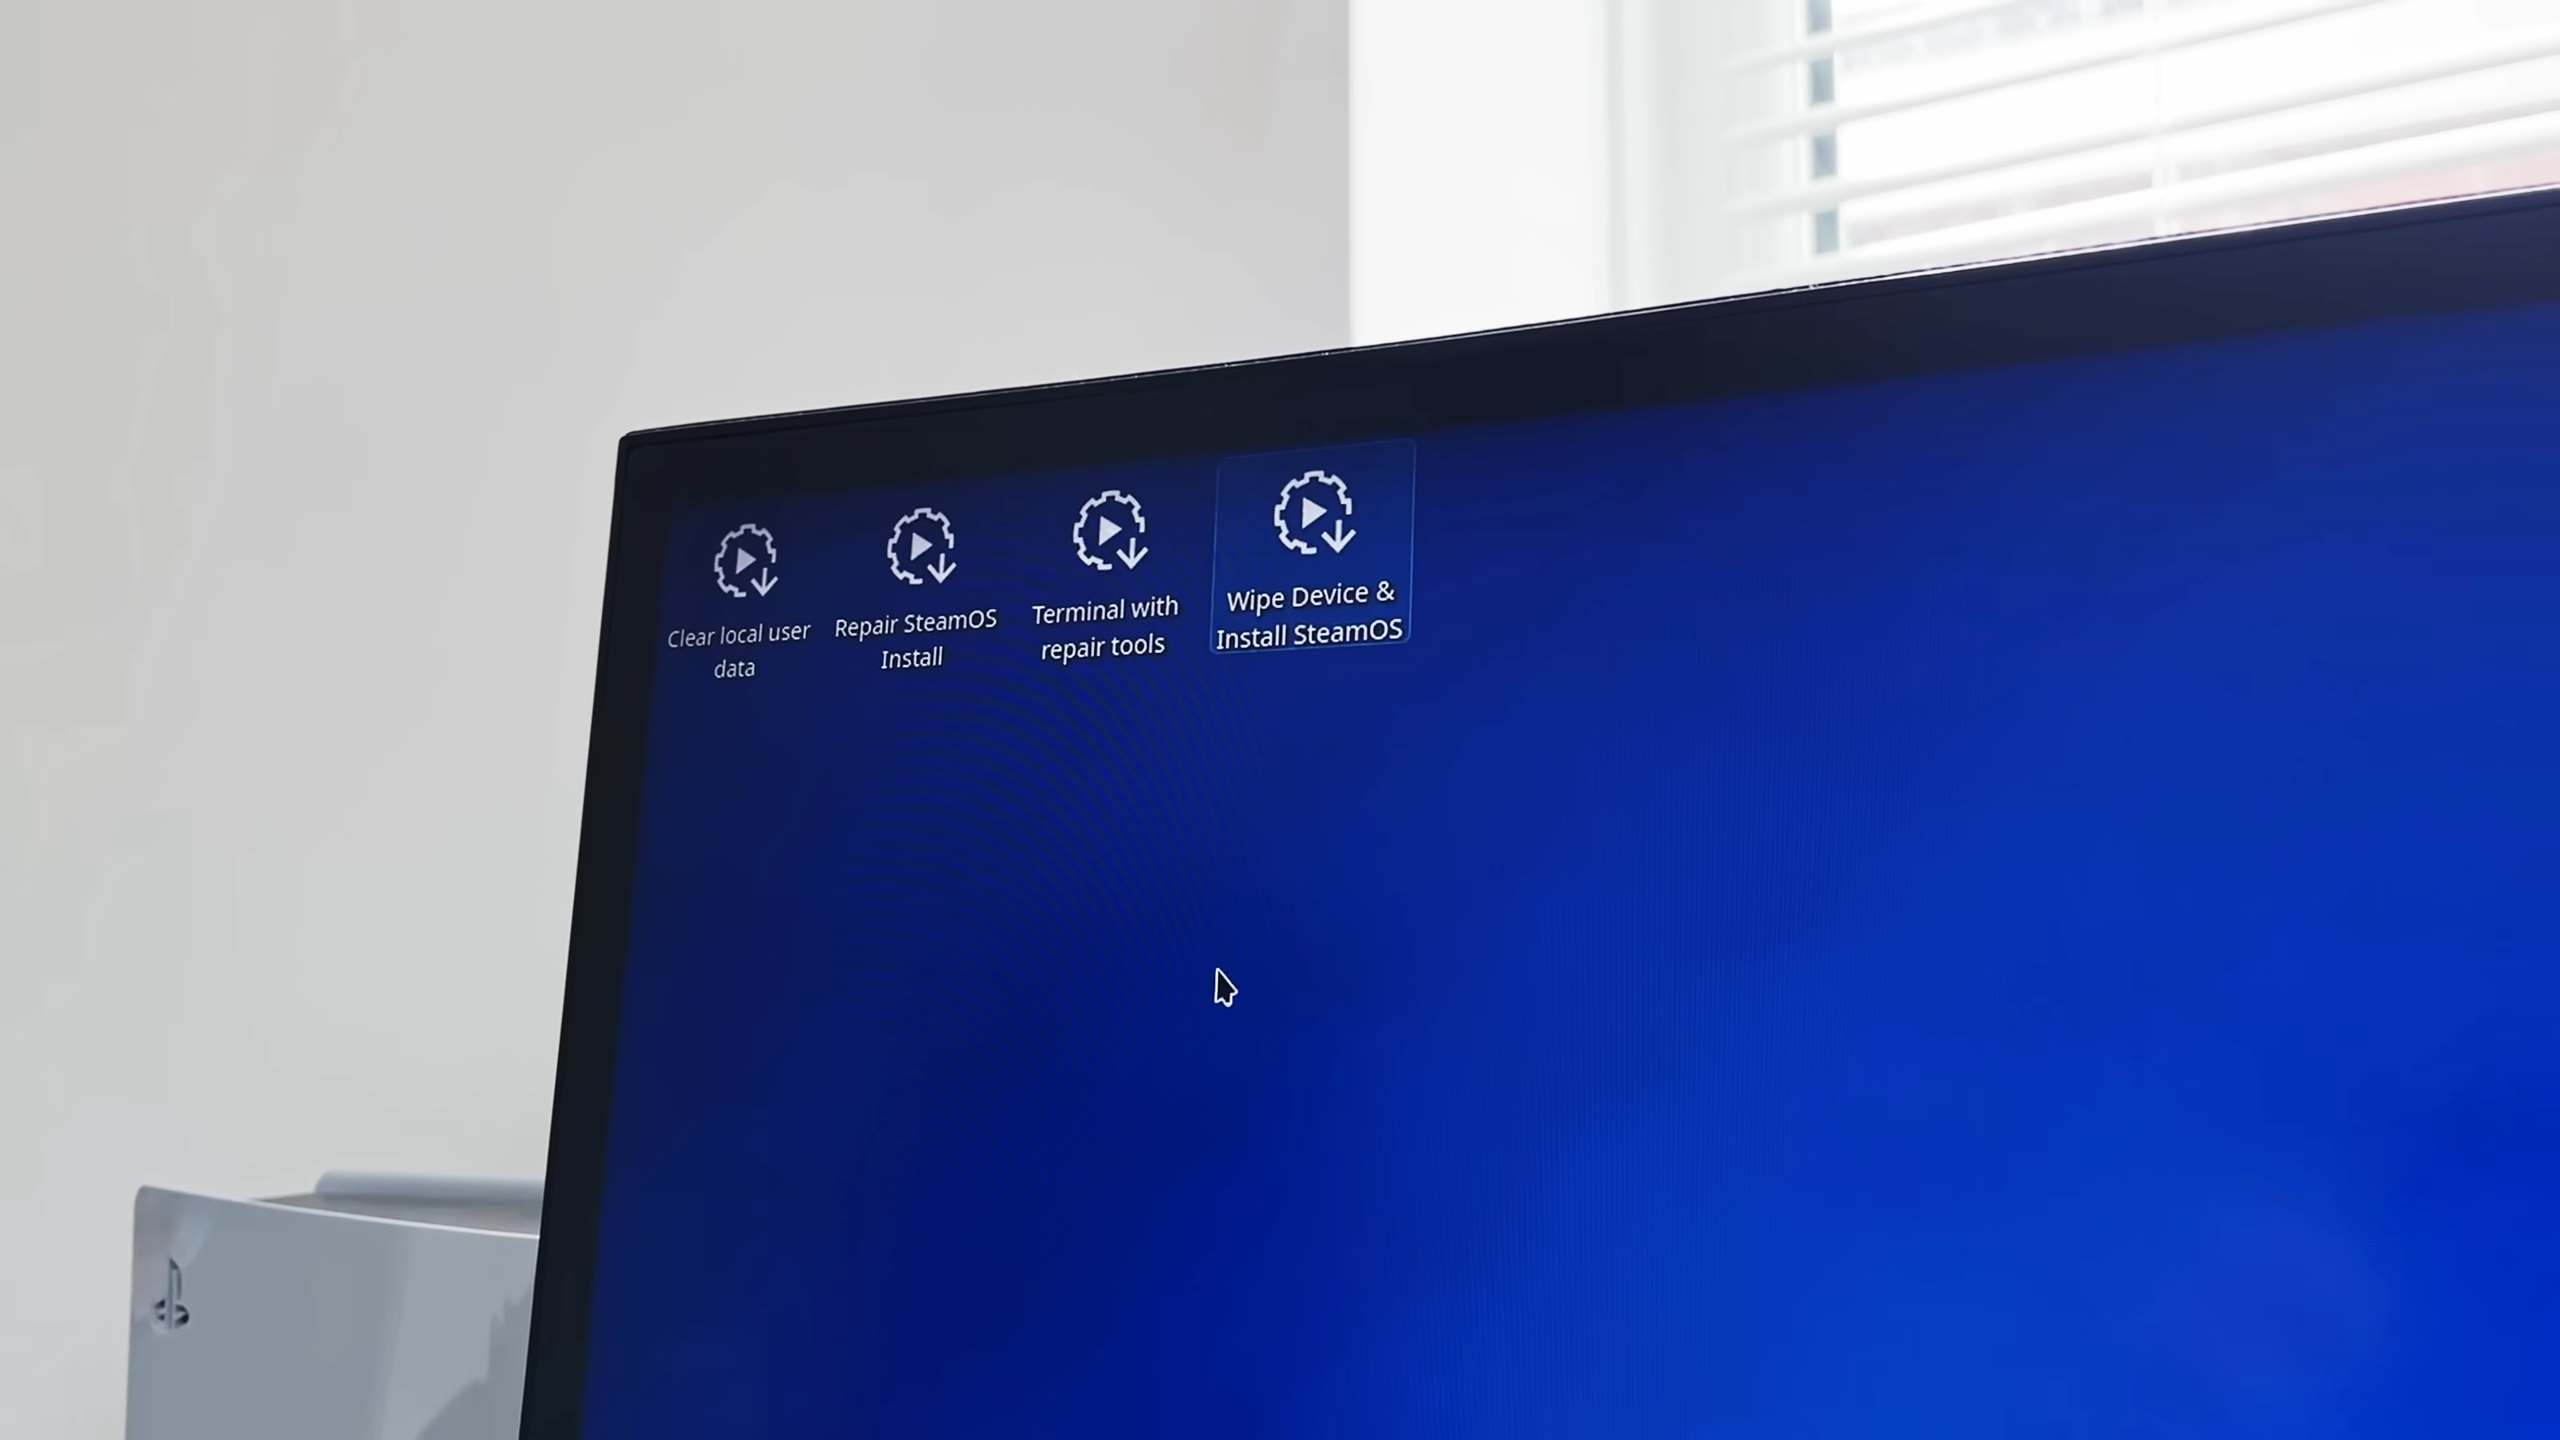
Here are the steps on how to install SteamOS for the first time:
- In the BIOS menu, put the SteamOS USB drive at the top of the boot order. Some BIOS menus have options to boot directly from USB. You can watch a YouTube video on how to change the boot order for your motherboard, as every BIOS is different.
- Next, boot from the USB drive that was previously prepared, and you will boot into the desktop screen of SteamOS.
- On the desktop screen, you will see an option called Wipe Device & Install SteamOS. Click on it and select Proceed to begin the installation.
- Wait for the installation to complete, and then select Restart.
- When it restarts, set up the SteamOS config and reach the main homescreen.
3) Shrinking the Drive Partition for Windows 11
By SteamOS occupies all this storage space on your PC. We need to make space for Windows 11. Here’s how to do it:
- Boot your PC from the SteamOS USB drive again, just like we did in the last step.
- Once you reach the desktop screen of SteamOS, click on the Start menu/KDE menu.
- Next, select System in the Start menu and click on KDE Partition Manager. Your internal drive should be automatically selected in the left pane.
- In the main screen of KDE Partition Manager, you will see a bunch of partitions. Find a partition with the label home. It should be the last partition, and the home label should be written on the right side.
- Right-click on the home partition and select Resize/Move.
- In the new window, you will see a text field for Size. Whatever number you see on Size, you must divide that number by 2 and enter that. Therefore, if Size is ported as 1,001,100.00 MiB, then you should erase that and type 500,550.00MiB.
- Next, select OK and click on the Apply button at the top-left corner. If it asks you to click Apply again, do that.
- Wait for the process to finish.
- Next, right-click on the unallocated partition and select New.
- Select NTFS as the File system and click OK.
- Next, click on the Apply button at the top-left corner. If it asks you to click Apply again, do that.
4) Installing Windows 11 as the Second OS

Once you have shrunk the SteamOS partition, it’s time to restart to the BIOS screen and boot from the Windows USB flash drive. Here are the steps on how to install Windows alongside SteamOS:
- In the Windows 11 setup, select the language, license key, and everything else until you reach the page where there are two options: Install Windows 11 or Repair My PC.
- Select the Install Windows 11 option, and tick the checkbox that says “I agree everything will be deleted……”
- Click Next. Don’t worry, your SteamOS won’t be deleted if you follow our instructions.
- Now, you will see a bunch of partitions. You should focus on the last two partitions, which should have higher capacities than any other partitions.
- The last two partitions should be called Disk 0 Partition 8 and 9, or something similar. Select the Disk 0 Partition 8 or its equivalent on your PC and check if there’s a warning that says Windows 11 cannot be installed on this partition. If it shows that warning, select the Disk 0 Partition 9, which shouldn’t have that warning.
- If the selected Disk 0 Partition 9 doesn’t have that warning, click on Next to proceed.
- Click on Next again to begin installation.
- Once Windows 11 is installed, set it up normally.
- Next, install all the drivers you previously copied to the flash drive.
5) Configuring Your PC To Show Both OS During Boot
Now, you have to configure the EFI to show both SteamOS and Windows during the boot process. This will allow you to choose either OS when you start your computer. Here are the steps on how to do it:
- Boot your PC from the SteamOS USB drive again, just like we did in the last step.
- Once you reach the desktop screen of SteamOS, click on the Start menu/KDE menu.
- Next, select System in the Start menu and click on the Konsole app.
- A command prompt-like console screen should appear on the screen.
- Type
sudo fdisk -l /dev/nvme0n1and press Enter on your keyboard. - Next, type
sudo fdisk /dev/nvme0n1and press Enter again. - After that, type w and press Enter again.
- Next, type sudo efibootmgr -c -d /dev/nvme0n1 -p 1 -L “SteamOS” -l “\EFI\steamos\steamcl.efi” and press Enter again.
- Next, shut down your PC and remove the USB flash drive. Start your PC, and it should boot into Windows automatically.
- Next, launch the command prompt as an admin.
- Now, type
bcdedit.exe -set {globalsettings} highestmode onand press Enter again. - Next, go into the BIOS and put the SteamOS Boot drive at the top of the boot order. Save the BIOS and restart. Your PC should boot into SteamOS now.
- Once SteamOS loads, go to desktop mode and launch the Konsole app again.
- Next, type cd $HOME && rm -rf $HOME/SteamDeck_rEFInd/ && git clone https://github.com/jlobue10/SteamDeck_rEFInd && cd SteamDeck_rEFInd && chmod +x install-GUI.sh && ./install-GUI.sh and press Enter again. Type your password and press Enter again.
- Launch the File Manager and check the Home directory, and select the folder called SteamDeck_rEIFInd.
- Double-click the SteamDeck_rEIFInd.desktop file and execute it.
- Next, in the SteamDeck_rEIFInd setup, select SteamOS as the Default Boot Option.
- Next, select SteamOS in Boot Option #1 and Windows in Boot Option #2.
- At the bottom of this app, tick the checkbox for “Enable Mouse” and instead of Nobara on the right side, select Arch – systemd.
- Next, click on Install rEIFInd and proceed.
- Next, click on Create Config and then select Install Config.
- Now, close everything and restart your PC. You will now see both SteamOS and Windows options during boot.
Final Thoughts
This concludes the detailed installation process for dual booting SteamOS and Windows 11. Follow the setup process carefully to ensure there are no errors.
We provide the latest news and “How To’s” for Tech content. Meanwhile, you can check out the following articles related to PC GPUs, CPU and GPU comparisons, mobile phones, and more:
- 5 Best Air Coolers for CPUs in 2025
- ASUS TUF Gaming F16 Release Date, Specifications, Price, and More
- iPhone 16e vs iPhone SE (3rd Gen): Which One To Buy in 2025?
- Powerbeats Pro 2 vs AirPods Pro 2: Which One To Get in 2025
- RTX 5070 Ti vs. RTX 4070 Super: Specs, Price and More Compared
- Windows 11: How To Disable Lock Screen Widgets