Facebook
 Reddit
 Email
Email
Everything you need to know about the best Hammer build in Monster Hunter Wilds, including the best Decorations, skills, armor, and more.
The Hammer is one of the easiest weapons to pick up and use in Monster Hunter Wilds. It’s a very low-commitment weapon that, if used right, can dish out incredibly high amounts of damage, while also immobilizing monsters. However, the Hammer is also among the weapons that are highly skill and loadout-dependent. Meaning that, if you don’t spend some time min-maxing your build, selecting the perfect Decorations, and the right armor pieces, you won’t be able to fully utilize the weapon to its utmost potential. Thankfully, crafting a build for the Hammer isn’t really all that difficult, especially in the endgame and with access to Wyvern Melding.
Here’s a comprehensive guide on creating the best Hammer build in Monster Hunter Wilds.
Note: This article is updated according to the latest title update for Monster Hunter Wilds (TU1), and takes into account the new weapons and skills added to the game.
Monster Hunter Wilds Hammer Overview
The Hammer is a weapon that’s quite similar to the Great Sword. However, at the same time, it works completely differently from how a Great Sword does. Instead of being focused on single-hit damage, the Hammer is more about combos and charged attacks.
Now, the Great Sword too relies on charged attacks, but its regular combos are equally as effective, especially with the new Focus Mode. Hammer, on the other hand, relies solely on charged combos. In fact, it’s among the few weapon types that allow you to charge while being mobile. This ability is what sets it apart from other weapon types. Furthermore, the Hammer’s Big Bang attack is one of the most damaging combos in the entire game.
Despite its weight, Hammer is all about mobility. The new Mighty Charge Slam combo essentially encourages you to move around while charging, allowing you to deal more damage based on your charge level. In addition to all this, Hammer, being a blunt weapon, is incredibly effective at dealing knockout damage. It also synergizes really well with Partbreak skill and can easily break through armored monsters like Gravios and Arkveld.
While the Hammer is a pretty good weapon on most accounts, it does have some shortcomings. Due to its reliance on combos, it’s not a good weapon if you want to employ the “hit-and-run” strategy (akin to Great Sword). Furthermore, it’s a weapon that forces you to stay close to a monster’s head. Since it’s not effective at severing parts, there’s really no incentive for Hammer users to target any other part apart from the monster’s head. In addition to that, the Hammer is incredibly stamina-hungry. As such, using Dash Juice or Energy Drinks is a must on every hunt.
Pros and Cons of Hammer in Monster Hunter Wilds
Here’s a list of pros and cons for the Hammer in Monster Hunter Wilds:
| Pros | Cons |
|---|---|
| Incredibly high DPS on combos. | Worse single-hit damage compared to other weapon types. |
| Can be charged while staying mobile. | Is not efficient at severing monster parts. |
| It is not efficient at severing monster parts. | Requires a lot of stamina to use, even for the regular combos. |
Best Hammer Build in Monster Hunter Wilds
Our best Hammer build focuses on three major aspects – Affinity, Partbreak, and wound damage (Weakness Exploit). The Hammer already excels at dishing out massive amounts of raw damage. As such, instead of using Attack Jewels, we used Critical Jewels to add to the weapon’s Affinity. Furthermore, we also chose to max out Weakness Exploit and Partbreak.
You can also add Flayer using a Talisman to make inflicting wounds on monsters much easier. However, since you’re already going to deal a ton of raw damage, in addition to Partbreak, Flayer is completely optional.
Here’s a breakdown of the best Hammer build in Monster Hunter Wilds:
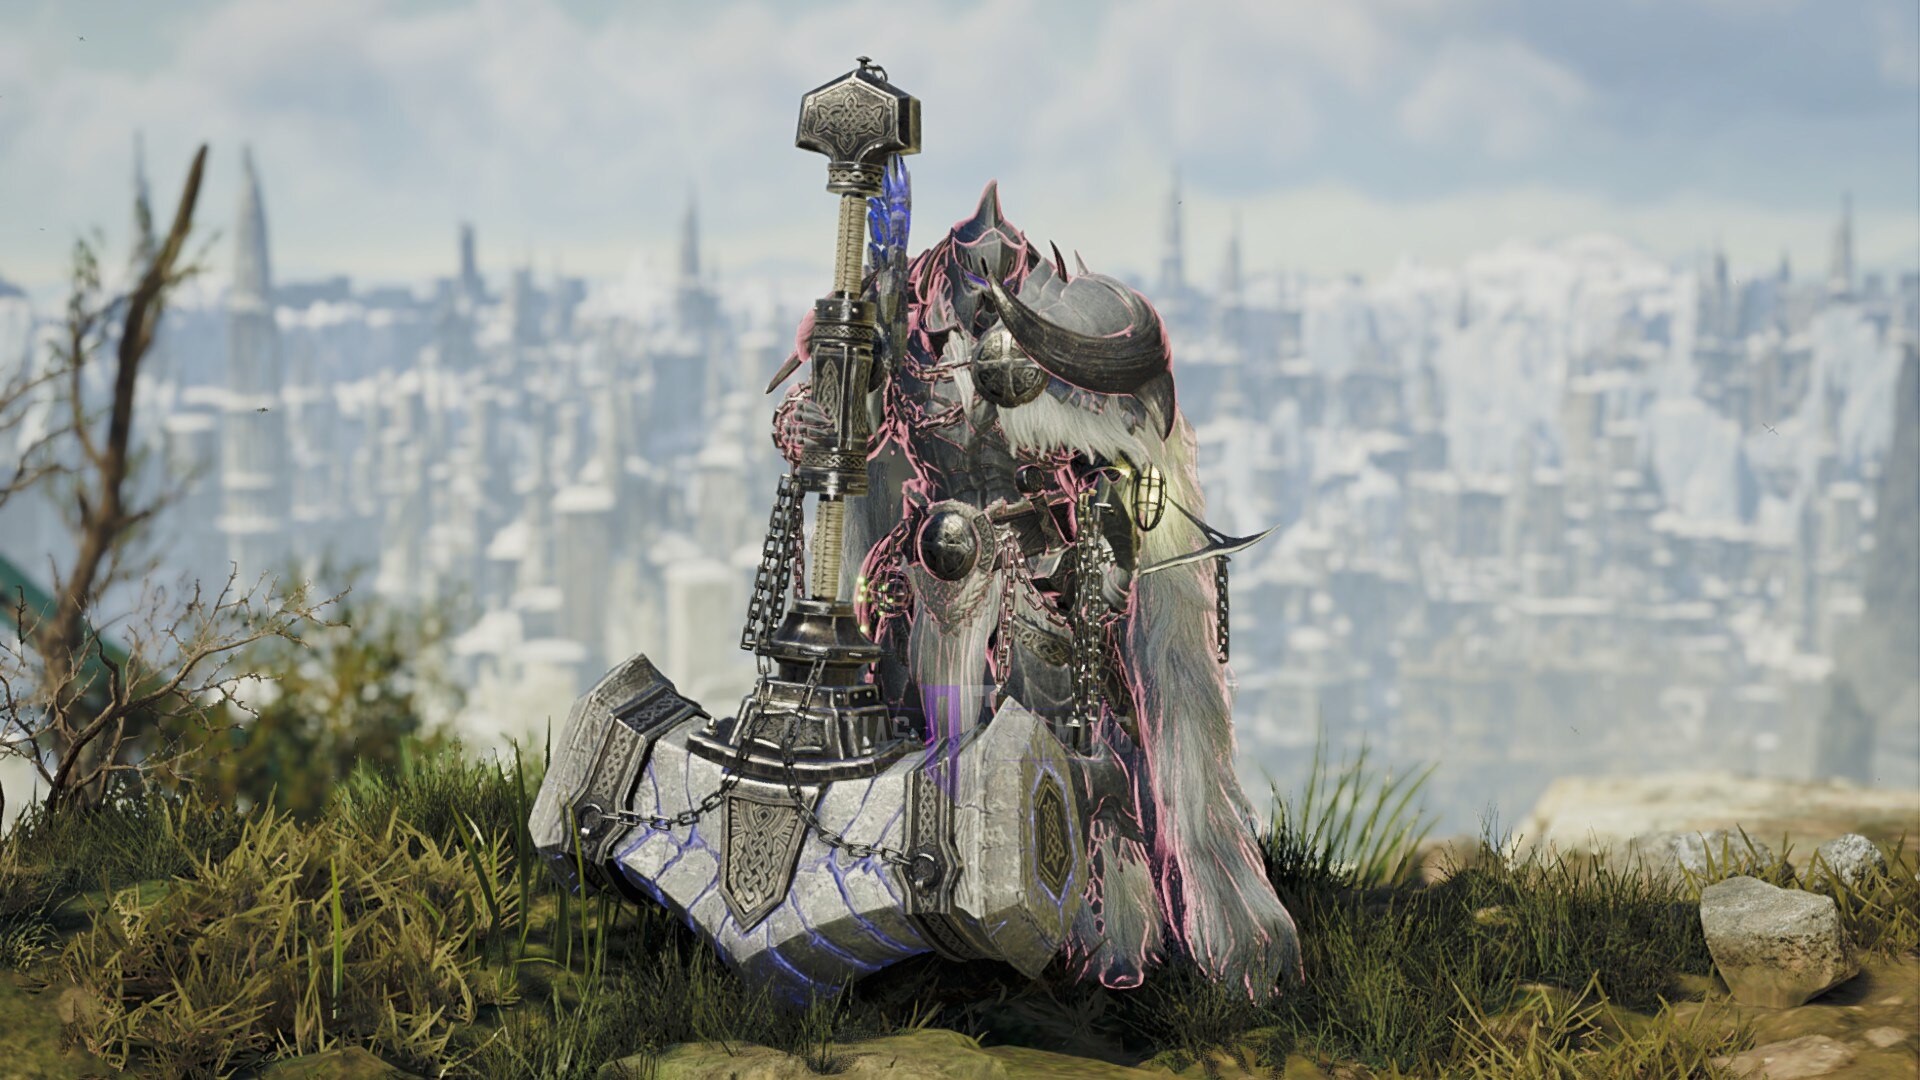
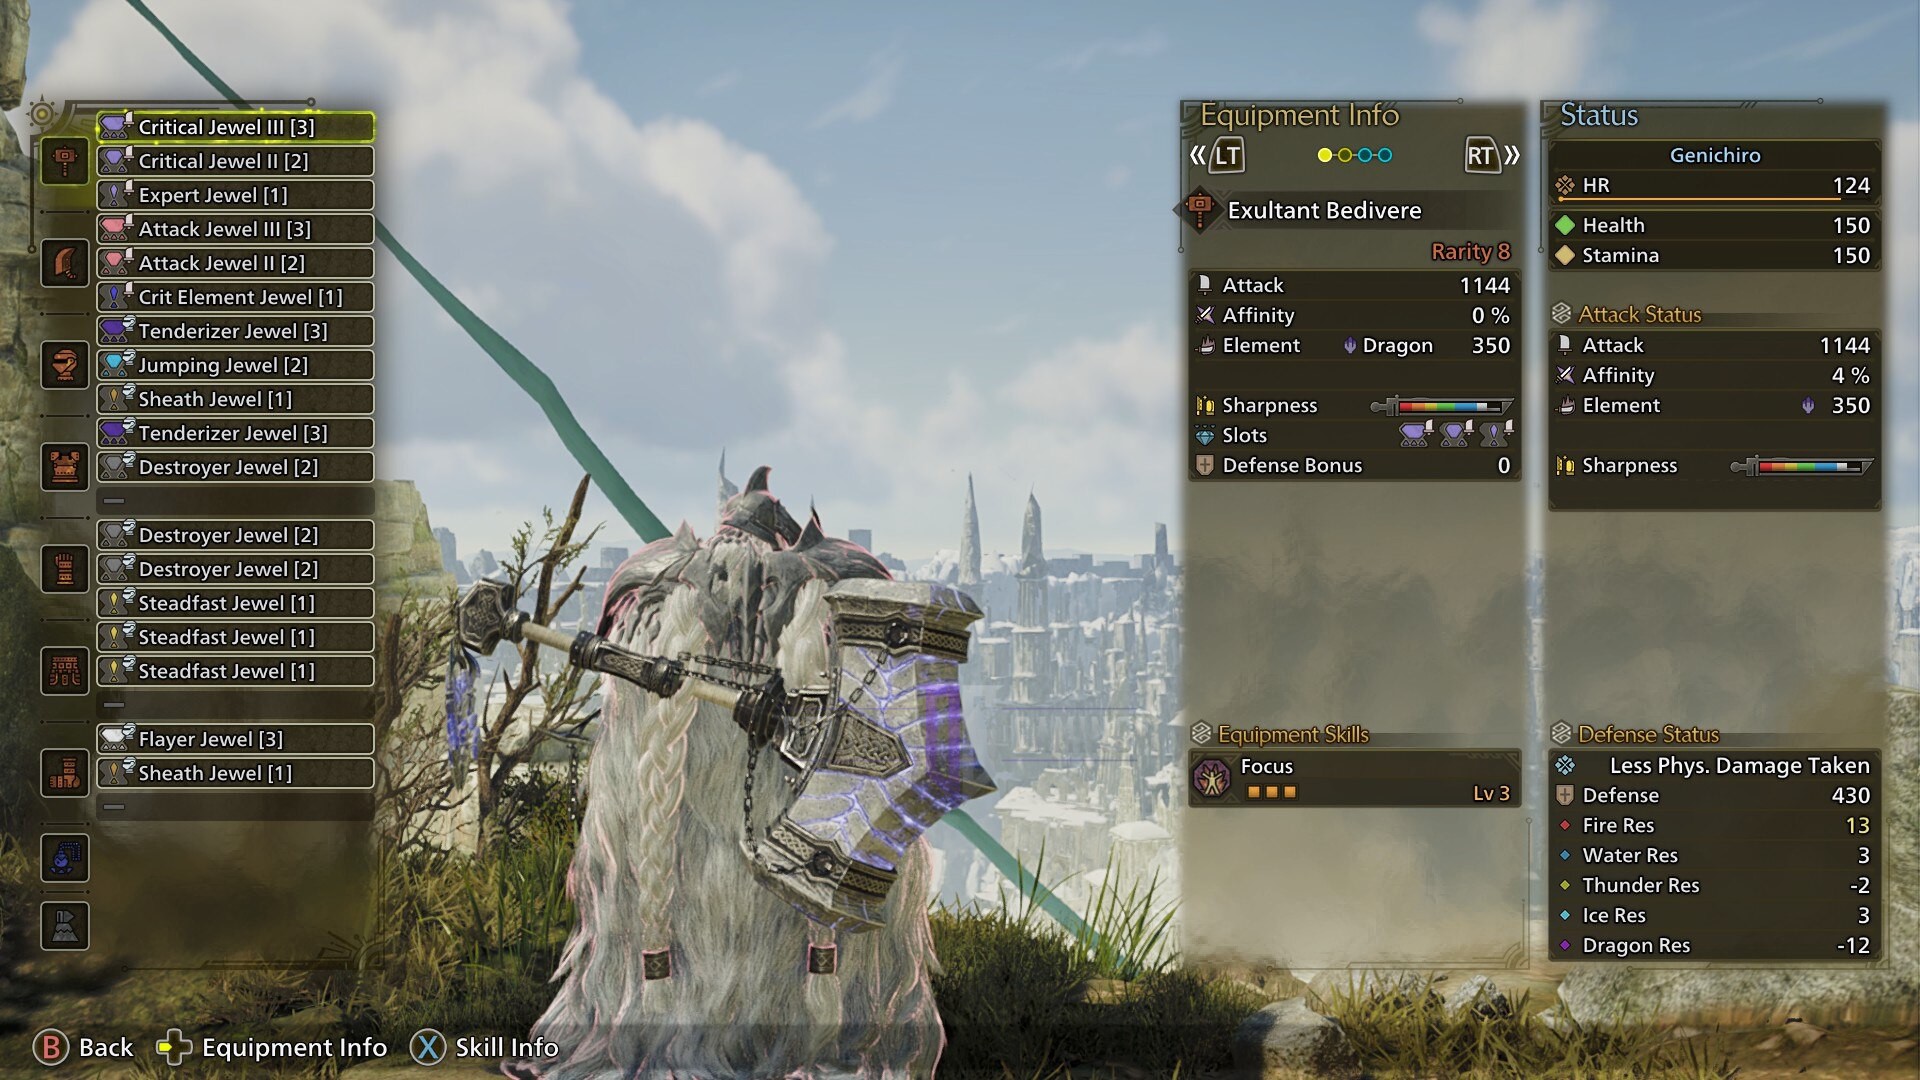
- Weapon: Exultant Bedivere (Rarity 8, Arkveld Tree)
- Weapon Decorations:
- Critical Jewel III [3]
- Critical Jewel II [2]
- Expert Jewel [1]
- Armor: Full Arkvulkan (Arkveld) β set
- Arkvulkan Helm β
- Decorations:
- Tenderizer Jewel [3]
- Jumping Jewel [2]
- Sheath Jewel [1]
- Decorations:
- Arkvulcan Mail β
- Decorations:
- Tenderizer Jewel [3]
- Destroyer Jewel [2]
- Decorations:
- Arkvulkan Vambraces β
- Decorations:
- Destroyer Jewel [2]
- Destroyer Jewel [2]
- Steadfast Jewel [1]
- Decorations:
- Arkvulkan Coil β
- Decorations:
- Steadfast Jewel [1]
- Steadfast Jewel [1]
- Decorations:
- Arkvulkan Greaves β
- Decorations:
- Flayer Jewel [3]
- Sheath Jewel [1]
- Decorations:
- Talisman: Defense Charm 4
- Mantle: Rocksteady Mantle
Hammer Skills
Here are the skills that you get access to with the best Hammer build:
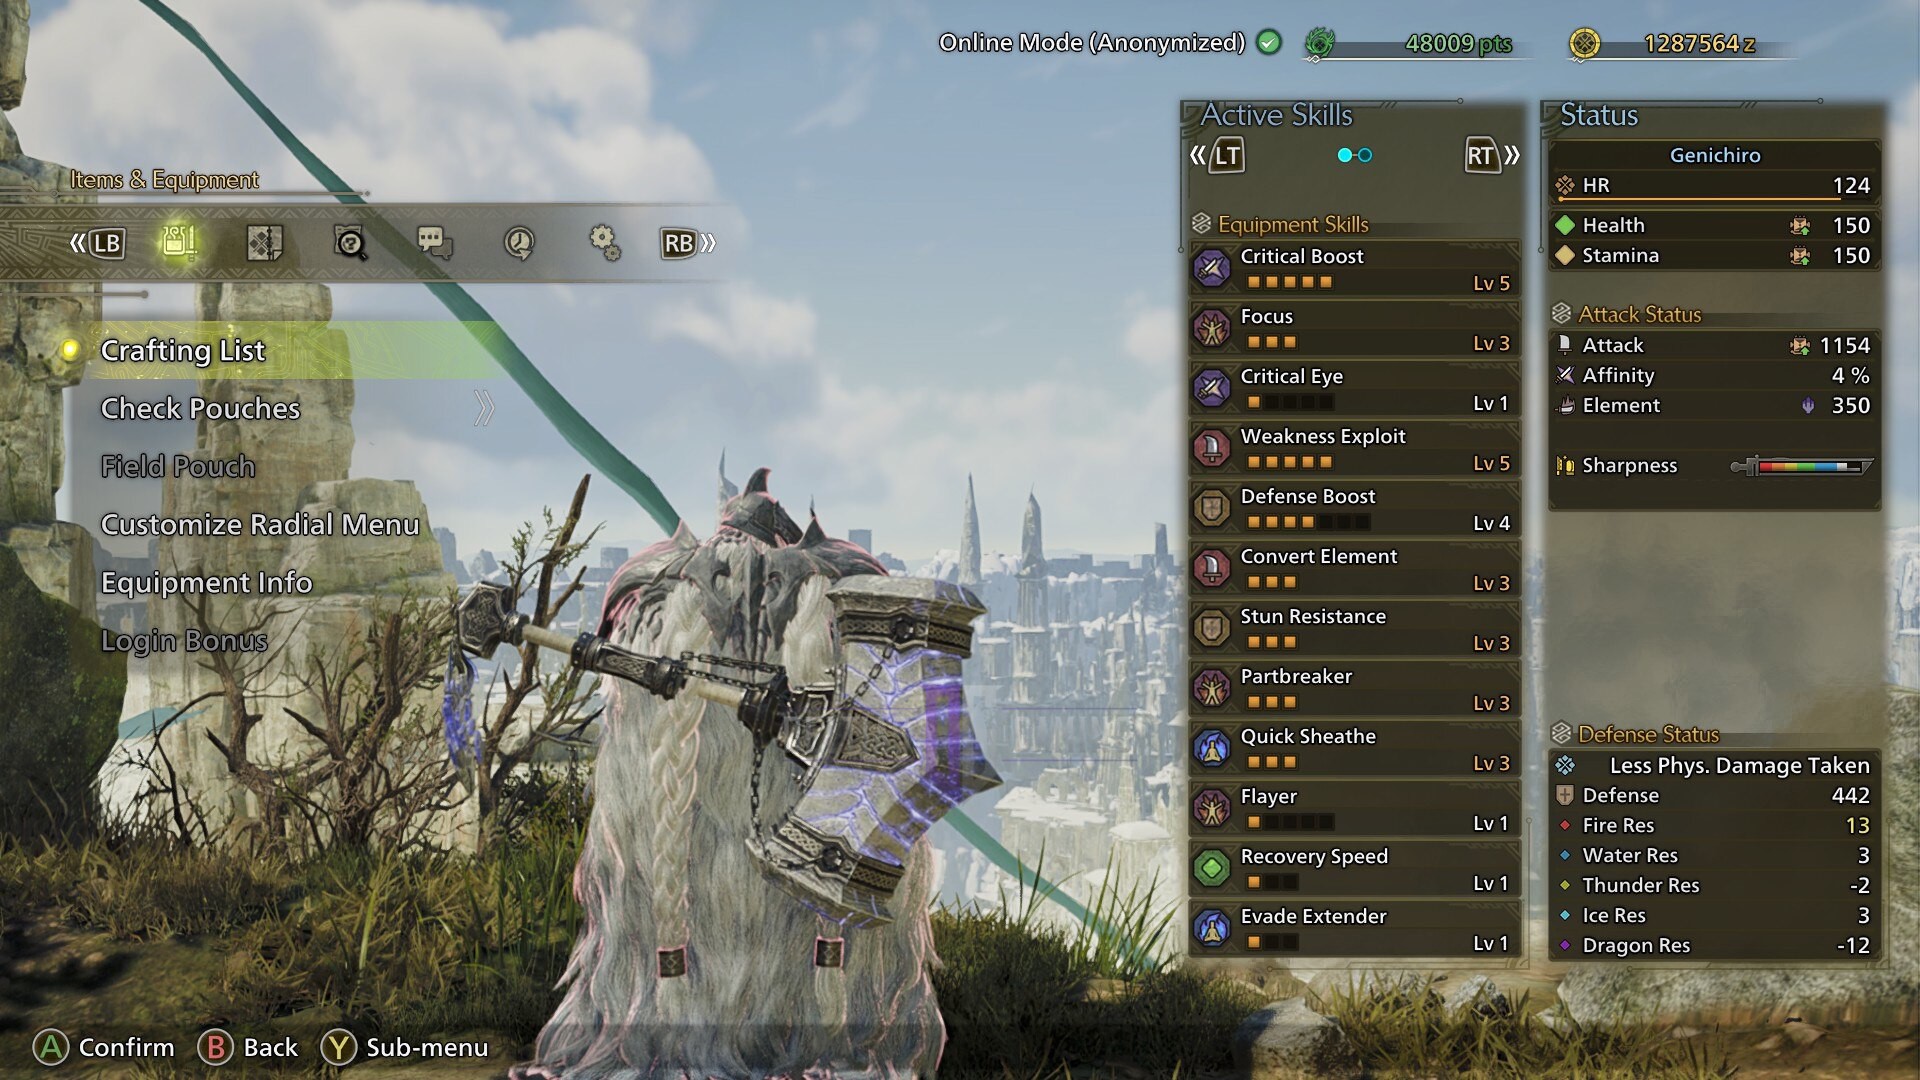
Equipment Skills
- Critical Boost: Level 5
- Focus: Level 3
- Critical Eye: Level 1
- Weakness Exploit: Level 5
- Defense Boost: Level 4
- Convert Element: Level 3
- Stun Resistance: Level 3
- Partbreaker: Level 3
- Quick Sheathe: Level 3
- Flayer: Level 1
- Recovery Speed: Level 1
- Evade Extender: Level 1
Set Bonus Skills
- 2-set bonus active: Hasten Recovery I
- 4-set bonus active: Hasten Recovery II
Group Skills
- 3-set bonus active: Diversion
Hammer Build Stats
Following are the raw stats for the best Hammer build:
Attack Status
- Attack: 1144
- Affinity: 4%
- Element: 350 (Dragon)
Defense Status
- Defense: 424
- Fire Res: 13
- Water Res: 3
- Thunder Res: -2
- Ice Res: 3
- Dragon Res: -12
Monster Hunter Wilds Hammer Build Explained
The Hammer build focuses on these primary factors:
- Increased damage
- Faster charging
- Focus on wound damage
Here’s an explanation of how these factors come into play for the Hammer build:
Increased Damage
The Hammer excels at dishing out damage via its Big Bang and Mighty Charge combos. To further enhance the weapon’s raw DPS, our build uses Critical Boost skills. This grants the weapon enough Affinity to dish out crit damage with its combo finishers and deal bonus damage. Furthermore, since we chose a Dragon Elemental weapon, Critical Boost also helps deal additional elemental damage, granted the monster you’re hunting is weak to the element chosen. If you want to sacrifice Critical Chance in favor of raw damage, you can slot in Attack Jewels in place of Critical Boost.
Faster Charging
The primary reason for going with the Exultant Bedivere Hammer is its Focus Level 3 weapon skill. This massively reduces the time it takes to charge the Hammer to Level 3. Furthermore, Focus also lets you cut down on the charging time for the Mighty Charge combo. As a result, you’re able to use the Hammer’s charged combos more efficiently. Furthermore, faster charging corresponds to lower stamina usage.
Focus on Wound Damage
Wounds are one of the best ways to deal damage to monsters, for both raw and elemental weapons. With skills like Flayer and Partbreaker, you’ll be able to create plenty of wounds and also dish out bonus damage on top of the Hammer’s base DPS. Furthermore, with Partbreaker equipped, you’ll be able to easily break monster parts, immobilizing them and capitalizing on the stagger with the Big Bang combo.
How To Use the Best Hammer Build in Monster Hunter Wilds
Here are some tips on how to use the best Hammer build in Monster Hunter Wilds:
- Always start the battle with a mounting attack. Using the Hammer, you’d want to dish out more damage to wounds, and mounting is one of the easiest ways to create wounds on monsters. Once you mount a monster, you can transition to a wall bang or create multiple wounds to follow up with a Focus Strike.
- Since we use the Partbreaker skill in this build, it’s technically not necessary to stick to a monster’s head at all times. However, the head is still the best part to focus most of your attacks on. Furthermore, make sure to use not only the regular charged combo but also the Mighty Charge, especially whenever you topple the monster or inflict Exhaust.
- Do not forget that the Hammer isn’t meant to be used like a Great Sword. It’s a weapon that’s focused on being mobile and dishing out damage in short bursts. Even the Mighty Charge combos let you stay mobile in Monster Hunter Wilds. As such, make sure you take full advantage of the weapon’s mobility factor. Don’t plant yourself in one place for too long. Stay mobile even while you’re charging the weapon.
- Always keep an eye on the Stamina gauge. Charging the Hammer or using the Mighty Charge saps a ton of Stamina. Make sure you’re stocked up on Energy Drinks and Dash Juice.
- Make proper use of the Upswing’s offset ability. The regular Triangle/Y combo for the Hammer now acts as an offset attack. Make sure to use the offset attack to not only deal additional damage to monsters but also stagger them.
Additional Notes
As a good alternative, you can also use the Zoh Shia Hammer, which comes with the Whiteflame Torrent skill. Furthermore, the weapon also has 5% Affinity by default, which you can increase further with skills like Agitator and Critical Boost. While Artian Weapons are still a better alternative, the Zoh Shia weapons do offer good base stats and a unique design. Furthermore, for monsters like Mizutsune, the Zoh Shia weapons are a much better choice, coupled with the Scorcher skill to take full advantage of Whiteflame Torrent.
Looking For More?

We provide the latest news and create guides for Monster Hunter Wilds or MH Wilds. Meanwhile, you can check out the following Monster Hunter articles or catch us playing games on Twitch and YouTube: