Facebook
 Reddit
 Email
Email
In this guide, we will walk you through the Treasure Traitor boss fight in Rise of The Dragon Realm in Split Fiction.
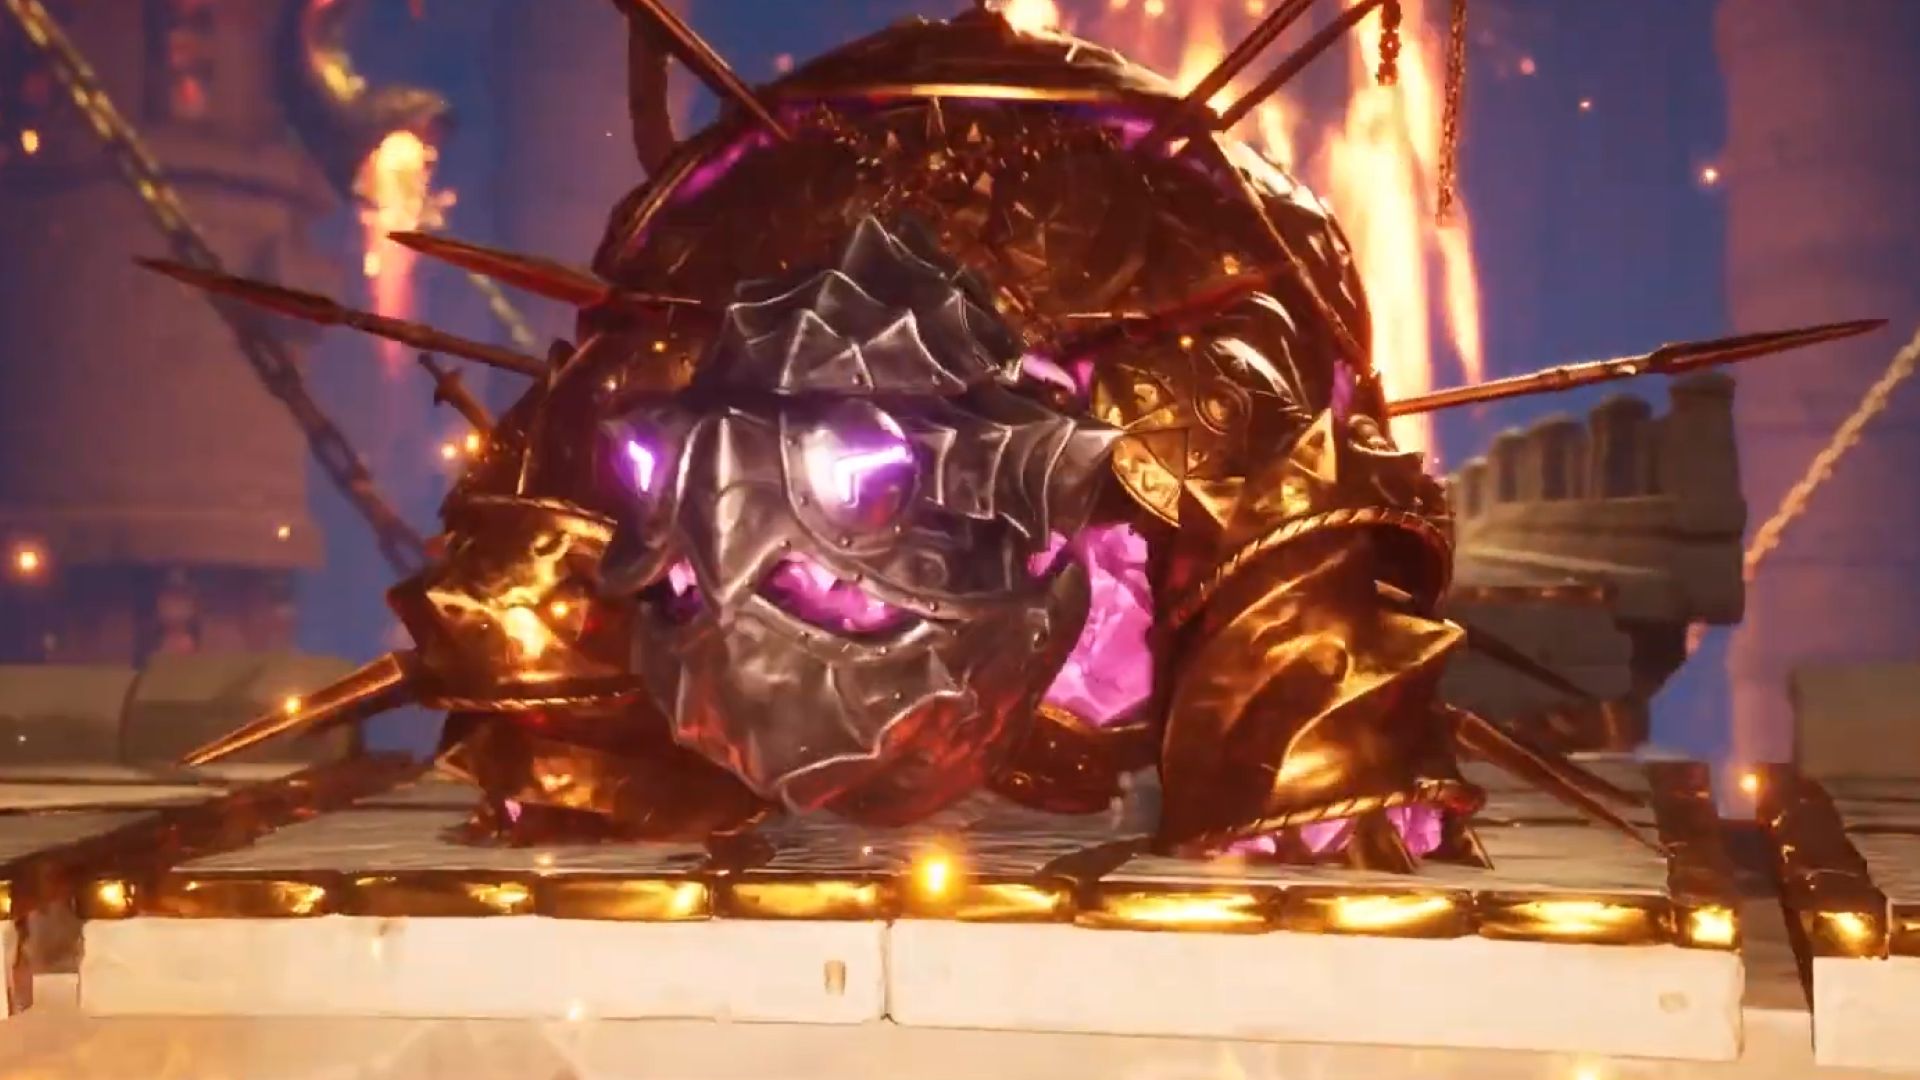
The Rise Of The Dragon Realm is the fifth chapter in Split Fiction. And it takes you to a land of magic and mystique. In this chapter, you will encounter many strange and amazing things, such as water temples, floating boats, hostile armored limbs, and the Treasure Traitor. It is an armored turtle you will encounter first in the Treasure Temple. However, you will get to fight him only after you complete the Royal Palace area in Chapter 5.
The Treasure Turtle Boss Fight in Rise of The Dragon Realm
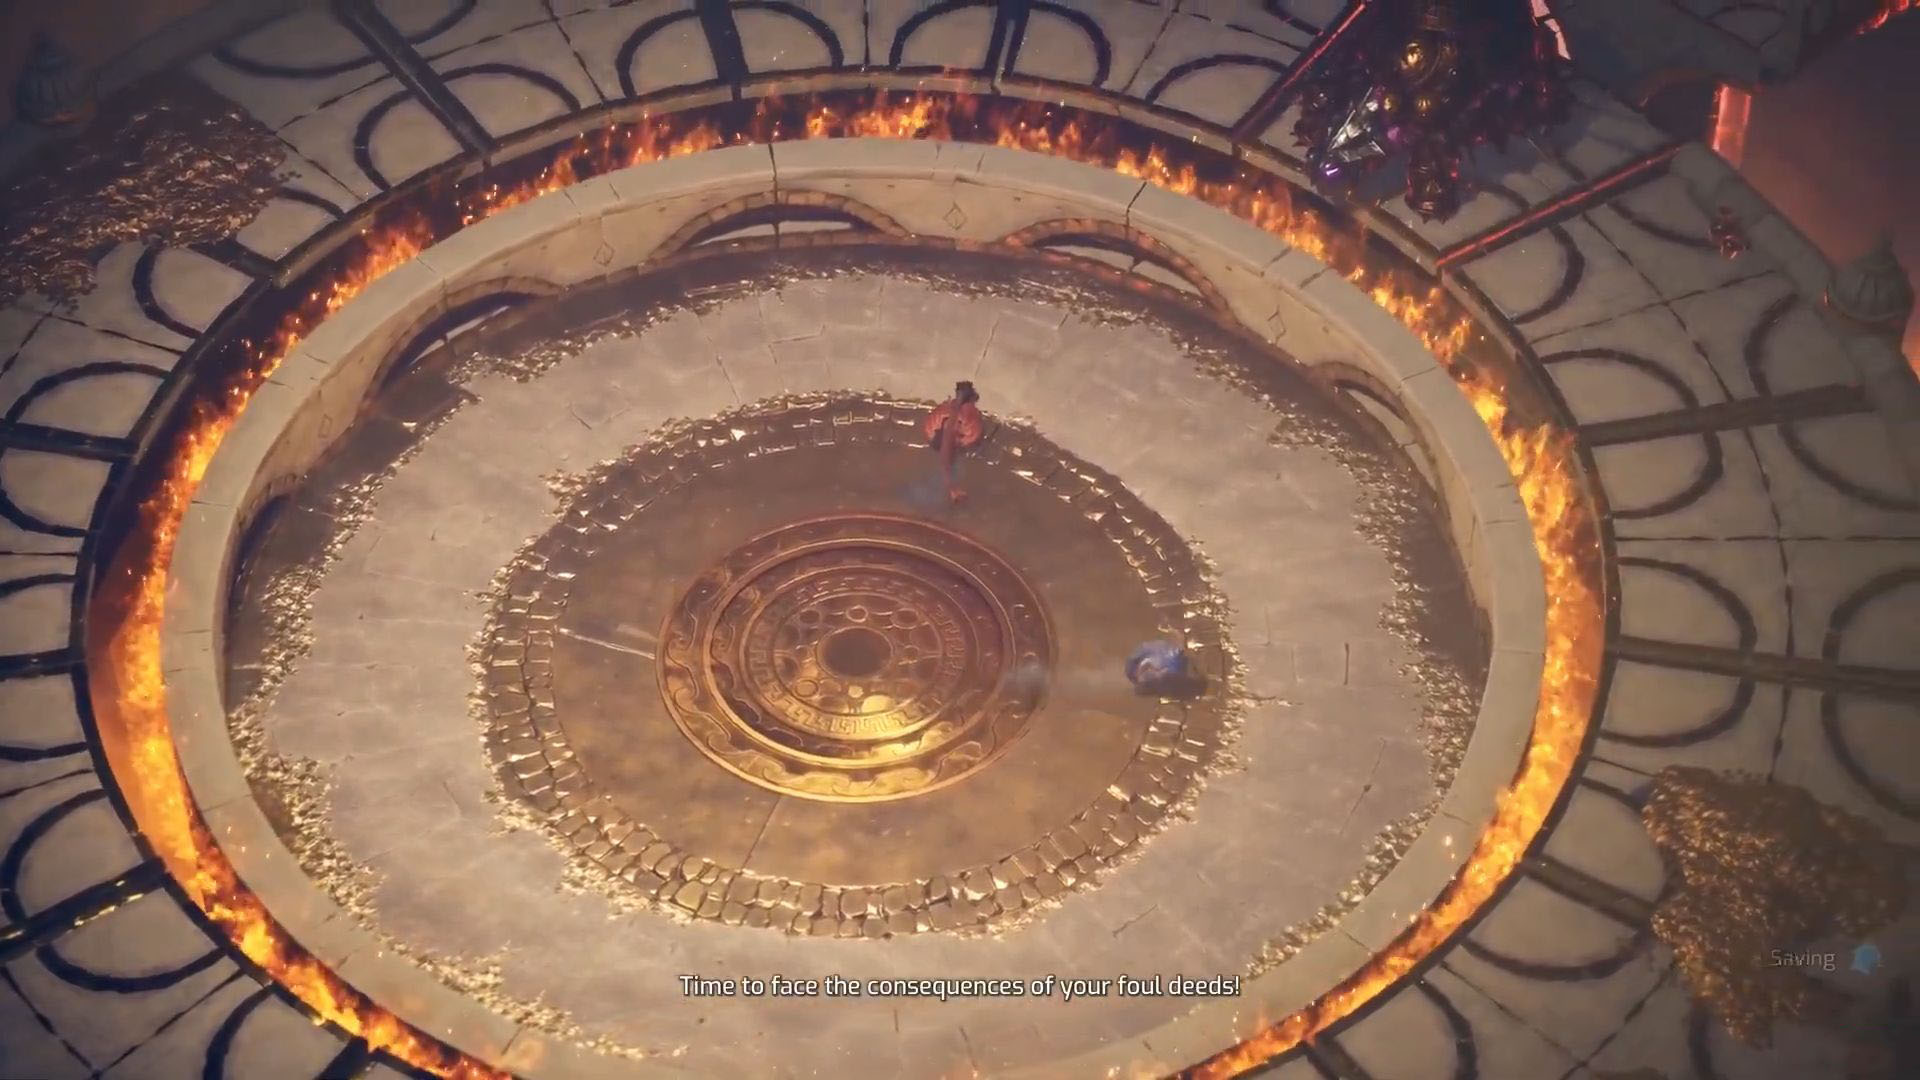
As mentioned, you will first meet the Treasure Traitor turtle during the Treasure Temple section of Rise of The Dragon Realm in Split Fiction. However, instead of fighting it, Mio and Zoe will try to escape and fall into the Royal Palace. Once you make your way out of that area, you will find Treasure Traitor again, and this time, it is time to do or die.
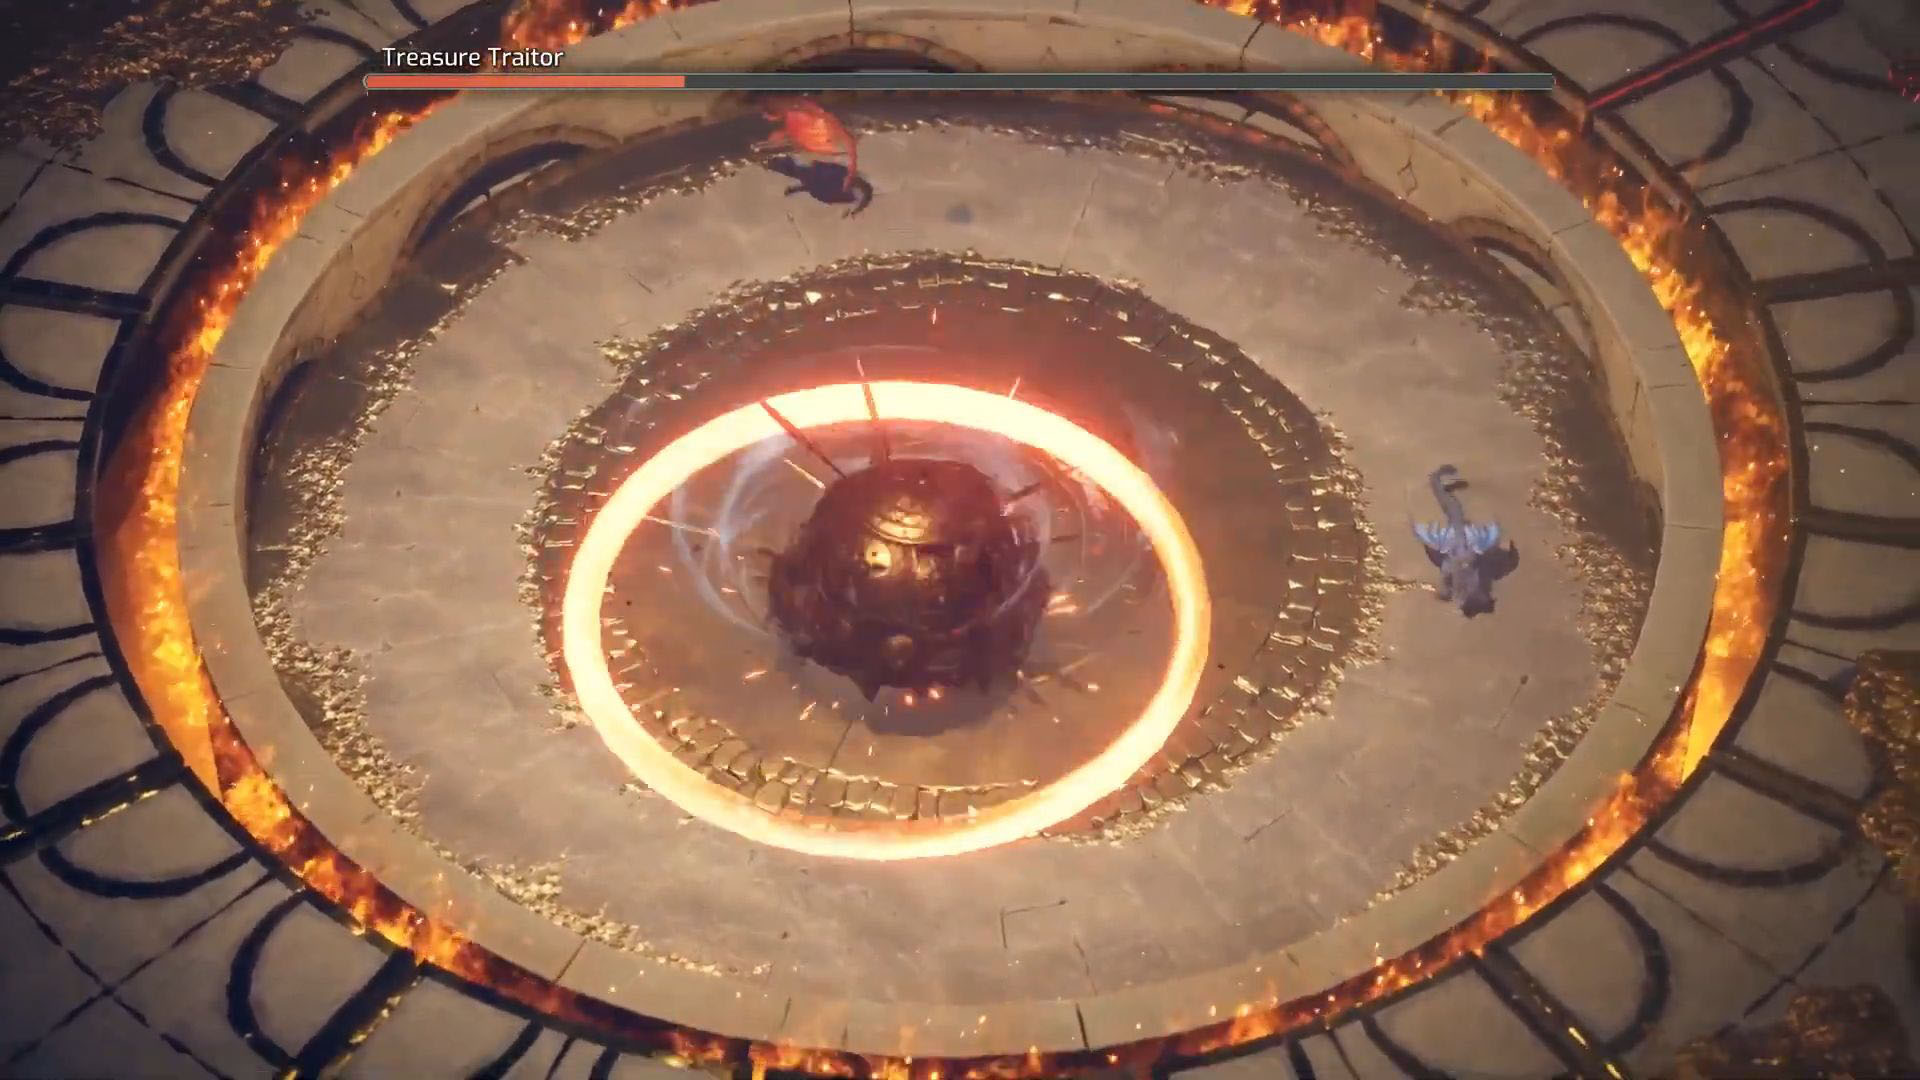
When you first enter the boss area, a short cutscene will re-introduce you to the metal turtle and then the boss fight will instantly begin. Just like the previous sections, this fight will also take place from a top-down perspective. Mio and Zoe must work together to win against the Treasure Turtle and his numerous tricks.
Phase 1
The first thing the boss is going to do is raise spikes out of the ground. These will mostly stick to the edges of the area, so you will be able to easily dodge them. After that, the turtle will throw bombs at you. These bombs are a two-edged sword—you will need to first, melt the metal off the bomb with Mio’s acid and then bump into them as Zoe. This will send the bomb back to the Treasure Traitor and damage it.
Remember that the turtle might seem slow and heavy, but he can move around and throw orbs that trap you on contact. Shortly after, a metal structure will come out of the ground, shooting three laser beams while spinning slowly. Jump over these lasers, avoid the spikes, and send the bombs back to the boss. When you have dealt enough damage, the fight will shift to phase 2.
Phase 2
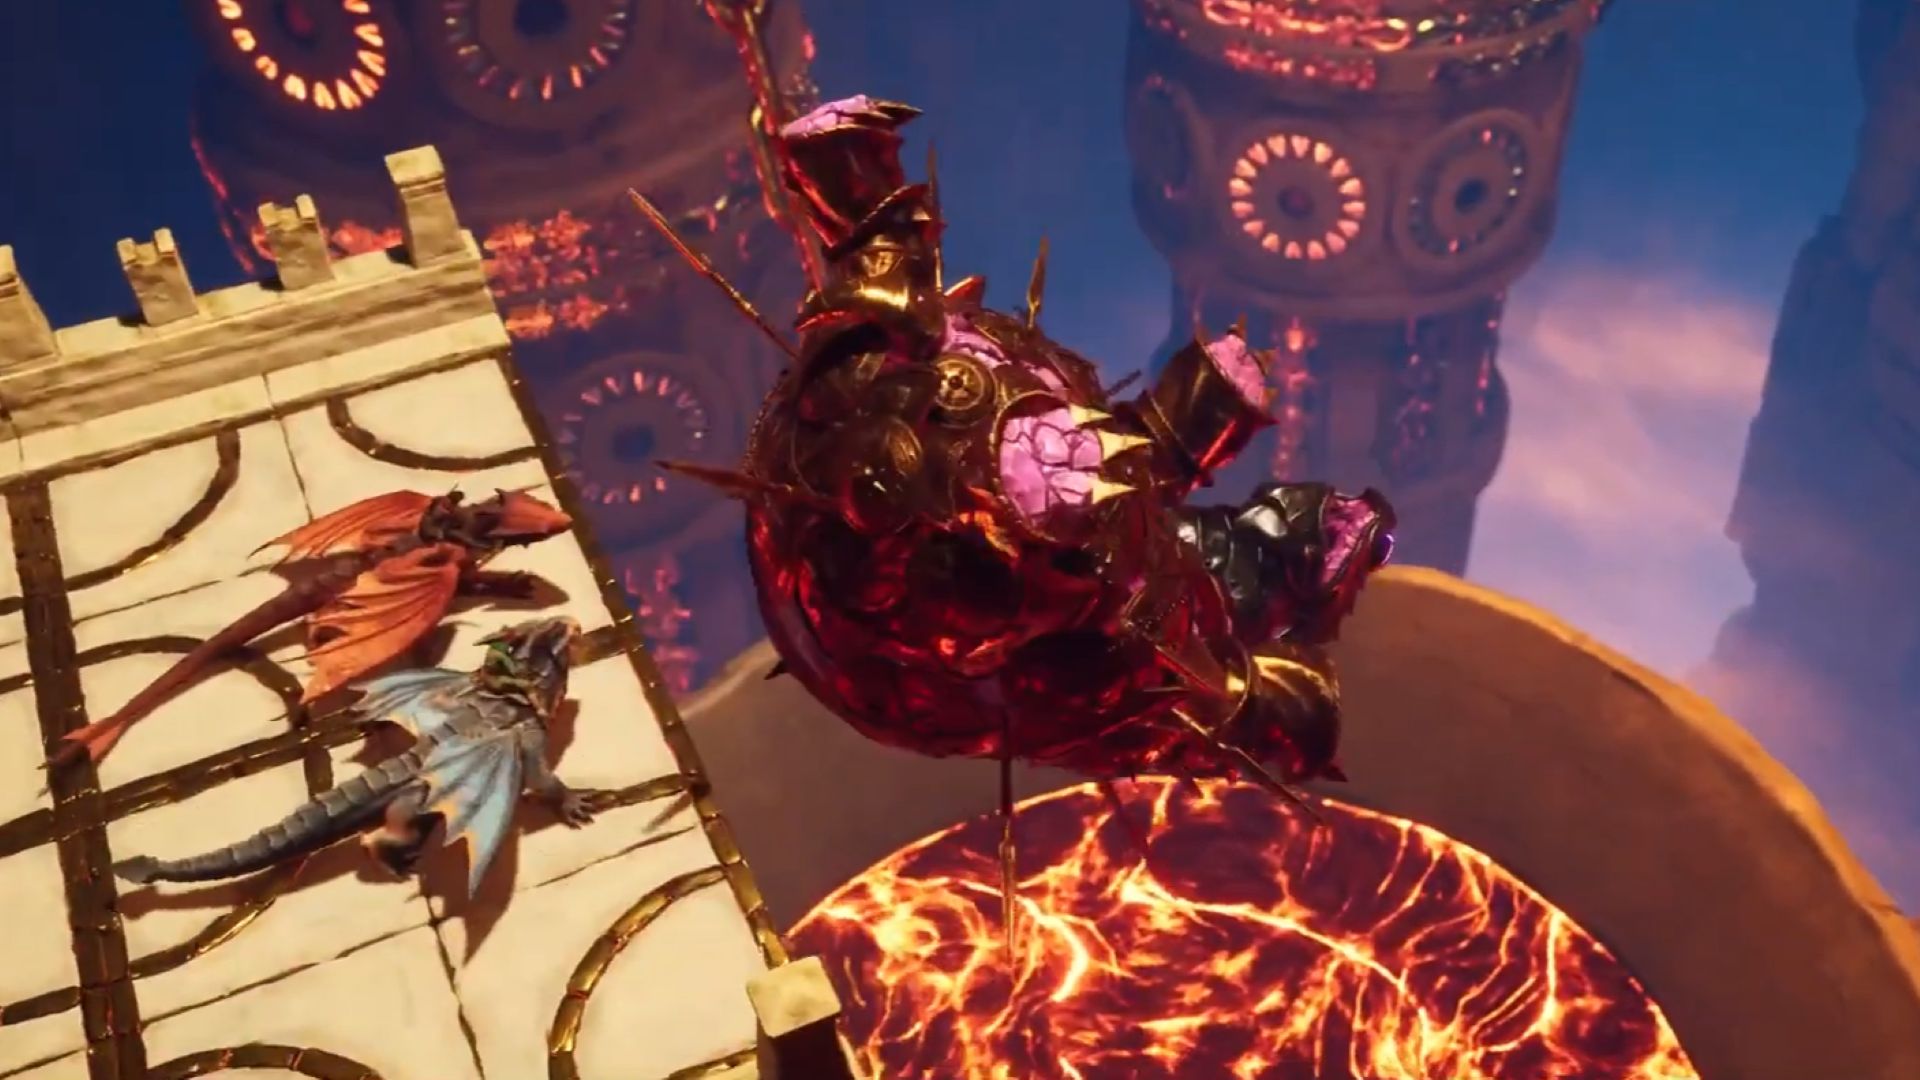
In this phase, the Treasure Traitor will descend to the arena and start spinning violently while shooting spikes out of its body. This attack is quite strong and you will die after a few hits if you are not careful. It can also send some shockwaves at you that will do some significant damage. So, try to steer clear of it and jump over the projectiles when they come close.
During this entire segment, the turtle will keep leaving bombs behind. So, you know what to do, melt the metal off and bump them back to it. There is a lot to do in this part of the fight, but don’t worry, you can hit the bomb any way you want and they would still return to the Treasure Traitor.
Again, when you have damaged the boss enough, it will get stunned. Once the turtle is immobile, use Mio’s acid to melt the armor off its face and then smash into it with Zoe to do some heavy damage. However, the fight won’t end there because the turtle will regrow its head. So, repeat the process a few more times, and eventually, you will beat the Treasure Traitor for good.
Once defeated, the Treasure Traitor will flip over, and then Mio and Zoe will push it into a bucket of lava, which will turn it into liquid gold.
Looking For More?
Thank you for reading the article. We provide the latest news and create guides for Baldur’s Gate 3, Starfield, ARK Survival Ascended, and more. Also, watch Deltia play games on Twitch or visit his YouTube channel!