Facebook
 Reddit
 Email
Email
Badges are a way to unleash your wrestler’s true potential during a match. Here are the WWE 2K25 badges explained.
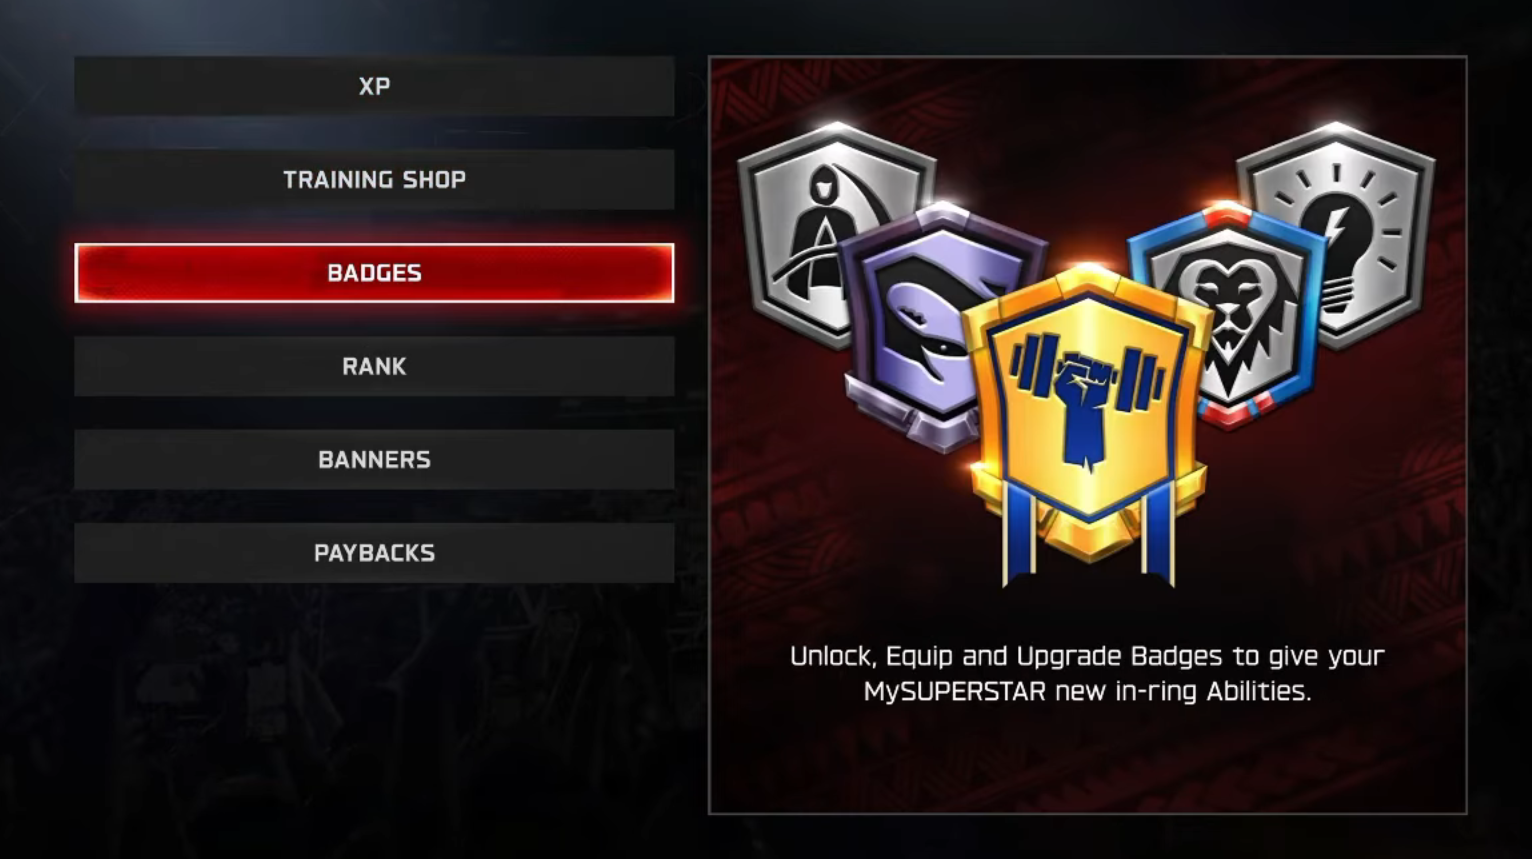
The WWE 2K25 badges will be available to use on your favourite characters in multiple game modes. There are a total of 45 badges available in-game. Out of these, 11 are exclusive to the MyFaction mode.
Certain badges either take action at the beginning of the match or while a specific requirement is fulfilled mid-match. Here we will look at which badge can be used how many times, and at which point during a match, and what they would do to enhance your game.
What Are Badges in WWE 2K25?
Through WWE 2K25 badges, you can provide your character with a significant power-up, giving you an upper edge. These can be equipped by both your created superstars and the roster of available characters. Knowing exactly which badge you want is crucial, as it takes time to level up each of them.
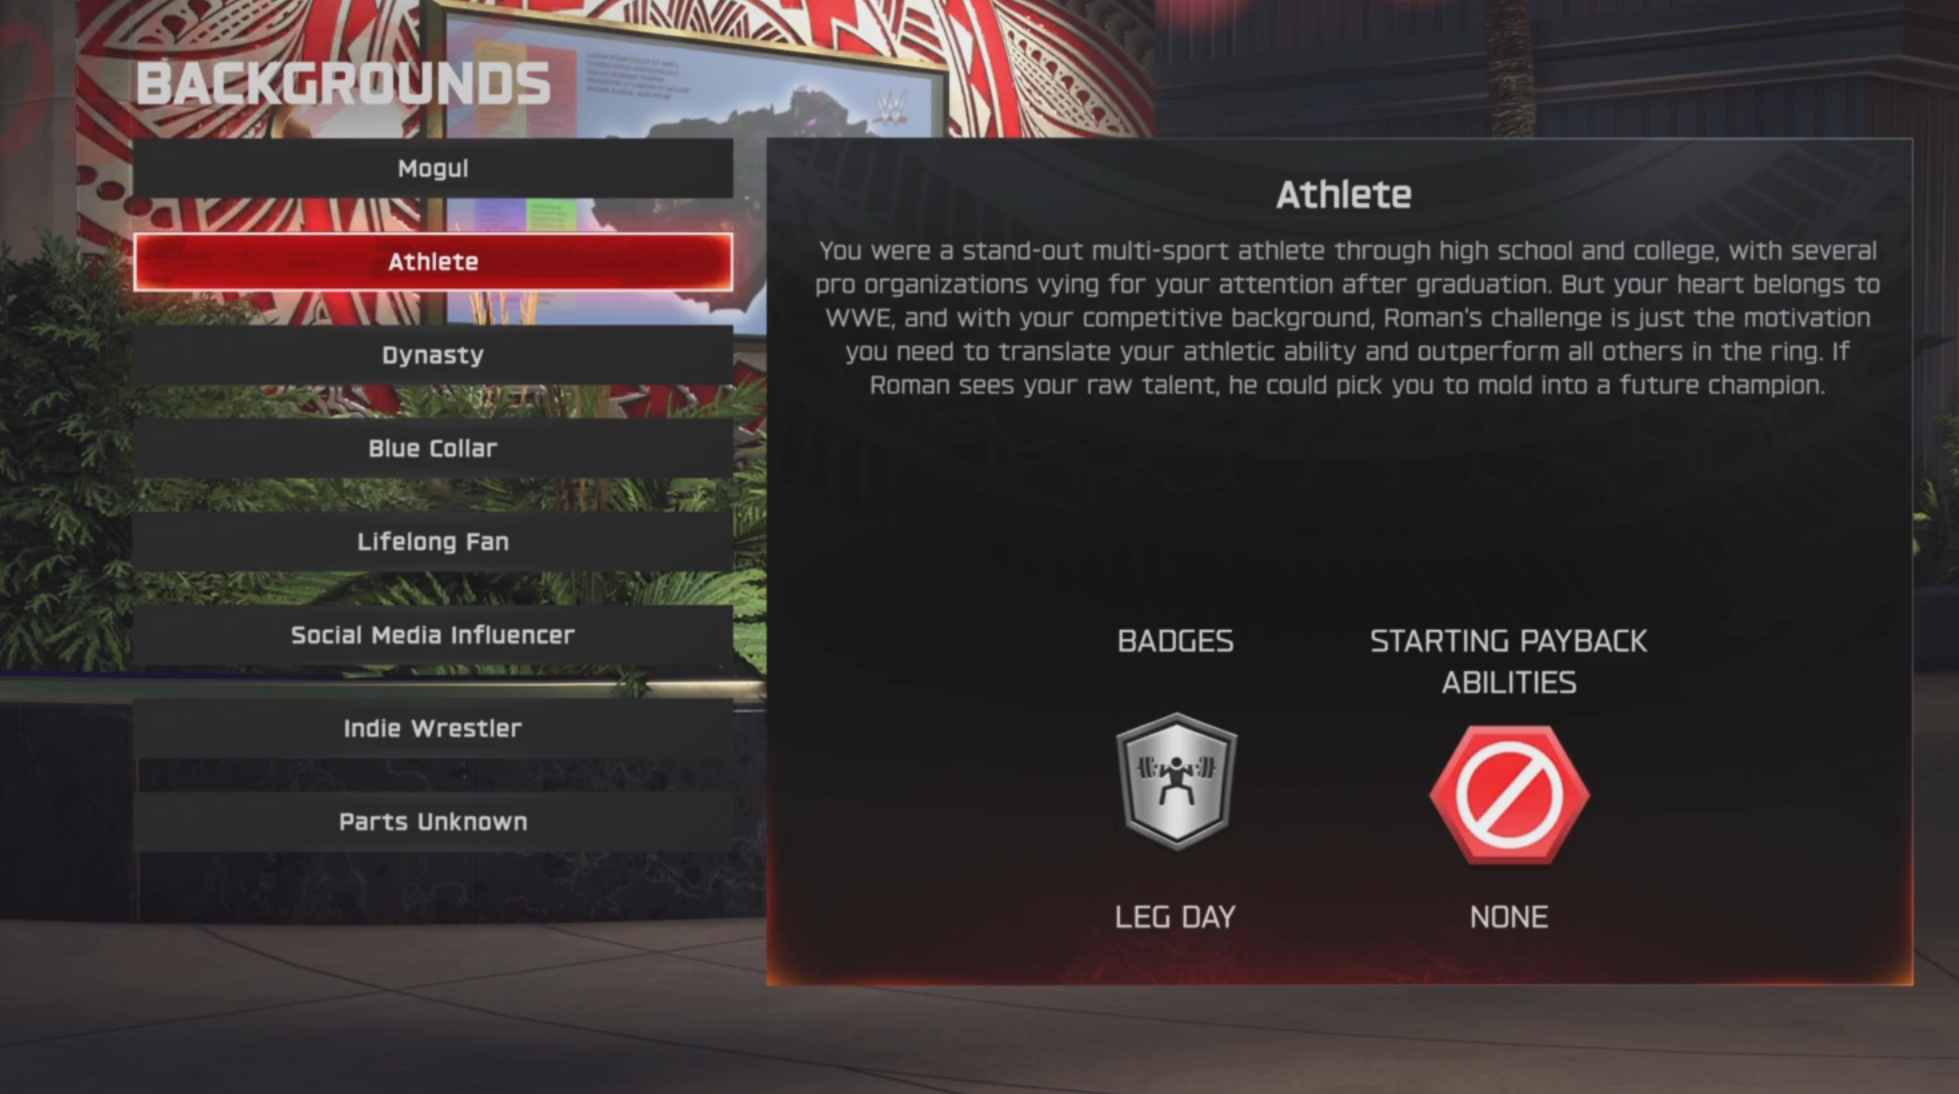
How To Unlock Badges?
Each badge has a unique method of unlocking. Most of the badges will get unlocked through your natural gameplay. There are, however, some badges that would require you to be playing with a wrestler from a particular background.
The article below will give you a descriptive guide on how every WWE 2K25 badge can be unlocked.
Read: How To Unlock All Badges in WWE 2K25
What Each Badge Does in WWE 2K25
| Badge | Ability |
| Adrenaline | This reduces your recovery time when on the mat or stunned. |
| All The Answers | This increases your stun meter on your attacker with each combo, reversal, breaker, and grab breaker performed. |
| Always See It Coming | This increases your stun meter on your attacker with each combo, reversal, breaker, and grab breaker performed. |
| Anaconda | This increases your chances of submitting your opponent. |
| Bee Repellent | This reduces the damage done by light and heavy attacks by 5% |
| Better Together | This enables you to enter Tank mode when tagged in or out. (once per match) |
| Born To Fly | This enables you to enter Beast mode when you climb up high. (Once per match) |
| Clock Watcher | This enables you to enter Beast mode when facing a DQ or Ring Out count. (once per match) |
| Crosshairs | This increases the dizziness when you taunt a grounded opponent from over the top rope. |
| Crowd Boost | This enables you to enter Tank mode when you taunt the crowd. (once per match) |
| Curls | This decreases the damage done to your wrestler’s arms. |
| Demolition Man | This enables you to enter Beast mode when you use weapons or props to attack. |
| Determination | This enables you to enter Tank mode after receiving heavy damage. |
| Dirty Trickster | This increases your stun meter when your opponent’s limbs reach a red damage level. |
| Dive Bomber | This increases the damage done by aerial attacks. |
| Double Trouble | This gives you a finisher when your partner successfully performs a finisher. (once per match) |
| Dreamstreet | This increases damage done by dive or springboard attacks on dizzy opponents. |
| Endurance | This recovers a small percentage of your health after each kick-out from a pin. |
| Energetic Opportunist | This enables you to enter Beast mode when you stun an opponent. |
| Going In Hot | This gives a special when the match starts. |
| Heavy Handed | This allows you to stun your opponent easily by ending your combos with a heavy attack. |
| Hot Tag | This gives you a special when tagged in, if you already don’t have one. (once per match) |
| In It Together | This increases your recovery when tagged in or out. (once per match) |
| Leg Day | This decreases the damage done to your wrestler’s legs. |
| Lifesaver | This gives you a finisher if you don’t have one when being tagged in by a heavily damaged partner. (once per match) |
| Lionheart | This recovers your damage when you perform a finisher. |
| Locomotion | This decreases the stamina drained by performing strikes and sprints. (Moful Background) |
| Merciless Opportunist | This increases the damage done to a stunned opponent. |
| Pain Train | This increases damage done by running strikes. |
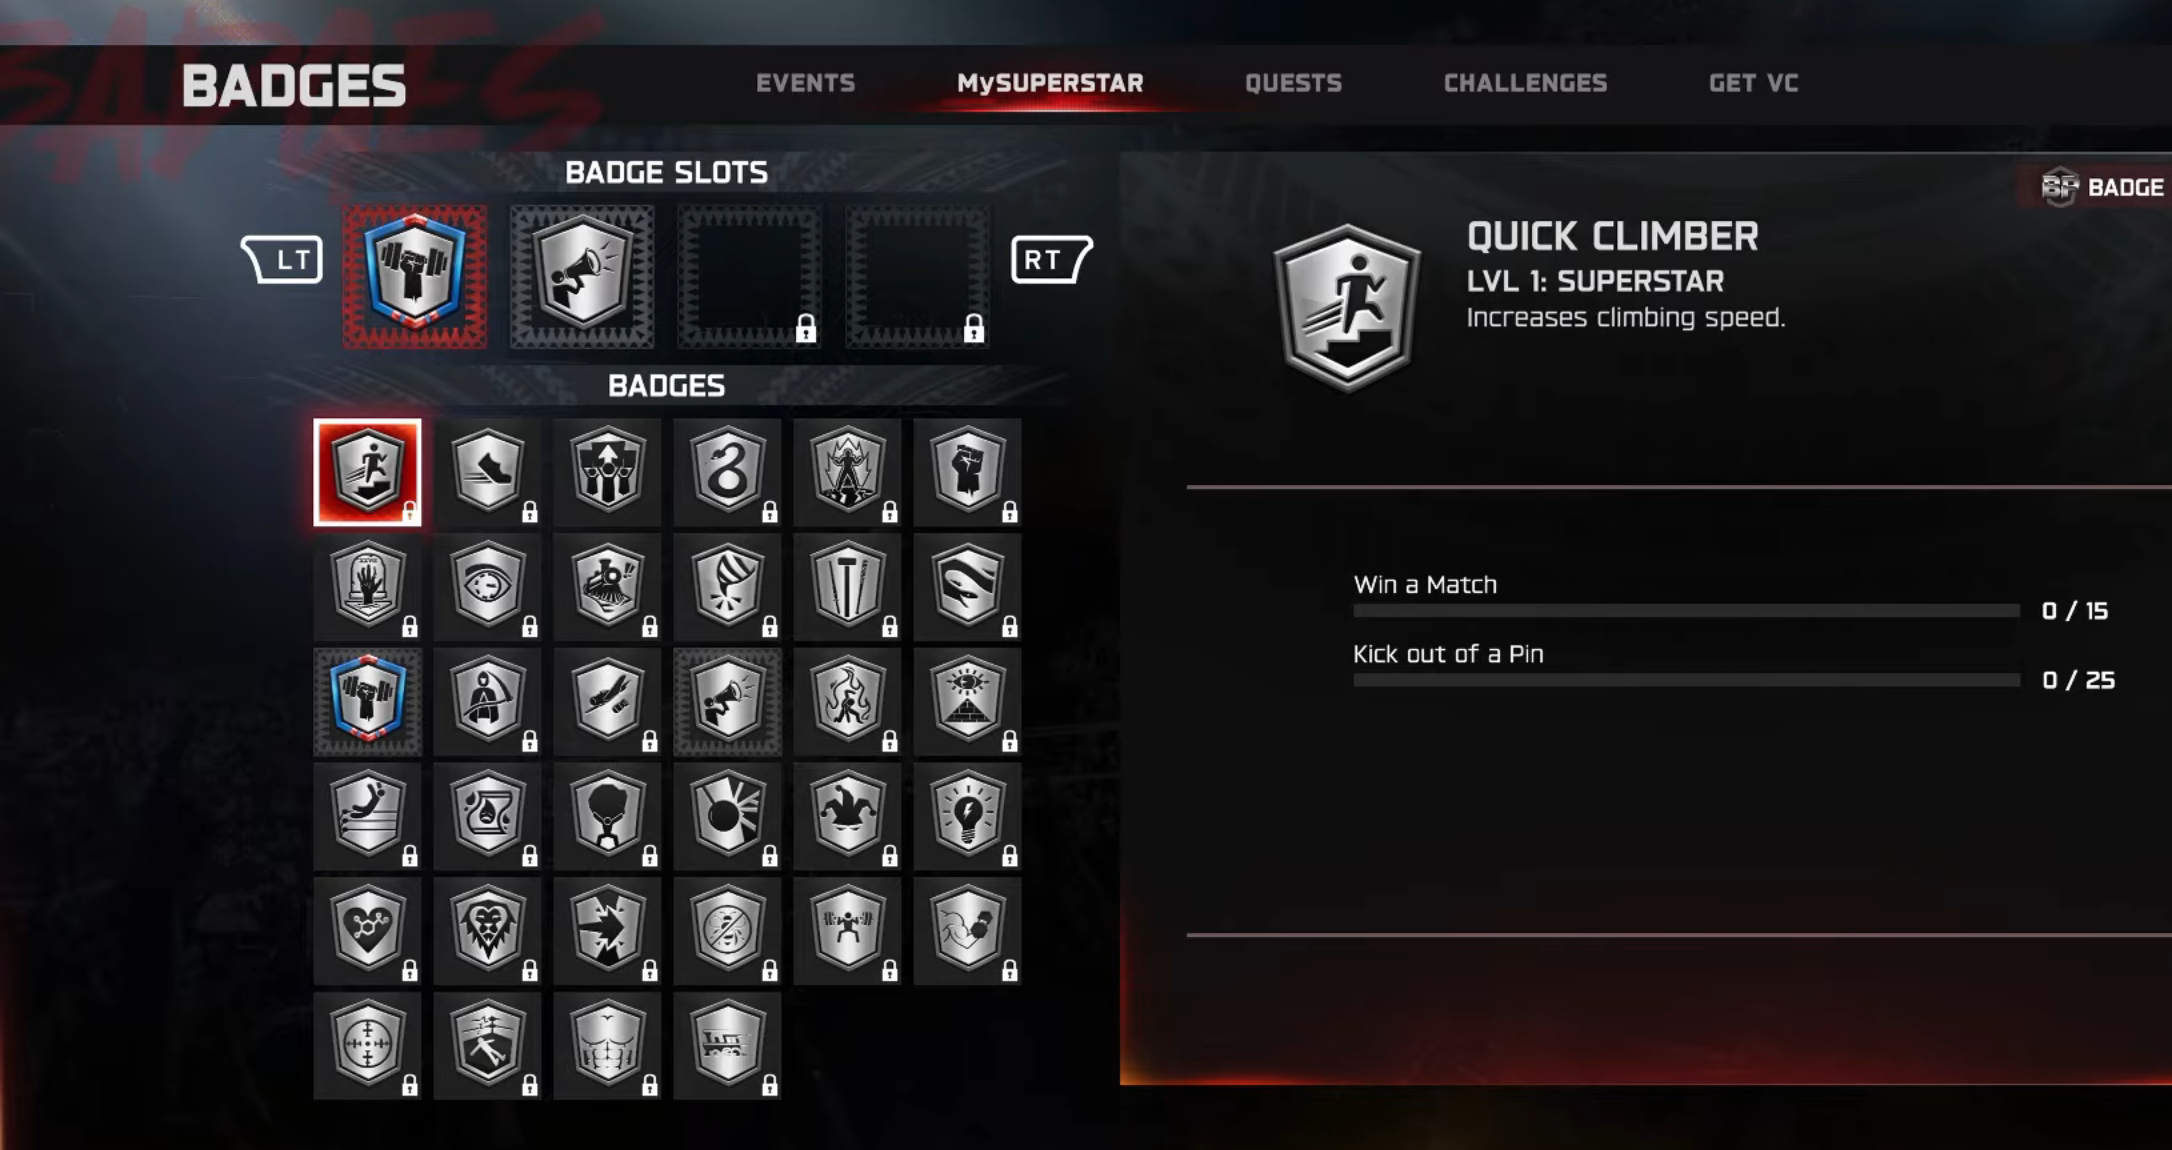
| Quick Climber | This increases the climbing speed. |
| Quick Winner | This gives you a quick recovery after taking heavy damage. |
| Rabblerouser | This gives you a finisher after performing four successful taunts. (once per match) |
| Rage | This enables you to enter Beast mode after taking heavy damage. |
| Second Wind | This gives you a quick recovery after taking heavy damage. |
| Showman | This gives you a bonus MFP after winning a match straight after a finisher. |
| Six Pack | This decreases damage taken and dizziness from attacks on your torso. |
| Slippery Eel | This increases the chances of kicking out of a pin. |
| Sticking Together | This enables you to enter Beast mode when tagging in or out. (once per match) |
| Sting Like A Bee | This increases damage dealt with light and heavy attacks. |
| Swiftness | This increases movement speed. |
| Unscathed | This gives you a bonus MFP if the match is won with more than half vitality. |
| Unstoppable | This enables you to enter Beast mode after kicking out of a pin. |
| Weapon Master | This increases damage done with foreign objects. |
| Wet Blanket | This reduces the opponent’s special and finisher stock when stunning them with an attack. |
| Wolf Pack | This gives you a special when performing team attacks. |
Looking For More?
Thank you for reading the article. We provide the latest news and create guides for Baldur’s Gate 3, Starfield, ARK Survival Ascended, and more. Also, watch Deltia play games on Twitch or visit his YouTube channel!