Facebook
 Reddit
 Email
Email
Discover everything you need to know about the best Birthsign Tier list in Elder Scrolls Oblivion Remastered, including the bonuses from each.
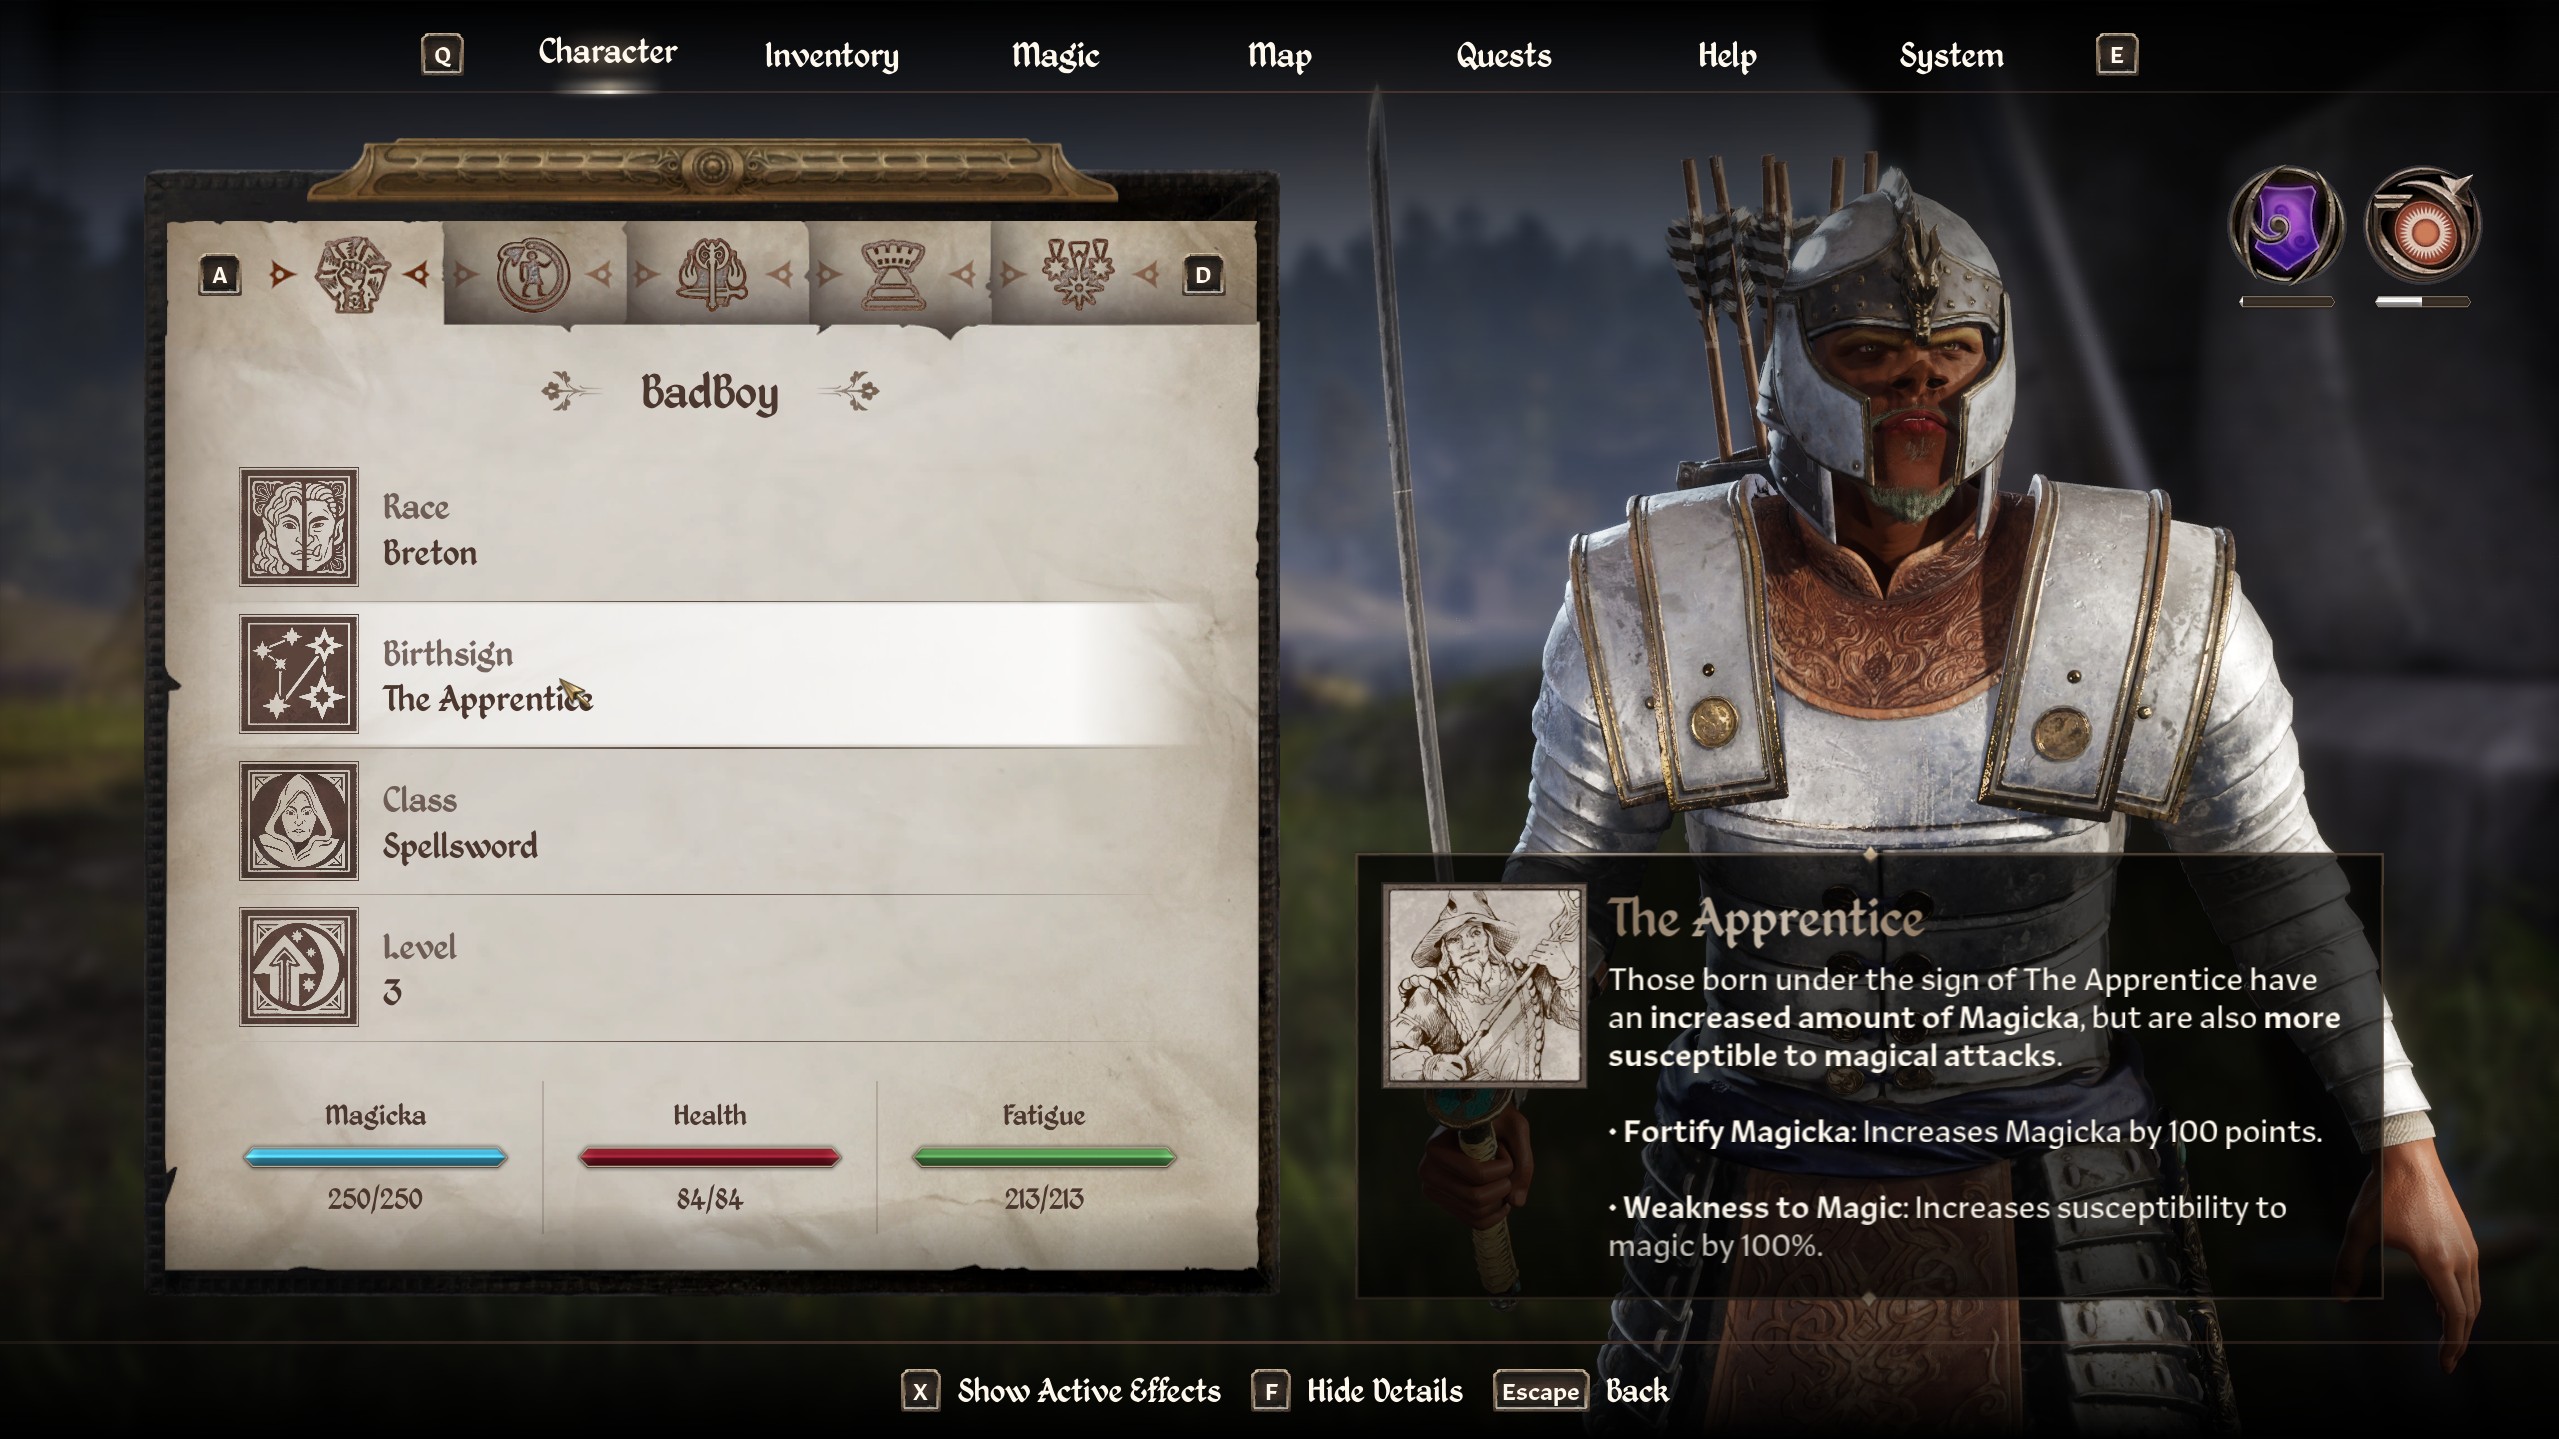
A birthsign in Elder Scrolls Oblivion Remastered is a celestial constellation under which your character is born, granting unique magical abilities or attribute bonuses. Choosing the birthsign for your character is done during the game’s tutorial, after meeting Emperor Uriel Septim. The game offers 13 birthsigns, and each offers unique effects to your character. However, selecting the best one is crucial for your gameplay and build. While Apprentice, Atronach, and Mage offer magicka effects, Warrior, Thief, Lady, Steed offer attribute modifiers, and Lord, Lover, Ritual, Serpent, Shadow, and Tower grant power. Each birthsign offers either a greater power that enhances your character’s abilities. Some birthsigns also come with drawbacks, so make the right choice while character creation. Consider that your choice should align with your character’s intended playstyle. In this guide, we’ll discuss the best birthsign tier list in Elder Scrolls Oblivion Remastered, what makes them the best and worst ones.
Best Birthsign Tier List Oblivion Remastered
Birthsign offers a powerful boost to your character that can make things much smoother, especially in the early stages of the game. For example, the Warrior birthsign combined with the Redguard race gives an enormous boost to your strength and endurance. This makes your warrior build far stronger out of the gate than if you’d used, for example, the apprentice birth sign and the ultimate race. In this particular example, this isn’t just a small difference. It’s going to be immediately noticeable, especially in the early stages of the game, and it’s arguably essential if you want to play at higher difficulty settings. Here’s the best birthsign tier list in Elder Scrolls: Oblivion Remastered.
| Tier | Birthsign |
|---|---|
| S-Tier | Warrior, Lord |
| A-Tier | Thief, Mage, The Atronach |
| B-Tier | Lady, Lover |
| C-Tier | Shadow, The Steed, Apprentice |
| D-Tier | Tower, Serpent, Ritual |
S-Tier
Warrior

Warrior is the best Birthsign in Elder Scrolls Oblivion Remastered because it provides a simple offering of a 10-point bonus to both your strength and endurance. Strength increases your maximum fatigue and carry capacity, as well as increasing your melee damage. Endurance increases your maximum fatigue and health. This makes strength and endurance two of the most powerful stats in the game. There isn’t a huge amount to say on the warrior, aside from it just makes any melee build significantly more powerful from day one. It’s useful in every situation and doesn’t require any active fort. You just select it for an instant power boost and play the game. Combining the warrior birth sign with a race such as Redguard that gives similar bonuses will make a night and day difference to your character’s power level from the moment you select them.
Lord
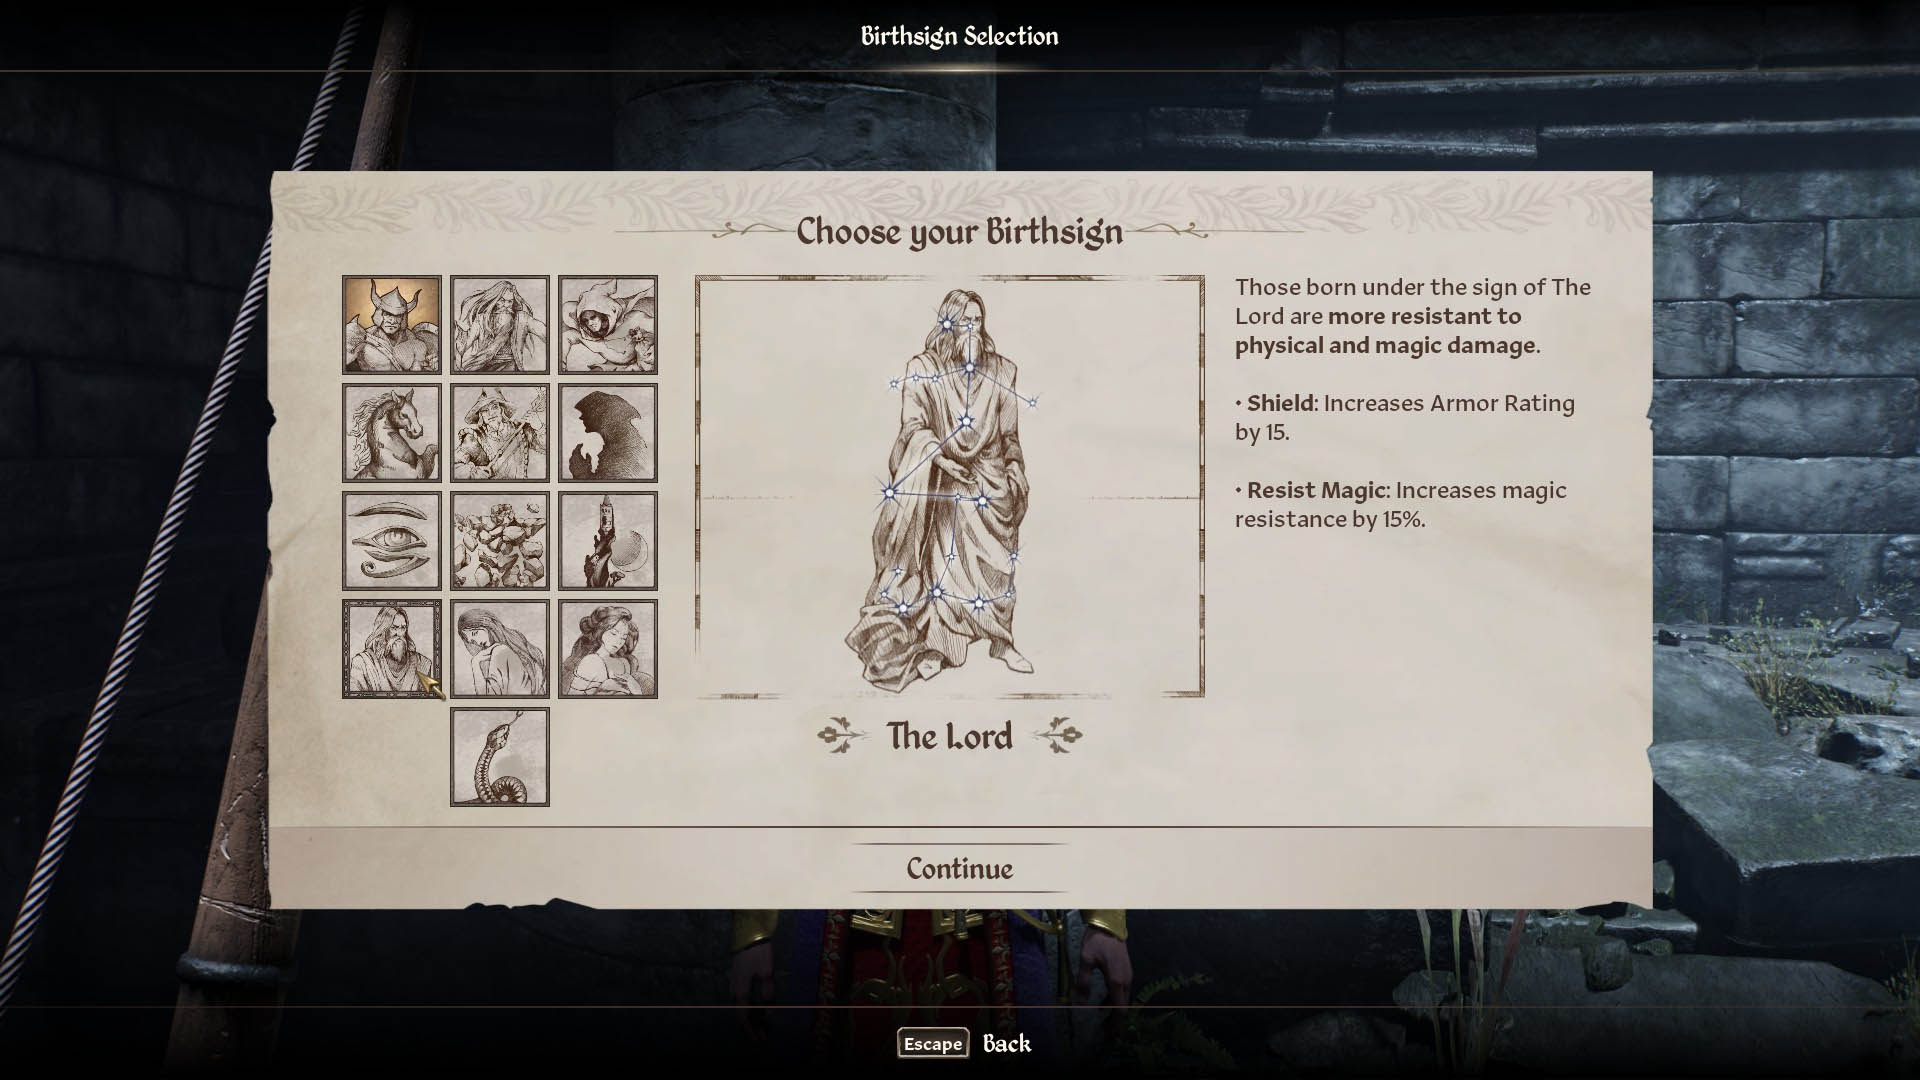
The Lord now offers increased armor rating, increased by 15, and it offers 15% magic resistance. This makes it now a really strong choice for pretty much any build where you want to have a bit more survivability. The power is once per day, so you have to use it wisely. Lord has excellent defensive buffs that allow you to live longer in tough combat. A Lord gets a Journeyman-level, Magicka-light healing spell right from the start of the game. This sign is especially useful for combat-based characters. The healing ability is also a Lesser Power, so it is unaffected by any armor your character may be wearing.
A-Tier
The Atronach
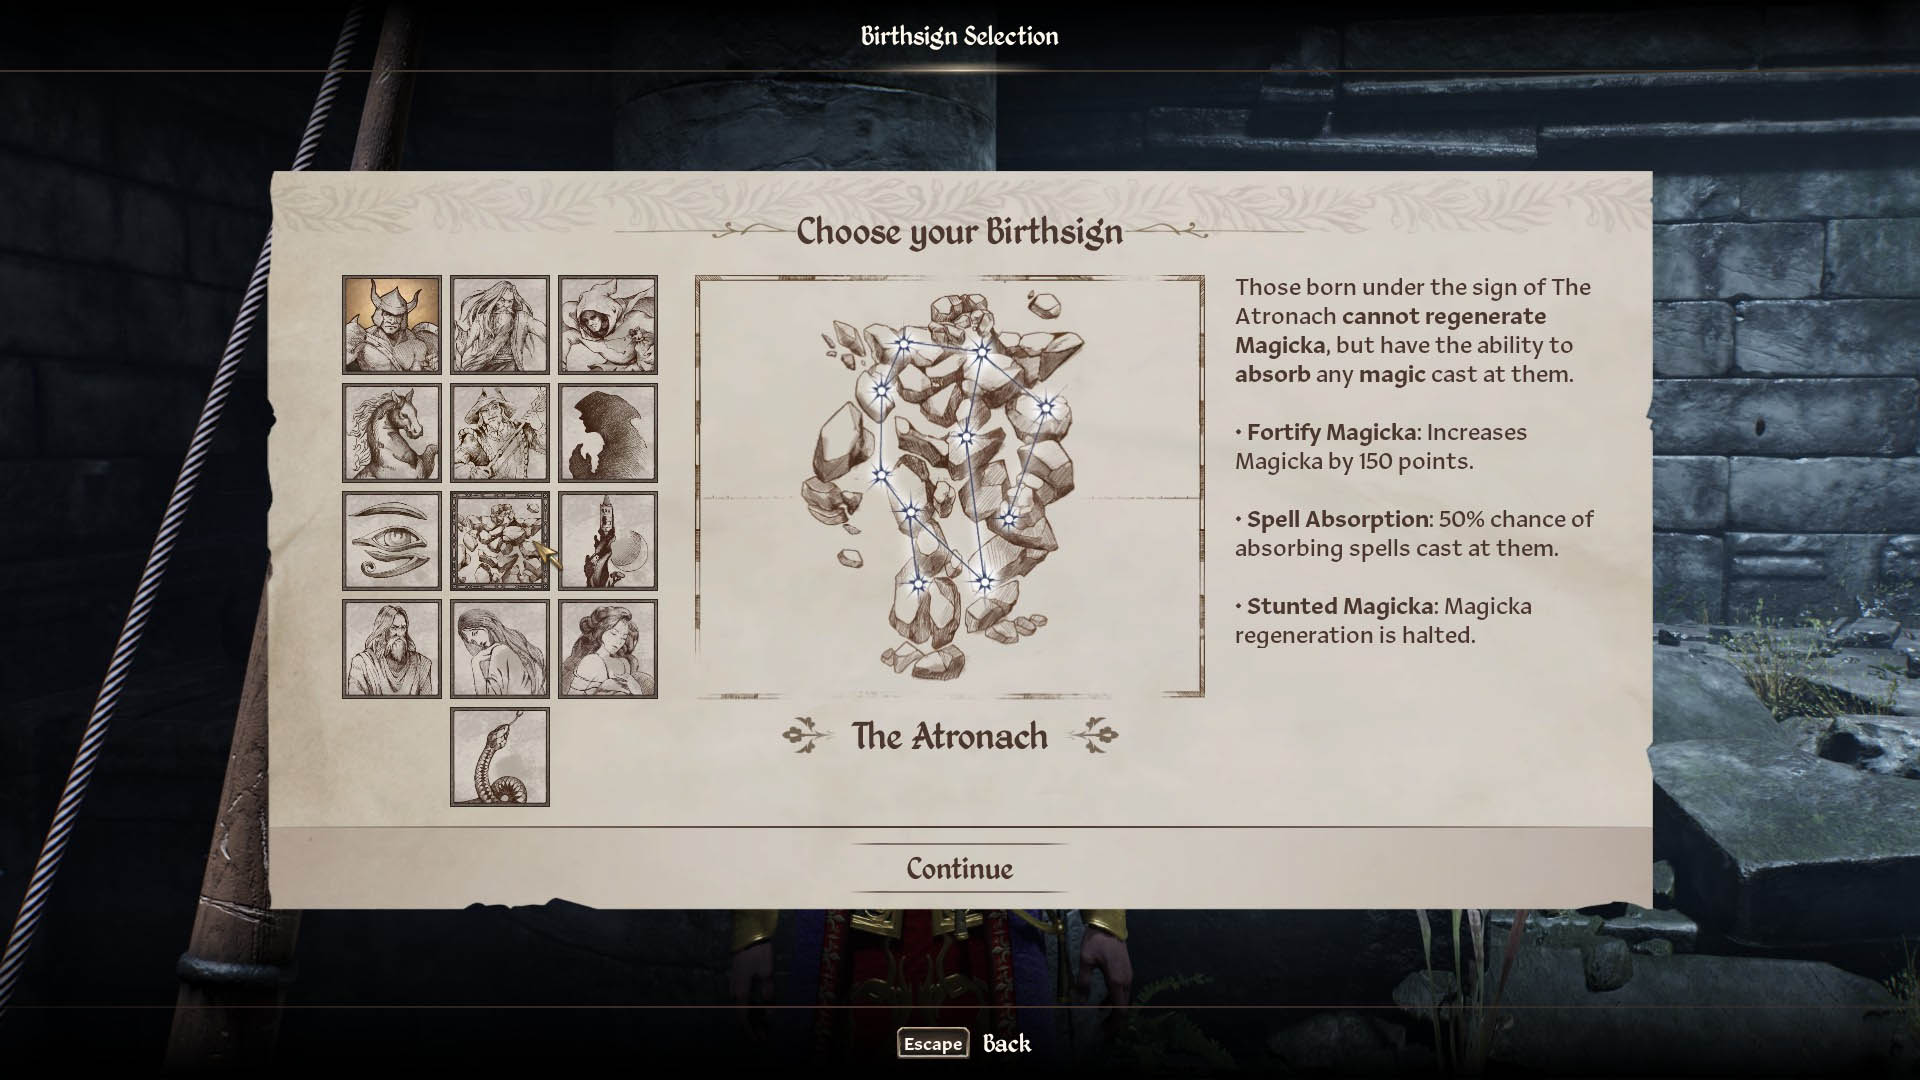
The Atronach is an overall solid birth sign that trades out your standard magicka regeneration for an additional 150 points of overall magicka. It also grants a 50% chance to absorb the magicka of any spell cast on you. Not only topping up your magicka, but also completely negating the damaging effects of that spell. This makes The Atronach incredibly powerful for going up against enemy spellcasters. It does become weaker against non-spell-casting enemies, though, if you’re using a spell-casting build yourself. This is because your magicka regen is going to be very weak. However, you still have a larger magicka pool due to the 150-point bonus. This will allow you to cast a decent number of spells before running dry. You can also supplement this to some extent with potions. Overall, it’s a top-tier choice, and it’s a particularly strong burst sign for more defensive magicka-based playstyles rather than builds that spam destruction magic and go through mana extremely quickly.
Thief
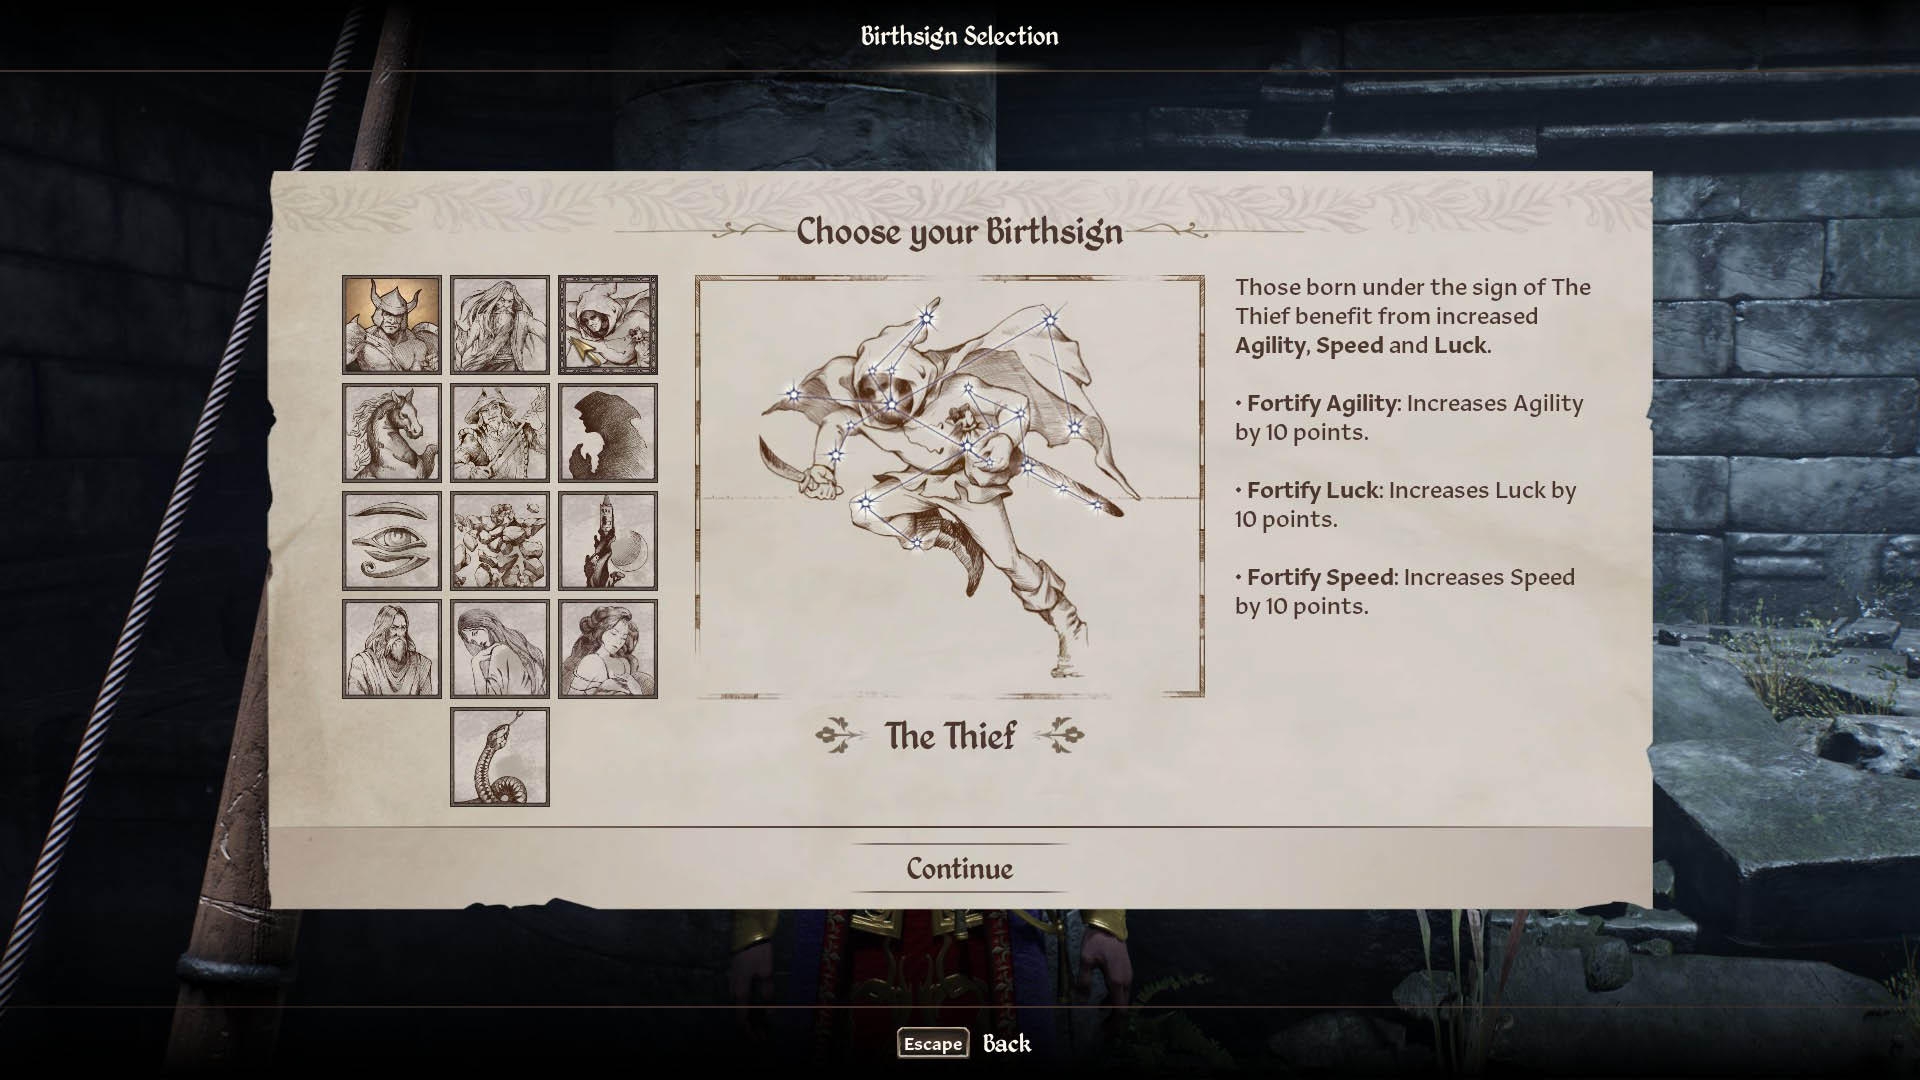
The thief is very similar to the warrior in the sense that it simply provides a boost to your attributes. In this case, you gain 10 points in agility, speed, and luck. Agility increases your maximum fatigue and your ranged weapon damage. It also reduces your chance of being staggered in combat. Speed increases your movement speed and jump distance. Luck positively modifies the values of most skills in the game. This combination makes the thief burst sign an obvious choice for the famous stealth archer build. If you pair the thief with a race choice such as a Bosmer, this is going to make for an incredibly strong stealth archer right out of the gate.
Mage
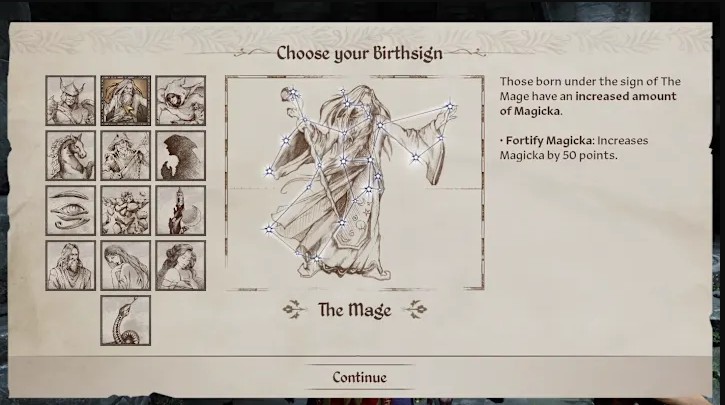
Mage Potentially the simplest burst sign of all. It just increases your magicka pool by 50 points, allowing you to cast more spells before you run out of magicka. This makes the mage a solid choice for anyone wanting to play as any form of spellcaster. The obvious question is probably why would you bother with this when the Atronach gives you 150 points of additional magicka? Well, it’s because there’s no downside to the mage. You simply get a decent chunk of extra magicka without losing your magicka regeneration. You have to rely on being hit by spells to get any kind of regen at all. It’s just a safe and solid choice for any magic-based build.
B-Tier
Lady
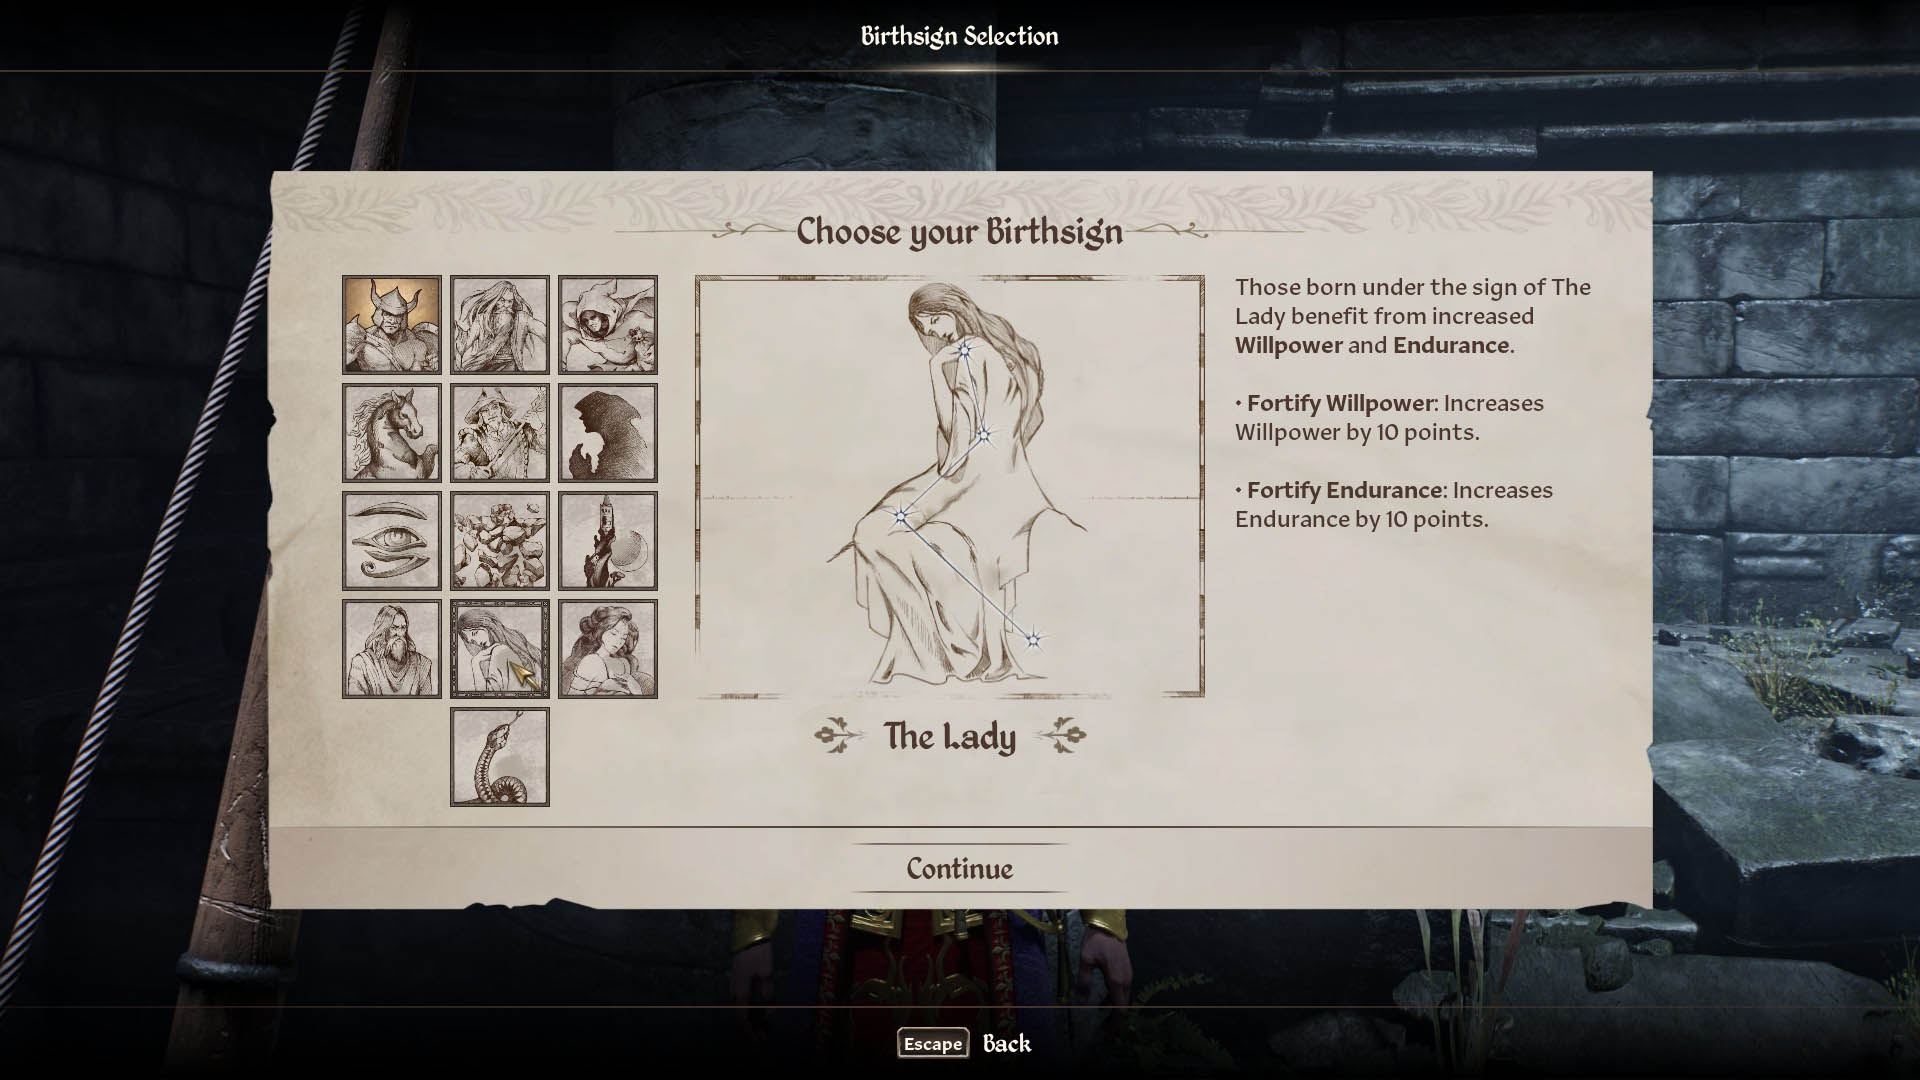
Your alternative as a spellcaster for a simple but effective birth sign is the lady. This is much like the Warrior and Thief, offering a flat boost to some of your attributes. In the case of the Lady, you get plus 10 willpower and endurance. Willpower increases your maximum fatigue as well as your magicka regen. Endurance increases your maximum fatigue and health. If you’re planning to end fights quickly, the Mage is a better choice for a bigger magicka pool. However, if you’re playing at higher difficulties and expect fights to last longer, then the lady may be a better option due to the enhanced magicka regen. Either Birthsign is solid for a no-fuss spellcaster build.
Lover
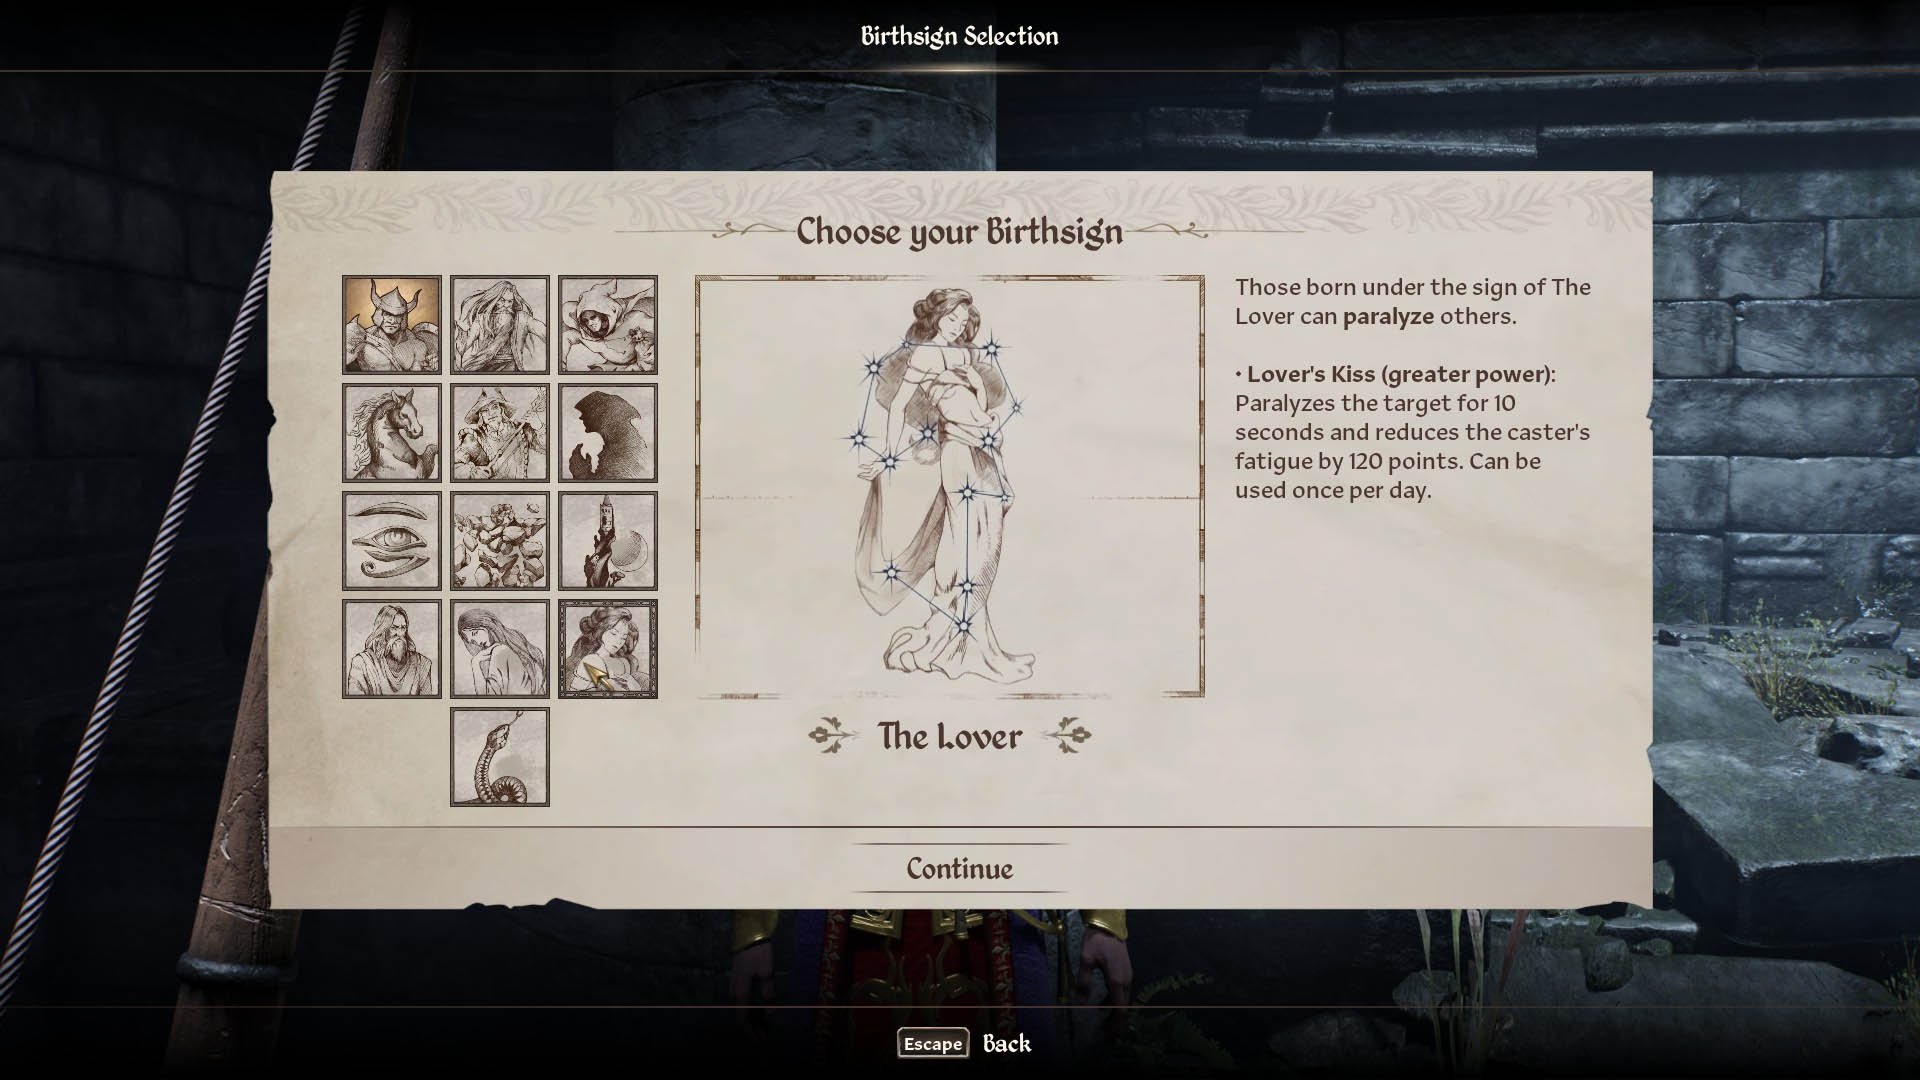
Lover is a pretty lackluster birth sign, as all it gives is a single spell that paralyzes an enemy for 10 seconds. However, it just about scrapes its way into the niche burst signs rather than the worst burst signs, as paralyzing a strong enemy for 10 seconds can trivialize a fight. This can be particularly useful at higher difficulty settings. However, overall, I’d still consider the Lover to be one of the mid-tier birthsigns.
C-Tier
Shadow
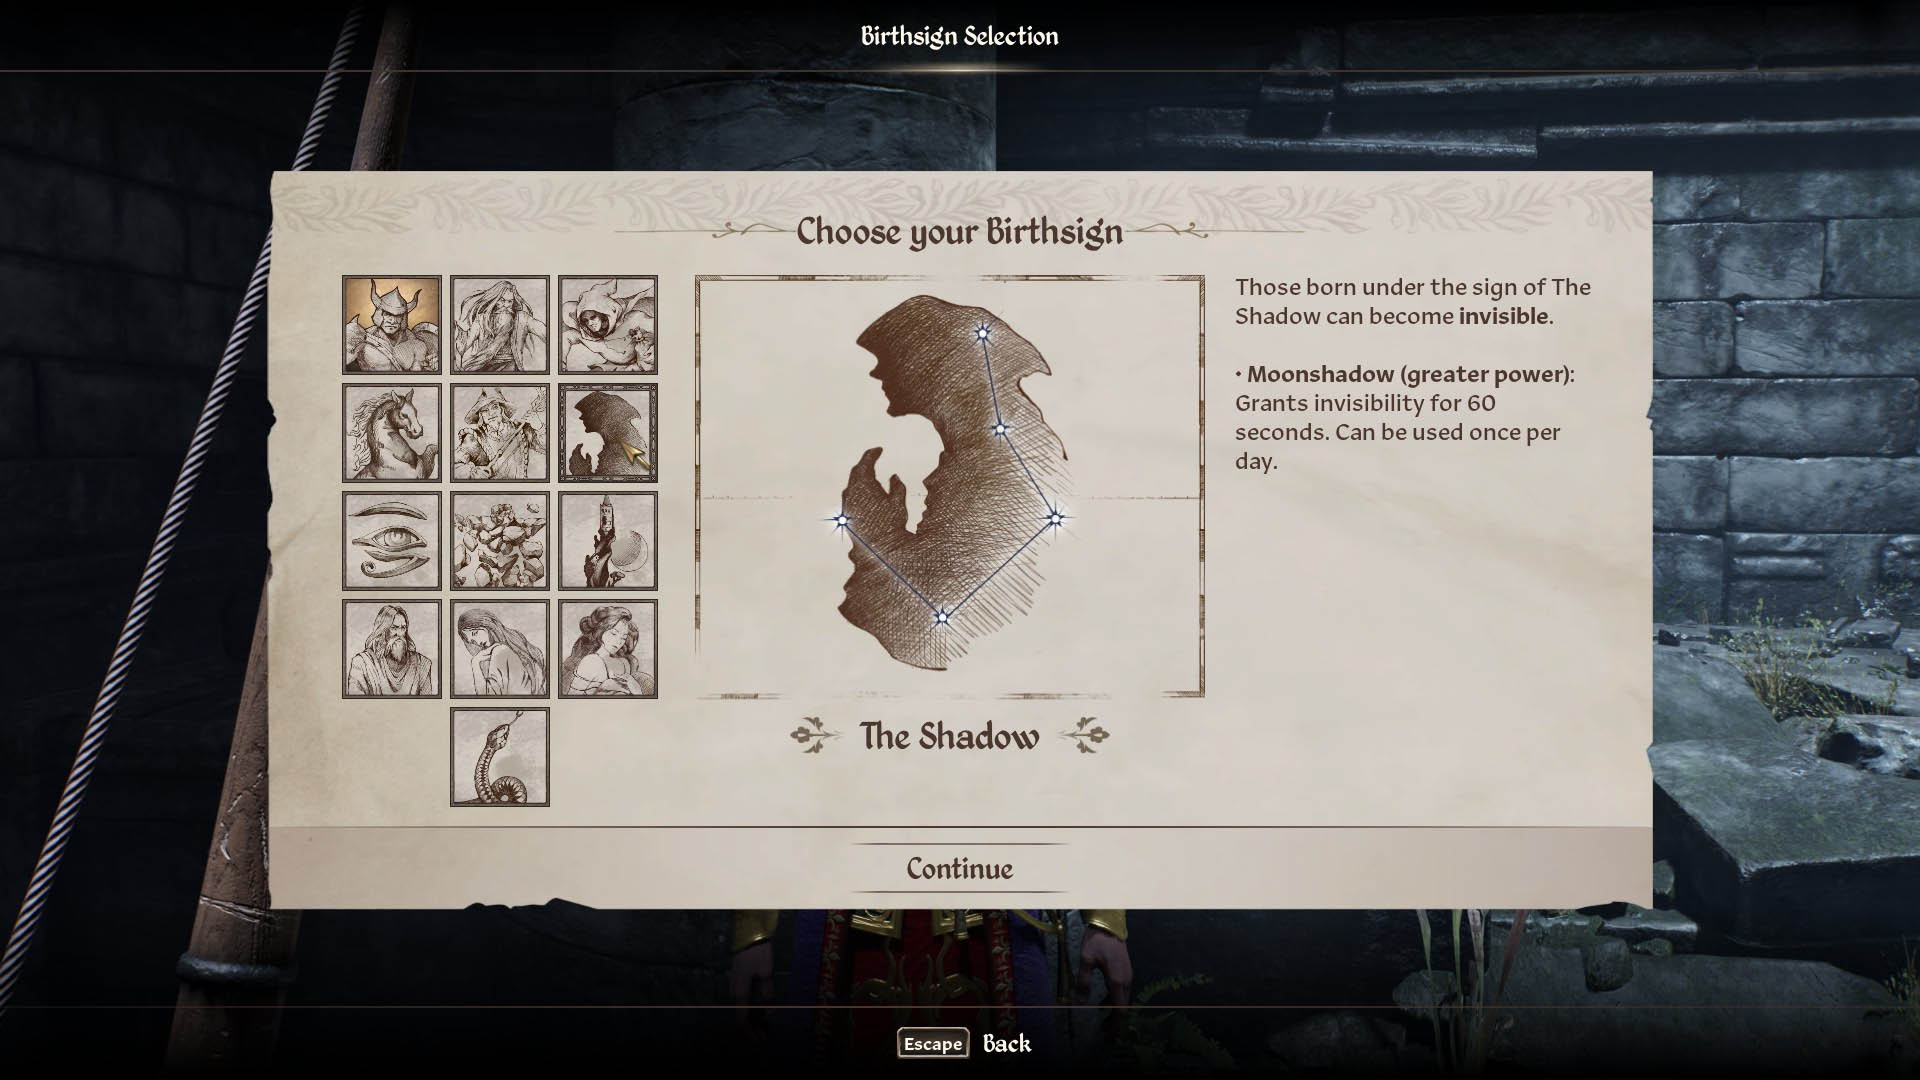
Shadow Birthsign allows you to cast a spell once per day that gives you 60 seconds of invisibility. On paper, this doesn’t sound bad at all. There is a wide range of use cases in which invisibility can be useful. These range from making stealth missions trivial to escaping particularly dicey combat situations. However, there’s an item you can acquire pretty early on in the game called the Joan Stone. This stone gives you a greater power that offers 120 seconds of invisibility as well as several other benefits. This makes the shadow pretty much redundant unless you feel you need a full 3 minutes of invisibility for some reason. So, while it’s not a bad power, basically it’s always going to be better to take the benefits of another birth sign and use the stone to deal with your invisibility needs.
The Steed
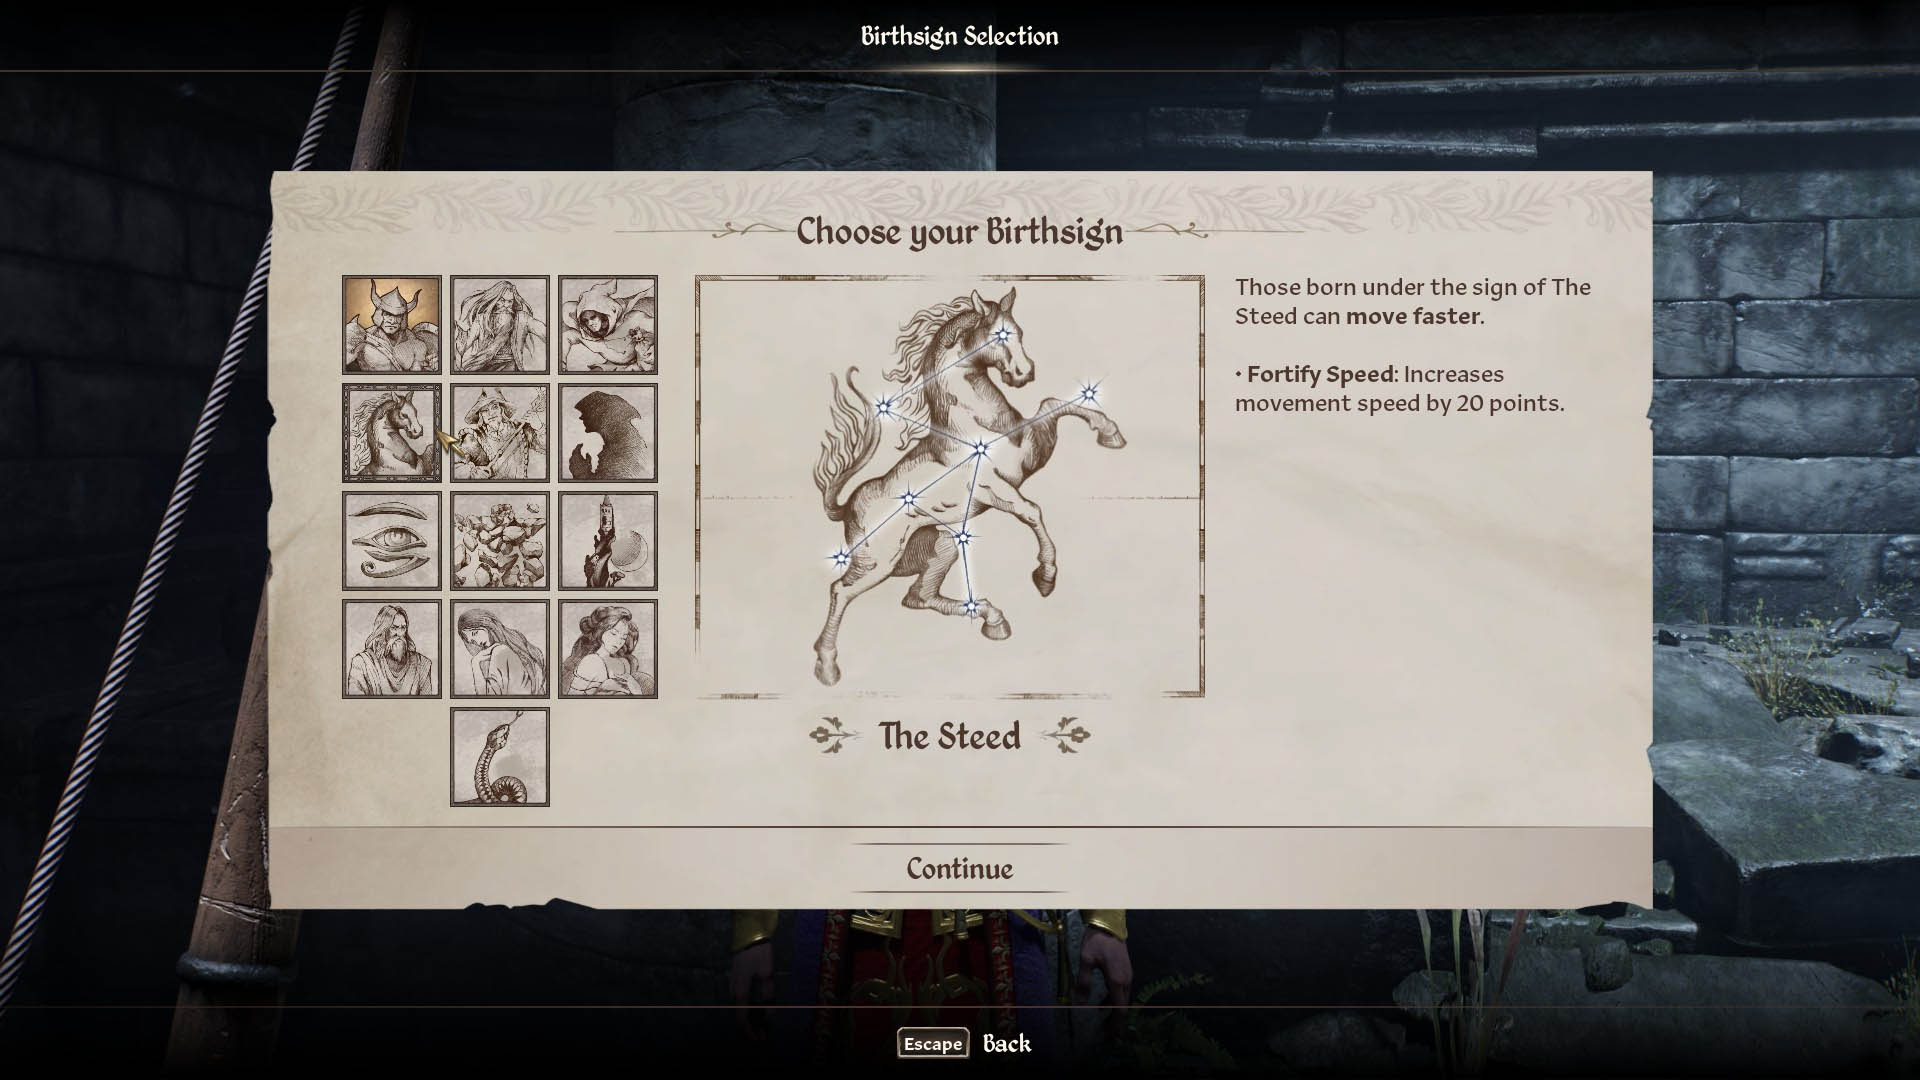
The speed offers a 20-point bonus to speed, which isn’t particularly relevant for most playthroughs. This is particularly useful for any character who can easily increase their speed by just running around and gaining athletic skill. However, it does have a niche in speed running, so I can’t put it in the worst birth sign section when it’s consistently used in a record-breaking speed run. It’s not particularly relevant to 99.9% of players.
Apprentice

The Apprentice birthsign offers a 100-point boost to your magicka. This gives it a larger overall magicka pool than the mage. While it’s smaller than the Arronach’s 150 point boost, you don’t have to take the substantial downside of losing your magicka regen. Therefore, inevitably running out of magicka during longer fights at high difficulty, even when supplementing with mana potions. This balance makes the Apprentice the best overall birth sign for spell damage output. However, it does come with a massive downside of a 100% weakness to magic. Because of this, it’s not one for beginners on the basis that you’re likely going to get clapped against spellcasters if you haven’t put other mitigations in place. However, it is a fun choice for a glass cannon build, and therefore, it occupies a strong niche for more experienced players.
D-Tier
Tower
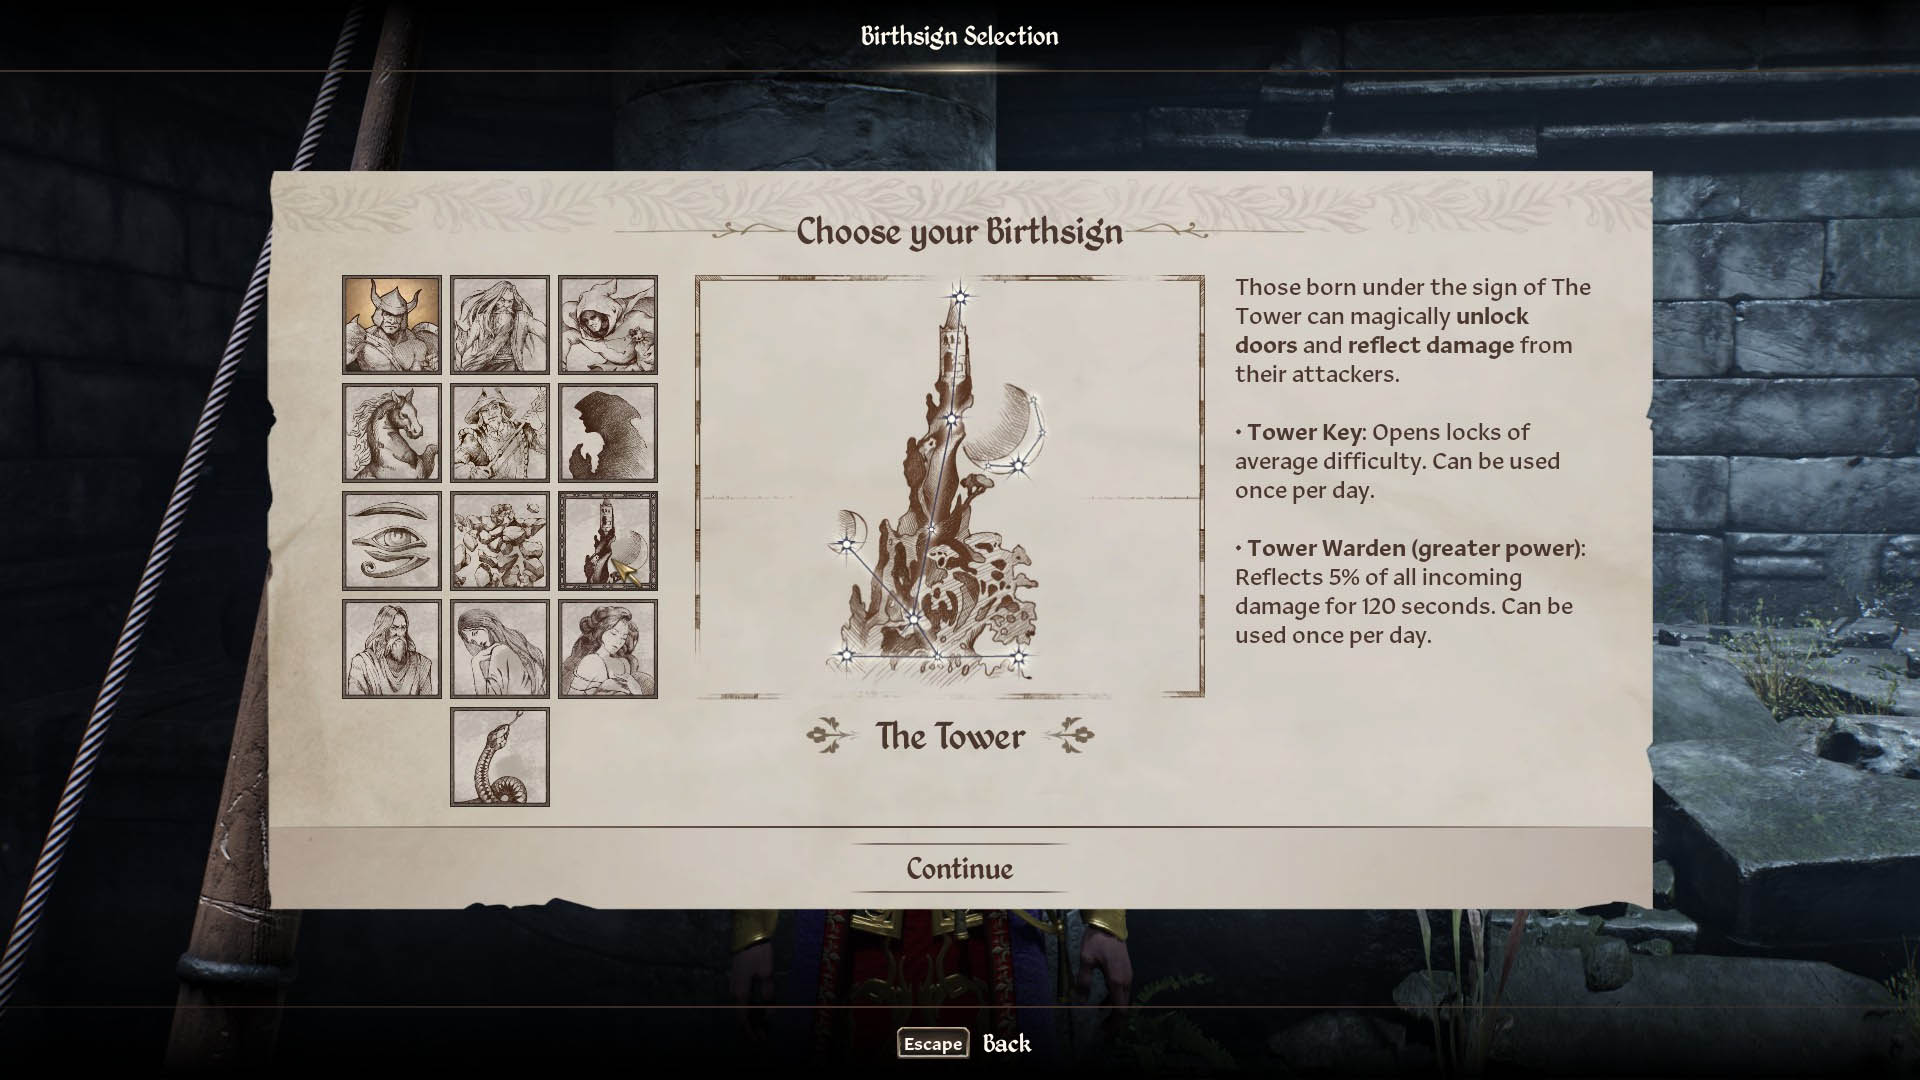
Tower is probably the worst birth sign in the game. It allows you to open one average difficulty lock per day. This also provides a minor damage reflection spell that can only be used once per day. Now, average locks are trivially easy to pick, and you’re likely to come across multiple locks per day. So, it doesn’t feel like much of a convenience feature to instantly unlock one. The 5% damage reflection for 120 seconds is so minor that it barely feels like you’ve used it. Honestly, I really can’t see any reason to pick the tower over the other birth signs.
Serpent

Serpent is another birth sign that you should probably look to avoid. It offers you a spell that simultaneously puts a minor damage overtime effect on the enemy. It also cures you of poison and dispels any magic effects on you. This spell can only be cast once per day, and it’s going to cost you 100 fatigue. It’s not that it’s necessarily a bad spell, but it’s very low impact for something you can only use once per day. It’s given that it’s the only benefit you get for picking the serpent birth sign. If it were spammable, maybe the serpent would make its way into the situational or mid-tier build category. However, it isn’t, so it can’t be justified as anything but one of the worst choices available.
Ritual
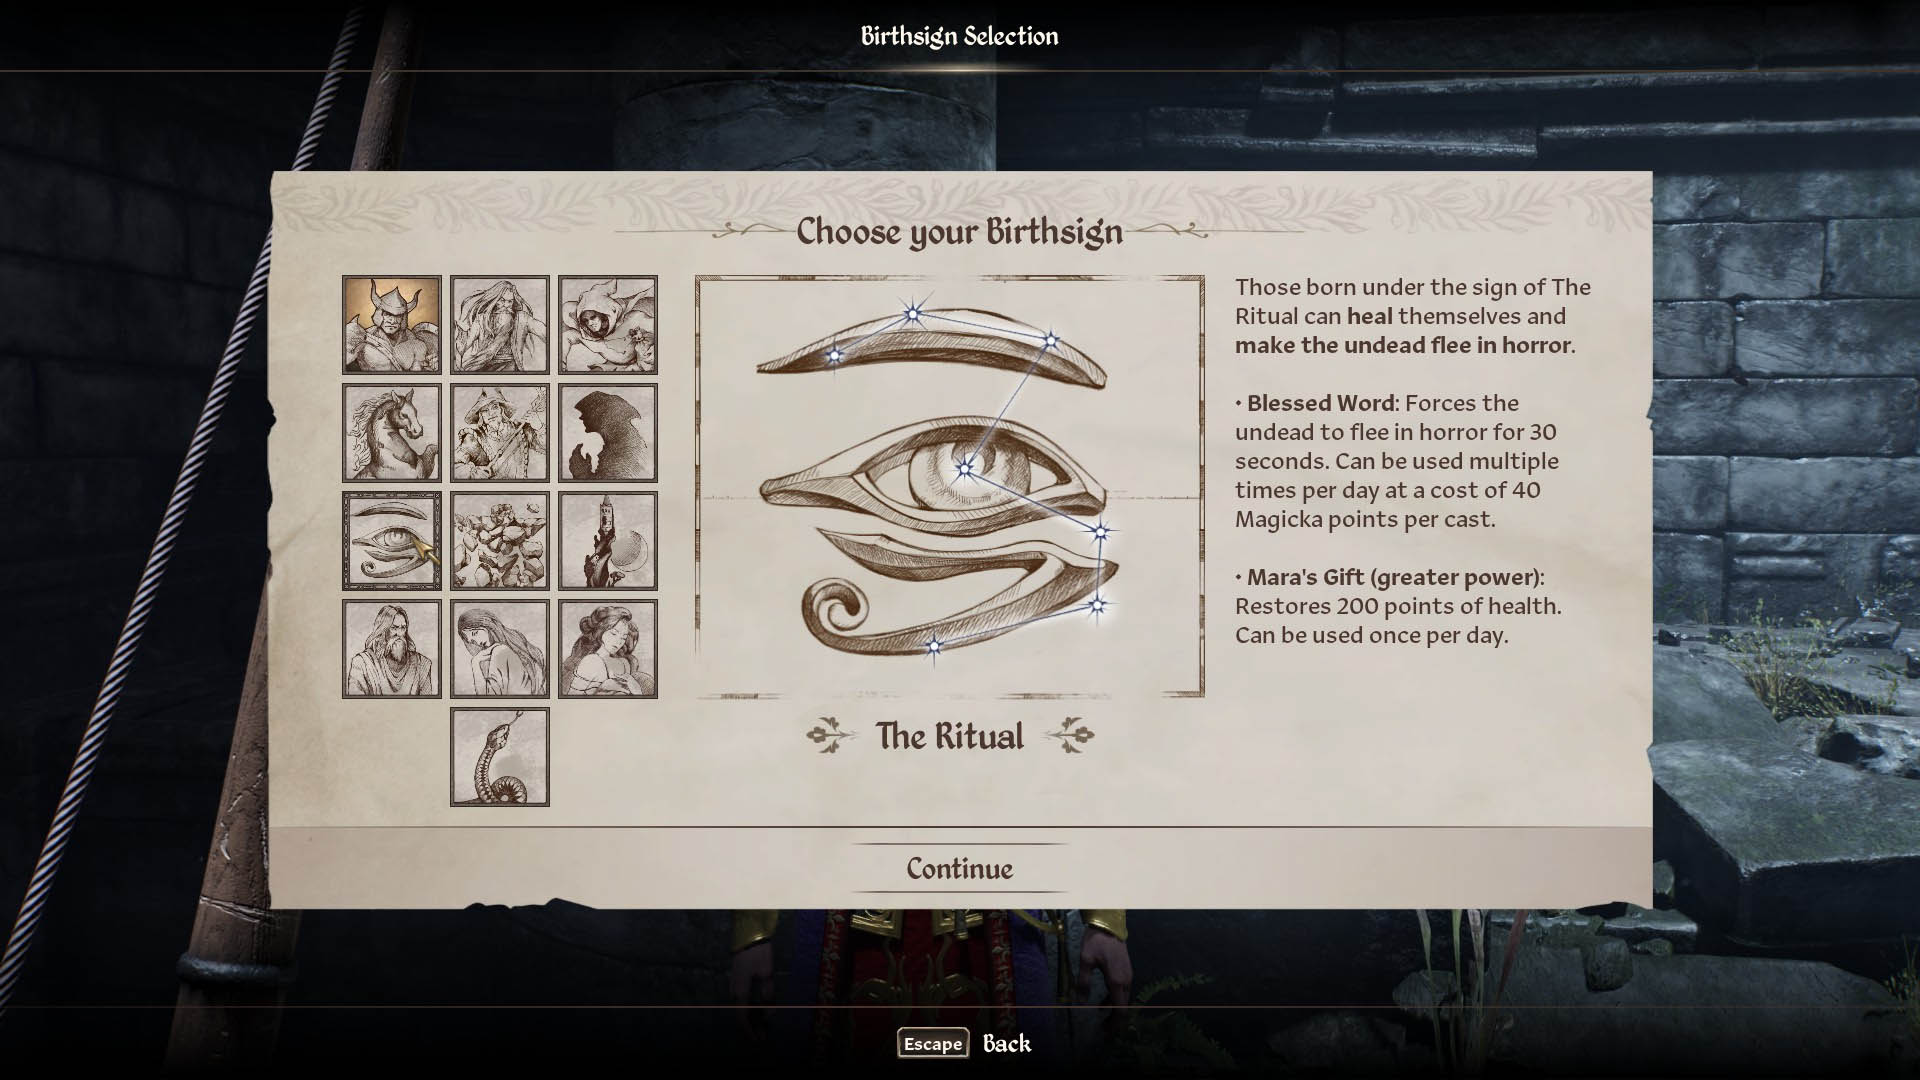
Ritual, in my opinion, probably gets the title of best of the worst. Firstly, it offers you the ability to turn undead, making them run away from you for 30 seconds. This can be used multiple times per day. It could potentially be useful at harder difficulties for certain undead-heavy areas, such as Sancre Tor. Secondly, the ritual also offers a 200-point heal that can be used once per day. This is a very strong heal and it can get you out of certain death situations. So, whilst the ritual certainly isn’t in the same sort of category as the tower for just being flat-out bad, I just can’t see any reason to pick it over the other choices available.
Methodology For Birthsign Tier List
Creating a Birthsign Tier list involves breaking down how each birthsign affects gameplay across different builds, difficulties, and stages of the game. The best birthsign is the one that synergizes well with your build and grants you additional bonuses to become a powerful character. Some birthsigns shine early, like The Warrior, while others grow stronger over time, like Astronach. The Lord has a stronger heal or reduced fire weakness, making it a top-tier choice. We put the birthsign in the top tier that grants continuous buffs to your playstyle and build. The A-tier birthsign has a small drawback that can have a negative impact on your strategies. The B-Tier and C-Tier have some major drawbacks, and they can only be picked for specific builds. The D-Tier birthsigns are not worth picking for any build, due to their limitations and smaller buffs.
How to Change Your Birthsign in Oblivion Remastered?
The game offers you one final chance to change the birthsign after selecting it. You can make a final decision before you leave the sewers, and after that, your choice is permanent throughout your playthrough. Use a console command to change your birthsign while playing Oblivion Remastered on Windows PC. Hit the tilde key (~) to open the cheat console to type (showbirthsignmenu). This will pop up the birthsign menu that allows you to change your birthsign in the game.
FAQs About Birthsigns in Elder Scrolls Oblivion Remastered
Which is the best birthsign in Elder Scrolls Oblivion Remastered?
Warrior is the best Birthsign in Elder Scrolls Oblivion Remastered because it provides a simple offering of a 10-point bonus to both your strength and endurance.
Which is the worst birthsign in Elder Scrolls Oblivion Remastered?
Ritual is the worst birthsign in Elder Scrolls Oblivion Remastered because it offers you the ability to turn undead, making them run away from you for 30 seconds.
Can you change the birthsign in Elder Scrolls Oblivion Remastered?
You can change your birthsign after choosing it during the character creation before leaving the sewer. Press the ~ key to open the cheat console to type “showbirthsignmenu”. Now, you can select the birthsign from the menu.
Looking For More About Elder Scrolls Oblivion Remastered?
Thank you for reading the Guide. We provide the latest news and create guides for Baldur’s Gate 3, Enshrouded, Dune Awakening, and more. Also, watch Deltia play games on Twitch or visit my YouTube channel!