Facebook
 Reddit
 Email
Email
This article analyzes Furina’s Constellations to determine if they are worth obtaining for different players.

Constellations usually increase the strength and viability of a unit by a significant amount, and Furina is no exception to this rule. However, that does not mean that you need to get Furina’s Constellations to use her properly.
This article will analyze all of Furina’s Constellations and determine if they are worth getting in the game.
C0
If you are a free-to-play player who does not spend money on the game, you do not need to invest in constellations for Furina. Furina is perfectly viable at C0. No part of her kit will be underutilized, even at C0.
However, if you are looking to invest some more into Furina, you should consider getting some constellations for her.
C1 and C2
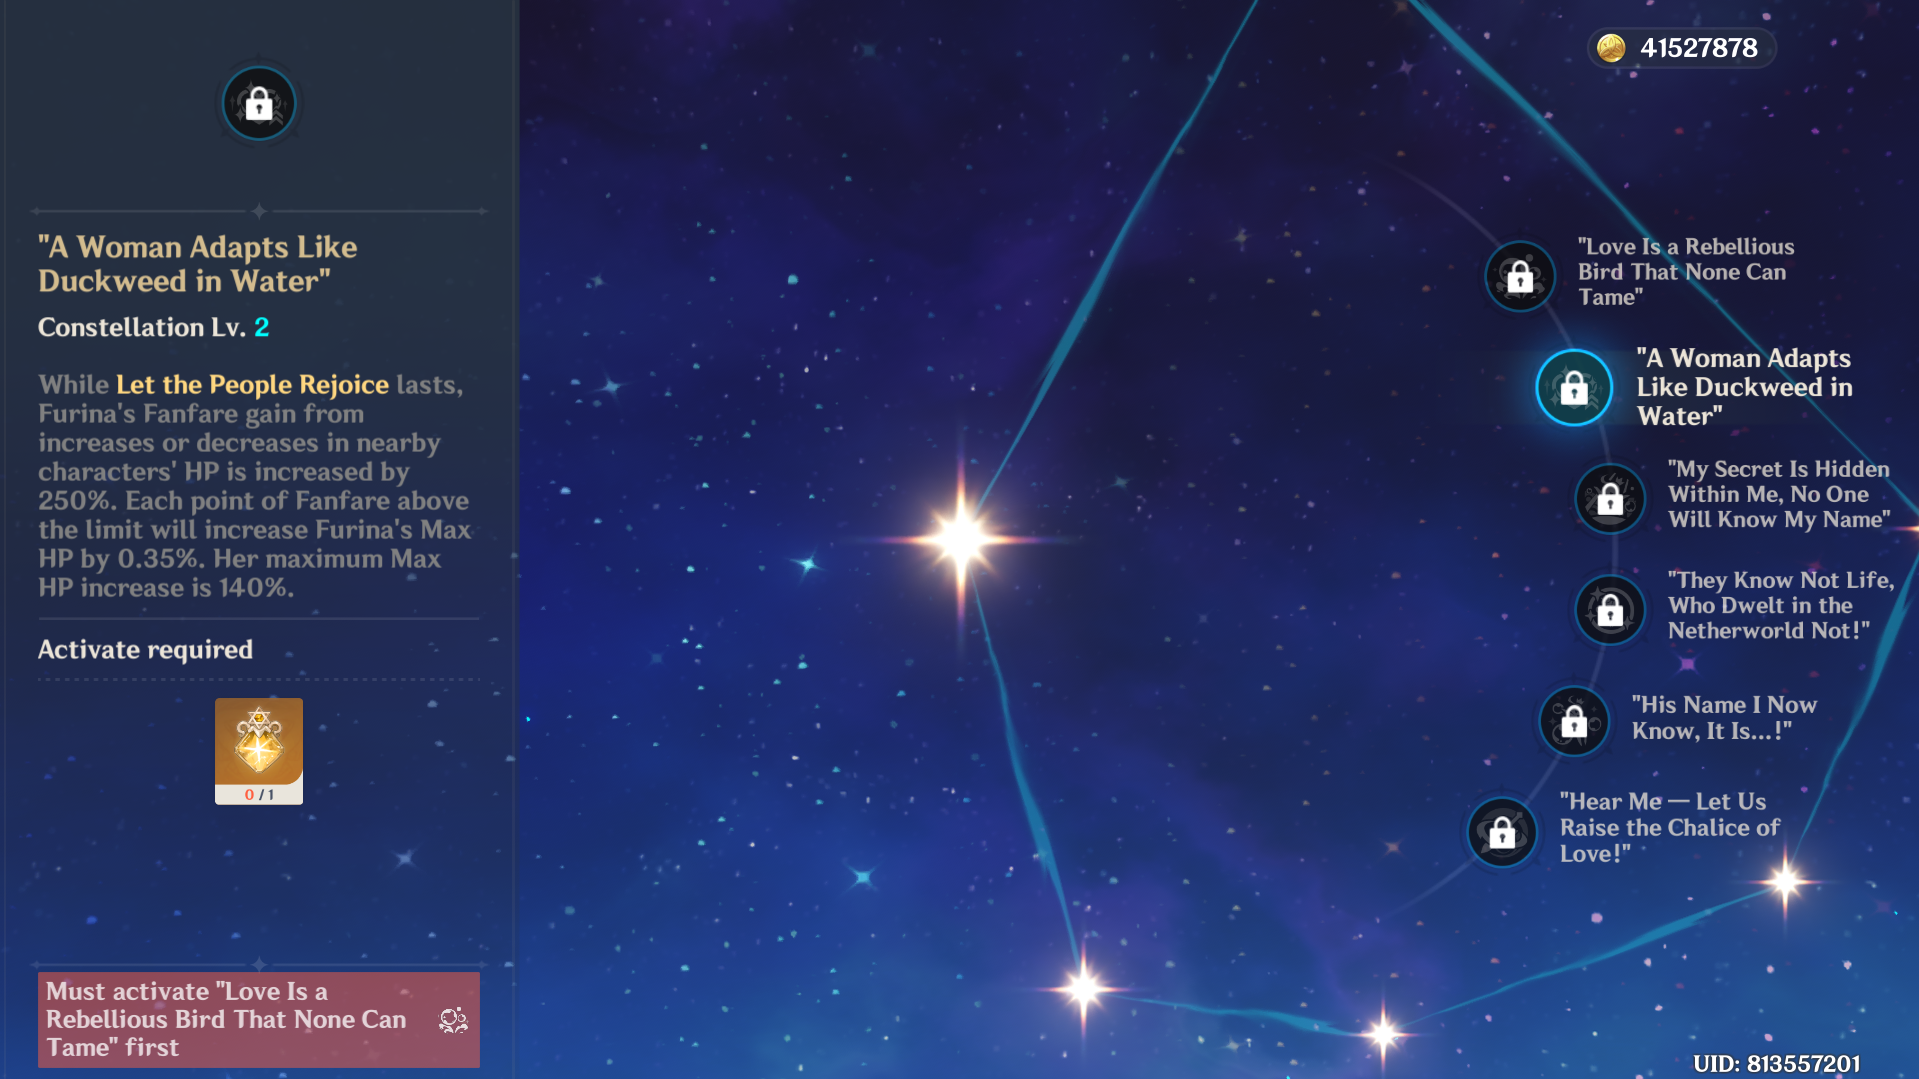
C1 gives Furina 100 stacks of Fanfare when she uses her burst. Moreover, her maximum fanfare limit is also increased by 150. Although this is a nice buff, it is not very important in the long run and not something you should prioritize getting.
However, C2 is a different matter. With this constellation, her Fanfare charge rate is increased by 250%. This is a massive boost to her buffing capabilities, making her receive Fanfare stacks much faster than before. Moreover, the maximum limit increase from C1 will finally become noticeable in C2.
This is a good stopping point for low spenders or those who might be interested in only pulling some constellations.
C3 and C5
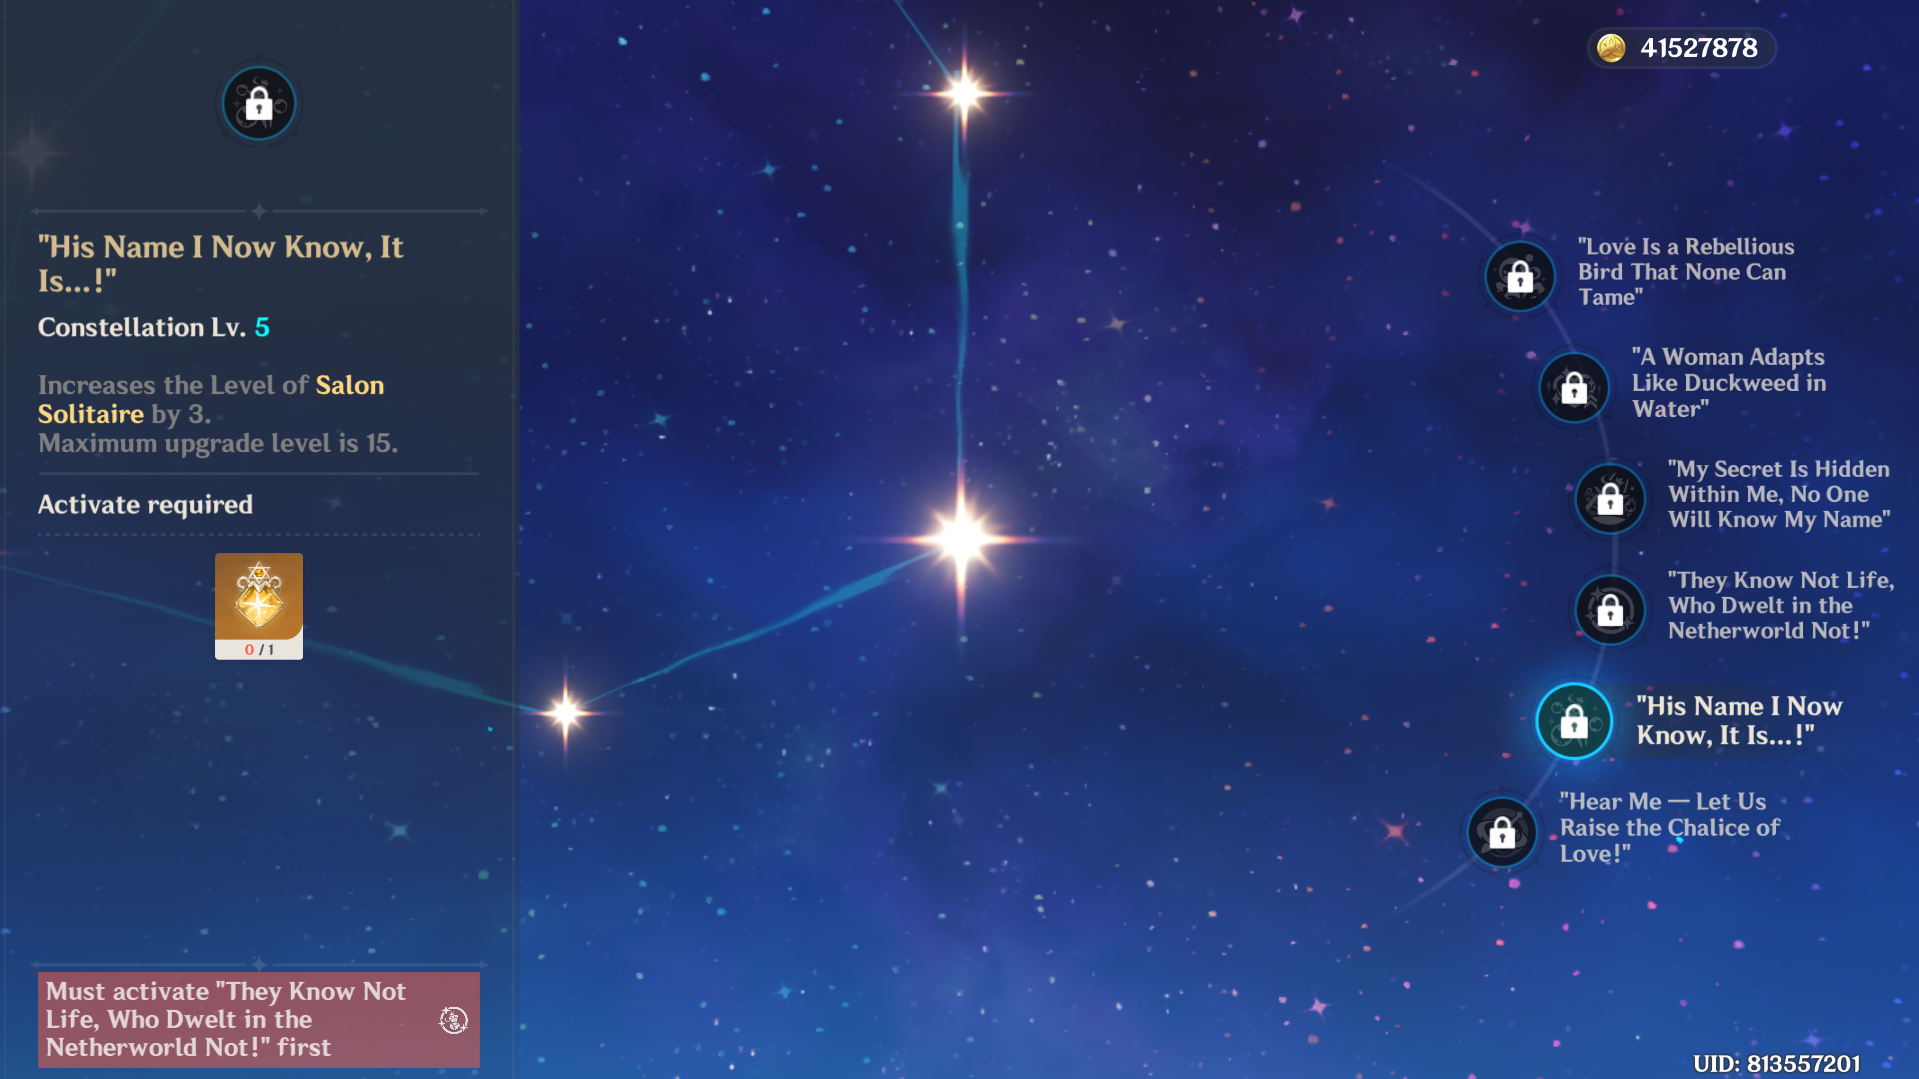
These two constellations are the same for every unit in the game. C3 increases Furina’s Elemental Burst, while C5 increases her Elemental Skill level by 3. None of these are particularly important buffs to her kit.
These two constellations should not be your focus, as they will be incidental upgrades on your road to higher constellations.
C4
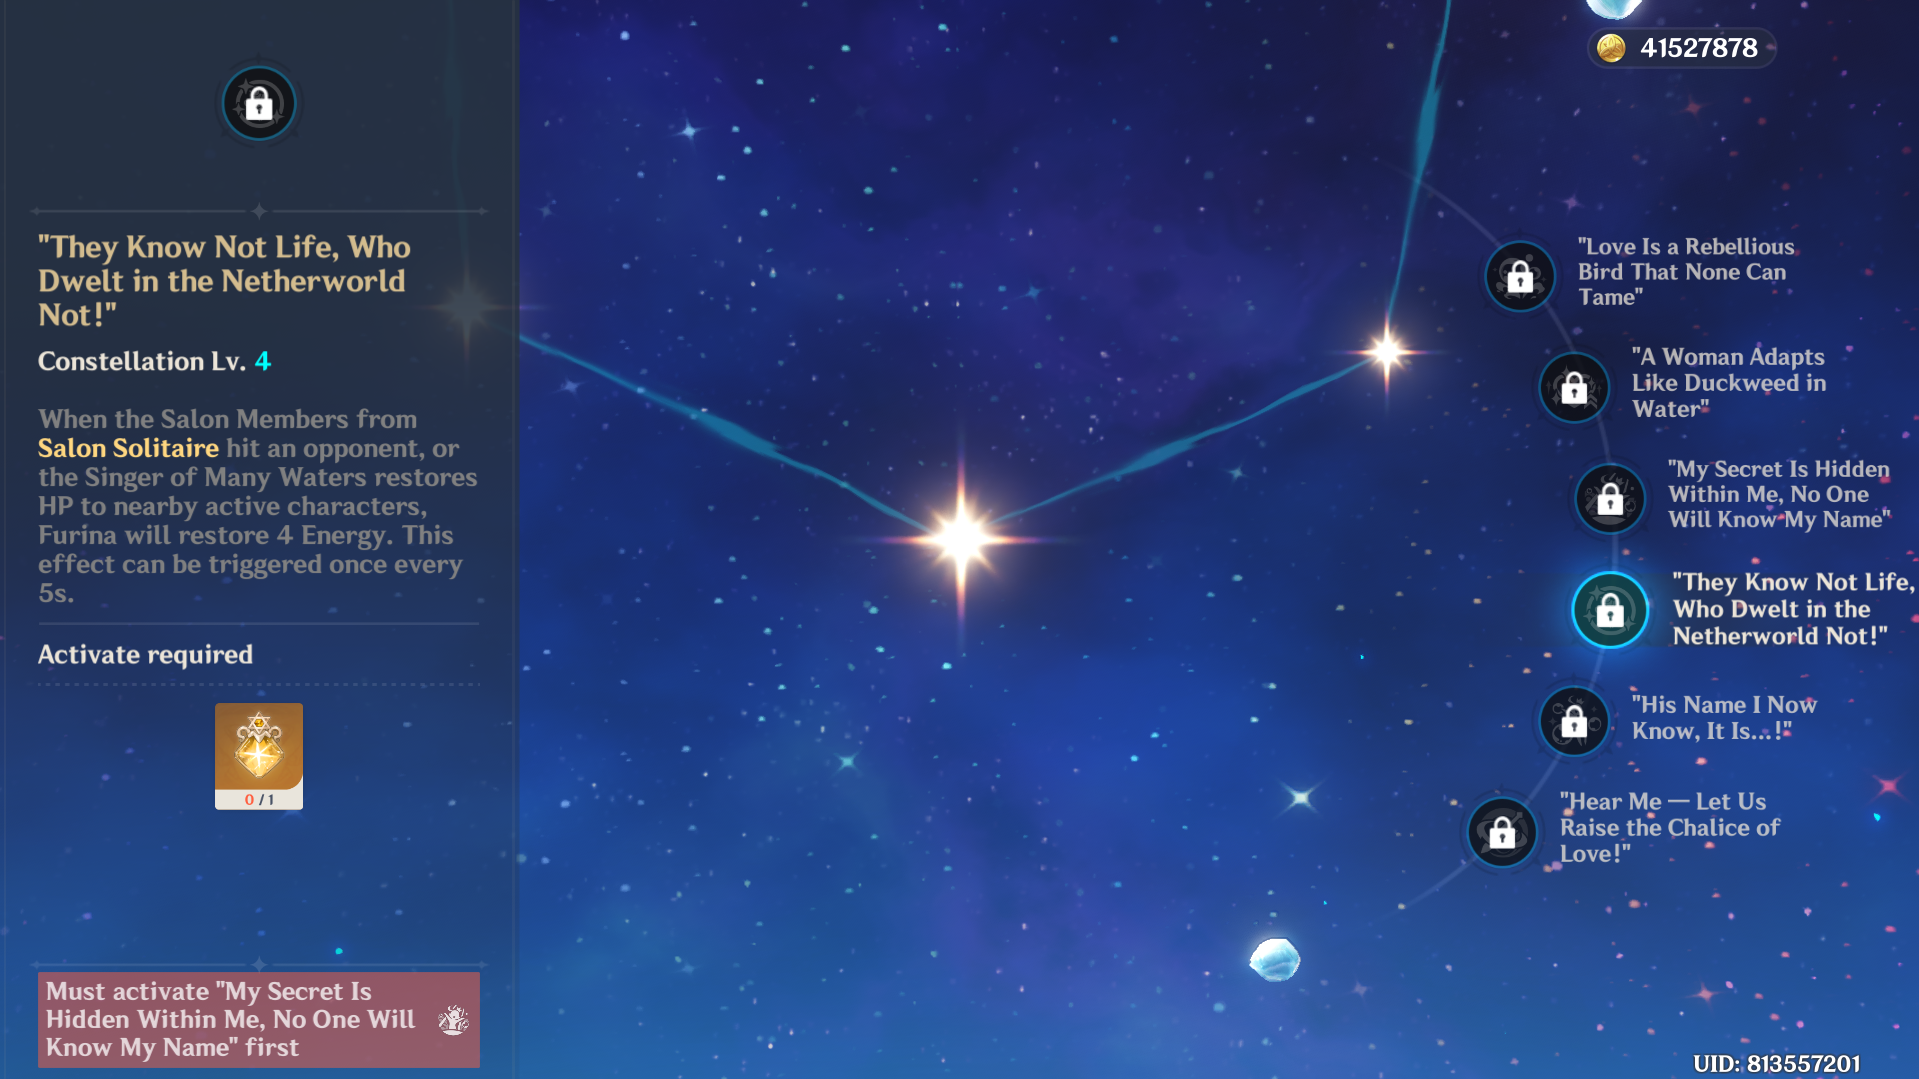
This Constellation is likely the most unnecessary of all of Furina’s Constellations. It lets her regain four energy whenever her Salon Members hit an enemy or get healed from the Singer of Many Waters.
The C4 is unnecessary because Furina has a Burst cost of 60. Moreover, her burst lasts for quite a while. Therefore, getting energy is generally not an issue for Furina. This problem can also be solved by having a second Hydro unit or a battery on the team.
C6
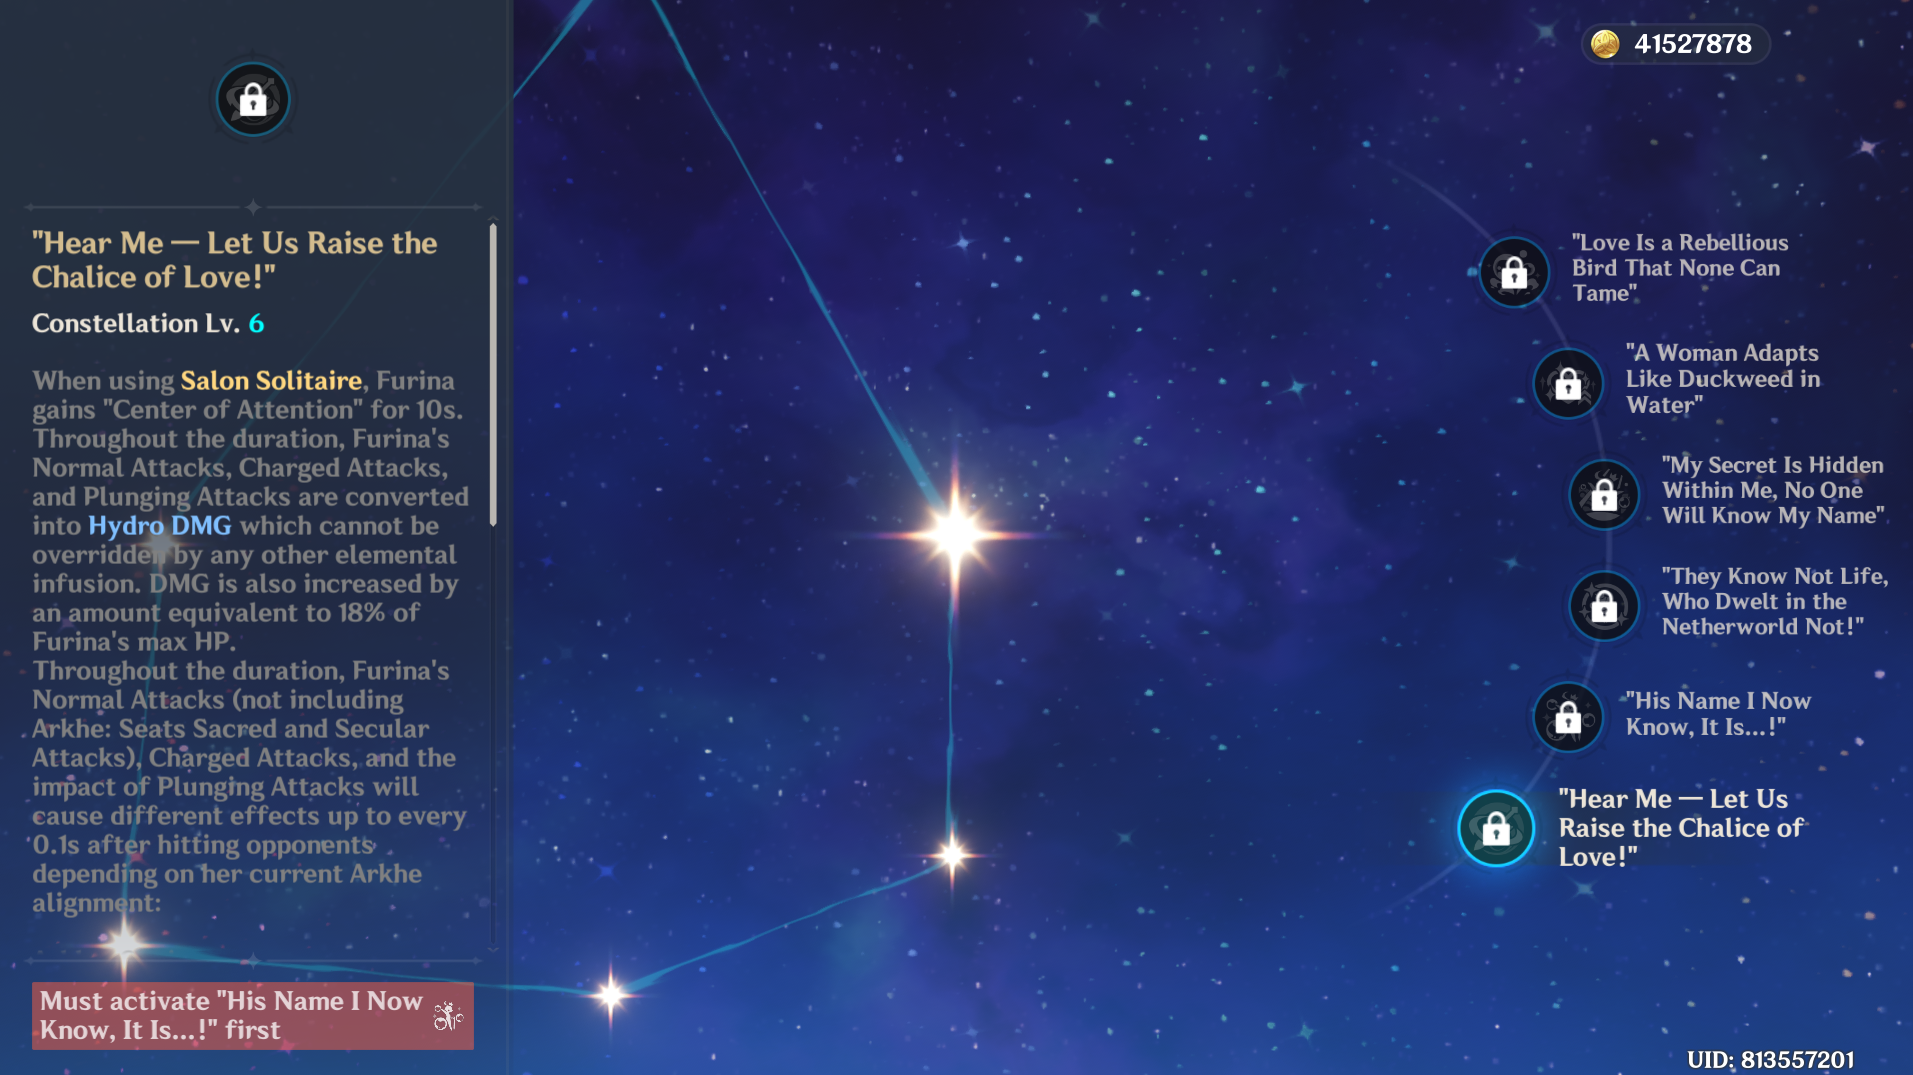
This is the Constellation that lets Furina become the Main DPS of the team. Whenever she uses her Elemental Skill, for 10 seconds, she gains Hydro infusion. Moreover, this damage is increased by 18% of her maximum HP. This is a huge boost to her damage, especially because Furina’s attacks scale via HP. So, she is already going to have a massive HP pool.
Additionally, her Arkhe alignment will also set off different effects. During Ousia, every hit from Furina will heal the entire party for 4% of Furina’s maximum HP for 2.9 seconds. Moreover, in Pneuma, her normal, charge, or plunge attacks are increased by 25% of Furina’s maximum HP. Also, whenever these attacks hit an enemy, the team will lose 1% of their current HP.
This constellation is a must-pull for people willing to invest heavily in Furina. Additionally, if you are aiming to turn Furina into a main DPS, then this constellation will make your life (and the entire game) very easy.
Looking For More?
Thank you for reading the article. We provide the latest news and create guides for Baldur’s Gate 3, Starfield, ARK Survival Ascended, and more. Also, watch Deltia play games on Twitch or visit his YouTube channel!