 Facebook
 Reddit
 Email
Email
Here we will be discussing the Lightless Arbor dungeon, the boss battles and all the rewards you can claim in it in Last Epoch.
The Lightless Arbor is located in the Ruined Era, close to the Last Refuge. One of the highlights of completing this dungeon is the reward system. The functionality of the chest at the end of the dungeon is quite unique compared to many of the rest, earning you more and more for a certain trade-off. Let’s dive into this dungeon and watch the intricacies of the Lightless Arbor unfold.
Tips on Entering the Lightless Arbor
Access to the dungeon requires finding the Lightless Arbor Key. There are also four tiers of difficulty, which you will have to organically complete each time. The important thing to note is that if you were to die during your exploration, you would have to start over and look for a new key. While the efforts may sound taxing, the rewards are worth it.
Lightless Arbor keys, fortunately, are easier to stumble across compared to completing the dungeon. Each boss you defeat on your path in the game has a chance of dropping the key, which you can collect. Over your progress, you will possess a good number of keys and an equal number of chances to complete the dungeon with ease. It also helps to level up as much as you can to have a better fighting chance once in the dungeon. You can collect these more easily by farming them via the arena of Champions and again by defeating the timeline bosses.
Exploring the Lightless Arbor in Last Epoch
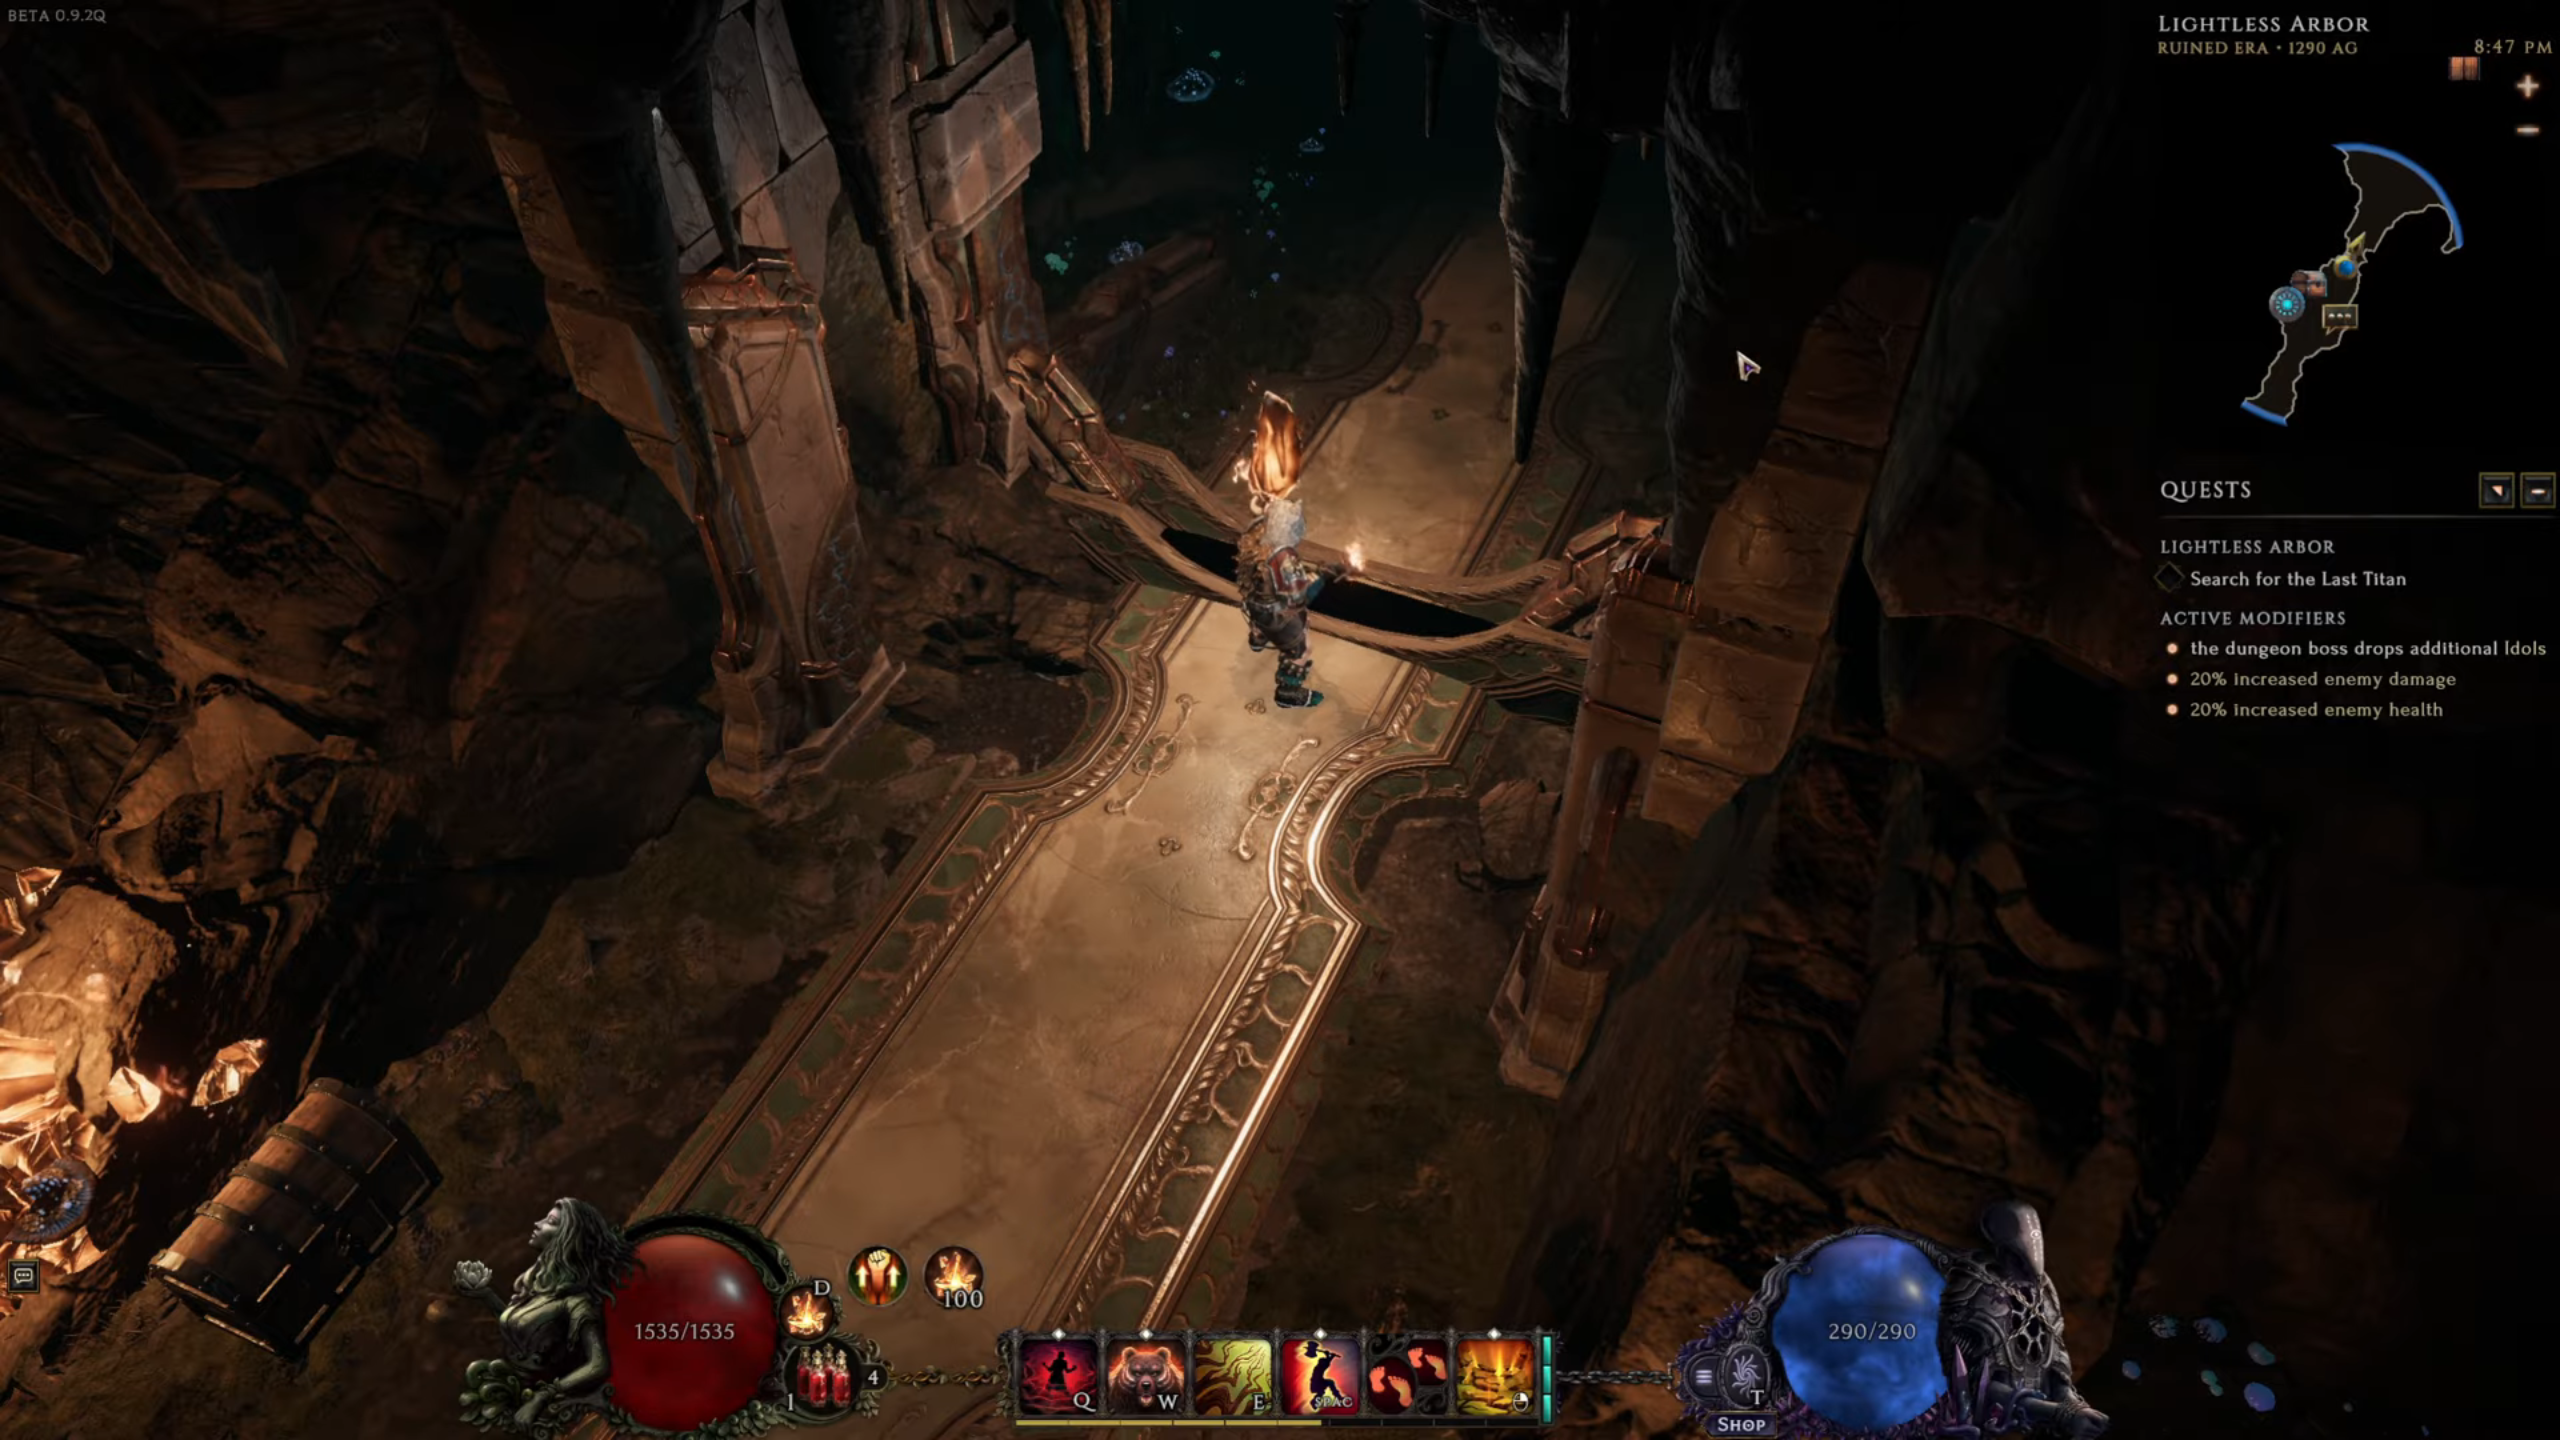
Burning Amber Crystal
The dungeon is filled with darkness while terror lurks around in the shadows, waiting for your missteps. You will be able to navigate your way with the help of an illuminated crystal called the ‘Burning Amber’. This is a very important crystal throughout your expenditure within the dungeon. Your visibility and the strength of your enemies are largely impacted by this very crystal.
Keeping the crystal intact and in great shape is necessary, as the radius across which it shines is dependent on that. If the crystal shines brighter, more enemies will be within its radius. Now, the enemies once inside the radius of the illumination will deal less damage and have a lower health bar. This makes it easier to wipe them out. On the contrary, if they are outside the range of the illumination, they will be able to deal a lot more damage and take fewer hits.
While you have the option to relocate your crystal around to shine on enemies, this would expose it for the enemies to take a quick hit and damage it, resulting in lower charge. But you also get an opportunity to replenish its health. This can be done by eliminating the ‘Large Amber Elementals’. My tip: keep the burning amber attached to your body at all times.
Dungeon Modifiers
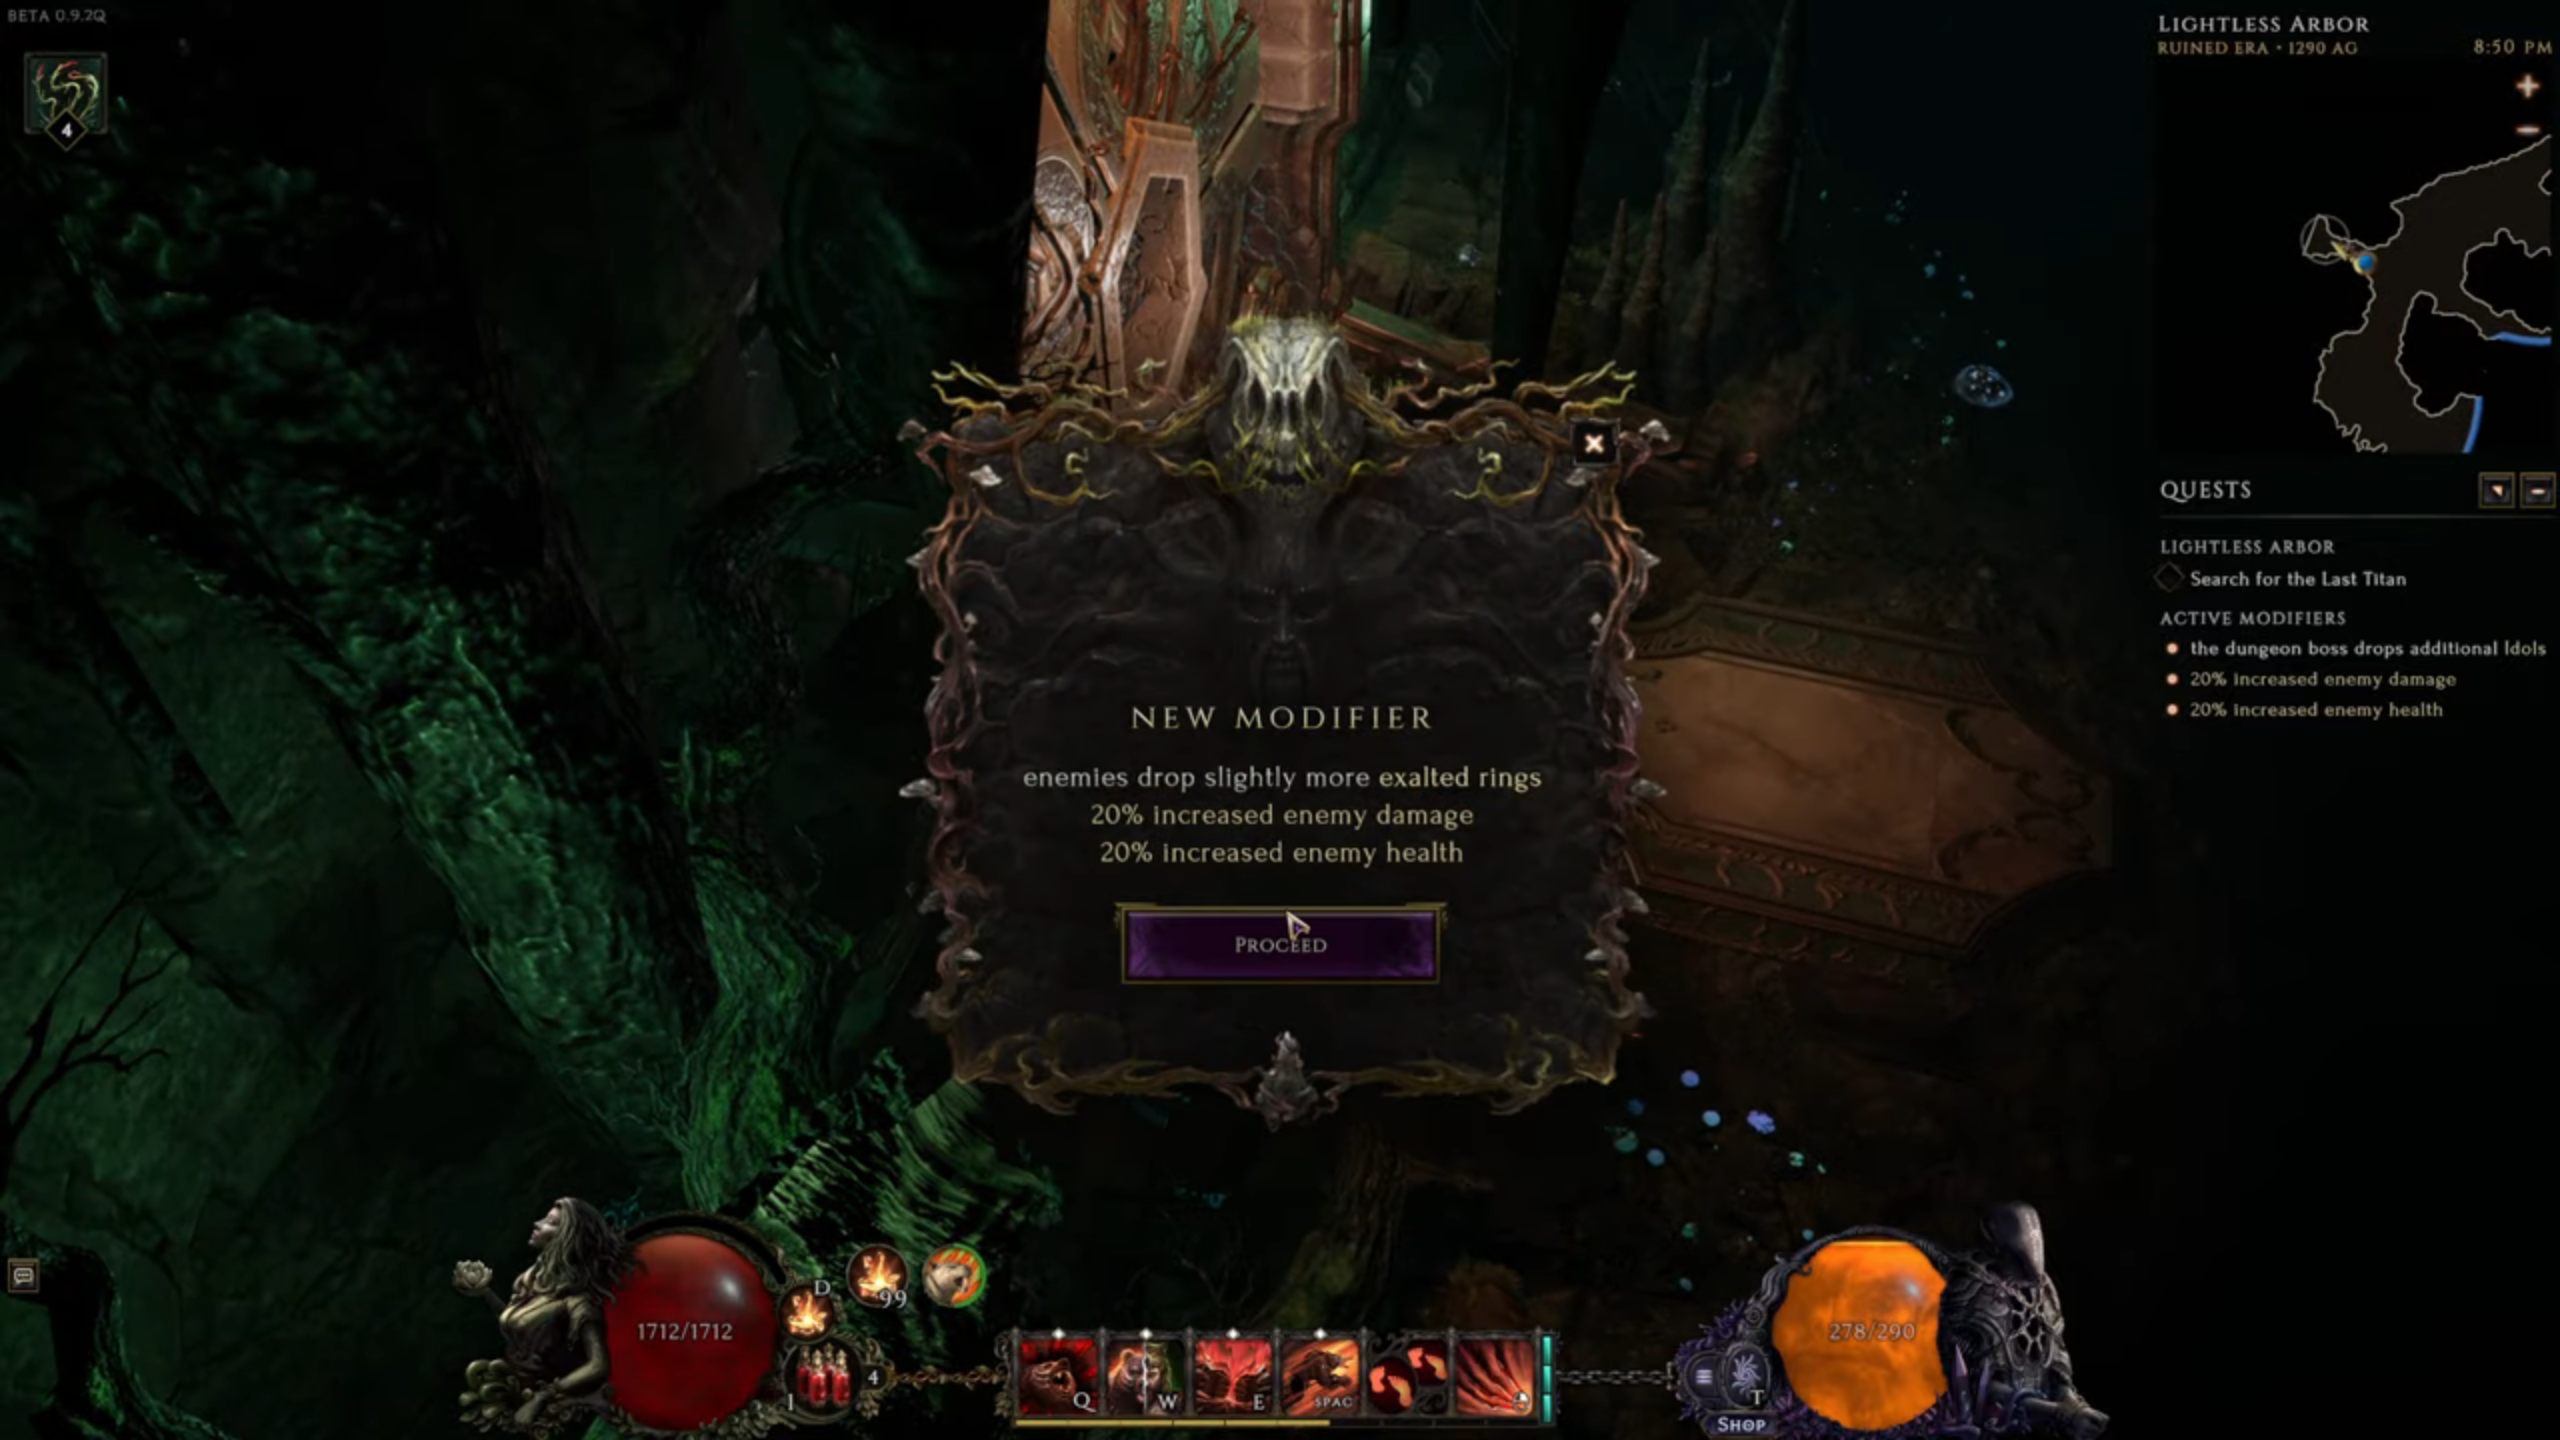
As you progress through the dungeon, you will reach a series of doors. Each door indicates that the direction you are embarking on is correct, as well as modifies your further path in a certain way. The difficulty of the next phase will be greater, but at the same time, you will be a recipient of greater rewards.
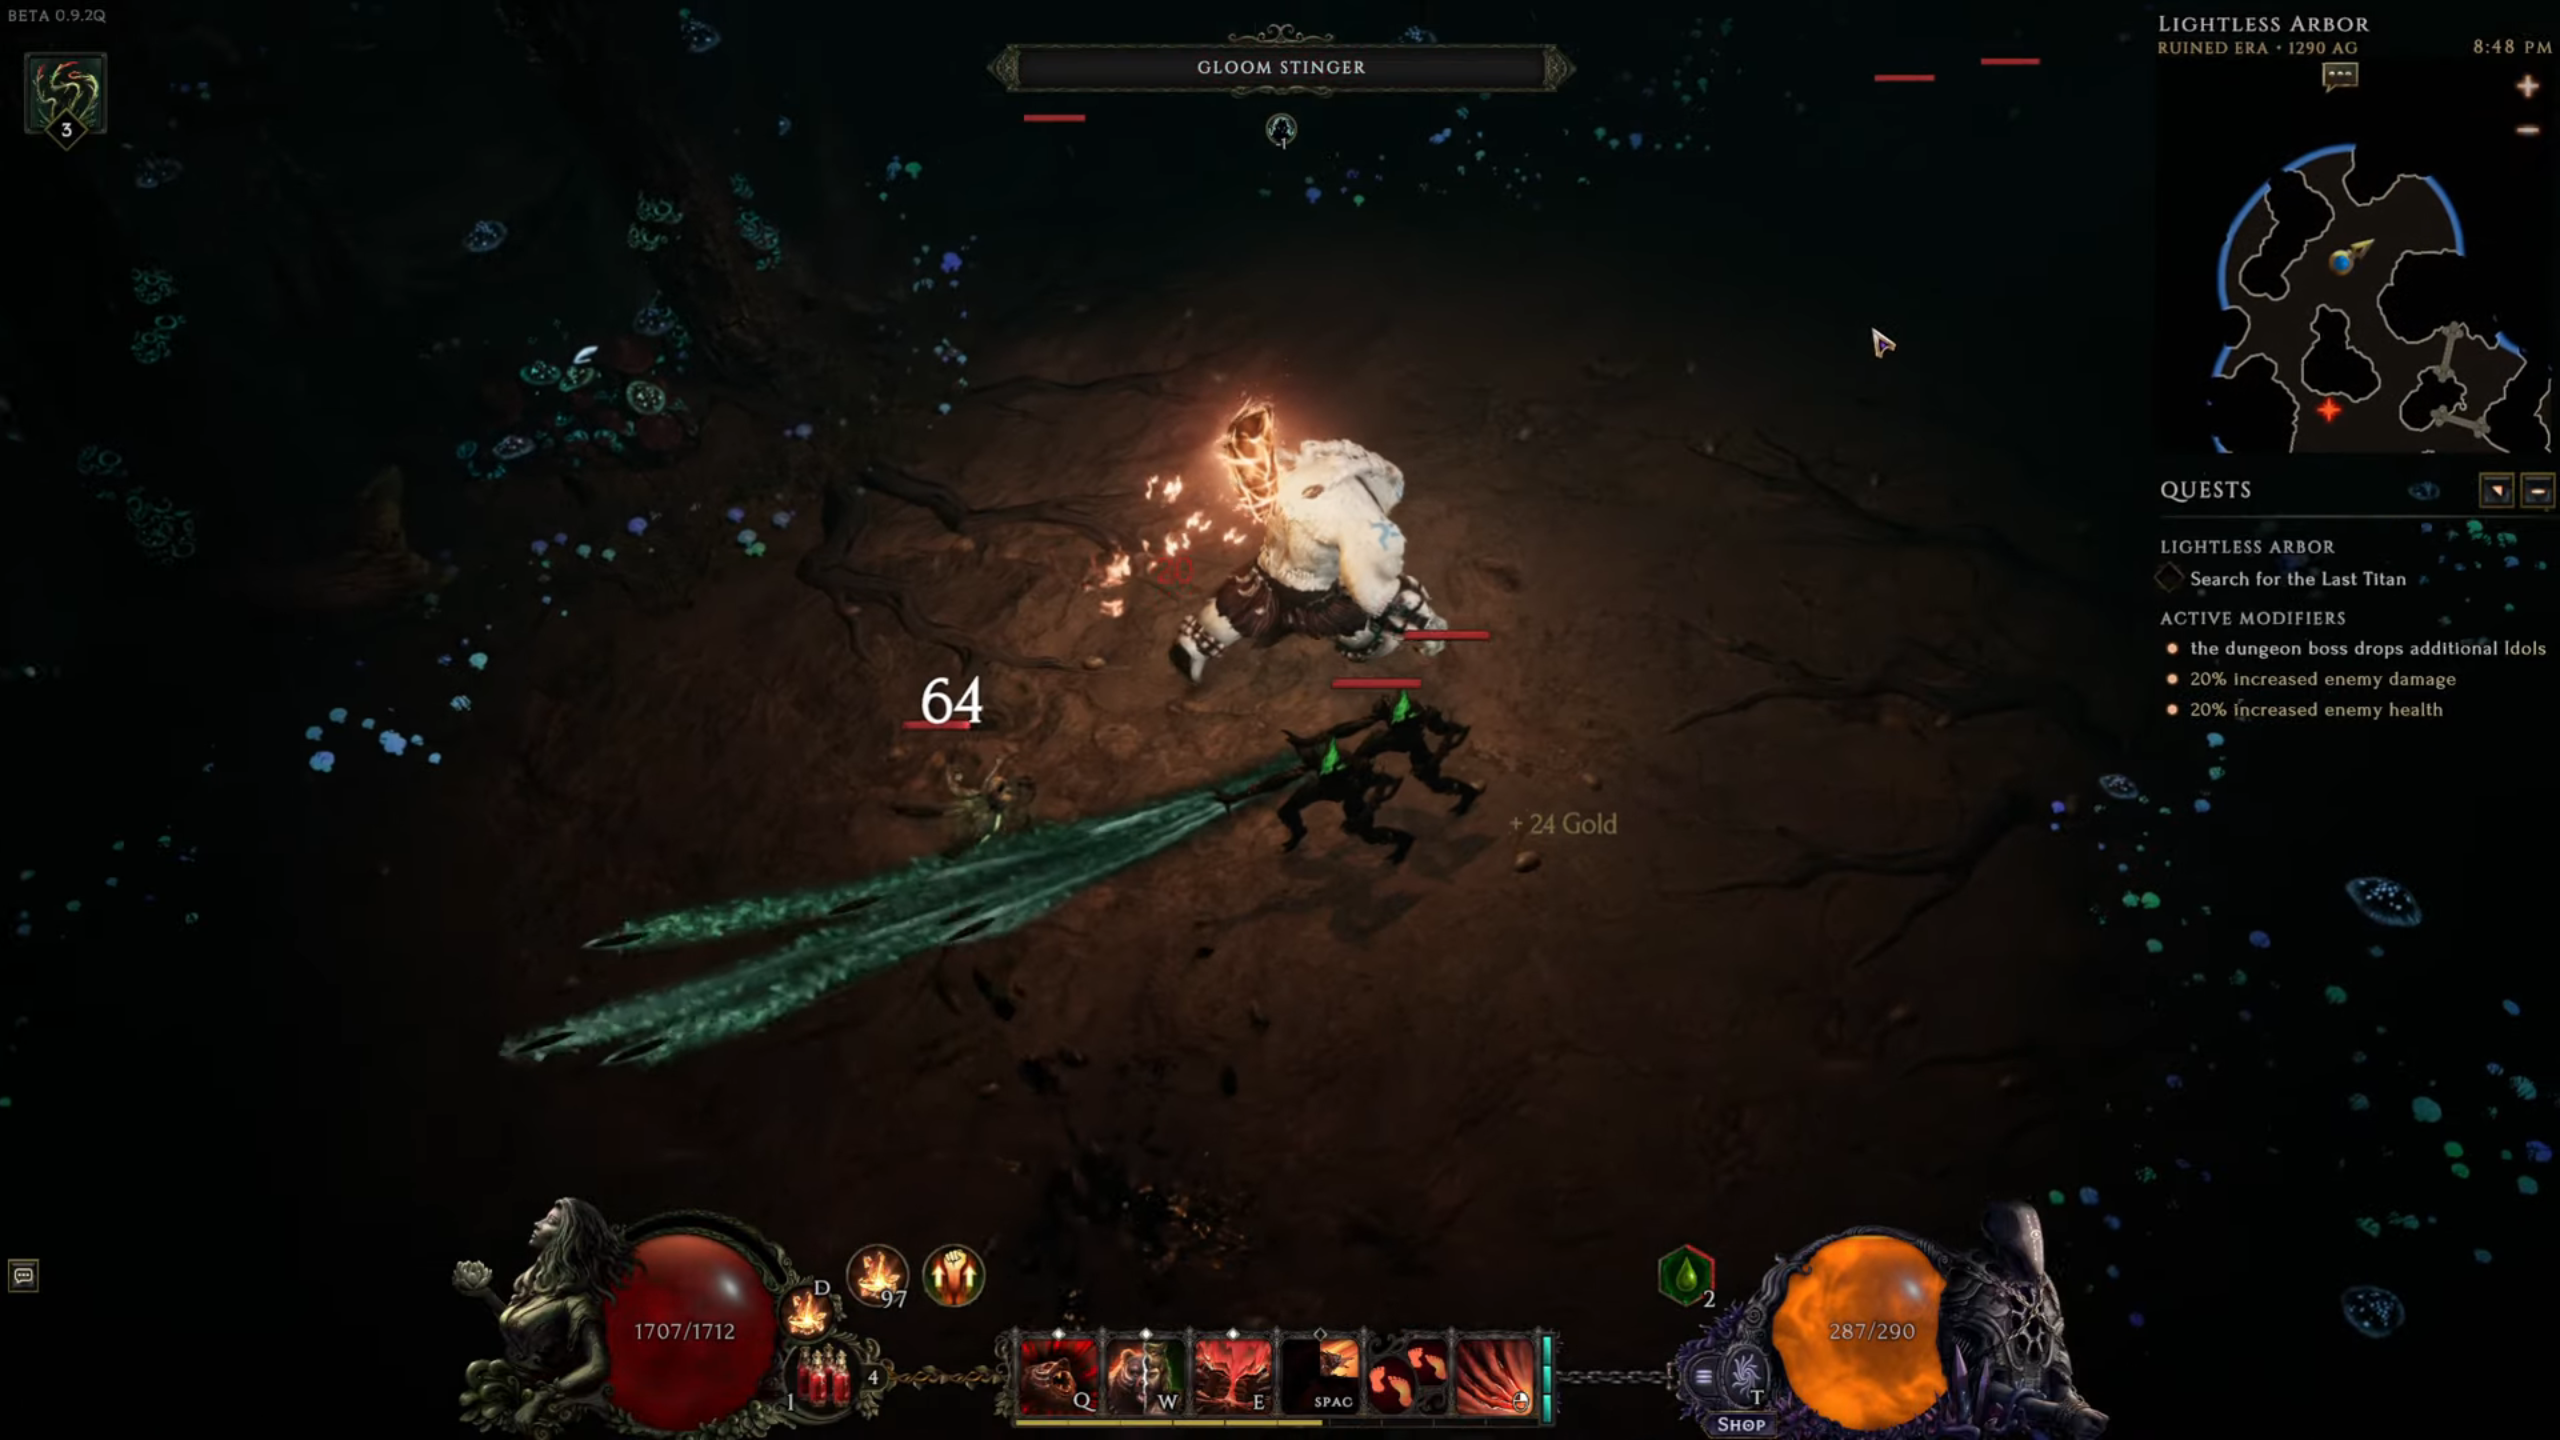
Boss Battle: The Mountain Beneath
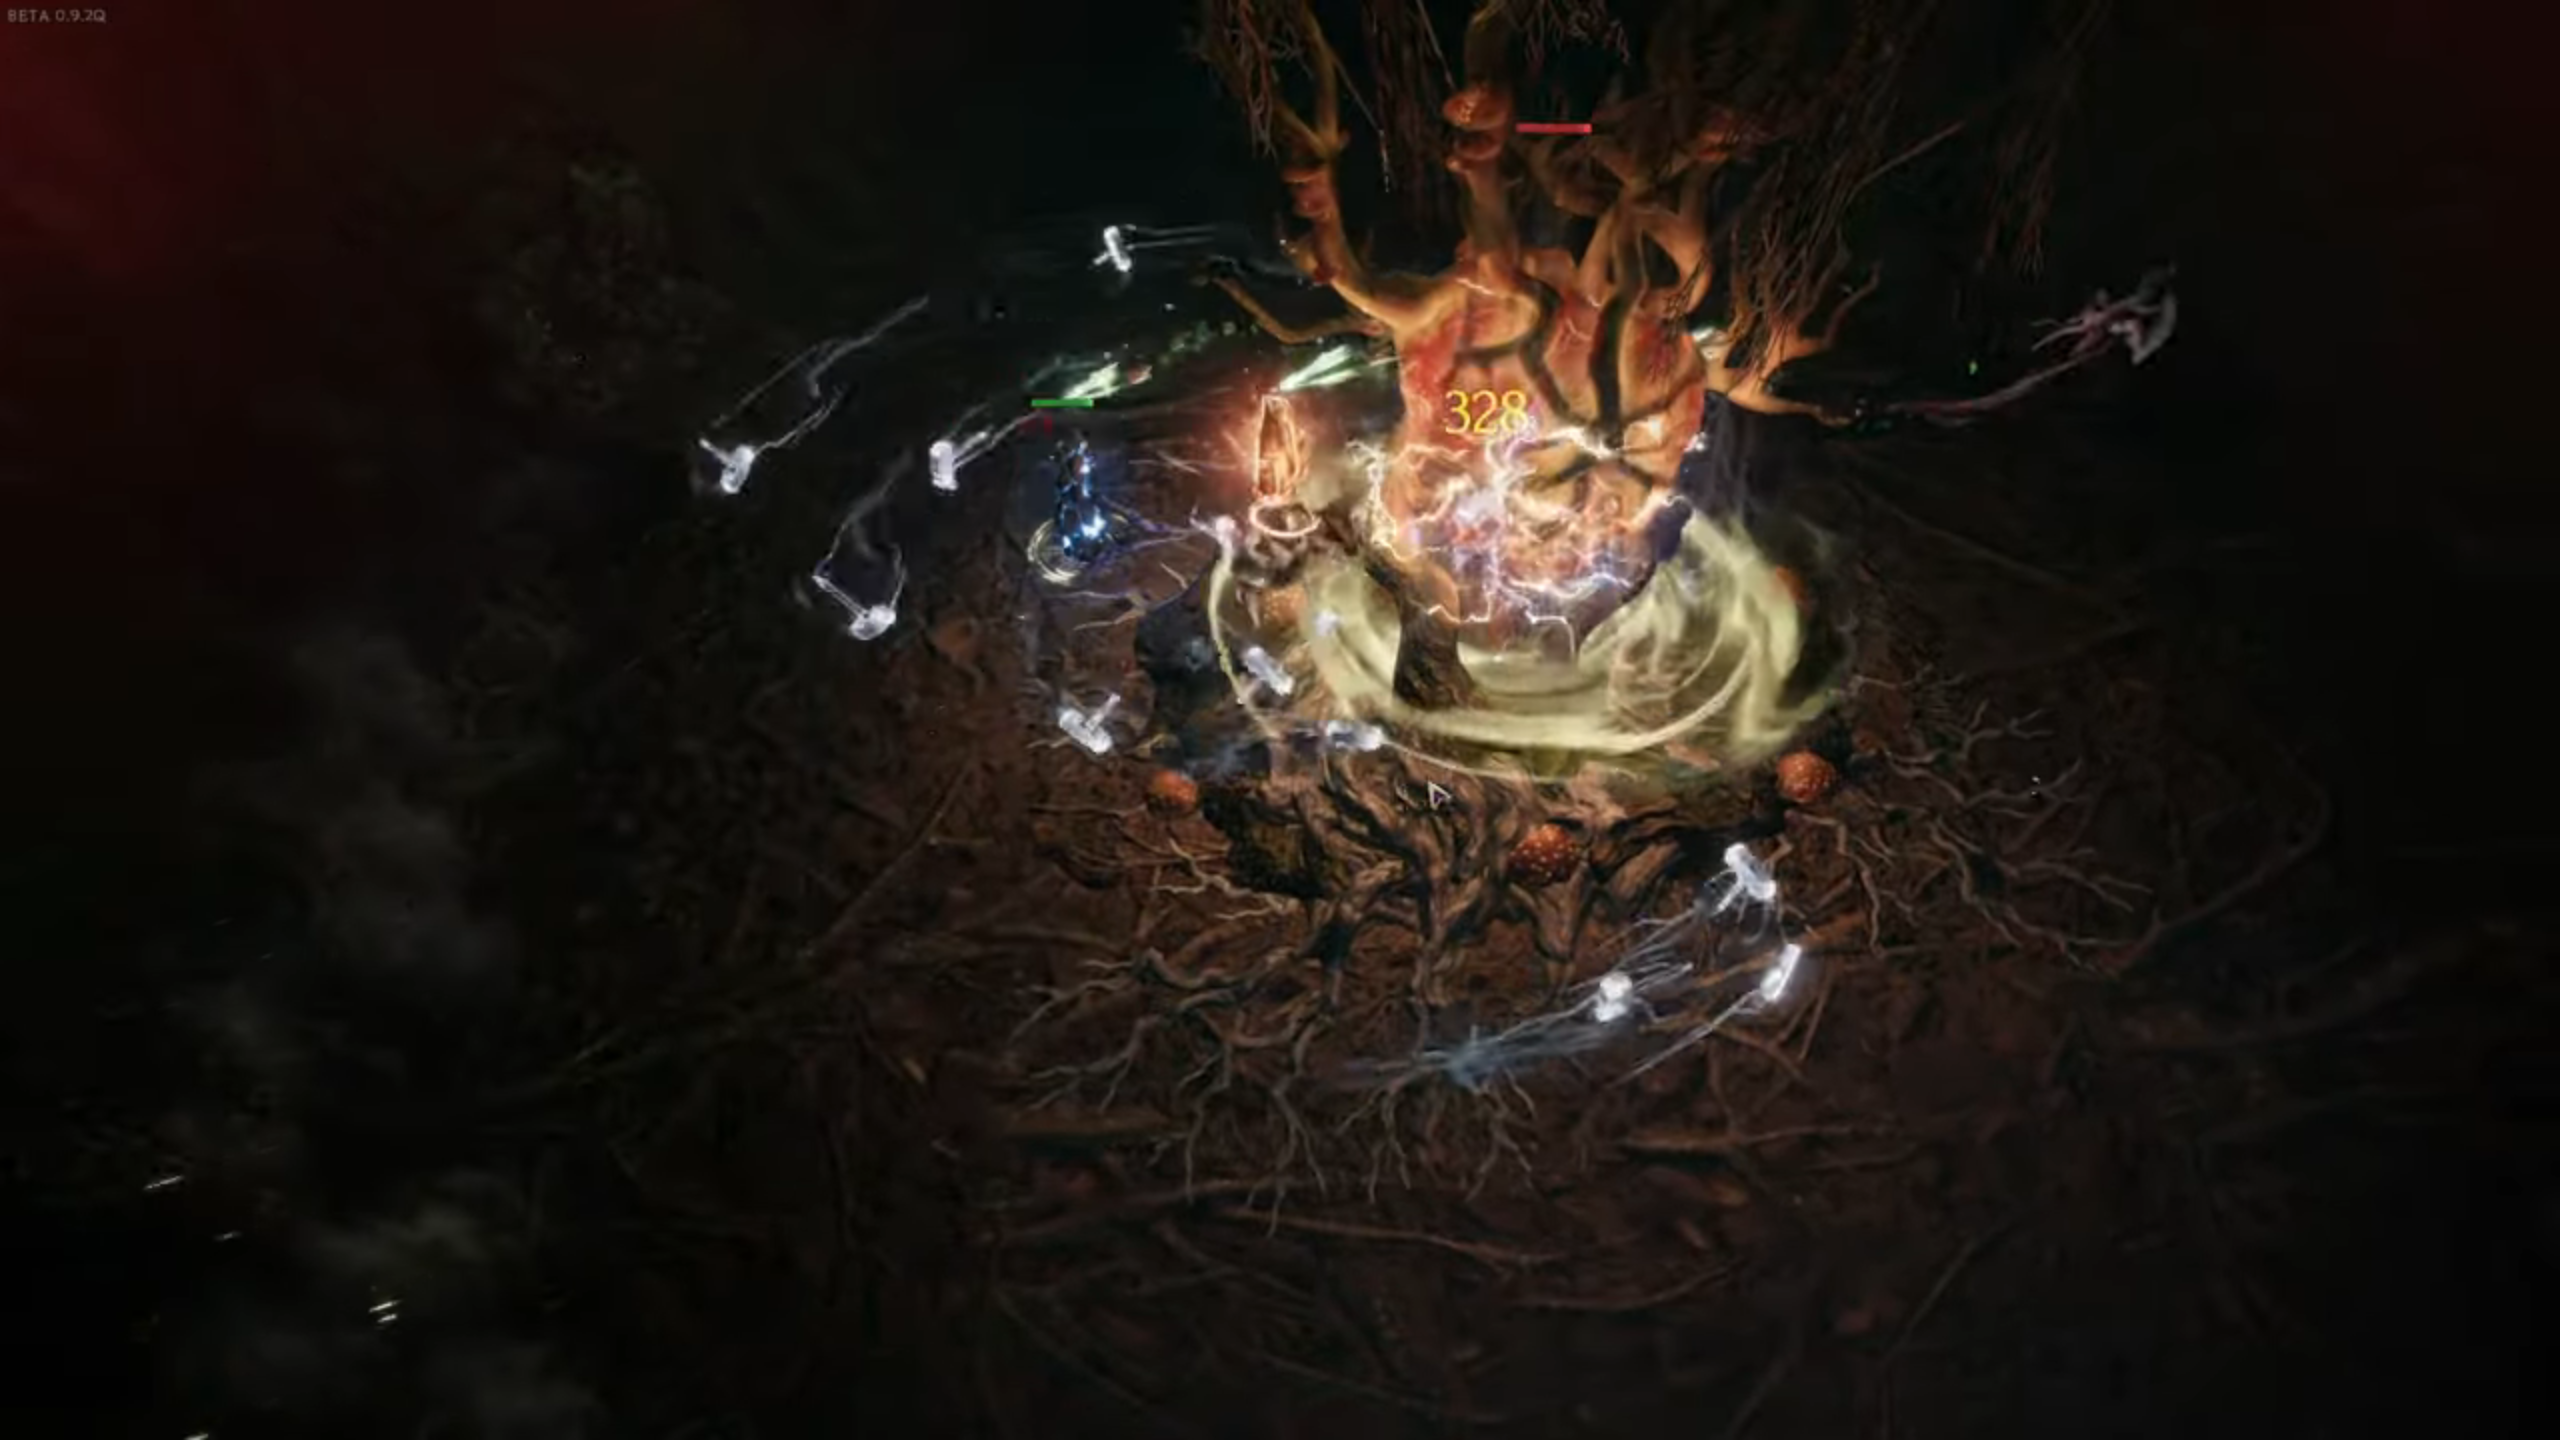
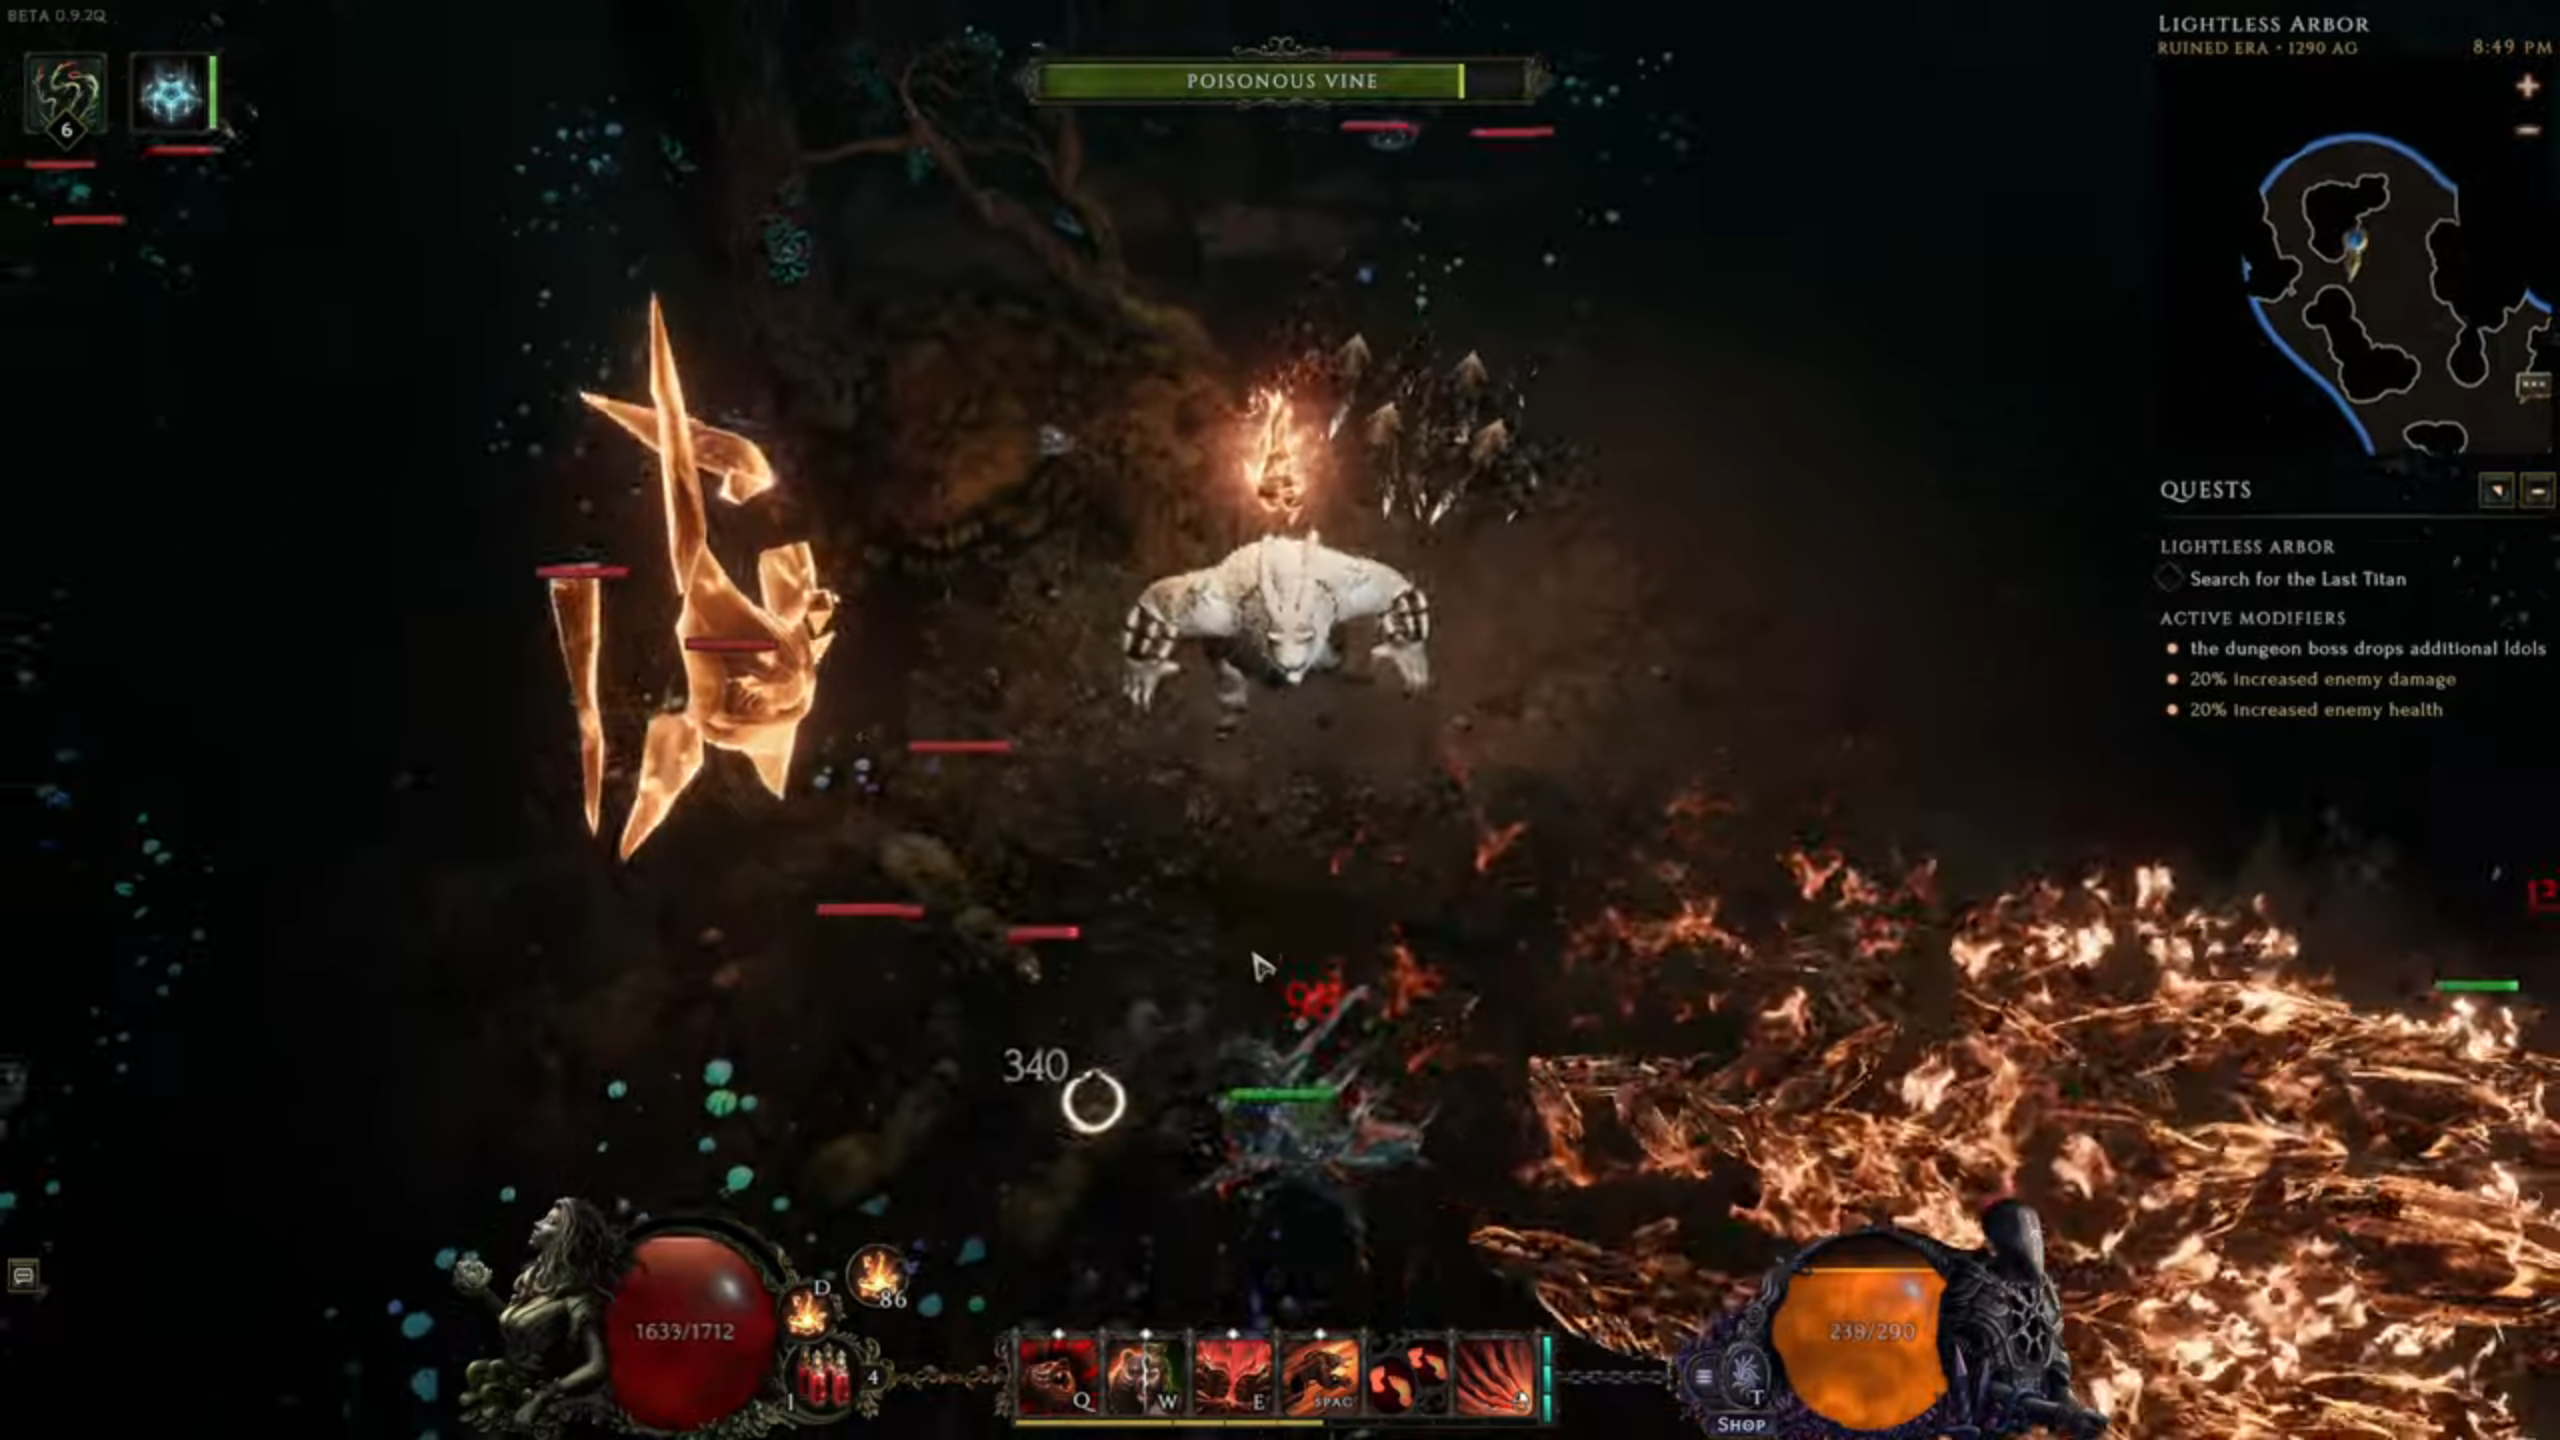
All great things come to an end, and in this dungeon, it will when you come face to face with the mighty boss: The Mountain Beneath. This boss battle consists of two phases. Taking notes of the mechanics and the patterns is a must to make your life easier.
The first phase is fairly easy to complete. During this phase, the boss will be immune to any sort of damage you try and inflict on him. You will find a root wall on both sides of your screen. After destroying these, you have to place your burning amber and light the pyre behind it. Once you light the fire, the burning amber will return, prompting you to repeat this action on the other side. However, you may occasionally have to call the amber back to aid you in your fight with the minions he spawns to kill you. Once both sides are on fire, the boss will collapse, in turn ending the first phase of this battle. An entrance opens up within the boss’s mouth, prompting you to ‘Enter The Mountain’.
In this phase, you will have to destroy the titan heart. But this is not easy with all the enemies spawning around, making your life more difficult. There are a total of five patterns to take note of. Five different types of abilities will try to wave you off, and understanding the rhythm and timings of these is crucial. Keeping as close as you can to the titan heart will help you avoid most of the attacks.
Rewards for Completing the Dungeon
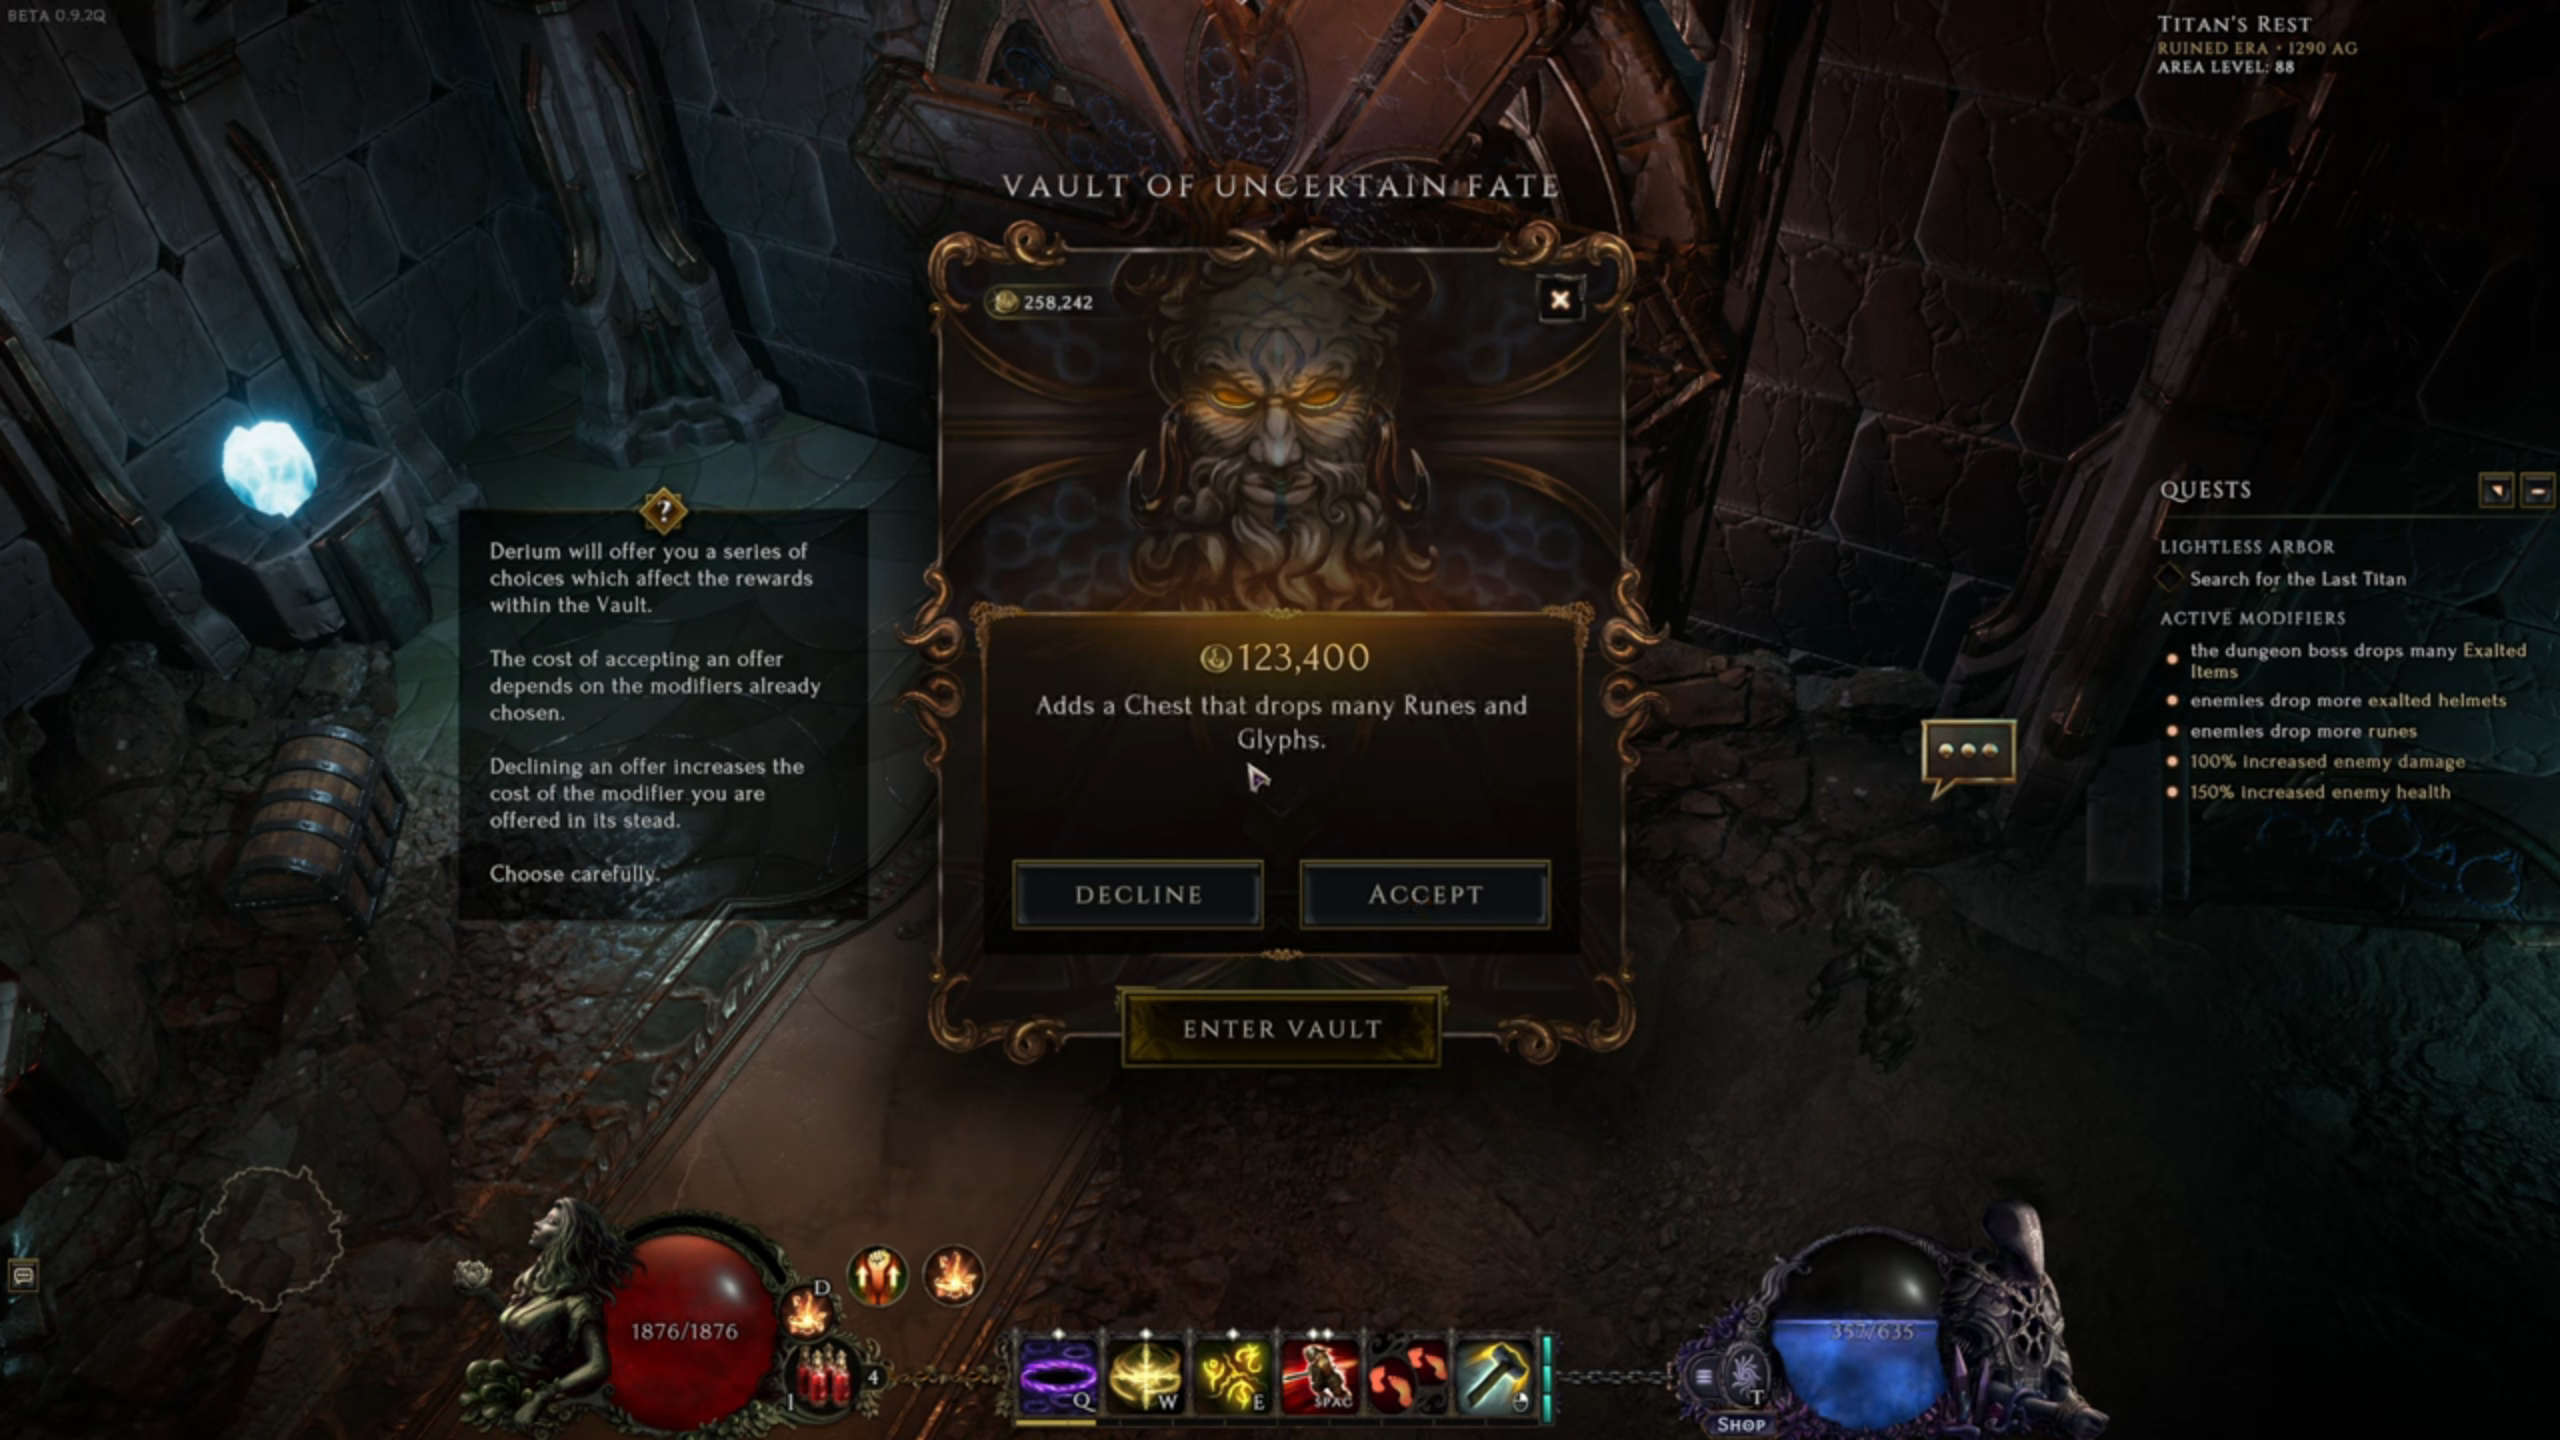
The reward for completing the boss will be behind the ‘Vault of Uncertain Fate’. Depending on the amount of gold you are willing to sink. You will be given a series of various modifiers, each having an adverse effect on the loot you can receive from the vault. It is up to you to decide which option is good and which you don’t require. The different options are:
| Modifier Description | Rarity |
| Adds a chest that drops a rare item, an exalted item, a unique item, and a set item. | Common |
| Adds a Chest that drops a rare item, an exalted item, a unique item, and a set item. | Common |
| Adds a Chest that drops a rare weapon, an exalted weapon, and a unique weapon. | Common |
| Adds a Chest that drops an exalted helmet, exalted body armour, exalted gloves, and exalted boots. | Common |
| Adds a Chest that drops many Affix Shards. | Common |
| Adds a Chest that drops many Runes and Glyphs. | Common |
| Adds a Chest that drops several exalted helmets. | Common |
| Adds a Chest that drops several exalted items. | Common |
| Adds a Chest that drops several Idols. | Common |
| Adds a Lightless Arbor Key to a Random Chest | Common |
| Adds a Set Item to a Random Chest | Common |
| Adds a Unique Item to a Random Chest | Common |
| Adds a Unique Weapon to a Random Chest | Common |
| Adds additional Exalted Relic to All Chests | Common |
| Adds an additional Exalted Item to All Chests | Common |
| Adds an additional Glyph of Chaos to All Chests | Common |
| Adds an idol to Every Chest | Common |
| Adds many Glyphs to a Random Chest | Common |
| Adds many Runes to a Random Chest | Common |
| Adds several Exalted Weapons to a Random Chest | Common |
| Adds several pieces of Exalted Jewellery to a Random Chest | Common |
| All chests drop 15% more items (multiplicative with other modifiers) | Common |
| All items from Every Chest have a 20% chance to be duplicated. This is additive with other item duplication effects. Duplication chance above 100% can result in even more copies. | Rare |
| All chests drop 20% more exalted items (multiplicative with other modifiers) | Rare |
| All chests drop 30% more items (multiplicative with other modifiers) | Rare |
| All items from Every Chest have a 50% chance to be duplicated. This is additive with other item duplication effects. Duplication chance above 100% can result in even more copies. | Rare |
| Duplicates all items from a Random Chest This is additive with other item duplication effects | Rare |
| Duplicates all items from a Random Chest. This is additive with other item duplication effects | Rare |
| Duplicates all unique items from every Chest. This is additive with other item duplication effects | Rare |
| Duplicates every chest. This occurs after modifiers that apply to a random chest have already been applied | Rare |
| Triplicates every chest. This occurs after modifiers that apply to a random chest have already been applied | Rare |
| Adds a Unique Item to Every Chest | Rare |
| Adds an additional Glyph of Despair to All Chests | Rare |
| Adds an additional Rune of Ascendance to All Chests | Rare |
| Adds an additional Set Item to All Chests | Rare |
A quick tip would be to add modifiers, which would add more chests to the vault. Happy exploring, player.
Looking For More?
Thank you for reading the article. We provide the latest news and create guides for Baldur’s Gate 3, Starfield, ARK Survival Ascended, and more. Also, watch Deltia play games on Twitch or visit his YouTube channel!

![Death Stranding 2 Ending Explained [Source: Kojima Productions/Deltias Gaming]](https://static.deltiasgaming.com/2025/06/Screenshot-5507.png)