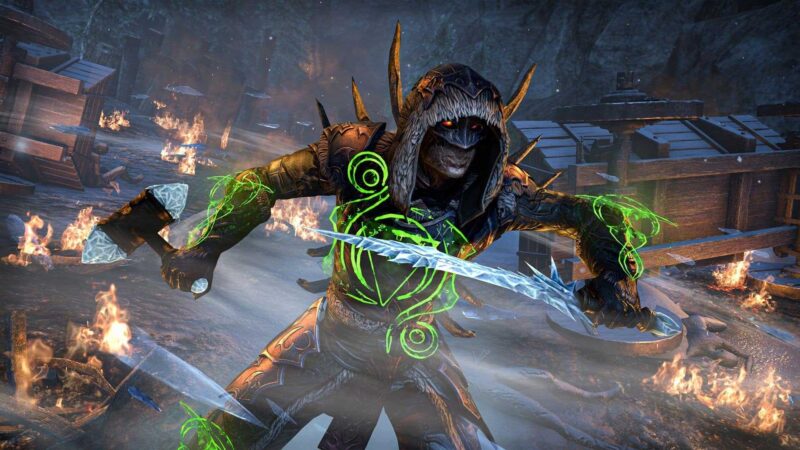
Are you finding the Templar leveling experience a little lack luster? Or you’ve just reached Veteran Rank content and need something to plow through endless mobs. Then The Harvester is the build for you ! Specifically designed to solo anything, from Dolmens, Delves, World Bosses, and Questing. This is the ultimate ESO Templar Leveling Build!
UPDATED BUILD
CLICK HERE
Alternative Magicka Build here
Table of Content
Build Objective

This build is meant for soloing, as in soloing ANYTHING. I love the Templar for it’s stamina regeneration, self-heals, and shield of destruction. The Harvester focuses on that trinity to keep resources up, dropping ultimate for health, and smashing enemies into dust. The more enemies you’re fighting, the stronger you become. You’ll be Carving enemies to generate massive ultimate then harvesting their dead corpses for stamina and health. This is an absolute blast to play and I feel powerful every time I logon.
The character I’m using is Big-Jake, an Imperial race Templar. Usually when I’m making a build, I read every single class ability and morph and design around one or more class skills. In this case, it was Blazing Shield and Repentance. Blazing Shield holds a shield and does damage based on the amount of health you have, thus Imperial passives seemed a logical choice. Plus extra stamina with a two-hander and I feel this is a awesome race choice though a Redguard would have been great as well.
Second is Repentance which gives back stamina and health from nearby dead enemies. Additionally, you’ll have near zero dependency on magicka, and use the Vampire ultimate for self-healing. You’re generally charging into combat, generating ultimate with two abilities, then dropping bats and watching everything die. Once they’re dead, pop Repentance to harvest their bodies and off to the next group. If you watch my video, I’ll be taking on a Craglorn Anomaly at VR 5. Yes, this build can literally solo an VR 11 boss meant for 4+ people. Like every build, it has some pros and cons and here’s my list:
+ Tanky – Nearly impossible to kill
+ Amazing AoE – In your face style explosions
+ Ultimate Generation – I’ll nearly always have an ultimate up
– Low Sustained DPS – Made for survival not sustainment
– Need Corpses – The fewer the mobs, the harder it is to survive
Skills
 Bar one is your primary bar you’ll be spending most of the time wielding. The general concept here is to leap in, getting your defensive shield up, and Carve their faces off. Once the shield pops and your done carving, swap to bar two for a Devouring Swarm (AKA bats) to finish off the enemies. Now Repentance to get health and stamina back then off to the next group. It’s really that simple.
Bar two is more for sustained fights or single target encounters. You’ll start off with a Focused Aim, Venom Arrow then lock the enemy down with Blazing Spear or knock them back with Draining Shot. The whole idea here is to not let anyone reach you. And if they do, swap back to bar one, pop Blazing Shield and you’ll be safe. So let’s discuss each skill in detail.
Bar 1 | Two-Handed Greatsword
- Critical Rush – The standard leap or gap-closer. It can also hit like a truck and if you practice backing up, can constantly be used. Consider this a good opener.
- Blazing Shield – This thing is amazing. It last for six seconds and is based off my total health. I’ve seen this hit up to six enemies for 700 damage at VR 5. Essentially, if you have magicka up, you should ALWAYS have a shield up. This absorbs damage and puts it right back in the enemies faces. Plus it generates a huge amount of ultimate if attacking six targets.
- Carve – My bread and butter stamina dump that generates three additional ultimate per enemy hit. If fighting 6+ mobs, literally one Carve and Blazing Shield will generate enough ultimate for bats. With this combo rolling, it’s seriously hard to kill me. When in doubt Carve.
- Repentance – The whole sustainment stamina regeneration comes from Repentance hence the name The Harvester. With passive health and stamina generation this thing is already powerful. Now throw in that this ability has zero cost and heals you and the group. Repentance is a game changer. Even if there’s one corpse around use it. So there’s only one ability on this bar that requires magicka, thus it’ll be much easier to keep up Blazing Shield with little to no magicka regeneration.
- Executioner – I firmly believe each build should have a finisher and Executioner is perfect for this build. Not only does it work around 30% but it makes Carve a semi finisher as well. The only problem with it is the range so you’ll need to be very close. But with Blazing Shield up, that’s okay for us.
- Flawless Dawnbreaker (ultimate) – Passively increasing you’re weapon damage by 13% once morphed, this is literally a must have for any weapon based damage dealer. I rarely use the ultimate unless I “fat finger,” so make sure to swap back to bar two and drop bats.
Bar 2 | Bow
- Blazing Spear – This morph allows for a guaranteed stun on one target which is exactly what we need. You’ll be alternating between Spear and Draining Shot for either a knock back or a stun. This will allow you’re resources to stay up and keep one target off of you for at least a couple of minutes. In my video, I’ll show how this is done fight two VR 5 world boss trolls kiting them and stun locking them both.
- Venom Arrow – I love this ability for it’s DoT and ranged interrupt. Since this bar is designed for range and kiting, we need something that can stop casters and this is perfect. I wouldn’t “spam” this over and over for DPS, save that for Draining Shot.
- Draining Shot – Here’s our strong knock back and stamina DPS dump. After you weave in a light attack + draining shot, you’ll do a decent amount of damage and keep targets at a distance.
- Focused Aim – My go-to opener for bar two that hits like a monster truck. I like this morph because it increases bow damage and marks the target if in a group. Keep the mark up by knocking back twice and firing a snipe at distance.
- Honor the Dead – A curious choice but I have this up in case a massive group get through my Blazing Spear, I don’t have an ultimate up, and I’m below 50% health. This is my last resort heal.
- Devouring Swarm (ultimate) – Yes it’s cheap, cheesy, and corny but bats is so darn good. For only 150 ultimate I can solo anything and not die for five seconds. Combine this with Carve and Blazing Shield it’s almost always up. I consider this a must have ability.
Now that we’ve talked about the abilities, let’s look at gear optimization to make the build shine!
Gear
Goal is = Health 3000 > Weapon Damage Soft Cap 180 > Stamina
Armor Weight – For this build, I use all medium armor since I have little to no reason for magicka. Plus I want near soft cap for stamina regeneration to keep up my DPS. Additionally, the more weapon crit, the better. I tried my usual 5 medium 2 light and it just didn’t seem nearly as effective as straight 7 medium.
Traits – This is my usual setup on traits. For large slots, head/chest/legs, I go Infused to get maximum result from my glyph. Everything else go with Divines for increased critical chance.
Set Bonuses – Hunding’s Rage is my first five piece set bonus. It’s great for stamina regeneration and helps my character reach the soft cap for weapon damage without relying on potions. The second set I use is Ashen Grip for similar reasons. Additionally, Ashen has some added health which allows me to reach my critical 3000 without wasting a glyph on my gear for health.
Attributes – I go with all 49 points into health. Since my build centers on Blazing Shield, I really need max health. This combined with my race passives and Ashen Grip helps me reach that number.
Glyphs – Pretty basic here, once your each 3000 go all stamina since we don’t use tons of magicka. For weapons I kept it simple using flame damage. I did go with stamina recovery on my jewelry, but you could go a different route if you modified this build. I personally like the stamina always up.
Jewelry – Since I’m a cheesy Vampire, I must have at least one jewelry flame resist on. The rest, I use stamina based rings and stamina recovery.
Mundus Stone – I like the Thief Mundus Stone on this guy even though I have a guaranteed critical with Rush. If you’re not an Imperial race, you could use this to get your health near the 3000 mark.
Food – I use the tri-stat food like usual and the standard set of potions at VR 5 (weapon power/crit/stamina and health/magicka/stamina recovery).
Summary
And that’s the build! I know some like the written portion better, but the video posted above will really show how this all comes together. Moreover, this took a lot of time to flesh out the perfect synergy between abilities, resources and gear. Most of these builds take 100 hours or more to complete and I’m really happy with the end result.
But what do you think about the build design? Please let me some comments and I can’t wait to continue leveling my Templar!
 Reddit
 Email
Email


Comments are closed.