 Facebook
 Reddit
 Email
Email
This guide focuses on the best ESO Solo Templar Magicka Build for PvE, skills, gear, champion points, and more!

This build has been updated for the Updated 42, the Gold Road Chapter of the Elder Scrolls Online (ESO).
Gameplay for ESO Solo Templar Magicka Build PvE (Magplar)
Magplar feels incredible in solo content, and they are probably the best class to start with if you are new to solo content. The ease of play, strong class heals, and buffs make this class feel amazing in content right now. This was true in the last patch, and it’s even more true in this patch with the status effect buffs.
Templar Class Pros
- Beam to Win: Radiant Destruction is the strongest execute in the game. Opting for Glory to heal you will make you practically unkillable once the boss is under 44% health.
- High-Class Healing: Puncturing Sweeps main spammable pumps out a ton of healing.
- Simple Playstyle: the Templar’s kit and rotation are relatively easy to play.
Templar Class Cons
- Weak Class Ultimates: The Templar ults need some love; they don’t do as much damage as we’d like.
- Shorter AOE Damage: The Plar’s AOE, while strong when it hits, doesn’t extend as far as other classes.
- Tight Bar Space: The Plar needs an extra bar slot to fit in all of the great skills it has access to.
Overall, Templars feel very strong in solo content this patch. With the strongest execute in the game that also heals you, it’s much more difficult to die on a Templar than other classes. Our build focuses on sustainability, allowing you to spam Puncturing Sweeps to your heart’s content endlessly.
ESO Solo Templar Magicka Build for PvE Playstyle
Power of the Light is one of the primary skills you need to manage for the Solo Templar Magicka build. If you cast this skill every 6 skill casts, you’ll apply it right as it’s blowing up. It’s incredibly important to not cast this skill on any other targets or cast it early, as it can only last on one target, and half of its damage comes from a second “pop” as the skill expires.
This skill is the most consistent cast in the build. The rest of the skills, other than your spammable, are Damage Over Time (DoTs). DoTs are great for extended fights because in one global cooldown, you do more damage over the duration of the DoT than you would have with a single spammable cast. That means you’re going to want to get your DoTs up on a high-health target, then reapply them only when they’re expiring and fill the gaps with more spammables.
Radiant Glory is the other skill you need to be mindful of. It’s an execute, meaning its damage scales the lower the target’s health gets. At a high level, execute skills become so strong that the lower the enemy’s health, the fewer DoTs you maintain because it does so much damage. Magicka Templars can also run Radiant Oppression for higher damage, but you do lose out on the healing. You want to start casting Radiant Glory instead of your spammable at 44% boss health in this build, dropping your DoTs off until you only spam this execute under 10%.
Sustain
This build shouldn’t have any trouble staying high health with the use of Puncturing Sweeps. For solo content all you need to do is make sure you’re always casting something, and your passive healing should pull you through most encounters.
If you run out of resources, a heavy attack with your daggers restores stamina, while heavy attacking with your staff restores magicka. You can also always run food with higher recovery on it, but you shouldn’t have very much trouble sustaining these skills.
ESO Solo Templar Magicka Build for PvE Features and Mechanics
Below are some of the features found using the ESO Solo Templar Magicka Build for PvE in the Elder Scrolls Online:
- Class – Templar
- Weapon One – Dual Wield Staff
- Weapon Two – Flame
- Armor Types – 2 light, 5 medium
- Race – High Elf
- Armor Set 1 – Perfected Whorl of the Depths
- Armor Set 2 – Deadly Strike
- Monster Helm – Valkyn Skoria
- Mythic – Velothi Ur-Mage’s Amulet
- Attributes – 64 Magicka
- Mundus Stone – Thief
- Best Grimoires – Ulfsild’s Contingency
Related:
Skills
Front Bar – Dual Wield
Front Bar Weapon Style Choices:
- Dual Wield – better for stamina heavy builds in medium armor
- Flame Staff – good for single damage
- Lighting Staff – good resource sustain
Solar Barrage (Morph of Solar Flare | Skill Line : Dawn’s Wrath) – Great aoe DoT that follows you, and increases damage done with class abilities by 5%.
Power of the Light (Morph of Backlash | Skill Line : Dawn’s Wrath) – Powerful single target bursting tool, stamina morph debuffs armor.
Deadly Cloak (Morph of Blade Cloak | Skill Line : Dual Wield) – used for area damage reduction, and area damage in melee range.
Puncturing Sweep (Morph of Puncturing Strikes | Skill Line : Aedric Spear) – Powerful main spammable that hits multiple targets and heals you for percentage done.
Radiant Glory (Morph of Radiant Destruction | Skill Line : Dawn’s Wrath) – An executable ability you want to use when the enemy is in execute range roughly 35% health replaces Sweeps as main spammable. The strength of this ability is how hard it hits single target. You still need to light attack weave in between applying it. This morph heals you though you do a little less damage.
Flawless Dawnbreaker (Morph of Dawnbreaker | Skill Line : Fighters Guild) – The performance of DB (Dawnbreaker) is very good now that it grants massive spell damage boost of 300 for 20 seconds. Not to mention added spell damage from slayer passive. This is a great ultimate to use on front bar that’s low cost. Crescent Sweeps is a good flex spot if you don’t have fighters guild.
Back Bar – Flame Staff
Back bar options:
- Lighting Staff – procs off balance and resource sustain
- Inferno Staff – good for single target
- Bow – good if you want to sustain more stamina and use Endless Hail
Ritual of Retribution (Morph of Cleansing Ritual | Skill Line : Restoring Light) – Massive area based damage that has long duration.
Degeneration (Morph of Entropy | Skill Line : Mages Guild) – Mage’s Guild DoT that provides Major Sorcery and Brutality.
Vampire’s Bane (Morph of Sun Fire | Skill Line : Dawn’s Wrath) – Strong long-duration DoT that provides Major Prophecy and Savagery.
Channeled Focus (Morph of Rune Focus | Skill Line : Restoring Light) – Armor buff and resource sustain for magicka.
Blockade of Fire (Morph of Wall of Elements | Skill Line : Destruction Staff) – Powerful back bar damage over time that is boosted by VMA staff.
Shooting Star (Morph of Meteor | Skill Line : Mages Guild) – Lost cost ultimate with return ultimate generation.
Scribing Skills & Grimoires
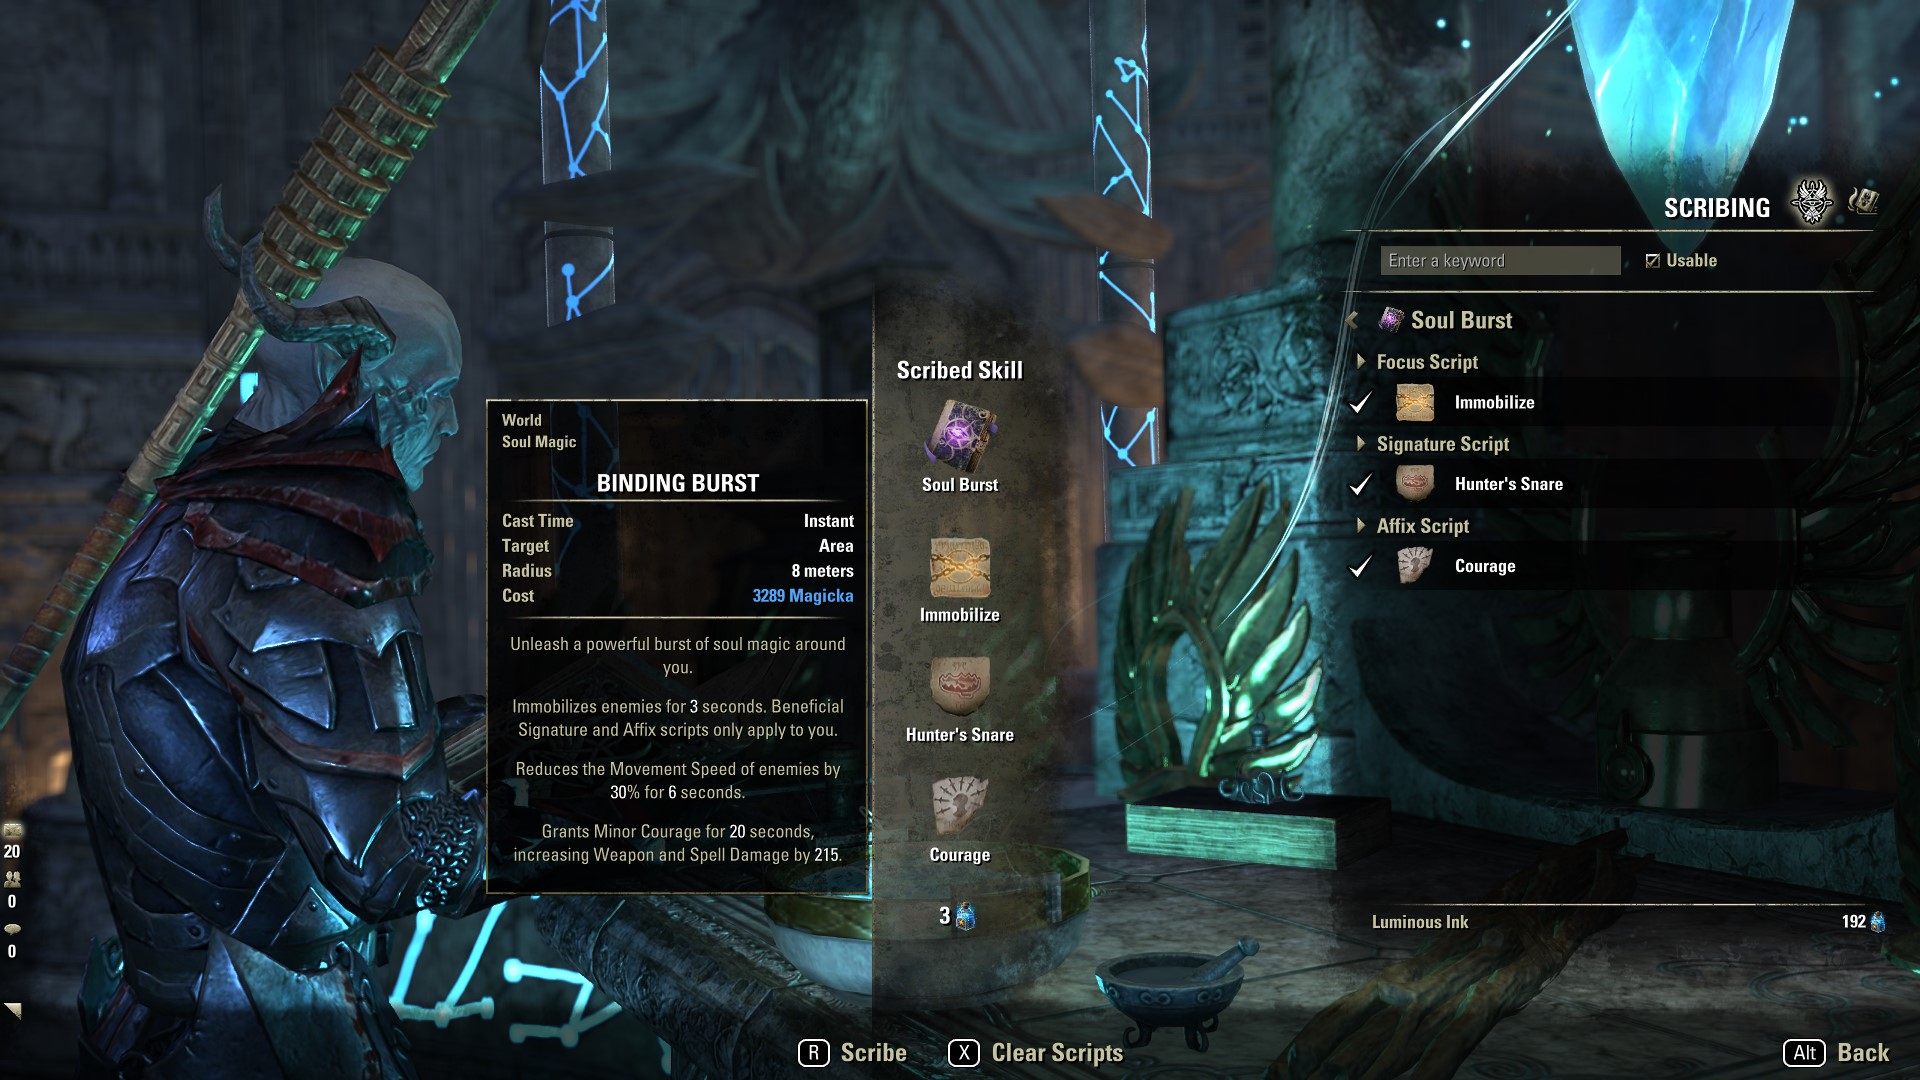
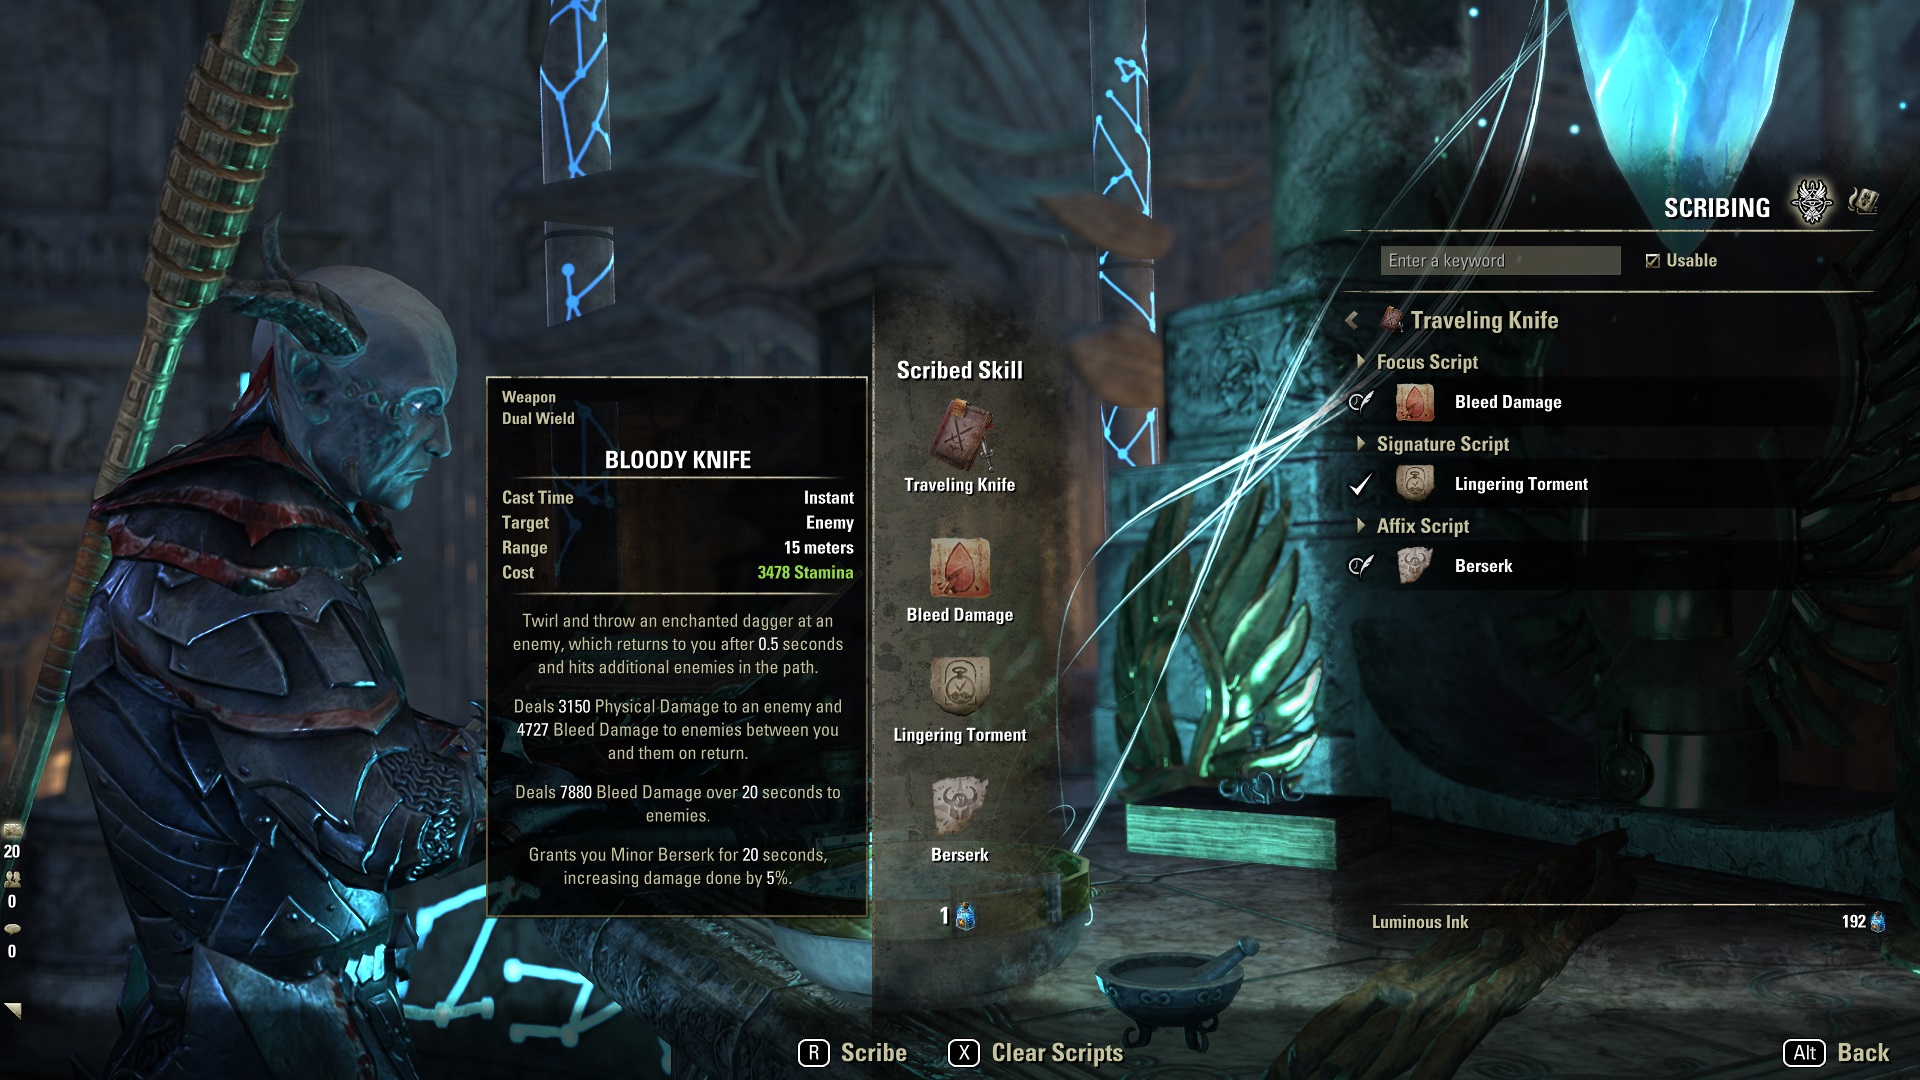
Ulfsild’s Contingency is the only Grimoire (skill) you might consider for a solo Magicka Templar PvE build. Contingency grants powerful area-based damage and buffs. It’s only really useful for aoe encounters, however, and your bar space is already so limited. Below are the suggested combination of Grimoires, focus, signature, and affix scripts:
- Ulfsild’s Contingency (Mage Guild) – Flame Damage (focus script), Lingering Torment (signature script), Resolve (Affix Script)
The Scribing System utilizes one of 11 new skills from the Gold Road Chapter called Grimoires. With Grimoires, you can customize spells via Scripts. The scribing feature requires the purchase of the Gold Road Chapter (sponsored link). To learn more about scribing, check out our full guide here.
Passives Skills
Consider taking all of the passives in the below skill trees to increase your builds performance without slotting any skills:
- Aedric Spear (class skill line)
- Dawn’s Wrath (class skill line)
- Restoring Light (class skill line)
- Light Armor
- Medium Armor
- Undaunted
- Fighters Guild
- Mages Guild
- Destructive Staff
- Dual Wield
- Psijic Order
- Racial
- Alliance War Support
- Alliance War Assault
- Crafting, Alchemy Medicinal Use
Gear – Best in Slot
Below gear setup is optimal for solo arenas and dungeons using the ESO Solo Templar Magicka Build:
| Slot | Type | Set | Trait | Glyph |
| Head | medium | Deadly Strike | Divines | Magicka |
| Shoulders | light | Valkyn Skoria | Divines | Magicka |
| Chest | medium | Deadly Strike | Divines | Magicka |
| Legs | medium | Deadly Strike | Divines | Magicka |
| Gloves | medium | Deadly Strike | Divines | Magicka |
| Boots | medium | Deadly Strike | Divines | Magicka |
| Belt | light | Perfected Whorl of the Depths | Divines | Magicka |
| Weapon One | Dagger | Perfected Whorl of the Depths | Nirnhoned | Poison |
| Secondary | Dagger | Perfected Whorl of the Depths | Charged | Flame |
| Weapon Two | Flame Staff | Perfected Crushing Wall | Infused | Spell Damage |
| Necklace | Mythic | Velothi Ur-Mage’s Amulet | Bloodthirsty | Spell Damage |
| Ring 1 | Perfected Whorl of the Depths | Bloodthirsty | Spell Damage | |
| Ring 2 | Perfected Whorl of the Depths | Bloodthirsty | Spell Damage |
While this is a magicka build, we use Medium Armor specifically to avoid the penetration cap 18,200 in Veteran content. If you use more than two light armor in content, you will likely spill over that 18.2k pen cap and have wasted stats. Thus, medium armor with specific gear sets will out perform light generally.
Monster Helms and Mythic
Valkyn Skoria: obtained in City of Ash II veteran. Gives a powerful one-piece bonus for penetration. Alternative: Slimecraw.
Velothi Ur-Mage’s Amulet: mythic item requiring the Antiquies system and Necrom Chapter. Requires five leads; find them here. Incredibly strong passive damage in the current meta.
FLEX OPTIONS (if you switch to monster setup, drop the amulet)
- Stormfist: always works, easy to obtain AoE DPS set.
- Zaan: great single target dps and easy to proc.
- Iceheart: is great for survivability.
- Ring of the Pale Order: this gives great healing for doing damage and allows you to focus on pure damage.
- Mora’s Whisper: set and forget high critical mythic but requires a collection of Mages Guild books.
Gear Sets
Perfected Whorl of the Depths: obtained in Veteran Dreadsail Reef trial DLC High Isle. It’s one of the hardest-hitting proc sets in the game.
Deadly Strike: These were obtained in Cyrodiil, Bruma Elite Gear Vendor. Incredible damage with damage over time and spammable execute skills.
Perfected Crushing Wall: from Veteran Maelstrom Arena in Orsinium. Increase your overall DPS due to the ability of the wall of elements and more damage.
FLEX OPTIONS
- Pillar of Nirn: medium armor proc set geared towards single target damage.
- Arms of Relequen: highest single target dps set in the game. Just make sure you hit your light attacks.
- Order’s Wrath: best overall crafted option for great damage
- Ansuul’s Torment: great set-and-forget trial dps set.
- Perfected Merciless Charge: must change out Unstable Blockade for Stampede, good damage but requires melee skills.
Gear – Secondary
Meant for someone who’s familiar with the game and wants strong solo build without mythics or trials gear.
| Slot | Type | Set | Trait | Glyph |
| Head | Medium | Nerien’eth | Divines | Magicka |
| Shoulders | light | Nerien’eth | Divines | Magicka |
| Chest | Medium | Order’s Wrath | Divines | Magicka |
| Legs | Medium | Order’s Wrath | Divines | Magicka |
| Gloves | light | Order’s Wrath | Divines | Magicka |
| Boots | light | Order’s Wrath | Divines | Magicka |
| Belt | light | Order’s Wrath | Divines | Magicka |
| Weapon One | Daggers | Deadly Strike | Nirn > Precise | Poison |
| Secondary | Daggers | Deadly Strike | Charged | Flame |
| Weapon Two | Inferno Staff | Perfected Crushing Wall | Infused | Berserker Enchant |
| Necklace | Deadly Strike | Infused | Spell Damage | |
| Ring 1 | Deadly Strike | Infused | Spell Damage | |
| Ring 2 | Deadly Strike | Infused | Spell Damage |
- Nerien’eth: Great base game monster helm. Obtained in Crypt of Hearts II base game dungeon.
- Order’s Wrath: Best overall crafted option for great damage.
- Deadly Strike: Gives a passive boost to Sweps. Obtained in Cyrodiil PvP Vendor.
- Perfected Crushing Wall: Adds damage to Wall of Elements. Obtained in Veteran Maelstrom Arena, Orsinium DLC.
Gear – Beginner
This setup is for someone who just started and doesn’t have access to Monsters, Mythics, and Trials gear.
| Slot | Type | Set | Trait | Glyph |
| Head | light | Withered Hand | Divine | Magicka |
| Shoulders | light | Withered Hand | Divine | Magicka |
| Chest | light | Mother’s Sorrow | Divine | Magicka |
| Legs | light | Mother’s Sorrow | Divine | Magicka |
| Gloves | light | Mother’s Sorrow | Divine | Magicka |
| Boots | light | Mother’s Sorrow | Divine | Magicka |
| Belt | light | Mother’s Sorrow | Divine | Magicka |
| Weapon One | Dagger | Willpower | Precise > Any | Flame |
| Secondary | Dagger | Willpower | Precise > Any | Poison |
| Weapon Two | Lighting Staff | Willpower | Infused > Charged | Berserker |
| Necklace | Withered Hand | Arcane | Magicka Recovery | |
| Ring 1 | Withered Hand | Arcane | Magicka Recovery | |
| Ring 2 | Withered Hand | Arcane | Spell Damage |
- Withered Hand: Gives great resource sustain. Obtained in Overland Alik’r Desert.
- Mother’s Sorrow: Gives great damage for a simple set. Obtained in Overland Deshaan.
- Willpower: Provides a lot of Magicka for two-piece. Obtained in Imperial City, base game dungeon.
Race
The best racial choice for the Magplar Solo PvE build is below:
- High Elf: Gain resource sustain passive, max magicka, and weapon and spell damage. The downside of High Elf is a lack of stamina or flame resistance.
- Dark Elf: Gain max magicka, stamina, and weapon and spell damage. The flame resistance is also helpful and considered the strongest overall PVE DPS race.
- Khajiit: This race gets recovery, max stats, and critical damage and healing. Consider the Khajiit a great option if you aren’t over the critical cap of 125%.
Attributes
The best choice is 64 magicka, which increases damage, healing, and shields.
Mundus Stone
The Thief is the best Mundus Stone for PvE Builds because it gives Increases Weapon and Spell Critical Strike a chance.
Champion Points
| Craft | Warfare | Fitness |
| Treasure Hunter | Fighting Finesse | Siphoning Spells |
| Liquid Efficiency | Deadly Aim | Boundless Vitality |
| Rationer | Master-at-Arms | Rejuvenation |
| Steed’s Blessing | Wrathful Strikes | Fortified |
Warfare Constellation Champion Points

Below is a step-by-step method for slotting your champion points in the Warfare tree (blue). We have used the minimum possible to reach four slottable selections, all maxed out. If you have more CP, consider taking more in the passives for optimal performance.
Below are recommended Warfare Champion Point selections for the Solo Templar Magicka Build for PvE:
- Precision 10
- Wrathful strikes (slottable) 50
- Fighting fineses(slottable) 50
- Extended might – sub constellation – piercing 10
- Masters at arms (slottable) 50
- Deadly aim (slottable) 50
This would be the bare minimum setup, spending 220 CP (660 total required). The next step is to max out passives that do not require a slottable but increase performance.
- Precision 10
- Piercing 10
- Tireless discipline 20
- Eldritch insight 20
- Blessed 20
- Quick recovery 20
- Flawless ritual 40
- War mage 30
- Battle mastery 40
- Mighty 30
- Elemental aegis 20
- Hardy 20
- Preparation 20
This would max out the Warfare tree with all active and passive champion points at 520 spent 1,560 total spent.
Fitness Constellation Champion Points

Below are recommended Fitness Champion Point selections for the Solo Templar Magicka Build for PvE:
- Fortified (slottable) 50
- Boundless vitality (slottable) 50
- Rejuvenation (slottable) 50
- Sprinter 10
- Winder chaser – sub constellation – hasty 8
- Hero’s Vigor 10
- Siphoning spells (slottable) 50
This would be the bare minimum setup, spending 228 CP (684 total required). The next step is to max out passives, that do not require a slottable but increase performance.
- Hero’s Vigor 10
- Tumbling 30
- Sprinter 10
- Defiance 20
- Hasty 8
- Tireless guardian 20
- Fortification 30
- Nimble 6
- Mystic tenacity 50
- Tempered soul 50
- Piercing gaze 30
- Savage defense 30
- Bashing brutality 20
This would max out the fitness tree with all active passive champion points at 542 cp spent 1,626 total spent
Craft Constellation Champion Points

Below are recommended Craft Champion Point selections for the Solo Templar Magicka Build for PvE:
- Steed’s blessing (slottable) – 50
- Breakfall 10
- Wanderer 15
- Steadfast 10
- Treasure hunter 50 (slottable)
- Master gatherer 15
- Gifted rider (slottable) 100
- War mount (slottable) 120
This would be the bare minimum setup, spending 370CP (1110 total required). The next step is to max out passives, that do not require a slottable but increase performance.
- Steadfast enchantment 40cp
- Breakfall 40 cp
- Wanderer 60
- Fortunes favor 10
- Rationer 10
- Friends in low places 25
- Out of sight 30
- Fleet of Phantom 40
- Soul’s Reservoir 33
- Gilded fingers 50
- Fortunes favor 40
- Inspiration boost 45
- Infamous 30
This would max out the crafting tree with all active passive champion points at 823 cp spent 2,469 total spent.
Consumables – ESO Solo Templar Magicka Build for PvE
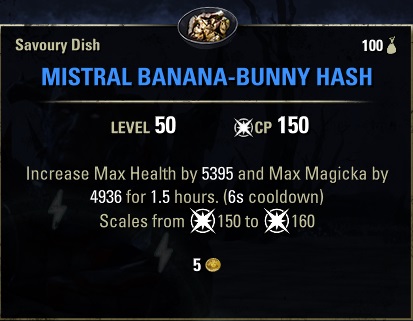
The best consumables for the Magplar Solo PvE build are Mistral Bananan-Bunny Hash food and Heroism potions. Mistral Bananan-Bunny Hash gives the most damage possible, though Clockwork Citrus Filet is good for resource sustain if you struggle. A third balanced option for more hybrid resource pools is Bewitched Sugar Skulls. The best potions if you have spell critical and spell power buff is Heriosm (the essence of magicka). Another option is Spell Power potions if you lack the buffs or tri-stat Essence of Health. Below are our recommended food and potion choices:
Mistral Bananan-Bunny Hash (best damage no sustain) – Increases max health and max magicka. Crafted with Provisioning ingredients of Small Game, Bananas, and Seasoning.
- Clockwork Citrus Filet – Increases max health, health recovery, max magicka, and magicka recovery. Crafted with Provisioning ingredients of Red Meat, Lemon, Frost Mirriam, and Perfect Roe.
- Witchmother’s Potent Brew – Increases max magicka, max health, and magicka recovery. Crafted with Provisioning ingredients of Nightshade, Bervez Juice, Rice, and Small Game.
- Bewitched Sugar Skulls (tri-max stats) – increases max health, stamina, magicka, and health recovery. Crafted with provisioning from ingredients of Scrib Jelly, Flour, Columbine, Bervez Juice, and Honey.
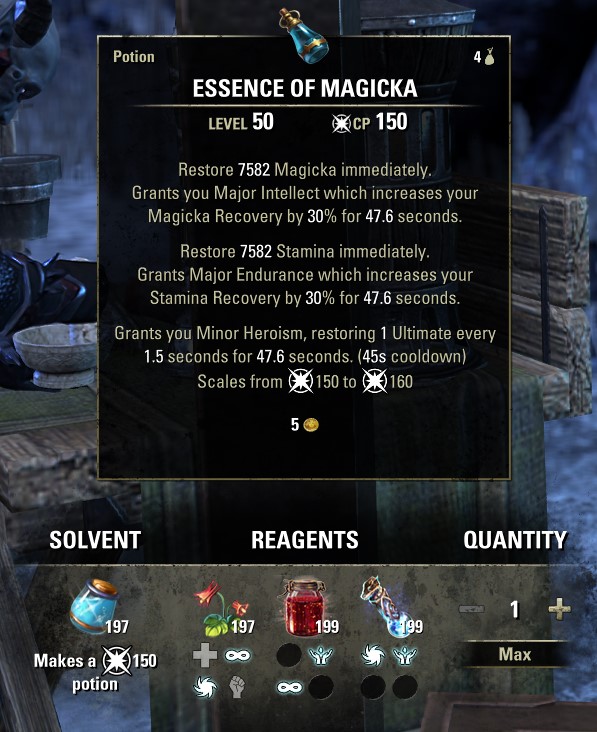
Heroism Potion – Restores stamina and magicka and grants minor heroism for a time. Crafted with Alchemy from ingredients of Columbine, and Dragon’s Blood, Dragon Rheum.
- Essence of Spell Power – grants major critical, major spell power buff, and magicka recovery. Crafted with alchemy from ingredients such as Corn Flower, Lady’s Smock, and Luminous Russula (other combinations).
- Tri-Pots – grants immediate health, stamina and magicka, along with tri-recovery. Crafted with Alchemy from ingredients of Bugloss, Columbine, and Mountain Flower.
Build Summary – ESO Solo Templar Magicka Build for PvE
Class: Templar
Race: High Elf
Attributes: 64 Magicka
Mundus Stone: Thief
Weapon One: Dual Wield
Weapon Two: Flame Staff
Armor Set 1: Perfected Whorl of the Depths
Armor Set 2: Deadly Strike
Monster Helm: Valkyn Skoria
Mythic: Velothi Ur-Mage’s Amulet
Armor Weight: 5 medium, 2 light
Food: Mistral Bananan-Bunny Hash
Potion: Essence of Magicka with Minor Heroism
Skill Bar 1
- Solar Barrage
- Power of the Light
- Deadly Cloak
- Puncturing Sweep
- Radiant Glory
- Flawless Dawnbreaker (Ultimate)
Skill Bar 2
- Ritual of Retribution
- Degeneration
- Vampire’s Bane
- Channeled Focus
- Blockade of Fire
- Shooting Star (Ultimate)
Scribing Grimoires and Scripts
- Ulfsild’s Contingency (Mage Guild)
- Flame Damage (focus script)
- Lingering Torment (signature script)
- Resolve (Affix Script)
Looking For More ESO Builds?
Thank you for reading ESO Solo Templar Magicka Build for PvE Guide. We provide the latest news and create guides for ESO. Also, watch me play games on Twitch or visit my YouTube channel!