 Facebook
 Reddit
 Email
Email
This Destiny 2 Into the Depths Walkthrough will guide you step by step each week, leading you through the seasonal mission as quickly and painlessly as possible.

Into the Depths Walkthrough
In order to start the Into the Depths quest line, you must have completed the intro quest and talked to Sloane at the Helm projector. If you have not completed that quest, we have a guide on how to complete it and unlock the seasonal artifact.
This will be updated each week, so make sure to check back every Tuesday after reset for the most up-to-date walkthrough.
Week 1
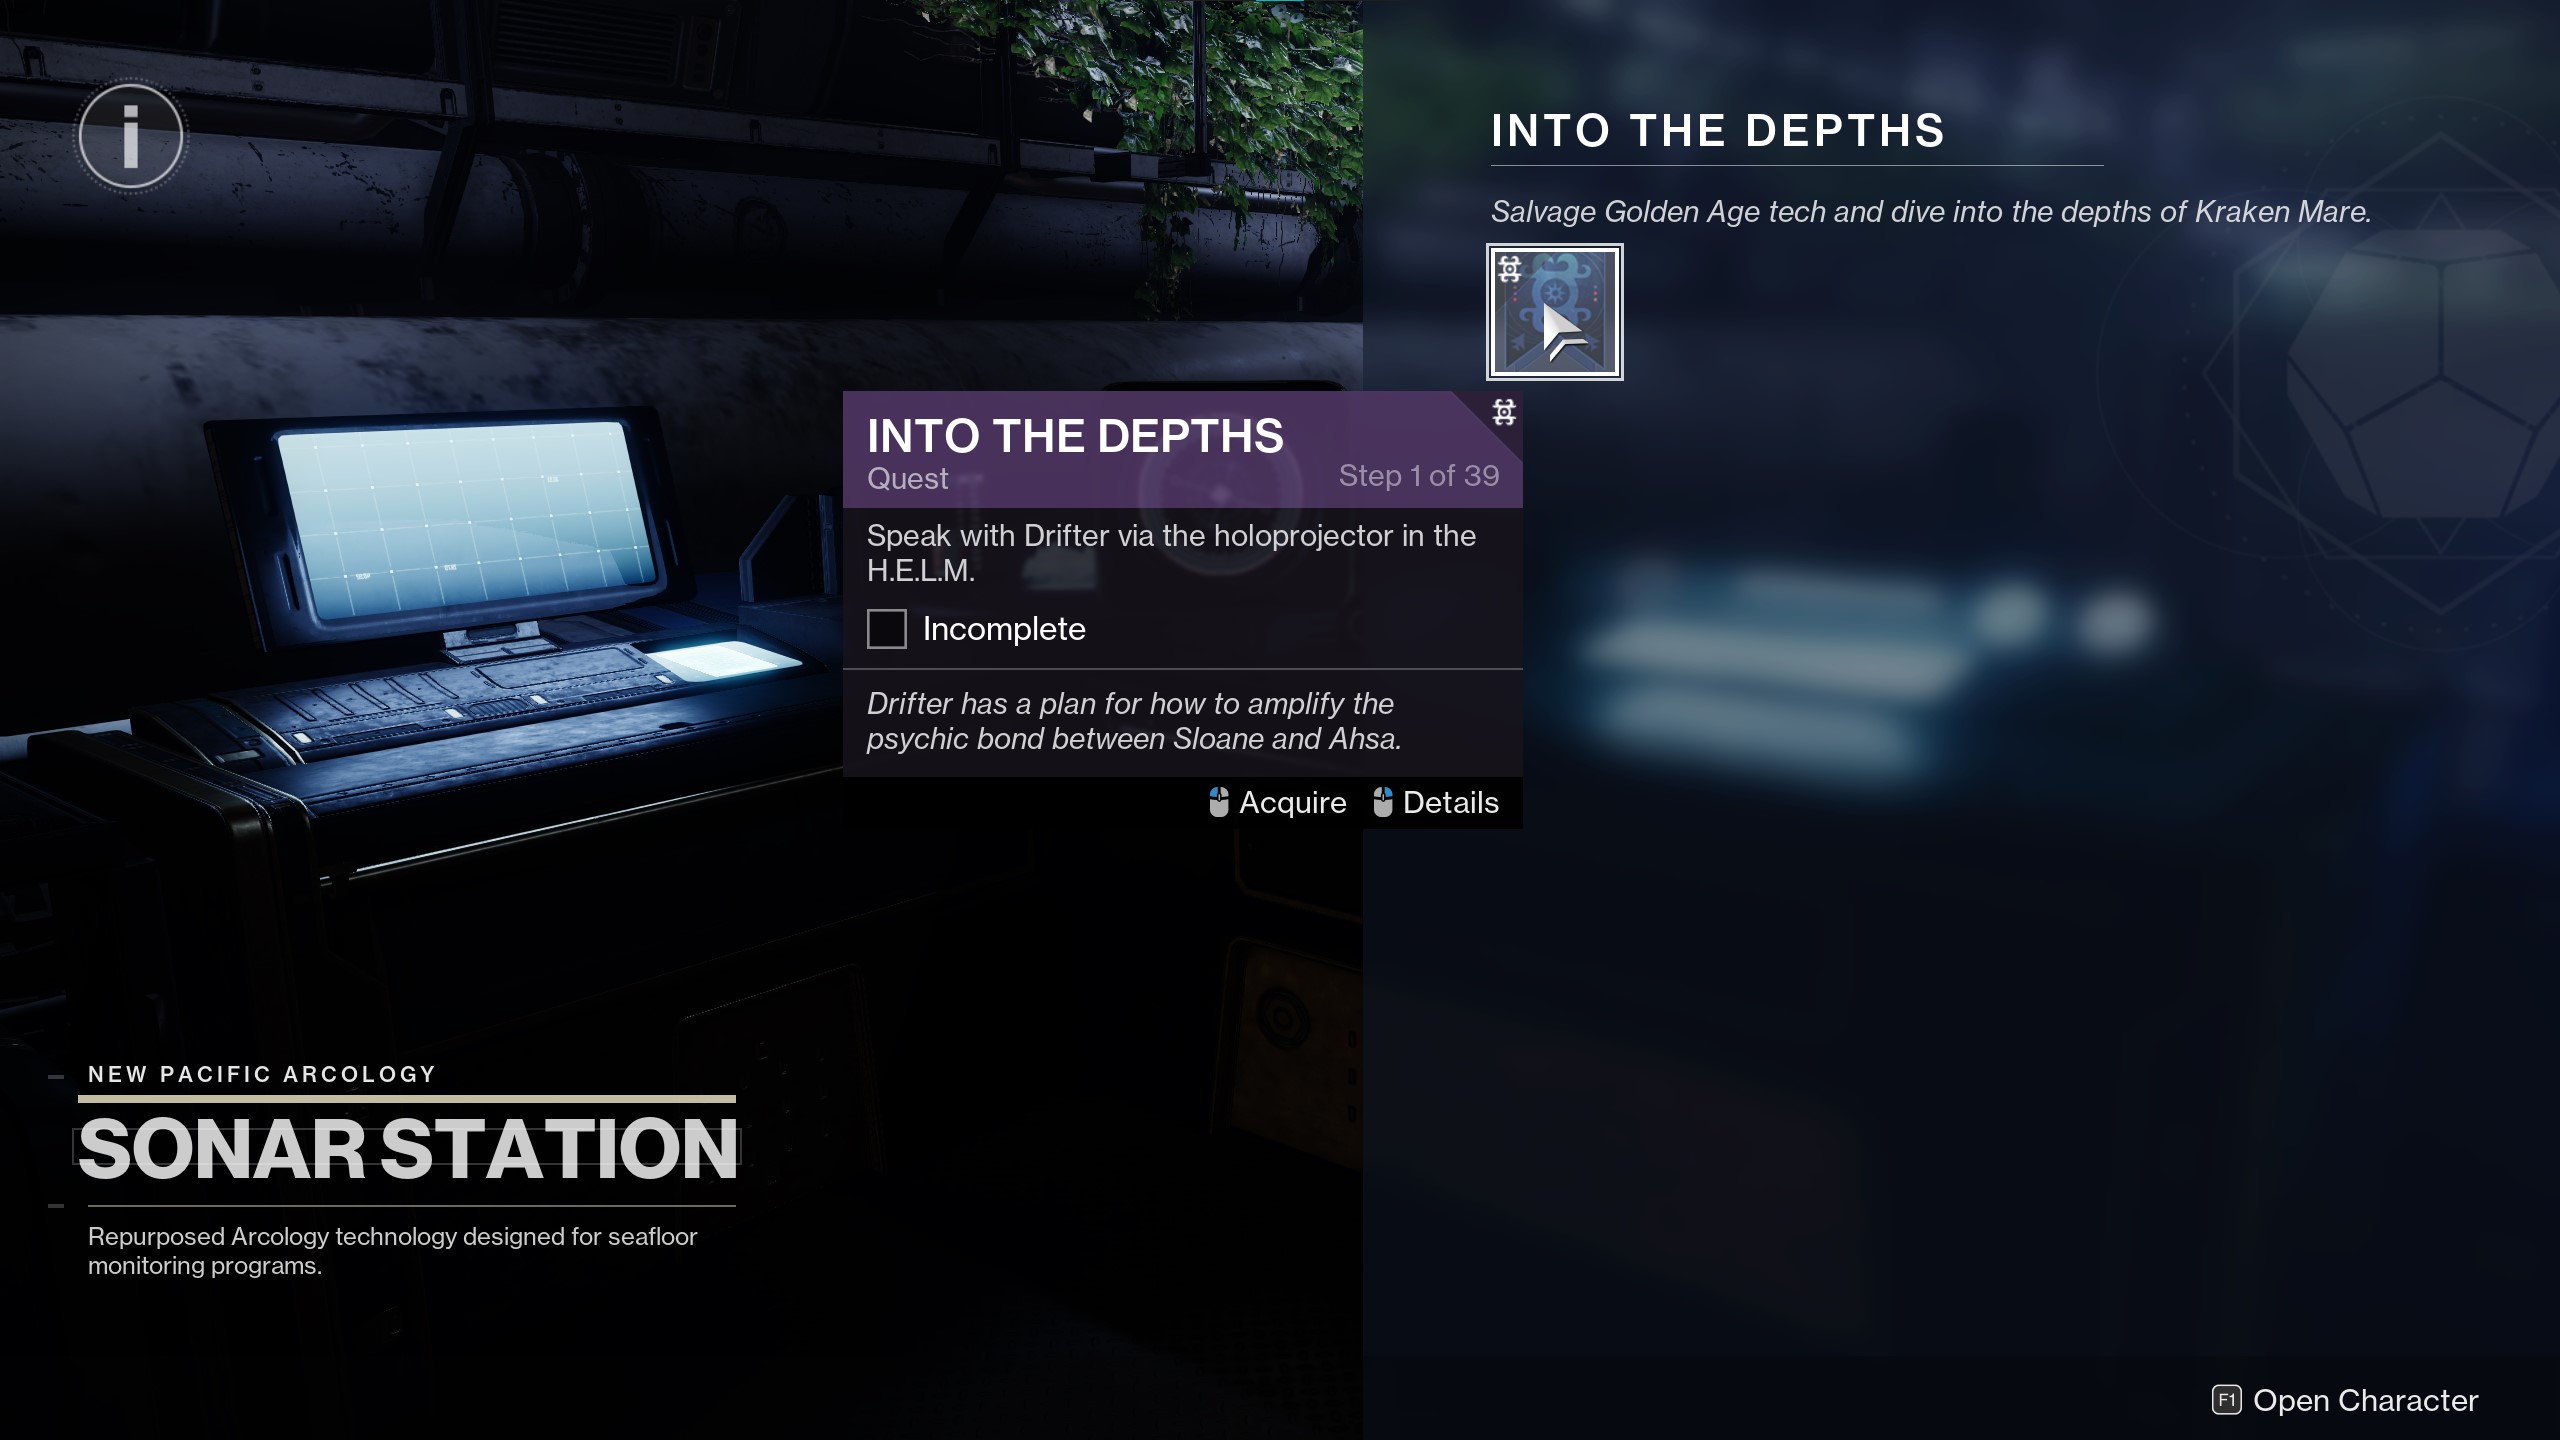
Step 1: Speak with Drifter via the holoprojector in the Helm
Simple enough step, after picking up the seasonal artifact and the quest, simply interact with the same helm terminal to talk to Drifter
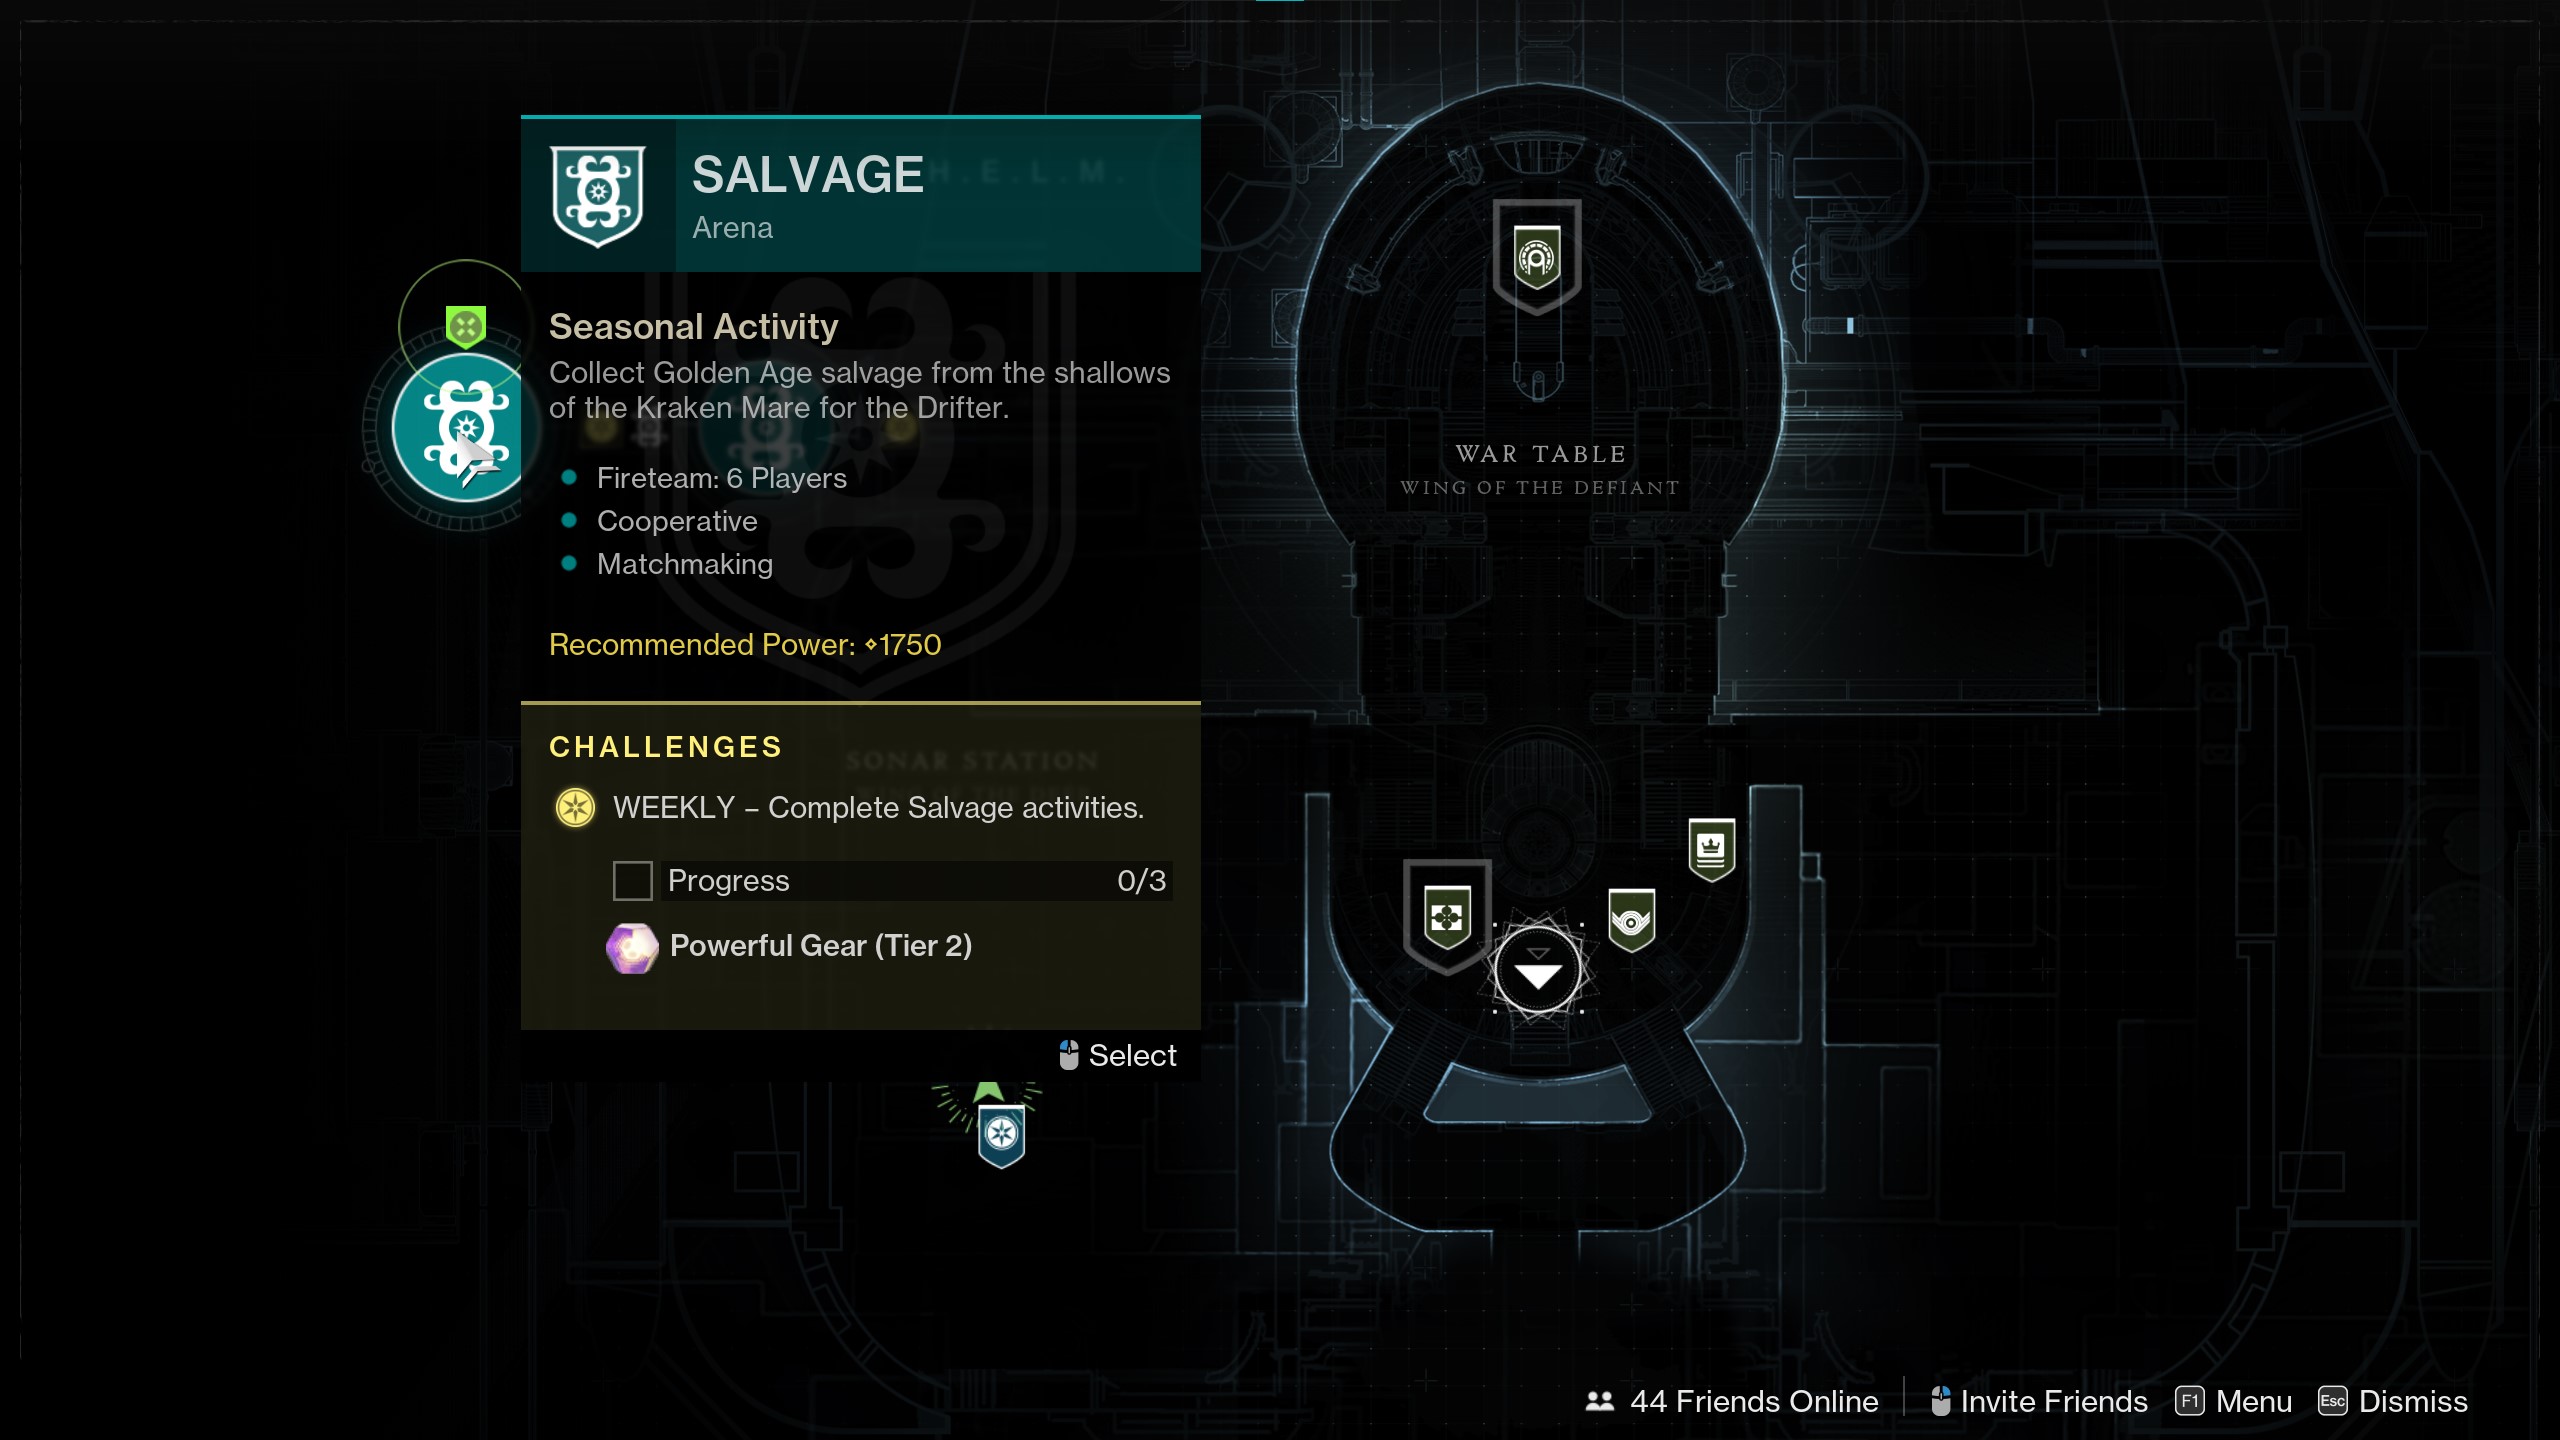
Step 2: Complete the Salvage Activity
This is one of the new seasonal activities, requiring 6 guardians to complete tasks on the rig on Titan and then kill a boss. Simply queue for this activity from the Destinations tab in the Helm.

Step 3: Complete the Mission Operation Thunderbolt: Twilight
This is a weekly mission queued from the Destinations tab in the Helm.
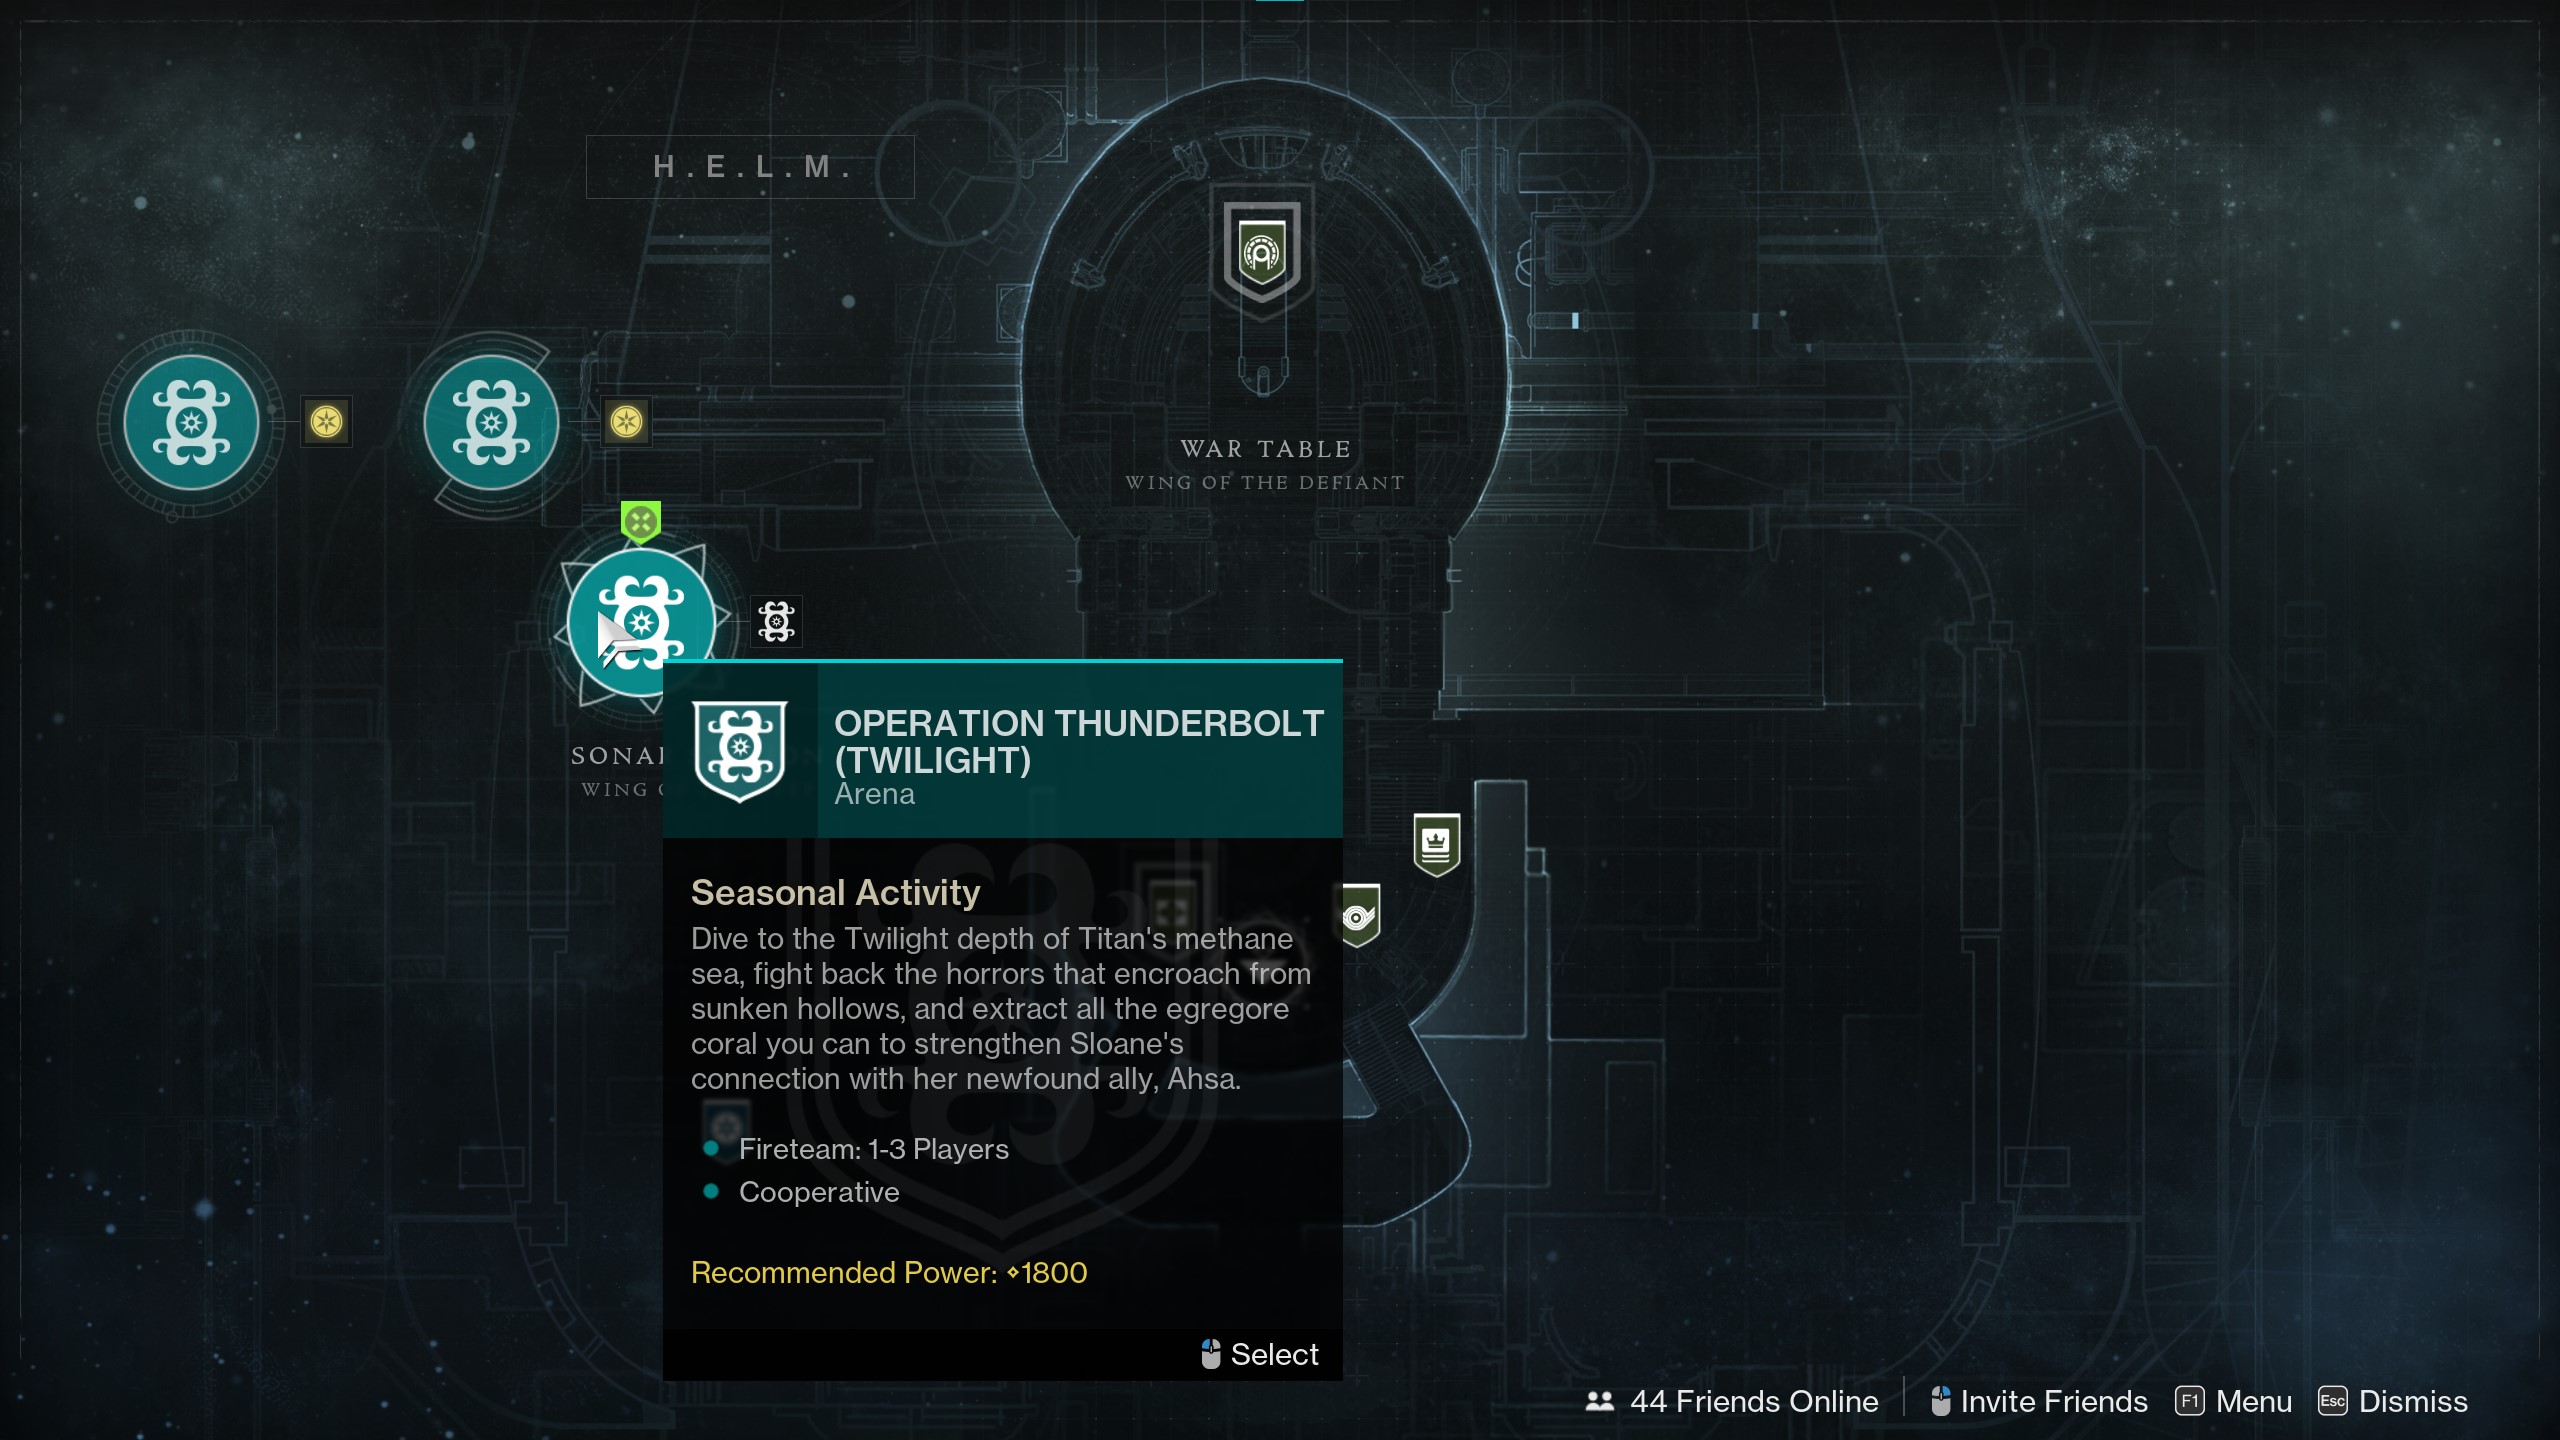
After finally killing the boss, follow the quest icon to some egregore coral and collect it. This will spawn a clam reward chest which you need to interact with for your rewards.
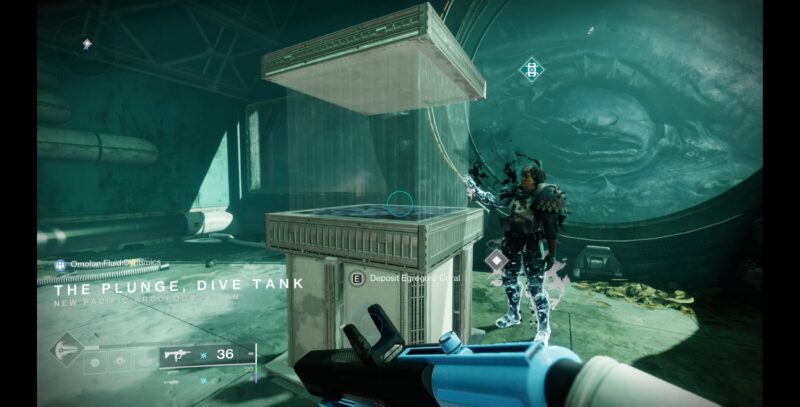
Step 4: Bring the Coral to Sloane in the Helm
Once you’ve collected the coral and your rewards, teleport to the helm and go down towards to portal to Sloane. Once there deposit the coral into the tank which will start a dialogue.

Step 5 and 6: Speak with Sloane via the holoprojector and collect your rewards
Once the dialogue is complete, head back through the portal to the helm and go to the holoprojector to receive a message from Sloane. Collect your rewards which will auto-complete Step 6.
Step 7: Wait for next week to continue the story
Final step of the week is to wait until next week for the continuation of the story.
Week 2
Step 8: Speak with Zavala via the holoprojector in the HELM
Simply select the HELM in the Destinations tab and then provide to the left wing holoprojector by where last weeks quest chain ended.
Step 9: Complete the Salvage activity
This is one of the new seasonal activities, requiring 6 guardians to complete tasks on the rig on Titan and then kill a boss. Simply queue for this activity from the Destinations tab in the Helm.
Step 10: Complete the mission “Mayday, Mayday”
This is a weekly mission queued from the Destinations tab in the Helm.

After finally killing the boss, follow the quest icon to some egregore coral and collect it. This will spawn a clam reward chest which you need to interact with for your rewards.
Step 11: Witness the conversation in the HELM
Return back to the Season of the Deep wing of the HELM and there you will find Zavala. Saint-14 will arrive from the portal and you can witness their dialogue.
Step 12: Bring the coral to Sloane in the HELM

After the dialogue ends, proceed into the portal. At the end, you’ll find Sloan and the coral tank from last week. Simply interact with the tank to deposit the coral and then listen to the dialogue.
Step 13: Speak with Sloane via the holoprojector in the HELM
Proceed back through the portal to the HELM and go to the desk nearby to speak with Sloane.
Step 14: Wait for next week to continue the story
Final step of the week is to wait until next week for the continuation of the story.
Week 3
Step 15: Speak with Saladin via the Holoprojector in the H.E.L.M.
This next step of Destiny 2 Into the Depths Mission Walkthrough guide is straightforward, select the HELM in the Destinations tab and then head over to the holoprojector in the left wing by the Sonar Station. Accept the Salvage and Deep Dive Key.
Step 16: Complete the Mission “Operation Fulgurite.” Launch the mission from the Destinations tab in the H.E.L.M.
Under the Destinations Tab, select the H.E.L.M and the select the “Operation Fulgurite (Abyss)” Node. Launch the Activity.
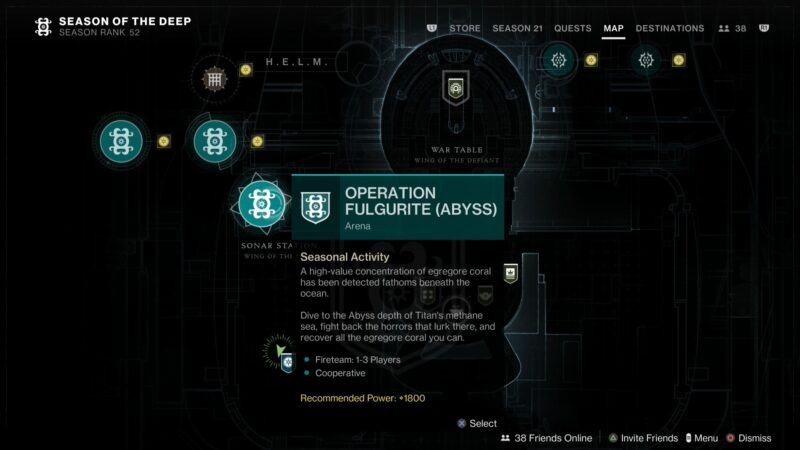
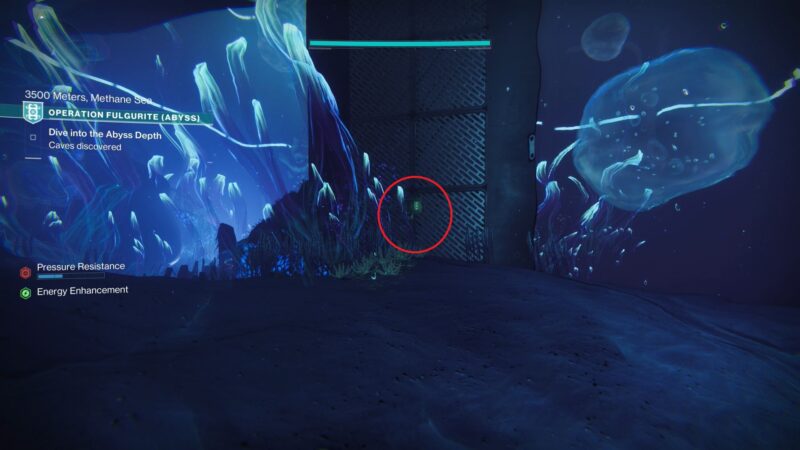
The Mission is fairly straight forward basically serving as a tutorial for the Abyss section of Deep Dive activities. There are however two sections that may give you trouble in the underwater pressure sections. When you jump down a level you will notice a shut door behind you. Simply move forward and find the switch behind the wall to open the door to proceed.
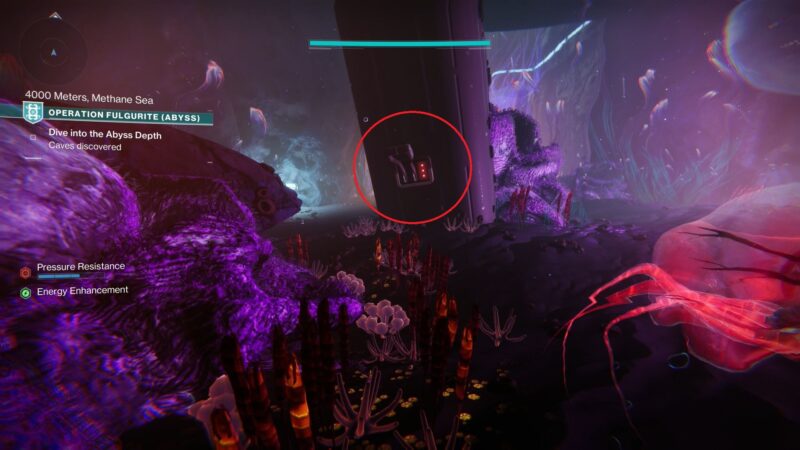
After another drop down there is a second switch behind a pillar to open another door. Note that this will also be done during Deep Dives as well.
The boss has a minor mechanic when it hits certain damage thresholds. Simply destroy the Taken Blights when they come up to remove his immunity shield. After he is defeated, collect the coral and the chest to complete the mission.
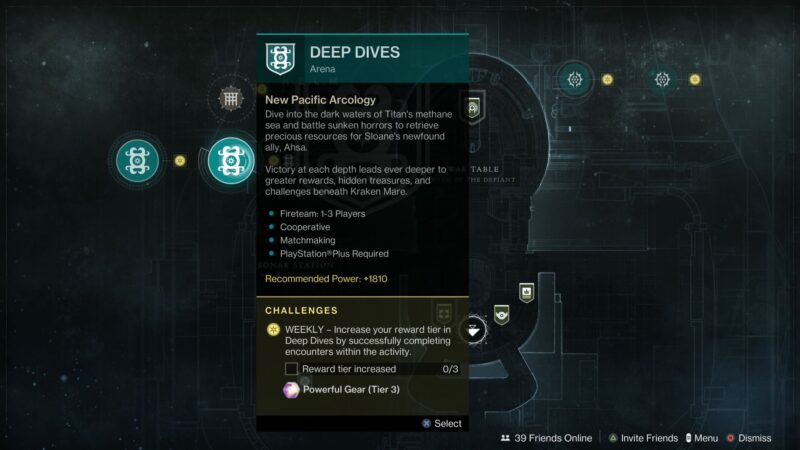
Step 17: Complete a Deep Dive activity. Deep Dives are launched from the Destinations tab in the H.E.L.M.
This is one of the new seasonal activities, requiring 3 guardians to complete tasks in the deep. As of week 3 this will take us all the way to Abyss level, so there will be 3 sections and then a boss section. It is the same boss as the weekly mission. Simply queue for this activity from the Destinations tab in the Helm. If you are up for a challenge and want higher rewards, make sure you find the Toland lights hidden in each of the 3 puzzle sections.
Step 18: Witness the conversation at the H.E.L.M.
Go to the HELM once again and head back over to the left wing, head over to the portal and witness the conversation between the Drifter and Saladin.
Step 19: Bring the coral to Sloane in the H.E.L.M.
After the dialogue ends, proceed into the portal. At the end, you’ll find Sloan and the coral tank just like previous weeks. Simply interact with the tank to deposit the coral and then listen to the dialogue.
Step 20: Speak with Sloane via the holoprojector in the H.E.L.M.
Proceed back through the portal to the HELM and head to the holoprojector nearby to speak with Sloane. Accept your “Thin Precipice” reward.
Step 21: The Vanguard will inform you once Sloane and Ahsa are ready to boost their bond again.
If you are completing this week as it becomes available, you will have to wait until Week 4 to continue. If you are playing this after week 4, week 4’s steps should begin immediately.
Week 4
Step 22: Speak with Drifter via the Holoprojector in the H.E.L.M.
This next step of Destiny 2 Into the Depths Mission Walkthrough guide is straightforward, select the HELM in the Destinations tab and then head over to the holoprojector in the left wing by the Sonar Station. Accept the Deep Dive Key.
Step 23: Collect Amorphus Alloys by defeating Scorn on Savathun’s throne world.
Go to Savathun’s Throne World and defeat Scorn. Scorn are common in the Miasma and in the Extraction Lost Sector which is located in the Quagmire. These drop fairly often on a kill, so it won’t take long.
Step 24: Complete a Deep Dive activity. Deep Dives are launched from the Destinations tab in the H.E.L.M.
As of week 3 this will take us all the way to Abyss level, so there will be 3 sections and then a boss section. Simply queue for this activity from the Destinations tab in the Helm. If you are up for a challenge and want higher rewards, make sure you find the Toland lights hidden in each of the 3 puzzle sections.
Step 25: Witness the conversation at the H.E.L.M.
Go to the HELM once again and head back over to the left wing, head over to the portal and witness the conversation between the Drifter and Sloane.
Step 26: Bring the coral to Sloane in the H.E.L.M.
After the dialogue ends, proceed into the portal. At the end, you’ll find Sloan and the coral tank just like previous weeks. Simply interact with the tank to deposit the coral and then listen to the dialogue.
Step 27: Speak with Sloane via the holoprojector in the H.E.L.M.
Proceed back through the portal to the HELM and head to the holoprojector nearby to speak with Sloane. Accept your Deep Engram.
Step 21: The Vanguard will inform you once Sloane and Ahsa are ready to boost their bond again.
If you are completing this week as it becomes available, you will have to wait until Week 5 to continue. If you are playing this after week 5, week 5’s steps should begin immediately.
Week 5
Step 22: Speak with Saint-14 via the Holoprojector in the H.E.L.M.
As with previous week’s quest steps, select the HELM in the Destinations tab and then head over to the holoprojector in the left wing by the Sonar Station.
Step 30: Check in with Drifter via the holoprojector in the H.E.L.M.
Since you are already at the holoprojector already this should pop up automatically. If it doesn’t simply, activate the holoprojector again. No cutscene for this one, just text.
Step 31: Speak to Hawthorn in the Tower
Travel to the Tower and head over to Hawthorne. She is located in the Bazaar. She will give you the “Fishing Rally: Throne World” Quest. Feel free to break off and do that quest if you like.
Step 32: Defeat Hathrek, the Glasweard in the Extraction Lost Sector in Savathun’s throne world
Travel to the Savathun’s throne world. Go into the Lost Sector (you will have to activate the Deepsight at the edge of the cliff) and clear it out.
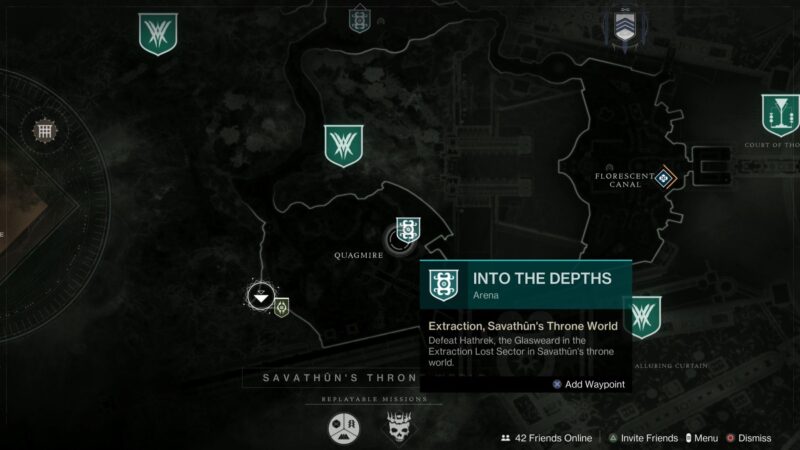
To proceed through the second room with all of the Hive and Scorn enemies, you have to activate all three plates by standing on them until green fire comes out of them and then dissipates. You don’t have to complete the entire Lost Sector, as this quest step completes when you defeat the Hive Lightbearer Wizard and finish its Ghost.
Step 33: Return to Sloane and Ahsa in the H.E.L.M
Go back to the H.E.L.M. and go through the portal in the left wing. Speak with Sloane as previous weeks. A cutscene will play.
Step 34: Speak with Sloane via the holoprojector in the H.E.L.M
Proceed back through the portal to the HELM and head to the holoprojector nearby to speak with Sloane. Accept your Deep Engram.
Step 35: The Vanguard will inform you once Sloane and Ahsa are ready to boost their bond again.
If you are completing this week as it becomes available, you will have to wait until Week 6 to continue. If you are playing this after week 6, week 6’s steps should begin immediately.
Week 6
Step 36: Speak with Saladin via the Holoprojector in the H.E.L.M.
As with previous week’s quest steps, select the HELM in the Destinations tab and then head over to the holoprojector in the left wing by the Sonar Station.
Step 37: Complete the Mission “Barotrauma.” The mission can be launched from the Destinations tab in H.E.L.M.
The mission is fairly straightforward. Follow the linear path, killing any Taken on the way. Eventually you will come to a large room with a Hive ritual circle. All you need to do is kill the wizards and pick up the taken balls they drop on death. Deposit these balls into the machine above the ritual circle. The battle can get a bit crowded, so make sure you are prepared to take out large groups of enemies at once. Eventually Cabal reinforcements will arrive to aid you. Once the mission is over, a cutscene will play.
Step 38: Witness the conversation at the H.E.L.M.
You will automatically get transported to the H.E.L.M. after the cutscene. Simply go over to the portal in left wing and witness the conversation of the big three: Zavala, Saladin, and Saint.
Step 39: Speak with Sloane via the holoprojector in the H.E.L.M.
After the conversation, walk up to the holoprojector and activate it to speak with Sloane. Accept your Deep Engram
Congratulations! You have completed the Main Quest of Season of the Deep!
More Destiny 2 Weapon Articles and Beginner Guides
- Destiny 2: Comprehensive Beginner Guide
- Destiny 2: Builds
- Destiny 2: God Roll Weapons
- Destiny 2: How to Unlock Strand
Thank you for reading Into the Destiny 2 Depths Walkthrough Guide. I play every aspect of MMO, Solo, PvP and PvE. If you want to see more of Destiny 2 or ESO, consider watching me live on Twitch or Youtube. Also, we regularly post Destiny 2 news builds and Seasonal and Weapon God Rolls guides.