Facebook
 Reddit
 Email
Email
The Reaper’s Embrace is a strong heavy armour set, and you can earn it at the end of Act 2 of Baldur’s Gate 3 (BG3).

Shrouded in shadow and steeped in death, Reaper’s Embrace is more than just armor, it’s a statement. In Baldur’s Gate 3, few gear pieces channel raw intimidation and dark power like this sinister set. Perfect for users of heavy armor, or any adventurer who walks a darker path, Reaper’s Embrace offers both formidable protection and a haunting presence on the battlefield. In this guide, we’ll explore Reaper’s Embrace, how to acquire it, and tips for using it effectively in Baldur’s Gate 3.
What is Reaper’s Embrace in BG3?
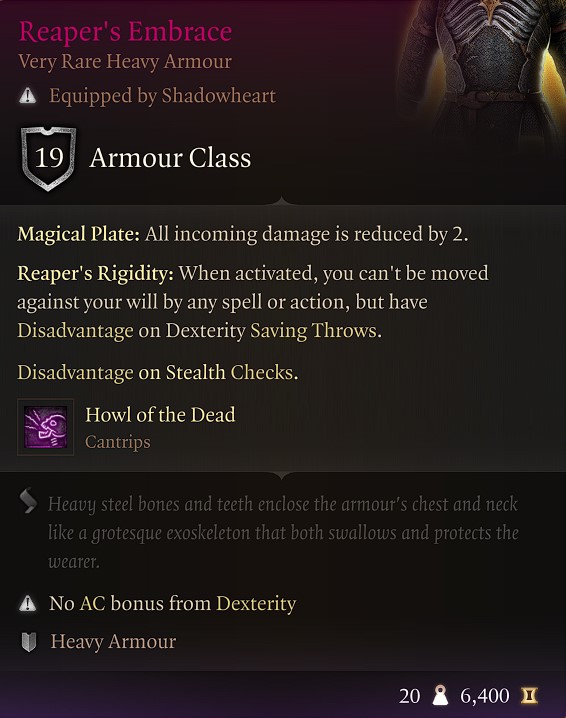
In Baldur’s Gate 3 the Reaper’s Embrace is a heavy armour set that grants extra overall protection, in addition to making you immovable and granting you access to a special cantrip. The bonus called Magical Plate grants the wearer a -2 reduction on all incoming damage. Secondly, you can toggle the Reaper’s Rigidity bonus, a passive feature that allows your character to become unmovable against any spell or action that tries to take control. Unfortunately, it does have the side effect of causing you to have Disadvantage on Dexterity Saving Throws.
Finally, the last benefit this armour set grants you is access to the unique cantrip called Howl of the Dead. Unlike other cantrips, which can be cast as many times as desired, you can only cast this once per Short Rest. Casting this cantrip releases a bone-chilling howl which can possibly Numb creatures within a 3 meter radius. If successful, the condition can last for up to three turns. Furthermore, affected enemies have their movement speed halved.
Related:
Reaper’s Embrace Abilities and Effects
Below are all the features, abilities, and effects of Reaper’s Embrace in Baldur’s Gate 3:
- Armour Type: Heavy Armour
- Armour Class: 19 AC
- Requirements: Heavy Armour proficiency
- Rarity: Very Rare
- Weight: 20 kg
- Value: 6,400
- Location: Looted from Ketheric Thorm, Act 2.
- Bonuses:
- Magical Plate: All incoming damage is reduced by 2.
- Reaper’s Rigidity: When activated, you can’t be moved against your will by any spell or action, but have Disadvantage on Dexterity Saving throws.
- Cast Howl of the Dead once per Short Rest.
- Classes with Heavy Armour proficiency: Fighter, Paladin, Cleric, and Ranger.
- Companions Who Can Use This Armour: Lae’zel, Minthara, Minsc, Shadowheart
How to Get Reaper’s Embrace in BG3? Explained
To get the Reaper’s Embrace armour in Baldur’s Gate 3 you simply have to follow the main story quest through all of Act 2, where it will culminate with a confrontation against Ketheric Thorm at Moonrise Towers. You can’t miss this fight as it is part of the main story quest. One way or another, your party will end up at Moonrise Towers. We recommend that you don’t try to rush through just to push the story forward in order to get this armour. There is a lot to see and do in Act 2, and you should definitely explore.
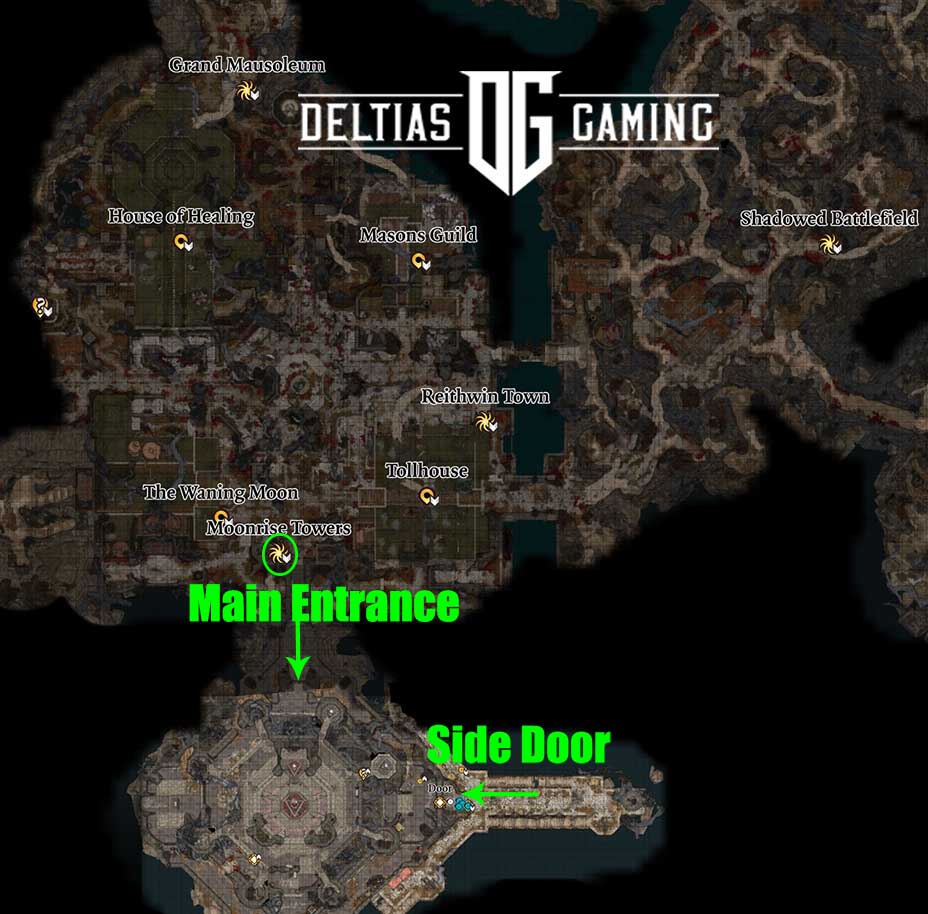
When you’re ready, you can find Moonrise Towers west across the bridges and then directly south. Again, if you are following the main story quest, you will eventually get to where you need to go, and we don’t want to put too many spoilers in here. Suffice to say, that eventually you will end up in direct confrontation with Ketheric Thorm.
Ketheric Thorm Fight
The first phase of the fight takes place at the top of Moonrise Towers. You’ll be fighting Ketheric along with several cultists and Necrolites. These enemies aren’t too difficult. Additionally, you only have to get Ketheric down to about 40% of his HP here. He does have the annoying habit of bashing any of your melee characters who hit him directly. Unfortunately, this can incapacitate them. Still, given that he leaves the fight at about 40% HP, it’s better to focus him down.
The second phase of the fight takes place in two parts. In the first you and your party will be facing Ketheric, Mind Flayers and Necrolites. If you rescued the Nightsong, she’ll be held captive in the back. Absolutely use a character with Misty Step or high mobility to go over and free her using the Help action. She can be a big help in this fight. Set her and the rest of your party to attacking Ketheric again.
If you’re surprised to see Ketheric go down handily, don’t get too confident yet. A short cut scene break and you’ll be back fighting again, as he’s ‘morphed’ into his final form with the help of Myrkul. He can now consume Necrolites, which grant him the ability to cast the Finger of Death spell. This is basically a one-shot spell and should be avoided. Due to this it might be tempting to try and take out the Necrolites first so that Ketheric can’t use them. However, if you’re got the Nightsong with you and the firepower in your party, it’s usually best to simply DPS him down.
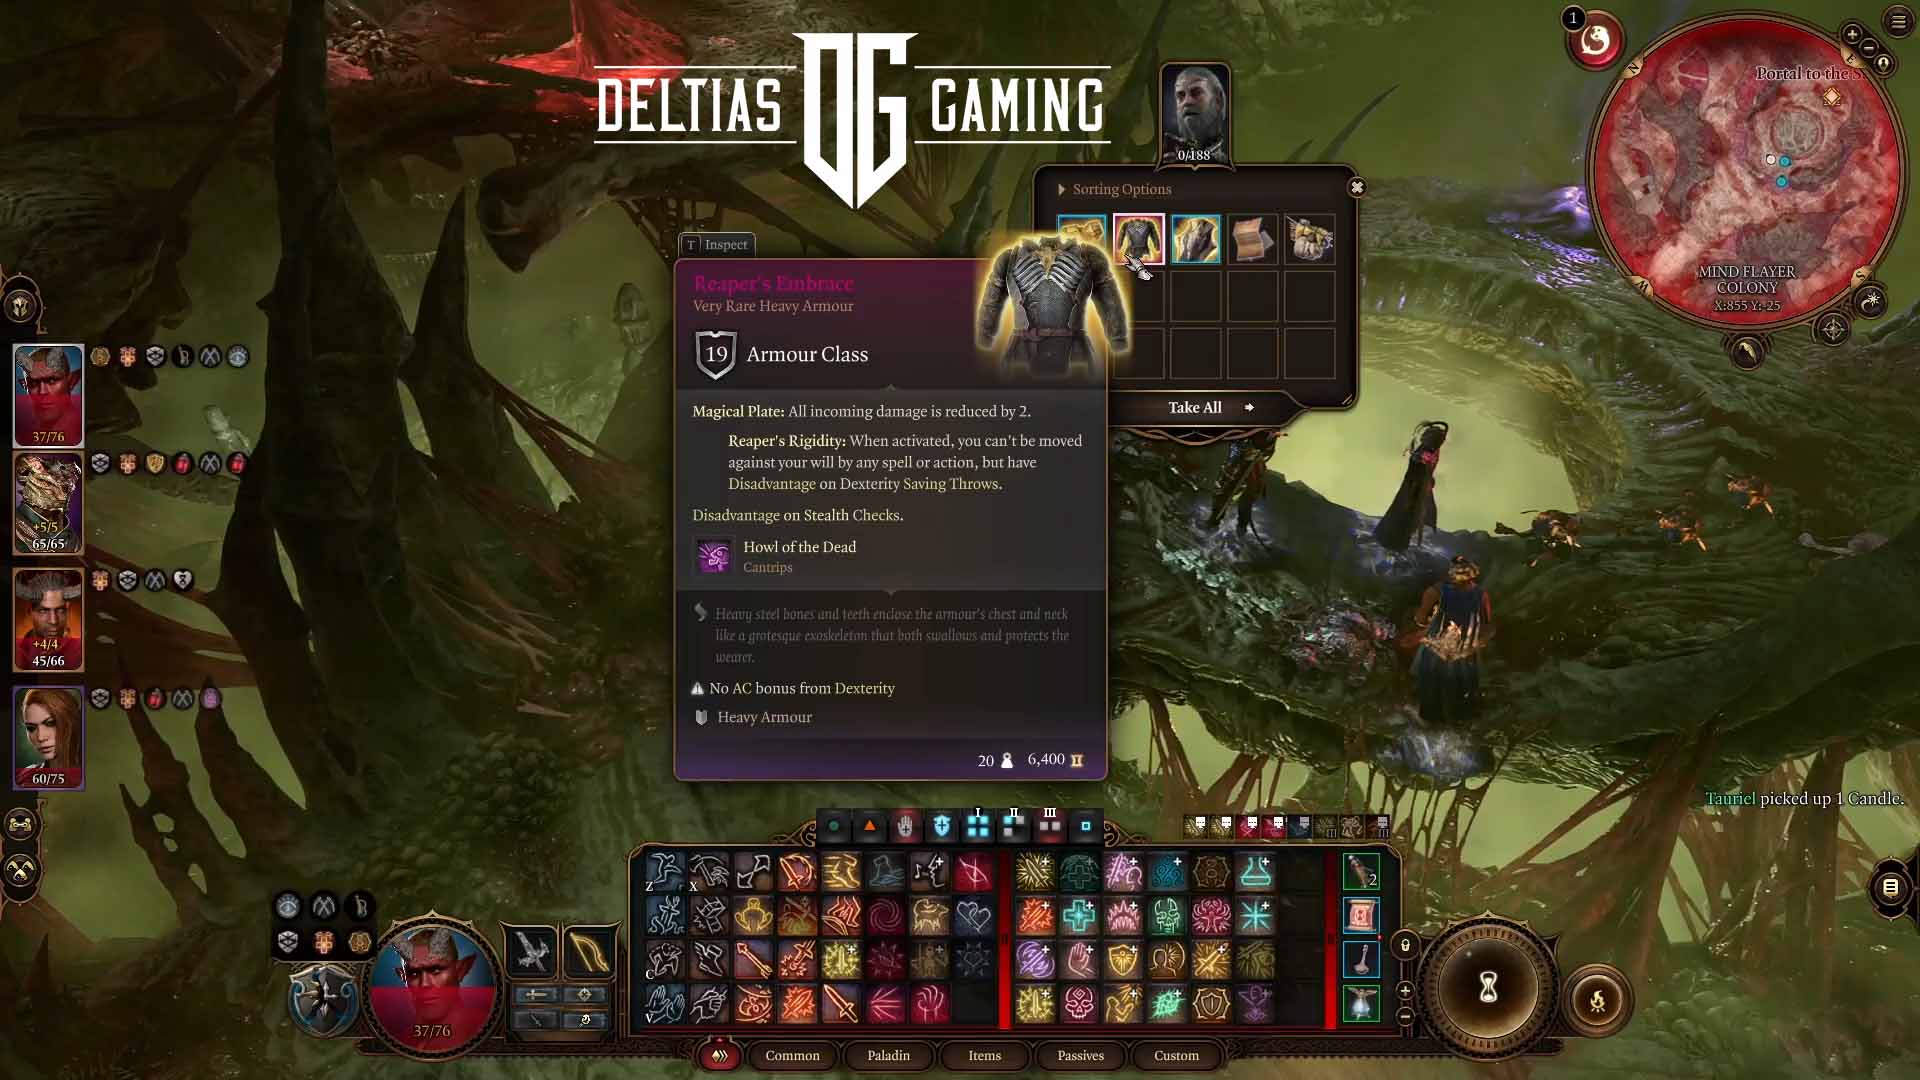
Once you’ve defeated Ketheric there will be another cut scene. When it’s over, make sure to loot Ketheric’s body for the Reaper’s Embrace before you leave Act 2!
How to Use Reaper’s Embrace in BG3?
The best way to use the Reaper’s Embrace heavy armour in BG3 is by equipping it to a Cleric, Paladin, or Fighter party member. The Howl of the Dead cantrip is a great bonus action for any of these classes who are in the thick of the fight. However, it’s a great thematic match for the Cleric class especially, and can be cast once every Short Rest.
Tips and Tricks for Reaper’s Embrace in BG3
These are the best tips and tricks for finding and using Reaper’s Embrace in Baldur’s Gate 3:
- The Numbed condition caused by Howl of the Dead will last for up to 3 turns.
- However, if the spellcaster hits the Numbed enemy, it will remove the condition. This does not apply if an ally hits the creature.
- Wearing Reaper’s Embrace is the only way to get access to the Howl of the Dead cantrip.
Related:
FAQs about Reaper’s Embrace in BG3
Where can I find Reaper’s Embrace in Baldur’s Gate 3?
You can find Reaper’s Embrace by killing Ketheric Thorm during the climactic confrontation at the end of Act 2 of BG3.
Which classes or builds benefit most from Reaper’s Embrace?
Clerics, Paladins, or Fighter builds will benefit the most from the bonuses offered by the Reaper’s Embrace heavy armor in BG3.
Looking For More About Baldur’s Gate 3?
Thank you for reading the How to Get Reaper’s Embrace in Baldur’s Gate 3 guide. We provide the latest news and create guides for Baldur’s Gate 3. Also, watch me play games on Twitch or visit my YouTube channel!